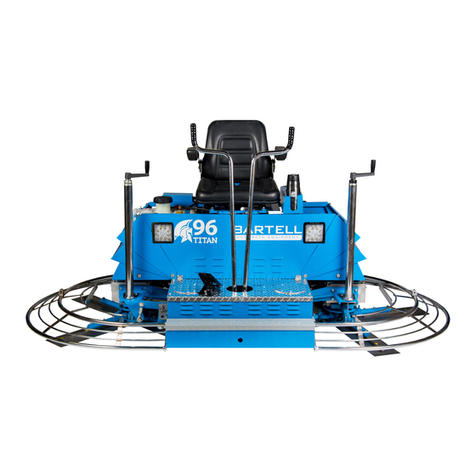
Bartell Global TS78 User manual

Doc. # OI-B19007
Orig. Rel. – 09/16
Curr Rev. – 02- 06/17
RIDE-ON TROWELS
TS78, TS88, TS96, BXR-836, Titan 78,88,96,96H
OWNER’S MANUAL
Discount-Equipment.com

Discount-Equipment.com is your online resource for commercial and industrial
quality parts and equipment sales.
Locations:
Florida (West Palm Beach): 561-964-4949
Outside Florida TOLL FREE: 877-690-3101
Need parts? Check out our website at www.discount-equipment.com
Can’t find what you need?
Click on this link: http://www.discount-equipment.com/category/5443-parts/ and fill out
the request form.
Please have the machine model and serial number available in order to help us get
you the correct parts. One of our experienced staff members will get back to you with
a quote for the right part that your machine needs.
We sell worldwide for the brands: Genie, Terex, JLG, MultiQuip, Mayco, Toro/Stone,
Diamond Products, Magnum, Airman, Mustang, Power Blanket, Nifty Lift, Atlas Copco,
Chicago Pneumatic, Allmand Brothers, Essick, Miller Spreader, Skyjack, Lull, Skytrak,
Tsurumi, Husquvarna/Target, Whiteman-Concrete/Mortar, Stow-Concrete/Mortar, Baldor,
Wacker, Sakai, Snorkel, Upright, Mi-T-M, Sullair, Neal, Basic, Dynapac, MBW, Weber,
Bartell, Bennar Newman, Haulotte, Ditch Runner, Blaw-Knox, Himoinsa, Best, Buddy,
Crown, Edco, Wyco, Bomag, Laymor, Terremite, Barreto, EZ Trench, Takeuchi, Basic, Bil-
Jax, Curtis, Gehl, Heli, Honda, ICS/PowerGrit, Puckett, Waldon, ASV, IHI, Partner, Imer,
Clipper, MMD, Koshin, Rice, Gorman Rupp, CH&E, Cat Pumps, Comet, General Pump,
Giant,AMida, Coleman, NAC, Gradall, Square Shooter, Kent, Stanley, Tamco, Toku, Hatz,
Kohler, Robin, Wisconsin, Northrock, Oztec, Toker TK, Rol-Air, Small Line, Wanco, Yanmar
Discount-Equipment.com

RIDE-ON FAMILY
OWNER’S MANUAL
1
OIPB – B19007!
REV.
DATE
DESCRIPTION
APPROVED BY:
Discount-Equipment.com

RIDE-ON FAMILY
OWNER’S MANUAL
2
OIPB – B19007!
SAFETY PRECAUTIONS
DANGER
EXPLOSION HAZARD
Never operate the machine in an explosive
atmosphere, near combustible materials, or
where ventilation does not clear exhaust fumes.
WARNING
BURN HAZARD
Never come into contact with the engine or
muffler when engine is operating or shortly after it
is turned off. Serious burns may occur.
WARNING
ROTATING HAZARD
Never place hands or feet inside safety guard
rings. Serious injury will result from contact with
rotating blades.
CAUTION
MOVING PARTS
Before starting the machine, ensure that all
guards and safety devices are in place and
functioning properly.
ATTENTION
READ OWNER’S MANUAL
Read and understand owner’s manual before
using this machine. Failure to follow operating
instructions could result in serious injury or death.
Discount-Equipment.com

RIDE-ON FAMILY
OWNER’S MANUAL
3
OIPB – B19007!
TABLE OF CONTENTS
QUALITY ASSURANCE/MACHINE BREAK IN 4!
WARRANTY INFORMATION 5!
SPECIFICATIONS 6!
PREVENTATIVE MAINTENANCE AND ROUTINE SERVICE PLAN 8!
oROUTINE SERVICE SCHEDULE 9!
oROUTINE SERVICE INTERVALS 11!
SAFETY PRECAUTIONS 12!
ASSEMBLY INSTRUCTIONS 13!
OPERATING INSTRUCTIONS 14!
oSTARTING PROCEDURES - WARM TEMPERATURES 14!
oSTARTING PROCEDURES - COLD TEMPERATURES 14!
oSTOPPING PROCEDURE 15!
oSTEERING 15!
oFLOAT/TROWEL PITCH SETTING 15!
oBLADE SYNCHRONIZATION (TS88, TITAN 88, AND SPECIALLY MODIFIED UNITS ONLY)16!
oTRANSPORTER USE 16!
MAINTENANCE INSTRUCTIONS 18!
oGENERAL 18!
oAIR CLEANER 18!
oSPARK PLUG 18!
oBELT CHANGE PROCEDURE 18!
LUBRICATION 22!
TROWEL ARM ADJUSTMENT FIXTURE 23!
oADJUSTMENT PROCEDURE 23!
oTROWEL ARM ADJUSTMENT SCREW 24!
TROUBLESHOOTING 25!
DECLARATION OF CONFORMITY ERROR! BOOKMARK NOT DEFINED.!
Discount-Equipment.com

RIDE-ON FAMILY
OWNER’S MANUAL
4
OIPB – B19007!
QUALITY ASSURANCE/MACHINE BREAK IN
The Bartell Ride-on Trowel is the product of extensive engineering development
designed to give long life and unmatched performance. Once machines are fully assembled, a
run-in test is performed to ensure quality standards of the highest level. A series of operational
tests are conducted on concrete, incorporating a phase of operations at 1/2 to 3/4 throttle and a
final run phase at full throttle for a minimum of 20 minutes.
You can help ensure that your Ride-on will perform at top levels by following a simple
routine on first use. Consider that your new Ride-on Trowel is like a new car. Just as you would
break in a new car to the road or any new machine to the job, you should start gradually and
build up to full use. Learn what your machine can do and how it will respond. Refer to the
engine manufacturer’s manual for run-in times. Full throttle and control may be used after this
time period, as allowed by material. This will serve to further break in the machine on your
specific application, as well as provide you with additional practice using the machine.
We thank you for the confidence you have placed in us by purchasing a Bartell Ride-on
Trowel and wish you many years of satisfied use.
Discount-Equipment.com

RIDE-ON FAMILY
OWNER’S MANUAL
5
OIPB – B19007!
WARRANTY INFORMATION
All ride-on trowels sold by Bartell Morrison Inc. are warranted against defects in
materials and/or workmanship; excluding normal wear on wearing components and
components covered by a separate original manufacturer’s warranty, for a period of 24 months
from the date of sale to the original end user purchaser provided that certain conditions have
been met.
Conditions:
1. The equipment serial number has been registered with Bartell Morrison Inc. or its
approved dealers, distributors, representatives or agents.
2. The equipment has been operated in an appropriate manner by qualified individuals.
3. The equipment has been properly maintained as per the instructions included in the
Owner’s Manual.
4. All claims for warranty must be filed on proper forms and include the serial number of the
equipment along with proof of purchase.
Any evidence of failure to meet these conditions may result in a denial of the warranty claim.
Consideration of warranty claims will be at the sole discretion of Bartell Morrison Inc., or its
authorized dealers, distributors, representatives or agents. Bartell Morrison Inc. may, at its
discretion, request that the equipment to be considered for warranty be returned at the owner’s
expense to an authorized repair facility for inspection. Under this warranty we may, at our
discretion, repair or replace a part or the whole of the defective component or equipment. Our
Warranty coverage is limited to the cost to repair or replace the defective portion of the
equipment and a reasonable (as determined by Bartell Morrison Inc.) amount of labour to
conduct the repair or replacement. Under no circumstances shall Bartell Morrison Inc. be liable
for any additional or exceptional costs beyond the cost to repair or replace the defective portion
of the equipment. Bartell Morrison Inc. shall not be held accountable for; costs associated with
travel to inspect or repair defective equipment, costs for transporting defective equipment to or
from an authorized repair facility, costs incurred to repair or replace the defective equipment at
any facility other than one authorized by Bartell Morrison Inc., or ancillary damage caused by or
as a result of the defective equipment. Under no circumstances shall equipment be returned to
Bartell Morrison Inc. or its authorized dealers, distributors, representatives or agents without the
approval of Bartell Morrison Inc. as evidenced by a Returned Goods Number. To obtain a
Returned Goods Number contact the factory or your authorized dealer, distributor,
representative or agent. This warranty is for the sole benefit of the original end user purchaser
and is not transferable to any other company or person.
Discount-Equipment.com

RIDE-ON FAMILY
OWNER’S MANUAL
6
OIPB – B19007!
SPECIFICATIONS
TS 78
TS 88
TS 96
BXR 836
Engine Options
Honda 22hp
Kohler 23.5hp
Kohler 26.5hp (EFI)
Honda 22hp
Kohler 23.5hp
Kohler 26.5hp (EFI)
Vanguard 35
Honda 22hp
Length
78” (198 cm)
88” (224 cm)
96” (244 cm)
73” (186 cm)
Width
40” (102 cm)
48” (122 cm)
48” (122 cm)
40” (102 cm)
Path
73 ¾” (187 cm)
85” (216 cm)
93” (236 cm)
71” (180 cm)
Height (without seat and
steering levers)
30” (76 cm)
30” (76 cm)
28” (71 cm)
40” (102 cm)
Weight
Up to 740lbs (336
kg)
Up to 635lbs (289
kg)
1225lbs (557 kg)
492lbs (223.6 kg)
Trowel Coverage
17 sq. ft. (1.7 sq. m)
17 sq. ft. (1.7 sq. m)
29 sq. ft. (2.7 sq. m)
14.5 sq. ft. (1.45 sq.
m)
Travel Speed
Up to 400ft/min
(122m/min)
Up to 380ft/min
(116m/min)
380ft/min (116m/min)
Up to 380ft/min
(115m/min)
Dual Rotor Speeds
180 rpm
180 rpm
180 rpm
145 rpm
Float Blade Size
10”x14” (25x35.6
cm)
10”x18” (25x46 cm)
10”x18” (25x46 cm)
10” x 14” (25 x 35.6
cm)
Finish Blade Size
6”x14” (15x35.6 cm)
6”x18” (15x46 cm)
6”x18” (15x46 cm)
6” x 14” (15 x 35.6
cm)
Combo Blade Size
8”x14” (20x35.6 cm)
8”x18” (20x46 cm)
8”x18” (20x46 cm)
8” x 14” (20 x 35.6
cm)
Pan Float Size
36.5’ (92.7 cm)
38.5” (98 cm) (With
adapter blade)
45.75” (116 cm)
36.5’ (92.7 cm)
Electric Start
Yes
Yes
Yes
Yes
Electrical System
12 Volt
12 Volt
12 Volt
12 Volt
Charging System
25 Amps
15 to 35 Amps
15 or 25 Amps
16 Amps
Battery
12 Volt
12 Volt
12 Volt
12 Volt
Safety Switch
Yes
Yes
Yes
Yes
Fuel Capacity (approx.)
6 Gal. (22.71L)
6 Gal. (22.71L)
6 Gal. (22.71L)
3 Gal. (12.5 mL)
Running Time (approx.)
3 hours
2.5 hours
2.75 hours
2.5 hours
Steering Levers
Twin Sticks
Twin Sticks
Adjustable Twin
Sticks
Twin Sticks
Variable Speed Clutch
Yes
Yes
Yes
Yes
“U” Joint Drive Coupling
Yes
Yes
Yes
Yes
Single Belt Drive
Yes
Yes
No
Yes
Standard Features
Seat Adjuster
Hour Meter
50W Light Package
(4 light kit)
Lifting Hooks
Seat adjuster
Hour Meter
50W Light Package
(4 light kit)
Seat adjuster
Hour Meter
50W Light Package
(4 light kit)
Seat Adjuster
Hour Meter
50W Light Package
(4 light kit)
Options
Catalytic Muffler
Transporter
Retardant Sprayer
Combo Blades
Pan Float Discs
Catalytic Muffler
Transporter
Retardant Sprayer
Combo Blades
Pan Float Discs
Catalytic Muffler
Transporter
Retardant Sprayer
Pan Float Discs
Catalytic Muffler
Transporter
Lifting Hooks
Combo Blades
Pan Float Discs
Discount-Equipment.com

RIDE-ON FAMILY
OWNER’S MANUAL
7
OIPB – B19007!
Titan 78
Titan 88
Titan 96
Titan 96 Hydraulic
Engine Options
Kohler 23.5hp
Kohler 25hp
Kohler 26.5hp (EFI)
Kohler 23.5hp
Kohler 25hp
Kohler 26.5hp (EFI)
Vanguard 35hp
Vanguard 37hp (EFI)
Kubota 44
Length
76 1/4” (194 cm)
88” (224 cm)
96” (244 cm)
104” (264cm)
Width
40-1/2” (103 cm)
48” (122 cm)
48” (122 cm)
50” (127cm)
Path
73 ¾” (187 cm)
85” (216 cm)
93” (236 cm)
96””
Height (seat folded
down)
52” (132cm)
52” (132cm)
52” (132cm)
57” (145cm)
Weight
Up to 885lbs (402 kg)
Up to 935lbs (425 kg)
Up to 940lbs (427 kg)
1770lbs (802kg)
Trowel Coverage
18 sq. ft. (1.7 sq. m)
27 sq. ft. (2.5 sq. m)
29 sq. ft. (2.7 sq. m)
29 sq. ft. (2.7 sq. m)
Travel Speed
Up to 400ft/min
(122m/min)
Up to 380ft/min
(116m/min)
Up to 380 ft/min
(116m/min)
Up to 380 ft/min
(116m/min)
Dual Rotor Speeds
180 rpm
180 rpm
180 rpm
160rpm
Float Blade Size
10”x14” (25x35.6 cm)
10”x18” (25x46 cm)
10”x18” (25x46 cm)
N/A
Finish Blade Size
6”x14” (15x35.6 cm)
6”x18” (15x46 cm)
6”x18” (15x46 cm)
6”x18” (15x46 cm)
Combo Blade Size
8”x14” (20x35.6 cm)
8”x18” (20x46 cm)
8”x18” (20x46 cm)
8”x18” (20x46 cm)
Pan Float Size
37” (94 cm)
N/A
46” (118 cm)
46” (118 cm)
Electric Start
Yes
Yes
Yes
Yes
Electrical System
12 Volt
12 Volt
12 Volt
12 Volt
Charging System
25 Amps
15 to 25 Amps
15 or 25 Amps
40 Amps
Battery
12 Volt
12 Volt
12 Volt
12 Volt
Safety Switch
Yes (in seat)
Yes (in seat)
Yes (in seat)
Yes (foot pedal)
Fuel Capacity
6 Gal. (22.71L)
6 Gal. (22.71L)
6 Gal. (22.71L)
6 Gal. (22.71L)
Steering Levers
Twin Sticks
Twin Sticks
Twin Sticks
Joysticks
Variable Speed
Clutch
Yes
Yes
Yes
No
“U” Joint Drive
Coupling
Yes
Yes
Yes
Yes
Single Belt Drive
Yes
Yes
Yes
Yes
Standard Features
Lifting Hooks Dual Position Steering
Seat Adjuster Hour Meter with Tach
LED Lights Hand Trowel Holder
Dual USB Charger
Lifting Hooks
LED Lights
USB
Hour Meter
Retardant Sprayer
Options
Catalytic Muffler Transporter
Retardant Sprayer Combo Blades
Pan Float Discs
Weight Package (18 to 216lbs) (8 to 96kg)
Transporter
Discount-Equipment.com

RIDE-ON FAMILY
OWNER’S MANUAL
8
OIPB – B19007!
PREVENTATIVE MAINTENANCE AND ROUTINE SERVICE PLAN
This Bartell ride-on power trowel has been assembled with care and will provide years of
service. Preventative maintenance and routine service are essential to the long life of your
Bartell ride-on power trowel. Your dealer is interested in your new trowel and has the desire to
help you get the most value from it. After reading through this manual thoroughly you will find
that you can do some of the regular maintenance yourself. However, when in need of parts or
major service, be sure to see your Bartell dealer. For your convenience we have provided this
space to record relevant data about your ride-on trowel. When in need of parts or service be
prepared to provide your trowel serial number. Locate the serial number now and record in the
space below.
Date Purchased:
Type of Machine:
Dealer Name:
Model:
Dealer Phone:
Serial Number:
Replacement Parts Used
Maintenance Log:
Part No.
Quantity
Cost
Date
Date
Operation
Discount-Equipment.com

RIDE-ON FAMILY
OWNER’S MANUAL
9
OIPB – B19007!
ROUTINE SERVICE SCHEDULE
Routine Service Intervals
Each
Use
After 1.5
months
or 50 hrs
Each 3
months
or 100
hrs
Each 6
months
or 200
hrs
Each 9
months
or 300
hrs
Each 12
months
or 400
hrs
General Inspection
Operation of lights
Check
O
O
O
O
O
Battery
Check and clean
O
O
O
O
Recharge
O
O
O
O
Replace
2 yrs
Guards
Check
O
O
O
O
O
O
Warning Stickers
Check
O
O
O
O
O
Test Run
Check Operation
O
O
O
O
O
Controls
Safety switch
operation
Check
O
O
O
O
O
O
Throttle pedal
operation
Check
O
O
O
O
O
O
Steering Linkages
Check
O
O
O
O
O
O
Lubricate
O
O
O
O
O
Replace
As req’d
Hydraulic Fluid
Check
O
O
O
O
O
O
Replace
O
O
Pitch Control Levers
Check
O
O
O
O
O
O
Lubricate
O
O
O
O
O
Engine:
Fuel Lines & Clamps
Check
O
O
O
O
O
Replace
2 yrs
Engine oil
Check level
O
O
O
O
O
O
Change
O
O
O
Engine oil filter
Replace
O
O
Oil Cooler
Clean
O
O
O
O
Cooling fins
Clean
O
O
O
O
O
Air Cleaner
Check-clean
O
O
O
O
O
O
Replace
O
Air Intake Line
Check
O
Replace
2 yrs
Valve Clearance
Check-adjust
O
O
Fuel Filter
Check and clean
O
O
O
O
Replace
O
Fuel Tank
Clean
500 hrs
Fuel Injection Nozzles
Check pressure
500 hrs
Fuel Injection Timer
Check
500 hrs
Injection Pump
Check
500 hrs
Engine Wiring
Check
O
Coolant
Check
O
Change
O
Discount-Equipment.com

RIDE-ON FAMILY
OWNER’S MANUAL
10
OIPB – B19007!
Routine Service Intervals
Each
Use
After 1.5
months
or 50 hrs
Each 3
months
or 100
hrs
Each 6
months
or 200
hrs
Each 9
months
or 300
hrs
Each 12
months
or 400
hrs
Drive Train:
Bearings
Lubricate
O
O
O
O
O
O
Universal Couplings
Lubricate
O
O
O
O
Belt Tension/
Condition
Check
O
O
O
O
O
O
Clutch/ Pulley
Operation
Check
O
O
O
O
O
O
LH spider plate
assembly
Check
O
O
O
O
O
Lubricate
O
O
O
O
O
O
RH spider plate
assembly
Check
O
O
O
O
O
Lubricate
O
O
O
O
O
O
Gearboxes:
LH Gearbox oil
Check level
O
O
O
O
O
O
Change
O
O
RH Gearbox oil
Check level
O
O
O
O
O
O
Change
O
O
Gearbox breathers
Check operation
O
O
O
O
Water Retardant Spray:
Water pump operation
Check
O
O
O
O
O
O
Spray Nozzles
Clean
O
Retardant Fluid
Check levels
O
Discount-Equipment.com

RIDE-ON FAMILY
OWNER’S MANUAL
11
OIPB – B19007!
ROUTINE SERVICE INTERVALS
Due to the nature and environment of use, power trowels are exposed to severe
operating conditions.
Some general maintenance guidelines will extend the useful life of your trowel:
•The initial service for your power trowel should be performed after 25 hours of use, at
which time your mechanic (or authorized repair shop) should complete all of the
recommended checks in the schedule above. The previous chart is handy for keeping a
record of the maintenance performed and the parts used for servicing your trowel.
•Regular service according to the schedule above will prolong the life of the power trowel
and prevent expensive repairs.
•Keeping your power trowel clean and free from concrete residue is the single
most important regular maintenance operation, over and above the checks in the
service schedule above. Components such as oil seals, belts, drive line parts and
bearings are prone to premature wear from exposure to concrete residue. Using a spray-
on release agent on your power trowel before each use will make clean-up after use
easy and extend the time between the replacements of most of the wearing components
of the machine.
•After each use, your power trowel should be cleaned to remove any concrete residue
from the undercarriage and surrounding components. Use of a power washer will make
clean up quick and easy, especially if a release agent was applied prior to use.
•In the Service Schedule above, items that should be checked, replaced or adjusted are
indicated by “o” in the appropriate column. Not all power trowel models include the same
features and options and as such not all service operations may have to be performed.
For ease of recording, place a checkmark (√) through the “o” when the item is complete.
If an item is not required or not completed place an “x” through the “o” in the box.
•For all fuel-line powered trowels the governed speed of the engine is 2000 to 3600 rpm.
See engine manufacturer’s manual for exact specifications. Care should be used when
making any adjustments to the power trowel not to change the governed speed.
Increasing the governed speed of the engine may lead to premature failure and void the
manufacturer’s warranty.
•Failure to have your power trowel regularly serviced and properly maintained in
accordance with the manufacturer’s instructions will lead to premature failure and void
the warranty.
Discount-Equipment.com

RIDE-ON FAMILY
OWNER’S MANUAL
12
OIPB – B19007!
SAFETY PRECAUTIONS
It is important that the following be read carefully in order that the operational
performance of the Bartell Ride-On Power Trowel be fully understood. Proper maintenance
procedures will ensure long life and top performance of the unit.
SAFETY PRECAUTIONS
•Always keep unauthorized, inexperienced, untrained people away from this machine.
•Rotating and moving parts will cause injury if contacted. Make sure guards are in place.
Keep hands and feet away from moving parts.
•Fuel the machine only when the engine is stopped, using all necessary safety
precautions.
•The engine must always be stopped before attempting any repair or adjustments.
Ignition key should be off.
•Be careful not to come in contact with the muffler when the engine is hot, serious burns
may result!
•Always operate the machine in a seated position to maintain machine balance.
•The transporter is designed for moving the unit around the job site only. It is not
to be used for towing the Ride-On unit off-site.
•When starting the trowel, do not exceed the ¼ throttle position as recommended. A
higher setting could cause the centrifugal clutch to engage, turning the trowel blades.
•Be careful with the trowel around stub pipes or other obstructions on the floor. Should
the machine catch, or hit such an obstruction, serious damage may result to the
machine, or operator may be thrown from the machine.
•Excess surface water may result in sudden loss of control of steering.
•Disconnect battery before attempting any electrical maintenance.
•Ensure that the electrical safety switch, located either under the left foot pedal or under
the seat is engaged. Pressing the foot pedal down or sitting on the seat will engage the
safety switch. Removing your foot off the pedal or standing up will disengage the safety
switch and stop the engine. The engine will not start unless the safety switch is engaged.
This safety feature must be used as designed.
Danger: Never operate the machine in an explosive atmosphere, near combustible
materials or where ventilation does not clear exhaust fumes. Repair fuel leaks
immediately. Refer to your engine owner’s manual for more safety instructions.
Discount-Equipment.com

RIDE-ON FAMILY
OWNER’S MANUAL
13
OIPB – B19007!
ASSEMBLY INSTRUCTIONS
Your new Bartell Ride-On Trowel has been shipped to you partially disassembled. To
prepare for operation use the following instructions:
1. STEERING HANDLE ASSEMBLY (Not applicable to BXR836 or 96H)
The steering handles are shipped ready to connect. Position the handles over the handle
sleeves so that the set-screws (2 per handle) are lined up with the tapped holes on the sleeves.
Tighten the set-screws and test the mobility of the handles.
2. PITCH CONTROL ASSEMBLY (If required)
Bolt pitch control tube (C) to pitch control bracket (D) with
bolts provided. Put cable end (E) through yoke arm (F) and secure
with nylon insert locknut (G). For proper cable adjustment, turn
crank (A) counter-clockwise to the stop position. Tighten nut (G)
until all slack in the cable is removed. If more than 2 or 3 threads
show through the nut, it should be turned back and the guide
screw (B) moved to the next lower hole. Tension in the cable
should then be readjusted. After adjusting tension, turn hand crank
full clockwise (ABOUT 24 TURNS) and check for clearance
between the yoke arm (F) and the gear box at point (H). There
should be enough space to pass a business card through but not
more than 1/8 inch.
3. SEAT ASSEMBLY (If required)
Remove protective wrapping from seat. The seat is now ready to secure to the frame
using included washers and hex nuts. If the seat adjuster is ordered, the slider bars must be
positioned between the seat and the frame using included screws to secure the seat to the
sliders, and then securing the sliders to the frame as indicated above.
4. TRANSPORTER ASSEMBLY (Not applicable to 96H)
The components of the transporter (handle, frame, wheels, and parts bag) are shipped
separately, requiring some assembly. Extend the handle outside the frame. Slide the handle
along the frame cross-bar to align the hole on the handle with the hole on the “U” frame. Insert
the large hitch pin (Part #12487) through the hole to secure the handle to the “U” frame.
Position one of the wheels on the axle and secure in place by inserting pin (Part #10315) into
the hole on the end of the axle. Repeat procedure for the other wheel.
CAUTION: The transporter is designed to be used on the job site only. Do not use the
transporter to tow the machine off-site.
Discount-Equipment.com

RIDE-ON FAMILY
OWNER’S MANUAL
14
OIPB – B19007!
OPERATING INSTRUCTIONS
STARTING PROCEDURES - WARM TEMPERATURES
a) Prior to starting the trowel, check the engine and gearbox oil levels. Be sure the fuel tank
is full. Fuel is not shipped with the unit. Before attempting to start, fill the fuel tank. Check
engine and gearbox oil levels. WARRANTY IS VOID IF RUN WITHOUT OIL. Fill tank
with safety approved fuel containers. DO NOT MIX OIL WITH FUEL.
b) Maintain contact with the safety switch. Engine will disengage and stop if safety switch is
released. Do not tape, tie-down, or otherwise attempt to bypass safety device.
c) If starting a diesel hold the key between run and start for 15 seconds to operate the glow
plugs if the engine is cold.
d) Turn ignition key all the way. Allow engine to warm up before proceeding with full trowel
operation.
STARTING PROCEDURES - COLD TEMPERATURES
Follow same procedure as above but allow for a longer warm up period of 3-5 min. (In
cold weather, oil is much heavier to move. Extra time is required to heat the oil.)
ADDITIONAL DIESEL STARTING PROCEDURES
•Bleed the fuel if necessary using bleed screw shown
Discount-Equipment.com

RIDE-ON FAMILY
OWNER’S MANUAL
15
OIPB – B19007!
STOPPING PROCEDURE
a) Bring throttle to low idle, and wait a few seconds.
b) Remove left foot from safety switch.
c) Turn off ignition key.
STEERING
Guiding the machine on the slab is quite simple but
does require some familiarity before actually working with the
machine. The controls respond as shown in Figure 2. Test
the machine on a finished section of the floor, with the blades
in a flat position, and the engine at a low revolution to gain
the necessary feel for the steering. For straight line
movement, move both handles as one in the direction you
wish to travel. Move the handles in opposite directions to
produce rotation on the machines axis. Left handle forward,
right handle backward for clockwise rotation. Left handle
backward, right handle forward, for counter-clockwise
rotation. Sideways direction is achieved by sideways
movement of the right handle in the required direction of travel.
FLOAT/TROWEL PITCH SETTING
Once you are familiar with the steering functions on a flat floor, you are ready to combine
the steering with float/trowel pitch settings to produce the finish you require. The pitch
adjustment feature of the Bartell Ride-On Trowel permits quick and accurate pitch changes of
the finishing/float blades, without having to stop the machine. Turning the adjustment crank-
handle at the end of the pitch control tubes enables you to change the pitch whenever
necessary to allow for varying conditions over the slap surface. Each spider plate is adjusted
independently. The pitch setting will affect the steering of your unit. Experiment with the settings
as you test drive so you will know what to expect.
WARNING: Serious injury or property damage may result due to temporary loss of
control if operated with excess liquid on the concrete surface.
CAUTION: Do not let the machine stand in one spot on the soft concrete; this may
place unnecessary strain on the clutch to break it free of the concrete. If the unit has
been sitting for any length of time, break it free from the concrete before attempting
operation.
NOTE: Ensure pitch is flat every time the rider is transported. Keeping the machine
pitched creates strain on the pitch cable and can result in a broken or damaged cable.
Figure 2
Discount-Equipment.com

RIDE-ON FAMILY
OWNER’S MANUAL
16
OIPB – B19007!
BLADE SYNCHRONIZATION
(TS88, Titan 88, and specially modified units only)
Figure 3.
To avoid blades hitting, make sure spider plates are
positioned as shown with respect to each other after
performing any maintenance.
TRANSPORTER USE
Titan 78, 88, 96
The transporter has pick-up brackets located on the inside of the wheels which should
be positioned under the pick-up points on the frame. Before connection, the handle will be
pointing upwards at approximately a 45-degree angle. Pull the handle down, engaging the
transporter and secure the bracket and transporter to the frame by locking the handle bracket in
the frame lock by means of the hitch pin. Using the handle as a lever, the ride-on may now be
moved. To disconnect the transporter, follow the above steps in reverse.
Titan 96H
The transporter consists of 2 wheels and a dolly. Lift one end of the rider with the dolly
and then insert the wheels into the holes closest to the dolly. Lower the rider onto the wheels
and move the dolly to the other end of the unit. Lift the unit and transport it. When transporting
is complete reverse installation for removal.
CAUTION: When finishing concrete above grade, erect a situation barrier along the
edge of the slab as a protective measure. The barrier must follow all applicable codes
and should be such that it will stop the trowel from riding over the edge of the slab in
case of loss of control.
CAUTION: The transporter is designed to be used on the job site only. Do not use it to
tow the machine offsite.
Discount-Equipment.com

RIDE-ON FAMILY
OWNER’S MANUAL
17
OIPB – B19007!
TITAN TRANSPORTER INSTRUCTIONS
1. Remove the steering handles and fold the seat
down. Locate the transport pins on the front and
back of the chassis.
2. Angle the transporter so that the frame is almost
vertical.
3. Roll the transporter over the machine, aligning the
transporter brackets with the pins. Slide the
brackets under the pins.
4. Bring the handle down and fit the pickup bar on
the lowest ring of the chassis.
5. Slide the hitch pin into the pickup bar to secure it
on the ring. Attach the cotter pin to the bottom of
the hitch pin.
6. Use the handle to transport the Ride-On Trowel.
Discount-Equipment.com

RIDE-ON FAMILY
OWNER’S MANUAL
18
OIPB – B19007!
MAINTENANCE INSTRUCTIONS
GENERAL
Keep engine oil clean. Change according to engine manufacturer’s specifications.
•Maintain the oil levels in the engine and gearbox assemblies. Change as required.
•Use only clean fuel in the engine.
•Check for loose nuts and bolts on the trowel and tighten as necessary.
•Check belts for wear, replace if worn.
•Grease all fittings daily. See diagram.
•Clean the unit after every use to prevent hardening of concrete residue. Hard concrete is
very difficult to remove, greatly increases weight, and reduces efficient subsequent
operation of unit.
•Check clutch linings regularly for wear. Linings should be changed when 3/4 worn. Do
not allow metal to metal contact as this will damage the clutch drum. (New lining is
8mm.)
AIR CLEANER
Maintaining a clean engine will extend engine life.
Keep air filter clean at all times. Clean air filter using the recommended solvent. See engine
manual for proper cleaning procedure. Let the filter dry before reinstalling.
SPARK PLUG
Check and clean spark plugs regularly. A fouled, dirty spark plug causes hard starting and poor
engine performance. Set spark plug gap to recommended clearance. Refer to engine manual.
BELT CHANGE PROCEDURE
BXR836:
1. Remove belt cover from the machine to expose the drive components.
2. Release the belt tensioner to release the belt.
TS78 & TS88:
1. Remove belt cover from the machine to expose the drive components.
2. Compress the belt in the directions shown (Figure 4) while pushing the belt towards the
center of the driven pulley (1).
3. While the pulley is opened by the belt, insert a wedge so that it will remain open. (Figure
5)
4. Slip the belt off by rotating the opened pulley.
Figure 4
1
Step 2: Press belt toward
center of driven pulley.
Step 3: Insert a wedge to
hold the pulley open.
Figure 5
Discount-Equipment.com
Other manuals for TS78
1
This manual suits for next models
7
Table of contents
Other Bartell Global Trowel manuals
