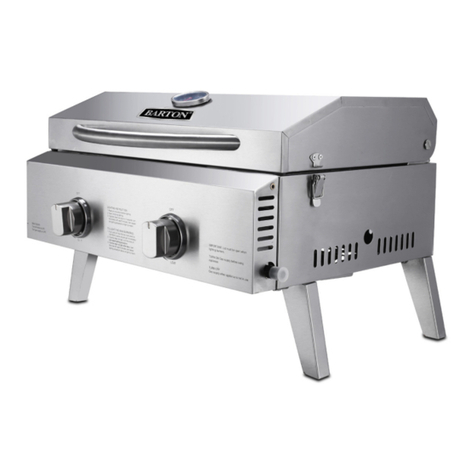
Barton 96962 Original instruction manual

SAVE THIS MANUAL: KEEP THIS MANUAL FOR SAFETY WARNINGS, PRECAUTIONS, ASSEMBLY,
OPERATING, INSPECTION, MAINTENANCE AND CLEANING PROCEDURES. WRITE THE PRODUCT’S
SERIAL NUMBER ON THE BACK OF THE MANUAL NEAR THE ASSEMBLY DIAGRAM (OR MONTH
AND YEAR OF PURCHASE IF PRODUCT HAS NO NUMBER).
OWNER’S MANUAL AND SAFETY INSTRUCTIONS
ITEM: 96962 (3500W) / 96963 (7800W)
FOR QUESTIONS PLEASE CALL OUR CUSTOMER SUPPORT: (909) 628 0880 MON-FRI 9AM TO 3PM PST
STAINLESS STEEL INFRARED GRILL

1
IMPORTANT SAFETY INFORMATION
GENERAL SAFETY WARNINGS
Read these instructions for use carefully. Familiarise yourself with the appliance before connecting it to a gas
cylinder. Keep these instructions for future reference. This instruction manual contains important information
necessary for the proper assembly and safe use of the appliance. Follow all warnings and instructions when
using the appliance. If you have questions about assembly, operation, servicing or repair of this product,
please call Customer Service at 909.628.0880.
This grill must be kept away from ammable materials during use.
Propane gas should be stored or used in compliance with local ordinances and codes or with ANSI/NFPA
58. Turn off propane when not in use.
CALIFORNIA PROPOSITION 65:WARNING: Fuels used in gas or oil red appliances and the products of
combustion of such fuels, contain Chemicals known to the State of California to cause cancer, birth defects
or other reproductive Harm.This product contains chemicals,including lead and lead compounds,known
to the State of California to cause cancer, birth defects or other reproductive harm. Wash hands after
handling.
Keep children away from this appliance at all times.
DO NOT move the grill when in use.
Turn off the gas supply at the gas cylinder after use.
DO NOT modify this appliance.
DO NOT attempt to disconnect any gas ttings while the grill is in use.
DO NOT use charcoal or any other solid or liquid fuels in the gas grill.
DO NOT use as cylinder if the cylinder and/or valve are damaged, rusty or dented as this may be hazardous.
NEVER leave the grill unattended when in use.
Use heat resistant gloves when opening the gas grill.
Incorrect assembly can be dangerous. Follow assembly instructions carefully.
Should a re occur, close the valve of the gas cylinder and turn off the gas burner.
When cleaning the valves and burners, be careful not to stretch the valve orices or burner ports. Be sure
to keep the hose away from heated surfaces.
If gas is leaking from the gas cylinder, move away from the cylinder immediately and call emergency
services. DO NOT try to correct the issue yourself.
If gas is leaking from the gas cylinder, move away from the cylinder immediately and call emergency
services. DO NOT try to correct the issue yourself. NEVER use a ame to correct any leaks.
ALWAYS check for gas leaks and any obstructions to the burner before use. Be sure to do this after a
period of non-use.
The precautions to be taken when changing the gas bottle which shall be carried out away from any
source of igntion.

2
PARTS

OPERATION
3
1. Unpack and identify all parts and hardware using
the parts list on the previous page.
2. Assembling the gas hose on the gas grill valve:
Take the hose which provided in the package and
bring in to the gas valve. First rotate clockwise with
you nger and tighten.
3. Use the wrench on the rear side of the grill grate
handle to fully tighten the hose on the valve.
4. Make sure to not apply excessive force/pressure to
the gas grill valve which will result in damage.
5. Connect the regulator to the gas cylinder.
6. Make sure the gas cylinder valve is in its full OFF position, (turn clockwise to stop).
7. Check the gas cylinder valve to assure it has proper external male threads.
8. Make sure the gas grill knob is in the OFF position.
9. Remove the protective cap from the gas cylinder valve. Always use cap and strap supplied with the valve.
10. Inspect the valve connection port and regulator assembly. Look for damage and remove any debris.
Inspect the hose for damage. Never attempt to use damaged equipment.
11. When connecting regulator assembly to the gas cylinder valve, hand tighten the nut clockwise to a positive
stop. Do not over tighten, not use a wrench to tighten. Use of a wrench may damage the quick coupling nut.
12. Open the gas cylinder valve fully, counter-clockwise. Use a soapy water solution to check all connections
for leaks before attempting to light the grill. If a leak is found, turn the gas cylinder valve off and do not use
the grill until a local gas dealer can make repairs.

OPERATION
4
GAS CONNECTION
Regulator and Hose requirements: The regulator used with your grill must be CSA approved and standard
7/16”. The hoses connected to the gas cylinder must be CSA approved and conform to local codes. The
length of the hose should not excess of 5 feet.
GAS CYLINDER REQUIREMENTS
When using the gas grill, move the gas cylinder as far away as possible from the heat source, placing it to
the side of the grill. The gas cylinder used shall not exceed 28.5lbs, with a maximum height including the
regulator of in case of the smell of gas, close the gas cylinder valve and test the leakage.
TO DISCONNECT THE GAS CYLINDER
1. Turn the gas grill knob off.
2. Turn the gas cylinder valve off fully turn clockwise to stop).
3. Detach the regulator assembly from the gas cylinder valve by turning the quick coupling nut counter-
clockwise.
4. Install the protective cap back on the gas tank valve.
NOTE: ALWAYS disconnect the gas cylinder when the grill is not in use.
LEAK TESTING
NEVER LEAK TEST WHEN AN OPEN FLAME IS PRESENT.
1. Make a soap solution with 1 part liquid detergent and one
part water. Using a spray bottle or rag, apply the solution to the
connection. For the initial leak test, make sure the cylinder is full.
2. Make sure before leak testing, make sure the grill is located
outdoors in a well-ventilated area away from ignition sources.
3. Make sure the knob on the grill is in the OFF position and that
the regulator us connected to the gas cylinder tightly.
4. Completely open the gas cylinder valve by turning counter-
clockwise. If you hear a “POP” sound, turn the gas off IMMEDIATELY,
it indicates a heavy leak at the connection. Call your local gas
dealer to inspect and repair before using the grill.
5. Check all connections from the gas cylinder up to the gas grill connection by brushing or spraying the soapy
solution. If bubbles appear, there is a leak. Turn off the cylinder immediately and re-tighten all connections.
Open the cylinder valve again and recheck.
7. Always close the cylinder valve after leak testing, clockwise.

OPERATION
5
LIGHTING THE GRILL
Before ignition of the grill, unscrew the black electronic button and place a 1.5V battery inside, then tighten it.
1. Turn the knob to OFF position then open the gas cylinder valve.
2. Simply press the knob in, turn counter-clockwise to the maximum position and the burner will ignite.
Before releasing the knob, ensure a ame is established. If the burner fails to ignite, put it into the OFF
position and try again.
3. If after 15 seconds, the burner does not light, stop operating the gas and wait at least 1 minute before
attempting a further ignition of the burner.
4. In the event of the burner ames being accidentally extinguished, turn off the burner control and do not
attempt to re-ignite the burner for at least 1 minute.
USING THE GRILL
Using the Trays
Deep Tray: Cooking
Flat Tray: Use for cooking oil/fat
Both the deep tray and at tray can be placed on the bottom last rail and outside the chamber.
Warming the deep tray and at cannot be used at the upper rail. 1st, 2nd and 3rd because the air circulation
in the grill chamber will be interrupted this would shut off the gas burner.

OPERATION TROUBLESHOOTING
6

OPERATION
13
THE MANUFACTURER AND/OR DISTRIBUTOR HAS PROVIDED THE PARTS LIST AND ASSEMBLY
DIAGRAM IN THIS MANUAL AS A REFERENCE TOOL ONLY. NEITHER THE MANUFACTURER OR
DISTRIBUTOR MAKES ANY REPRESENTATION OR WARRANTY OF ANY KIND TO THE BUYER THAT
HE OR SHE IS QUALIFIED TO MAKE ANY REPAIRS TO THE PRODUCT, OR THAT HE OR SHE IS
QUALIFIED TO REPLACE ANY PARTS OF THE PRODUCT. IN FACT, THE MANUFACTURER AND/OR
DISTRIBUTOR EXPRESSLY STATES THAT ALL REPAIRS AND PARTS REPLACEMENTS SHOULD BE
UNDERTAKEN BY CERTIFIED AND LICENSED TECHNICIANS, AND NOT BY THE BUYER. THE BUYER
ASSUMES ALL RISK AND LIABILITY ARISING OUT OF HIS OR HER REPAIRS TO THE ORIGINAL
PRODUCT OR REPLACEMENT PARTS THERETO, OR ARISING OUT OF HIS OR HER INSTALLATION
OF REPLACEMENT PARTS THERETO.
PLEASE READ THE FOLLOWING CAREFULLY
Record Product’s Serial Number Here:
Note: If product has no serial number, record month and year of purchase instead.
Note: Some parts are listed and shown for illustration purposes only and are not available individually
as replacement parts.
PRODUCT MADE IN CHINA
This manual suits for next models
1
Table of contents
Other Barton Grill manuals
Popular Grill manuals by other brands

Cook'in garden
Cook'in garden PE002 Instructions for care and use

Char-Broil
Char-Broil Commercial 466231203 Assembly, use and care manual

blive
blive GOB manual

Kenmore
Kenmore 146.05349710 Use & care guide

Even Embers
Even Embers GAS7650AS owner's manual

GRILLWORKS
GRILLWORKS Infierno 52/64/80 Installation & use

George Foreman
George Foreman GRP4B Use and care book

Tupperware
Tupperware MicroPro Series manual

HOMCOM
HOMCOM 800-110V70 instruction manual

Mareno
Mareno NG94G Operating and maintenance instructions

goldstein
goldstein GPG-30, GPG-45, GPGDB-12 Installation procedure – user manual service instruction

Rival
Rival FD350S-CN owner's guide