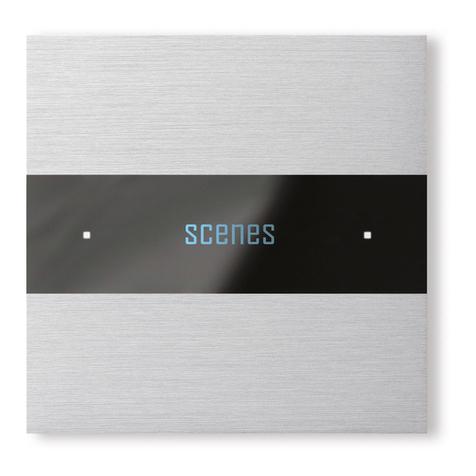
Basalte Deseo Cresnet User manual

Deseo Cresnet
Manual
1/ 17 v0.6 © 2020 basalte
Deseo Cresnet
Manual
Basalte bvba
hundelgemsesteenweg 1a
9820 merelbeke
belgium

Deseo Cresnet
Manual
2/ 17 v0.6 © 2020 basalte
1. Introduction
The Deseo keypad is a HVAC control panel that can be part of a Crestron®solution total control
system. The Deseo keypad is a standard Cresnet®device, which can be programmed in SIMPL
Windows using the Basalte Deseo Configuration Module.
With the OLED user interface, you can adjust the set point, fan speed and temperature modes. Deseo
also has an integrated temperature and humidity sensor.
Additional features are the short and long multitouch to turn the lights on and off, using a welcome
and goodbye scene.
The Deseo keypad should be used in combination with the Deseo HVAC front covers.

Deseo Cresnet
Manual
3/ 17 v0.6 © 2020 basalte
2. Installation
Use a standard European back box with screws to mount the Basalte Deseo keypad. The distance
between the screws must be 60mm. The screws must be installed vertically.
Using screws that are too big might hinder the mounting of the front cover onto the Basalte Deseo
keypad. When mounted, the front cover should hide the keypad completely. If not, the connection
to the front cover might not work properly, which will result in a reduced sensitivity of the switch!
When fixing the screws, do not apply too much force since this could deform the plastic surrounding
opening. Doing so might hinder the installation of the Basalte Deseo front cover onto the keypad!
The minimal depth required for the Basalte Deseo keypad is 0.14 in (35 mm). Additional depth should
be reserved to connect the device.
The minimum gap between 2 Sentido or Deseo keypads should be at least 1.6 in (4 cm).
2.1 Touch sensor calibration
The touch sensors need calibration to compensate for environment changes. At start-up, this
calibration is performed automatically. Internal drift compensation will track slow variations.
Quick changes in the environment (installation or removal of front cover) will necessitate
recalibration. In most cases, automatic recalibration is performed without user intervention.
When manual recalibration is required, the user can force this by touching the switch for 20 seconds.
The device will restart, and calibration is performed.
While calibrating, a status bar and the software build number will be shown on the display.
Note: Do not touch the front cover during recalibration because this can lead to insensitive sensors!

Deseo Cresnet
Manual
4/ 17 v0.6 © 2020 basalte
2.2 Identifying the parts
2.2.1 Front view
A 1.7” OLED-display
B Touch sensor up
C Touch sensor down
D Touch sensor left
E Touch sensor right
F Opening to screw the device into the wall box
G Guide for the deseo front cover
H Temperature/Humidity sensor
I Led left
J Led right
2.2.2 Rear view
F Cresnet connector

Deseo Cresnet
Manual
5/ 17 v0.6 © 2020 basalte
3. General functions
The Basalte Deseo keypad has 4 touch sensitive areas: the upper, lower, left and right sensor.
The upper and lower sensor can be used to adjust the setpoint.
The left sensor is used to browse through the available fan levels.
The right sensor is used to browse through the available thermostat modes.
Touching the upper and lower surface of the device simultaneously will trigger the multitouch
event. Please refer to section Multitouch.
In SIMPL Windows, a ‘Basalte Deseo Configuration’ module is used for every Deseo keypad in the
project, to define the functionality.
3.1 Screen standby
To reduce power consumption and prolong display life, the display shuts down after a prolonged
time of inactivity. This time can be configured in the configuration module.
The device automatically wakes up when one or more buttons are touched or when the wake-up
input is pulsed high.
3.2 Start page
The start page is the main entry, shown when the device wakes up. The page can display:
•Thermostat state
•Ventilation state
•1 or 2 info lines: time, temperature or humidity.
The device contains an internal clock that can be set with the serial clock input. The time format can
be set either in 12h or 24h notation.
The time should be updated on a regular base and after each restart of the device. After restarting,
the Deseo will show the time 9:00.
Temperature and humidity can be internal values from the Deseo sensor or external values coming
from the Cresnet bus. The temperature can be displayed in °C or °F. These settings can be configured
in the ‘Basalte Deseo Configuration’ module.
3.3 Setpoint page
When the up or down button is pressed, the setpoint increases/decreases in steps of 0.5°C or 1°F.
When the button is pressed and hold, the setpoint changes in steps of 1°C or 2°F.
In case the upper limit is reached, the ‘˄’ sign on the top of the display disappears and the upper
button is disabled. When the lower limit is reached, the ‘˅’ sign on the bottom of the display
disappears and the lower button is disabled. The temperature setpoint limits are set using the input
joins (section Setpoint limits).
Deseo will only send its setpoint on the output join as set on the display. By receiving an update on
the setpoint input joins, the Deseo will overwrite the internal setpoint and the screen will be
updated, even if the temperature setpoint is beyond the upper or lower limit.
Note: When a value is sent to the setpoint input join, the Deseo will not send a new setpoint to the
output on the bus because this will occur an infinitive loop.

Deseo Cresnet
Manual
6/ 17 v0.6 © 2020 basalte
3.4 Multitouch
A multitouch event occurs when the user simultaneously touches the upper and lower surfaces of
the device.
The short and long multitouch can be enabled or disabled in the ‘Basalte Deseo Configuration’
module. The delay for the multitouch long press is adjustable from 0.5 s to 5.0 s.
3.4.1 Short Multitouch
When a multitouch action is shorter then the ‘long press delay’, a multitouch short press is triggered.
The installer can set dynamic text fields which are displayed shortly when the multitouch occurs.
The message is adjustable by sending a serial string to the <Multitouch_Short_Message$> input.
After the multitouch is triggered there is a brief time to update the text string before it will be
displayed.
3.4.2 Long Multitouch
When the multitouch action is longer then the ‘long press delay’, a long multitouch is triggered.
Identically to the short multitouch, the installer can send a text string to the
<Multitouch_Long_Message$>. The text will display when the multitouch long press is triggered.
3.5 Thermostat modes
In the configuration module it is possible to enable the following thermostat modes:
Heating , Cooling , Heating Cooling Auto
When touching and releasing the right sensor, the Deseo will cycle through the different modes if
they are enabled (off, heating, cooling, auto).
If the mode is changed by touching the mode sensor, the corresponding digital output join will be
pulsed high.
<Mode_Heat>
<Mode_Cool>
<Mode_Auto>
<Mode_Off>
All thermostat modes can be activated from the Cresnet bus by sending a pulse to one of the
corresponding digital input joins.
<Mode_Heat_FB>
<Mode_Cool_FB>
<Mode_Auto_FB>
<Mode_Off_FB>

Deseo Cresnet
Manual
7/ 17 v0.6 © 2020 basalte
3.5.1 Setpoints
After starting the Deseo the default setpoint will be 70°F or 21 °C.
The Deseo can support 2 different setpoint approaches.
3.5.1.1 Single mode
In single mode, only one setpoint is available. For this reason, there will be one setpoint for all
thermostat modes. In this setup only one setpoint join is needed to update the setpoint.
Note: All 3 setpoint joins will have the same behavior.
3.5.1.2 Dual mode
In dual setpoint mode, it is possible to have a different setpoint for heating and cooling.
The input join <Single_Setpoint_FB> is not used in this mode.
When updating the setpoint on the Deseo, the setpoint will be sent to the setpoint join of the active
mode.
When changing the heating setpoint, the <Heat_Setpoint> will be updated.
When changing the cool setpoint, the <Cool_Setpoint> will be updated.
Note: The Deseo displays only one setpoint. This makes it not recommended to use dual setpoints
in combination with auto mode!
3.5.1.3 Setpoint limits
By default, the setpoints are limited as follows:
Heat setpoint: 38 to 89 °F or 3 to 32 °C
Cool setpoint: 59 to 99 °F or 15 to 37° C
In case single setpoint is used the limits are from 59 to 89 °F or 15 to 32 °C.
The setpoint limits can be adjusted using 4 analog input joins.
<Min_Heat_Setpoint>
<Max_Heat_Setpoint>
<Min_Cool_Setpoint>
<Max_Cool_Setpoint>
Note: In case of single setpoint mode, there are no separate limits for heat and cool. Deseo will
accept the last updated value.

Deseo Cresnet
Manual
8/ 17 v0.6 © 2020 basalte
3.6 Fan modes
In the configuration module it is possible to enable the following fan modes:
Off –Low –Mid –High –Auto
When touching and releasing the fan sensor, the Deseo will cycle through the different fan modes if
they are enabled.
If the fan mode is changed by touching the fan sensor, the corresponding output join will be pulsed
high.
<Fan_Low>
<Fan_Mid>
<Fan_High>
<Fan_Auto>
<Fan_Off>
All fan modes can also be changed from the Cresnet bus by sending a pulse to one of the
corresponding digital input joins.
<Fan_Low_FB>
<Fan_Mid_FB>
<Fan_High_FB>
<Fan_Auto_FB>
<Fan_Off_FB>
3.7 Temperature
Each Basalte Deseo keypad has a temperature sensor to report the ambient temperature on the
Cresnet bus. The temperature is reported in tenths of a degree Celsius or Fahrenheit on the analog
output <Temperature_FB>. The serial output <Temperature_FB$> will report the same value in “xx.x”
format for visualization.
When enabled, the temperature can be reported every 60 seconds, or on a temperature change of
0.5° Celsius. (equal to a temperature change of 0.9° Fahrenheit)
The report mode and temperature format are configured using the ‘Basalte Deseo Configuration’
module. A temperature compensation is available to anticipate on any environmental factors that
might disturb the temperature measurement.
3.8 Humidity
Each Basalte Deseo keypad has a humidity sensor to report the relative humidity on the Cresnet bus.
The humidity is reported on the analog output <Internal_Humidity>. The serial output <Humidity$> will
report the same value in “xx.x” format for visualization.
When enabled, the humidity can be reported every 60 seconds, or on a change of 1 %.
The report mode and temperature format are configured using the ‘Basalte Deseo Configuration’
module. A humidity compensation is available to anticipate on any environmental factors that might
disturb the humidity measurement.

Deseo Cresnet
Manual
9/ 17 v0.6 © 2020 basalte
4. Changing the Basalte Deseo Cresnet ID
A Basalte Deseo keypad’s Cresnet ID is factory set to 25.
To change the Cresnet ID, you can use the Network Device Tree View in Crestron Toolbox.
Right-click on a discovered Basalte Deseo and press the Change Network ID ... button.
A new pop-up-window allows you to change the Cresnet ID.
Note: When press and hold the left and right sensor for one second, the Cresnet ID of the Deseo
will be displayed on the display of the deseo.
Alternatively, to identify multiple already installed Basalte Deseo keypads in an installation, you can
use the Identify This Device ... button when right-clicking a Basalte Deseo again. A new pop-up-
window gives an overview off all Cresnet devices in identification mode.
A request is sent on the Cresnet bus to the selected Basalte Deseo. The Polling Mode Status says,
‘Start requested, Start in progress’.
After some seconds, this status will change to ‘Active’, and the corresponding Basalte Deseo’s will
display the message Light & Poll. Now press any one of the sensors on the keypad. The Polling
Mode Status will change to ‘Pressed’. Pressing the OK button will bring you back to the Network
Device Tree View, where you can change the Cresnet ID of the identified keypad.

Deseo Cresnet
Manual
10 / 17 v0.6 © 2020 basalte
5. Programming in SIMPL Windows
5.1 Adding a Basalte Deseo keypad
A Basalte Deseo keypad is added to the Cresnet Bus like C2N-CHIP. Please refer to the demo project.
An overview of all available signals on the Basalte Deseo symbol:
Signal Name and Type
Description
Digital input:
<Wake_Up>
High/1 (pulse) = Display wake up
Digital output:
<Multitouch_Short_Press>
When the Multitouch is enabled, this output indicates that the upper
and lower sensor have been pressed and released within the ‘Long
Press Delay’.
The output will pulse High when the sensors are released.
High/1 (pulse) = Multitouch press/release
Digital output:
<Multitouch_Long_Press>
When the Multitouch is configured as a ‘Short/Long Press’, this output
indicates that the upper and lower sensor have been pressed for a
longer time than the ‘Long Press Delay’.
When touching the sensors, the output will pulse High when the ‘Long
Press Delay’ has elapsed.
Both the ‘Multitouch mode’and ‘Long Press Delay’ are set using the
‘Basalte Deseo Configuration’ module.
High/1 (pulse) = Multitouch long press.
Digital inputs:
<Mode_Heat_FB>
<Mode_Cool_FB>
<Mode_Auto_FB>
<Mode_Off_FB>
Selects the system mode on the rising edge of the input. The system
mode is visible in the upper right corner of the display.
High/1 (rising edge) = Select system mode; Low/0 = no effect
Digital outputs:
<Mode_Heat>
<Mode_Cool>
<Mode_Auto>
<Mode_Off>
Reports the current system mode after the system mode button is
pressed.
High/1 = System mode running; Low/0 = System mode not running

Deseo Cresnet
Manual
11 / 17 v0.6 © 2020 basalte
Digital inputs:
<IsHeating>
Indicates that the system is heating. A high signal will highlight the
flame symbol in heating mode.
High/1 = Heat running; Low/0 = System not running
Digital inputs:
<IsCooling>
Indicates that the system is cooling. A high signal will highlight the
snowflake symbol in cooling mode.
High/1 = Cool running; Low/0 = System not running
Digital inputs:
<Fan_Low_FB>
<Fan_Mid_FB>
<Fan_High_FB>
<Fan_Auto_FB>
<Fan_Off_FB>
Selects the fan mode on the rising edge of the input. The fan state is
visible in the upper left corner of the display.
High/1 (rising edge) = Select fan mode; Low/0 = no effect
Digital outputs:
<Fan_Low>
<Fan_Mid>
<Fan_High>
<Fan_Auto>
<Fan_Off>
Reports the current fan mode after the fan mode button is pressed.
High/1 = Fan mode selected; Low/0 = Fan mode not selected
Analog input:
<External_Temperature>
Receives the room temperature from an external sensor. If enabled in
the ‘Basalte Deseo Configuration’ module the temperature can be
displayed on the start screen of the Deseo.
This value is ignored if the internal sensor is used.
Analog output:
<Internal_Temperature>
Reports the ambient room temperature in tenths of a degree Celsius
or Fahrenheit.
Depending of the report type, the temperature will be updated every
60 seconds, or on every temperature change of 0.5° Celsius. (equal to
0.9° Fahrenheit)
The temperature format and report type can be set using the ‘Basalte
Deseo Configuration’ module.

Deseo Cresnet
Manual
12 / 17 v0.6 © 2020 basalte
Analog input:
<External_Humidity>
Receives the relative humidity from an external sensor. If enabled in
the ‘Basalte Deseo Configuration’ module the humidity can be
displayed on the start screen of the Deseo.
This value is ignored if the internal sensor is used.
Analog output:
<Internal_Humidity>
Reports the relative humidity of the built-in humidity sensor in whole
numbers.
The humidity report type can be set using the ‘Basalte Deseo
Configuration’ module.
Analog inputs:
<Heat_Setpoint_FB>
<Cool_Setpoint_FB>
The current heat and cool setpoint temperature to display on the
display. Reported in tenths of a degree.
Remark: The Deseo displays only one setpoint. This makes it not
recommended to use dual setpoints in combination with auto mode!
Analog input:
<Single_Setpoint_FB>
The current setpoint temperature to display on the display.
Analog outputs:
<Heat_Setpoint>
<Cool_Setpoint>
Reports the heating and cooling setpoint after changing the setpoint
by pressing up or down button on the Deseo. Reported in tenths of a
degree.
Analog output:
<Single_Setpoint>
Reports the single setpoint after changing the setpoint by pressing up
or down button on the Deseo. Reported in tenths of a degree.
Analog inputs:
<Min_Heat_Setpoint>
<Max_Heat_Setpoint>
<Min_Cool_Setpoint>
<Max_Cool_Setpoint>
Sets the minimum and maximum setpoints allowed to display and
report by the Deseo. Reported in tenths of a degree.
Default analog values are as follows:
Heat setpoint: 380 to 890 (38° to 89°F); or 30 to 320 (3° to 32°C).
Cool setpoint: 590 to 990 (59° to 99°F); or 150 to 370 (15° to 37°C).
In case single setpoint is used: 59 to 89 °F or 15 to 32 °C.
Serial input:
<Clock$>
This input can be connected to the output of a Clock Driver symbol to
make the time of day available on the display.
Serial input:
<Message$>
Sends text string to display on the Deseo.
The string will be visible on the display for a time specified in the
‘Basalte Deseo Configuration’ module.
Serial input:
<Multitouch_Short_Message$>
Sends text label for display when the Multitouch Short Press is
activated.

Deseo Cresnet
Manual
13 / 17 v0.6 © 2020 basalte
Serial input:
<Multitouch_Long_Message$>
Sends text label for display when the Multitouch Long Press is
activated.
Serial output:
<Status$>
After power cycle of the keypad, this string reports the keypad’s
software version.
If an invalid string is received on the <Configuration$> input, an
error message will be displayed on this output.
Serial output:
<Temperature$>
Reports the ambient room temperature in following format “xx.x”.
Depending of the report type, the temperature will be updated every
60 seconds, or on every temperature change of 0.5° Celsius. (equal to
0.9° Fahrenheit)
The temperature report type can be set using the ‘Basalte Deseo
Configuration’ module.
Serial output:
<Humidity$>
Reports the relative humidity in following format “xx.x”.
Depending of the report type, the temperature will be updated every
60 seconds, or on every temperature change of 1% Humidity.
The humidity report type can be set using the ‘Basalte Deseo
Configuration’ module.
Serial input:
<Configuration$>
Needs to be connected to the serial output <Initialize_To_Device$>
on the ‘Basalte Deseo Configuration’ module.

Deseo Cresnet
Manual
14 / 17 v0.6 © 2020 basalte
5.2 Basalte Deseo Configuration module
Each Basalte Deseo on the Cresnet bus requires a ‘Basalte Deseo Configuration’ module. This module
allows to change the parameters for each Deseo, and to send this custom configuration to the Basalte
Deseo.
Make sure to include the ‘Basalte Deseo Configuration.umc’ file in the
same SIMPL Windows project folder. The module should be visible in
the Symbol Library Pane.
Add as many of these modules to the project as there are Basalte
Deseo’s on the Cresnet Bus.

Deseo Cresnet
Manual
15 / 17 v0.6 © 2020 basalte
An overview al all available signals and parameters on the Basalte Deseo Configuration symbol:
Signal Name and Type
Description
Digital input:
<Initialize>
When a High pulse is sent on this input, all configured parameters
are sent in 1 configuration string to the corresponding Basalte Deseo
device.
High/1 (pulse) = Send configuration string
Serial output:
<Initialize_To_Device$>
Needs to be connected to the serial input <Configuration$> on the
Basalte Deseo device symbol.
Parameter:
<Time Format>
Determines how the time will be displayed on the start-up screen, if
enabled.
Available settings:
12h
24h
Parameter:
<Timeout Display>
Defines the timeout for the display to go in standby.
Available settings:
10 –100 s
Parameter:
<Timeout Message>
Defines the timeout for message display.
Available settings:
10 –100 s
Parameter:
<Long Press Delay>
Defines the time between a short press detection and a long press
detection.
Available settings range from 0.5 s to 5.0 s in steps of 0.5 s.
Parameter:
<Display Line 1>
Defines the 1st line of the display on the start-up screen.
Available settings:
Time
Temperature
Humidity
Parameter:
<Display Line 2>
Defines the 2nd line of the display on the start-up screen.
Available settings:
Disabled
Time
Temperature
Humidity

Deseo Cresnet
Manual
16 / 17 v0.6 © 2020 basalte
Parameter:
<Multitouch Mode>
Defines the mode of the Multitouch.
Available settings:
Disabled
Short Press
Short/Long Press
Parameters:
<Fan Mode Low>
<Fan Mode Mid>
<Fan Mode High>
<Fan Mode Auto>
<Fan Mode Off>
Defines the available Fan modes that can be selected on the Deseo.
Available settings:
Disabled
Enabled
Parameter:
<Heating>
<Cooling>
<Heating Cooling Auto>
Defines the available thermostat modes that can be selected on the
Deseo.
Available settings:
Disabled
Enabled
Parameter:
<Setpoints>
Dual setpoints will allow 2 individual setpoints for heating and
cooling.
When using single setpoint, there will be one setpoint equal for all
system modes.
Remark: The Deseo displays only one setpoint. This makes it not
recommended to use dual setpoints in combination with auto mode!
Available settings:
Single
Dual
Parameter:
<Temperature>
Defines the temperature used to display on the Deseo.
Available settings:
Internal
External

Deseo Cresnet
Manual
17 / 17 v0.6 © 2020 basalte
Parameter:
<Temperature Sensor>
Defines how the temperature is updated.
If enabled, the temperature can be sent every 60 seconds, or on a
0.5° Celsius change. (equal to 0.9° Fahrenheit)
Available settings:
Disabled
Send Cyclic
Delta Temp
Remark: Please consider a delay of about 20 minutes until you have
a correct temperature reading.
Parameter:
<Temperature Format>
Defines in which format the temperature will be reported.
Available settings:
Celsius
Fahrenheit
Parameter:
<Temperature Compensation>
Due to environmental factors, a temperature offset may be required.
Available settings range from -9.5°C to +9.5°C in steps of 0.5°C.
(equal to a range from -9.5°F to +9.5°F)
Parameter:
<Humidity>
Defines the humidity used to display on the Deseo.
Available settings:
Internal
External
Parameter:
<Humidity Sensor>
Defines how the humidity is updated.
If enabled, the humidity can be sent every 60 seconds, or on a
change of 1%.
Available settings:
Disabled
Send Cyclic
Delta 1%
Parameter:
<Humidity Compensation>
Due to environmental factors, a humidity offset may be required.
Available settings range from -30% to +30%.
Questions or remarks?
Contact your Basalte representative or
Table of contents
Other Basalte Controllers manuals
Popular Controllers manuals by other brands

Mastervolt
Mastervolt Softstart 8kW installation manual

Stoltzen
Stoltzen SHC-001 user manual

SMC Networks
SMC Networks IN-777 Series Operation manual

Megmeet
Megmeet MC5000 Series User quick reference manual

Leviton
Leviton Decora NE515 installation instructions

Advantech
Advantech ADAM-5550KW Series user manual