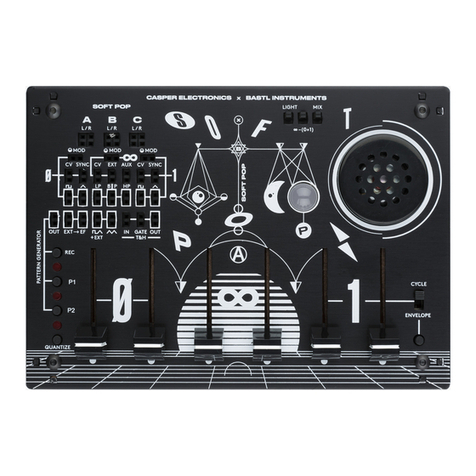
Bastl CASPER SOFTPOP SP2 Quick start guide

SP2 digital VCO upgrade
SP2 has officially leveled up. This free firmware update unlocks enhanced MIDI control, MIDI CC implementation,
new CV and GATE output modes, and a bunch of quality-of-life improvements. But the real big news is that the
original analog oscillator (bless its pitch-drifting soul) has gone digital. That means vastly improved tuning precision
and stability and 8 new variable waveforms to explore and run through SP2's rich and unruly analog filter and VCA.
This update requires moving a jumper on the SP2 circuit board before uploading the new firmware. See the firmware
update instructions below.
This manual covers the differences between the analog VCO firmware v1.2 and the digital VCO firmware v1.0. For
full feature functionality, please see the digital VCO reference manual: here.
New features of SP2 digital VCO version 1:
1. Digital VCO
2. Fine-tune fader mode
3. ENV G and SLIDE G trigger/gate modes
4. Envelope gate probability as FX8
5. Triggered pitch change mode
6. VCO Pitch Limiter
7. CV pitch tracking mode
8. MIDI clock detection
9. FX controlled by MIDI notes
10. Envelope triggered by Note On mode
11. MIDI CC implementation
12. MIDI transpose
13. Improvements and bug fixes
New Button Combos:
SLIDE + MIDI + GATES = select waveform
SLIDE + FINE-TUNE = set waveshape
PATTERN + MIDI = toggle Triggered pitch mode
MIDI + TRIG = toggle Trigger Envelope at Note On mode
TRIG + SLIDE = toggle SLIDE G trigger/gate mode
TRIG + PATTERN = toggle ENV G trigger/gate mode
Hold SCALE at power up = toggle VCO Pitch Limiter mode
Hold PATTERN at power up = toggle CV Pitch tracking mode
Hold SLIDE at power up = toggle FINE-TUNE fader function
Hold PLAY + TEMPO + TRIG at power up = factory reset
Hold SCALE + SLIDE at power up = calibration and test mode
Hold MIDI at power up = firmware update mode

1. Digital VCO
Note: The new waveforms are output from the TRI jack. To hear these new waveforms most clearly, it is best to patch
TRI out to FILTER IN to override the normalization of PULSE to FILTER IN.
Note: SLIDE+MIDI no longer accesses the automatic tuning feature because it is not necessary for the digital VCO.
SLIDE + MIDI + GATES = select waveform
To select a WAVEFORM, hold both the SLIDE and MIDI buttons and press one of the GATE buttons.
SLIDE + FINE-TUNE = set waveshape
Hold the SLIDE button and move the FINE-TUNE fader to adjust the waveforms variable WAVESHAPE parameter.
The waveforms and their waveshaping parameters are:
1: fractal triangle fractal transformation
2: super fractal triangle: 2 detuned triangles fractal-transforming each other exp. detune & lin. detune*
3: animated fractaled triangle fractal to pulsing saw
4: exponential saw detune exp. detune
5: super triangle: 2 detuned triangle waves mixed together exp. detune & lin. detune*
6: super saw: 2 detuned saw waves mixed together exp. detune & lin. detune*
7: triangle to noise glitch morph
8: glitch radio radio tune
*exp. detune & lin. detune: At the lowest setting, the two oscillators are one octave apart and slightly detuned.
Sweeping up to the middle setting, the lower oscillator will pitch up to almost the frequency of the static oscillator,
creating a typical beating LFO effect. The second half of the fader is the linear detune of the two oscillators which
means the beating LFO frequency should remain very similar across the octaves. At the highest setting, the two
oscillators are at an almost identical frequency.


2. FINE-TUNE fader mode
Hold SLIDE at power up = toggle FINE-TUNE fader function
The default FINE-TUNE fader function can be altered, so that the WAVESHAPE is the default function, and the
FINE-TUNE function is only accessed by holding the SLIDE button. To change the default function of the FINE-TUNE
fader, hold the SLIDE button while powering up the unit.
3. ENV G and SLIDE G trigger/gate modes
TRIG + SLIDE = toggle SLIDE G trigger/gate mode
TRIG + PATTERN = toggle ENV G trigger/gate mode
The ENV_G and SLIDE_G outputs can now be either a gate or a trigger signal.
Hold TRIG and press PATTERN to change the ENV_G from gate to trigger.
Hold TRIG and press SLIDE to change the SLIDE_G from gate to trigger.
While holding the TRIG button, the trigger/gate mode is indicated by the fader lights:
PITCH fader light OFF = ENV_G trigger mode
PITCH fader light ON = ENV_G gate mode
PITCH MOD fader light OFF = SLIDE_G trigger mode
PITCH MOD fader light ON = SLIDE_G gate mode
4. Envelope gate probability FX
Holding the TRIG button and the GATE 8 button is no longer SILENCER mode but a 50% probability for all signals
related to triggering the envelope: ENV_G output, normalized trigger to the envelope's TRIG input, and FX retrigger
functions. FX loop recording can be applied to have permanent probability on certain steps.
5. Triggered pitch change mode
PATTERN + MIDI = toggle Triggered pitch mode
Hold PATTERN and press MIDI to activate/deactivate the mode in which the oscillator pitch is updated only at active
envelope gates. That means if you only have active envelope gates at steps 1 and 5, the oscillator pitch will also
update only at steps 1 and 5. The envelope gate probability is taken into account when rendering the oscillator pitch.
Note: This setting is not stored in the memory after SAVE.
6. VCO Pitch Limiter mode
Hold SCALE at power up = toggle VCO Pitch Limiter mode
For more focused tonal work, the PITCH fader can be limited to avoid the subsonic LFO territory. Hold SCALE while
powering up the unit to toggle the VCO Pitch Limiter mode.

7. CV pitch tracking mode
Hold PATTERN at power up = toggle CV Pitch tracking mode
The CV output can now output the exact voltage that represents the pitch of the SP2 oscillator (including slides) = CV
TRACK mode. The original CV SEQ mode is still available. In the CV SEQ, the CV only outputs voltages from the
sequencer – excluding slides, pitch fader and pitch modulation. To alternate between these two modes, hold
PATTERN while powering up the unit.
Note: Please remember that MIDI+PATTERN still switches between the CV Out being used either for Velocity CV or
sequencer CV output.
MIDI Implementation:
8. MIDI Clock detection
Automatic MIDI Clock detection: When no MIDI Clock is present, the SP2 will use the internal TAP tempo or the
analog clock at the SYNC IN input. If the MIDI clock is present, it will use the MIDI clock. Using the MIDI clock can be
disabled by holding MIDI and pressing PLAY, so the light at the PLAY button is OFF.
While holding the MIDI button, the MIDI clock will only work if the light at the PLAY button is ON.
9. FX controlled by MIDI notes
MIDI notes above the 8th octave (above note 96 = C7) control the temporary FX.
Notes 96-103 = FX 1-8, Notes 104-111 = FX 1-8 etc.
10. Envelope triggered by Note On mode
MIDI+TRIG = Note On triggers the envelope
Hold MIDI and press TRIG to activate/deactivate triggering of the envelope with every received MIDI Note On
message. While holding the MIDI button the state is displayed on the MIDI Gate light.
11. MIDI CC implementation:
CC 0 BANK select: values 0-7 (1-8)
CC 1 (mod wheel) WAVESHAPE 0-127
CC 2 PITCH fader 0-127
CC 3 PITCH MOD fader 0-127
CC 5 SLIDE time 0-127
CC 16 PATTERN selection: values 0-7 (1-8ú (removes chain)
CC 17 SCALE selection 0-7 (1-8) (removes chain)
CC 18 select PLAY MODE 0-7 (1-8) (removes chain)
CC 19 SAVE current bank (any value)
CC 20 select WAVEFORM 0-7 (1-8)
CC 64 (sustain) sustain pedal OFF<64, ON >=64
CC 123 all notes off – clears midi buffers

12. MIDI transpose
MIDI notes on channel 16 will transpose anything happening on the SP2. The MIDI transpose adds together with the
transpose CV input. Note C2 (note 36) means no transpose. Notes above C2 are positive transpose in semitones
(note 37= +1 semitone) and below C2 is negative transpose (note 35 = -1 semitone).
13. Improvements / bug fixes:
improvement: tempo increments at lower tempos are bigger = more natural control at a slow tempo
improvement: better filtering on VCO TRANSPOSE and MOD inputs.
improvement: better filtering of PITCH, PITCH MOD, and FINE-TUNE faders.
improvement: TRANSPOSE input calibration improvement
improvement: does not play an octave higher than other synths (with the fine-tune fader at the lowest setting)
improvement: removed lag between pitch change and trigger
bugfix: the first step should never be shorter and, therefore, should always trigger the envelope
bugfix: fixed overflow at the CV output with the highest notes
bugfix: playmodes reflected when starting sequencer and using reset input
bugfix: reset input triggers random step on random playmodes
bugfix: first step not triggered when synced via MIDI
New power up animation
New animation helps you easily tell apart analog VCO and digital VCO modes.
Digital VCO:
1: All lights are ON except one blinking – this light indicates the version of the digital VCO firmware.
2: lights 1, 3, 5, and 7 animate while:
the state of light 2 indicates the VCO Pitch Limiter mode
the state of light 4 indicates the CV Pitch tracking mode
the state of light 6 indicates the flipped function of the FINE-TUNE fader

Installing the update:
A video manual of the update is available at our YouTube channel.
Step 1: Flip the jumper
Take a Phillips screwdriver and undo the backplate of your Softpop. Before removing the back plate, secure the
side panels in place with tape. Reassembling the case after the upgrade will be much easier.
Inside you will find a jumper marked VCO with ANALOG and DIGITAL positions. Move the jumper to the DIGITAL
position, i.e., connect the middle pin to the outer right pin to make the new digital oscillator modes and firmware work.
Put the backplate back on, aligning the sides properly in the slots, then put the screws back.
Step 2: Update the firmware
The Softpop’s firmware can be updated by playing a wav file into its RESET jack.
Hold the MIDI button at power up to enter bootloader mode.
To upload new firmware, connect a cable from the RESET input to your computer/phone audio output, and play the
wav file downloaded from the product page at maximum volume. Lights should animate the progress, and all should
light up when the process is done. Power off and on after all lights come on.
The firmware version is indicated at startup by the corresponding number blinking several times.
Calibrating the TRANSPOSE input
We recommend to re-calibrate the TRANSPOSE input after the update.
Patch the CV output to TRANSPOSE input and hold SLIDE+SCALE while powering up the unit. Wait until the GATE
lights go off. Unpatch the cable and power cycle the unit.
If you want the calibration to be accurate, make sure you use a high-quality power source! We recommend a good
quality wall charger or USB power bank.

Firmware upload troubleshooting
In case the SP2 does not boot to normal operation, get back to bootloader mode and check the following:
● Check that you have set the jumper on the circuit board to the correct position - i.e., that you have bridged the
middle and right pins (DIGITAL). The jumper is small and can easily be misaligned, so make sure it actually
connects the pins.
● Powering via USB and playing audio from the same computer can sometimes cause issues (depending on the
computer). Also, some power supplies may introduce noise into the device, which can disrupt the firmware
update. That can also apply to expensive externally powered USB hubs. Sometimes changing the power source
may help with updates if they fail repeatedly. We recommend updating the SP2 while powered by a good-quality
wall charger or USB power bank.
● When updating the firmware via audio from the phone/computer, the GATE LEDs should run smoothly in one
direction. If they do not move at all, the audio volume is too low or too high.
● If your audio output level is too low for the RESET jack, connect your phone/computer audio output to INPUT on
the SP2. Set the INPUT slider in the middle, patch AMP to RESET, and play the wav file again.
● Make sure your phone or computer does not make any sound (e.g., notification/alerts) during the firmware
upload, as this will cause the process to fail, and your unit will not work properly. We recommend turning on
airplane mode before starting.
● If you still have no luck updating your SP2 via the RESET connector directly from your phone/computer, you
can try the following method:
1) Connect your phone/notebook audio output to the AUDIO INPUT on the SPII.
2) Patch AMP to FILTER IN.
3) Patch OUTPUT to RESET.
4) Set the Filter Mode switch to LP (low-pass).
5) Set the RESONANCE fader to the minimum (all the way to the left).
6) Set the POP fader to SOFT (all the way to the left).
7) Set the CUTOFF fader to the maximum (fader all the way up).
8) Set the CUTOFF MOD fader to the minimum (fader all the way down).
9) Set the Input and Output faders to the maximum (all the way up).
10) Play the FW upgrade audio.
11) Re-calibrate the TRANSPOSE input after the update.
Other manuals for CASPER SOFTPOP SP2
2
Table of contents
Other Bastl Synthesizer manuals

