Baumr consaw75bbmracab User manual

Concrete Cut-Off Saw
User Manual
RETAIN THIS MANUAL FOR FUTURE REFERENCE
PLEASE READ THIS MANUAL CAREFULLY BEFORE USE

Concrete Cut-Off Saw
i
Table of Contents
PREFACE.................................................................................................................................................1
SAFETY PRECAUTIONS...................................................................................................................... 2
EQUIPMENT.......................................................................................................................................... 3
Anti-Vibration System................................................................................................................3
Inspection ............................................................................................................................3
Stop Switch................................................................................................................................4
Muffler........................................................................................................................................4
Blade Guard for the Cutting Blade.............................................................................................4
Transport and Storage.........................................................................................................5
Fuel Safety.................................................................................................................................5
STARTING AND STOPPING THE SAW ............................................................................................. 6
Starting a Cold Engine...............................................................................................................6
Starting a Warm Engine.............................................................................................................6
Starting the Saw.........................................................................................................................7
Stopping the Saw.......................................................................................................................7
WORKING INSTRUCTIONS.................................................................................................................. 8
Cutting Technique......................................................................................................................8
Diamond Blades.........................................................................................................................8
Blade Vibration...........................................................................................................................9
Kickbacks and How to Avoid Them...........................................................................................9
How to avoid kickbacks.......................................................................................................9
Pinching/Pull-In..........................................................................................................................9
How to avoid pinching.........................................................................................................9
Abrasive Discs.........................................................................................................................10
CUTTING BLADES ............................................................................................................................... 11
Abrasive Discs.........................................................................................................................11
Checklist............................................................................................................................11
Diamond Blades.......................................................................................................................12
BLADE SET-UP ...................................................................................................................................13
Check the Drive Shaft and Flanges.........................................................................................13
Fitting the Blade.......................................................................................................................13
FUEL HANDLING .................................................................................................................................14
Petrol........................................................................................................................................14
Two-Stroke Oil.........................................................................................................................14
Mixing.......................................................................................................................................14

Concrete Cut-Off Saw
ii
Refuelling.................................................................................................................................14
MAINTENANCE.................................................................................................................................... 16
Adjusting the Drive Belt ...........................................................................................................16
Changing the Drive Belt...........................................................................................................17
Belt Pulley and Clutch..............................................................................................................17
Carburettor Adjustment............................................................................................................17
Final Setting of the Idling Speed..............................................................................................17
Fuel Filter.................................................................................................................................17
Air Filter....................................................................................................................................18
Starter ......................................................................................................................................19
Tensioning the Recoil Spring ............................................................................................19
Replacing the Starter Cord................................................................................................19
Fitting the Starter...............................................................................................................19
Spark Plug ...............................................................................................................................20
Mufflers....................................................................................................................................20
Cooling System........................................................................................................................21
MAINTENANCE ROUTINES...............................................................................................................22
Daily Maintenance...................................................................................................................22
Weekly Maintenance ...............................................................................................................22
Monthly Maintenance...............................................................................................................22
SOUND LEVELS .................................................................................................................................24
PARTS LIST .......................................................................................................................................25
TECHNICAL SPECIFICATIONS .........................................................................................................26

Concrete Cut-Off Saw
Preface
Thanks for buying the Cut-Off Saw, another high-quality machine from our company.
To get the most out of your purchase, please read the manual before using the Cut-Off Saw.
We ask you to please read this manual carefully beforehand in order to familiarise yourself with
this product and after reading, please store this instructional manual for future reference. Failure
to follow the proper protocols listed in the manual may cause personal injury to the operator or
damage to equipment.
Concrete Cut-Off Saw
Safety Precautions
Under no circumstances should you modify the original design of the cut-off saw without the
approval from the manufacturer. Unauthorised modifications and spare parts from other
companies may lead to serious injury.
Cutting material can generate dust and vapours which may contain harmful chemicals. Know
the nature of the material being cut before using the cut-off saw. During work, please wear an
appropriate dust mask or respirator protection.
The engine exhaust from the cut-off saw contains chemicals which may cause cancer, birth
defects or other reproductive harm.
A cut-off saw is a very dangerous tool. If it is used carelessly or incorrectly, it can cause
serious and even fatal injuries.
Never use a cut-off saw with defective safety components.
All service and repair work on the cut-off saw demands special training.
This is especially true for all of the safety equipment involved. If your
cut-off saw fails any of the checks described below, you should
immediately take it to be serviced before using it again.
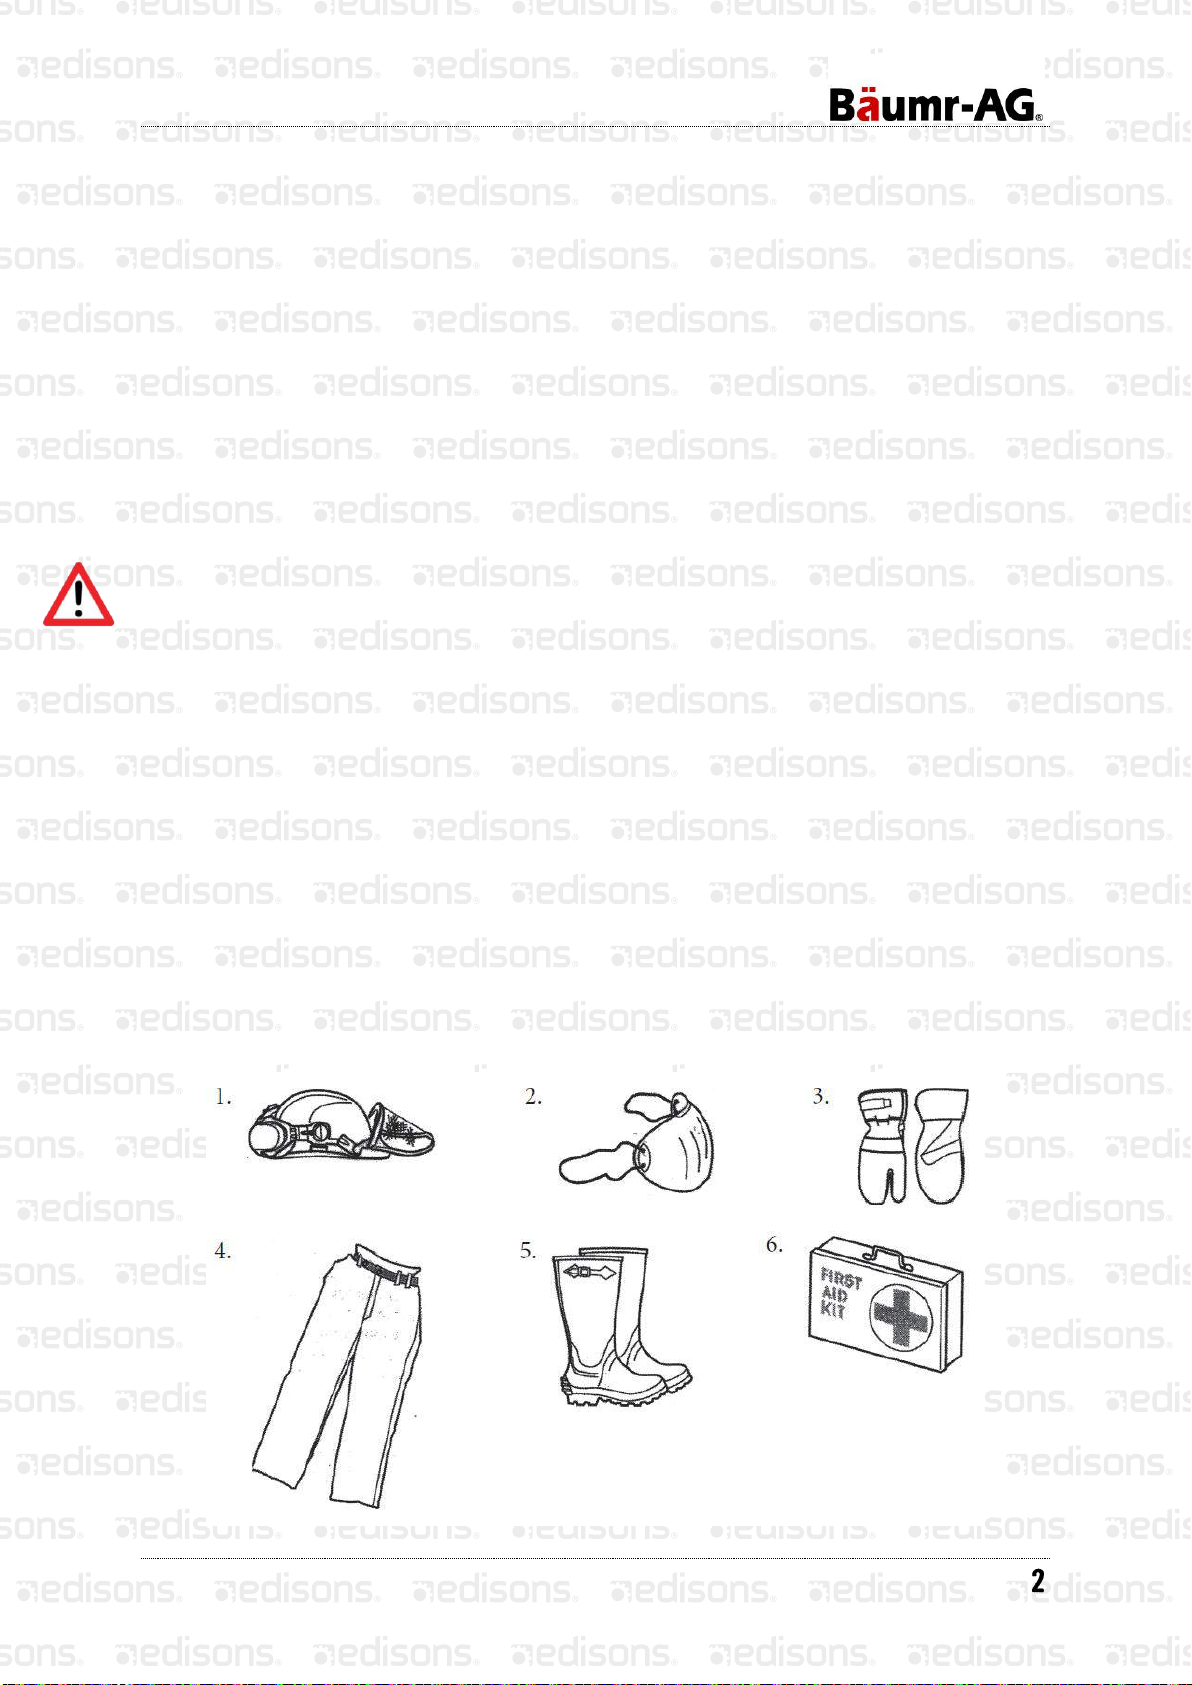
You must wear protective equipment whenever you use a cut-off saw. Personal protective
equipment does not eliminate the risk of accidents, however, it can reduce the effects of an
injury in the event of an accident.
Protective helmet, ear protection, protective glasses, full face protection (Fig. 1).
Breathing Mask (Fig. 2).
Heavy duty, firm grip protective gloves (Fig. 3).
Snug-fitting, heavy duty, comfortable clothing and leg protection that allows full freedom
of movement (Fig. 4).
Anti-slip boots with steel toe caps. (Fig. 5).
First aid kit (Fig. 6).
Concrete Cut-Off Saw
Equipment
This section explains the various safety features of the cut-off saw, how they work, and the basic
inspection and maintenance that you should carry out to ensure safe operation.
Anti-Vibration System
Over exposure to vibrations can result in blood vessel
or nerve injury to persons suffering with blood
circulation problems. Seek medical attention if you
experience physical symptoms that can be related to
over exposure to vibrations. Examples of such
symptoms are numbness, lack of feeling, tickling, lack
of or a reduction in normal strength, changes in the
colour of the skin or its surfaces. These symptoms
normally appear in the fingers, hands or wrists.
Your cut-off saw is equipped with a vibration damping
system; this is designed to give low vibration levels
and comfortable usage.
The vibration damping system reduces the vibrations
transmitted from the engine and blade to the handles
of the cut-off saw. The engine’s body including the
cutting equipment is suspended in a handle system via
anti-vibration elements.
Inspection
Check the anti-vibration elements regularly for material cracks and deformation.
Check that the anti-vibration elements are securely mounted between the engine unit and the
handle system.
Concrete Cut-Off Saw
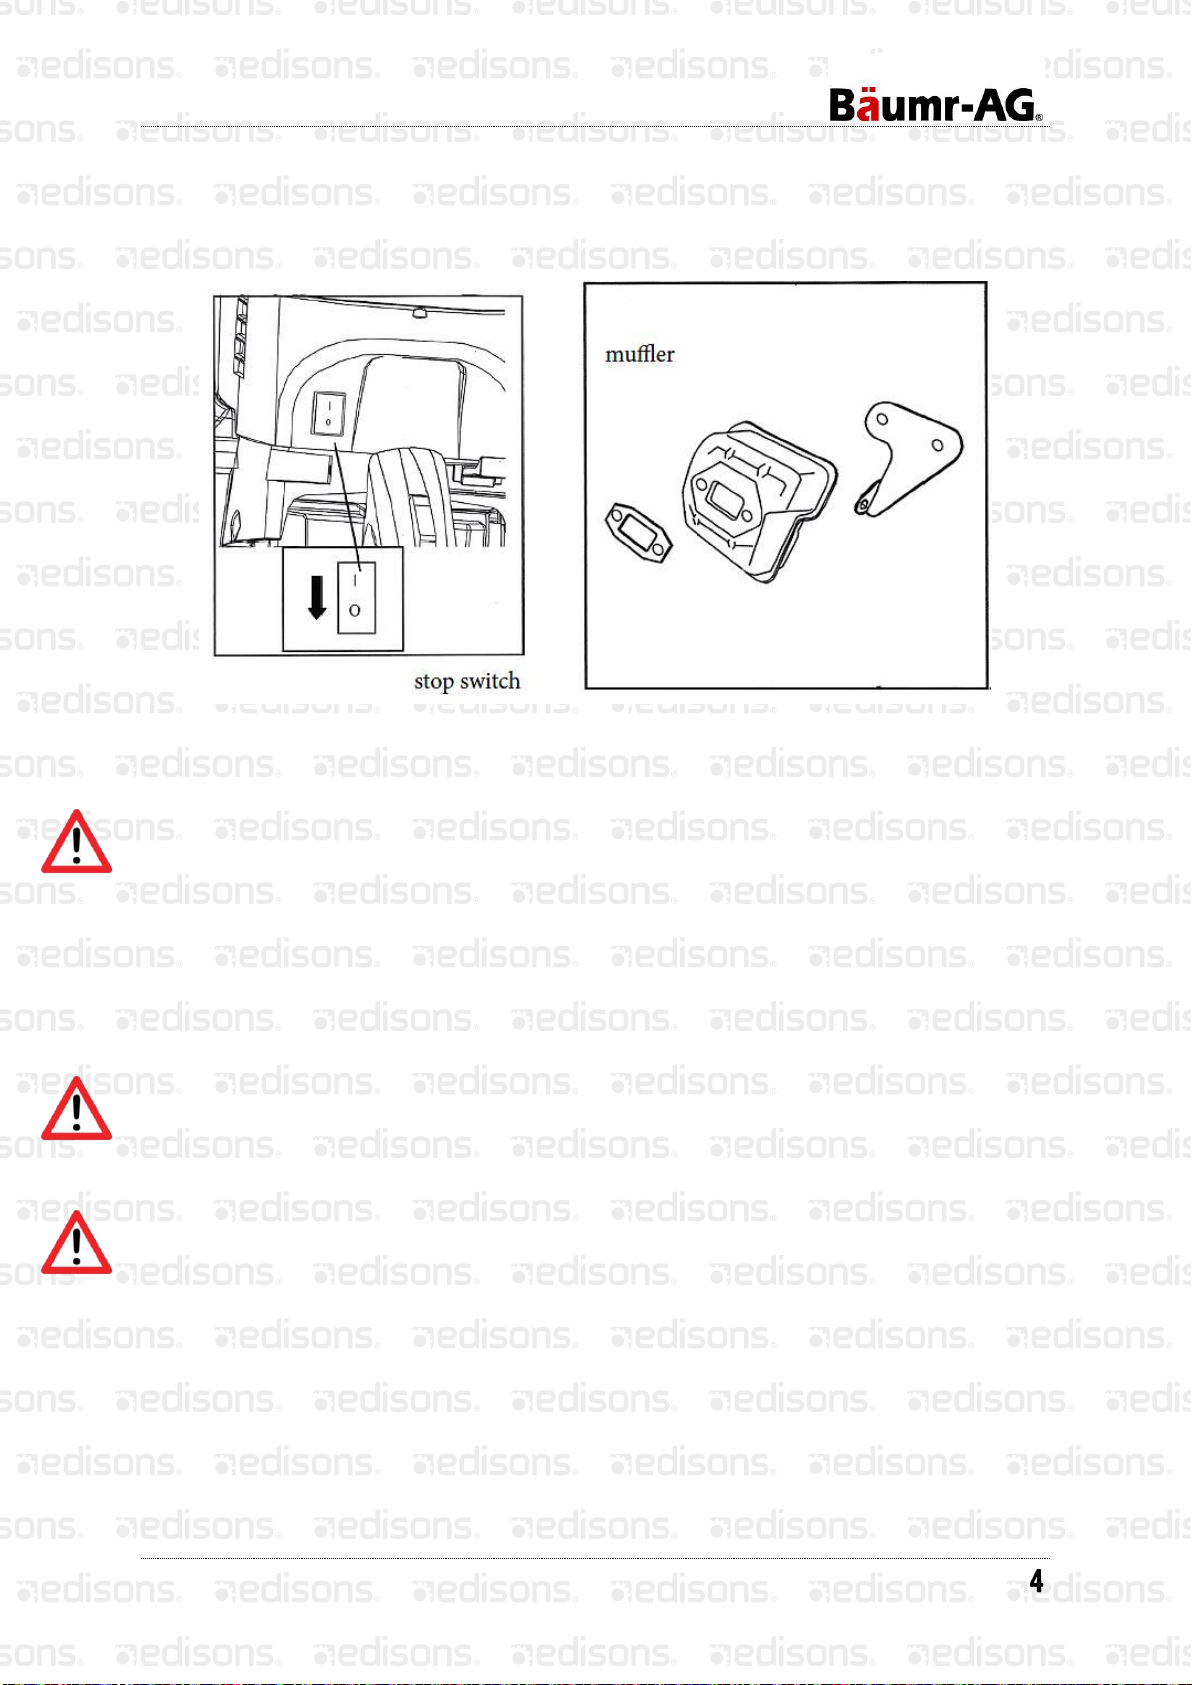
Stop Switch
The stop switch should be used to stop the engine. Start the engine and make sure that the
engine stops when the stop switch is on.
Muffler
The muffler gets very hot during use and remains so for a short time afterwards. Do not touch the
hot muffler.
The muffler is designed to give the lowest possible noise level and to direct the engine’s exhaust
fumes away from the user. The engine’s exhaust fumes are hot and can contain sparks, which
can lead to the outbreak of fire.
Never use a cut-off saw that has a faulty muffler so check mufflers regularly.
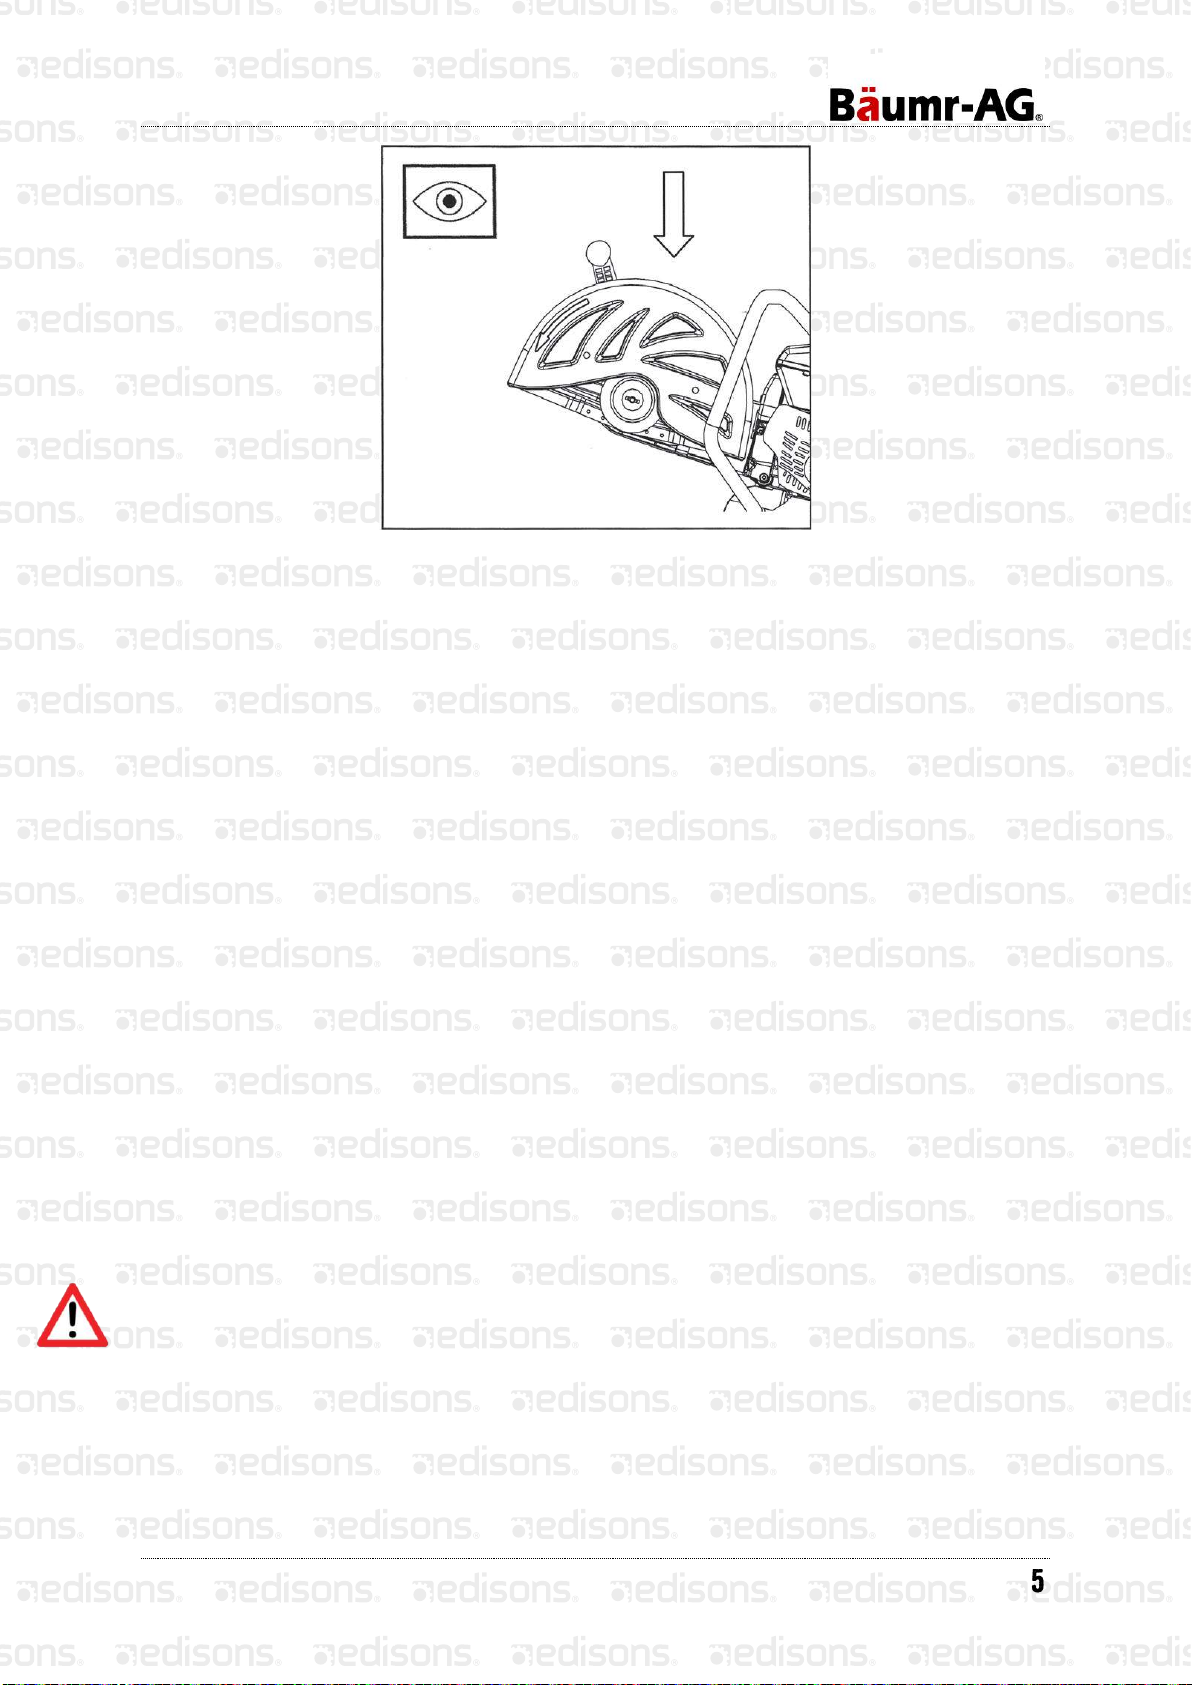
Blade Guard for the Cutting Blade
Always check that the blade guard is correctly fitted before starting the machine.
This guard is fitted above the cutting blade and is designed to prevent parts of the blade or
cutting fragments from being thrown towards the user.
Check that the cutting blade is fitted correctly and does not show signs of damage. A damaged
cutting blade can cause personal injury.
Concrete Cut-Off Saw
Transport and Storage
Store the cut-off saw in a lockable area so that it is out of reach of children and unauthorised
persons.
Do not store or transport the cut-off saw with the cutting blade still fitted in.
Fuel Safety
Exercise great care when handling fuel. Bear in mind the risk of fire, explosions and inhaling
fumes.
Never fill the cut-off saw while the engine is running (Gasoline and 2-stroke oil).
Never start the cut-off saw if:
If you have spilt the fuel on it. Wipe up all the spillage.
If you have spilt fuel on yourself or your clothes, change your clothes.
If there is a fuel leak. Make regular check for leakage from the fuel cap and the fuel supply
pipes.
Always store the cut-off saw and fuel so that any leakage or vapours is not in risk coming into
contact with sparks or flames. For example, electrical machines, electric motors, relays, switches
or boilers.
When storing fuel, only approved containers must be used. The fuel tank should be emptied
when storing the cut-off saw for long periods.
Move the cut-off saw at least 3 metres from the refuelling site before starting.
Concrete Cut-Off Saw
Starting and Stopping the Saw
Before starting observe the following:
Do not start the cut-off saw without the cutting arm, belt or cutting head fitted. Otherwise, the
clutch can come loose and cause personal injuries.
Always move the cut-off saw from the fuelling area before starting.
Ensure that you stand firmly and that the cutting blade rotates freely.
Starting a Cold Engine
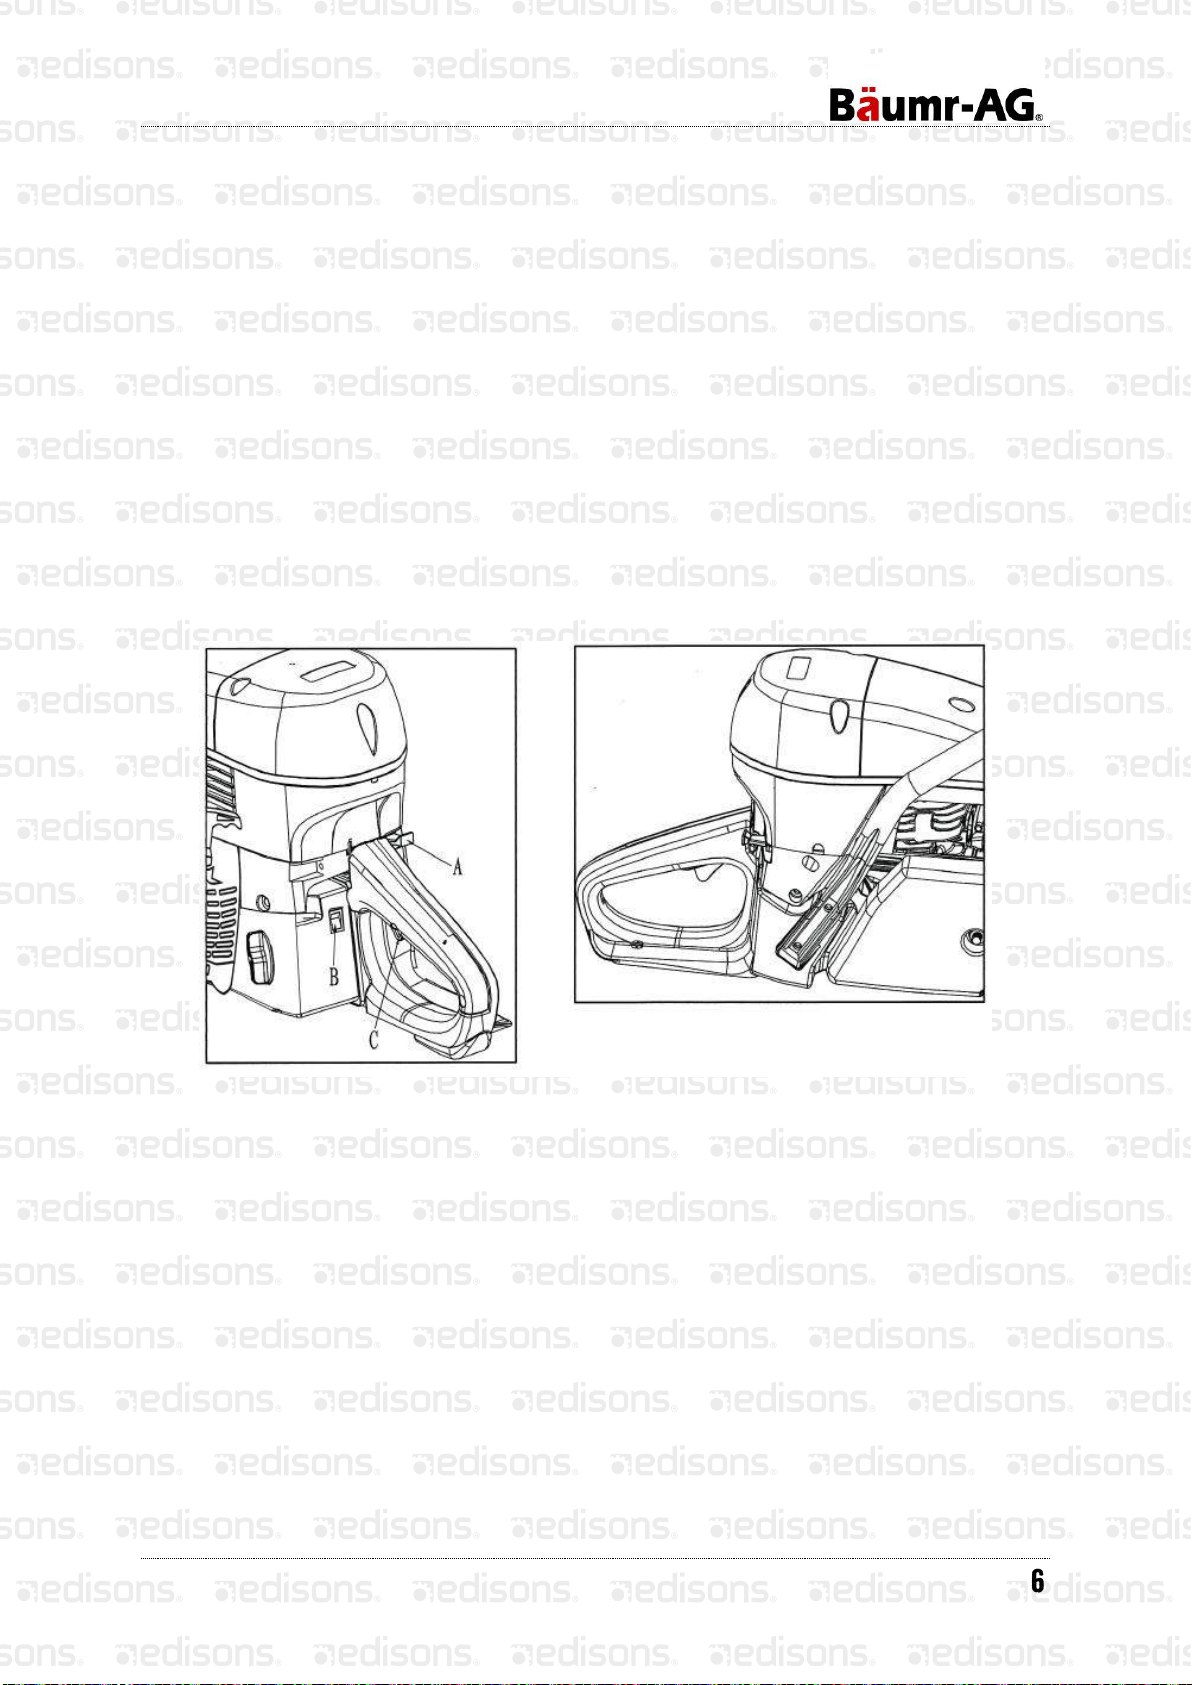
1. Set the stop switch (B) to the run position.
2. Pull the choke lever out (A) Press the choke lever in after it begins to run. In summer and in
high temperatures, press the choke lever in when you hear a combustion sound (engine
attempts to run) and then restart the saw.
Starting a Warm Engine
Use the same procedures as ‘starting a cold engine’ but without the choke.

Concrete Cut-Off Saw
Starting the Saw
1. Put the cut-off saw on the ground.
2. Take hold the front handle by your left hand. Put your right foot on the lower part of the rear
handle.
3. Grip the starter with your right hand, and slowly pull the starter cord out until you feel some
resistance from the grip.
4. Then pull quickly.
Do not pull the starter cord completely and do not release the starter from a fully extended
position as this will damage the cut-off saw.
Utilise the choke function until the engine starts up.
Stopping the Saw
The engine can be stopped by switching off the ignition/stop switch.

Concrete Cut-Off Saw
Working Instructions
Only use the machine in areas with good ventilation. Carbon monoxide in the exhaust fumes
causes suffocation.
Cutting Technique
1. Place the cutting materials according to the illustration:
2. Always cut at full throttle.
3. Start cutting gently, do not force or squeeze the blade in.
4. Move the blade slowly backwards and forwards.
5. Only use the blade’s cutting edge when cutting.
6. Cut with the blade fully vertical –and at a right angle to the work piece.
Under all circumstances, avoid cutting using the side of the blade; the blade
will break and become damaged.
Do not pull the cut-off saw to one side, this can cause the blade to jam or
break, resulting in injury.
Diamond Blades
Diamond blades can become dull when the wrong feeding pressure is used. Working with a dull
blade will cause overheating. Sharpen diamond blades against a soft material such as sandstone
or brick.

Concrete Cut-Off Saw
Blade Vibration
The blade can become out of shape and vibrate if the feeding pressure is too high or if the blade
is pressed into the work piece. A lower feeding pressure should stop the vibration. Otherwise,
replace the cutting blade.
Kickbacks and How to Avoid Them
Kickbacks can occur very suddenly and with great force, if the following directives are not
followed, it can result in serious or even fatal injury.
How to avoid kickbacks
Never cut with the segment illustrated in the diagram.
Keep a good balance and a firm foothold.
Use both hands and take a firm grip with the thumb and fingers around the handle.
Stand at a comfortable distance from the work piece.
Run the cut-off saw at full throttle.
Take care when inserting the blade in an existing cut.
Never cut above shoulder height.
Pinching/Pull-In
Pull-in occurs when the lower part of the blade is suddenly stopped. Pinching occurs when the
cut closes. The cut-off saw can be pulled down suddenly with a powerful movement.
How to avoid pinching
Support the work piece in such a way to avoid closing the cut.

Concrete Cut-Off Saw
Abrasive Discs
Abrasive discs are not intended for use with water. If an abrasive disc is stored in humid
conditions, this can cause an imbalance of the disc.
Always handle the cut-off saw carefully and store it with the blade
removed.

Concrete Cut-Off Saw
Cutting Blades
Cutting blades are available in two standard designs; abrasive discs and diamond blades.
Never use a cutting blade at a lower speed rating than that of the cut-off saw.
Never use a cutting blade for any other purpose than that it was intended for.
Abrasive Discs
The cutting material in abrasive discs consists of grit bonded using an organic binder.
‘Reinforced Blades’ are made up of a fabric or fibre base that prevents total breakage at
maximum working speed if the blade should be cracked or damaged (the term reinforced does
not refer to those cutting blades that are only reinforced around the flange).
A cutting blade’s performance is determined by the type and size of the abrasive corn, and the
type and hardness of the bonding agent.
Characteristics that give the blade a shorter service life and greater cutting capacity are said to
make the blade ‘softer’. A blade with a longer service life and slower cutting capacity is a blade
with a ‘harder’ effect.
Checklist
Check that the blade is approved for the same or higher speed according to the approval
plate of the engine. Never use a cutting blade with a lower speed rating than that of the cut-
off saw.
Ensure the blade is not cracked or damaged in any other way.
Test the abrasive disc by hitting it lightly with a piece of wood. If the blade does not give a
full-sounding ring then it is damaged.
Never use a blade that has fallen on the floor.
All the blades used must pass MPA certification.

Concrete Cut-Off Saw
Diamond Blades
Diamond blades for dry cutting are a new generation of blades that do not require water cooling.
However, the blades can still be damaged by excessive heat. Let the blade cool by simply lifting
the blade from the cut every 30-60 seconds and let it rotate in the air for 10 seconds to cool.
Cool continually with water.
Keep the cutting blade sharp.
Remove the cutting blade when the machine is transported.
Avoid:
Running the cutting blade in the wrong direction.
Forcing a dull blade or wedging the blade into a cut.
Transporting the cut-off saw with the blade fitted.
Letting the blade fall onto the work piece.

Concrete Cut-Off Saw
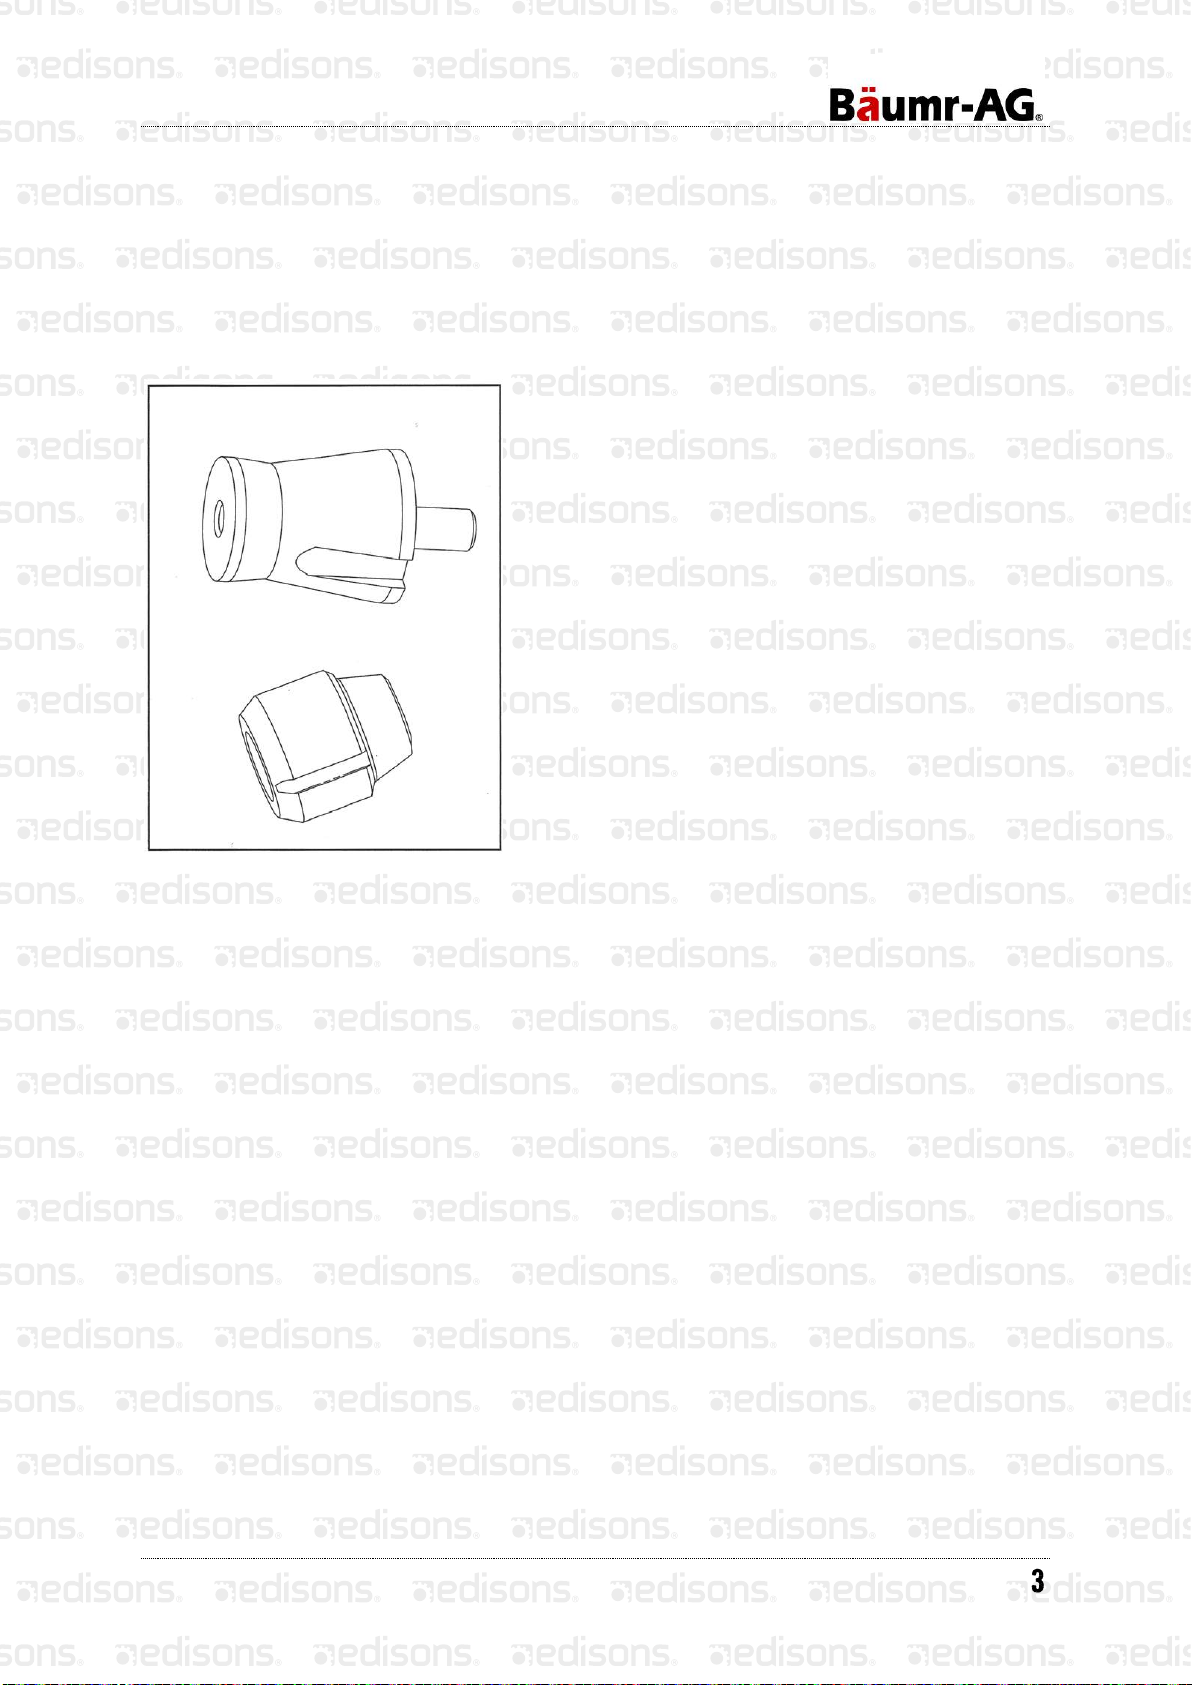
Blade Set-Up
Check the Drive Shaft and
Flanges
Check that the drive shaft is undamaged.
Check that the contact surfaces of the cutting blades and
flanges are flat, run correctly on the spindle and are free
from foreign objects.
Do not use flanges that are dirty, twisted and have
damaged edges.
Do not use different sized flanges.
Fitting the Blade
The blade is placed between the right flange and the left
flange. Tightening torque for the bolt holding the blade is
18~20N.m

Concrete Cut-Off Saw
Fuel Handling
The cut-off saw is equipped with a two-stroke engine and must always be operated using a
mixture of petrol and two-stroke engine oil. It is important to accurately measure the amount of oil
to be mixed to ensure that the correct mixture is obtained.
When mixing small amounts of fuel, even small inaccuracies can drastically affect the ratio of the
mixture.
Always provide good ventilation when handling fuel.
Petrol
Use good quality unleaded or leaded petrol, the lowest octane recommended is 90. If you run the
engine on a lower octane grade than 90 so called ‘knocking’ can occur.
This gives rise to a high engine temperature, which can result in serious engine damage.
Two-Stroke Oil
Use two-stroke oil of good quality that is intended for air-cooled engines. Follow the
manufacturer’s recommended mixing ratio of 1:25.
Never use oil intended for four-stroke engines.
Mixing
Always mix the petrol and oil in a clean fuel container.
1. Always start by filling half the amount of the petrol to be used.
2. Mix (shake) the fuel mixture.
3. Add the remaining amount of petrol.
4. Mix the fuel mixture thoroughly before filling the fuel tank.
Do not mix more than one month’s supply of fuel.
If the cut-off saw is not used for some time the fuel tank should be emptied.
Refuelling
The following precautions will reduce the risk of fire:
Do not smoke or place any source of heat in the vicinity of the fuel.
Always move the cut-off saw form the fuelling area before starting.
Never refuel while the engine is running.
Open the fuel cap slowly when fuelling so that any pressure is released slowly.
Tighten the fuel cap carefully after refuelling.

Concrete Cut-Off Saw
Always move the cut-off saw from the fuelling area before starting.
Keep the handle dry, clean and free from oil and fuel.
Clean around the fuel cap after fuelling.
Clean the fuel tank regularly.
Contamination in the tank can disrupt operations.
Ensure that the fuel is well mixed by shaking the container before filling the tank.
Always exercise care when filling the fuel.
Move the cut-off saw at least three metres from the fuelling area before you begin. Make sure
the fuel cap is tightened.

Concrete Cut-Off Saw
Maintenance
Adjusting the Drive Belt
1. Remove the right belt guard (A), loosen three screws (C) and adjust the pulley (B) to tighten
the belt.
2. Tighten three screws and fit the right belt guard.
Concrete Cut-Off Saw
Changing the Drive Belt
1. Remove the right belt guard, loosen the two screws and adjust the pulley to release the belt.
2. Remove the belt from the belt pulley. Dismantle the cutting head. Replace the belt.
3. To assemble, reverse the procedures for dismantling.
4. Check the blade guard for signs of cracking or other damage. Replace it if is damaged.
Drive belts should be tensioned after every tank of fuel.
Belt Pulley and Clutch
Never start the engine when the belt pulley and clutch are removed for maintenance.
Carburettor Adjustment
To ensure that your unit is at its peak performance and producing the least amount of harmful
emissions, have your authorised servicing person check your carburettors for optimum operating
conditions after running the cut-off saw for 8 to 10 tanks of fuel.
The carburettor is equipped with fixed jets to ensure that the engine always receives the correct
fuel mixture.
If the engine lacks power or accelerates poorly, replace the air filter and if this doesn’t work,
please take the cut-off saw in for service.
Final Setting of the Idling Speed
Turn the idling speed adjusting screw clockwise until the blade starts to rotate. Then turn it
counter-clockwise until the blade stops.
The recommended idling speed is 2600rpm.
If the idling speed setting cannot be adjusted, do not use the cutter until it has been correctly
adjusted or repaired.
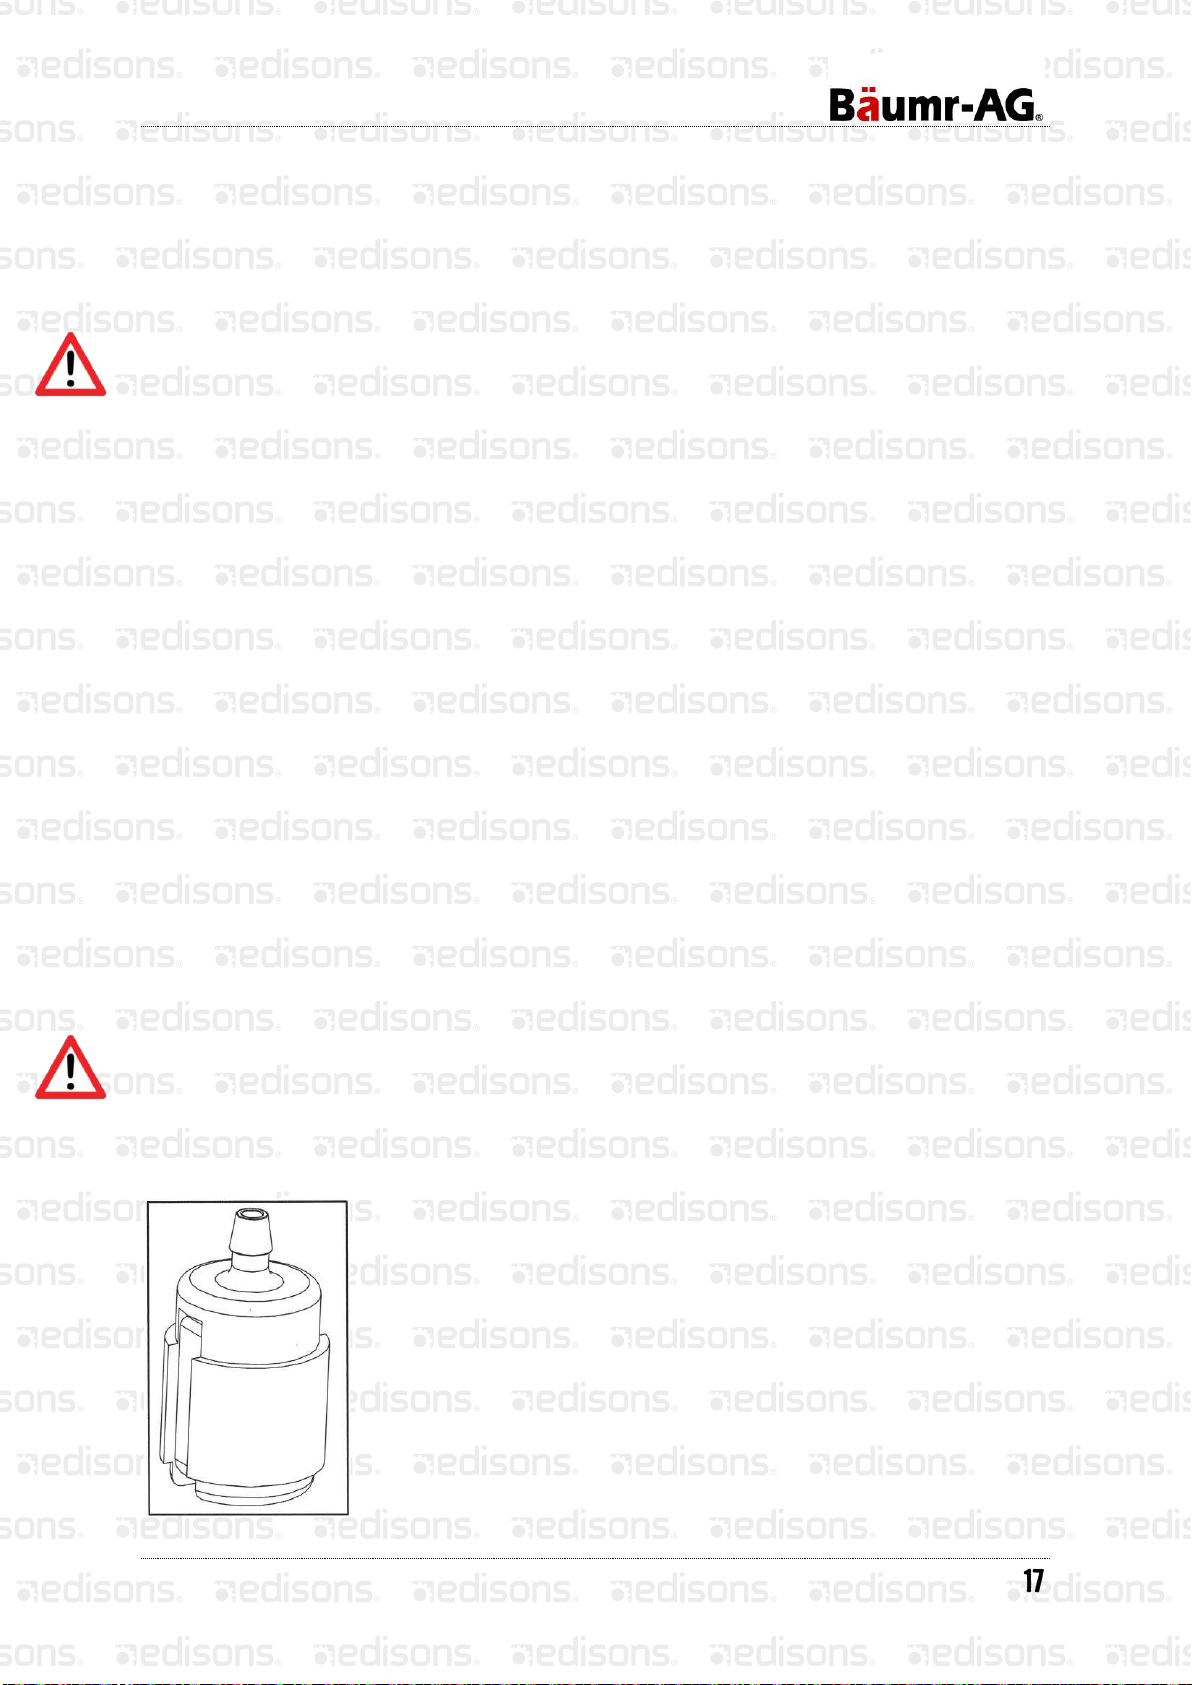
Fuel Filter
The fuel filter must be protected from contamination when filling as this
will reduce blockages caused by the fuel filter.
The filter cannot be cleaned but must be replaced when it is blocked.
The filter should be changed at least once per year.
Table of contents


