baxter 35700BAX Instructions for use

41394 Rev. A
July 2017
Preventive
Maintenance
SIGMA SPECTRUM INFUSION PUMP WITH
MASTER DRUG LIBRARY
35700BAX
Pump Operating Software Version 6.02 and 6.05
For use with Master Drug Library Version 6

ii
Manual 41394 SIGMA Spectrum Infusion System
Revision A Preventive Maintenance
©2017 Copyright Baxter Healthcare Corporation
711 Park Avenue
Medina, New York 14103
T 800.356.3454
F 888.894.7794
www.sigmapumps.com

iii
Manual 41394 SIGMA Spectrum Infusion System
Revision A Preventive Maintenance
Preventive Maintenance . . . . . . . . . . . . . . . . . . . . . . . . . . . . . . . . . . . . . . . . . . 1
Preventive Maintenance and Frequency . . . . . . . . . . . . . . . . . . . . . . . . . . . . . . . . . 1
Pump Identification . . . . . . . . . . . . . . . . . . . . . . . . . . . . . . . . . . . . . . . . . . . . . . . . . 2
Serial Number and Operating Software Version . . . . . . . . . . . . . . . . . . . . . . . . . . . . . . 2
Network Connectivity . . . . . . . . . . . . . . . . . . . . . . . . . . . . . . . . . . . . . . . . . . . . . . . . 2
Active Drug Library . . . . . . . . . . . . . . . . . . . . . . . . . . . . . . . . . . . . . . . . . . . . . . . . . 3
Visual Inspection . . . . . . . . . . . . . . . . . . . . . . . . . . . . . . . . . . . . . . . . . . . . . . . . . . . 4
Visual Inspection - AC Power Adaptor . . . . . . . . . . . . . . . . . . . . . . . . . . . . . . . . . . . 5
Preventive Maintenance Pump Tests . . . . . . . . . . . . . . . . . . . . . . . . . . . . . . . . . . . 6
Equipment Required . . . . . . . . . . . . . . . . . . . . . . . . . . . . . . . . . . . . . . . . . . . . . . . . . . . . 7
Keypad Operation Test . . . . . . . . . . . . . . . . . . . . . . . . . . . . . . . . . . . . . . . . . . . . . . . . . . 8
Memory Test . . . . . . . . . . . . . . . . . . . . . . . . . . . . . . . . . . . . . . . . . . . . . . . . . . . . . . . . . . 9
Pump Operation Tests . . . . . . . . . . . . . . . . . . . . . . . . . . . . . . . . . . . . . . . . . . . . . . 10
Test Setup . . . . . . . . . . . . . . . . . . . . . . . . . . . . . . . . . . . . . . . . . . . . . . . . . . . . . . . . . . 10
Downstream (Distal) Occlusion Sensor Test . . . . . . . . . . . . . . . . . . . . . . . . . . . . . . . . 12
Upstream (Proximal) Occlusion Sensor Test . . . . . . . . . . . . . . . . . . . . . . . . . . . . . . . . 14
Flow Rate Accuracy Test . . . . . . . . . . . . . . . . . . . . . . . . . . . . . . . . . . . . . . . . . . . . . . . 15
Air Detection Test . . . . . . . . . . . . . . . . . . . . . . . . . . . . . . . . . . . . . . . . . . . . . . . . . . . . . 17
Battery Capacity Test . . . . . . . . . . . . . . . . . . . . . . . . . . . . . . . . . . . . . . . . . . . . . . . . . . 18
Preventive Maintenance Check Sheet . . . . . . . . . . . . . . . . . . . . . . . . . . . . . . . . . . 20
Pump Identification . . . . . . . . . . . . . . . . . . . . . . . . . . . . . . . . . . . . . . . . . . . . . . . . . . . . 20
Pump Inspection . . . . . . . . . . . . . . . . . . . . . . . . . . . . . . . . . . . . . . . . . . . . . . . . . . . . . . 21
Preventive Maintenance Tests . . . . . . . . . . . . . . . . . . . . . . . . . . . . . . . . . . . . . . . . . . . 22

iv
Manual 41394 SIGMA Spectrum Infusion System
Revision A Preventive Maintenance

Preventive Maintenance 1
SIGMA Spectrum Infusion System Pump Operating Software Version 6.02 and 6.05
Preventive Maintenance For Use With MDL Version 6
PREVENTIVE MAINTENANCE
Read each PM test completely prior to performing.
To ensure that the SIGMA Spectrum Infusion System is operating within specified parameters,
perform the PM tests in this section according to the maintenance schedule below.
After each operation in this procedure, record the results on a copy of the “Preventive
Maintenance Check Sheet” on page 20.
NOTE: SIGMA Spectrum Technical Training is available, but not required, for performing Pump
PM. Contact MedinaTechTraining@baxter.com for more information.
Preventive Maintenance and Frequency
PM consists of:
■Scheduled inspections, testing, and performance evaluations
■Servicing any SIGMA Spectrum Infusion Pump that fails any inspection, test, or performance
evaluation
PM is required on:
■All Pumps in service (use)
■Any Pump suspected of being physically damaged, dropped, or having fluid intrusion.
Recommended PM frequency:
■Pump: Annually
NOTE: A PM or network expiration due date may be entered in the BIOMED options. A “Due for
Inspection” reminder will appear at power on followed by the programming screens. At
power off, a “Due for Inspection” display will appear prior to Pump shutdown.
When performing an annual PM on SIGMA Spectrum Infusion Systems, record the findings on the
check sheet provided. See “Preventive Maintenance Check Sheet” on page 20.

2Preventive Maintenance
Manual 41394 SIGMA Spectrum Infusion System
Revision A Preventive Maintenance
When using the Annual Preventive Maintenance Check Sheet:
■Enter the Hospital/Facility name in the space provided.
■Enter the Biomed name and date of the test.
■Perform the inspections, tests, and performance evaluations described in this chapter.
■Record the test result findings.
■Return any Pump to Baxter that fails any inspection or test.
Pump Identification
Serial Number and Operating Software Version
The Pump’s serial number and operating software version are located in two areas, the Power
Status screen and the User Options screen.
Record and verify the serial number and software version of the Pump using one of the methods
described in this section.
To verify the Pump serial number and software version from the Power Status screen:
1. Press ON/OFF to power on the Pump.
2. View the current software version and serial number.
3. Record the software version and serial number on the Preventive Maintenance Check Sheet.
4. Check the label on the bottom of the Pump. Verify the serial number is the same.
To verify the Pump serial number and software version from the User Options menu:
1. Press ON/OFF to power on the Pump.
2. From the Select Care Area screen, press the options menu soft key (software version 6.05)
or Help then the Options soft Key (software version 6.02).
3. Select User Options and press OK.
4. Select View Information and press OK.
5. Select Pump Information and press OK to display the Pump Info screen.
6. Record the software version and serial number on the Preventive Maintenance Check Sheet.
7. Check the label on the bottom of the Pump. Verify the serial number is the same.
8. Press the exit soft key four times to return to the Care Area screen.
Network Connectivity
To verify current Network connectivity:
1. From the Select Care Area screen, press the options menu soft key (software version 6.05)
or Help then the Options soft Key (software version 6.02).

Preventive Maintenance 3
SIGMA Spectrum Infusion System Pump Operating Software Version 6.02 and 6.05
Preventive Maintenance For Use With MDL Version 6
2. Select Biomed Options and press OK.
3. Enter the Biomed password and press OK.
4. Select Network Configuration and press OK.
5. Select Network Status and press OK.
When using a WBM, a wireless icon (in the top right corner of the Pump display) will indicate
the status of the network connection. See the “Pump Icons” section of the device’s Operator’s
manual.
6. Record the status on the Preventive Maintenance Check Sheet.
Active Drug Library
If using a WBM, the Drug Library will load automatically from the Gateway Server once the
Network Configuration is complete.
NOTE: It may take several minutes for the Drug Library BDL file to begin downloading to the
Pump.
The message, “Activating new drug library” appears with a progress bar on the Pump’s display.
To confirm Drug Library activation:
» When the new Drug Library has been activated on the Pump, the screen will display
“COMPLETE”. Press OK to confirm activation.
NOTE: If the Drug Library is not current or is missing, see “Programming the Pump” in the
device’s Operator’s Manual.
WARNING Confirm Drug Library.
Master Drug Library Administrators (MDLAs) should verify the
correct Drug Library is installed when deploying the Drug Library to
Pumps.
Master Drug Library Administrators (MDLAs) should verify the
Drug Library transfer is successful after deployment.
Users should verify the correct Drug Library is installed on the
deployed Pumps.
Before implementation, clinical users at each facility must
thoroughly test and validate their Drug Library per their facility’s
procedure to ensure configuration and workflow reflect clinical
practice.
To identify the Active Drug Library:
The name and version of the Pump’s active Drug Library BDL file can be viewed on two screens of
the Pump’s display: the Power Status screen and the User Options screen.
Record and verify the Pump’s active Drug Library BDL file using one of the following methods.

4Preventive Maintenance
Manual 41394 SIGMA Spectrum Infusion System
Revision A Preventive Maintenance
The Power Status screen (the Pump must be powered off):
1. Press ON/OFF to power on the Pump and view the current software version and serial
number.
2. Record the Pump’s active Drug Library BDL file on the Preventive Maintenance Check Sheet.
3. Verify the current Drug Library BDL file in use with the facility’s pharmacy or MDLA.
4. Record the facility’s current Drug Library BDL file on the Preventive Maintenance Check Sheet
and verify they are the same.
5. Press ON/OFF to power off the Pump.
NOTE: The User Options screen (the Pump must be powered off):
1. Press ON/OFF to power on the Pump and view the current software version and serial
number.
2. From the Select Care Area screen, press the options menu soft key (software version 6.05)
or Help then the Options soft Key (software version 6.02).
3. Select User Options and press OK.
4. Select View Information and press OK.
5. Select Library Information and press OK.
6. Record the Pump’s active Drug Library BDL file and date on the Preventive Maintenance
Check Sheet.
7. Verify the current Drug Library BDL file in use with the facility’s pharmacy or MDLA.
8. Record the facility’s current Drug Library BDL file on the Preventive Maintenance Check
Sheet.
9. Press ON/OFF to power off the Pump.
Visual Inspection
To inspect the Pump:
1. Inspect the Pump for visual evidence of damage and/or defects to exterior components such as
dents, cracks, cuts, heat damage or fluid intrusion.

Preventive Maintenance 5
SIGMA Spectrum Infusion System Pump Operating Software Version 6.02 and 6.05
Preventive Maintenance For Use With MDL Version 6
Pump Case
Pump Display
Keypad
Keyhole
Pump Door
IV Set Tube Channel
Pole Clamp
External Power Adaptor/Accessory Connection port
NOTE: The IV tube channel must be free of foreign materials and dry for both testing and
use.
2. Verify presence and legibility of all labels. Replace/order labels as necessary.
For label location, see Appendix A: “Technical Drawings” in the Service Manual.
Company ID label
Power/Bolus label
Certification label
Serial Number label
Tubing ID label
Direction of Flow label
Replace/order labels as necessary.
3. Record the findings on the Preventive Maintenance Check Sheet.
Visual Inspection - AC Power Adaptor
To inspect the AC Power Adaptor:
1. Inspect the AC Power Adaptor for visual evidence of damage and/or defects such as cracks,
bent prongs, cuts or exposed wires or dents.
AC Power Adaptor Module
AC Power Adaptor Cord
AC Power Cord Adaptor Retainer
If the AC Power Cord Adaptor Retainer is damaged,
Remove the Retainer and inspect the 6-pin Plug Connector (on the AC Power Adaptor
cord).
Inspect the External Power Adaptor/Accessory Connection port (on the back of the Pump)
for signs of damage such as cracks or missing pins.
NOTE: If damage is found on the AC Power Adaptor, it may be sent for service repair
(without the Pump).
2. If no signs of damage are found, plug the AC Power Adaptor into a working wall receptacle.

6Preventive Maintenance
Manual 41394 SIGMA Spectrum Infusion System
Revision A Preventive Maintenance
3. Verify that the green LED on the AC Power Adaptor is lit while plugged in and a plug icon
appears on the Pump’s Charging screen.
4. Verify legibility of all labels on the AC Power Adaptor Module.
5. Record the findings on the Preventive Maintenance Check Sheet.
Preventive Maintenance Pump Tests
WARNING Flow Rate Inaccuracy.
Rate accuracy can be affected by variations of fluid viscosity, fluid
temperature, head height or back pressure, or any combination
thereof. In addition to IV set specific warnings, the following can
cause flow rate inaccuracies and must be avoided:
Incompatible brand IV sets and compatible brand IV sets with
unusually large or small diameters or unusually stiff materials.
Using a dropped, damaged, dirty or wet Pump.
Pressurizing IV bags.
Non-vented IV sets with rigid non-vented containers.
Vents on sets or burettes left in the closed position when they
should be open.
Using Minidrip chambers for flow rate settings greater than
200 mL/hr. Doing so may influence flow rate accuracy and cause
air in line or upstream occlusion alarms.
Laying the IV container flat. Doing so may influence flow rate
accuracy and cause upstream occlusion and air in line alarms.
Exceeding 500 mL/hr flow rate settings when using sets with
backcheck valves. Doing so may influence flow rate accuracy or
cause air in line or upstream occlusion alarms.
Flow rates above 300 mL/hr may cause fluid to be siphoned from
the primary container during a secondary infusion. For information
on secondary infusions, refer to the device’s Operator’s manual.
NOTE: Not applicable with non-DEHP tubing because 250 mL/hr is
the maximum flow rate per warning statement.
WARNING Use the Specified Manufacturer’s IV Set.
A label located on the top of the Pump indicates the specific type of IV
tubing that the Pump has been calibrated for. The use of other
manufacturers’ brands or type tubing could produce Pump
inaccuracies that could be unsafe for patients.
WARNING Do Not Reuse Tubing.
Do not reload pumped-on tubing (the tubing segment previously used
in the pumping channel) into the pumping channel. Doing so will
cause alarms and adversely affect flow rate accuracy.

Preventive Maintenance 7
SIGMA Spectrum Infusion System Pump Operating Software Version 6.02 and 6.05
Preventive Maintenance For Use With MDL Version 6
CAUTION Perform Preventive Maintenance Annually.
Pumps should be tested for proper performance annually and also
whenever damage from drops, fluid intrusion and other causes is
suspected.
CAUTION Avoid Bright Natural Sunlight or Artificial Overhead Light.
Bright Light (equivalent to greater than or equal to 100 watt
incandescent bulb) within 30.5 cm (1 ft) above the Pump’s keyhole
(load point #1) may affect the Pump’s ability to recognize the IV set
slide clamp during set loading. To prevent alarms or continuous
system errors:
Increase the distance between the Pump and the light source.
Move the Pump to an adjacent location.
CAUTION Avoid Overheating.
When operating the Pump, keep out of bright sunlight or direct heat
sources to prevent overheating.
Equipment Required
■SIGMA Spectrum Infusion System
■IV set compatible with the Pump being tested (must not include a backcheck valve)
Recommended test set: Preventive Maintenance (PM) Kit P/N 42059, (1 each P/N 99004
Alternate Test Set, 10 each P/N 99051-1 38 cm (15 in) segment.
■3-way valve (P/N 55568)
■IV container (250mL minimum or 1000 mL recommended) to be used as pumping source.
■Balance or scale with a minimum resolution of 0.1 g calibrated to a range of 0 to 100 g (used
for gravimetric flow rate accuracy test).
■A 25 mL class “A” graduated collection vessel (used for volumetric flow rate accuracy test).
Volumetric vessel should be TC (to contain) with a resolution of 0.2 mL.
■Pressure gauge with at least 207 kPa (30 psi) accuracy of 0.5%
■IV Pole or test fixture
■One hemostat
■Saline, Deionized Water (ISO class III) or distilled water
■Collection vessel (cup, bag, or equivalent)
NOTE: All measurement tools should be calibrated to National Institute of Standards and
Technology (NIST) standards.
NOTE: Do not use tap water.
NOTE: Do not use IV sets that include backcheck valves when performing preventive
maintenance tests.

8Preventive Maintenance
Manual 41394 SIGMA Spectrum Infusion System
Revision A Preventive Maintenance
Keypad Operation Test
To check the Pump keypad and display for proper operation:
1. Plug the AC Power Adaptor into a working wall outlet, or install a Battery Module.
2. Press ON/OFF to power on the Pump.
3. When the Care Area screen appears, press SETUP.
4. Using the keypad, enter the letters BA then press OK.
5. Press the down arrow soft key to select BASIC and press OK. The Pump is now in BASIC
MODE.
6. Press OK to select Primary Bag.
7. Press OK to select mL/hr.
8. Press 9, 0, and the decimal key on the keypad.
9. Verify that numbers and a decimal point (90.) appear in the Rate mL/hr field.
10. Press the clear rate soft key.
11. Press 5, 6, 7, 8 on the keypad.
12. Verify that numbers (5678) appear in the Rate mL/hr field.
13. Press the clear rate soft key.
14. Press 1, 2, 3, 4on the keypad.
15. Verify that numbers (1234) appear in the Rate mL/hr field.
16. Press RUN/STOP.
The message, “Above UPPER Hard Limit Enter a Value of 999 or lower” appears.
17. Press OK. The message disappears.
18. Press the clear program soft key.
A “Clear Program? yes/no” prompt appears.
19. Press the yes soft key.
The Care Area Selection screen appears.
20. Press ON/OFF to power off the Pump.
21. If the keypad malfunctions, repeat the test.
22. If the error repeats, remove the Pump from service and contact Technical Support for service.
23. Record the findings on the Preventive Maintenance Check Sheet.

Preventive Maintenance 9
SIGMA Spectrum Infusion System Pump Operating Software Version 6.02 and 6.05
Preventive Maintenance For Use With MDL Version 6
Memory Test
To test the Pump’s memory:
1. Plug the AC Power Adaptor into a working wall outlet, or install a Battery Module.
2. Press ON/OFF to power on the Pump.
3. Select any Care Area and press OK.
NOTE: If the “New Patient Yes/No?” prompt appears, press the yes soft key.
4. Press OK to view the Drug Library.
5. From the Drug Library, select BASIC and press OK.
6. Select Primary Bag and press OK.
7. For Mode select mL/hr and press OK.
8. Set the Rate to 100 mL/hr and press OK.
9. Set VTBI mL to 50 mL and press OK.
10. Press ON/OFF to power off the Pump.
11. Press ON/OFF to power on the Pump.
12. On the “New Patient Yes/No?” screen, press the no soft key.
13. Verify that the Rate and VTBI parameters were saved. (100 mL / 50 mL)
14. Press ON/OFF to power off the Pump.
15. Record the findings on the Preventive Maintenance Check Sheet.

10 Preventive Maintenance
Manual 41394 SIGMA Spectrum Infusion System
Revision A Preventive Maintenance
Pump Operation Tests
The Pump operation tests include:
■Downstream (Distal) Occlusion Sensor
■Upstream (Proximal) Occlusion Sensor
■Gravimetric or Volumetric Flow Rate Accuracy
■Air Detection
Test Setup
To prepare the Pump for testing:
NOTE: The IV sets being used for testing the Pump must be compatible with the Pump
under test. The proper IV set calibration is listed on the label located on the top of
the Pump.
NOTE: Do not use IV sets that include backcheck valves when performing preventive
maintenance tests.
NOTE: Do not use IV sets that include mini drip chambers when performing preventive
maintenance tests.
NOTE: The IV container needs to be collapsible or vented to the atmosphere.
NOTE: If the Pump is being tested for accuracy following a clinical problem, it is essential to
use an IV set of the same catalog number and lot number as that in use when the
problem occurred.

Preventive Maintenance 11
SIGMA Spectrum Infusion System Pump Operating Software Version 6.02 and 6.05
Preventive Maintenance For Use With MDL Version 6
1. Attach the pole clamp to a stable IV pole.
2. Obtain a new compatible IV set.
3. Connect the set to the IV container.
4. Verify that the IV bag contains enough fluid to complete the testing.
5. Verify the drip chamber is at fill line.
6. Verify that there is no foreign material in the delivery solution during flow rate testing.
7. Prime the IV set, removing all air from the tubing.
NOTE: Follow the instructions on the IV bag to fill drip chamber.
8. Plug the AC Power Adaptor into a working wall outlet, or install a Battery Module
9. Insert the slide clamp into the keyhole and open the Pump door. Verify that the Pump powers
on.
1The drip chamber filled to fill line.
2610 ± 51 mm (24 in ± 2 in) between the top
of the fluid level and the center of the
Pump.
3Do not allow the tip of the IV set to fall
below the fluid level of the collection cup or
graduated cylinder during the test.
4The maximum vertical distance of 304.8
mm (12 in) from the center of the pump to
the distal end of the IV set
Figure 1. Test Setup.
2
34
1

12 Preventive Maintenance
Manual 41394 SIGMA Spectrum Infusion System
Revision A Preventive Maintenance
10. Inspect the IV tube channel. Confirm that it is free of foreign materials and dry for both testing
and use.
11. Load the IV set into the Pump following the Direction of Flow diagram inside the Pump door,
and close the door.
NOTE: If using the IV test header, load that section into the Pump. Leave 1.2 m (48 ±0.5 in)
of tubing between the lower side of the Pump and the end of the IV set.
12. Remove the slide clamp and open the roller clamp.
13. Verify that the tubing above and below the Pump is not occluded.
Downstream (Distal) Occlusion Sensor Test
It is suggested to only use the calibrated IV set for the Downstream Occlusion Sensor Test.
NOTE: Softer tubing between the Pump, air in the gauge, or air in the line can result in
inaccurate results.
To test the downstream occlusion sensor:
1. Load a primed IV set into the Pump for testing. See “Test Setup.” on page 11.
2. On the Care Area screen, press the options menu soft key (software version 6.05) or Help
then the Options soft Key (software version 6.02).
3. On the Options screen, select User Options and press OK.
4. Select Alarm Settings and press OK.
5. Advance the highlighted field to DS Pressure Limit by pressing OK for each field.
6. Press the arrow soft key to set the DS Pressure Limit to med (medium) and press OK.
NOTE: The Downstream Occlusion Sensor Test must be performed with the downstream
pressure limit setting at medium. Any other setting will cause Pump test failure.
7. Press the exit soft key two times to exit User Options.
8. Select Biomed Options and press OK.
9. Enter the Biomed password and press OK.
10. Select Sensor Configuration and press OK.
11. Verify that the Downstream Occlusion Auto Restart is set to On.
12. Press the exit soft key three times to exit the Sensor Configuration screen, Biomed Options
screen and Options screen.
13. Select a Care Area and press OK.
14. Press OK to view the Drug Library.
15. Press the arrow soft key to select BASIC and press OK.

Preventive Maintenance 13
SIGMA Spectrum Infusion System Pump Operating Software Version 6.02 and 6.05
Preventive Maintenance For Use With MDL Version 6
16. Select Primary Bag and press OK.
17. For Mode select mL/hr and press OK.
18. Set the Rate to 100 mL/hr and press OK.
19. Set the VTBI mL to 50 mL and press OK.
20. Attach the 3-way valve P/N 55568 to the pressure gauge.
21. Connect a pressure gauge to the end of a fluid-filled new IV set with approximately 1.2 m
(48 ±0.5 in) of tubing between the Pump and gauge. See Figure 2.
NOTE: Verify that the pressure gauge is properly primed and set up per manufacturer’s
instructions.
NOTE: Make sure there is no air inside the 3-way valve.
NOTE: Make sure to close the 3-way valve.
1The Distal end of the tubing should be at
the same level as the center of the pump.
2Length of the Distal tubing maximum 48”
+/- 0.5”.
Figure 2. Downstream Pressure Test
1
2

14 Preventive Maintenance
Manual 41394 SIGMA Spectrum Infusion System
Revision A Preventive Maintenance
NOTE: The pressure gauge should be at the same height as the Pump.
22. Press RUN/STOP to start the infusion.
NOTE: The Pump may indicate BAG NEAR EMPTY <30 MIN REMAIN. Press OK to
silence this alarm.
NOTE: If the Pump displays a Check Flow screen, press the yes soft key to proceed to the
Infusion Running Screen.
23. Verify that the Pump displays a DOWNSTREAM OCCLUSION alarm at a pressure within the
89 kPa ±41 kPa (48 kPa to 131 kPa) [13 psi ±6 psi (7 psi to 19 psi)] occlusion trip pressure
setting (check the maximum pressure on gauge).
24. Remove the pressure gauge and confirm that the Pump auto restarts.
25. Press RUN/STOP to stop the infusion.
NOTE: In the event of a test failure, confirm the failure by repeating the test with a new
(unused) IV set.
26. Record findings on the Preventive Maintenance Check Sheet.
Upstream (Proximal) Occlusion Sensor Test
NOTE: If the Pump has been inactive for 2 minutes, an Inactivity alarm will sound. Follow the
screen prompts to silence the alarm.
To test the upstream occlusion sensor:
1. Load a primed IV set into the Pump for testing. See “Test Setup.” on page 11.
2. Select any Care Area and press OK.
3. Press OK to view the Drug Library.
4. Press the arrow soft key to select BASIC and press OK.
5. Select Primary Bag and press OK.
6. For Mode select mL/hr and press OK.
7. Set the Rate to 100 mL/hr and press OK.
8. Set VTBI mL to 13.3 mL and press OK.
9. Press the clear total soft key to clear the volume given.
10. Occlude IV set 30.2 cm (12 in) above the Pump with a hemostat.
11. Press RUN/STOP to start the infusion.
NOTE: The Pump may indicate BAG NEAR EMPTY <30 MIN REMAIN. Press OK to
silence this alarm.

Preventive Maintenance 15
SIGMA Spectrum Infusion System Pump Operating Software Version 6.02 and 6.05
Preventive Maintenance For Use With MDL Version 6
NOTE: If the Pump displays a Check Flow screen, press the yes soft key to proceed to the
Infusion Running Screen.
12. Verify that the Pump indicates an UPSTREAM OCCLUSION alarm prior to the infusion
complete message.
13. Release the occlusion by removing the hemostat.
14. Press OK to acknowledge the alarm.
15. Press RUN/STOP to continue to run the infusion until the IV normalizes (air removed from line)
(5-10 seconds).
16. Press RUN/STOP to stop the infusion.
NOTE: In the event of a test failure, confirm failure by repeating the test with a new
(unused) IV set.
17. Record the findings on the Preventive Maintenance Check Sheet.
Flow Rate Accuracy Test
Either Volumetric or Gravimetric methods of collection may be used. Begin to test the flow rate
accuracy with either method by performing the following steps.
To test the flow rate accuracy:
1. Load a primed IV set into the Pump for testing. See “Test Setup.” on page 11.
NOTE: If the “New Patient Yes/No?” prompt appears, press the yes soft key.
2. Verify that the roller clamp is open.
3. Select any Care Area and press OK.
4. Press OK to view the Drug Library.
5. From the Drug Library, select BASIC and then press OK.
6. Select Primary Bag and press OK.
7. For Mode select mL/hr and press OK.
8. Set the Rate to 40 mL/hr and press OK.
9. Set VTBI mL to 20 mL and press OK. (The run time is 30 minutes)
10. Set up the collection cup or graduated cylinder.
NOTE: The collection cup or graduated cylinder should be dry.
11. Press RUN/STOP. Allow the infusion to run until the Pump displays an infusion complete
alarm.

16 Preventive Maintenance
Manual 41394 SIGMA Spectrum Infusion System
Revision A Preventive Maintenance
NOTE: If the Pump displays a Check Flow screen, press the yes soft key to proceed to the
Infusion Running Screen.
12. At the Infusion Complete Alarm, immediately press RUN/STOP to stop the infusion.
NOTE: KVO will continue to run until RUN/STOP is pressed. KVO will allow fluid to flow into
the collection cup.
Volumetric Test
13. Set the graduated cylinder on a flat surface.
14. Visually measure the fluid in the graduated cylinder from the 40 mL / hr run. Read the level
from the bottom of the fluid meniscus. See Figure 3.
15. Record the volume on the Preventive Maintenance Check Sheet.
If the test procedure fails, review the test set up to ensure that the process has been
followed correctly. Install a new approved IV set and repeat the test.
If the error repeats, contact Baxter technical support and service at:
Telephone: 800.356.3454 or
E-mail: MedinaTechSupport@baxter.com
Gravimetric Test
16. Tare (zero) Scale
17. Weigh (in grams) the fluid in the collection cup from the 40 mL/hr run.
18. On the balance, press Tare (zero) while fluid is in the cup.
19. Remove the cup, empty the cup and dry the inside with a lint-free absorbent cloth.
20. Weigh the empty cup. This value multiplied by negative one (-1) is the weight of the fluid
collected.
21. Record the weight on the Preventive Maintenance Check Sheet.
Figure 3. Measuring the fluid level.
Table of contents
Other baxter Water Pump manuals
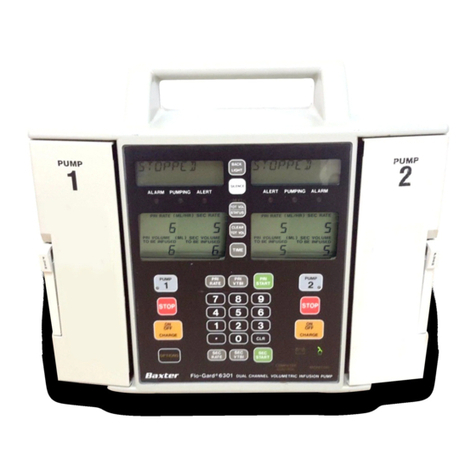
baxter
baxter Flo-Gard 6301 User manual
baxter
baxter Colleague CXE User manual
baxter
baxter Auto Syringe AS50 User manual

baxter
baxter PCA II User manual

baxter
baxter ExactaMix 2400 Compounder User manual

baxter
baxter Flo-Gard 6301 User manual

baxter
baxter 35700BAX2 User manual
baxter
baxter Flo-Gard 6201 User manual

baxter
baxter Auto Syringe AS50 User manual
Popular Water Pump manuals by other brands

SOLIDSVAC
SOLIDSVAC SV70-SP Operation manual

Wilo
Wilo CronoLine-IL Installation and operating instructions

STA-RITE
STA-RITE EC2 Series Installation, Operation & Parts Manual

Flamingo
Flamingo Orca instructions

STA-RITE
STA-RITE PNB-1L owner's manual

Pentair Pool Products
Pentair Pool Products SW Use and maintenance manual