BCP SKY3023 User manual

SKY3023
Ver. 2
INSTRUCTION
MANUAL
Recumbent Exercise Bike

TOOLS REQUIRED
HARDWARE
2 AAA BATTERIES
(PROVIDED)
+AAA -
ALLEN WRENCH
(PROVIDED)
MULTIFUNCTION TOOL
(PROVIDED)
3
2 PCS
M8 x 35mm
BOLT SET
4
8 PCS
M8 x 16mm
SCREW
2
2 PCS
M8 x 60mm
BOLT SET
1
4 PCS
M8 x 62mm
BOLT SET
APPROXIMATELY
30 MIN.
ASSEMBLY
1 PERSON
ASSEMBLY
220 LBS
CAPACITY
LBS
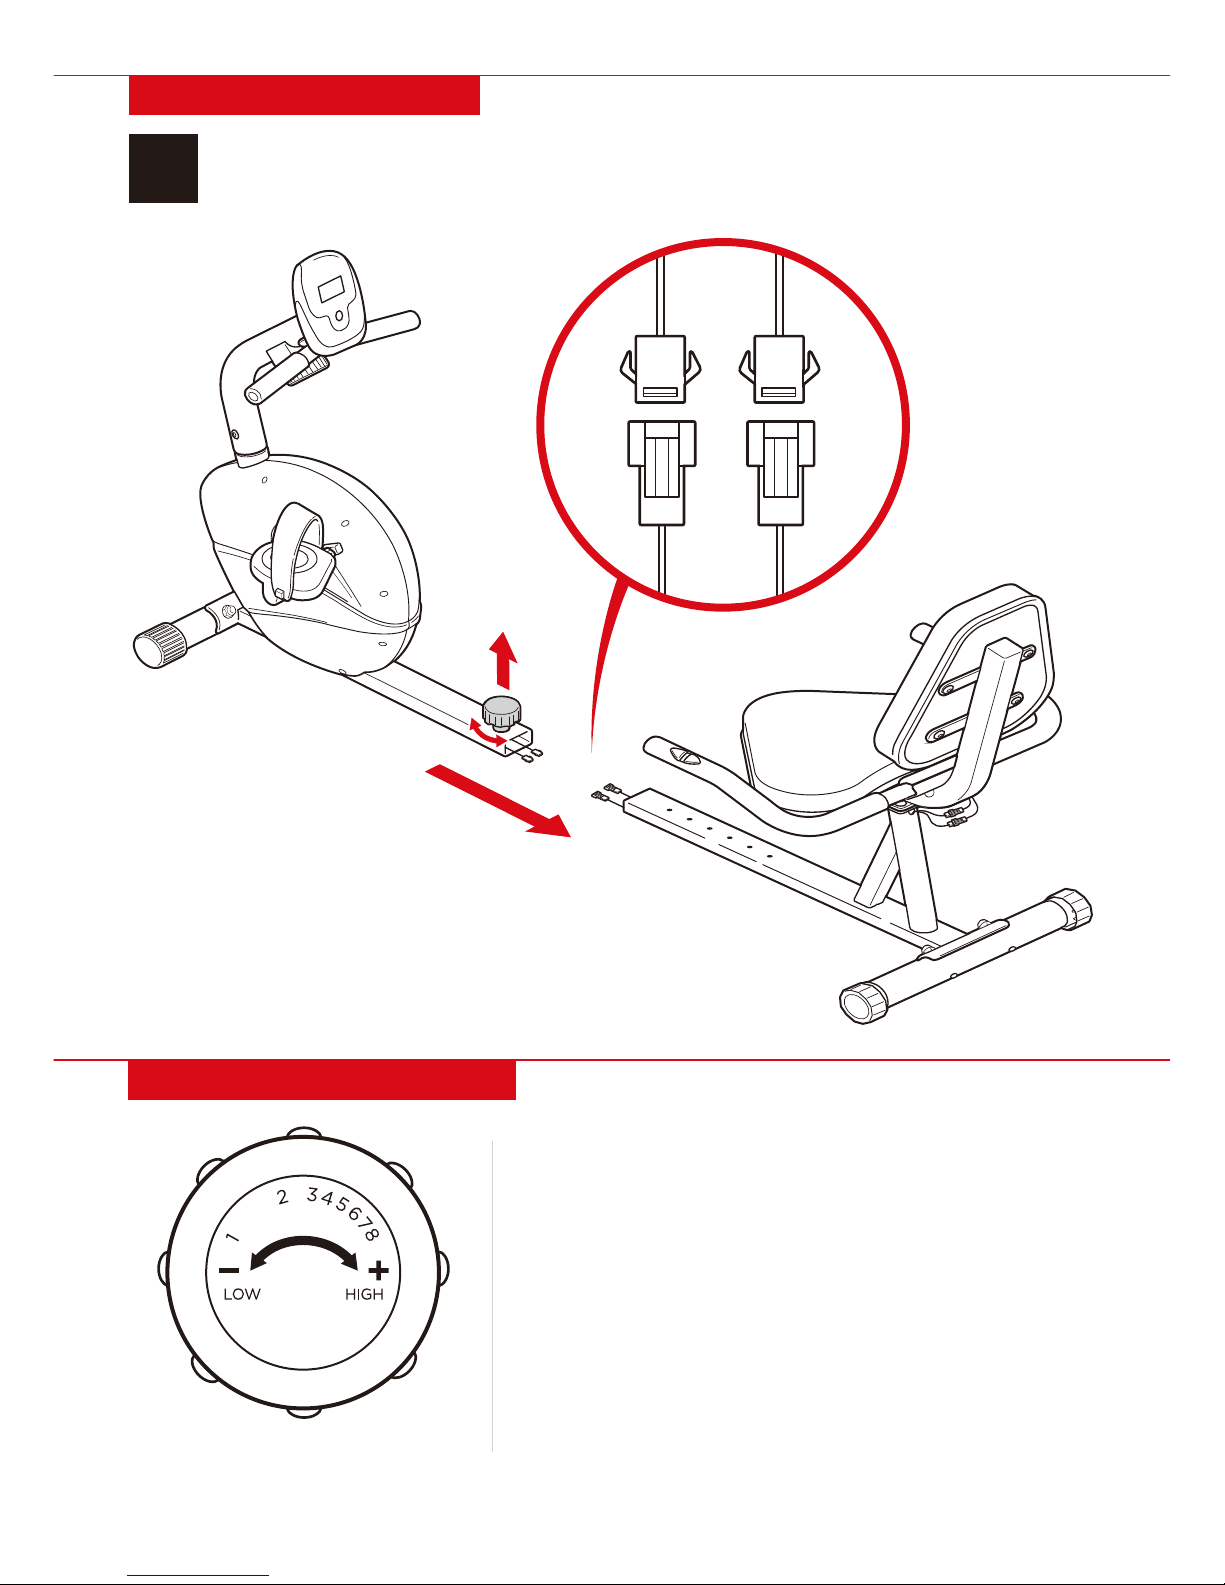
•Please read the manual carefully before beginning to exercise.
•Firmly secure all screws before use.
•Product is intended for indoor use only.
•This appliance is not intended for use by persons (including children) with reduced physical, sensory or
mental capabilities, or lack of experience and knowledge, unless they have been given supervision or
instruction concerning use of the appliance by a person responsible for their safety.
•If any parts are missing, broken, damaged, or worn, stop using this item until repairs are made and/or
factory replacement parts are installed.
•Do not use this item in a way inconsistent with the manufacturer’s instructions as this could void the
product warranty.
NOTICE Please retain these instructions for future reference.
CAUTION DURING USE
•Use machine on a stable and level surface.
•Do not use outdoors, near water, or in places with excessive noise.
•Do not use near heat sources like a heater/fireplace or in enclosed spaces without proper air circulation.
•Do not use near sharp or dangerous objects.
•Before beginning any exercise, consult with your doctor to ensure do not have any medical or physical
conditions that could put your health and safety at risk. This consultation is essential if you are taking
medication that aects your heart rate, blood pressure, or cholesterol level.
•Beware of your body’s signals, as incorrect or excessive exercise can damage your health.
Stop your workout and consult with your doctor immediately if you experience any of the following:
dizziness, nausea, chest pain, back pain, or any other health-related symptoms.
•Routinely inspect your machine periodically to ensure all nuts and bolts are securely tightened and that
your machine is in good condition.
•This machine is designed for adult use only and is not suitable for therapeutic use.
•Keep children and pets away from the equipment.
•Always ease into working out and warm up before every exercise.
•Wear appropriate clothing while working out; do not wear a robe or any other clothing that could
become caught in the machine.
•Wear running or aerobic shoes when exercising.
•Keep hands away from all moving parts. Always be sure to lift or move the equipment carefully.
•Do not use any accessory or fitting other than original accessories and fittings.

PARTS
AD
BC
1 PC 1 PC
1 PC 1 PC
REAR BOTTOM
TUBE
REAR FRAME SEAT FRAME SEAT CUSHION
EH
FG
1 PC 1 PC
1 PC 1 PC
BACKREST
CUSHION
HANDLEBAR FIXING PLATE FRONT BOTTOM
TUBE
IL
JK
1 PC 1 PC
1 SET 1 PC
FRONT FRAME PEDALS (L/R) SUPPORT TUBE FRONT
HANDLEBAR
M
1 PC
DISPLAY MONITOR
HARDWARE
7
4 PCS
M8 WASHER
6
4 PCS
M8 LARGE
WASHER
5
4 PCS
M8 SPRING
WASHER
| 3

PRODUCT ASSEMBLY
1Attach part A rear bottom tube to part B rear frame with two part 1 bolt sets.
Attach part C seat frame to the rear frame with four part 4 screws, four part 5 spring washers,
and four part 7 washers.
2
4|
x2
A
1
x4
4
x4
7
B
C
x4
5

| 5
PRODUCT ASSEMBLY
4
3
Remove the screws from the part E backrest cushion.
Replace the screws to attach the backrest cushions to the seat frame.
Remove the screws from the part D seat cushion.
Replace the screws to attach the seat cushion to the seat frame.
D
E

6|
PRODUCT ASSEMBLY
5Attach part F handlebar with the part G fixing plate
and two part 3 bolt sets.
Join the two connectors on the handlebar to the
corresponding connectors on the frame.
HEART RATE MONITOR
Place hands on the heart rate grips
during your workout to monitor your
pulse in BPM (beats per minute).
NOTE: PULSE must be selected on
the display to see your heart rate.
x2
3
G
F

| 7
PRODUCT ASSEMBLY
6Attach part H front bottom tube to part I front frame with two part 1 bolt sets.
7Use the multifunction tool to install the part J pedal set (L/R).
NOTE: The left pedal must be screwed counter-clockwise and the right pedal must be
screwed clockwise.
x2
1
H
I
J

8|
PRODUCT ASSEMBLY
8Join the three connectors and metal wire on the front frame to the corresponding
connectors/wire on the part K support tube.
Attach the support tube with four part 4 screws and four part 6 large washers.
Attach the metal wire to the corresponding wire by hooking the head into the designated slot,
then sliding the wire into the bracket to secure it (make sure wire is straight).
x4
4
x4
6
K

| 9
PRODUCT ASSEMBLY
9Attach part L front handlebar with two part 2 bolt sets.
10 Install two AAA batteries in the part M display monitor. Join the three connectors on the
display monitor to the corresponding connectors on the top of the support tube.
Remove screws from the display monitor, then replace the screws to attach the display
monitor to the support tube.
x2
2
L
M

10 |
TENSION ADJUSTMENT
•Before beginning your workout, adjust the tension
to your desired level.
•During a workout, use the tension adjustment knob
(found under the display monitor) to manipulate
the tension.
•Turn the knob clockwise for stronger tension and
turn it counter-clockwise to ease the tension.
TENSION KNOB
PRODUCT ASSEMBLY
11 Join the two connectors on the front frame to the corresponding connectors on the rear frame.
Slide the rear frame into the front frame and tighten the adjustment knob to your desired
frame length.

| 11
WARNINGS REGARDING BATTERIES
•Do not mix alkaline, standard (carbon zinc) and rechargeable (nickel hydride) batteries.
•Do not mix old and new batteries.
•Non-rechargeable batteries should not be charged.
•Rechargeable batteries should be charged under adult supervision only.
•Exhausted batteries should be removed.
•The supply terminals should not be short-circuited.
•Do not put batteries next to or in a heat source (fire, electronic heating device, etc.).
•Do not hit batteries against hard objects.
•Do not submerge batteries in water.
•Batteries should be inserted with the correct polarity.
•Monitor turns on when the mode button is pressed or when pedals spin.
•Monitor turns o automatically after 4 minutes of non-use.
DISPLAY MONITOR
•Mode Button: Press to select a function to display.
Press and hold for 3 seconds to reset.
•Scan: Press button until SCAN is selected.
The monitor will then rotate through all 6 functions
–Time, Speed, Distance, Calories, Odometer, and
Pulse - and display each for 4 seconds.
•Time: Press button until TIME is selected.
This displays the total time of your workout from
start to finish.
•Speed: Press button until SPEED is selected.
This displays your current speed.
•Distance: Press button until DISTANCE is selected.
This displays the total distance of your workout
from start to finish.
•Calories: Press button until CALORIES is selected.
This displays the total calories burned during your
workout from start to finish.
•Odometer: Press button until ODOMETER is selected.
This displays the total distance traveled during the
lifetime of the machine.
•Pulse: Press button until PULSE is selected and a
“P” appears on the screen. Place your hands on the
heart rate grips (located on the side handlebars)
to monitor your pulse in BPM (beats per minute).
MODE BUTTON

All items can be returned for any reason within 60 days of the receipt and will receive a full refund as long
as the item is returned in its original product packaging and all accessories from its original shipment are
included. All returned items will receive a full refund back to the original payment method. All returned
items will not be charged a re-stocking fee.
All returned items require an RA (Return Authorization) number, which can only be provided by a Best
Choice Products Customer Service Representative when the return request is submitted. Items received
without an RA may not be accepted or may increase your return processing time. Once an item has been
received by Best Choice Products, refunds or replacements will be processed within 5 business days.
All returns must be shipped back to the Best Choice Products Return Center at the customer’s expense. If
the reason for return is a result of an error by Best Choice Products then Best Choice Products will provide
a pre-paid shipping label via email. Boxes for return shipping will not be provided by Best Choice Products,
and is the customer’s responsibility to either use the original shipping boxes or purchase new boxes.
Pictures may be required for some returns to ensure an item is not damaged prior to its return. Items
returned are not considered undamaged until they are received by Best Choice Products and verified as
such. All damages to items are the customer’s responsibility until the item has been received by and
acknowledge by Best Choice Products as undamaged.
PRODUCT WARRANTY INFORMATION
Manufacturer and seller expressly disclaim any and all liability for personal injury, property damage or
loss, whether direct, indirect, or incidental, resulting from the incorrect attachment, improper use,
inadequate maintenance, or neglect of this product.
HELP CENTER
Product Assembly
Product InquiryChat Support Returns & Refunds
Orders FAQ
WARNING
Question about your product? We're here to help. Visit us at:
help.bestchoiceproducts.com
CHAT
US!
Table of contents