beadedstream D605 Datasheet


4
Purpose
Do this FIRST before deploying a logger in the field with the Terminal
Emulator in the Capture App
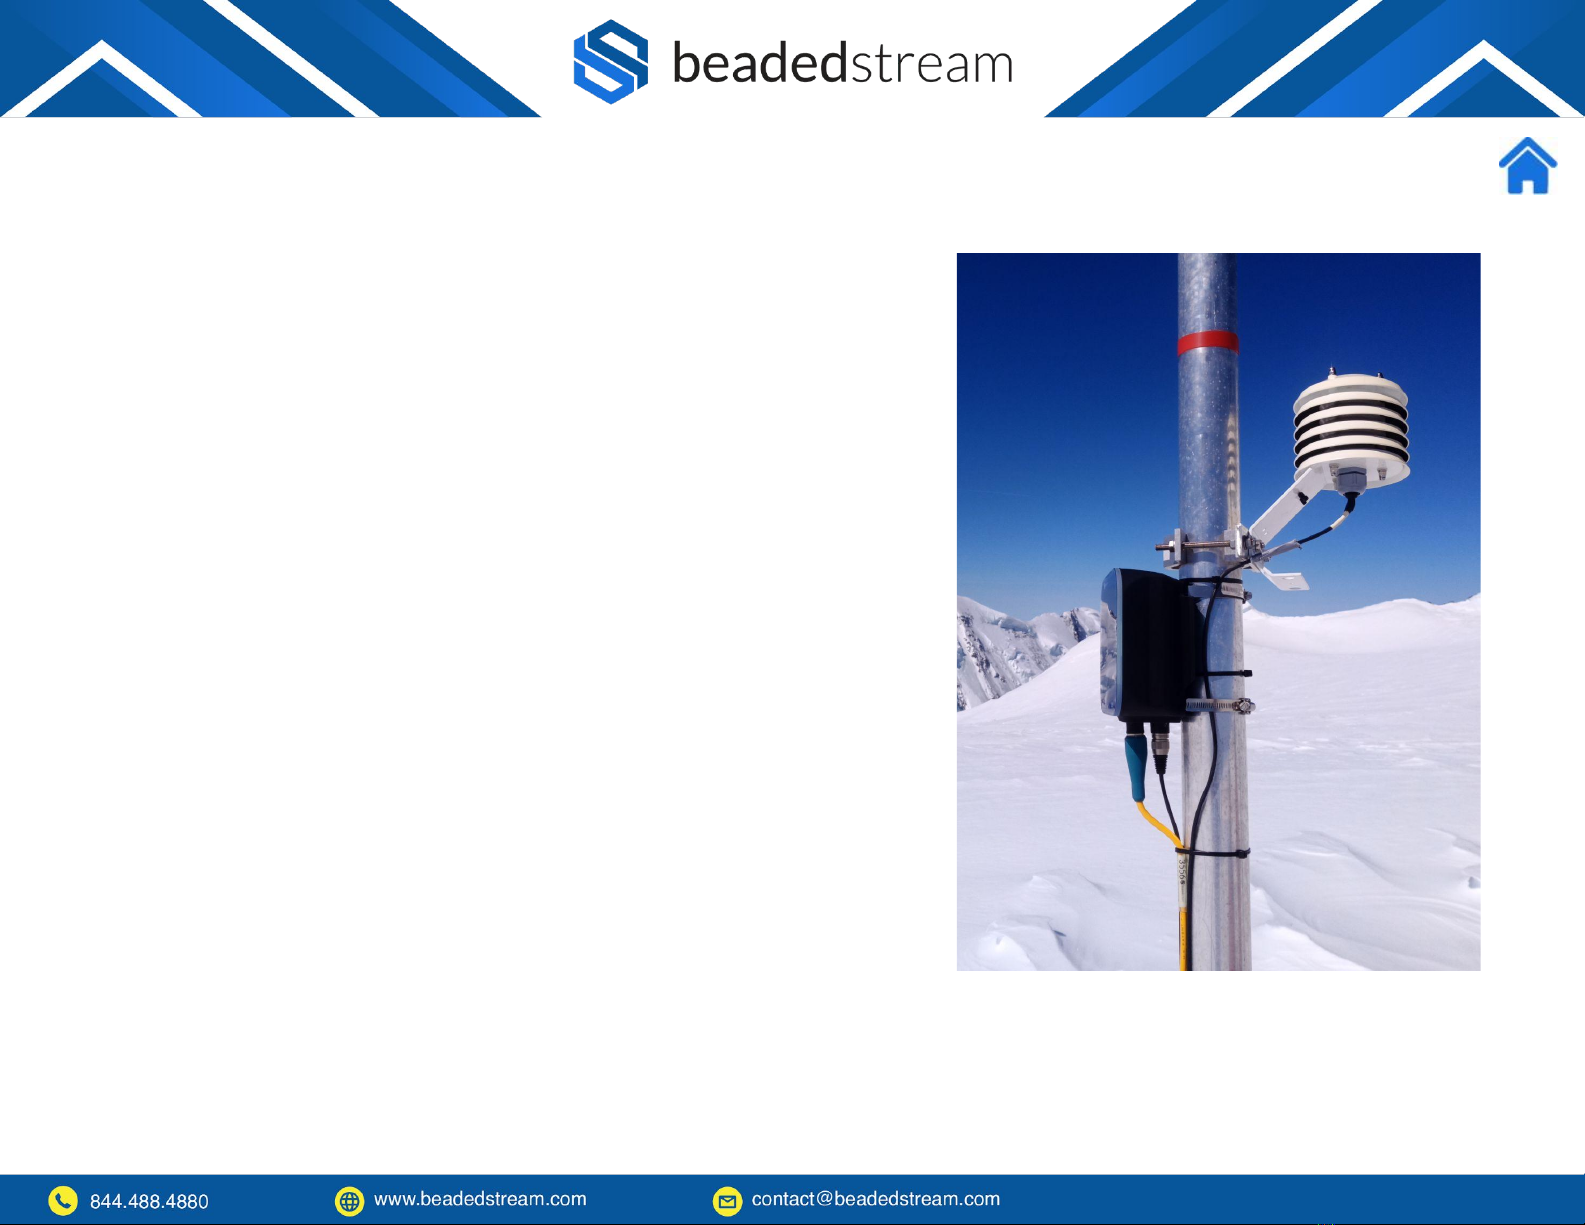
Logger Mounting Steps:
❏Mount logger above yearly maximum snow and/or water levels
❏Orient logger towards true south (northern hemisphere) or true
north (southern hemisphere)
❏No overhead obstructions
❏Minimal vertical tilt
**Tilt will DRASTICALLY REDUCE satellite antenna performance. No
tilt means logger bottom ports point straight down. In locations with
snow, no tilt is a good balance of direct sun and energy reflected from
the snow.
Logger Installation
Make sure that the logger is oriented
towards true south (northern
hemisphere)
Steps
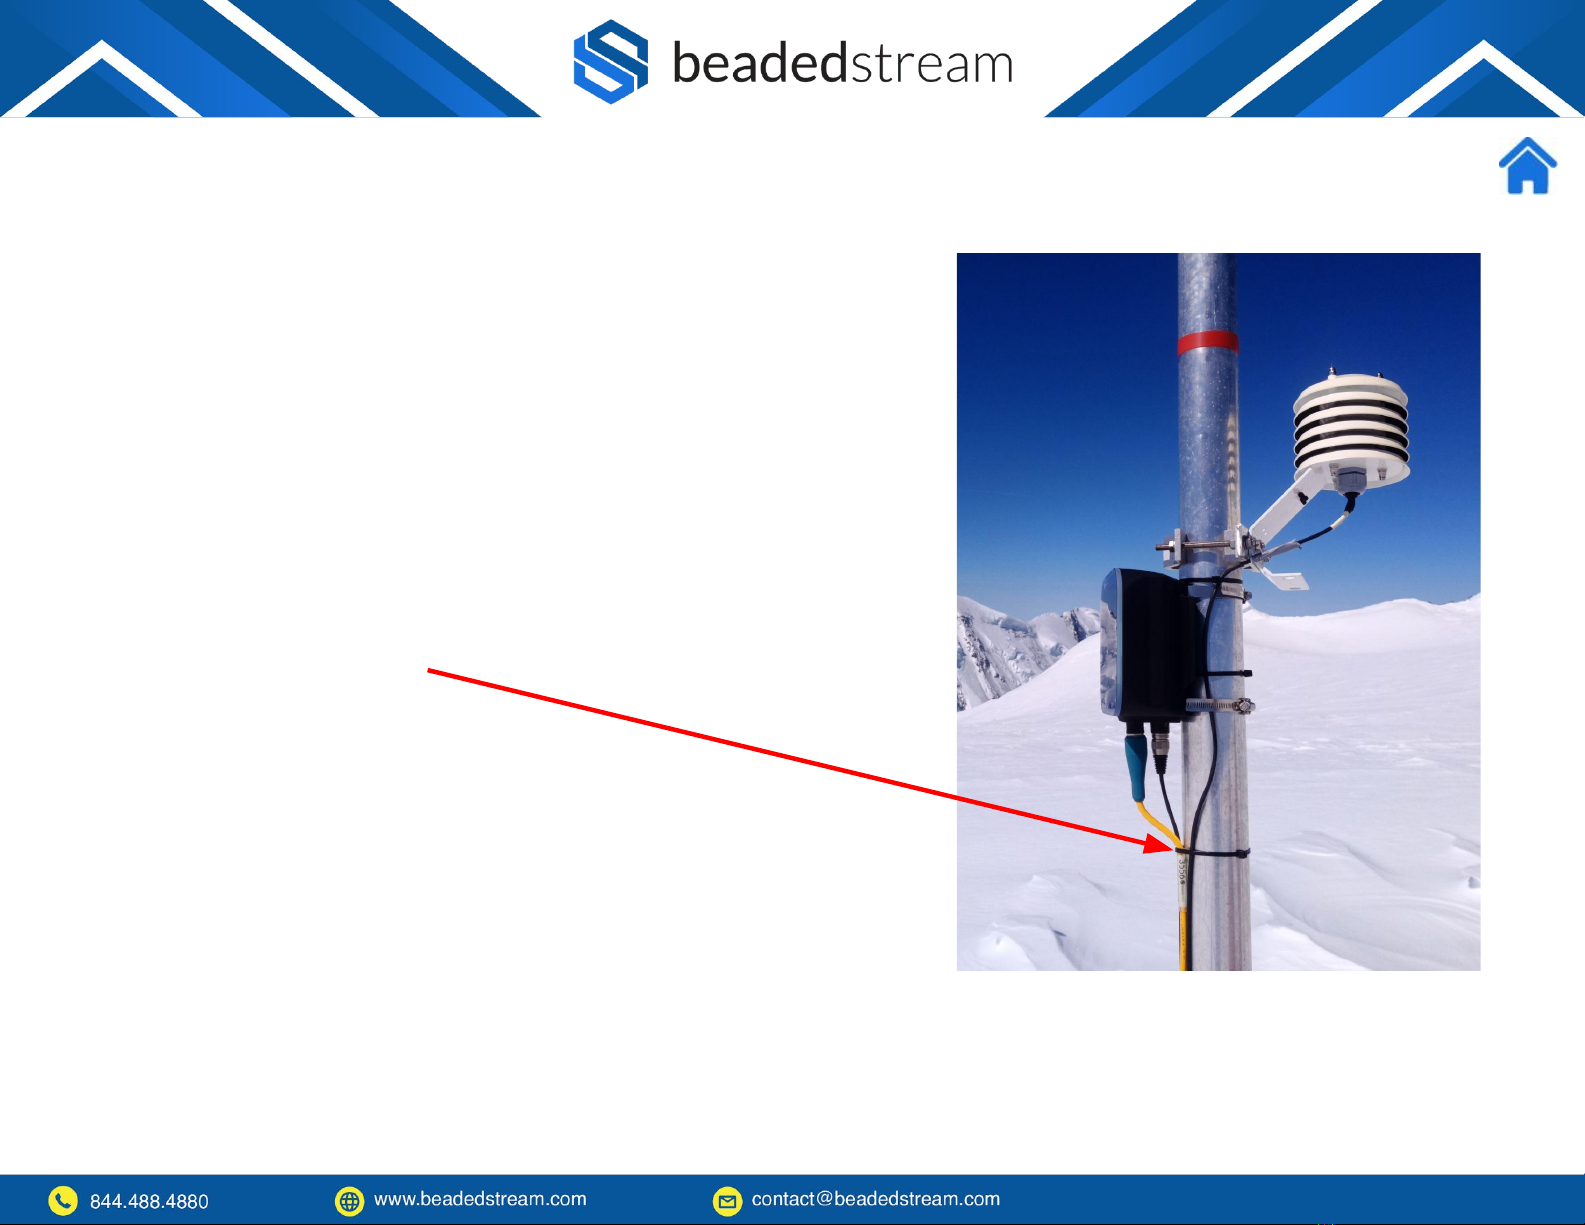
●Cable connector is coated with a small amount of “Stuf” paste
●Align the pins on the cable connector and the bulkhead
receptacle
●Cable connector is locked into the bulkhead receptacle (push
hard, feel and hear a slight click, do a light tug test)
●Cables are secured (zip ties are typically used if conduit isn’t
present)
5
Connect the Cable(s)
Steps
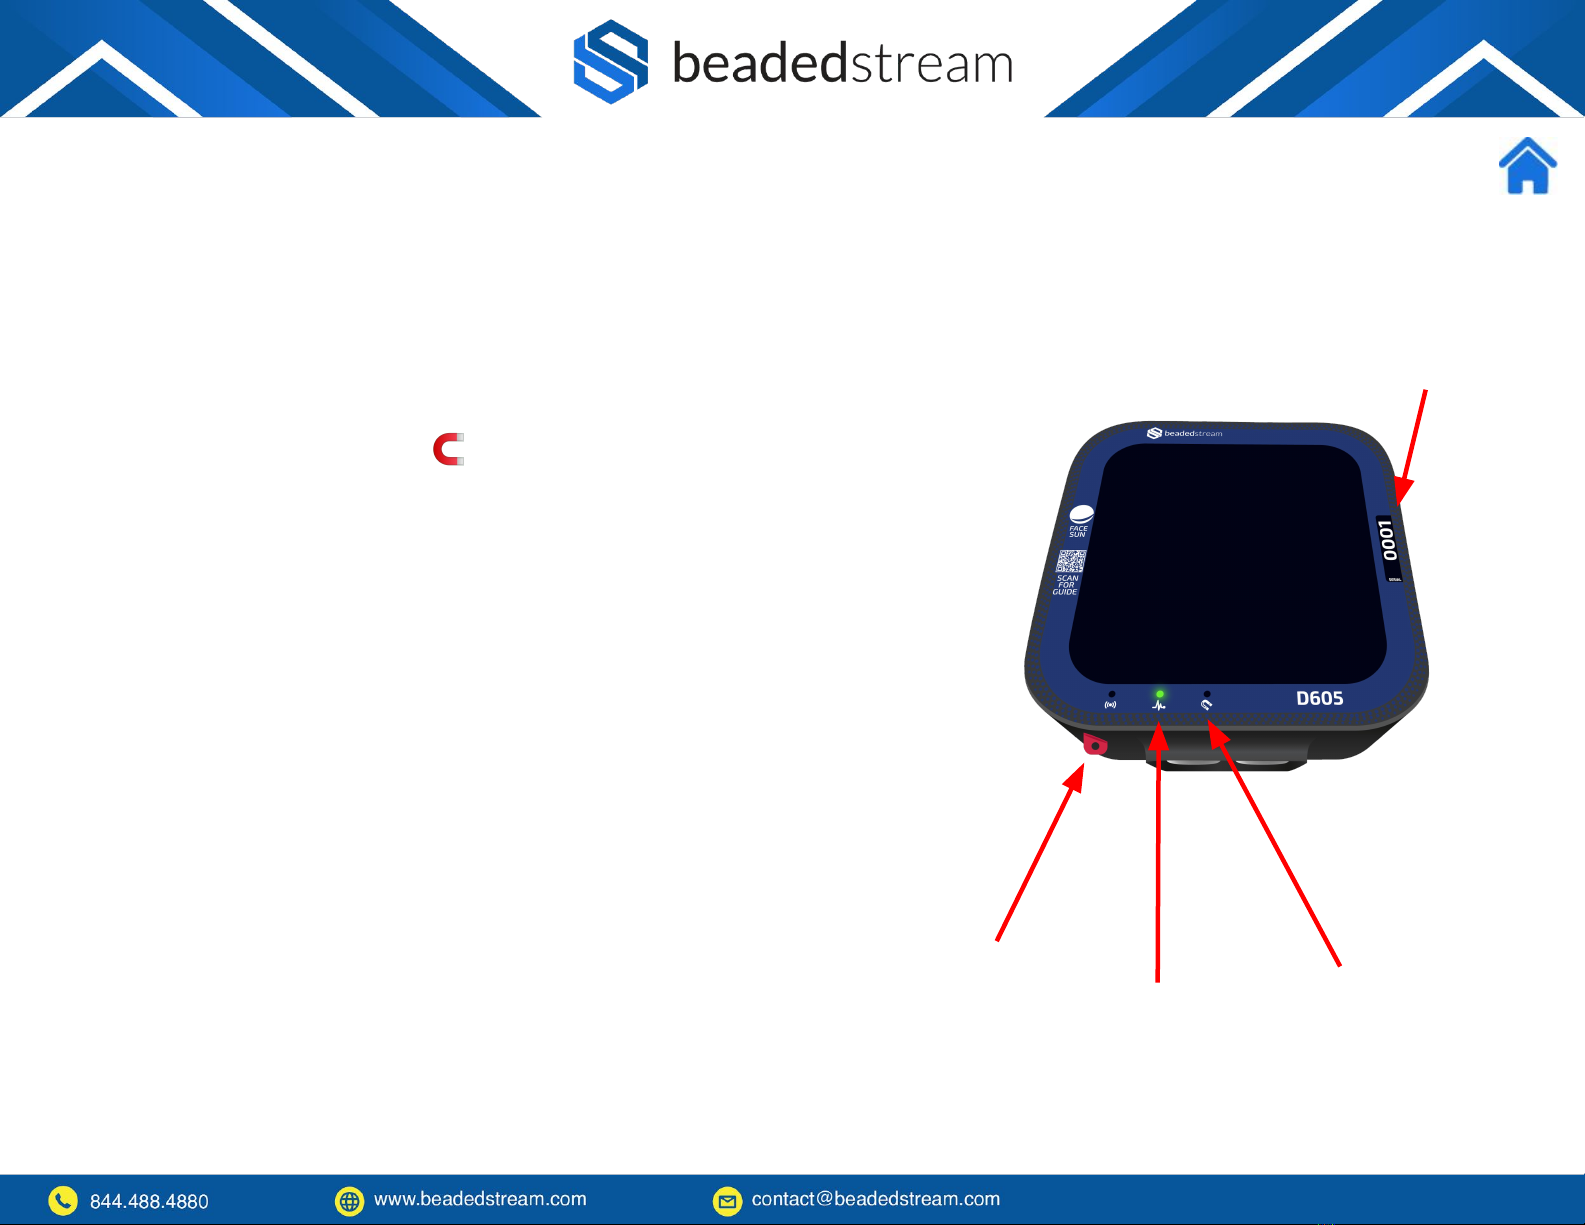
●Remove the provided magnet from its compartment on the
bottom side of the data logger (it slides out)
●Hold the magnet over the 🧲 icon on the face of the logger for
3-4 seconds
●The green LED may or may not turn on at that time and nap mode
should be turned off
●If the green LED comes on, before moving to the deploy step on
the next page, swipe the magnet for 1 second to turn off the
green LED
●See more information about how to check nap mode later in this
document
6
Wake Up From Nap Mode
Magnet
compartment Green LED Hold magnet
3-4 seconds
here
D605XXXX
Logger Serial Number

7
Here’s how to make sure that your satellite connection is working properly before leaving
the field
Steps
●Open Capture App on iOS device
●Select Settings
●Select Terminal Emulator
●Select your logger (ex. D605XXXX)
●Swipe magnet (~1 second) to connect to Bluetooth faster
●Wait ~15 seconds for the black screen to show “ > ”
●On the black screen, type “deploy” and press Enter
○It will ask a series of questions. Answer Y or N.
■A sequence of commands to aid in deployment is about to run.
Continue? (Y/N)
■Logger is set to take and STORE readings every _____ (ex 12:00) OK?
(Y/N)
■Logger is set to take and SEND readings every _____ (ex. 12:00) OK?
(Y/N)
○The whole deployment process, satellite transmission, and confirmation
takes about one minute.
●Make sure that after one minute it says TRANSMISSION SUCCEEDED
Deploying logger in the field for satellite telemetry

8
Here’s how to make sure that your satellite connection is working properly
before leaving the field
Steps (continued)
●If it says TRANSMISSION FAILED, then type “status” and press
Enter
●When it returns the status, take a screenshot of the information on
the screen and email it to us ([email protected]) to
troubleshoot further.
●If you can contact our team from the field while you are with the
data logger, that is ideal. If you do not have communication in the
field, please contact us when you can.
Deploying logger in the field (Continued)


Other manuals for D605
1
Table of contents
Other beadedstream Data Logger manuals


