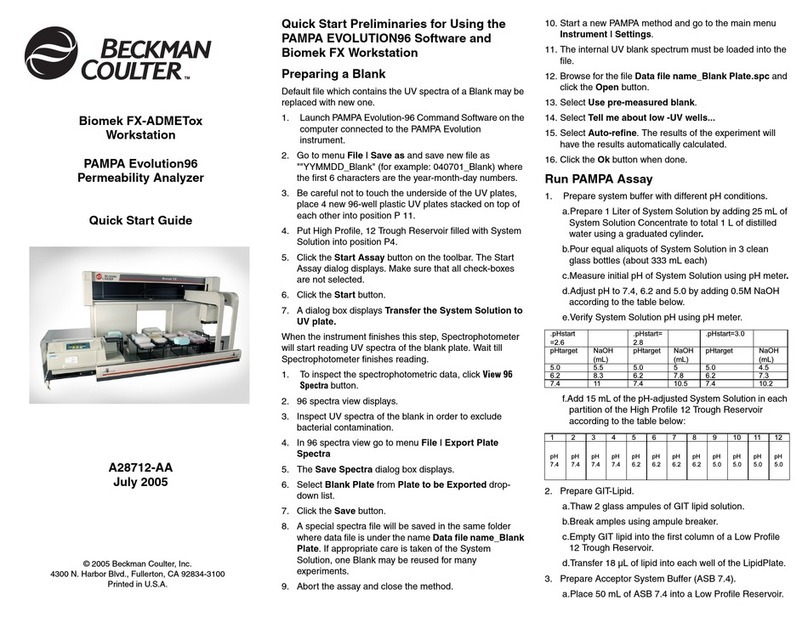
Beckman Coulter Biomek 4000 User manual

A99498AD
April 2019
Hardware Manual
Biomek 4000
Laboratory Automation Workstation
Beckman Coulter, Inc.
250 S. Kraemer Blvd.
Brea, CA 92821 U.S.A.

Biomek 4000 Hardware Manual
PN A99498AD (April 2019)
© 2019 Beckman Coulter, Inc.
All rights reserved.
Trademarks
Beckman Coulter, the stylized logo, and the Beckman
Coulter product and service marks mentioned herein are
trademarks or registered trademarks of Beckman Coulter,
Inc. in the United States and other countries.
Windows 7 and Windows 10 are registered trademarks or
trademarks of Microsoft Corporation in the United States
and/or other countries.
All other trademarks, service marks, products, or services
are trademarks or registered trademarks of their
respective holders.
May be covered by one or mor pat. - see
www.beckman.com/patents
Contact Us
If you have any questions, contact our Customer Support
Center.
• Worldwide, find us via our website at
www.beckman.com/support/technical.
• In the USA and Canada, call us at 1-800-369-0333.
• Outside of the USA and Canada, contact your local
Beckman Coulter Representative.
Find us on the World Wide Web at:
www.beckman.com
Glossary of Symbols is available at
beckman.com/techdocs (PN C24689).
Original Instructions

A99498AD iii
Revision History
Initial Issue A99498AA, 08/2012
Software Version 4.0
Revision AB, 09/2014
Software Version 4.0
Changes or additions were made to: CHAPTER 1, Changing Fuses.
Revision AC, 04/2017
Software Version 4.0.
Changes or additions were made to: CE Mark, RCM Mark, CSA/International Certified Label
Revision AD, 04/2019
Software Version 4.2.
Changes or additions were made to: China RoHS Caution Label; CHAPTER 1, Related Manuals;
Table2.1,SystemSpecifications; Related Documents; Updated references to related manuals
throughout document.
This document applies to the latest software listed and higher versions. When a subsequent software
version affects the information in this document, a new issue will be released to the Beckman Coulter
website. For labeling updates, go to www.beckman.com/techdocs and download the latest version of the
manual or system help for your instrument.
Note: Changes that are part of the most recent revision are indicated in text by a bar in the margin of the
amended page.

A99498AD
iv
Revision History

A99498AD v
Safety Notice
Overview
Read all product manuals and consult with Beckman Coulter-trained personnel before attempting
to operate the instrument. Do not attempt to perform any procedure before carefully reading all
instructions. Always follow product labeling and manufacturer’s recommendations. If in doubt as
to how to proceed in any situation, contact us.
Beckman Coulter, Inc. urges its customers and employees to comply with all national health and
safety standards such as the use of barrier protection. This may include, but is not limited to,
protective eyewear, gloves, and suitable laboratory attire when operating or maintaining this or
any other automated laboratory instrumentation.
WARNING
If the equipment is used in a manner not specified by Beckman Coulter, Inc., the
protection provided by the equipment may be impaired.
Alerts for Warning, Caution, Important, and Note
All Warnings and Cautions in this document include an exclamation point, framed within a triangle.
The exclamation point symbol is an international symbol which serves as a reminder that all safety
instructions should be read and understood before installation, use, maintenance, and servicing are
attempted.
WARNING
WARNING indicates a potentially hazardous situation which, if not avoided, could
result in death or serious injury.
CAUTION
CAUTION indicates a potentially hazardous situation, which, if not avoided, may
result in minor or moderate injury. It may also be used to alert against unsafe
practices.
IMPORTANT IMPORTANT is used for comments that add value to the step or procedure being performed.
Following the advice in the Important adds benefit to the performance of a piece of equipment or to a
process.
NOTE NOTE is used to call attention to notable information that should be followed during installation, use,
or servicing of this equipment.

A99498AD
vi
Safety Notice
Instrument Safety Precautions
Instrument Safety Precautions
WARNING
Risk of operator injury if:
• All doors, covers and panels are not closed and secured in place prior to and
during instrument operation.
• The integrity of safety interlocks and sensors is compromised.
•Youcontactmovingparts.
• You mishandle broken parts.
• Doors, covers and panels are not opened, closed, removed and/or replaced
with care.
• Improper tools are used for troubleshooting.
To avoid injury:
• Keep doors, covers and panels closed and secured in place while the
instrument in use.
• Take full advantage of the safety features of the instrument. Do not defeat
safety interlocks and sensors.
• Acknowledge and act upon instrument alarms and error messages.
• Keep away from moving parts.
• Report any broken parts to your Beckman Coulter Representative.
• Use the proper tools when troubleshooting.
CAUTION
System integrity could be compromised and operational failures could occur if:
• This equipment is used in a manner other than specified. Operate the
instrument as instructed in the Product Manuals.
• You introduce software that is not authorized by Beckman Coulter into your
computer. Only operate your system’s computer with software authorized by
Beckman Coulter.
• You install software that is not an original copyrighted version. Only use
software that is an original copyrighted version to prevent virus
contamination.
CAUTION
If you purchased this product from anyone other than Beckman Coulter or an
authorized Beckman Coulter distributor, and, if it is not presently under a
Beckman Coulter Service Maintenance Agreement, Beckman Coulter cannot
guarantee that the product is fitted with the most current mandatory engineering
revisions or that you will receive the most current information bulletins

A99498AD vii
Safety Notice
Electrical Safety
concerning the product. If you purchased this product from a third party and
would like further information concerning this topic, contact us.
Electrical Safety
To prevent electrically related injuries and property damage, properly inspect all electrical
equipment prior to use and immediately report any electrical deficiencies. Contact a Beckman
Coulter Representative for any servicing of equipment requiring the removal of covers or panels.
High Voltage
This symbol indicates the potential of an electrical shock hazard existing from a high-voltage
source and that all safety instructions should be read and understood before proceeding with the
installation, maintenance, and servicing of all modules.
Do not remove system covers. To avoid electrical shock, use supplied power cords only and connect
to properly grounded (three-holed) outlets.
Laser Light
This symbol indicates that a potential hazard to personal safety exists from a laser source. When
this symbol is displayed in this manual, pay special attention to the specific safety information
associated with the symbol.
Laser Specifications
• Laser Type: Class II Laser Diode
• Maximum Output: 11 mW
• Wavelength: 670 nm

A99498AD
viii
Safety Notice
Chemical and Biological Safety
Disposal of Electronic Equipment
It is important to understand and follow all laws regarding the safe and proper disposal of electrical
instrumentation.
The symbol of a crossed-out wheeled bin on the product is required in accordance with the Waste
Electrical and Electronic Equipment (WEEE) Directive of the European Union. The presence of this
marking on the product indicates:
• That the device was put on the European Market after August 13, 2005 and
• That the device is not to be disposed via the municipal waste collection system of any member
state of the European Union.
For products under the requirement of WEEE directive, please contact your dealer or local Beckman
Coulter office for the proper decontamination information and take back program which will
facilitate the proper collection, treatment, recovery, recycling, and safe disposal of device.
Chemical and Biological Safety
If a hazardous substance such as blood is spilled onto the instrument, ALPs, or accessories, clean up
the spill by using a 10% bleach solution, or use your laboratory decontamination solution. Then
follow your laboratory procedure for disposal of hazardous materials. If the instrument, ALPs, or
accessories need to be decontaminated, contact us.
WARNING
Risk of chemical injury from bleach. To avoid contact with the bleach, use barrier
protection, including protective eyewear, gloves, and suitable laboratory attire.
Refer to the Safety Data Sheet for details about chemical exposure before using
the chemical.

A99498AD ix
Safety Notice
Chemical and Biological Safety
WARNING
Before running with chemistry or any biological samples, new labware types will
require testing to determine if labware offsets are necessary to move to or from
the Peltier ALP, or to access the labware during pipetting operations while on the
Peltier ALP. If you do not do the required testing, the labware could crash and the
contents could spill if the offset is incorrect.
Normal operation of the instrument may involve the use of materials that are
toxic, flammable, or otherwise biologically harmful. When using such materials,
observe the following precautions:
• Handle infectious samples according to good laboratory procedures and
methods to prevent the spread of disease.
• Observe all cautionary information printed on the original solutions
containers prior to their use.
• Dispose of all waste solutions according to your facility’s waste disposal
procedures.
• Operate the instrument in accordance with the instructions outlined in this
manual and take all the necessary precautions when using pathological, toxic,
or radioactive materials.
• Splashing of liquids may occur; therefore, take appropriate safety
precautions, such as using safety glasses and wearing protective clothing,
when working with potentially hazardous liquids.
• Use an appropriately-contained environment when using hazardous
materials.
• Observe the appropriate cautionary procedures as defined by your safety
officer when using flammable solvents in or near a powered-up instrument.
• Observe the appropriate cautionary procedures as defined by your safety
officer when using toxic, pathological, or radioactive materials.
NOTE Observe all warnings and cautions listed for any external devices attached or used during operation
of the instrument. Refer to applicable external device user’s manuals for operating procedures of that
device.
NOTE For Safety Data Sheets (SDS/MSDS) information, go to the Beckman Coulter website at
www.beckman.com.

A99498AD
x
Safety Notice
Moving Parts
Moving Parts
WARNING
Risk of personal injury. To avoid injury due to moving parts, observe the following:
• Never attempt to exchange labware, reagents, or tools while the instrument
is operating.
• Never attempt to physically restrict any of the moving components of the
instrument.
• Keep the instrument work area clear to prevent obstruction of the movement.
Cleaning
Observe the cleaning procedures outlined in this user’s manual for the instrument. Prior to cleaning
equipment that has been exposed to hazardous material:
• Contact the appropriate Chemical and Biological Safety personnel.
• Review the Chemical and Biological Safety information in the user’s manual.
Maintenance
Perform only the maintenance described in this manual. Maintenance other than that specified in
this manual should be performed only by service engineers.
IMPORTANT It is your responsibility to decontaminate components of the instrument before requesting
service by a Beckman Coulter Representative or returning parts to Beckman Coulter. Beckman Coulter
will NOT accept any items which have not been decontaminated where it is appropriate to do so. If any
parts are returned, they must be enclosed in a sealed plastic bag stating that the contents are safe to
handle and are not contaminated.

A99498AD xi
Safety Notice
China RoHS Caution Label
China RoHS Caution Label
This logo indicates that this electronic information product contains certain toxic or hazardous
substances or elements, and can be used safely during its environmental protection use period. The
number in the middle of the logo indicates the environmental protection use period for the
product. The outer circle indicates that the product can be recycled. The logo also signifies that the
product should be recycled immediately after its environmental protection use period has expired.
The date on the label indicates the date of manufacture.
CE Mark
A “CE” mark indicates that a product has been assessed before being placed on the market, and has
been found to meet European Union safety, health, and/or environmental protection
requirements.
RCM Mark
The RCM mark is intended for use on products that comply with Australian communications Media
Authority (ACMA) EMC Requirements.

A99498AD
xii
Safety Notice
CSA/International Certified Label
CSA/International Certified Label
169502 — This label indicates recognition by a Nationally Recognized Testing Laboratory (NRTL)
that the instrument has met the relevant product safety standards.

xiii
Contents
Overview,v
Alerts for Warning, Caution, Important, and Note,v
Instrument Safety Precautions,vi
Electrical Safety,vii
High Voltage,vii
Laser Light,vii
Disposal of Electronic Equipment,viii
Chemical and Biological Safety,viii
Moving Parts,x
Cleaning,x
Maintenance,x
China RoHS Caution Label,xi
CE Mark,xi
RCM Mark,xi
CSA/International Certified Label,xii
Introduction,1-1
Overview,1-1
Hardware,1-1
Software,1-1
Related Manuals,1-1
System Components,1-3
Main Components,1-3
Configuration Options,1-4
Front Rail,1-8
Rear Support Assembly,1-8
Bridge,1-9
Indicator Lights,1-9
Pod,1-9
Integration Deck (Elevated Base),1-9
Deck,1-9
Side Modules,1-10
Labware and Tools,1-10
Labware Positioners,1-10
Tip Rack Holder,1-11
Tool Racks,1-11
Tools,1-11

xiv
Contents
Optional Devices,1-11
1 x 1 Standard ALP,1-11
Auto-Latching Tip Rack Holder,1-12
Circulating Reservoir,1-12
Deck Mounted Barcode Reader,1-12
Filtration System,1-12
Handheld Barcode Reader,1-12
Orbital Shaker ALP,1-12
Shaking Peltier ALP,1-12
Static Peltier ALP,1-13
Thermal Exchange Unit,1-13
Off-Deck Platform Devices,1-13
Moving and Installing the Biomek Laboratory Automation
Workstation,2-1
Overview,2-1
Preparing the Site,2-1
System Specifications,2-1
Weight and Space Requirements,2-3
Electrical Requirements,2-7
Vacuum Requirements,2-7
Moving the Workstation,2-8
Connecting the Workstation,2-9
Installing Side Modules,2-11
Removing Installed Side Modules,2-15
Preventive Maintenance,2-15
Cleaning Spill Trays,2-16
Troubleshooting the Workstation,2-17
Changing Fuses,2-18
Setting Up the Worksurface,3-1
Overview,3-1
Positioners,3-1
Standard Labware Holders,3-2
Installing Labware Holders,3-2
Framing Instructions,3-3
Inserting Labware into a Labware Holder,3-3
Removing Labware Holders from the Worksurface,3-4
Storing Labware Holders,3-4
Preventive Maintenance,3-4
Tip Rack Holders,3-5
Installing Manual Tip Rack Holders,3-5
Framing Instructions,3-5
Inserting Tip Racks into Manual Tip Rack Holders,3-6
Removing Manual Tip Rack Holders from the Worksurface,3-7
Storing Manual Tip Rack Holders,3-7

xv
Contents
Preventive Maintenance,3-7
Tool Racks and Gripper Tool Racks,3-8
Installing Tool Racks,3-9
Framing Instructions,3-10
Removing Tool Racks from the Worksurface,3-10
Storing Tool Racks,3-10
Preventive Maintenance,3-11
Collar Holder,3-11
Installing Collar Holders,3-11
Framing Instructions,3-12
Installing Collars on a Collar Holder,3-12
Removing Collar Holders from the Worksurface,3-13
Storing Collar Holders,3-14
Preventive Maintenance,3-14
Pipetting Tools,4-1
Overview,4-1
Liquid Level Sensing,4-2
Installing Pipette Tools on the Tool Racks,4-3
Tip Compatibility,4-5
Labware and Tip Compatibility with the Pipette Tools,4-5
Storing Pipette Tools,4-7
Preventive Maintenance,4-7
Troubleshooting Pipette Tools,4-8
Gripper Tool,5-1
Overview,5-1
Installing the Gripper Tool in the Tool Rack,5-1
Removing the Gripper Tool from the Tool Rack,5-3
Storing the Gripper Tool,5-3
Preventive Maintenance,5-3
Troubleshooting the Gripper Tool,5-4
Replacing Gripper Finger Pads,5-4
Hardware Setup,6-1
Overview,6-1
Accessing Hardware Setup,6-2
Options in Hardware Setup,6-3
Configuring the Workstation,6-3
Calibrating the X- and Y-Axis,6-7
Saving, Restoring, and Deleting Settings,6-7
Saving Pod Settings,6-7

xvi
Contents
Restoring Pod Settings,6-9
Deleting Pod Settings,6-10
Adding and Removing Tools and Devices,6-11
Adding Tools and Devices,6-11
Removing Tools and Devices,6-14
Configuring Tools,6-14
Configuring Pipette Tools,6-14
Configuring the Gripper Tool,6-18
Configuring Wash Tools,6-19
Configuring External Devices,6-20
Framing,7-1
Overview,7-1
Attaching the Manual Framing Tool ,7-2
Manually Framing Deck Positions,7-3
Framing to Position Target,7-8
Framing to Microplate Wells,7-9
Using the Graphic Alignment Tool,7-11
Using the Delta Value and Directional Buttons,7-12
Framing the Z-Axis,7-14
Attaching the Framing Adapter to the Manual Framing Tool,7-16
Installing the AccuFrame,7-17
Installing the Deck Adapter,7-17
Installing the AccuFrame on the Deck,7-19
Framing the Deck with AccuFrame,7-19
Framing Troubleshooting,7-22
Framing the Gripper Tool,7-23
Calibrating the Gripper Sensor,7-27
Testing Gripper Framing Accuracy,7-30
Manually Controlling the Workstation,8-1
Overview,8-1
Accessing Manual Control,8-1
Using Manual Control,8-2
Homing all Axis of the Pod ,8-2
Moving the Pod to a Specific Deck Position,8-3
Stopping a Pod,8-4
Viewing the Firmware Version,8-4
Accessing Advanced Manual Control,8-5
Using Advanced Manual Control with the Pod,8-6
Viewing the Current Position of the Pod,8-7
Moving the Pod to a Safe Roving Height,8-8
Performing Relative Moves Using the Vector Builder,8-9

xviii
Illustrations
Illustrations
1.1 Biomek 4000 Laboratory Automation Workstation,1-3
1.2 Biomek 4000 Laboratory Automation Workstation — Base
Instrument,1-6
1.3 Biomek 4000 Laboratory Automation Workstation — Base
Instrument With Integration Deck,1-7
1.4 Connections on the Right Side of Rear Support Assembly,1-8
1.5 Close-up of the deck,1-10
1.6 Close-up of Off-Deck Platform,1-13
2.1 Instrument Axis Orientations,2-3
2.2 Lift Points for Moving the Workstation,2-9
2.3 Connectors,2-10
2.4 Attaching a Side Module to the Left Side of the Deck,2-12
2.5 Fastening the Side Module to the Front Rail,2-13
2.6 Installing the Spill Tray and Mounting Plate,2-14
2.7 Removing the Spill Tray on a Side Module to Clean,2-16
2.8 Location of Fuse Carrier,2-19
2.9 Removing Fuses from Fuse Carrier,2-20
3.1 Installing Labware Holder on the Deck,3-3
3.2 Inserting Tip Box into a Standard Tip Box Holder,3-6
3.3 Gripper Tool Rack With Gripper Tool,3-8
3.4 Installing a Tool Rack on the Deck,3-9
3.5 Installing Collar Holder on the Deck,3-12
3.6 Installing Collar on Collar Holder,3-13
4.1 MP200 Eight-Channel Tool,4-2
4.2 Installing Pipette Tools into Tool Rack,4-4
5.1 Installing Gripper Tool in Gripper Tool Rack,5-2
5.2 Replacing Finger Pad on the Rear Finger Assembly,5-5
5.3 Replacing Finger Pads on the Front Finger Assembly,5-6
6.1 Hardware Setup for Biomek 4000 Laboratory Automation
Workstation,6-2
6.2 Hardware Setup Showing the Configuration View for a Pod,6-4
6.3 Homing Instrument Warning,6-4
6.4 Device Has Been Modified,6-6
6.5 Save Configuration,6-8

xix
Illustrations
6.6 Load Settings,6-9
6.7 Confirmation to Reset Stored Configuration,6-9
6.8 Delete Settings,6-10
6.9 Confirmation to Delete Settings,6-10
6.10 Adding a Device,6-12
6.11 New Devices Displaying All Tools, CAN Devices, RS-485 Devices,
and External Devices,6-13
6.12 Hardware Setup Configuration for a Pipetting Tool,6-15
6.13 Hardware Setup Configuration for a Gripper Tool,6-18
6.14 Hardware Setup Configuration for a Wash Tool,6-19
6.15 Hardware Setup for an External Device,6-20
7.1 Installing the Framing Tool on the Pod,7-2
7.2 Deck Editor for Biomek 4000 Laboratory Automation
Workstation,7-3
7.3 Position Properties for a Labware Positioner,7-4
7.4 Manual Teaching Warning,7-4
7.5 Framing Adapter is Not Required,7-5
7.6 Manual Teaching if Framing Adapter is Required,7-5
7.7 Loading Tool During Manual Teach,7-6
7.8 Selecting Target to Manual Teach Position,7-6
7.9 Teaching Instructions,7-7
7.10 Position Target on Labware Positioners,7-8
7.11 Framing to the Corner of Four Wells,7-10
7.12 Framing to the Center of a Well,7-10
7.13 Manual Teaching the X- and Y-Axis,7-11
7.14 Manual Teaching the X- and Y-Axis ,7-12
7.15 Manual Teaching the Z-Axis,7-14
7.16 Installing the Framing Adapter to the Manual Framing
Tool,7-16
7.17 Installing the Deck Adapter,7-18
7.18 Deck Editor for Biomek 4000 Laboratory Automation
Workstation,7-19
7.19 Position Properties for a Labware Positioner,7-20
7.20 Auto Teaching Warning,7-20
7.21 Teaching Instructions,7-21
7.22 Hardware Setup for Gripper Tool,7-24
7.23 Grippers Warning,7-24
7.24 Pick Previously Framed Deck Position to Frame the Gripper
Tool,7-25

xx
Illustrations
7.25 Gripper Framing Plate,7-25
7.26 Manual Control for Moving Gripper Tools During Framing,7-26
7.27 Moving Pod into Gripping Position,7-26
7.28 Incorrect and Correct Gripper Tool Framing Alignment,7-27
7.29 Hardware Setup for Gripper Tool,7-28
7.30 Grippers Warning,7-28
7.31 Pick Previously framed Deck Position to Calibrate Gripper
Sensor,7-29
7.32 Gripper Framing Plate,7-29
7.33 Confirm Framing Plate is Held by Gripper,7-29
8.1 Manual Control,8-1
8.2 Homing Instrument Warning,8-3
8.3 Firmware Version Information,8-4
8.4 Overview Advanced Manual Control for a Pod,8-6
8.5 Vector Builder,8-10
8.6 Enter Absolute Move Coordinates,8-11
Table of contents
Other Beckman Coulter Desktop manuals

