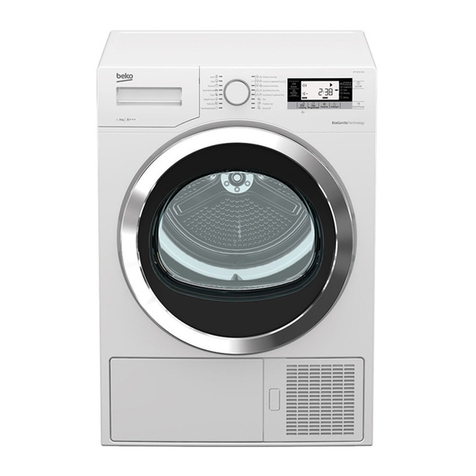
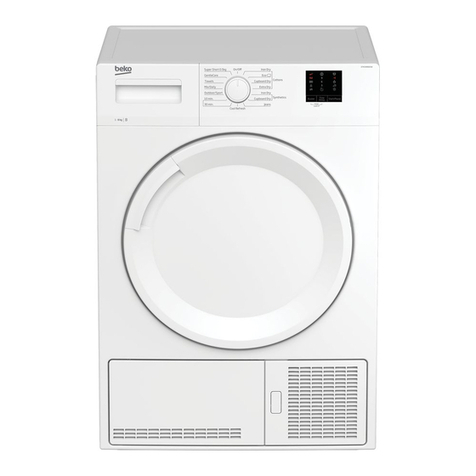
Beko DCU 9330 User manual

Dryer
User Manual
DCU 9330
2960310398_EN/031116.1024
EN
Suščky
Návod k použtí
CZ

Please read this user manual first!
Dear Customer,
Thank you for prefering a Beko product. We hope that your product which has been manufac-
tured with high quality and technology will give you the best results. We advise you to read
through this manual and the other accompanying documentation carefully before using your
product and keep it for future reference. If you transfer the product to someone else, give its
manual as well. Pay attention to all details and warnings specied in the user manual and follow
the instructions given therein.
Use this user manual for the model indicated on the cover page.
Read the instructions.
Explanation of symbols
Throughout this user manual the following symbols are used:
CImportant information or useful hints about usage.
AWarning for hazardous situations with regard to life and property.
BWarning against electric shock.
Warning against hot surfaces.
Warning against re hazard.
Packaging materials of the product are manufactured from recyclable materials in
accordance with our National Environment Regulations.
Do not dispose of the packaging wastes with the domestic waste or other wastes, discard them
to the dedicated collection points designated by the local authorities.
This product was manufactured using the latest technology in environmentally friendly conditions.

3 / EN
Dryer / User Manual
1 Important instructions for safety and
environment
Ths secton contans safety nstructons that wll help
protect from rsk of personal njury or property damage.
Falure to follow these nstructons shall vod any warranty.
1.1 General safety
•The dryer can be used by chldren at and above 8
years old and by persons whose physcal, sensory or
mental capabltes were not fully developed or who
lack experence and knowledge provded that they are
supervsed or traned on the safe usage of the product
and the rsks t brngs out. Chldren should not play wth
the product. Cleanng and mantenance works should not
be performed by chldren unless they are supervsed by
someone.
•Chldren of less than 3 years should be kept away unless
contnously supervsed.
•Adjustable feet should not be removed. The gap between
the dryer and the floor should not be reduced wth
materals such as carpet, wood and tape. Ths wll cause
problems wth the dryer.
•Always have the nstallaton and reparng procedures
carred out by the Authorzed Servce.Manufacturer
shall not be held lable for damages that may arse from
procedures carred out by unauthorzed persons.
•Never wash the dryer by sprayng or pourng water onto t!
There s the rsk of electrc shock!

4 / EN Dryer / User Manual
1.1.1 Electrcal safety
AElectrcal safety nstructons should be followed
whle electrcal connecton s made durng the
nstallaton.
AThe applance must not be suppled through an
external swtchng devce, such as a tmer,or
connected to a crcut that s regularly swtched on
and off by utlty.
•Connect the dryer to a grounded outlet protected by a fuse
at the value specfed on the type label. Have the groundng
nstallaton performed by a qualfed electrcan. Our
company shall not be lable for any damages that wll arse
when the dryer s used wthout groundng n accordance
wth the local regulatons.
•The voltage and allowed fuse protecton s stated on the
type label plate.
•The voltage specfed on the type label must be equal to
your mans voltage.
•Unplug the dryer when t s not n use.
•Unplug the dryer from the mans durng nstallaton,
mantenance, cleanng and repar works.
•Do not touch the plug wth wet hands! Never unplug by
pullng on the cable, always pull out by grabbng the plug.
•Do not use extenson cords, mult-plugs or adaptors to
connect the dryer to power supply n order to decrease the
rsk of fre and electrc shock.
•Power cable plug must be easly accessble after
nstallaton.
BDamaged mans cable should be changed notfyng
the Authorzed Servce.
BIf the dryer s faulty, t must not be operated unless
t s repared by an authorzed servce agent! There s
the rsk of electrc shock!

5 / EN
Dryer / User Manual
1.1.2 Product safety
Superheatng of the clothes nsde of the dryer can
occur f you cancel the programme or n the event
of a power falure whlst the dryer s runnng, ths
concentraton of heat can cause self-combuston and
fre so always actvate the ventlaton programme
to cool down or quckly remove all laundry from the
dryer n order to hang them up and dsspate the
heat.
Ponts to be taken nto consderaton for fre
hazard:
Below specfed laundry or tems must not be dred n
the dryer consderng fre hazard.
•Unwashed laundry tems
•Items soled wth ol, acetone, alcohol, fuel ol,
kerosene, stan removers, turpentne, paraffn or
paraffn removers must be washed n hot water
wth plenty of detergent before beng dred n the
dryer.
For ths reason especally the tems contanng the
above specfed stans must be washed very well, to
do ths use adequate detergent and choose a hgh
washng temperature.

6 / EN Dryer / User Manual
Below specfed laundry or tems must not be
dred n the dryer due to the fre hazard:
•Garments or pllows bolstered wth rubber foam
(latex foam), shower bonnets, water resstant
textles, materals wth rubber renforcement and
rubber foam pads.
•Clothng cleaned wth ndustral chemcals.
Items such as lghter, match, cons, metal parts,
needle etc. may damage the drum set or may lead to
functonal problems. Therefore check all the laundry
that you wll load nto your dryer.
Never stop your dryer before the programme
completes. If you must do ths, remove all laundry
quckly and lay them out to dsspate the heat.
Clothes that are washed nadequately may gnte on
ther own and even may gnte after dryng ends.
•You must provde enough ventlaton n order to prevent
gases extng from devces operatng wth other types of
fuels ncludng the naked flame from accumulatng n the
room due to the back fre effect.
AUnderwear that contans metal renforcements
should not be dred n the dryer. Dryer may be
damaged f metal renforcements come loose and
break off durng dryng.
CUse softeners and smlar products n accordance
wth the nstructons of ther manufacturers.
CAlways clean the lnt flter before or after each
loadng. Never operate the dryer wthout the lnt
flter nstalled.
•Never attempt to repar the dryer by yourself. Do not
perform any repar or replacement procedures on the
product even f you know or have the ablty to perform
the requred procedure unless t s clearly suggested n the
operatng nstructons or the publshed servce manual.
Otherwse, you wll be puttng your lfe and others’ lves n

7 / EN
Dryer / User Manual
danger.
•There must not be a lockable, sldng or hnged door that
may block the openng of the loadng door n the place
where your dryer s to be nstalled.
•Install your dryer at places sutable for home use.
(Bathroom, closed balcony, garage etc.)
•Make sure that pets do not enter the dryer. Check the nsde
of the dryer before operatng t.
•Do not lean on the loadng door of your dryer when t s
open, otherwse t may fall over.
•The lnt must not be allowed to accumulate around the
tumble dryer
1.2 Mountng over a washng machne
•A fxng devce should be used between the two machnes
when nstallng the dryer above a washng machne. The
fttng devce must be nstalled by the authorzed servce
agent.
•Total weght of the washng machne and the dryer -wth
full load- when they are placed on top of each other
reaches to approx. 180 klograms. Place the products on a
sold floor that has suffcent load carryng capacty!
AWashng machne cannot be placed on the dryer.
Pay attenton to the above warnngs durng the
nstallaton on your washng machne.
Installation Table for Washing Machine and Dryer
Dryer
Depth
Washing Machine Depth
62 cm 60 cm 54 cm 50 cm 49 cm 45 cm 40 cm
54 cm Can be installed Can be
installed Cannot be
installed
60 cm Can be installed Cannot be
installed

8 / EN Dryer / User Manual
1.3 Intended use
•Dryer has been desgned for domestc use. It s not sutable
for commercal use and t must not be used out of ts
ntended use.
•Use the dryer only for dryng laundry that are marked
accordngly.
•The manufacturer waves any responsblty arsen from
ncorrect usage or transportaton.
•The servce lfe of the dryer that you purchased s 10 years.
Durng ths perod, orgnal spare parts wll be avalable to
operate the dryer properly.
1.4 Chld safety
•Packagng materals are dangerous for the chldren. Keep
packagng materals away from chldren.
•Electrcal products are dangerous for the chldren. Keep
chldren away from the product when t s operatng. Do not
let them tamper wth the dryer. Use the chld-proof lock n
order to prevent the chldren to tamper wth the dryer.
CChld-proof lock s on the control panel.
(See Chld lock)
•Keep loadng door closed even when the dryer s not n use.

9 / EN
Dryer / User Manual
1.5 Complance wth the WEEE regulaton
and dsposng of the waste product
Ths product comples wth EU WEEE Drectve
(2012/19/EU). Ths product bears a classfcaton
symbol for waste electrcal and electronc equpment
(WEEE).
Ths product has been manufactured wth hgh
qualty parts and materals whch can be reused and are
sutable for recyclng. Do not dspose of the waste product
wth normal domestc and other wastes at the end of ts
servce lfe. Take t to the collecton center for the recyclng
of electrcal and electronc equpment. Please consult your
local authortes to learn about these collecton centers.
1.6 Complance wth RoHS Drectve:
The product you have purchased comples wth EU RoHS
Drectve (2011/65/EU). It does not contan harmful and
prohbted materals specfed n the Drectve.
1.7 Package nformaton
Packagng materals of the product are manufactured
from recyclable materals n accordance wth our Natonal
Envronment Regulatons. Do not dspose of the packagng
materals together wth the domestc or other wastes. Take
them to the packagng materal collecton ponts desgnated
by the local authortes.

10 / EN Dryer / User Manual
EN
Heght (Mn. / Max.) 84,6 cm / 86,6 cm*
Wdth 59.5 cm
Depth 59.8 cm
Capacty (max.) 9 kg**
Weght (net) 39 kg
Voltage
See type label***Rated power nput
Model code
1.8 Techncal Specfcatons
* Mn. heght: Heght wth adjustable feet are closed.
Max. heght: Heght wth adjustable feet are opened
maxmum.
** Dry laundry weght before washng.
*** Type label s located behnd the loadng door.
CTechncal specfcatons of the dryer are subject to
specfcaton wthout notce to mprove the qualty of
the product.
CFgures n ths manual are schematc and may not
match the product exactly.
C
Values stated on markers on the dryer or n the other
publshed documentaton accompanyng wth the
dryer are obtaned n laboratory n accordance wth
the relevant standards. Dependng on operatonal and
envronmental condtons of the dryer, these values
may vary.

11 / EN
Dryer / User Manual
2Your Dryer
2.1 Package Contents
12 3 5
4
1. Water drain hose *
2. Filter drawer spare sponge*
3. User Manual
4. Drying basket*
5. Drying basket user manual*
*It can be supplied with your machine depending on its model.

12 / EN Dryer / User Manual
3Installation
Refer to the nearest Authorised Service Agent
for installation of your product.
CPreparation of location and electri-
cal installation for the product is
under customer’s responsibility.
BInstallation and electrical connec-
tions must be carried out by a quali-
ed personnel.
APrior to installation, visually check
if the product has any defects on
it. If so, do not have it installed.
Damaged products will cause risks
for your safety.
3.1 Appropriate installation
location
• Install the product in an environment
which has no risk of freezing and is in a
stable and level position.
• Operate your product in a well ventilated,
dust-free environment.
• Do not block the air ducts in front of and
under the product with materials such as
long pile rugs and wooden bands.
• Do not place your product on a long pile rug
or on similar surfaces.
• Do not install the product behind a door
with a lock, sliding door or a hinged door
which can strike the product.
• Once the product is installed, it should stay
at the same place where its connections
have been made. When installing the
product, make sure that the rear wall of
it does not touch anywhere (tap, socket,
etc.) and also pay attention to install
the product at a place where it will stay
permanently.
BDo not place the product on top of
the power cable.
• Keep at least 1.5 cm distance to walls of
other furniture.
3.2 Removing the
transportation safety assembly
ARemove the transportation safety
assembly before using the product
for the first time.
1. Open the loading door.
2. There is a nylon bag inside the drum that
contains a piece of styrofoam. Hold it from
its section marked with XX.
3. Pull the nylon towards yourself and remove
the transportation safety assembly.
AMake sure that you have removed
the transportation safety assembly
(nylon+styrofoam pieces) before
using the product for the first time.
Do not leave any items inside the
drum.
3.3 Under counter installation
• A special part (Part no. 297 360 0100)
replacing the top trim must be provided
and installed by the Authorised Service
Agent in order to use the machine under a
counter or in a cupboard. It should never be
operated without the top trim.
• Leave at least 3 cm of space between the
side and rear walls of the product and
the walls of the counter/cupboard when
installing your product under a counter or
in a cupboard.
3.3 Connecting to the drain
In products equipped with condenser unit,
water accumulates in the water tank during
the drying cycle. You should drain accumu-
lated water after each drying cycle.
You can directly drain accumulated water
through the water drain hose supplied with
the product instead of periodically draining
the water collected in the water tank.

13 / EN
Dryer / User Manual
CNever unscrew the adjustable feet
from their housings.
3.6 Electrical connection
For specic instructions for electrical connec-
tion required during installation (see 1.1.1
Electrical Safety)
3.7 First use
• To have the product ready for operation
before calling the authorised service agent,
make sure that its location and power
supply installations are appropriate. If they
are not, call a qualified electrician to have
any necessary arrangements carried out.
• Make sure that the power connections of
the product are in accordance with the
instructions given in relevant chapters of
this manual.
3.8 Disposing of packaging
material
Packaging materials are dangerous to children.
Keep packaging materials in a safe place out
of reach of children. Packaging materials of
your product are manufactured from recy-
clable materials.
Sort and dispose of them in accordance with
recycled waste instructions. Do not dispose of
them with normal domestic waste.
3.9 Transportation of the
machine
1. Unplug the machine from the mains.
2. Remove the water drain (if any) and
chimney connections.
3. Drain water remained in the machine
completely before transportation.
3.10 Disposing of the old
machine
Dispose of your old machine in an environ-
mentally friendly manner. Refer to your local
dealer or solid waste collection centre in your
area to learn how to dispose of your machine.
Before disposing of your old machine, cut o
the power cable plug and make the loading
door lock unusable to avoid dangerous condi-
tions to children.
Connecting the water drain hose
1-2Pull hose at the behnd of the dryer by
hand n order to dsconnect t from where
t s connected. Do not use any tools to
remove the hose.
3Connect one end of the dran hose
suppled wth the dryer to the connecton
pont from where you removed the hose
of the product n prevous step.
4Connect the other end of the dran hose
drectly to the wastewater dran or to the
washbasn.
1
3 4
2
AHose connection should be made in
a safe manner. Your drain house will
be ooded if the hose comes out of
its housing during water discharge.
CWater drain hose should be at-
tached to a height of maximum 100
cm.
CMake sure that the water drain
hose is not stepped on and it is not
folded between the drain and the
machine.
3.5 Adjusting the feet
In order to ensure that your machine operates
more silently and vibration-free, it must stand
level and balanced on its feet. Balance the
machine by adjusting the feet.
Rotate the feet to adjust until the machine
stands level and rmly.

14 / EN Dryer / User Manual
4.1 Laundry suitable for drying in the dryer
Always obey the instructions given on the garment tags. Dry only the laundry having a label
stating that they are suitable for drying in a dryer and make sure that you select the appropriate
programme.
Drying
Settings
At any temperature
At high temperature
At medium
temperature
At low temperature
Without heating
Hang to dry
Lay to dry
Hang wet to dry
Lay in shadow
to dry
Dry-cleanable
Iron -
IRON
Dry or Steam Iron at high
temperature
Iron at medium
temperature Iron at low
temperature
Do not iron
Iron without
steam
Maximum temperature 200 0C150 0C110 0C
LAUNDRY DRYING SYMBOLS
Drying
Symbols Suitable for
dryer No Iron Sensitive /
Delicate dry
Do not dry
with dryer
Do not dry Do not dry-
clean
4Preparation
4.2 Laundry not suitable for
drying in the dryer
CDelicate embroidered fabrics,
woolen, silk garments, delicate and
valuable fabrics, airtight items and
tulle curtains are not suitable for
machine drying.
4.3 Preparing laundry for
drying
• Laundry may be tangled with each other
after washing. Separate the laundry
items before placing them into the dryer.
• Dry garments having metal accessories
such as zippers, inside out.
• Fasten the zippers, hooks and buckles
and button sheets.
4.4 Things to be done for
energy saving
• Following information will help you use
the dryer in an ecological and energy-
efficient manner.
• Spin your laundry at the highest speed
possible when washing them. Thus, the
drying time is shortened and energy
consumption is reduced.
• Sort out the laundry depending on their
type and thickness. Dry the same type
of laundry together. For example thin
kitchen towels and table clothes dries
earlier than thick bathroom towels.
• Follow the instructions in the user
manual for programme selection.
• Do not open the loading door of the
machine during drying unless necessary.
If you must certainly open the loading
door, do not to keep it open for a long
time.
• Do not add wet laundry while the dryer is
in operation.

15 / EN
Dryer / User Manual
• Clean the lint filter before or after each
drying cycle. (See 6.1 Filter Cartridge /
Door Inner Surface)
• Clean the condenser regularly at
least once every month or after every
30 drying cycles. (See 6.4 For the
condenser;)
• Ventilate the room, where the dryer is
located, well during drying.
4.5 Correct load capacity
Follow the instructions in the “Programme
selection and consumption table”. Do not load
more than the capacity values stated in the
table.
CIt is not recommended to load
the dryer with laundry exceeding
the level indicated in the figure.
Drying performance will degrade
when the machine is overloaded.
Furthermore, dryer and the laundry
can get damaged.
Following weights are given as examples:
Laundry Approximate
weights (g)*
Cotton quit covers
(double) 1500
Cotton quit covers
(single) 1000
Bed sheets (double) 500
Bed sheets (single) 350
Large tablecloths 700
Small tablecloths 250
Tea napkins 100
Bath towels 700
Hand towels 350
Blouses 150
Cotton shirts 300
Shirts 250
Cotton dresses 500
Dresses 350
Jeans 700
Handkerchiefs (10
pieces) 100
T-Shirts 125
*Dry laundry weight before washing.

16 / EN Dryer / User Manual
5Selecting a Programme and Operating Your
Machine
1. Washing machine spin speed*/
Timer programme selection
Spin speed used to spin the laundry in the
washing macthine / Indicates the time for
timer programs.
2. Display
Indicates the status of the machine.
3. Start/Pause/Cancel button
Used to start, pause or cancel the pro-
gramme.
4. Programme selection knob
Used to select a programme.
5. On/O button
Used to turn on and o the machine.
6. Anti-creasing
Prevents the laundry from creasing after
the machine completes its programme.
7. Dryness level
Used to adjust the required dryness level.
8. Cancel audio warning
Used to cancel the audio warning given at
the end of the programme.
9. Time delaying buttons
Used to set the time delay.
1 2 3 4 5
6789
5.1 Control panel
Spin speed is used to show the remaining time more accurately.
It does not affect the performance of your machine.
Spin speed / Timer programmes
Operation icon
Pause icon
Water tank full warning icon
Filter cleaning warning icon
Condenser cleaning warning icon
Remaining time indicator
Child-proof lock warning icon
Time delaying mode
Door open warning icon
Anti-creasing mode
Audio warning level / Cancel audio warning
Drying degree
Anti-creasing is activated

17 / EN
Dryer / User Manual
5.2 Preparing the machine
1. Plug in your machine.
2. Place the laundry in the machine.
3. Press the “On/Off” button.
CPressing the “On/Off” button
does not necessarily mean that
the programme has started. Press
“Start/Pause/Cancel” button of the
machine to start the programme.
5.3 Programme selection
Decide the appropriate programme from
the table below which includes drying tem-
peratures in degrees. Select the desired pro-
gramme with the programme selection knob.
Extra dry
Drying at high temperature
only for cotton laundry. Thick
and multi layered laundry
(E.g.: towels, linens, jeans)
are dried in a way that they
do not require ironing before
placing in the wardrobe.
Cupboard
dry
Normal laundry (E.g.: table-
cloths, underwear) are dried
in a way that they do not
require ironing before placing
in the wardrobe.
Iron dry Normal laundry (E.g., Shirts,
dresses) are dried ready to
be ironed.
CFor further programme details, see,
“Programme Selection Table”
5.4 Main programmes
Depending on the type of laundry, the follow-
ing main programmes are available:
•Cottons
You can dry your durable laundry with this
programme. Dries at high temperature. It is
recommended to use for your cotton items
(such as bed sheets, quilt cover, undercloth-
ing, etc.).
•Synthetics
You can dry your less durable laundry with this
programme. It dries at a lower temperature
compared to the cottons programme. It is rec-
ommended for your synthetic laundry (such
as shirts, blouses, synthetic/cotton blended
laundry, etc.).
CDo not dry curtains and lace in your
machine.
5.5 Special programmes
For special cases, there are also extra pro-
grammes available:
CAdditional programmes may differ
according to the model of your ma-
chine.
•Xpress 35
You can use this programme to dry your cot-
ton laundry that you have spun at high speeds
in your washing machine. This program dries
2 kg cotton laundry (2 Shirts / 5 T-shirts) in 35
minutes.
Daily
End/anti-
creasing
Timer
programs
Cottons Synthetics Freshen Up Anti
Creasing
Iron dry Extra
dry
Cupboard
dry
Cupboard
dry plus
Dryness
Level
Drying
Buzzer/
cancel
On/Off Start
pause
cancel
Filter
cleaning
Child-proof
lock
Tank
full
Xpress
35’
Jeans Shirts
BabyProtect Sport Spin Mix Delicates
Wool
Refresh Drying
Rack
Timer
Delay

18 / EN Dryer / User Manual
CTo obtain better results from your
dryer, your laundry must be washed
at suitable programmes and spun
at the recommended spin speeds in
the washing machine.
•Shirts
This programme dries the shirts more sensi-
tively and creases them less and thus, helps to
iron them more easily.
CThere may be a little humidity
on your shirts at the end of the
programme. We recommend you not
to leave the shirts in the dryer.
•Jeans
You can use this programme to dry your jeans
that you have spun at high speeds in your
washing machine.
CReview the relevant section in the
programme table.
•Mix
Used to dry synthetic and cotton laundry that
do not release colour. Used for laundry that is
suitable for drying.
•Sport
Used to dry the laundry that are made of syn-
thetic, cotton or mixed fabrics and have a tag
indicating that they are suitable for drying.
•Wool Refresh
You can use this function to ventilate and
soften your woolen laundry that can be
washed in the washing machine. Do not use
this function to dry your laundry completely.
Take out your laundry and ventilate them im-
mediately after the program is over.
•Daily
This programme is used to dry cottons and
synthetics daily, and lasts for 1 hour.
•BabyProtect
This programme is used for baby clothes that
bear machine dryable approval on its label.
•Delicates
You candry your highly delicate laundry that
are suitable for drying or laundry which is
advised to be hand-washed at a lower tem-
perature.
CIt is recommended to use a cloth bag to
prevent certain delicate laundry from
getting creased or damaged. Take your
laundry immediately out of the dryer and
hang them after the programme ends in
order to prevent them being creased.
•Freshen Up
Only ventilation is performed for 10 Tminutes
without blowing hot air. You can air your
clothes that have been kept at closed envi-
ronments for a long time and deodourise un-
pleasant odours thanks to this programme.
•Timer programs
You can select one of the 10 min., 20 min., 30
min., 40 min., 50 min., 60 min., 80 min., 100
min., 120 min., 140 min. and 160 min. timer
programmes to achieve the desired nal dry-
ing level at low temperatures. Programme
dries at the selected time regardless of the
drying temperature.
5.6 Time display
The display shows the time remaining for the
programme to complete while a programme is
running. Time is displayed in hours and min-
utes as “02:30”. The exemplary display image
shows the dryer when it is running and child-
proof lock is active.
CProgramme duration may differ from the
values in the consumption table subject
to the changes in the water hardness
and temperature, ambient temperature,
type and amount of laundry, auxiliary
functions selected, and changes in the
supply voltage.

19 / EN
Dryer / User Manual
5.7 Programme selection and consumption table
Programme table
* : Energy Label standard programme (EN 61121:2012)
All values given in the table have been xed according to EN 61121:2012 Standard. These
values may deviate from the table according to the laundry type, laundry spin speed, envi-
ronmental conditions and voltage uctuations.
CWhen selecting the Cottons programme, send the condensed water out through the
drain hose.
Programs Capacity
(kg) Spin speed in wash-
ing machine (rpm)
Approximate amount
of remaining humid-
ity
Drying time
(minutes)
Cottons / Coloreds
AExtra dry 9 1000 % 60 151
AReady to Wear 9 / 4,5 1000 % 60 143 / 80
AReady to Iron 9 1000 % 60 110
Xpress 35' 2 1200 %50 35
Shirts 1,5 1200 %50 40
Jeans 4 1200 %50 80
Mix 4 1000 %60 83
Sport 4 1000 %60 92
Wool Refresh 1,5 600 %50 6
Daily 4 1200 %50 59
BabyProtect 3 1000 %60 65
Synthetics
BReady to Wear 4,5 800 % 40 58
Delicates
BReady to Wear 2 600 % 40 40
Energy consumption values
Programs Capacity
(kg) Spin speed in wash-
ing machine (rpm)
Approximate amount
of remaining humid-
ity
Energy con-
sumption value
kWh
Cottons linen Ready to
wear* 9 / 4,5 1000 % 60 5,11 / 2,85
Cottons Ready to iron 9 1000 % 60 4,1
Synthetics Ready to wear 4.5 800 % 40 1,9
„Cotton cupboard dry programme“ used at full and partial load is the standard drying
programme to which the information in the label and the fiche relates, that this programme is
suitable for drying normal wet cotton laundry and that it is the most efficient programme in
terms of energy consumption for cotton.

20 / EN Dryer / User Manual
5.8 Auxiliary function
Audio Warning
Cancel
audio warning
Audio warning
level 1
Audio warning
level 2
Audio warning
level 3
Your dryer will give an audio warning when
the programme comes to an end. If you do not
want to hear this buzzing or want to change
the volume level, you need to press the
“Volume level” button. No audio warning will
be given when “x” appears on the screen.
CYou can select this function either
before or after the programme
starts.
5.9 Drying degree
Used to adjust the required dryness level.
More drying is performed compared to the de-
fault settings when “+” sign appears and less
drying is performed when “-” sign appears.
Programme duration can change depending
on the selection.
AThis function must be selected
before the programme starts.
5.10 Anti-creasing
A 2-hour anti creasing programme to prevent
laundry from creasing will be activated if you
do not take the laundry out after the pro-
gramme is over. This programme rotates the
laundry in 600-second intervals to prevent
creasing. Press “Anti-creasing” button to ac-
tivate.
Anti-creasing is activated but the programme
is running in the rst exemplary gure. Drying
is over and the rst step of anti-creasing has
started in the second gure.
5.11 Changing the contrast
Contrast can be adjusted in order to make the
symbols on the display appear clearer. It may
particularly be necessary to change the con-
trast setting of the display when the dryer is
installed over a washing machine.press and
Press and hold the Spin Speed/Time button
for 3 seconds.
When the contrast is changed at the end of
3 seconds, all symbols on the display will be-
come visible for 3 seconds in order to indicate
that the process is complete.
Perform the same procedure to revert back to
the previous contrast setting.
5.12 Warning indicators
CWarning indicators may differ
according to the model of your
machine.
Filter cleaning
A warning symbol will appear to remind lter
cleaning after the programme nishes.
CIf the filter cleaning symbol flashes
continuously, please refer to
“Suggested solutions for problems”.
Water tank
A warning symbol will turn on at the end of
the programme or when the tank is full with
water. The machine stops operating if the
warning symbol turns on when a programme
is running. To restart the machine, please
drain the water in the water tank. Press
“Start/Pause/Cancel” button to start the pro-
gramme after you have emptied the water
tank. The warning symbol turns o and the
programme resumes operating.
Other manuals for DCU 9330
2
Table of contents
Languages:
Other Beko Dryer manuals

Beko
Beko EDE8635RX0 User manual

Beko
Beko DTBC 10001W User manual

Beko
Beko DPS 7343 X User manual

Beko
Beko B5T43243 User manual

Beko
Beko DC 7430 User manual

Beko
Beko B3T47238 User manual

Beko
Beko B3T43230 User manual

Beko
Beko DRYPOINT RA 1080-8800 User guide

Beko
Beko DC 7041 User manual

Beko
Beko BDP710W User manual

Beko
Beko DC 72301 User manual

Beko
Beko DS7432PXA User manual

Beko
Beko DV 1562 X User manual

Beko
Beko B3T48241DW User manual

Beko
Beko DRYPOINT M DEC 1-30 User manual

Beko
Beko DPH 8744 W User manual

Beko
Beko B3T4823DW User manual

Beko
Beko DE 8434 RX0M User manual

Beko
Beko DU10134GX0WS User manual

Beko
Beko DHY9P46W User manual