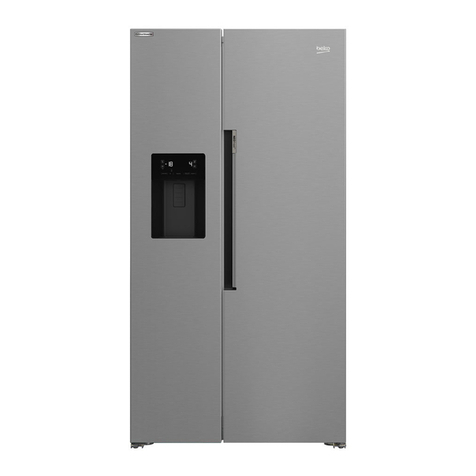
Beko GNE 45730 User manual

GNE 45730 S
Refrigerator

EN
1
Contents
1 The Refrigerator 2
The Refrigerator................................................. 3
Technical specifications of your refrigerator........4
2 Safety precautions 5
Safety precautions............................................. 5
Electrical Safety ................................................. 5
3 Using your refrigerator 15
Using the accessories...................................... 18
Placing the food .............................................. 24
Things to be done for saving energy ................ 25
Changing the illumination lamp ........................ 23
4 Deep-Freeze information 26
5 Cleaning your refrigerator 27
6 Service 27

EN
2
The Refrigerator
1 Freezercompartment 14 Eggholder
2 Fridgecompartment 15 FridgeCompartmentdoorracks
3 FreshFreezecompartment 16 FridgeCompartmentinteriorlight
4 Icecontainer 17 Snacktray
5 FreezerCompartmentinteriorlight 18 Crispercompartment
6 FreezerCompartmentglassshelves 19 CrisperorChillerCompartment
7 Iceductlid 20 CrisperorChillerCompartmentadjustmentbolt
8 Freezercompartmentdrawers 21Bottleholder
9 Ventilationlid 22 Adjustablefrontlegs
10 Humidityadjustmentslider 23 Winecellar
11 Crispercover 24 Homebar
12 Dairycompartment 25 Bluelight
13 FridgeCompartmentglassshelves
• Figures that take place in this instruction manual are schematic and may not correspond
exactly with your product. If the subject parts are not included in the product you have
purchased, then it is valid for other models.
2
1
14
1110
25
13
12
15
24
18
22
19
9
13
4
6
8
22
23
3
7
5
12
23
21
21
8
6
6
6
17
16
1

EN
3
MAIN BOARD COVER: NEVER REMOVE THIS COVER
Powermainscable
Icematicwatersupplypipe
Waterpipecover
Coldwatermainsinletvalve
REAR COVER: NEVER REMOVE THIS COVER
The Refrigerator

EN
4
Technical specifications of your refrigerator
ProductCategory Refrigerator/deep-freezefordomesticuse
EnergyClass A
AnnualEnergyConsumption(kWh/year) 529 (Actualconsumptionvariesdependingonwhereandhow
theapplianceisused)
FridgeCompartmentVolume(Net-lt) 383
FrozenFoodCompartmentVolume(Net-lt) 146
StarClass
TwoStarCompartment(lt) 6
CoolingSystem NO-FROST
TemperatureIncreasingTime(hour) 8 (Powerfailuresafety;itisrecommendednottoconsume
thefoodinfreezercompartmentafterthisperiod.)
FreezingCapacity(kg/24hours) 13
ClimateClass SN
NoiseLevel(dB(A)) 46
TotalNetVolume(lt) 535
(H)Height(cm) 177.5
(W)Width(cm) 92.5
(D)Depth(cm) 74
Weight(kg) 125
ElectricSupply(V/Hz) 230/50
TotalPower(W) 180
• Technical specifications can be changed to
increase the product quality without being
subject to prior notice.
• Values stated on the markings on the
product or in the printed materials supplied
with the product are the values obtained
in laboratory in accordance with relevant
standards. Such values may vary depending
on the usage of the product and the ambient
conditions.
• You can find the information about the cabin
size of the refrigerator in section “Installing
your refrigerator”.

EN
5
2Safety precautions
• When you want to dispose/scrap the product,
we recommend you to consult the authorized
service in order to learn the required information
and authorized bodies.
• Do not damage the cooling circuit.
• Do not use any electrical tools other than those
recommended by the manufacturer inside the
food storage compartments of the product.
• Consult your authorized service for all your
questions and problems related to the refrigerator.
Do not intervene or let someone intervene to
the refrigerator without notifying the authorized
services.
• Do not eat cone ice cream and ice cubes
immediately after you take them out of the freezer
compartment! (This may cause frostbite in your
mouth.)
• Do not put bottled and canned liquid beverages
in the freezer compartment. Otherwise, these may
burst.
• Do not touch frozen food by hand; they may
stick to your hand.
• Vapor and vaporized cleaning materials
should never be used in cleaning and defrosting
processes of your refrigerator. In such cases, the
vapor might get in contact with the electrical parts
and cause short circuit or electric shock.
• Never use the parts on your refrigerator such as
kick plate or door as a means of support or step.
• Do not use electrical devices inside the
refrigerator.
• Do not operate a damaged refrigerator. Consult
your service if you have any doubts.
• Do not damage the parts, where the refrigerant
is circulating, with drilling or cutting tools. The
refrigerant that might blow out when the gas
channels of the evaporator, pipe extensions or
surface coatings are punctured may cause skin
irritations and eye injuries.
• Do not cover or block the ventilation holes on
your refrigerator with any material.
• Only authorized service personnel may make any
repair on electrical appliances. Repairs performed
by incompetent persons may create a risk for the
user.
• In case of any failure or during a maintenance or
repair work, disconnect your refrigerator’s mains
supply by either turning off the relevant fuse or
unplugging your appliance.
• Be careful not to pull from the cable when pulling
the plug out.
• Electrical safety of your refrigerator shall be
guaranteed only if the earth system in your house
complies with standards.
• Do not allow children play with your refrigerator.
They might harm themselves and the refrigerator.
(E.g. do not allow them hang from the door.)
• Place the beverage with higher proofs tightly
closed and vertically.
• Flammable items or products that contain
flammable gases (e.g. spray) as well as the
explosive materials should never be kept in the
appliance.
• Do not use mechanical devices or other means
to accelerate the defrosting process, others than
those recommended by the manufacturer.
• Moving parts such as blades in a housing at
the ice outlet of the dispenser and in cube ice
compartment, must not be touched to avoid
injury.
Electrical Safety
This product is designed for indoor use. It is not
appropriate to use it outdoor even if the place is
covered with a roof.
Exposing the product to rain, snow, sun and wind
is dangerous with respect to electrical safety.
If the connection cable is damaged, it must
be changed by the manufacturer or customer
services in order to avoid potential risks to you.
A Your product is equipped with
a natural cooling system (R600a) which
does not contain CFC and HFC gases.
This gas is ammable. Therefore, pay
attention to not damaging the cooling
system and piping during usage and
transportation. In the event of damage,
do not dispose the product in re; keep
your product away from potential re
sources that can cause the product
catch a re and ventilate the room in
which the unit is placed.
EN
6
3Prior to operating your refrigerator
• Please remember that the manufacturer
shall not be held liable if the information
given in the instruction manual is not
observed. This product is designed for
domestic use.
Prior to operating your refrigerator, please
read the instruction manual carefully that
includes important information such as
installation, usage and maintenance of your
product.
Things to be done
•Yourrefrigeratorshouldbeinstalledatleast
30cmawayfromheatsourcessuchashobs,
ovens,centralheaterandstovesandatleast5
cminawayfromelectricalovensandshouldnot
belocatedunderdirectsunlight.
•Theambienttemperatureoftheroomwhere
youinstallyourrefrigeratorshouldatleastbe
10°C.Operatingyourrefrigeratorundercooler
conditionsthanthisisnotrecommendedwith
regardtoitsefficiency.
•Pleasecaretokeeptheinsideofyour
refrigeratorclean.
•Iftworefrigeratorsaretobeinstalledside
byside,thereshouldbeatleast2cmdistance
betweenthem.
•Yourrefrigeratormustrunsmoothlywithout
anyvibration.Toensurethis,maintainthe
balanceofyourrefrigeratoronthefloorby
turningtheadjustablefrontlegsclockwiseor
counterclockwise.Thisshouldbedonebefore
thefoodisplacedintherefrigerator.
•Whenyouoperateyourrefrigeratorforthefirst
time,pleaseobservethefollowinginstructions
duringtheinitialsixhours.
-Temperatureadjustmentbuttonshouldnot
beturnedoff.
-Thedoorshouldnotbeopenedfrequently.
-Itmustbeoperatedemptywithoutanyfood
init.
-Donotunplugyourrefrigerator;ifapower
failureoccursoutofyourcontrol,pleaseseethe
warningsinsection“Thingstobedonebefore
callingtheauthorizedservice”.
•Originalpackagingandfoammaterialsshould
bekeptforfuturetransportationsormoving.
Points to be Considered when
Transporting the Product:
1.Yourrefrigeratormustbeemptiedandcleaned
priortoanytransportation.
2.Shelves,accessories,crisperandetc.in
yourrefrigeratormustbefastenedsecurely
byadhesivetapeagainstanyjoltbefore
repackaging.
3.Packagingmustbetiedwiththicktapesand
strongropesandtherulesoftransportation
printedonthepackagemustbefollowed.
Please remember…
Everyrecycledmaterialisanindispensable
sourceforthenatureandforournational
resources.
Ifyouwishtocontributetorecyclingthe
packagingmaterials,youcangetfurther
informationfromtheenvironmentalbodiesor
localauthorities.
Why No-Frost?
•No-Frostrefrigeratorsarequitedifferentfrom
otherrefrigeratorswithrespecttotheiroperating
principles.Innormalfridges,thehumiditythat
rushesintotherefrigeratorandthehumidity
broughtbythefoodcausesiceformationinthe
freezercompartment.Thisiceismeltedand
cleanedwithcertainintervals.
•However,inNo-frostrefrigeratorsnoiceor
snowformationoccursinsidetheusableareasof
therefrigerator.
•No-Frostrefrigeratorsalsoshowverydifferent
characteristicsfromotherrefrigeratorswith
respecttotheircoolingsystems.ANo-Frost
refrigeratorprovidesequalcoolingdownof
allthefoodinitthankstothecoolairbeing
circulatedinitcontinuously.
•Therefore,yourNo-Frostrefrigeratorprovides
youagreatcomfortinusage.

EN
7
Placing and Assembly of Your Refrigerator
Caution: Never plug the refrigerator in to the wall
outlet during installation. Otherwise, risk of death
or serious injury may arise.
If the entrance door of the room where the
refrigerator will be installed is not wide enough
for the refrigerator to pass through, than call the
authorized service to have them remove the doors
of your refrigerator and pass it sideways through
the door.
1. Install your refrigerator to a place that allows
ease of use.
2. Keep your refrigerator away from heat sources,
humid places and direct sunlight.
3. There must be appropriate air ventilation around
your refrigerator in order to achieve an efficient
operation. If the refrigerator is to be placed in a
recess in the wall, there must be at least 5 cm
distance with the ceiling and at least 5 cm with
the wall.
If the floor is covered with a carpet, your product
must be elevated 2.5 cm from the floor.
4. Place your refrigerator on an even floor surface
to prevent jolts.
5. Do not keep your refrigerator in ambient
temperatures under 10°C.
Usage area measures
Following figure shows the required place to allow
you use your refrigerator most efficiently.
154 cm
117 cm
74 cm
92.5 cm

EN
8
Floor balance adjustment
If your refrigerator is not level, you can level it by
turning the front feet as illustrated in the figure
below. (See. Figure A) The corner where the leg
exists is lowered when you turn in the direction
of black arrow and raised when you turn in the
opposite direction. Taking help from someone to
slightly lift the refrigerator will facilitate this process.
Door height adjustment
In case there is a problem with the alignment of
the doors, with respect to each other, they may be
aligned by ascension vertically in the order given
below. Ensure that door shelves are empty when
adjusting the door height.
1. Remove the lower ventilation door by
unscrewing its screws, as shown in the figure
below. (See. Figure B)
4
12 3
(Figure A)
(Figure B)

EN
9
2. Loosen the three screws of the hinges of the
lower door, which you wish to escalate, with the
help of a screwdriver as shown in the figure below.
(Do not remove completely) (See. Figure C)
• If the freezer compartment door is lower than the
fridge compartment door, bring them to the same
level by turning the turning the elevation screw
on the freezer compartment side in the direction
of arrow using a M6 Allen wrench as illustrated in
Figure D.
• If the freezer compartment door is higher than
the fridge compartment door, bring them to the
same level by turning the elevation screw on the
freezer compartment side in the direction of arrow
using a M6 Allen wrench as illustrated in Figure D.
After bringing the doors to the same level
by elevating the front part with the aid of the
elevation screws, doors of the refrigerator shall
close properly. If the doors do not close properly,
this might adversely affect the efficiency of the
refrigerator.
(Figure C)
Allen Wrench (M6)
(Figure D)

EN
10
Installation Requirements
In order to operate the automatic ice maker/
dispenser and chilled water dispenser, your
appliance needs to be plumbed into the cold
mains water supply in your house via a standard
1/2 “ valve fitting. In case this valve is not present
or in case you are not sure, consult a qualified
plumber.
* First of all, make sure that the parts on the side
are shipped with the device.
1. 5-meter long water pipe (1/4 inch in diameter)
2. Cold mains water valve with mesh filter (Tap
Adapter)
3. 3 pieces of pipe clips (In case required to
secure the water pipe)
4. Water Filter to be fitted to the bracket inside
the fridge compartment.
5. Nut for connection of the water pipe to the
rear of the appliance
1
5
2
3
4
Connection to the Cold Mains
Please follow the instructions below.
MAKE SURE THAT STANDARD 1/2” VALVE
FITTING FED BY COLD MAINS WATER
SUPPLY IS AVAILABLE AND IS TURNED OFF
FULLY.
Connection of the Water Pipe to the
Refrigerator
1. After assembling the nut on the water pipe,
insert the water pipe to the refrigerator inlet valve
by pressing downwards firmly.
2. Fix nut as seen in the opposite figure, by
squeezing by hand on the refrigerator inlet valve.
Note: You should not need to tighten the nut with
a tool to achieve water tight assembly. In case of
a leak use a spanner or a pair of pliers to tighten
the nut.
1
2
Water Tube
Water Tube
Nut
Valve

EN
11
Connection of the Water Pipe to the Cold Water Mains Line
1. Separate the nut from the tap adaptor. (Figure
A)
2. As shown in the figure, assemble the tap
adaptor to 1/2” valve fitting (Figure B)
3. As shown in the figure, after inserting the water
pipe to the nut, install it to the tap adaptor and
insert to the tap as shown in the figure. (Figure C)
4. Tighten the nut manually. In case of a leak use a
spanner or a pair of pliers to tighten the nut.
Caution: Secure the water pipe to suitable
points by means of the pipe clips supplied to
avoid any damage or displacement or accidental
disconnection.
Caution: After turning on the water valve, make
sure that there is no leakage at both connection
points of the water pipe. In case of a leak, turn off
the valve immediately and tighten all joints again
using a spanner or a pair of pliers.
Mesh Filter
Tap Adaptor Nut
Figure A
Main Cold Water Line
Feed Valve
Tap Adaptor
Figure B
Tap Adaptor
Nut
Water Tube
Figure C

EN
12
123
Water Filter
To fit the water filter follow the instructions below
referring to figures supplied:
1. Take out the upper salad crisper in the fridge as
shown in the figure below.
2. Unscrew the water filter by-pass cover.
Caution: Make sure that the Ice off mode is active
before taking out the by-pass cover.
Note: It is normal that a few drops of water drip
after the cover has been taken out.
3. After removing the red cover on the head of the
water filter, install it as shown in the figure below.
4. Press Ice Off button on the display again to exit
from this mode.
Water filter should be replaced every 6 months.
By-pass Cover
Water Pipe
Bypass Cover
Water Pipe
Filter
Water filter replacement warning will appear on
the screen after about 6 months. The warning light
will remain on for about 15 days before it starts
to flash. Once the filter has been replaced, this
warning light can be cancelled by pressing the
Eco Extra button on the display for 5 seconds.
The water filter must be removed as shown in the
figure when it is going to be replaced or when it
will no longer be used. Make sure that the Ice off
mode is active before removing the water filter.
If you do not want to use the water filter, warning
light should be cancelled. To do this, “Freezer
Set” and “Water/Ice Type Selection” buttons
must be pressed simultaneously for 2 seconds.
Filter warning will flash for 5 times when pressed
in this way and the warning will be cancelled.
Filter warning will flash for 10 times when the
same buttons are pressed for 2 seconds and the
warning will be reactivated.
REMOVE LOCK

EN
13
Caution: Water filter is for cleaning some foreign
particles in the water. It does not purify water from
microorganisms.
Caution: Ice off button must always be pressed
during replacement of the water filter or installing
the bypass cover.
REMOVE
Water Reservoir
Ice/Water Dispenser Prior to First
Use
• Water mains pressure must not be below 1 bar.
• Water mains pressure must not be over 8 bars.
• Pumps must be used in case the water mains
pressure drops below 1 bar.
• Water system of the refrigerator must be
connected to the cold water line. It must not be
connected to hot water line.
• Do not forget to remove the ice channel cover
from its location before using Ice Dispenser.
• In case you see condensation on the dispenser
(water drops) or in case you connect your device
to the water mains, make sure that the anti-
condensation switch is pressed. (See Page 15)
Anti-Condensation button is pressed as a factory
setting.
• Dispenser will not work when the door of the
freezer compartment is open. Make sure that the
door is closed for the operation of the dispenser.
• No water may be obtained in the initial operation
of the refrigerator. This is caused by the air in the
system. To discharge air from the system, press
Dispenser latch for periods of 1 minute until water
comes from the Dispenser. Water flow may be
irregular in the beginning. Irregular water flow
will be normalized after the air in the system is
discharged.
• When the refirigerator is run for the first
time, Water Dispenser choice will be selected
automatically. However, approximately 12 hours
must pass before cold water can be obtained.
• Water mains pressure must be between 1-8
bars for the operation of Ice/water Dispenser
smoothly. For this, check that 1 glass of water
(100 cc) can be filled in 10 seconds.
• The first 10 glasses of water should not be
consumed.
• 12 hours must pass to obtain ice from the Ice
Dispenser for the first time. In case not enough
ice is present in the ice dispenser, ice may not be
obtained from ice dispenser.
• Approximately the first 30 cubes of ice to be
obtained from the ice dispenser must not be used.
Water Reservoir
If you wish to disassemble the water reservoir from
the refrigerator for cleaning the vicinity of the water
reservoir follow the instructions below;
• Remove the 2 screws by using a cross headed
screwdriver as shown in the figure.
• Gently hold and remove the water reservoir as
shown in the figure.
Caution:
Never remove the bolts, assembled to the water
reservoir.

EN
14
Operating your refrigerator
Before you start using the fridge/freezer check
that:
1. The feet have been adjusted so that the
product stands level.
2. The interior is dry and air can circulate freely at
the rear.
3. Clean the interior as recommended under
"CLEANING AND CARE."
4. Plug the refrigerator into the power mains
outlet.
• When the door is open the respective
interior light will come on.
5. You will hear a noise as the compressor
starts up. The liquid and gases sealed within the
refrigeration system may also give rise to noise,
even if the compressor is not running or not which
is quite normal.
Due to the operation of fans inside the
appliance, overall noise level is slightly higher
in comparison to non-frost free appliances.
This is quite normal and is not a fault.
6. Front edges of the refrigerator may feel warm.
This is normal. These areas are designed to be
warm to avoid condensation.
7. Do not fill the interiors of the refrigerator in
initial operation. Wait until the correct storage
temperature has been reached. (See page 16)
8. When the compartments reach the desired
temperatures fans will stop.
9. Especially pay special attention to prevent
the foodstuffs, in particular, small pieces, such
as rice, peas and beans from running into the fan
protectors and air flow ducts. These may cause
clogging of the cooling system and a decrease in
the efficiency of the device.
10. The factory set temperature is +4°C for fridge
compartment and -18°C for freezer compartment.
11. The compressor will start running
approximately 5 minutes after the refrigerator is
plugged in to protect the electronic components
of your appliance. After startup of the compressor,
compartment temperatures will reach to the
setup temperatures in 24 hours depending on
the ambient temperature and load status of your
refrigerator.
12. Pay attention to the following points during the
first 24 hours of the operation:
-Do not open the doors frequently.
-Do not overload your refrigerator.
-Do not put hot food.

EN
15
Freezer Set button
Fresh Freeze Button
Eco Extra Button
Water Dispenser light button
Water Dispenser Lights
Ice / Water selection button
Anti-condensation switch
Ice-off button
Ioniser / Key lock button
Quick Cool button
Fridge Set/ Vacation button
Using your refrigerator
3
Setting Buttons and Temperature Control
Control buttons allow you to make the settings of your refrigerator easily and without opening the doors.
Thus, heat loss is avoided.
Economy Mode indicator
Freezer Compartment Temperature indicator
Freezer Door Open indicator
Freezer Temperature Setting indicator
High Temperature/ Error Warning indicator
Key Lock indicator
Fridge Temperature indicator
Fridge Temperature Setting indicator
Fridge Door Open
indicator
Filter indicator
Vacation indicator
-24 °C
-22 °C
-20 °C
-18 °C
Fresh Freeze indicator
Eco Extra indicator
Water indicator
Ice Cube
Ionizer
indicator
Ice Off indicator
Crash Ice indicator
Quick Cool indicator
2 °C
4 °C
6 °C
8 °C

EN
16
Freezer Compartment
Adjustment
Fridge Compartment
Adjustment Explanations
-18°C 4°C This is the normal recommended setting.
-20,-22 or -24°C 4°C These settings are recommended when the
ambient temperature exceeds 30°C.
Fresh freeze Display will
show -27°C 4°C
Use this when you wish to freeze your
food or make ice in a short time. Your
refrigerator will return to its previous mode
when the process is over.
-18°C or colder 2°C
If you think that your fridge compartment
is not cold enough because of the hot
conditions or frequent opening and closing
of the door.
-18°C or colder Quick cool Display will
show +1°C
You can use it when your fridge
compartment is overloaded or if you wish to
cool down your food rapidly.
Making the Fridge Compartment
Temperature Adjustment
Fridge temperature can be set at one of the
following temperatures : 8,6,4 and 2°C
Press the button to change. The temperature will
decrease by 2°C. Everytime you press the button,
it will go down and then around to the highest
setting. Release at the desired temperature and
the new set temperature will be stored.
If you think that your food is colder than you
desired, you can adjust the temperature setting of
fridge compartment to 6 or 8.
Making the Freezer Compartment
Temperature Adjustment (SET)
Freezer temperature can be set at one of the
following temperatures : -18,-20,-22 and -24°C
Press the button to change. The temperature
will decrease by 2°C. Everytime you press the
button, temperature will go down and then return
to the highest setting. Release at the desired
temperature and the new set temperature will be
stored.
Fresh Freeze Function
When you press “Fresh Freeze” button, the
compressor will run for about 24 hours.
Fresh Freeze indicator will glow and freezer
compartment temperature settings will switch to
-27°C whilst the Fresh Freeze is active. To cancel
this function press Fresh Freeze button again.
Fresh Freeze indicator will turn off and return to
its normal settings. Fresh Freeze will cancel itself
automatically after about 24 hours if you do not
cancel it.
If you want to freeze large amounts of fresh food,
press the fresh freeze button 24 hours before
putting the food into the freezer compartment.

EN
17
Quick Cool Function
When you press “Quick Cool” button, the
temperature of the compartment will be colder
than the adjusted values. This function can be
used for food placed in the fridge compartment
and required to be cooled down rapidly.
After pressing the Quick Cool button, Quick
Cool indicator will glow and fridge compartment
temperature setting will switch to 1°C whilst the
Quick Cool is active. To cancel this function press
Quick Cool button again. Quick Cool indicator will
turn off and return to its normal settings. Quick
Cool function will cancel itself automatically in
case you do not cancel it.
Vacation Button
In case the fridge compartment will not be
used for a long time, the usage of the fridge
compartment may be cancelled by pressing on
the “Set” Button. By this way, the refrigerator may
operate more economically. Press on Vacation
Button for 2 seconds to activate this function.
When this function is active, the door of the fridge
compartment must be kept closed and no food
must be left in the fridge compartment.
Special Economy Function (Auto
Eco)
When “Auto Eco” button is pressed, Special
Economy Function will be activated. If the door of
the fridge compartment is kept closed for a long
time when this function is selected, the fridge
compartment will switch to a more economic
operation mode to safe electricity automatically.
When the “Auto Eco” button is pressed again,
this function is deactivated.
Ion+ Button (Ioniser)
Ionizing in the refrigerator is carried out
automatically.
Press this button if you request extra ions.
Key Lock Button (Ioniser)
The key lock is activated when this button is
pressed for 3 seconds and all buttons and the
dispenser latch will not work. If you want to
deactivite key lock press again for 3 seconds.
Water Dispenser Illumination (Light)
When the “Light” button is pressed, the water
dispenser lamp will light up and it will go off when
the button is pressed again. This illumination will
also light up when the water dispenser latch is
pressed, and it will go off delayed when the latch
is released.
Water/Ice Type Selection (Dispenser
Mode)
With “Dispenser Mode” button, either one of
“water” or “ice cube” or “crushed ice” options is
selected.

EN
18
Using the accessories
Ice/Water Dispenser
Withitsthreedifferentfunctions,thedispenser
efficientlymeetsyourcoldwater,cubeiceand
crushediceneedswithouthavingtoopenthe
dooroftherefrigerator.Itisacontinuouscold
waterandicesourcewithoutaddingwater.User
friendlycontrolpanelprovidesthefollowing
dispensingfunctions:
Note:
•Wateroricecanbedispensedforamaximum
of60secondsateachuse.
•Whenthefreezerdoorisopen,thedispenser
willnotwork.
IceCube
CrushedIce
ColdWater
Spillage Tray
Waterdropsthatdripduringuse,accumulates
inthespillagetray.Removethespillagetray
bypressingdownintherightcorner.Youcan
removethewaterwithaspongeorasoftcloth.
Using the Water Dispenser
Warnings
*Itisnormalforthefirstfewglassesofwater
takenfromthedispensertobewarm.
*Incaseswherethewaterdispenserhasnot
beenusedfrequently,sufficientamountofwater
mustbedrainedfromthedispensertogetfresh
water.
Using the Ice Dispenser
Pleasenote,firsticecubeswillnotbeready
before12hoursafterswitchingontheappliance.
Incaseyoudonotneedice,suchasduring
winterorincaseyouareonvacation,turnonIce
Offfunction.
Icedeviceproducesapproximately110cubes
oficein24hoursandthisamountmaychange
accordingtothefrequencyofopeningofdoors,
refrigeratorsettingsandpoweroutage.Produced
icemaybeobtainedfromthedispenserascube
iceorcrushedice.
Itisnormaltogetcrushedicefromthedispenser
inalongertimethaningettingtheicecubes
andalsoflowingofsomecrushedicebeforethe
icecubesdropifcrushediceoptionhadbeen
selected
Changeinthesmellortasteoftheiceorsticky
cubesandadecreaseintheformoficeis
normalincaseiceisnotobtainedfromdispenser
foralongtimeorincaseofpoweroutages.If
thisisthecase,theiceintheiceboxmustbe
controlledandtheiceboxshouldbeemptiedand
cleanedthoroughly.

EN
19
Warnings
• Noicemustbeaddedtotheicedispenser
compartment.Thismayadverselyaffecttheice
supplyorcrushingtheice.
• Itisnormaltohaveacoupleoficecubes
stucktogetherintheicebank.
• Movingpartssuchasbladesinahousing
attheiceoutletofthedispensermustnotbe
touchedtoavoidinjury.
• Neverusesharpobjectstobreaktheice
intheicebox.Thismaycausedamageonthe
icebox.
• Foodstuffshouldneverbeplacedintothe
icebankforquickcoolingpurposes.
• Incaseyouseecondensationonthe
dispenser(waterdrops)orincaseyouconnect
yourdevicetothewatermains,makesurethat
theanti-condensationswitchispressed.(See
Page 15)Anti-Condensationbuttonispressedas
afactorysetting.
• Whentheicecontaineristoberemovedfor
anyreason,firstofallIceOffButtonmustbe
pressed.
Ice Off
Tostopiceformation,“IceOff”buttonispressed.
Wheniceoffisselected,nowaterwillbetaken
intotheIcematic.However,alreadyexistingice
canbetakenfromthedispenser.Torestartice
formation,“iceoff”buttonmustbepressedagain.
Caution:Ifyoudonotusetheicedispenser,
donotforgettoputiceductcoverintothering
insideofthefreezerdoor.(See. Page 2)
Cleaning the Icebox and the Water
Dispenser
Followtheprocedureandwarningsbelowto
cleantheicebox:
• RemovetheIceboxbyliftingfirstand
thenpullingtowardsyourselfasshowninthe
diagram.
• EmptytheiceintheIceboxifany.Totake
outthestuckice,useobjectsthatarenotsharp
toavoidanydamageontheIcebox.
• PayattentionthattheinsideoftheIcebox
isnotwet/dampbeforeplacingitbacktoits
housing.
• Ifyouwanttogeticefromtheicedispenser
afterplacingtheiceboxbacktoitshousingand
closingthefreezerdoor,exitfromiceoffmode
bypressingtheiceoffbuttonagain.
• Do not touch moving parts like the knife in
the Icebox
2. Pull
1. Lift
This manual suits for next models
1
Table of contents
Other Beko Refrigerator manuals

Beko
Beko CN 148220 User manual

Beko
Beko BFBF3018SS User manual

Beko
Beko CN163223DE User manual

Beko
Beko GN1416233ZGB User manual

Beko
Beko RFNE290L31WNP User manual

Beko
Beko RCNA406EO6XBN Instruction Manual

Beko
Beko CFD6914W User manual

Beko
Beko GN164020GB User manual

Beko
Beko CNK321EC0A User manual

Beko
Beko RCNT340I50VZS User manual

Beko
Beko GN163131ZXB User manual

Beko
Beko GNE60020X User manual

Beko
Beko RFNE270T21W User manual

Beko
Beko RDNE390M21SX User manual

Beko
Beko RSSA290M23W User manual

Beko
Beko DSA240K21W User manual

Beko
Beko B3RCNE364HW User manual

Beko
Beko FNE 19906 User manual

Beko
Beko CN232220X User manual

Beko
Beko B5RDNE504LDXB User manual