Beko GNE6049XPN User manual

EN/DE/FR
58 9480 0000/AB 1/2 -EN-DE-FR
Refrigerator
User Manual
Gefrierschrank
Bedienungsanleitung
Réfrigérateur
Manuel d’utilisation
GNE6049XPN

A
A
A
C
SUPPLIER’S NAME MODEL IDENTIFIER (*)
INFORMATION
C
.The model information as stored in the product data base
can be reached by entering following website and searching
for your model identifier (*) found on energy label.
https://eprel.ec.europa.eu/
Dear Customer,
Please read this manual before using the product.
Thank you for choosing this product. We would like you to achieve the optimal efficiency
from this high quality product which has been manufactured with state of the art technol-
ogy. To do this, carefully read this manual and any other documentation provided before
using the product and keep it as a reference.
Heed all information and warnings in the user manual. This way, you will protect yourself
and your product against the dangers that may occur.
Keep the user manual. Include this guide with the unit if you hand it over to someone else.
The following symbols are used in the user guide:
Hazard that may result in death or injury.
NOTICE A hazard that may cause material damage to the product or its
surroundings
Important information or useful tips on operation.
Read the user manual.
Risk of fire / Flammable materials
GNE6049XPN

2 / 31 EN Refrigerator / User Manual
1- Safety Instructions 3
1.1 Purpose of usage . . . . . . . . . . . . . . . . . . 3
1.2 Safety of children, vulnerable persons and
pets. . . . . . . . . . . . . . . . . . . . . . . . . . . . . . 3
1.3 Electrical safety. . . . . . . . . . . . . . . . . . . 4
1.4 Handling Safety. . . . . . . . . . . . . . . . . . . 4
1.5 Installation Safety . . . . . . . . . . . . . . . . . 4
1.6 Operational safety . . . . . . . . . . . . . . . . . 5
1.7 Maintenance and cleaning safety. . . . . . 7
1.8HomeWhiz . . . . . . . . . . . . . . . . . . . . . . . 7
1.9 Lighting . . . . . . . . . . . . . . . . . . . . . . . . 7
1.10 Environmental instructions. . . . . . . . . . 7
Compliance with the WEEE Directive and Disposing
of the Waste Product: . . . . . . . . . . . . . . . . 7
1.11 Compliance with RoHS Directive . . . . . . 7
1.12 Package information. . . . . . . . . . . . . . . 7
2 Refrigerator 8
3 Installation 9
3.1. Right place for installation . . . . . . . . . . . . . . 9
3.2. Attaching the plastic wedges . . . . . . . . . . . . 9
3.3. Adjusting the stands . . . . . . . . . . . . . . . . . 10
3.4. Power connection . . . . . . . . . . . . . . . . . . . 10
3.5. Water connection . . . . . . . . . . . . . . . . . . . 10
3.6. Connecting water hose to the product . . . . 11
3.7. Connecting to water mains . . . . . . . . . . . . 11
3.8. For products using water carboy . . . . . . . . 12
3.9 Water filter . . . . . . . . . . . . . . . . . . . . . . . . . 12
3.9.1. Fixing external filter on the wall (Optional) 13
3.9.2. Internal filter . . . . . . . . . . . . . . . . . . . . . 14
4 Preparation 16
4.1. What to do for energy saving . . . . . . . . . . . 16
4.2. First use . . . . . . . . . . . . . . . . . . . . . . . . . . 16
5 Using the product 17
5.1. Indicator panel . . . . . . . . . . . . . . . . . . . . . 17
5.2. Zero degree compartment . . . . . . . . . . . . . 20
5.3. Vegetable bin . . . . . . . . . . . . . . . . . . . . 20
5.4. Blue light/HarvestFresh . . . . . . . . . . . . . . . 20
5.5. Description and cleaning of odour filter . . . 20
5.6. Telescopic drawer . . . . . . . . . . . . . . . . . . 21
5.7. Ionizer . . . . . . . . . . . . . . . . . . . . . . . . . . . 21
5.8. Humidity controlled crisper . . . . . . . . . . . . 21
5.9. Movable middle section . . . . . . . . . . . . . 22
5.10. Ice container . . . . . . . . . . . . . . . . . . . . . . 22
5.11. Ice box . . . . . . . . . . . . . . . . . . . . . . . . . . 23
5.12. Ice maker . . . . . . . . . . . . . . . . . . . . . . . . 23
5.13. Freezing fresh food . . . . . . . . . . . . . . . . . 24
5.14. Recommendations for storing frozen foods 24
5.15. Deep freezer details . . . . . . . . . . . . . . . . . 24
5.16. Placing the food. . . . . . . . . . . . . . . . . . . . 25
5.17. Door open alert . . . . . . . . . . . . . . . . . . . . 25
5.18. Interior light . . . . . . . . . . . . . . . . . . . . . . . 25
6 Maintenance and cleaning 26
6.1 Avoiding bad odours . . . . . . . . . . . . . . . . . . 26
6.2 Protecting the plastic surfaces . . . . . . . . . . 26
7. Troubleshooting 27

3 / 31 EN
Refrigerator / User Manual
This section includes the safety
instructions necessary to prevent
the risk of personal injury or material
damage.
Our company shall not be held
responsible for damages that may
occur if these instructions are not
observed.
Installation and repair operations shall always
be performed by Authorized Service.
Always use genuine spare parts and
accessories.
Original spare parts will be provided for
10 years, following the product purchasing date.
Do not repair or replace any part of the
product unless specified expressly in the user
manual.
Do not perform any modifications on the
product.
1.1 Purpose of usage
This product is not intended for commercial
use and it shall not be used out of its intended
purpose.
This product is intended for operating interiors,
such as households or similar.
For example;
- In the staff kitchens of the stores, offices and
other working environments,
- In farm houses,
- In the units of hotels, motels or other resting
facilities that are used by the customers,
- In hostels, or similar environments,
- In catering services and similar non-retail
applications.
This product shall not be used in open or enclosed
external environments such as vessels, balconies
or terraces. Exposing the product to rain, snow,
sunlight and wind may cause risk of fire.
1.2 Safety of children,
vulnerable persons and pets
This product may be used by children
aged 8 years and older and persons
with underdeveloped physical,
sensory or mental capabilities or
lack of experience and knowledge
if they have been given supervision
or instruction concerning use of the
appliance in a the product safe way
and the hazards involved.
Children between 3 and 8 years are
allowed to put and take out food to/
from the cooler product.
Electrical products are dangerous for
children and pets. Children and pets
must not play with, climb on, or enter
the product.
Cleaning and user maintenance
should not be performed by children
unless there is someone overseeing
them.
Keep the packaging materials away
from children. Risk of injury and
suffocation.
Before disposing of old products that
shall not be used any more:
1.
Unplug the power cord from the mains socket.
2.
Cut the power cord and remove it from the
appliance together with the plug.
3.
Do not remove the racks and drawers from the
product to prevent children from getting inside the
appliance.
4.
Remove the doors.
5.
Store the product so that it shall not be tipped over.
6.
Do not allow children to play with the scrapped
product.
Do not dispose of the product by throwing it
into fire. Risk of explosion.
If there is a lock available in the product’s door,
keep the key out of children’s reach.
1- Safety Instructions

4 / 31 EN Refrigerator / User Manual
Safety and environment instructions
1.3 Electrical safety
The product shall not be plugged
into the outlet during installation,
maintenance, cleaning, repair, and
transportation operations.
If the power the cord is damaged,
it shall be replaced by authorized
service only to avoid any risk that may
occur.
Do not tuck the power cord under the
product or to the rear of the product.
Do not put heavy items on the power
cord. The power cord should not be
bent, crushed, and come into contact
with any heat source.
Do not use an extension cord, multi-
plug or adaptor to operate your
product.
Portable multisockets or portable
power supplies may overheat and
cause fire. Thus, do not have a multi-
plug behind or in the vicinity of the
product.
The plug shall be easily accessible.
If this is not possible, a mechanism
that meets the electrical legislation
and that disconnects all terminals
from the mains (fuse, switch, main
switch, etc.) shall be available on the
electrical installation.
Do not touch the plug with wet hands.
When unplugging the appliance, don’t
hold the power cord, but the plug.
1.4 Handling Safety
This product is heavy, do not handle it
by yourself.
Do not hold the product from its door
while handling the product.
Be careful not to damage the cooling
system and the pipes while handling
the product. Do not operate the
product if the pipes are damaged, and
contact an authorized service.
1.5 Installation Safety
Contact the Authorized Service
for the product’s installation. To
prepare the product for installation,
see the information in the user
guide and make sure the electric
and water utilities are as required.
If the installation is not suitable, call
a qualified electrician and plumber
to have them make the necessary
arrangements. Otherwise, electric
shock, fire, issues with the product or
injuries may occur.
Check for any damage on the product
before installing it. Do not have the
product installed if it is damaged.
Place the product on a level and
hard surface and balance with the
adjustable legs. Otherwise, the
refrigerator may tip over and cause
injuries.
The product shall be installed in a
dry and ventilated environment.
Do not keep carpets, rugs or similar
floor covers under the product. This
may cause risk of fire as a result of
inadequate ventilation!
Do not block or cover ventilation
holes. Otherwise, power consumption
may be increased and damage to your
product may occur.
Do not connect the product to supply
systems such as solar power supplies.
Otherwise, damage to your product
may occur as a result of the abrupt
voltage fluctuations!
The more refrigerant a refrigerator
contains, the bigger its installation
room shall be. In very small rooms,
a flammable gas-air mixture may
occur in case of a gas leak in the
cooling system. At least 1 m3of
volume is required for each 8 grams
of refrigerant. The amount of the

5 / 31 EN
Refrigerator / User Manual
Safety and environment instructions
refrigerant available in your product is
specified in the Type Label.
The installation place of the product
shall not be exposed to direct sunlight
and it shall not be in the vicinity of a
heat source such as stoves, radiators,
etc.
If you cannot prevent installation of the product in
the vicinity of a heat source, you shall use a suitable
insulation plate and the minimum distance to the
heat source shall be as specified below.
- At least 30 cm away from heat sources such
as stoves, heating units and heaters, etc.,
- And at least 5 cm away from electric ovens.
Your product has the protection
class of I. Plug the product in a
grounded socket that conforms with
the Voltage, Current and Frequency
values specified in the type label. The
socket outlet shall be equipped with a
fuse with a rating of 10 A – 16 A. Our
company shall not be responsible for
the damages that shall be incurred
as a result of operating the product
without ensuring ground and electrical
connections made as per local or
national regulations.
The product’s power cable must
be unplugged during installation.
Otherwise, risk of electric shock and
injury may occur!
Do not plug the product to loose, broken, dirty,
greasy sockets or sockets that has come out
their seats or sockets with a risk of water
contact.
Place the power cord and hoses (if available) of
the product so that they shall not cause a risk of
tripping over.
Penetration of humidity to live parts or to the
power cord may cause short circuit. Thus, do
not use the product in humid environments or
in areas where water may splash (e.g. garage,
laundry room, etc.) If the refrigerator is wet
by water, unplug it and contact an authorized
service.
Do not connect your refrigerator to power
saving devices. These systems are harmful for
the product.
1.6 Operational safety
Do not use chemical solvents on the product.
These materials contain an explosion risk.
In case of a failure of the product, unplug it
and do not operate until it is repaired by the
authorized service. There is a risk of electric
shock!
Do not place a source of flame (e.g. candles,
cigarettes, etc.) on the product or in the vicinity
of it.
Do not get on the product. Risk of falling and
injury!
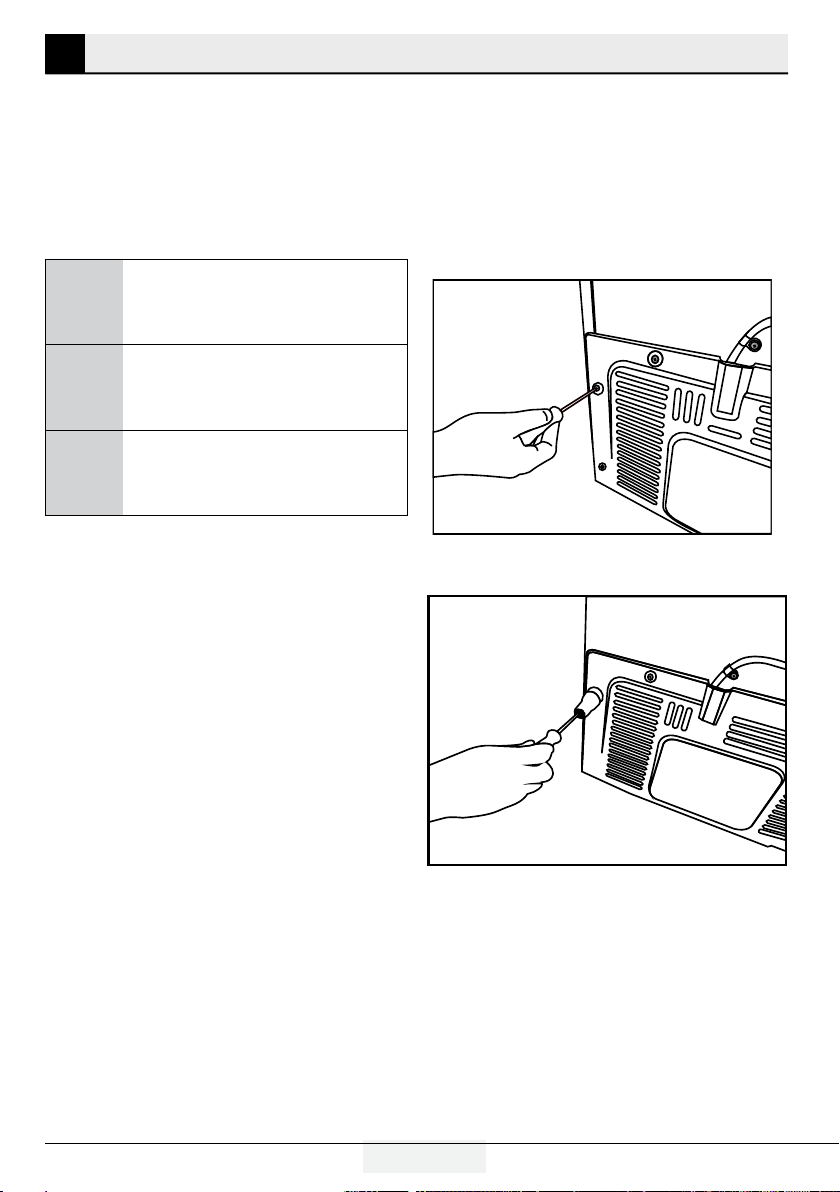
Do not cause damage to the pipes of the
cooling system using sharp and piercing tools.
The refrigerant that sprays out in case of
puncturing the gas pipes, pipe extensions or
upper surface coatings may cause irritation of
skin and injuries of the eyes.
Do not place and operate electric appliances
inside the refrigerators/deep freezer unless it is
advised by the manufacturer.
Do not jam any parts of your hands or your
body to the moving parts inside the product.
Be careful to prevent jamming of your fingers
between the refrigerator and its door. Be
careful while opening or closing the door if
there are children around.
Do not put ice cream, ice cubes or frozen food
to your mouth as soon as you take them out of
the freezer. Risk of frostbite!
Do not touch the inner walls, metal
parts of the freezer or food kept
inside the refrigerator with wet
hands. Risk of frostbite!
Do not place soda cans or cans
and bottles that contain fluids
that may be frozen to the freezer
compartment. Cans or bottles may
explode. Risk of injury and material
damage!

6 / 31 EN Refrigerator / User Manual
Safety and environment instructions
Do not use or place materials
sensitive against temperature
such as flammable sprays,
flammable objects, dry ice or other
chemical agents in the vicinity of
the refrigerator. Risk of fire and
explosion!
Do not store explosive materials
such as aerosol cans with flammable
materials inside the product.
Do not place cans containing fluids
over the product. Splashing of water
on an electrical part may cause the
risk of an electric shock or a fire.
This product is not intended for
storage and cooling of medicines,
blood plasma, laboratory preparations
or similar materials and products that
are subject to the Medical Products
Directive.
If the product is used against its
intended purpose, it may cause
damage to or deterioration of the
products kept inside.
If your refrigerator is equipped with
blue light, do not look at this light
with optical devices. Do not stare
directly at UV LED light for a long
time. Ultraviolet rays may cause eye
strain.
Do not fill the product with more food
than its capacity. Injuries or damages
may occur if the contents of the
refrigerator falls when the door is
opened. Similar problems may occur
when an object is placed over the
product.
Ensure that you have removed any
ice or water that may have fallen to
the floor to prevent injuries.
Change the locations of the racks/
bottle racks on the door of your
refrigerator while the racks are
empty only. Danger of physical injury!
Do not place objects that may fall/
tipped over on the product. These
objects may fall while opening or
closing the door and cause injuries
and/or material damages.
Do not hit or exert excessive pressure
on glass surfaces. Broken glass
may cause injuries and/or material
damages.
The cooling system in your product
contains R600a refrigerant. The
refrigerant type used in the product
is specified in the the type label.
This gas is flammable. Therefore, be
careful not to damage the cooling
system and the pipes while operating
the product. In case of damage to the
pipes;
- do not touch the product or the power cord,
- Keep the product away from potential sources
of fire that may cause the product to catch fire.
- ventilation the area where the product is
placed. Do not use a fan.
- Contact authorized service.
If the product is damaged and you
observe gas leak, please stay away
from the gas. Gas may cause frostbite
if it contacts your skin.
For Products With Water Fountain / Ice Maker
Use only drinking water. Do not fill the water
tank with fruit juice, milk, fizzy beverages,
alcoholic beverages or any other liquids
incompatible for use in the water fountain. This
may cause risk to your health and safety.
Do not allow the children to play with the water
dispenser or Ice Maker to prevent accidents
and injuries.
Do not insert your fingers or other objects
inside the hole of the water dispenser, ice
channel or inside the container of the Ice
Maker. This may cause injuries or material
damages.

7 / 31 EN
Refrigerator / User Manual
Safety and environment instructions
1.7 Maintenance and
cleaning safety
Do not pull by the door handle if you
shall move the product for cleaning
purposes. Handle may cause injuries
if it is pulled too hard.
Do not clean the product by spraying
or pouring water on the product and
inside the product. Risk of electric
shock and fire.
Do not use sharp or abrasive tools
to clean the product. Do not use
materials such as household cleaning
agents, detergents, gas, gasoline,
alcohol, wax, etc.
Use cleaning and maintenance
agents that are not harmful for food
only inside the product.
Do not use steam or steamed
cleaning materials for cleaning the
product and thawing the ice inside it.
Steam contacts the live areas in your
refrigerator and causes short circuit
or electric shock!
Take care to keep water away from
the electronic circuits or lighting of
the product.
Use a clean, dry cloth to wipe the dust
or foreign material on the tips of the
plugs. Do not use a wet or damp piece
of cloth to clean the plug. Otherwise,
risk of fire or electric shock may occur.
1.8HomeWhiz
(May not be applicable for all models)
Follow the safety warnings even if
you are away from the product while
operating the product via HomeWhiz
app. Also, pay attention to the
warnings in the app.
1.9 Lighting
(May not be applicable for all models)
Contact an authorized service when
you shall replace the LED / bulb using
for lighting.
1.10 Environmental instructions
Compliance with the WEEE
Directive and Disposing
of the Waste Product:
This product complies with EU WEEE Directive
(2012/19/EU). This product bears a classification
symbol for waste electrical and electronic equip-
ment (WEEE).
This symbol indicates that this product
shall not be disposed with other house-
hold wastes at the end of its service life.
Used device must be returned to offical
collection point for recycling of electrical
and electronic devices. To find these collection sys-
tems please contact to your local authorities or re-
tailer where the product was puchased. Each
household performs important role in recovering
and recycling of old appliance. Appropriate disposal
of used appliance helps prevent potential negative
consequences for the environment and human
health.
1.11 Compliance with
RoHS Directive
The product you have purchased complies with EU
RoHS Directive (2011/65/EU). It does not contain
harmful and prohibited materials specified in the
Directive.
1.12 Package information
Packaging materials of the product are
manufactured from recyclable materials
in accordance with our National
Environment Regulations. Do not dis-
pose of the packaging materials together with the
domestic or other wastes. Take them to the pack-
aging material collection points designated by the
local authorities.

8 / 31 EN Refrigerator / User Manual
*1
*3
*2
*5
*6
7
*8
9
4
A
B
2 Refrigerator
C*Optional: Figures in this user guide are schematic and may not exactly match your product. If your
product does not comprise the relevant parts, the information pertains to other models.
A- Cooler compartment
B- Freezer compartment
1. Butter-cheese shelf
2. Cooler compartment shelves
3. Shelter wire
4. Frozen food storing compartments
5. Vegetable bins
6. Breakfast compartment
7. Odour filter
8. Adjustable glass shelves
9. Fan

9 / 31 EN
Refrigerator / User Manual
3 Installation
3.1. Right place for installation
Contact the Authorized Service for the product's
installation. To ready the product for installation,
see the information in the user guide and make
sure the electric and water utilities are as required.
If not, call an electrician and plumber to arrange
the utilities as necessary.
BWARNING: The manufacturer assumes
no responsibility for any damage caused
by the work carried out by unauthorized
persons.
BWARNING: The product’s power cable
must be unplugged during installation.
Failure to do so may result in death or
serious injuries!
AWARNING: If the door span is too narrow
for the product to pass, remove the door
and turn the product sideways; if this does
not work, contact the authorized service.
vibration.
heater, stove and similar sources of heat and at
least 5 cm away from electric ovens.
keep in damp environments.
If the product will be placed in an alcove,
remember to leave at least 5 cm clearance
between the product and the ceiling, rear
wall and the side walls. Check if the rear wall
clearance protection component is present at
its location (if provided with the product). If the
component is not available, or if it is lost or
fallen, position the product so that at least 5 cm
clearance shall be left between the rear surface
of the product and the wall of the room. The
clearance at the rear is important for efficient
operation of the product.
temperatures below -5°C.
3.2. Attaching the plastic wedges
Use the plastic wedges provided with the product
to provide sufficient space for air circulation
between the product and the wall.
1.
To attach the wedges, remove the screws on the
product and use the screws provided with the wedges.
2.
Attach 2 plastic wedges on the ventilation cover as
shown in the figure.

10 / 31 EN Refrigerator / User Manual
Installation
3.3. Adjusting the stands
If the product is not in balanced position, adjust the
front adjustable stands by rotating right or left.
3.4. Power connection
AWARNING: Do not use extension or
multi sockets in power connection.
BWARNING: Damaged power cable
must be replaced by Authorized
Service.
CWhen placing two coolers in adjacent
position, leave at least 4 cm distance
between the two units.
Our firm will not assume responsibility for any
damages due to usage without earthing and
power connection in compliance with national
regulations.
The power cable plug must be easily
accessible after installation.
Connect the refrigerator to an earthed socket
with 220-240V/50 Hz voltage. The socket must
comprise a 10-16A fuse.
Do not use multi-group plug with or without
extension cable between the wall socket and
the refrigerator.
3.5. Water connection
(Optional)
AWARNING: Unplug the product and
the water pump (if available) during
connection.
The product’s water mains, filter and carboy
connections must be rendered by authorized
service.
The product can be connected to a carboy or
directly to the water mains, depending on the
model. To establish the connection, the water hose
must first be connected to the product.
Check to see the following parts are supplied with
your product’s model:
3
1
4
2
*5
1. Connector (1 piece): Used to attach the water
hose to the rear of the product.
2. Hose clip (3 pieces): Used to fix the water
hose on the wall.
3. Water hose (1 piece, 5 meter diameter 1/4
inches): Used for the water connection.
4. Faucet adapter (1 piece): Comprises a porous
filter, used for connection to the cold water
mains.
5. Water filter (1 piece *Optional): Used to
connect the mains water to the product. Water
filter is not required if carboy connection is
available.

11 / 31 EN
Refrigerator / User Manual
Installation
3.6. Connecting water
hose to the product
To connect the water hose to the product,
follow the instructions below.
1. Remove the connector on the hose nozzle
adaptor in the back of the product and run the
hose through the connector.
2. Push the water hose down tightly and connect
to the hose nozzle adaptor.
3. Tighten the connector manually to fix on the
hose nozzle adaptor. You may also tighten the
connector using a pipe wrench or pliers.
3.7. Connecting to water mains
(Optional)
To use the product by connecting to the cold water
mains, a standard 1/2” valve connector must be
installed to the cold water mains in your home. If
the connector is not available or if you are unsure,
consult a qualified plumber.
1. Detach the connector (1) from the faucet
adaptor (2).
1
23
2. Connect the faucet adaptor to the water mains
valve.
3. Attach the connector around the water hose.

12 / 31 EN Refrigerator / User Manual
Installation
4. Attach the connector into the faucet adaptor
and tighten by hand / tool.
5. To avoid damaging, shifting or accidentally
disconnecting the hose, use the clips provided
to fix the water hose appropriately.
AWARNING:After turning the faucet on,
make sure there is no water leak on
either end of the water hose. In case of
leakage, turn the valve off and tighten all
connections using a pipe wrench or pliers.
3.8. For products using water carboy
(Optional)
To use a carboy for the product’s water
connection, the water pump recommended by the
authorized service must be used.
1. Connect one end of the water hose provided
with the pump to the product (see 3. 6) and
follow the instructions below.
2. Connect the other end of the water hose to
the water pump by pushing the hose into the
pump’s hose inlet.
3. Place and fasten the pump hose inside the
carboy.
4. Once the connection is established, plug in
and start the water pump.
CPlease wait 2-3 minutes after starting the
pump to achieve the desired efficiency.
CSee also the pump’s user guide for water
connection.
CWhen using carboy, water filter is not
required.
3.9 Water filter
(Optional)
The product may have internal or external filter,
depending on the model. To attach the water filter,
follow the instructions below.

13 / 31 EN
Refrigerator / User Manual
Installation
3.9.1. Fixing external filter
on the wall (Optional)
AWARNING: Do not fix the filter on the
product.
Check to see the following parts are supplied with
your product’s model:
123
4
5
6
1. Connector (1 piece): Used to attach the water
hose to the rear of the product.
2. Faucet adapter (1 piece): Used for connection
to the cold water mains.
3. Porous filter (1 piece)
4. Hose clip (3 pieces): Used to fix the water
hose on the wall.
5. Filter connecting apparatus (2 pieces): Used to
fix the filter on the wall.
6. Water filter (1 piece): Used to connect the
mains water to the product. Water filter is not
required if carboy connection is available.
1. Connect the faucet adaptor to the water mains
valve.
2. Determine the location to fix the external filter.
Fix the filter’s connecting apparatus (5) on the
wall.
3. Attach the filter in upright position on the filter
connecting apparatus, as indicated on the
label. ( 6 ).
4. Attach the water hose extending from the top
of the filter to the product’s water connection
adaptor (see. 3 6).

14 / 31 EN Refrigerator / User Manual
Installation
After the connection is established, it should look
like the figure below.
Water line:
Carboy line:
3.9.2. Internal filter
The internal filter provided with the product is
not installed upon delivery; please follow the
instructions below to install the filter.
1. “Ice Off ” indicator must be active while
installing the filter. Switch the ON-OFF
indicator using the “Ice” button on the screen.
2. Remove the water filter by-pass cover by
pulling.
CA few drops of water may flow out after
removing the cover; this is normal.
3. Place the water filter cover into the
mechanism and push to lock in place.

15 / 31 EN
Refrigerator / User Manual
Installation
4. Push the “Ice” button on the screen again to
cancel the “Ice Off ” mode.
CThe water filter will clear certain foreign
particles in the water. It will not clear the
microorganisms in the water.
CThe filter replacement period of your
product is 6 months.

16 / 31 EN Refrigerator / User Manual
4 Preparation
4.1. What to do for energy saving
AConnecting the product to electronic
energy-saving systems is harmful, as it
may damage the product.
For a freestanding appliance; ‘this refrigerating
appliance is not intended to be used as a built-
in appliance.
Do not keep the refrigerator doors open for
long periods.
Do not place hot food or beverages into the
refrigerator.
Do not overfill the refrigerator; blocking the
internal air flow will reduce cooling capacity.
To be able store maximum food in the freezer
compartment of your refrigerator, the upper
drawers have to be removed and placed on
top of wire rack. The net volume and energy
consumption values specified in the energy
label of the refrigerator was tested after
removing the freezer compartment’s upper
shelf and the ice container which can easily
be removed manually. Using the lower drawer
while loading is highly recommended.
Depending on the product’s features;
defrosting frozen foods in the cooler
compartment will ensure energy saving and
preserve food quality.
Make sure the foods are not in contact with
the cooler compartment temperature sensor
described below.
Since hot and humid air will not directly
penetrate into your product when the doors
are not opened, your product will optimize
itself in conditions sufficient to protect your
food. Functions and components such as
compressor, fan, heater, defrost, lighting,
display and so on will operate according to
the needs to consume minimum energy under
these circumstances.
Food must be stored in drawers inside the
cooler compartment in order to provide energy
saving and preserve the food in a better
ambient.
Prevent direct contact between the
temperature sensor in the freezer compartment
and the food packages. Energy consumption
may increase in case of a contact with the
sensor.
4.2. First use
Before using your refrigerator, make sure the
necessary preparations are made in line with
the instructions in “Safety and environment
instructions” and “Installation” sections.
Keep the product running with no food inside
for 6 hours and do not open the door, unless
absolutely necessary.
CA sound will be heard when the
compressor is engaged. It is normal to
hear sound even when the compressor is
inactive, due to the compressed liquids and
gasses in the cooling system.
CIt is normal for the front edges of the
refrigerator to be warm. These areas are
designed to warm up in order to prevent
condensation.
CIn some models, indicator panel is dimmed
automatically 5 minutes after the door is
closed. It will be activated again when the
door is opened or any key is pressed.

17 / 31 EN
Refrigerator / User Manual
C*Optional: The figures in this user guide are intended as drafts and may not perfectly match your
product. If your product does not comprise the relevant parts, the information pertains to other models.
5 Using the product
5.1. Indicator panel
This touch-control indicator panel allows you to set the temperature without opening the door of your
refrigerator. Just touch the relevant button with your finger to set the temperature.
*1 23
4
56
7.2 7.1
8910
11
1*2 4
3
(*)
12
11
5
6
789
10.2 10.1
1. Economic use
2- High temperature / fault alert
3- Energy saving function (display off)
4- Rapid cooling
5- Vacation function
6- Cooler compartment temperature setting
7- Energy saving (display off) / Alarm off warning
8- Keypad lock
9- Eco-fuzzy
10- Freezer compartment temperature setting
11- Rapid freezing

18 / 31 EN Refrigerator / User Manual
Using the product
1. Economic use
This sign will light up when the freezer compart-
ment is set to -18°C’, the most economical setting.
( ) Economic use indicator will turn off when
rapid cooling or rapid freezing function is selected.
2. High temperature / fault alert
This indicator ( ) will light up in case of tempera-
ture faults or fault alerts.This indicator illuminates
during power failure, high temperature failures
and error warnings. During sustained power
failures, the highest temperature that the freezer
compartment reaches will flash on the digital
display. After checking the food located in the
freezer compartment press the alarm off button to
clear the warning.
3. Energy saving function (display off)
If the product doors are kept closed for a long time
energy saving function is automatically activated
and energy saving symbol is illuminated. When
energy saving function is activated, all symbols
on the display other than energy saving symbol
will turn off. When the Energy Saving function is
activated, if any button is pressed or the door is
opened, energy saving function will be cancelled
and the symbols on display will return to normal.
Energy saving function is activated during delivery
from factory and cannot be cancelled.
4. Rapid cooling
When the rapid cooling function is turned on, the rapid
cool indicator will light up ( ) and the cooler compart-
ment temperature indicator will display the value 1.
Push the Rapid cool button again to cancel this func-
tion. The Rapid cool indicator will turn off and return to
normal setting. The rapid cooling function will be auto-
matically cancelled after 1 hour, unless cancelled by the
user. Too cool a large amount of fresh food, press the
rapid cool button before placing the food in the cooler
compartment.
5. Vacation function
To activate the Vacation function, press the
button for ( ) 3 seconds; this will activate the
vacation mode indicator ( ). When the Vacation
function is active, the cooler compartment
temperature indicator displays the inscription
"- -" and no cooling process will be active in
the cooling compartment. This function is not
suitable to keep food in the cooler compartment.
Other compartments will remain cooled with the
respective temperature set for each compartment.
Push the vacation function button again to
cancel this function
6. Cooler compartment temperature setting
After pressing the button, the cooler compartment
temperature can be set to 8,7,6,5,4,3,2 and 1
respectively. ( )
7.1. Energy saving (display off)
Pressing this button ( ) will light up the energy
saving sign ( ) and the Energy-saving function
will activate. Activating the energy-saving function
will turn off all other signs on the display. When
the energy-saving function is active, pressing any
button or opening the door will deactivate the
energy-saving function and the display signals will
return to normal. Pressing this button ( ) again
will turn off the energy-saving sign and deactivate
the energy-saving function.
7.2.Alarm off warning:
In case of power failure/high temperature alarm,
after checking the food located in the freezer
compartment press the alarm off button to clear
the warning.
8. Keypad lock
Press the keypad lock button ( ) simultane-
ously for 3 seconds. The keypad lock sign ( ) will
light up and the keypad lock will be activated.
The buttons will be inactive when the Keypad lock
is activated. Press the Keypad lock button again
simultaneously for 3 seconds. The keypad lock
sign will turn off and the keypad lock mode will be
disengaged.
Press the keypad lock button ( ) to prevent
changing the refrigerator's temperature settings.
9. Eco-fuzzy
To activate the eco-fuzzy function, press and hold
the eco-fuzzy button for 1 second. When this

19 / 31 EN
Refrigerator / User Manual
Using the product
function is active, the freezer will switch to the
economic mode after at least 6 hours and the
economic use indicator will light up. To deactivate
the ( ) eco-fuzzy function, press and hold the
eco-fuzzy function button for 3 seconds.
The indicator will light up after 6 hours when the
eco-fuzzy function is active.
10. Freezer compartment temperature setting
The temperature in the freezer compartment is ad-
justable. Pressing the button will enable the freezer
compartment temperature to be set at -18,-19,
-20, -21, -22, -23 and -24. ( )
11. Rapid freezing
For rapid freezing, press the button; this will acti-
vate the rapid freezing indicator ( ).
When the rapid freezing function is turned on, the
rapid freeze indicator will light up and the freezer
compartment temperature indicator will display
the value -27. Press the Rapid freeze button (
) again to cancel this function. The Rapid freeze
indicator will turn off and return to normal setting.
The rapid freezing function will be automatically
cancelled after 24 hours, unless cancelled by the
user. To freeze a large amount of fresh food, press
the rapid freeze button before placing the food in
the freezer compartment.
Table of contents
Languages:
Other Beko Refrigerator manuals

Beko
Beko CNA29121X User manual

Beko
Beko RCSA300K30WN Instruction Manual

Beko
Beko TSE 1240 User manual

Beko
Beko CN232120X User manual

Beko
Beko RCNE590E35ZXP User manual

Beko
Beko B7RDNE595LXPW User manual

Beko
Beko UM584W Owner's manual

Beko
Beko BCSA285K3SN Instruction Manual

Beko
Beko RCSA300K20W Instruction Manual

Beko
Beko RCHA340K21PT User manual

Beko
Beko GNE490E30DZXPN User manual

Beko
Beko RSSA215K40WN User manual

Beko
Beko BCSA240K3SN Instruction Manual

Beko
Beko RDNE455M10XB User manual

Beko
Beko RCSA330K30XPN Instruction Manual

Beko
Beko SN 140120 User manual

Beko
Beko RC 110 User manual

Beko
Beko RED29W User manual

Beko
Beko GNE60531XN User manual

Beko
Beko FS166020 User manual