Beko B3W5841IG User manual

Washing Machine
User Manual
B3W5841IG
2820530346/ EN/ / 01/07/2022 08:40

EN / 11
3 Technical Specifications
Supplier’s name or commercial brand Beko
Model name B3W5841IG
7175746100
Nominal Capacity (kg) 8
Maximum spin speed (cycle/min) 1400
Built-In No
Height (cm) 84
Width (cm) 60
Depth (cm) 55
Single Water inlet / Double Water inlet + / -
Electrical input (V/Hz) 230 V / 50Hz
Total current (A) 10
Total power (W) 2200
Main model code 1320
The model information as stored in the product database
can be reached by entering following website and search-
ing for your model identifier (*) found on energy label.
https://eprel.ec.europa.eu/
The consumption values apply when wireless network connection is turned off.

EN / 12
4 Installation
Please read the “Safety Instructions”
section first!
Your washing machine automatically
detects the amount of laundry
placed inside when selecting a pro-
gram.
While installing the product, before
the first use, calibration should be
done to ensure that the laundry
amount is detected in the most ac-
curate way.
To do this, select the Drum Clean-
ing* program and cancel the spin
function. Start the program without
laundry. Wait for the program to fin-
ish, which will take about 15
minutes.
*The program name may vary de-
pending on the model. For the ap-
propriate program selection, review
the program descriptions section.
• Please contact the nearest Authorised
Service for the installation of the appliance.
• Make sure that the installation and elec-
trical connections of the product are per-
formed by authorised service agent. Man-
ufacturer shall not be held responsible for
damages caused by operations performed
by unauthorised persons.
• Preparation of the location and electrical,
tap water and waste water installations at
the place of installation is under cus-
tomer's responsibility.
• Make sure that the water inlet and dis-
charge hoses as well as the power cable
are not folded, pinched or crushed while
pushing the product into its place after in-
stallation or cleaning procedures.
• Prior to installation, visually check if the
product has any defects on it. Do not have
the product installed if it is damaged.
Damaged products cause risks for your
safety.
4.1 Appropriate Installation Loca-
tion
• Place the product on a hard and level
floor. Do not place it onto a carpet with
high pile or other similar surfaces. Inappro-
priate floor may cause problems of noise
and vibration
• Total weight of the washing machine and
the dryer -with full load- when they are
placed on top of each other reaches to
approx. 180 kilograms. Place the product
on a solid and flat floor that has sufficient
load carrying capacity.
• Do not place the product on the power
cable.
• Do not install the product at places where
temperature may fall below 0 ºC. Freezing
might damage your product.
• Leave a minimum space of 1 cm between
the product and the furniture.
• If you will install the product on a surface
with steps, never place it close to the
edge.
• Do not place the product on any platform.
• Do not place heat sources such as
cooker, irons, ovens, heater etc. on the
appliance and do not use them on the
product.
4.2 Assembly of Bottom Panel Cov-
ers
• In order to increase the sound comfort of
the product, attach cover A after removing
the package foam.
Cover A

EN / 13
Tilt the machine back slightly. Rest the tabs
of Cover A against the lower panel. Com-
plete the assembly by rotating the cover.
• Cover B and the Cap are optional. If avail-
able, attach cover B and the Cap.
Cover B
Rest the tabs of Cover B against the lower
panel. Complete the assembly by rotating
the cover.
Cap
Insert the cap by pushing it with your finger.
4.3 Removing Transportation
Safety Bolts
a. Loosen all transportation safety bolts with
an appropriate wrench until they turn
freely.
b. Bend the inner part by pressing it at the
grip areas and pull the part out.
c. Attach the plastic covers supplied in the
User Manual bag into the holes on the
rear panel.
NOTICE
Remove the transportation safety
bolts before operating the product.
Otherwise, the product will get dam-
aged.
NOTICE
Keep the transportation safety bolts
in a safe place to reuse when the
product needs to be moved again in
the future.
Install the transportation safety bolts
in reverse order of the disassembly
procedure.
Never move the product without the
transportation safety bolts properly
fixed in place.
4.4 Connecting to Water Supply
NOTICE
Models with a single water inlet shall
not be connected to the hot water
tap. In such a case the laundry will
get damaged or the product will
switch to protection mode and will
not operate.
Do not use old or used water inlet
hoses on a new product. It may
cause water leakage from your ma-
chine and stain your laundry.
a. Tighten all hose nuts by hand. Never use
a tool when tightening the nuts.
b. Open the taps completely after making
the hose connection to check for water
leaks at the connection points. If any leak
occurs, turn off the tap and remove the
nut. Check the gasket and tighten the nut
carefully again. In order to prevent the
water leaks and resultant damages, keep
the taps closed when you do not use the
product.

EN / 14
4.5 Connecting the Drain Hose to
the Drain
a. Attach the end of the drain hose directly
to waste water drain, washbasin or
bathtub.
Your house will be flooded if the wa-
ter draining hose is dislocated during
water draining. There is also a risk of
burning due to the high washing
temperatures. In order to prevent
such situations and make sure that
the product performs water intake
and drain processes without any
problem, fix the drain hose securely.
b. Connect the drain hose to a minimum
height of 40 cm and a maximum height of
100 cm.
c. Installing the water draining hose at
ground level or close to the floor (40 cm
below) and then raising it makes water
discharge difficult and the laundry may
come out extremely wet. Thus, follow the
heights provided in the figure.
d. To prevent the waste water to go back
into the product again and to ensure easy
drainage, do not immerse the end of the
hose into the waste water or do not insert
it into the drain for more than 15 cm. If it
is too long, cut it short.
e. The end of the hose should not be bent,
it should not be stepped on and the hose
must not be pinched between the drain
and the product. Otherwise, water dis-
charge issues may emerge.
f. If the length of the hose is too short, use
it by adding an original extension hose.
The overall length of the hose shall not be
longer than 3.2 m. To prevent water
leaks, always secure the connection
between the extension hose and the
draining hose of the product with a suit-
able clamp so that it does not come off
and cause leaks.
4.6 Adjusting the Stands
NOTICE
In order to ensure that the product
operates more silently and vibration-
free, it must stand level and bal-
anced on its feet. Ensure that the
product is balanced by adjusting the
feet. Otherwise, the product may
move from its place and cause
crushing, noise and vibration prob-
lems.
To avoid damaging the lock nuts, do
not use any tools to loosen the nuts.
a. Loosen the lock nuts on the feet by hand.
b. Adjust the feet until the product stands
level and balanced.
c. Tighten all lock nuts again by hand.
4.7 Electrical Connection
Connect the product to a grounded outlet
protected by a 13 A fuse. Our company shall
not be responsible for the damages that
shall be incurred due to using the product
without grounding according to local regula-
tions.

EN / 15
• Connection must comply with national
regulations.
• The electrical connection cable infrastruc-
ture of the product must be adequate and
suitable for product requirements. It is re-
commended to use a Ground Fault Circuit
Breaker (GFCI).
• Power cable plug must be within easy
reach after installation.
• If the current supply to the fuse or breaker
in the house is less than 13 Amps, have a
qualified electrician install a 13 amp sup-
ply.
• The voltage specified in the "Technical
specifications" section must be equal to
your mains voltage.
• Do not make connections via extension
cables or multi-plugs. Overheating and
burning may occur due to the connecting
cable.
Damaged power cables should be
replaced by the authorised service in
order to prevent possible danger.
Important
Fitting a different plug:
As the colours of the wires in the mains lead
of this appliance may not correspond with
the coloured markings identifying the termin-
als on your plug, proceed as follows:
a. Connect the green - yellow or green
(earth) wire to the terminal in the plug
marked ‘E’ or with the symbol f or col-
oured green and yellow or green.
b. Connect the blue (neutral) wire to the ter-
minal in the plug marked ‘N’ or coloured
black.
c. Connect the brown (live) wire to the ter-
minal in the plug marked ‘L’ or coloured
red.
With the alternative plugs a 13 A fuse must
be fitted either in the plug or adaptor or in
the main fuse box. If in doubt contact a qual-
ified electrician.
4.8 Start Up
Before starting to use the product make sure
that the preparations described in section
“Environmental instructions” and “Installa-
tion”. To prepare the product for washing
laundry, perform first operation in Drum
Cleaning programme. If this programme is
not available in your product, apply the
method which is described in section
"Cleaning the loading door and the drum".
Some water has remained in the
product due to the quality control
processes in the production. It is not
harmful for the product.
5 Preparation
Please read the “Safety Instructions”
section first
5.1 Sorting the Laundry
• Sort laundry according to type of fabric,
colour, and degree of soiling and allowable
water temperature.
• Always observe the instructions given on
the garment care labels.

EN / 16
5.2 Preparing Laundry for Washing
• Laundry items with metal attachments
such as, underwiring, belt buckles or metal
buttons will damage the product. Remove
the metal pieces or wash such clothes by
putting them in a laundry bag or pillow
case.
• Take out all substances in the pockets
such as coins, pens and paper clips, and
turn pockets inside out and brush. Such
objects may damage the product or cause
noise problem.
• Put small size clothes such as infant’s
socks and nylon stockings in a laundry
bag or pillow case.
• Place curtains in without compressing
them. Remove curtain attachment items.
Curtain attachment items may cause
pulling and tearing on the curtain.
• Fasten zippers, sew loose buttons and
mend rips and tears.
• Wash “Machine washable” or “Hand
washable” labelled products only with an
appropriate programme.
• Do not wash colours and whites together.
New, dark coloured cottons release a lot
of dye. Wash them separately.
• Tough stains must be treated properly be-
fore washing.
• Wash trousers and delicate laundry turned
inside out.
• Laundry that are subjected to materials
such as flour, lime dust, milk powder, etc.
intensely must be shaken off before pla-
cing into the product. Such dusts and
powders on the laundry may build up on
the inner parts of the product in time and
can cause damage.
5.3 Tips for Energy and Water Sav-
ing
Following information will help you use the
product in an ecological and energy/water-
efficient manner.
• Operate the product in the highest load
capacity allowed for the programme you
have selected, but do not overload. See
"Programme and consumption table"
• Observe the temperature instructions on
the detergent packaging.
• Wash slightly soiled laundry at low temper-
atures.
• Use faster programmes for small quantit-
ies of lightly soiled laundry.
• Do not use prewash and high temperat-
ures for laundry that is not heavily soiled or
stained.
• If you plan to dry your laundry in a dryer,
select the highest spin speed recommen-
ded during washing process.
• Do not use more detergent than the re-
commended amount on the detergent
packaging.
5.4 Loading the Laundry
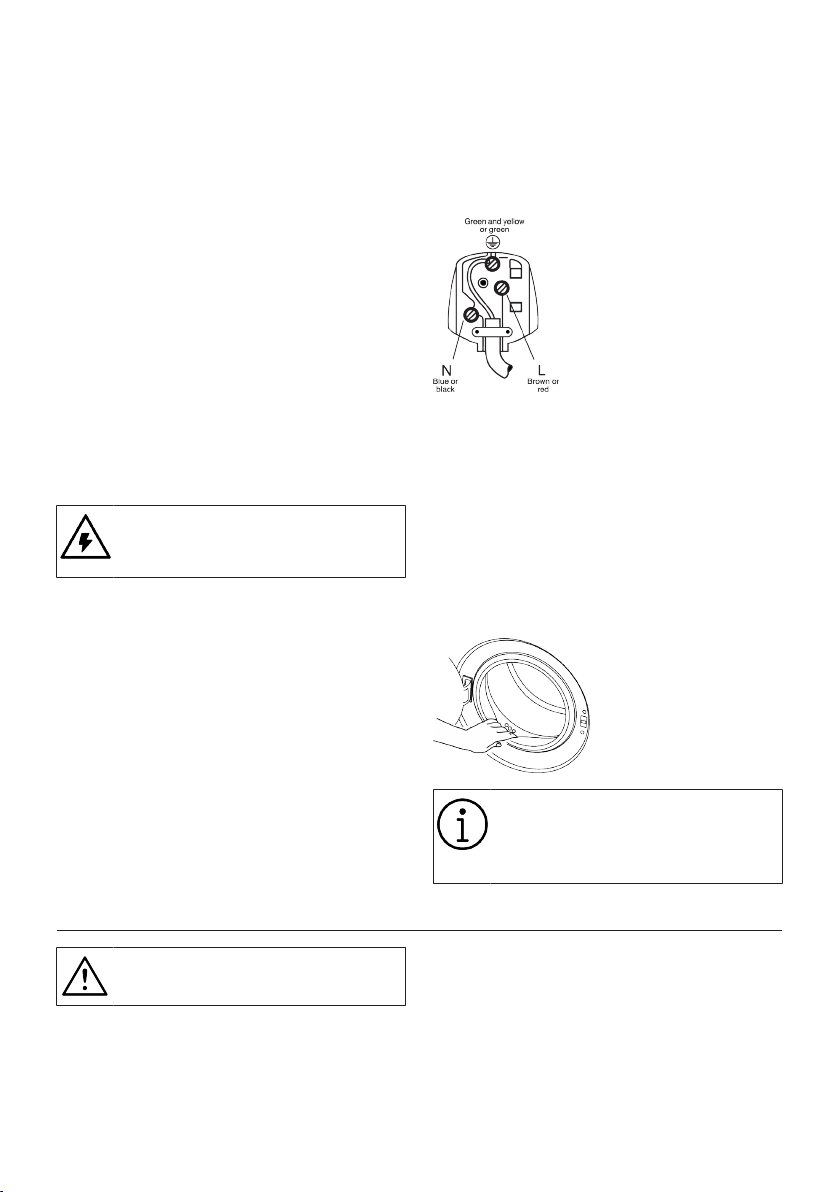
a. Open the loading door.
b. Put the laundry items into the product in
a loose manner.
c. Push the loading door to close until you
hear a locking sound. Ensure that no
items are caught in the door. The loading
door is locked while a programme is run-
ning. The door lock will open once the
programme is completed. Then you can
open the loading door. If the door does
not open, apply the solutions provided for
“Loading door cannot be opened” error in
the Troubleshooting section.
5.5 Correct Load Capacity
The maximum load capacity depends on the
type of laundry, the degree of soiling and the
desired washing programme.
The product automatically adjusts the water
amount according to the weight of the laun-
dry put inside it.

EN / 17
Follow the instructions in “Pro-
gramme and consumption table”.
When the appliances is overloaded
product’s washing performance will
drop. Moreover, noise and vibration
problems may occur.
5.6 Using Detergent and Softener
WARNING
Read the manufacturer instructions
on the package while using deter-
gents, softeners, starch, bleach and
decolourants, anti-limescale and fol-
low the dosage information
provided. Use a measuring cup, if
any.
The detergent drawer comprises of three
compartments:
(1) for prewash,
(2) for main washing,
(3) for softener,
( ) a syphon piece in the softener compart-
ment,
( ) there is a liquid detergent apparatus for
liquid detergent use in the main washing
compartment.
Detergent, Softener and Other Cleaning
Agents
• Add detergent and softener before starting
the washing programme.
• Do not leave the detergent drawer open
when the washing programme is on.
• If you are using a programme without pre-
washing, do not put detergent in the pre-
wash compartment (compartment no. “1”).
• If you are using a program with prewash,
start the machine after adding powder de-
tergent to the prewash and main wash
compartments (compartments 1 and 2).
• Do not select a programme with pre-
washing if you are using a detergent pod
or dispensing ball. Place the detergent
pod or the dispensing ball directly among
the laundry in the product.
• If you are using a liquid detergent, follow
the directions under “Liquid detergent use”
and do not forget to bring the liquid deter-
gent apparatus to the correct position.
Choosing the Detergent type
Detergent type to be used depends on the
washing programme, fabric type and colour.
• Use different detergents for coloured and
white laundry.
• Wash your delicate clothes only with spe-
cial detergents (liquid detergent, wool
shampoo, etc.) intended solely for delicate
clothes and at suggested programmes.
• When washing dark coloured clothes and
quilts, it is recommended to use liquid de-
tergent.
• Wash woollens at suggested programme
with special detergent made specifically
for woollens.
• Please review the programme descriptions
part for suggested programme for different
textiles.
• All recommendations about detergents are
valid for selectable temperature range of
programmes.
Only detergents, softeners and ad-
ditives suitable for washing ma-
chines should be used.
Do not use soap powder.
Adjusting the Detergent Amount
The amount of detergent depends on the
amount of laundry, how soiled they are and
the water hardness.

EN / 18
• Do not exceed the recommended dosage
values on the detergent packaging in order
to eliminate excessive foam and poor rins-
ing problems, to save money and protect
the environment.
• Use less amounts of detergent for fewer or
less soiled laundry.
Using Softeners
Put the softener in the softener compartment
of the detergent drawer.
• Do not exceed the (>max<) level sign in
the softener compartment.
• If the softener is not fluid, dilute with water
before placing in the softener compart-
ment.
WARNING
Do not use liquid detergents or other
materials with cleaning properties
unless they are intended for use in
washing machines for softening the
laundry.
Using Liquid Detergents
If the Product Has a Liquid Detergent
Apparatus
• Press and rotate the apparatus at where it
is shown when you want to use liquid de-
tergents. The part falling below will serve
as a barrier for liquid detergent.
• Clean with water at its place or by remov-
ing from its place when it is necessary. Do
not forget to place the apparatus in the
main washing compartment (compartment
no. “2”) after cleaning.
• The apparatus should be up if you will use
a powder detergent. The fan that you
would see in this position will mix the
powder detergent and help it to dissolve.
Use of Gel and Tablet Detergents
• If the detergent is fluid and there is no li-
quid detergent compartment in your
product, place the gel detergent in the
main washing detergent compartment in
first water intake. If your product has a li-
quid detergent compartment, fill the com-
partment with detergent before starting
the programme.
• If the gel detergent is not fluid or is in a
capsule liquid tablet, place directly inside
the drum before washing.
• Put the tablet detergent in the main wash-
ing compartment (compartment no. “2”) or
directly inside the drum before washing.
Using Starch
• Put in the liquid starch, powder starch or
fabric dye in the softener compartment.
• Do not use softener and starch in the
same washing programme simultaneously.
• Wipe the inside of the product with a
damp and clean cloth after using starch.
Using Anti-Limescale
• When necessary, only use anti-limescale
produced for washing machines.
Using Bleach and Decolourants
• Select a programme with pre-washing and
add bleach at the start of pre-washing. Do
not put detergent in the pre-wash com-
partment. As an alternative application, se-
lect a programme with additional rinsing
and add the bleach while the product is
receiving water to the detergent compart-
ment in the first rinsing step.
• Do not mix and use bleach and detergent
together.
• As bleach may cause skin irritation use
only small amounts (1/2 tea cups - ap-
proximately 50 ml and rinse the laundry
well.
• Do not pour bleach directly onto the laun-
dry.
• Do not use bleach for coloured clothes.
• Select a programme with low temperature
washing while using oxygen-based decol-
ourants.

EN / 19
• Oxygen-based decolourants can be used
together with detergents. However, if it
does not have the same viscosity as the
detergent, first place the detergent in com-
partment no. “2” in the detergent drawer
and wait for the product to rinse away the
detergent during water intake. Add the de-
colourant to the same compartment while
the machine continues taking in water.
5.7 Tips for Efficient Washing
Clothes
Light Colours and
Whites Colours Black/Dark Col-
ours
Delicates/Wool-
lens/Silks
(Recommended temperat-
ure range based on soil
level: 40-90 °C)
(Recommended temper-
ature range based on soil
level: cool -40 °C)
(Recommended
temperature range
based on soil level:
cool -40 °C)
(Recommended
temperature range
based on soil level:
cool -30 °C)
Soiling Level
Heavily Soiled
(difficult stains
such as grass,
coffee, fruits
and blood.)
It may be necessary to
pre-treat the stains or per-
form prewash.
Powder and liquid deter-
gents recommended for
whites can be used at
dosages recommended for
heavily soiled clothes. It is
recommended to use
powder detergents to
clean clay and soil stains
and the stains that are
sensitive to bleaches.
Powder and liquid deter-
gents recommended for
colours can be used at
dosages recommended
for heavily soiled clothes.
It is recommended to use
powder detergents to
clean clay and soil stains
and the stains that are
sensitive to bleaches.
Detergents which do not
contain decolourant
should be used.
Liquid detergents
suitable for colours
and black/dark col-
ours can be used at
doses recommen-
ded for heavily
soiled clothes.
Prefer liquid deter-
gents produced
for delicate
clothes. Woollen
and silk clothes
must be washed
with special wool-
len detergents.
Normally
Soiled
(For example,
stains caused
by body on col-
lars and cuffs)
Powder and liquid deter-
gents recommended for
whites can be used at
dosages recommended for
normally soiled clothes.
Powder and liquid deter-
gents recommended for
colours can be used at
dosages recommended
for normally soiled
clothes. Detergents
which do not contain de-
colourant should be
used.
Liquid detergents
suitable for colours
and black/dark col-
ours can be used at
doses recommen-
ded for moderately
soiled clothes.
Prefer liquid deter-
gents produced
for delicate
clothes. Woollen
and silk clothes
must be washed
with special wool-
len detergents.
Lightly Soiled
(No visible
stains exist.)
Powder and liquid deter-
gents recommended for
whites can be used at
dosages recommended for
lightly soiled clothes.
Powder and liquid deter-
gents recommended for
colours can be used at
dosages recommended
for lightly soiled clothes.
Detergents which do not
contain decolourant
should be used.
Liquid detergents
suitable for colours
and black/dark col-
ours can be used at
doses recommen-
ded for lightly soiled
clothes.
Prefer liquid deter-
gents produced
for delicate
clothes. Woollen
and silk clothes
must be washed
with special wool-
len detergents.
5.8 Displayed Programme Duration
You can view the programme duration on
the display of your machine while selecting a
programme. Depending on the amount of
laundry you have loaded into your machine,
foaming, unbalanced load conditions, fluctu-
ations in power supply, water pressure and
programme settings, the programme dura-
tion is automatically adjusted while the pro-
gramme is running.
SPECIAL CASE: At programme start of Cot-
tons and Cotton Eco programmes, display
shows the duration of half load. It is the most
common use case. After programme starts,
in 20-25 minutes actual load is detected by
the machine. And if the detected load is
higher than half load; washing programme
will be adjusted accordingly and programme
duration increased automatically. You can
follow this change on the display.

EN / 20
6 Operating the Product
Please read the “Safety Instructions”
section first!
6.1 Control Panel
1
2 3 4
56789101112
1 Programme Selection Button 2 Temperature Level Lights
3 Spin Level Indicator Lights 4 Display
5 Start/Pause Button 6 Remote Control Button
7 End Time Setting Button 8 Auxiliary Function Button 3
9 Auxiliary Function Button 2 10 Auxiliary Function Button 1
11 Spin Speed Adjustment Button 12 Temperature Setting Button

EN / 21
6.2 Symbols on the Display
1 2 3 4 5
6
7
8
91011121314151617
1 Temperature Indicator 2 Spin Speed Indicator
3 Duration information 4 Door lock is engaged symbol
5 Programme follow-up indicator 6 No Water indicator
7 Add Garment Indicator 8 Bluetooth Connection Indicator
9 Remote Control Indicator 10 Delayed Start Enabled Indicator
11 Auxiliary Function Indicators 3 12 Child Lock Enabled symbol
13 Auxiliary Function Indicators 2 14 Auxiliary Function Indicators 1
15 No spin indicator 16 Rinse Hold Indicator
17 Cold Water indicator
The visuals used for machine de-
scription in this section are schem-
atic and may not match exactly with
the features of your machine.

EN / 22
6.3 Programme and Consumption Table
Auxiliary Functions
Programme
Temperature
°C
Max. Load
(kg)
Water Con-
sumption (l)
Energy Con-
sumption
(kWh)
Max. Speed
Anti Crease+
Fast+
Prewash
Extra Rinse
Steam
Temperature °C
Cottons
90 8 96 2,40 1400 • • • • • Cold - 90
60 8 96 1,80 1400 • • • • • Cold - 90
40 8 95 0,97 1400 • • • • • Cold - 90
Eco 40-60
40*** 8 63 0,700 1400 40-60
40*** 4 44 0,445 1400 40-60
40*** 2 33 0,235 1400 40-60
Synthetics 60 3 70 1,35 1200 • • • • • Cold - 60
40 3 68 0,85 1200 • • • • • Cold - 60
Quick / Super Quick
90 8 66 2,20 1400 • • • • Cold - 90
60 8 66 1,20 1400 • • • • Cold - 90
30 8 66 0,20 1400 • • • • Cold - 90
Quick / Super Quick + Fast+ 30 2 40 0,15 1400 • • • • Cold - 90
Hand Wash 40 1,5 55 0,50 1200 • Cold - 40
Dark Care 40 3,5 83 0,85 1200 • • • * • Cold - 40
Sports 40 3,5 55 0,50 1200 • Cold - 40
StainExpert 60 4 85 1,55 1400 • • 30-60
Anti Allergy 90 8 125 2,90 1400 * * 20-90-
Down Wear 60 2 89 1,31 800 • • Cold - 60
SteamTherapy - 1 1,1 0,11 - *-
Shirts 60 3 70 1,40 800 • • • • * Cold - 60
Drum Clean 90 - 76 2,33 600 * 90
Downloaded Programme *****
Mix 40 3,5 85 0,90 800 • • • • Cold - 40
Towel 60 3 109 1,45 800 * • Cold - 60
Soft Toys 40 2 53 0,60 600 * Cold - 40
Curtain 40 2 79 0,69 800 • * Cold - 40
• : Selectable.
* : Automatically selected, cannot be can-
celled.
*** : Eco 40-60 programme is a test pro-
gramme according to 40 ° C temperature
selection, EU regulation EU / 2019/2014 and
EN 60456: 2016 / A11: 2020 standard.
***** : These programmes can be used with
the HomeWhiz application. Power consump-
tion may increase due to the connection.
- : See the programme description for max-
imum load.

EN / 23
Please read Installation section of
the manual before first use.
The auxiliary functions in the table
may vary according to the model of
your machine.
Water and energy consumption may
vary subject to the changes in water
pressure, water hardness and tem-
perature, ambient temperature, type
and amount of laundry, selection of
auxiliary functions and spin speed,
and changes in electric voltage.
Selection patterns for auxiliary func-
tions can be changed by the manu-
facturer company. New selection
patterns can be added or removed.
The spin speed of your machine may
vary according to the programme;
this spin speed cannot exceed the
max. spin speed of your machine.
The amount of noise and humidity
varies according to the spin speed;
when the higher spin speed is selec-
ted during the spinning phase, the
laundry contains less moisture but
higher noise occurs at the end of the
programme.
You can see the washing duration
on the display of your machine while
selecting a programme. Depending
on the amount of laundry you have
loaded into your machine, there may
be a difference of 1-1.5 hours
between the duration shown on the
display and the actual duration of
the wash cycle. Duration will be
automatically updated soon after the
washing starts.
Always select the lowest appropriate
temperature. The most efficient pro-
grammes in terms of energy con-
sumption are generally those that
wash at low temperatures for a long
time.
Consumption Values (EN)
Temperat-
ure Selec-
tion °C
Spin Speed
(cycle/min)
Capacity
(kg)
Programme
Duration
(h:min)
Energy
Consump-
tion (kWh/
cycle)
Water Con-
sumption
(liter/cycle)
Laundry
Temperat-
ure (°C)
Residual
Moisture
Percent (%)
Eco 40-60
40 1400 8 03:38 0,700 63 32 52,8
40 1400 4 02:47 0,445 44 28 52,9
40 1400 2 02:47 0,235 33 22 55,9
Cottons 20 1400 8 03:30 0,600 95 20 53,9
60 1400 8 03:30 1,800 96 60 53,9
Synthetics 40 1200 3 02:15 0,850 68 40 40
Quick / Su-
per Quick 30 1400 8 00:28 0,200 66 23 62
The consumption values given for programmes other than the Eco 40-60 programme are only indicative.
6.4 Programme Selection
a. Determine the programme suitable for the
type, quantity and soiling level of the
laundry in accordance with "Programme
and consumption table".
Programmes are limited with the
highest spin speed appropriate for
that particular type of fabric.
When selecting a programme, al-
ways consider the type of fabric, col-
our, degree of soiling and permiss-
ible water temperature.

EN / 24
b. Select the desired programme with the
Programme Selection knob.
6.5 Programmes
• Eco 40-60
In the Eco 40-60 programme, you may wash
normally soiled cotton laundry that are spe-
cified to be washed together at 40°C or
60°C. This programme is the standard test
programme according to the EU environ-
mentally friendly design and energy labelling
regulations.
Although this programme washes longer
than other washing programmes, it is more
efficient in terms of energy and water con-
sumption. Actual water temperature may be
different from the stated wash temperature.
When you load the machine with less laun-
dry (e.g. ½ capacity or less), periods in pro-
gramme stages may automatically get
shorter. In this way, energy and water con-
sumption would be much less.
• Cottons
You can wash your durable cotton laundry
(sheets, bedlinen, towels, bathrobes, under-
wear etc.) in this programme. When the
quick wash function button is pressed, pro-
gramme duration becomes notably shorter
but effective washing performance is en-
sured with intense washing movements. If
the quick wash function is not selected, ef-
fective washing and rinsing performance is
ensured for your heavily soiled laundry.
• Synthetics
You can wash your laundry (such as shirts,
blouses, synthetic/cotton blended fabrics
etc.) in this programme. When the quick
wash function button is pressed, the pro-
gramme duration will be shortened signific-
antly and effective washing performance is
provided for your laundry that is not very
dirty. If the quick wash function is not selec-
ted, effective washing and rinsing perform-
ance is ensured for your heavily soiled laun-
dry.
• Hand Wash
Use to wash your woollen/delicate laundry.
Select the appropriate temperature comply-
ing with the tag of your clothes. Your laundry
will be washed with a very gentle washing
action in order not to damage the clothes.
• Anti Allergy
Applying a steam step at the beginning of
the programme allows to soften the dirt eas-
ily.
Use this programme for your laundry (baby
clothes, bed sheets, bedlinen, underwear,
etc. cotton items) that requires an anti-aller-
gic and hygienic washing at high temperat-
ure with intensive and long washing cycle.
The high level of hygiene is ensured thanks
to the steam application before the pro-
gramme, long heating duration and addi-
tional rinsing step.
• Programme was tested by „The British Al-
lergy Foundation„ (Allergy UK) with the
60°C temperature option selected and it
was certified in terms of its efficacy in elim-
inating allergens in addition to bacteria and
mould.
Allergy UK is the brand of the British
Allergy Association. Seal of Approval
is created to guide people that re-
quire recommendation about a
product that the related product re-
stricts / reduces / eliminates the al-
lergens or reduces the allergen con-
tent significantly in the ambient
where allergy patients exist. It aims
to provide assurance that the
products are tested scientifically or
examined in a way to provide meas-
urable results.
• Down Wear
Use this programme to wash your coats,
vest, jackets etc. containing feathers with a
"machine-washable" label on them. Thanks

EN / 25
to special spinning profiles, it is ensured that
the water reaches the air gaps amongst the
feathers.
• Spin+Drain
You can use this program to remove the wa-
ter on the garment/inside the machine.
• Rinse
Use when you want to rinse or starch separ-
ately.
• SteamTherapy
Use this programme to reduce the creases
and ironing times of a small amount of un-
spotted cotton, synthetic or mixed laundry.
• Curtain
You can use this programme to wash your
tulles and curtains. As their meshed texture
causes excessive foaming, put little amount
of detergent into the main washing compart-
ment. Thanks to the special spin profile of
the programme, tulles and curtains crease
less. Do not load your curtains above the
specified capacity in order not to damage
them.
It is recommended to use special
detergents produced for curtains in
the powder detergent compartment
in this programme.
• Shirts
This programme is used to wash the shirts
made from cotton, synthetic and synthetic
blended fabrics altogether. It reduces
wrinkles. Steam is applied at the end of the
programme to help the wrinkle reducing
function. The special spin profile and steam
applied at the end of the programme reduce
the wrinkles on your shirts. When the quick
wash function is selected, the Pre-treatment
algorithm is executed.
• Apply the pre-treatment chemical on your
garments directly or add it together with
the detergent in the powder detergent
compartment. Thus, you can obtain the
same performance as you obtain with nor-
mal washing in a much shorter period of
time. Usage life of your shirts increases.
Do not use pre-wash detergent if you are
planning to use delay function of your ma-
chine. Prewash detergent may pour out on
your clothes and cause stains.
** It is recommended to operate the cycle
with no more than 6 shirts to minimize
wrinkles in your shirts using this cycle. When
washing more than 6 shirts, there may be
differences on the wrinkle levels and humid-
ity on shirts at the end of cycle.
• Quick / Super Quick
Use this programme to wash your lightly
soiled or unspotted cotton clothes in a short
time but not for towels or heavy cottons. The
programme duration can be reduced down
to 14 minutes when the quick wash function
is selected. When the quick wash function is
selected, maximum 2 (two) kg of laundry
must be washed.
• Dark Care
Use this programme to protect the colour of
your dark-coloured garments or jeans. It per-
forms high performance washing with spe-
cial drum movement even if the temperature
is low. It is recommended to use liquid deter-
gent or woollen shampoo for dark coloured
laundry. Do not wash your delicate clothes
containing wool or etc.
• Mix
Use to wash your cotton and synthetic
clothes together without sorting them.
• Sports
You can use this programme to wash sports
and outdoors garments that contain cotton/
synthetics mix and water repellent covers
such as gore-tex etc. It makes sure your
garments are washed gently thanks to spe-
cial rotating movements.
• StainExpert
The machine has a special stain programme
which enables the removal of different types
of stains in the most effective way. Use this
programme only for durable colourfast cot-
ton laundry. Do not wash delicate and pig-
menting clothes and laundry in this pro-
gramme. Before washing, make sure to
check garment tags (recommended for cot-
ton shirts, trousers, shorts, t-shirts, baby

EN / 26
clothes, pyjamas, aprons, table clothes, bed
sheets, duvet covers, pillowcases, bath-
beach towels, towels, socks, cotton under-
wear that are suitable for washing at high
temperature and for a long time). In the auto-
matic stain programme, you can wash 24
types of stains divided into three different
groups according to "Quick wash" function
selection. You can see stain groups that can
be selected with the “Quick Wash” button.
Depending on the selected stain group, a
special washing programme for which dura-
tion of rinse hold, washing action, washing
and rinsing duration are modified.
Below you can find the soil groups that
can be selected with the “Quick Wash”
setting button:
When “Quick Wash” is not selected;
Sweat, collar dirt, food, mayonnaise, salad
dressing, make-up, machine oil, baby food.
When the “Quick Wash” button is
pressed once;
Blood, chocolate, pudding, grass, mud,
eggs, butter, curry.
When the “Quick Wash” button is
pressed twice;
Tea, coffee, juice, ketchup, red wine, cola,
jam, coal
a. Select the stain programme.
b. Select the stain you want to clean by loc-
ating it in the groups above and selecting
the related group with the quick auxiliary
function button.
c. Read the garment tag carefully and en-
sure that correct temperature and spin
speed are selected.
• Downloaded Programme
This is a special programme that allows you
to download different programmes when you
want to. At the start, there is a programme
you can see with the HomeWhiz application
as default. However, you can use the Home-
Whiz application to select a programme from
the predetermined programme set, and then
change and use it.
If you want to use HomeWhiz feature
and Remote Control function, you
must select Downloaded Pro-
gramme. Detailed information can
be found in HomeWhiz Feature and
Remote Control Function.
• Soft Toys
Soft toys must be washed in a delicate pro-
gramme due to their delicate fabrics, and the
fibre and accessories they contain. Thanks
to its delicate washing movements and spin-
ning profile, the soft toys programme pro-
tects the toys during washing. It is recom-
mended to use liquid detergent.
Fragile toys with hard surfaces must
not be washed under any circum-
stances.
Toys must not be washed together
with your garments since they may
harm laundry.
• Towel
Use this programme to wash durable cotton
laundry such as towels. Load the towels into
the machine paying attention to place them
in a way that they will not contact the door
gasket or the glass.
6.6 Temperature Selection
Whenever a new programme is selected, the
recommended temperature for the pro-
gramme appears on the temperature indic-
ator. It is possible that the recommended
temperature value is not the maximum tem-
perature that can be selected for the current
programme.
Press the Temperature Adjustment button to
change the temperature. Temperature de-
creases gradually.

EN / 27
No change can be made in pro-
grammes where temperature adjust-
ment is not allowed.
You can also change the temperature after
the washing starts. This change can only be
made if the washing steps allow it.
If you scroll to cold wash option and
press Temperature Adjustment but-
ton again, the recommended max-
imum temperature for the selected
programme appears on the display.
Press the Temperature Adjustment
button again to decrease the tem-
perature.
6.7 Spin Speed Selection
Whenever a new programme is selected, the
recommended spin speed of the selected
programme is displayed on the Spin Speed
indicator. It is possible that the recommen-
ded spin speed value is not the maximum
spin speed that can be selected for the cur-
rent programme.
Press the Spin Speed Adjustment button to
change the spin speed. Spin speed de-
creases gradually.
Then, depending on the model of the
product, "Rinse Hold " and "No Spin
" options appear on the display.
If you are not going to unload your laundry
immediately after the programme completes,
you can use Rinse Hold function in order to
prevent them from getting wrinkled when
there is no water in the machine.
This function holds the laundry in the final
rinsing water. If you want to spin your laun-
dry after the Rinse Hold function:
a. Adjust the Spin Speed.
b. Press Start / Pause. The programme will
resume. Machine drains the water and
spins the laundry.
If you want to drain the water at the end of
the programme without spinning, use No
Spin function.
No change can be made in pro-
grammes where spin speed adjust-
ment is not allowed.
You can change the spin speed after the
washing starts if the washing steps allow it.
Changes cannot be made if the steps do not
allow it.
Soaking
If you are not going to unload your clothes
immediately after the programme completes,
you can use rinse hold function to keep your
laundry in the final rinsing water in order to
prevent them from getting wrinkled when
there is no water in the machine. Press
Start/Pause button after this process if you
want to drain the water without spinning
your laundry. Programme will resume and
complete after draining the water.
If you want to spin the laundry held in water,
adjust the Spin Speed and press Start/
Pause button. The programme will resume.
Water is drained, laundry is spun and the
programme is completed.
6.8 Auxiliary Function Selection
Select the desired auxiliary functions before
starting the programme. Whenever a pro-
gramme is selected, icons of the auxiliary
function symbol that is selected together
with it lights.

EN / 28
When an auxiliary function button
that cannot be selected with the cur-
rent programme is pressed, the
washing machine will make a warn-
ing sound.
Some functions cannot be selected
together. If a second auxiliary func-
tion conflicting with the first one is
selected before starting the ma-
chine, the function selected first will
be cancelled and the second auxili-
ary function selection will remain act-
ive. For example, if you want to se-
lect Quick Wash after you have se-
lected the Additional Water, Addi-
tional Water will be cancelled and
Quick Wash will remain active.
An auxiliary function that is not com-
patible with the programme cannot
be selected. (See "Programme and
consumption table")
Some programmes have auxiliary
functions that must be operated
simultaneously. Those functions
cannot be cancelled. The frame of
the auxiliary function will not be lit,
only inner area will be lit.
6.8.1 Auxiliary Functions
• Prewash
A Prewash is only worthwhile for heavily
soiled laundry. Not using the Prewash will
save energy, water, detergent and time.
• Fast+
After selecting a programme, you can press
the Quick Wash setting button to shorten the
programme duration. For some pro-
grammes, the duration can shorten by over
50%. Despite this, a good washing perform-
ance is achieved thanks to the changed al-
gorithm.
While it differs with each programme, when
you press the Quick Wash button once, the
programme duration will drop to a certain
level. If you press the same button for the
second time, it will drop to the minimum dur-
ation.
Do not use Quick Wash adjustment button
when washing heavily soiled laundry for a
better washing performance.
Use the Quick Wash button for Mildly and
Lightly soiled laundry and shorten the pro-
gramme duration.
• Steam
This function helps to reduce the creases of
your cotton, synthetic and mixed clothes,
shorten the ironing time and remove the dirt
by softening.
* Under conditions where the steam function
is applied at the end of the programme, your
laundry may be warmer at the end of the
washing. This is expected within the pro-
gramme working conditions.
When you activate the steam func-
tion, do not use liquid detergent if
there is no liquid container or liquid
detergent dosing feature. There is
the risk of staining of the clothes.
• Remote Control
You can use this auxiliary function button to
connect your product to smart devices. For
detailed information, see HomeWhiz Feature
and Remote Control Function.
• Customized Programme
This auxiliary function can only be used for
Cotton and Synthetic programmes together
with the HomeWhiz application. When this
auxiliary function is activated, you can add
up to 5 auxiliary rinsing steps to the pro-
gramme. You can select and use some aux-
iliary functions even though they are not
found on your product. You can increase
and decrease the time of the Cotton and
Synthetic programmes within a safe range.
When the Specialised Programme
auxiliary function is selected, the
washing performance and energy
consumption will be different than
the declared value.

EN / 29
6.8.2 Functions/Programmes Se-
lected by Pressing the Func-
tion Keys for 3 Seconds
• Drum Clean
Press and hold the related auxiliary function
button for 3 seconds to select the pro-
gramme. Regularly clean (once every 1 to 2
months) the drum for ensuring the required
hygiene. Steam is applied before the pro-
gramme to soften the residues in the drum.
Turn on the programme when the machine is
completely empty. For more effective results,
place powder anti-limescale (drum cleaning
materials) suitable for washing machines in-
side the detergent compartment no. "2”.
Leave the loading door half closed after the
programme ends for the inside of the ma-
chine to dry.
This is not a washing programme.
This is a maintenance programme.
Do not turn this programme on
when there is something inside the
machine. When you attempt to op-
erate, the machine automatically
senses that there is load inside, and
may quit or resume the programme
as per the model of your machine.
An effective cleaning is not achieved
if the programme is resumed.
• Anti Crease+
This function is selected when the spin se-
lection button is pressed and held for 3
seconds and the programme follow-up light
for the relevant step turns on. When the
function is selected, the drum rotates for up
to 8 hours for preventing the laundry from
creasing at the end of the programme. You
can cancel the programme and take your
laundry out at any time during the 8-hour
duration. Press the function selection key or
the machine on/off key to cancel the func-
tion. The programme follow-up light will re-
main on until the function is cancelled or the
step is complete. If the function is not can-
celled, it will be active in the subsequent
washing cycles as well.
• Extra Rinse
This function can be selected by pressing
and holding the related auxiliary function but-
ton for 3 seconds.
This function enables the product to make
additional rinsing in addition to the one
already made after the main wash. Thus, the
risk for sensitive skins (babies, allergic skins,
etc.) to be effected by the minimal detergent
remnants on the laundry can be reduced.
• Child Lock
Use Child Lock function to prevent children
from tampering with the machine. Thus you
can avoid any changes in a running pro-
gramme.
You can switch on and off the ma-
chine with On / Off button when the
Child Lock is active. When you
switch on the machine again, pro-
gramme will resume from where it
has stopped.
When the Child Lock is enabled, an
audio warning will be given if the
buttons are pressed. Audio warning
will be cancelled if the buttons are
pressed five times consecutively.
To activate the child lock:
Press and hold the related auxiliary function
button for 3 seconds. After the countdown
as “3-2-1" on the display is over, Child Lock
symbol appears on the display. When this
warning is displayed, you can release the
Auxiliary Function button 3.
To deactivate the child lock:
Press and hold the related auxiliary function
button for 3 seconds. After the countdown
as “3-2-1" on the display is over, Child Lock
symbol disappears.
• Bluetooth
You can use the bluetooth connection func-
tion to pair your machine with your smart
device. This way, you can use your smart
device to get information about your ma-
chine and control it.
Other manuals for B3W5841IG
1
Table of contents
Other Beko Washer manuals

Beko
Beko WCV8746X0 User manual

Beko
Beko WTL74051W User manual

Beko
Beko WMY 91493 LB1 User manual

Beko
Beko WMD 26125 T User manual

Beko
Beko WITC7613XW User manual

Beko
Beko WCV 9746 X0 User manual

Beko
Beko WTV 8612 XSS User manual

Beko
Beko WM 6103 W Manual

Beko
Beko HTV 8633XS0 User manual

Beko
Beko WMY 71432LMB3 User manual

Beko
Beko WRE 6632 ZWBW User manual

Beko
Beko WMB 61041 User manual

Beko
Beko WMD 61 W Operating instructions

Beko
Beko WTV 8512 BW User manual

Beko
Beko WTV9636W User manual

Beko
Beko WTE6611B0 User manual

Beko
Beko WMB 71343S User manual

Beko
Beko B7S-B7SLED How to use

Beko
Beko WUE 6612 BA User manual

Beko
Beko AUTOMATIC WASHING MACHINE WMA 657 S Troubleshooting guide