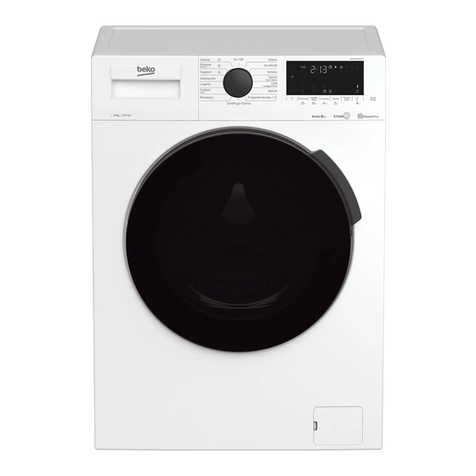
Beko WCB 77127 User manual

Washing machine
WCB 77127
WCB 77107
WCB 77087

2 - EN
1 Warnings
General Safety
•Never place your machine on a carpet
covered floor. Otherwise, lack of airflow
from below of your machine may cause
electrical parts to overheat. This may cause
problems with your washing machine.
•If the power cable or mains plug is
damaged you must call Authorized Service
for repair.
•Fit the drain hose into the discharge
housing securely to prevent any water
leakage and to allow machine to take in
and discharge water as required. It is very
important that the water intake and drain
hoses are not folded, squeezed, or broken
when the appliance is pushed into place
after it is installed or cleaned.
•Your washing machine is designed to
continue operating when the power
restores after a power interruption. The
machine will resume its program when the
power restores. Press the “Start/Pause/
Cancel” button for 3 seconds to cancel the
program (See, Canceling a Program)
•There may be some water in your machine
when you receive it. This is from the quality
control process and is normal. It is not
harmful to your machine.
•Some problems you may encounter may
be caused by the infrastructure. Press
“Start/Pause/Cancel” button for 3 seconds
to cancel the program set in your machine
before calling the authorized service.
First Use
•Carry out your first washing process
without loading your machine and with
detergent under “Cottons 90°C” program.
•Ensure that the cold and hot water
connections are made correctly when
installing your machine.
•If the current fuse or circuit breaker is less
than 16 Amperes, please have a qualified
electrician install a 16 Ampere fuse or
circuit breaker.
•While using with or without a transformer,
do not neglect to have the grounding
installation laid by a qualified electrician.
Our company shall not be liable for any
damages that may arise when the machine
is used on a line without grounding.
•Keep the packaging materials out of reach
of children or dispose them by classifying
according to waste directives.
Intended use
•This product has been designed for home
use.
•The appliance may only be used for
washing and rinsing of textiles that are
marked accordingly.
Safety instructions
•This appliance must be connected to
an earthed outlet protected by a fuse of
suitable capacity.
•The supply and draining hoses must
always be securely fastened and remain in
an undamaged state.
•Fit the draining hose to a washbasin or
bathtub securely before starting up your
machine. There may be a risk of being
scalded due to high washing temperatures!
•Never open the loading door or remove the
filter while there is still water in the drum.
•Unplug the machine when it is not in use.
•Never wash down the appliance with a
water hose! There is the risk of electric
shock!
•Never touch the plug with wet hands. Do
not operate the machine if the power cord
or plug is damaged.
•For malfunctions that cannot be solved by
information in the operating manual:
•Turn off the machine, unplug it, turn off
the water tap and contact an authorized
service agent. You may refer to your local
agent or solid waste collection center in
your municipality to learn how to dispose of
your machine.
If there are children in your
house...
•Keep children away from the machine
when it is operating. Do not let them
tamper with the machine.
•Close the loading door when you leave the
area where the machine is located.
• This appliance is not intended for use by
persons (including children) with reduced
physical, sensory or mental capabilities,or lack
of experience and knowledge,unless they
have been given supervises or instruction
concerning use of the appliance by a person
responsible for their safety.

3- EN
2 Installation
Removing packaging
reinforcement
Tiltthemachinetoremovethepackaging
reinforcement.Removethepackaging
reinforcementbypullingtheribbon.
Opening the transportation locks
ATransportationsafetyboltsmustbe
removedbeforeoperatingthewashing
machine!Otherwise,themachinewillbe
damaged!
1. Loosenalltheboltswithaspanneruntil
theyrotatefreely(“C”)
2. Removetransportationsafetyboltsby
turningthemgently.
3. Fitthecovers(suppliedinthebagwiththe
OperationManual)intotheholesonthe
rearpanel.(“P”)
C
Keepthetransportationsafetyboltsin
asafeplacetoreusewhenthewashing
machineneedstobemovedagaininthe
future.
C
Nevermovetheappliancewithoutthe
transportationsafetyboltsproperlyfixedin
place!
Adjusting the feet
ADonotuseanytoolstoloosenthelock
nuts.Otherwise,theycanbedamaged.
1. Manually(byhand)loosenthelocknutson
thefeet.
2. Adjustthemuntilthemachinestandslevel
andfirmly.
3. Important:Tightenalllocknutsupagain.
Connecting to the water supply.
Important:
• Thewatersupplypressurerequiredtorun
themachinemustbe1-10bar(0,1–1
MPa).
• Connectthespecialhosessuppliedwith
themachinetothewaterintakevalveson
themachine.
• Ifyouaregoingtouseyourdoublewater-
inletmachineasasingle(cold)water-inlet
unit,youmustinstallthestopper*,supplied
withyourmachinetothehotwatervalve.
• Ifyouwanttousebothwaterinletsofthe
product,youcanconnectthehotwater
hoseafterremovingthestopperand
gasketgroupfromthehotwatervalve.
*Appliesfortheproductssuppliedwithablind
stoppergroup.
• Modelswithasinglewaterinletshouldnot
beconnectedtothehotwatertap.
Whenreturningtheappliancetoitsplaceafter
maintenanceorcleaning,careshouldbetaken
nottofold,squeezeorblockthehoses.
Connecting to the drain
Thewaterdischargehosecanbeattachedto
theedgeofawashbasinorbathtub.Thedrain
hoseshouldbefirmlyfittedintothedrainasto
notgetoutofitshousing.
Important:
• Theendofthedrainhosemustbedirectly
connectedtothewastewaterdrainorto
thewashbasin.
• Thehoseshouldbeattachedtoaheightof
atleast40cm,and100cmatmost.
• Incasethehoseiselevatedafterlayingit
onthefloorlevelorclosetotheground
(lessthan40cmabovetheground),water
dischargebecomesmoredifficultandthe
laundrymaycomeoutwet.
• Thehoseshouldbepushedintothe
drainageformorethan15cm.Ifitistoo
longyoumayhaveitshortened.
• Themaximumlengthofthecombined
hosesmustnotbelongerthan3.2m.

4- EN
Electrical connection
Connectthemachinetoanearthedoutlet
protectedbyafuseofsuitablecapacity.
Important:
• Connectionshouldcomplywithnational
regulations.
• Thevoltageandtheallowedfuse
protectionarespecifiedinthesection
“TechnicalSpecifications”.
• Thespecifiedvoltagemustbeequalto
yourmainsvoltage.
• Connectionviaextensioncordsormulti-
plugsshouldnotbemade.
BAdamagedpowercablemustbereplaced
byaqualifiedelectrician.
BTheappliancemustnotbeoperatedunless
itisrepaired!Thereistheriskofelectric
shock!
3 Initial preparations for
washing
Preparing clothes for washing
Laundryitemswithmetalattachmentssuch
as,bras,beltbucklesandmetalbuttons
willdamagethemachine.Removemetal
attachmentsorplacetheitemsinaclothing
bag,pillowcase,orsomethingsimilar.
• Sortthelaundryaccordingtotypeoffabric,
color,anddegreeofsoilingandpermissible
watertemperature.Alwaysfollowthe
adviceonthegarmentlabels.
• Placesmallitemslikeinfants’socksand
nylonstockings,etc.inalaundrybag,
pillowcaseorsomethingsimilar.Thiswill
alsosaveyourlaundryfromgettinglost.
• Wash“machinewashable”or“hand
washable”labeledproductsonlywithan
appropriateprogram.
• Donotwashcolorsandwhitestogether.
New,darkcoloredcottonsmayreleasea
lotofdye.Washthemseparately.
• Useonlydyes/colorchangersandlime
removerssuitableformachinewash.
Alwaysfollowtheinstructionsonthe
packaging.
• Washtrousersanddelicateclothesturned
insideout.
Correct load capacity
CPleasefollowtheinformationinthe
"ProgramSelectionTable".Washing
resultswilldegradewhenthemachineis
overloaded.
Loading door
Thedoorlocksduringprogramoperationand
theDoorLockedSymbollightsup.Thedoor
canbeopenedwhenthesymbolfadesout.
Detergents and softeners
Detergent Drawer
Thedetergentdraweriscomposedofthree
compartments:
Thedetergentdispensermaybeintwo
differenttypesaccordingtothemodelofyour
machine.
–(I)forprewash
–(II)formainwash
-(III)siphon
–( )forsoftener
Detergent, softener and other cleaning
agents
Adddetergentandsoftenerbeforestartingthe
washingprogram.
Neveropenthedetergentdispenserdrawer
whilethewashingprogramisrunning!
Whenusingaprogramwithoutpre-wash,no
detergentshouldbeputintothepre-wash
compartment(Compartmentno.I).
Detergent quantity
Theamountofwashingdetergenttobeused
dependsontheamountoflaundry,thedegree
ofsoilingandwaterhardness.
• Donotuseamountsexceedingthe
quantitiesrecommendedonthepackage
toavoidproblemsofexcessivefoam,
poorrinsing,financialsavingsandfinally,
environmentalprotection.
• Neverexceedthe(>max<)levelmarking;
otherwise,thesoftenerwillbewasted
withoutbeingused.
• Donotuseliquiddetergentifyouwantto
washusingthetimedelayfeature.

5 - EN
Figure 2
4 Selecting a Program and Operating Your Machine
1 - Spin Speed Adjustment Button
2 - Time Delaying Button (+/-)
3 - Temperature Adjustment Button
4 - Start/Pause/Cancel Button
Control panel
Figure 1
7.a - Spin Speed Indicator
7.b - Temperature Indicator
7.c - Spin Symbol
7.d - Temperature Symbol
7.e - Remaining Time and Delaying Time
Indicator
7.f - Programme Indicator Symbols (pre-wash/
main wash/rinse/softener/spin)
7.g - Economy Symbol
7.h - Time Delaying Symbol
7.i - Door Locked Symbol
7.j - Start Symbol
7.k - Standby Symbol
7.l - Auxiliary Function Symbols
7.m - Water cut-off Symbol (According to your
machine’s model)
Display symbols
Turning the machine on
Plug in your machine. Turn the tap on
completely. Check if the hoses are connected
tightly. Place the laundry in the machine. Add
detergent and softener. Press the “On/Off”
button.
Program selection
Turn the Programme Selection Knob to the
program mode that you wish to wash your
laundry.
The recommended temperature and spin
speed for the selected program appear. Press
“Start/Pause/Cancel” button to start the
program.
C Sort the laundry according to type of fabric,
color, degree of soiling and permissible
water temperature when choosing a
program.
F1 F2 F3 F4
5 - Auxiliary Function Keys
6 - Program Selection Knob
7 - Display
8 - On/Off Button
1 7 3 6 8
2 5 4

6 - EN
Main programs
Depending on the type of textile, the following
main programs are available:
• Cotton
You can wash your durable clothes with this
program. Your laundry will be washed with
vigorous washing movements during a longer
washing cycle.
• Synthetics
You can wash your less durable clothes on
this program. Lighter washing movements
and shorter washing cycle is used compared
to “Cottons” program. It is recommended for
your synthetic clothes (such as shirts, blouses,
synthetic/cotton blended garments, etc.). For
curtains and lace, the “Synthetic 40” program
with pre-wash and anti-creasing functions
selected is recommended.
• Woollen
You can wash your machine-washable woolen
garments on this program. Wash by selecting
the proper temperature according to the labels
of your clothes. It is recommended to use
appropriate detergents for woolens.
Additional programs
For special cases, there are also extra
programs available:
Additional programs may differ according
to the model of your machine.
• BabyProtect
Increased hygiene is provided by a longer
heating period and an additional rinse cycle. It
is recommended for baby clothes and clothes
worn by allergic people.
• Delicate
You can wash your delicate clothes on this
program. It has more sensitive washing
movements and does not make intermediate
spinning compared to “Synthetic” program.
• Hand wash
You can wash your woolen/delicate clothes
that bear “not machine- washable” labels for
which hand wash is recommended on this
program. It washes the laundry with very
tender washing movements without damaging
your clothes.
• Super 40
This program washes for a longer period
at 40°C and gives the same result as the
“Cottons 60°C” program, thus it saves energy.
It is suitable for clothes for which you cannot
use the “Cottons 60°C” program.
• Intensive
You can wash your durable and heavily soiled
an extra rinse cycle will be made compared to
the “Cottons” program.
• Mix 40
You can use this program to wash cottons and
synthetics together. There is no need to sort
them.
Economy Symbol
Shows energy saving programs and
temperature selections.
As “Intensive” and “Baby” programs are long
programs with higher temperature selections
to ensure hygiene, “Economy” Symbol will not
light up.
Special programs
For specific applications, you can select any of
the following programs:
• Rinse
This program is used when you want to rinse
or starch separately.
• Spin
This program spins with maximum possible
rpm in the default setting.
You should use a lower spin speed for
delicate laundries.
• Pump
This program is used to discharge the water of
the clothes soaked into water in the machine.
Temperature selection
Whenever a new program is selected, the
temperature anticipated for that program
appears on the temperature indicator.
To change the temperature, press the
“Temperature” button. Temperature decreases
in 10° increments.
Cold selection is shown with “-” symbol.
90 C Normally soiled, white cottons
and linens.
60 C Normally soiled, fade proof
colored linens, cottons or
synthetic clothes and lightly
soiled white linens
40 C
30°C
Cold
Blended clothes including
synthetics and woolens as well
as delicates.
Spin Speed selection
Whenever a new program is selected, the
maximum spin speed of the selected program
is displayed on the spin speed indicator.
To decrease the spin speed, press the “Spin”
button. Spin speed decreases gradually. Then,
rinse hold and no spin options are shown
respectively.
Rinse hold is shown with “ ” and no spin is
clothes on this program. In this program, your
clothes will be washed for a longer time and
• Xpress Super Short
You can use this program to quickly wash a small
number of lightly soiled and unstained cotton garments.
E.g.: bathrobes, duvet covers, sport wear, daily clothes
and etc. used only once.
°
°
°

7 - EN
shown with “ ” symbols.
If you do not want to unload your clothes
immediately after the program, you may use
the rinse hold function in order to prevent your
clothes become wrinkled in an anhydrous
condition. With this function, your laundry is
kept in the final rinsing water. If you want to
spin your laundry after the rinse hold function:
- Adjust the spin speed.
- Press “Start/Pause/Cancel” button.
Program resumes. Your machine drains the
water and spins your laundry.
You can use no spin function in order to drain
the water without spinning at the end of the
program.
• Selectable
* Automatically selected, not cancelable.
** Energy Label program (EN 60456)
Water and power consumption and programme duration may differ from the table shown,
subject to changes in water pressure, water hardness and temperature, ambient temperature,
type and amount of laundry, selection of auxiliary functions, and fluctuations in the supply
voltage.
“Super 40” program may be selected instead of “Cotton 60” programme during winter in areas
where the input water temperature is low and/or in areas with low supply voltage.
The auxiliary functions in the table may differ according to the model of your machine.
Programme duration will be displayed on the screen of your machine according to your
selection.
Program selection and consumption table
EN 2
Programme (°C)
Max. Load (kg)
Water
Consumption (l)
Energy
Consumption
(kWh)
Prewash
Quick Wash
PHR(Pet Hair
Removal)
Anti-Creasing
Selectable
temperature range
°C
Cotton 90 7 54 2.70 • • • • 90-cold
Cotton 60** 7 52 1.19 • • • • 90-cold
Cotton 40 7 64 0.72 • • • • 90-cold
Intensive 60 7 66 1.40 •60-40
BabyProtect 90 7 66 2.70 90-30
Synthetics 60 3 45 1.00 • • • • 60-cold
Synthetics 40 3 45 0.45 • • • • 60-cold
Super 40 7 52 0.90 40
Mix 40 3.5 45 0.55 • • • • 40-cold
Woollen 40 1.5 56 0.30 40-cold
Hand wash 30 1 40 0.25 30-cold
Daily Xpress 90 7 60 2.00 90-cold
Daily Xpress 60 7 60 1.15 90-cold
Daily Xpress 30 7 70 0.20 90-cold
Xpress Super Short 30 2 35 0.10 30-cold
Auxiliary functions

8 - EN
Auxiliary functions
Auxiliary function selection keys
Select the required auxiliary functions before
starting the program.
Auxiliary functionbuttons may differ
according to the model of your machine.
Auxiliary function selection
If an auxiliary functionthat should not be
selected togetherwitha previously selected
functionis chosen, the first selected function
willbe cancelled and the last auxiliary function
selection willremain active.
For example: Ifyou wantto select pre-wash
firstand thenquick wash, pre-wash willbe
cancelled and quick wash willremain active.
Auxiliaryfunctionthatis not compatible
withthe program cannot be selected. (see
“ProgramSelection Table”)
• Prewash
A pre-wash is only worthwhileforheavily
soiled laundry. Withoutpre-wash you save
energy, water, detergent and time. Pre-wash
withoutdetergent is recommended forlace
and curtains.
• Quick wash
• Anti-creasing
• No Spin
You may use this program ifyou do not want
to spin your clothes at the end of cottons,
synthetics, woolenor delicate programs.
• Spin speed reduction
You may use the speed reduction button
whenever you wish to spin your clothes
below the maximum spin speed. Whenspeed
reduction buttonis pressed, spin speed willbe
at the minimumrpm given on the panel.
• Pet hair removal
This functionhelps you to remove the pet hairs
thatremain on your clothes.
When this functionis selected, your machine
adds pre-wash and additionalrinsing steps to
the normal program cycle. Thus, pet hairs are
removed more effectivelyby performingthe
washing withmore water (30%).
Never wash your pets in your washing
machine.
Starting the Program
Press “Start/Pause/Cancel” buttonto start
the program. “Start/Pause/Cancel” button
willlightup to indicate thatthe program has
started. The door is locked and the “Lid”light
fades.
Progressing a program
Progress of a runningprogram is shown
throughthe program follow-upindicator. Atthe
beginningof every program step, the relevant
indicator lamp willlightup and lightofthe
completed step willturnoff.
If the machine is not spinning,
the
program may be in rinse hold mode or the
automatic spin correction system has been
activated because of excessive unbalanced
distributionoflaundry in the machine.
Changing the selections after the
program has started
You can use this featureafteryour machine
has started to wash differenttextilegroups
in the same batch ofclothes under higher
or lower temperatures. You must cancel the
ongoingprogram in order to change the
washing program.
For example, press and hold the “Start/Pause/
Cancel”buttonfor3 seconds to “Cancel”
the program in order to select “Cottons40”
program instead of “Cottons60”program.
Select the “Cottons40”program by rotating
the program knob. Press “Start/Pause/Cancel”
buttonto start the program.
Switching the machine to standby
mode
Press “Start/Pause/Cancel” button
momentarilyto switch your machine to the
standby mode. Auxiliaryfunctions can be
Use this function for smaller
amounts or slightly soiled laundries.
Use this function for delicate
laundries that crease easily.
Whenever you select this auxiliary
function, load your machine with
half of the maximum laundry amount
specified in the program table.

9- EN
cancelledorselectedinaccordancewith
thesteptheprogramisat.Thedoorcanbe
openedifthewaterlevelissuitable.Laundry
maybeadded/takenoutbyopeningthe
door.
Child-proof lock
Youcanprotecttheappliancefrombeing
tamperedbychildrenbymeansofthechild-
prooflock.Inthiscase,nochangecanbe
madeintherunningprogram.
Thisfunctionprotectstheappliancefrom
beingtamperedbychildren.Inthiscase,allof
thebuttonsareinactiveexceptOn/Offbutton;
byOn/Offbuttonyoucanwhetherstopor
resume(whilechild-lockon)theprogramof
yourmachine.
Themachineisswitchedtochild-lockby
pressingthe1stand2ndauxiliaryfunctions
fromtheleftfor3sec.1stauxiliaryfunction
lightwillflashcontinuously.Todeactivatethe
child-prooflock,pressthesamebuttonsfor3
sec.
Ending the program through
canceling
Inordertocanceltheselectedprogram,
pressthe“Start/Pause/Cancel”buttonfor3
seconds.Themachinestartstodischargethe
water.“Wash”and“ProgramFinished”lights
willlightup.“Start/Pause/Cancel”and“Wash”
lightswillgooffafterdischargingprocessis
overandthe“Lid”lightwillstartflashing.“Lid”
lampwilllightupcontinuouslywhenthedoor
isunlocked.
Iftheprogramiscancelledinthemiddleof
theprocess,“Wash”and“ProgramFinished”
lightswilllightup.Themachinecandrainall
thewaterorcantakeinwaterfor3timesat
mosttocooldowntheclothesandcomplete
drainingprocess.Whenthewaterdischarging
processiscompleted,the“Wash”lightwillgo
off,the“ProgramFinished”lightwilllightup
andthe“Lid”lightwillcontinuouslyflashuntil
thedoorisunlocked.
End of program
The“ProgramFinished”lampontheprogram
follow-upindicatorwilllightupwhenthe
programcomestoanend.Thelidisunlocked
2minuteslater,the“ProgramFinished”and
“Lid”lampswilllightupcontinuously.The
machineisnowreadyforasecondcycle.
Ifanykeyispressedwhenthemachineisat
theendoftheprogramorifthepositionof
theselectionknobischanged,the“Program
Finished”lightwillgooffandonlythe“Lid”
lampwillremainaslit.Ifthedoorisstilllocked,
the“Lid”lightwillcontinueflashinguntilthe
doorisunlocked.
Pressthe“On/Off”buttontoshutdownthe
machine.
5 Maintenance and cleaning
Detergent Drawer
Removeanypowderresiduebuildupinthe
drawer.Todothis;
1. Pressthedottedpointonthesiphoninthe
softenercompartmentandpulltowards
youuntilthecompartmentisremovedfrom
themachine.
C Ifmorethananormalamountofwater
andsoftenermixturestartstogatherinthe
softenercompartment,thesiphonmustbe
cleaned.
2. Washthedispenserdrawerandthe
siphonwithplentyoflukewarmwaterina
washbasin.
3. Replacethedrawerintoitshousingafter
cleaning.Checkifthesiphonisinits
originallocation.
Inlet water filters
Thereisafilterattheendofeachwaterintake
valveatthebacksideofthemachineandalso
attheendofeachwaterintakehosewhere
theyareconnectedtothetap.Thesefilters
preventtheforeignsubstancesanddirtinthe
watertoenterintothemachine.Filtersshould
becleanedastheygetdirty.
• Closethetaps.
• Removethenutsofthewaterintakehoses
tocleanthesurfacesofthefiltersonthe
waterintakevalveswithanappropriate
brush.
• Ifthefiltersareverydirty,youcanpullthem
outbymeansofpliersandcleanthem.
• Takeoutthefiltersontheflatendsof
thewaterintakehosestogetherwith
thegasketsandcleanthoroughlyunder
streamingwater.
• Replacethegasketsandfilterscarefullyto
theirplacesandtightenthehosenutsby
hand.

10 - EN
bypullingouttheplugattheendofthe
hose.Iftheamountofwatertobedrained
offisgreaterthanthevolumeofthe
container,replacetheplug,pourthewater
out,thenresumethedrainingprocess.
• Afterdrainingprocessiscompleted,
replacetheplugintotheendofthehose
andfitthehosebackintoitsplace.
Ifyourproductisnotsuppliedwithan
emergencydrainhose,dothefollowingas
showninthefigurebelow:
• Placealargecontainerinfrontofthefilter
toreceivewaterflowingfromthefilter.
• Loosenpumpfilter(anticlockwise)until
waterstartstoflowoutofit.Directthe
flowingwaterintothecontaineryouhave
placedinfrontofthefilter.Youcanusea
pieceofclothtoabsorbanyspilledwater.
• Whenthereisnowaterleft,turnthepump
filteruntilitiscompletelylooseandremove
it.
• Cleananyresiduesinsidethefilteras
wellasfibers,ifany,aroundthepropeller
region.
• Ifyourproducthasawaterjetfeature,be
suretofitthefilterintoitshousinginthe
pump.Neverforcethefilterwhilereplacing
itintoitshousing.Fitthefilterfullyintoits
housing;otherwise,watermayleakfrom
thefiltercap.
4-Closethefiltercap.
Closethetwo-piecefiltercapofyourproduct
bypushingthetabonit.
Closetheone-piecefiltercapofyourproduct
byfittingthetabsonthebottomintotheir
positionsandpushingtheupperpartofit.
Draining any remaining water and
cleaning the pump filter
Yourproductisequippedwithafiltersystem
whichensuresacleanerwaterdischargethat
extendspumplifebypreventingsoliditems
suchasbuttons,coinsandfabricfibersfrom
cloggingthepumppropellerduringdischarge
ofthewashingwater.
• Ifyourmachinefailstodrainthewater,
thepumpfiltermaybeclogged.Youmay
havetocleanitevery2yearsorwhenever
itisplugged.Watermustbedrainedoffto
cleanthepumpfilter.
Inaddition,watermayhavetobedrainedoff
completelyinthefollowingcases:
• beforetransportingthemachine(e.g.when
movinghouse)
• whenthereisthedangeroffrost
Inordertocleanthedirtyfilteranddischarge
thewater;
1-Unplugthemachinetocutoffthesupply
power.
ATheremaybewaterat90°Cinthe
machine.Therefore,thefiltermustbe
cleanedonlyaftertheinsidewateris
cooleddowntoavoidhazardofscalding.
2-Openthefiltercap.Thefiltercapmaybe
composedofoneortwopiecesaccordingto
themodelofyourmachine.
Ifitiscomposedoftwopieces,pressthetab
onthefiltercapdownwardsandpullthepiece
outtowardsyourself.
Ifitiscomposedofonepiece,holditfrom
bothsidesandopenitbypullingout.
3-Anemergencydrainhoseissuppliedwith
someofourmodels.Othersarenotsupplied
withthisitem.
Ifyourproductissuppliedwithanemergency
drainhose,dothefollowingasshowninthe
figurebelow:
• Pulloutthepumpoutlethosefromits
housing.
• Placealargecontainerattheendofthe
hose.Drainthewateroffintothecontainer

11 - EN
6 Solution suggestions for problems
Cause Explanation / Suggestion
Programcannotbestartedorselected.
• Machinemayhaveswitchedtoself
protectionmodeduetoaninfrastructure
problem(suchaslinevoltage,water
pressure,etc.).
• Resetyourmachinebypressing“Start/
Pause/Cancel”buttonfor3seconds.(see,
CancelingaProgram)
Thereiswatercomingfromthebottomofthemachine.
• Theremightbeproblemswithhosesor
thepumpfilter.
• Besurethesealsofthewaterinlethoses
aresecurelyfitted.
• Tightlyattachthedrainhosetothetap.
• Makesurethatthepumpfilteriscompletely
closed.
Machinestoppedshortlyaftertheprogramstarted.
• Machinecanstoptemporarilyduetolow
voltage.
• Itwillresumeoperatingwhenthevoltageis
backtothenormallevel.
Itcontinuouslyspins.Remainingtimedoesnotcountdown.(Formodelswithadisplay)
• Theremaybeanimbalanceoflaundryin
themachine.
• Theautomaticspincorrectionsystemmight
havebeenactivatedduetotheunbalanced
distributionofthelaundryinthedrum.
• Thelaundryinthedrummaybeclustered
(bundledlaundryinabag).Laundryshould
berearrangedandre-spun.
• Nospinningisperformedwhenthelaundry
isnotevenlydistributedinthedrumto
preventanydamagetothemachineandto
itsenvironment.
Itcontinuouslywashes.Remainingtimedoesnotcountdown.(Formodelswithadisplay)
• Inthecaseofapausedcountdownwhile
takinginwater:
• Timerwillnotcountdownuntilthe
machineisfilledwiththecorrectamount
ofwater.
• Themachinewillwaituntilthereisa
sufficientamountofwatertoavoidpoor
washingresultsduetolackofwater.Then
thetimerwillstarttocountdown.
• Inthecaseofapausedcountdownatthe
heatingstep:
• Timewillnotcountdownuntilthe
selectedtemperaturefortheprogramis
reached
• Inthecaseofapausedcountdownatthe
spinningstep:
• Theremaybeanimbalanceoflaundryin
themachine.
• Theautomaticspincorrectionsystemmight
havebeenactivatedduetotheunbalanced
distributionofthelaundryinthedrum.
• Thelaundryinthedrummaybeclustered
(bundledlaundryinabag).Laundryshould
berearrangedandre-spun.
• Nospinningisperformedwhenthelaundry
isnotevenlydistributedinthedrumto
preventanydamagetothemachineandto
itsenvironment.
Thereisfoamingoverthedetergentdrawer
• Toomuchdetergentwasused.
• Mix1tablespoonfulsoftenerand½
literwaterandpourintothemainwash
compartmentofthedetergentdrawer.

12 - EN
7 Specifications
Specificationsof this appliancemay change without notice to improve the quality of the pr oduct.
Figuresin this manual are schematic and may not match your product exactly.
Valuesstated on the machine labels or in the documentation accompanying it are obtained
in laboratory in accordance with the relevantstandards. Dependingon operationaland
environmentalconditions of the appliance, valuesmay vary.
Models
Maximum dry laundry capacity
(kg)
Height (cm)
Width (cm)
Depth (cm)
Net Weight (kg)
Electricity(V/Hz.)
Total Current (A)
Total Power (W)
Spinning cycle (rpm max.)
This appliance’s packaging materialis recyclable.Help recycle it and protect the environmentby
dropping it off in the municipal receptacles provided for this purpose. Your appliance also contains
a great amount of recyclablematerial.It is marked with this label to indicate the used appliances
that should not be mixed with other waste. This way, the appliance recycling organised by your
manufacturerwill be done under the best possible conditions, in compliance with European
Directive2002/96/EC on Waste Electricaland ElectronicEquipment. Contact your town hall or your
retailerfor the used appliance collection points closest to your home. W
BabyProtect
e thank you doing your part
to protect the environment.
WCB 77127
777
84 84 84
60 60 60
56.5
70 70 70
230 V / 50Hz 230 V / 50Hz 230 V / 50Hz
10 10 10
2200 2200 2200
1200 1000 800
WCB 77107
WCB 77087
56.5 56.5
This manual suits for next models
2
Table of contents
Other Beko Washer manuals

Beko
Beko WTL74051W User manual

Beko
Beko B5WT594106WS User manual

Beko
Beko WMB 71032 Y User manual

Beko
Beko B3WT5941M User manual

Beko
Beko WTIK72111 User manual

Beko
Beko B3WFU57410W User manual

Beko
Beko WTV 8634 XG User manual

Beko
Beko WTE6611B0 User manual

Beko
Beko WMB 51232 PT User manual

Beko
Beko WTE7511 B0 User manual

Beko
Beko WRE 7512 XWW User manual

Beko
Beko WEY84064EG User manual

Beko
Beko WMB 60831 DS User manual

Beko
Beko WTE 7536 XA User manual

Beko
Beko WTK62041W User manual

Beko
Beko WTV 8636 XA User manual

Beko
Beko WUX81436AI-IT User manual

Beko
Beko WTX81232WI User manual

Beko
Beko WMY 91230 SLB1 User manual

Beko
Beko WITC 7612 B0W User manual