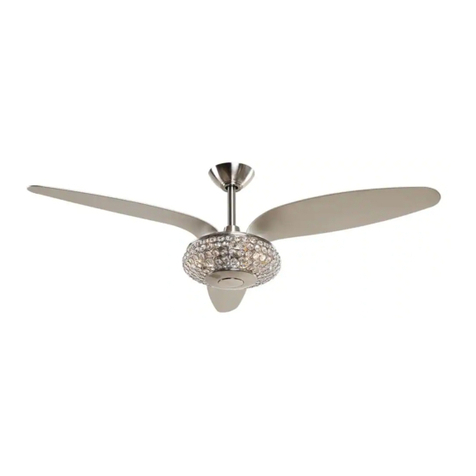
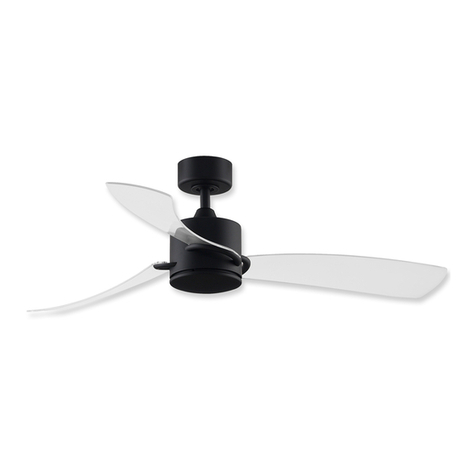
Beliani WEBER User manual


1. To ensure the success of the installation, be sure to read the instructions and review the diagrams
thoroughly before beginning
2. All electrical connections must be in accordance with local codes, ordinances or National Electrical
Code. If you are unfamiliar with methods of installing electrical wiring secure the services of a qualified
electrician
3. Make sure that your installation will not allow rotating fan blades to come in contact with any object.
4. If you are installing more than one ceiling fan, make sure that you do not mix fan blade sets
5. If the fan will be mounted on a ceiling outlet box, a 4 "x1/4" metal box is require The box must be
directly supported by building structure. The box and its support must be able to support the moving
weight of the fan. The box must not twist or work loose. Do not use plastic boxes
6. Installation to a concrete ceiling should be performed by a qualified electrician
7. Before beginning, disconnect power by removing fuse or turning off circuit breaker
8. After fan is completely installed. Make sure that all connections are secured to prevent fan from falling.
9. Do not insert anything into the fan blades while coming ran is operating
10. Fan must be turned off and stopped before reversing fan direction
11. The fan must be mounted with the blades at least 2.3m from the floor to minimum the possibility of
accidental contact with the fan blades
12. The supply wires Live& Neutral must be connected to wall switch( double poles)having a contact
separation at least 3mm in all poles.
13. The appliance is not to be used by persons (including children) with reduced physical, sensory or
mental capabilities, or lack of experience and knowledge, unless they have been given supervision or
instruction.
14. Children being supervised not to play with the appliance.
15. WARNING: If unusual oscillating movement is observed, immediately stop using the
ceiling fan and contact the manufacturer, its service agent or suitably qualified persons.
16. The instructions for ceiling fans shall include the substance of the following:
– the fixing means for attachment to the ceiling such as hooks or other devices shall be fixed with a
sufficient strength to withstand 4 times the weight of the ceiling fan;
– that the mounting of the suspension system shall be performed by the manufacturer, its
service agent or suitably qualified persons;
17. The weight of the appliance in 4.54 kilograms.
18. Once yearly Clean your fan periodically to its new appearance. Use only lukewarm water, Do not use
detergent, corrosive or acidic solution.
Damp the cloth lightly. Use only soft or lint-free cloth to clean the fan. Rough fan will scratch the surface.
There is no need to oil the fan. use a soft cloth moisten with mild soap to clean the blade, and then use a
dry cloth to wipe it again.
NOTE: The import safeguards and instructions appearing in the manual are not meant cover all possible
conditions and situations that may occur. It must be understood that common sense. Caution and
carefulness are factors which cannot be built into any product. These factors must be supplied by the
person(s) caring for and operating the unit.
-1- -2-
1.SAFTY PRECAUTIONS
CAUTION: To reduce the risk of personal
injury, do not bend the blades when installing the
blades, balancing the blades or cleaning the fan, Do
not insert foreign objects between rotating fan blades
CAUTION: The box must be supported
directly by the building structure. The box and its
support must be able support the fan weight-must
not twist or work loose. Do mot use plastic boxes.
3. PACKAGE CONTENTS / THE CEILING FAN ELEMENT
2.TOOLS AND MATERIALS REQUIRED
• Philips screw driver
• Blade screw driver
• 11 mm wrench
• Step ladder
• Pliers
• Insulating tape
1. Safe steel wire
2. J hook (For temporary hang up the fan
when wiring connection)
3. Mounting bracket
4. Nuts
5. Receiver
6. Remote
7. Hanger ball
8. Down rod
9. Upper canopy
10. Screws
11. Yoke cover
12. Cross pin
13. Cotter pin
14. Screws
15. Motor Housing
16. Blade holder decoration part
17. Light kit plate fixing bracket
18. Motor
19. Blade holder
20. Blades
21. Light kit plate
22. LED light kit
23. Shade

Concrete ceiling:Drill two holes with an
appropriate depth by a drilling bit with dia. at
8mm² and insert two pieces expansion screws
in the holes, then fix the hanger bracket into the
expansion screws with the wood screws and
tighten it by nuts of the expansion screws.
-3- -4-
4.MOUNTING BRACKET INSTALLATION
CAUTION: Do not install mounting bracket on the
roof with leaking and damp problem. The ceiling must be
able to withstand the weight of 40 kg or more, in order to
prevent the top of the danger that smallpox drop off .
Wood ceiling: Fix the mounting bracket to the
wood ceiling with(thickness at 7cm at least) by 4
wood screws.
CAUTION: Do not install on an uneven ceiling, and
ceiling mounted hanger must be fixed firmly to ensure
not be loose.
5. INSTALLATION OF THE CEILING FAN
1. Insert downrod over upper canopy,
then insert the cross pin over yoke
& Cotter pin and fasten the screws
which fix the downrod.(Fig.1)
2. Install the mounthing plate by screws.
(Fig.2)
3. Loose the screw from motor.(Fig.3)
4. Install the blades on the motor by
screws.(Fig.4)
5. Make sure the fan is disconnected
from the electrical supply and
carefully insert the fan into the
mounting bracket. Rotate the fan until
the notch of the hanger ball engages
the pin of the mounting bracket. Then,
firmly fix the screws.(Fig.5)
6. Assembly the LED light plate to the
light kit fixing bracket by the screws
and connect the LED light kit by male
& female plug. Insert the remote
control receiver on the mounting
bracket. Connect the motor wires, LED
light wires and receiver’s power
wires to the receiver by male &
female plug.Also, connect the ground
wire by male & female plug.Then
connect the power supply with the
fan.(Fig6)
7. Assembly the shade to the light plate
and assembly the upper canopy to
the mounting bracket. Both rotate
clockwise when assembling.(Fig.7)
8. Now, the fan is completed.(Fig.8)

-5- -6-
7. OPERATION AND MAINTENANCE
Operation
Turn on the power and check operation of fan. The pull chain controls the fan
speeds as follows: 1 pull - high; 2 pulls - medium; 3 pulls - low; 4 pulls - off.
Speed settings for warm or cool weather depend on factors such as room size,
ceiling height, number of fans and so on. The slide switch controls direction,
forward or reverse.
Warm weather/down position - (Forward) Fan turns counterclockwise direction.
A downward air flow creates a cooling effect as shown in illustration A. This
allows you to set your air conditioner on a higher temperature setting without
affecting your comfort.
Cool weather/up position - (Reverse) Fan turns clockwise direction. An upward
airflow moves warm air off the ceiling area as shown in illustration B.
This allows you to set your heating unit on a lower setting without affecting
your comfort. (Please however refer to point 10 in Safety Tips when operating
in this position.) NOTE: Turn off and wait for fan to stop before changing the
setting of the forward/reverse slide switch.
Maintenance
1.Because of the fan’s natural movement, some connections may become
loose. Check the support connections, brackets, and blade attachments twice
a year. Make sure they are secure.
2.Clean your fan periodically to help maintain its new appearance over the
years. Do not use water when cleaning. This could damage the motor, or the
wood, or possibly cause electrical shock.
3.Use only a soft brush or lint-free cloth to avoid scratching the finish. The
plating is sealed with a lacquer coating to minimize discoloration or tarnishing.
4.There is no need to oil your fan. The motor has permanently lubricated
bearings.
8. TROUBLESHOOTING GUIDE
6.DIFFERENT INSTALLATION MODES
FLUSH MOUNT INSTALLATION
For low ceilings
DOWNROD INSTALLATION
For normal ceilings
VAULTED CEILING INSTALLATION
May require a longer downrod
(sold separately)
If you have difficulty operating your new ceiling fan, it may be the result of incorrect assembly, installation,
or wiring. In some cases, these installation errors may be mistaken for defects. If you experience any
faults, please check this Trouble Shooting Chart. If a problem cannot be remedied, please consult with
your authorized electrician and do not attempt any electrical repairs yourself.
SUGGESTED REMEDY
1.Check main and branch circuit fuses or circuit breakers.
2.Check wire connections as performed in step #15 or #16 of installation.
CAUTION: Make sure main power is turned off.
3.Make sure forward/reverse switch is firmly in up or down position. Fan will not
operate when switch is in the middle.
4.If the fan still will not start, contact a qualified electrician. Do not attempt to
troubleshoot internal electrical connections yourself.
1.Check to make sure all screws in motor housing are snug (not over tightened).
2.Check to make sure the screws which attach the fan blade holder to the motor are
tight.
3.If using an optional Ceiling Fan Light Kit, check to be sure the screws securing
the glassware are finger tight. Check to be sure light bulb is tight in socket and not
touching glass shade(s). If vibration persists from glass, remove glass and install a
6mm wide rubber band on glass neck to act as an insulator. Replace glass and
tighten screws against rubber band.
4.Some fan motors are sensitive to signals from Solid State variable speed controls.
DO NOT USE a Solid State variable speed control.
5.Allow “break-in” period of 24 hours. Most noises associated with a new fan will
disappear after this period.
All blades are weighed and grouped by weight. Natural woods vary in density which
could cause the fan to wobble even though all blades are weight-matched. The
following procedures should eliminate most of the wobble. Check for wobble after
each step.
1.Check that all blades are screwed firmly into blade holders.
2.Check that all blade holders are tightened securely to motor.
3.Make sure that canopy and mounting bracket are tightened securely to ceiling
joist.
4.Most fan wobble problems are caused when blade levels are unequal. Check this
level by selecting a point on the ceiling above the tip of one of the blades.Measure
this distance as shown in Figure 1. Keeping measure within 3mm, rotate the fan
until the next blade is positioned for measurement. Repeat for each blade. If all
blade levels are not equal, you can adjust blade levels by the following procedure.
To adjust a blade tip down, insert a washer (not supplied) between the blade and
blade holder at the screw closest to the motor (Figure 2). To adjust a blade tip up,
insert washer (not supplied) between the blade and blade holder at the two screws
farthest from the motor (Figure 2).
5.If blade wobble is still noticeable, interchanging two adjacent (side by side) blades
can redistribute the weight and possibly result in smoother operation.
1.Check to see that the wire connections in the switch housing are connected.
2.Check for faulty light bulbs.
3.If light kit will still not operate, contact a qualified electrician for assistance.
TROUBLE
1.If fan does not start:
2.If fan sounds noisy:
3.If fan wobbles:
Figure 1
Figure 2
4.If light does not work:
Powered by TCPDF (www.tcpdf.org)
Popular Fan manuals by other brands

Ruck Ventilatoren
Ruck Ventilatoren MPC-T Series Assembly instruction
Monte Carlo Fan Company
Monte Carlo Fan Company 5GIR54XXD Series owner's manual

Noaton
Noaton CALLISTO Instructions for use
Singer
Singer SF40-5 WH instruction manual

Kichler Lighting
Kichler Lighting Pacific Edge 300157 instruction manual
Home Decorators Collection
Home Decorators Collection AM183W-NI Use and care guide
Oster
Oster 1691A instruction manual

NuAire
NuAire MRXBOX-ECO2-AE installation manual

TJERNLUND
TJERNLUND DC BAROMETRIC DRAFT CONTROL LIT 8500490 REV B... manual
2VV
2VV ALFA 95 II vertical Installation and operation manual
Taurus
Taurus ALPATEC Forest manual
Fanimation
Fanimation SCULPTAIRE FP8511 Series manual
