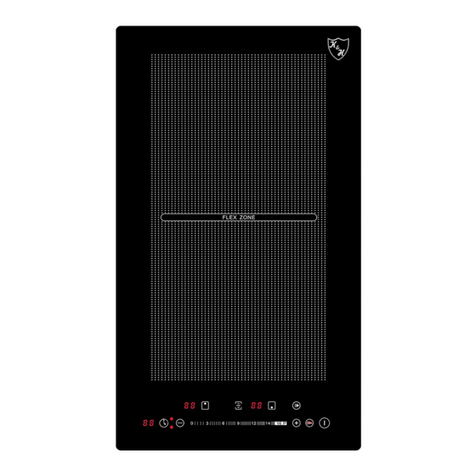
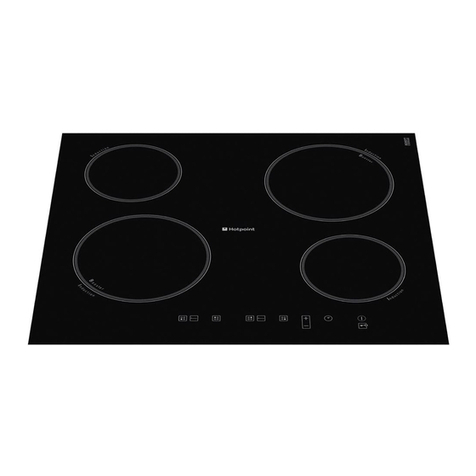
Belion EKK604T10 User manual

2 Ø = cm
(..7

3
éInhoudsopgave
[nl]Gebruiksaanwijzing
Veiligheidsvoorschriften............................................................3
Oorzaken van schade........................................................................4
Milieubescherming.....................................................................4
Milieuvriendelijk afvoeren ..................................................................4
Tips om energie te besparen ...........................................................4
Het apparaat leren kennen.........................................................5
Het bedieningspaneel ........................................................................5
Restwarmte-indicatie ..........................................................................5
Kookplaat instellen.....................................................................5
Kookplaat in- en uitschakelen ..........................................................5
Kookzone instellen .............................................................................5
Kooktabel .............................................................................................6
Kinderslot....................................................................................7
Kinderslot in- en uitschakelen ..........................................................7
Automatisch kinderslot ......................................................................7
Timer............................................................................................8
Een kookzone moet automatisch uitschakelen ............................8
Automatische timer.............................................................................8
Kookwekker .........................................................................................8
Automatische tijdsbegrenzing ..................................................8
Basisinstellingen........................................................................ 9
Basisinstellingen wijzigen..................................................................9
Reinigen en onderhouden .......................................................10
Glaskeramiek.................................................................................... 10
Omlijsting van de kookplaat .......................................................... 10
Storing opheffen.......................................................................10
Servicedienst ............................................................................ 10
: Veiligheidsvoorschriften
Lees deze gebruiksaanwijzing zorgvuldig
door. Berg de gebruiksaanwijzing, het
installatievoorschrift en de apparaatpas
goed op voor later gebruik of om ze door te
geven aan volgende eigenaren.
Controleer het apparaat na het uitpakken.
Niet aansluiten in geval van
transportschade.
Alleen een daartoe bevoegd vakman mag
apparaten zonder stekker aansluiten. Bij
schade door een verkeerde aansluiting
maakt u geen aanspraak op garantie.
Dit apparaat is alleen bestemd voor
huishoudelijk gebruik en de huiselijke
omgeving. Gebruik het uitsluitend voor het
bereiden van gerechten en drank. Zorg
ervoor dat het apparaat onder toezicht
gebruikt wordt. Het toestel alleen gebruiken
in gesloten ruimtes.
Dek de kookplaat niet af. Dit kan leiden tot
ongevallen, bijv. door oververhitting,
ontbranding of ontploffend materiaal.
Gebruik geen ongeschikte
beveiligingsapparaten of tralies voor de
bescherming van kinderen. Dit kan leiden
tot ongevallen.
Dit toestel kan worden gebruikt door
kinderen vanaf 8 jaar en door personen met
beperkte fysieke, sensorische of geestelijke
vermogens of personen die gebrek aan
kennis of ervaring hebben, wanneer zij
onder toezicht staan van een persoon die
verantwoordelijk is voor hun veiligheid of
geleerd hebben het op een veilige manier
te gebruiken en zich bewust zijn van de
risico's die het gebruik van het toestel met
zich meebrengt.
Kinderen mogen niet met het apparaat
spelen. Reiniging en onderhoud van het
toestel mogen niet worden uitgevoerd door
kinderen, tenzij zij 8 jaar of ouder zijn en
onder toezicht staan.
Zorg ervoor dat kinderen die jonger zijn dan
8 jaar uit de buurt blijven van het toestel of
de aansluitkabel.
Risico van brand!
■Hete olie en heet vet vatten snel vlam.
Hete olie en heet vet nooit gebruiken
zonder toezicht. Vuur nooit blussen met
water. Schakel de kookzone uit. Vlammen
voorzichtig met een deksel, smoordeksel
of iets dergelijks verstikken.
Risico van brand!
■De kookzones worden erg heet. Nooit
brandbare voorwerpen op de kookplaat
leggen. Geen voorwerpen op de
kookplaat leggen.
Risico van brand!
■Het apparaat wordt heet. Nooit brandbare
voorwerpen of spuitbussen bewaren in
laden direct onder de kookplaat.
Risico van brand!
■De kookplaat schakelt vanzelf uit en kan
niet meer worden bediend. Hij kan later
per ongeluk worden ingeschakeld.
Zekering in de meterkast uitschakelen.
Contact opnemen met de klantenservice.

4
Risico van verbranding!
■De kookzones en met name een
eventueel aanwezige kookplaatomlijsting
worden zeer heet. Raak de hete
oppervlakken nooit aan. Zorg ervoor dat
er geen kinderen in de buurt zijn.
Risico van verbranding!
■De kookzone warmt op, maar de indicatie
functioneert niet Zekering in de meterkast
uitschakelen. Contact opnemen met de
klantenservice.
Kans op een elektrische schok!
■Ondeskundige reparaties zijn
gevaarlijk.Reparaties mogen uitsluitend
worden uitgevoerd door technici die zijn
geïnstrueerd door de klantenservice.Is het
apparaat defect, haal dan de stekker uit
het stopcontact of schakel de zekering in
de meterkast uit. Contact opnemen met
de klantenservice.
Kans op een elektrische schok!
■Binnendringend vocht kan een schok
veroorzaken. Geen hogedrukreiniger of
stoomreiniger gebruiken.
Kans op een elektrische schok!
■Een defect toestel kan een schok
veroorzaken. Een defect toestel nooit
inschakelen. De netstekker uit het
stopcontact halen of de zekering in de
meterkast uitschakelen. Contact opnemen
met de klantenservice.
Kans op een elektrische schok!
■Scheuren of barsten in het glaskeramiek
kunnen schokken veroorzaken. Zekering
in de meterkast uitschakelen. Contact
opnemen met de klantenservice.
Risico van letsel!
Wanneer er vloeistof zit tussen de bodem
van de pan en de kookzone kunnen
kookpannen plotseling in de hoogte
springen. Zorg ervoor dat de kookzone en
de bodem van de pan altijd droog zijn.
Oorzaken van schade
Attentie!
■Door ruwe bodems van pannen ontstaan krassen op het
glaskeramiek.
■U dient te voorkomen dat pannen leeg koken. Hierdoor kan
schade ontstaan.
■Nooit hete pannen op het bedieningspaneel, het
indicatiegebied of de omlijsting zetten. Hierdoor kan schade
ontstaan.
■Wanneer er harde en puntige voorwerpen op de kookplaat
vallen, kan deze beschadigd raken.
■Aluminiumfolie of kook- of bakgerei van kunststof smelten op
de hete kookzones. Bakpapier is niet geschikt voor uw
kookplaat.
Overzicht
In de volgende tabel vindt u de meest voorkomende schade:
Milieubescherming
Milieuvriendelijk afvoeren
Voer de verpakking op een milieuvriendelijke manier af.
Tips om energie te besparen
■Sluit de pannen altijd af met een passend deksel. Wanneer u
kookt zonder deksel heeft u duidelijk meer energie nodig.
Met een glazen deksel kunt in de pan kijken zonder dat u het
deksel hoeft op te tillen.
■Gebruik pannen met egale bodems. Niet-egale bodems
verhogen het energieverbruik.
■De diameter van de bodem van de pan dient overeen te
komen met de grootte van de kookzone. Vooral te kleine
pannen op de kookzone zorgen voor energieverlies. Let op:
de fabrikanten geven vaak de diameter van de bovenkant
Schade Oorzaak Maatregel
Vlekken Overgelopen etenswaar Verwijder overgelopen etenswaar onmiddellijk met een schraper.
Ongeschikte reinigingsmiddelen Gebruik alleen schoonmaakmiddelen die geschikt zijn voor glaskeramiek.
Krassen Zout, suiker en zand Gebruik de kookplaat niet als plaats om iets neer te zetten of als werkvlak.
Door ruwe bodems van pannen ont-
staan krassen op het glaskeramiek.
Controleer uw kook- en bakgerei.
Verkleuringen Ongeschikte reinigingsmiddelen Gebruik alleen schoonmaakmiddelen die geschikt zijn voor glaskeramiek.
Slijtage van pannen (bijv. aluminium) Til de pannen tijdens het verplaatsen op.
Defecten aan het
oppervlak
Suiker, zeer suikerhoudende gerech-
ten
Verwijder overgelopen etenswaar onmiddellijk met een schraper.
Dit apparaat is gekenmerkt in overeenstemming met
de Europese richtlijn 2012/19/EU betreffende
afgedankte elektrische en elektronische apparatuur
(waste electrical and electronic equipment - WEEE).
De richtlijn geeft het kader aan voor de in de EU
geldige terugneming en verwerking van oude
apparaten.

5
van de pan aan. Deze is meestal groter dan de diameter van
de pannenbodem.
■Gebruik voor kleine hoeveelheden een kleine pan. Een grote,
slechts weinig gevulde pan heeft veel energie nodig.
■Kook met weinig water. Dit bespaart energie. Bij groente
blijven vitamines en mineralen behouden.
■Dek met uw pan altijd een zo groot mogelijk vlak van de
kookzone af.
■Schakel tijdig terug naar een lagere kookstand.
■Kies een geschikte doorkookstand. Met een te hoge
doorkookstand verspilt u energie.
■Maak gebruik van de restwarmte van de kookplaat. Schakel
bij langere bereidingstijden al 5-10 minuten voor het einde
van de bereidingstijd de kookzone uit.
Het apparaat leren kennen
Deze gebruiksaanwijzing geldt voor verschillende kookplaten.
Op pagina 2 vindt u een typenoverzicht met informatie over
afmetingen.
Het bedieningspaneel
Aanwijzingen
■Wanneer u een symbool aanraakt, wordt de betreffende
functie geactiveerd.
■Houd de bedieningsvlakken altijd droog. Vocht heeft een
nadelige invloed op de werking.
■Zorg ervoor dat er geen pannen in de buurt van indicaties en
sensoren komen. De elektronica kan oververhit raken.
Restwarmte-indicatie
De kookplaat heeft voor elke kookzone een restwarmte-
indicatie met twee standen.
Verschijnt er een •op het display, dan is de kookzone nog
heet. U kunt bijv. een klein gerecht warmhouden of couverture
smelten. Koelt de kookzone verder af, dan verandert de
indicatie in œ. De indicatie verdwijnt wanneer de kookzone
voldoende afgekoeld is.
Kookplaat instellen
In dit hoofdstuk leest u hoe u de kookzones kunt instellen. In de
tabel vindt u kookstanden en bereidingstijden voor
verschillende gerechten.
Kookplaat in- en uitschakelen
U schakelt de kookplaat met de hoofdschakelaar in en uit.
Inschakelen: raak het symbool #aan. Er klinkt een signaal.
Het indicatielampje boven de hoofdschakelaar en de indicaties
‹zijn verlicht. De kookplaat is klaar voor gebruik.
Uitschakelen: raak het symbool #aan tot het indicatielampje
boven de hoofdschakelaar en de indicaties uitgaat. Alle
kookzones zijn uitgeschakeld. De restwarmte-indicatie blijft aan
totdat de kookzones voldoende zijn afgekoeld.
Aanwijzingen
■De kookplaat gaat automatisch uit wanneer alle kookzones
langer dan 20 seconden uitgeschakeld zijn.
■De instellingen blijven gedurende de eerste 4 seconden na
het uitschakelen bewaard. Wanneer u in deze tijd de
kookplaat opnieuw inschakelt, treedt deze in werking met de
vorige instellingen.
Kookzone instellen
Met de symbolen + en -stelt u de gewenste kookstand in.
Kookstand 1 = laagste vermogen
Kookstand 9 = hoogste vermogen
Elke kookstand heeft een tussenstand. Deze is aangeduid met
een punt.
Indicaties
‚-ŠKookstanden
•/œRestwarmte
‰‰ Timer
Bedieningsvlakken
#Hoofdschakelaar
EKinderslot
¡Keuze kookzone
A @ Instelveer
0Timer

6
Kookstand instellen
De kookplaat dient ingeschakeld te zijn.
1. Het symbool ¡aanraken om de kookzone uit te kiezen.
2. In de volgende 10 seconden het symbool +of -aanraken.
De basisinstelling verschijnt.
Symbool +kookstand 9
Symbool -kookstand 4
3. De kookstand wijzigen: Het symbool +of - aanraken tot de
gewenste kookstand verschijnt.
Kookzone uitschakelen
Met het symbool ¡de kookzone kiezen. Het symbool +of -
aanraken, tot ‹verschijnt. Na ongeveer 10 seconden verschijnt
de restwarmte-indicatie.
Aanwijzingen
■De kookzone die het laatst is ingeschakeld blijft geactiveerd.
U kunt de kookzone instellen zonder deze opnieuw te
selecteren.
■De kookzone regelt de verwarming door in en uit te
schakelen. Ook bij het hoogste vermogen kan de verwarming
in- en uitschakelen.
Kooktabel
In de volgende tabel vindt u enkele voorbeelden.
De bereidingstijden en kookstanden zijn afhankelijk van de
aard, het gewicht en de kwaliteit van de gerechten. Daarom zijn
afwijkingen mogelijk.
Gebruik voor het aan de kook brengen kookstand 9.
Dikvloeibare gerechten af en toe roeren.
Doorkookstand Doorkookduur in
minuten
Smelten
Chocolade, couverture
Boter, honing, gelatine
1-1.
1-2
-
-
Opwarmen en warmhouden
Eenpansgerecht (bijv. linzenschotel)
Melk**
Worstjes in water verwarmen**
1-2
1.-2.
3-4
-
-
-
Ontdooien en opwarmen
Spinazie diepvries
Goulash diepvries
2.-3.
2.-3.
10-20 min.
20-30 min.
Gaarstoven, zachtjes laten koken
Knoedels, knödels
Vis
Witte sauzen, bijv. bechamelsaus
Geklopte sauzen, bijv. saus Bearnaise, saus Hollandaise
4.-5.*
4-5*
1-2
3-4
20-30 min.
10-15 min.
3-6 min.
8-12 min.
Koken, stomen, stoven
Rijst (met dubbele hoeveelheid water)
Rijstepap
In de schil gekookte aardappels
Gekookte aardappels
Deegwaren, pasta
Eenpansgerecht, soepen
Groente
Groente, diepvries
Garen in de snelkookpan
2-3
1.-2.
4-5
4-5
6-7*
3.-4.
2.-3.
3.-4.
4-5
15-30 min.
35-45 min.
25-30 min.
15-25 min.
6-10 min.
15-60 min.
10-20 min.
10-20 min.
-
* Doorkoken zonder deksel
** Zonder deksel
*** Meerdere malen keren

7
Kinderslot
Met het kinderslot kunt u voorkomen dat kinderen de kookplaat
inschakelen.
Kinderslot in- en uitschakelen
De kookplaat dient uitgeschakeld te zijn.
Inschakelen: Raak het symbool E gedurende ca.
4 seconden aan. Het indicatielampje boven het symbool
Ebrandt 10 seconden lang. De kookplaat is geblokkeerd.
Uitschakelen: Raak het symbool E gedurende ca.
4 seconden aan. De blokkering is opgeheven.
Automatisch kinderslot
Met deze functie wordt het kinderslot altijd automatisch
geactiveerd wanneer u de kookplaat uitschakelt.
In- en uitschakelen
In het hoofdstuk Basisinstellingen kunt u nalezen hoe u het
automatische kinderslot inschakelt.
Sudderen
Rollades
Stoofvlees
Goulash
4-5
4-5
2.-3.
50-60 min.
60-100 min.
50-60 min.
Braden**
Schnitzel, on/gepaneerd
Schnitzel, diepvries
Kotelet, on/gepaneerd***
Steak (3 cm dik)
Hamburgers / Gehaktballen (3 cm dik)***
Borst van gevogelte (2 cm dik)***
Borst van gevogelte, diepvries***
Vis en visfilet, ongepaneerd
Vis en visfilet, gepaneerd
Vis en visfilet, gepaneerd en diepvries, bijv. vissticks
Scampis en garnalen
Pangerechten, diepvries
Pannenkoeken
Omelet
Spiegelei
6-7
6-7
6-7
7-8
4.-5.
5-6
5-6
5-6
6-7
6-7
7-8
6-7
6-7
3.-4.
5-6
6-10 min.
8-12 min.
8-12 min.
8-12 min.
30-40 min.
10-20 min.
10-30 min.
820 min.
820 min.
8-12 min.
4-10 min.
6-10 min.
ononderbroken
ononderbroken
3-6 min.
Frituren (150-200g per portie ononderbroken in 1-2 ltr olie frituren**)
Diepvriesproducten, bijv. frites, chicken nuggets
Kroketten
Vlees, bijv. kipstukken
Vis, gepaneerd of in bierdeeg
Groente, paddenstoelen, gepaneerd of in bierdeeg
Klein gebak, bijv. beignets, Berliner bollen, fruit in bierdeeg
8-9
7-8
6-7
5-6
5-6
4-5
-
-
-
-
-
-
Doorkookstand Doorkookduur in
minuten
* Doorkoken zonder deksel
** Zonder deksel
*** Meerdere malen keren

8
Timer
De timer kan op 2 verschillende manieren worden gebruikt:
■Een kookzone moet automatisch worden uitgeschakeld
■Als kookwekker.
Een kookzone moet automatisch uitschakelen
Voer een tijdsduur voor de gewenste kookzone in. Na afloop
van de tijdsduur schakelt de kookzone automatisch uit.
Tijdsduur instellen
De kookzone moet ingeschakeld zijn.
1. Met het symbool ¡de kookzone kiezen.
2. Het symbool 0aanraken. In de timer-indicatie is ‹‹ verlicht.
Het indicatielampje van de gewenste kookzone brandt.
3. Het symbool +of -aanraken. De voorgestelde waarde wordt
weergegeven.
Symbool +: 30 min.
Symbool -: 10 min.
4. Het symbool +of -aanraken tot de gewenste tijdsduur in de
timer-indicatie verschijnt.
De tijd loopt af. Wanneer u voor meerdere kookzones een
tijdsduur heeft ingesteld, kunt u elke tijdsduur laten weergeven.
Hiervoor met het symbool ¡de kookzone kiezen.
Aan het einde van de ingestelde tijd
Na afloop van de ingestelde tijd wordt de kookzone
uitgeschakeld. In de kookzone-indicatie is ‹verlicht. Er klinkt
een signaal. In de timerindicatie is ‹‹ gedurende 10
seconden verlicht. Raak een willekeurig symbool aan. De
indicaties en het geluidssignaal verdwijnen.
Tijdsduur corrigeren of wissen
De kookzone kiezen. Het symbool 0aanraken en met het
symbool +of -de tijdsduur veranderen of op ‹‹ zetten.
Automatische timer
Met deze functie kunt u vooraf een tijdsduur voor alle
kookzones instellen. Na het inschakelen van een kookzone
loopt dan de vooraf ingestelde kookzone af. Na afloop van de
tijdsduur schakelt de kookzone automatisch uit.
In het hoofdstuk Basisinstellingen kunt u nalezen hoe u de
automatische timer inschakelt.
Aanwijzing: U kunt de tijdsduur voor een kookzone veranderen
of de automatische timer voor de kookzone uitschakelen
De kookzone kiezen. Het symbool 0aanraken en met het
symbool +of -de tijdsduur veranderen of op ‹‹ zetten.
Kookwekker
Met de kookwekker kunt u een tijd tot 99 minuten instellen.
Deze is onafhankelijk van alle andere instellingen.
Kookwekker inschakelen
U kunt de kookwekker op twee verschillende manieren
inschakelen:
■Wanneer er een kookzone geselecteerd is het symbool 0
twee keer binnen 10 seconden aanraken.
■Is er geen kookzone geselecteerd, raak dan het symbool 0
aan.
In de timer-indicatie is ‹‹ verlicht. Het indicatielampje naast het
symbool Vbrandt.
Tijd instellen:
1. Het symbool +of -aanraken. De voorgestelde waarde wordt
weergegeven.
Symbool +: 10 minuten
Symbool -: 05 minuten
2. Symbool +of -aanraken, tot de gewenste tijd in de timer-
indicatie verschijnt.
De tijd loopt af.
Aan het einde van de ingestelde tijd klinkt een signaal. In de
timer-indicatie is ‹‹10 seconden verlicht.
Tijd weergeven
Met het symbool 0de kookwekker kiezen. De tijd wordt 10
seconden weergegeven.
Tijd corrigeren
Met het symbool 0de kookwekker kiezen en opnieuw
instellen.
Automatische tijdsbegrenzing
Is een kookzone lang ingeschakeld zonder dat de instelling
veranderd is, dan wordt de automatische tijdbegrenzing
geactiveerd.
Het verwarmen van de kookzone wordt onderbroken. In de
kookzoneindicatie knipperen afwisselend ”‰en de
restwarmte-indicatie •/œ.
Wanneer u een willekeurig bedieningsveld aanraakt, verdwijnt
de indicatie. U kunt opnieuw instellen.
Het tijdstip waarop de tijdsbegrenzing actief wordt, is
afhankelijk van de ingestelde kookstand (1 tot 10 uur).

9
Basisinstellingen
Uw apparaat heeft verschillende basisinstellingen. U kunt deze
instellingen aanpassen aan uw gewoonten.
Basisinstellingen wijzigen
De kookplaat dient uitgeschakeld te zijn.
1. De kookplaat inschakelen.
2. In de volgende 10 seconden het symbool E4 seconden
lang aanraken
Op het linkerdisplay knipperen ™en‚afwisselend, op het
rechterdisplay is ‹verlicht.
3. Het symbool E zo vaak aanraken tot op het linkerdisplay de
gewenste indicatie verschijnt.
4. Het symbool +of -zo vaak aanraken tot op het display de
gewenste instelling verschijnt.
5. Het symbool E 4 seconden lang aanraken.
De instelling is geactiveerd.
Uitschakelen
Om de basisinstelling te verlaten de kookplaat met de
hoofdschakelaar uitschakelen en opnieuw instellen.
Indicatie Functie
™‚ Automatisch kinderslot
‹Uitgeschakeld.*
‚Ingeschakeld.
™ƒ Geluidssignaal
‹ Bevestigingssignaal en het signaal verkeerde bediening uitgeschakeld.
‚Alleen het signaal verkeerde bediening ingeschakeld.
ƒAlleen bevestigingssignaal ingeschakeld.
„Bevestigingssignaal en het signaal verkeerde bediening ingeschakeld.*
™† Automatische timer
‹ Uitgeschakeld.*
‚-ŠŠ Tijdsduur waarna de kookzones worden uitgeschakeld
™‡ Tijdsduur van het timer-einde signaal
‚10 seconden.*
ƒ n 30 seconden
„ 1 minuut.
™ˆ Bijschakeling van de verwarmingsringen
‹Uitgeschakeld.
‚Ingeschakeld.
ƒ Laatste instelling voor het uitschakelen van de kookzone.*
™Š Keuzetijd van de kookzone
‹Onbegrensd: u kunt de laatst gekozen kookzone altijd instellen zonder deze opnieuw te selecteren.*
‚ U kunt de laatst gekozen kookzone 10 seconden na de selectie instellen, daarna moet u de kookzone voor het
instellen opnieuw selecteren.
™‹ Terugzetten naar de basisinstelling
‹Uitgeschakeld.*
‚Ingeschakeld.
* Basisinstelling

10
Reinigen en onderhouden
De aanwijzingen in dit hoofdstuk helpen u bij het onderhoud
van uw kookplaat.
Geschikte reinigings- en onderhoudsmiddelen kunt u kopen via
de klantenservice of in onze e-shop.
Glaskeramiek
Reinig de kookplaat altijd na gebruik. Zo branden kookresten
nooit vast.
Reinig de kookplaat pas wanneer deze voldoende is afgekoeld.
Gebruik alleen schoonmaakmiddelen die geschikt zijn voor
glaskeramiek. Houd u aan de schoonmaakinstructies die op de
verpakking staan.
Gebruik nooit:
■onverdunde afwasmiddelen
■reinigingsmiddelen voor de vaatwasmachine
■schuurmiddelen
■agressieve reinigingsmiddelen, zoals ovensprays of middelen
om vlekken te verwijderen
■krassende sponzen
■hogedrukreinigers of stoomstraalapparaten
Sterk vuil verwijdert u het best met een in de handel
verkrijgbare schraper. Neem de aanwijzingen van de fabrikant
in acht.
Een geschikte schraper verkrijgt u ook via de klantendienst of
in onze e-shop.
Met speciale sponsjes voor het reinigen van glaskeramiek
bereikt u goede resultaten.
Omlijsting van de kookplaat
Om schade aan de omlijsting van de kookplaat te voorkomen,
dient u zich te houden aan de aanwijzingen:
■Gebruik alleen warm zeepsop.
■Was nieuwe vaatdoekjes voor het gebruik goed uit.
■Gebruik in geen geval bijtende of schurende
reinigingsproducten.
■Gebruik geen schrapermesjes.
Storing opheffen
Storingen worden vaak veroorzaakt door een kleinigheid. Neem
alstublieft de volgende aanwijzingen in acht voor u de
klantenservice belt.
In de kookzone-indicatie knippert -: Wanneer bij een netaansluiting van het apparaat of na een
stroomuitval in de kookzone-indicatie -knippert, is er een
storing in de elektronica. Om de storingsmelding ongedaan te
maken dient u het bedieningspaneel kort met de hand af te
dekken.
Servicedienst
Wanneer uw apparaat gerepareerd moet worden, staat onze
servicedienst voor u klaar.
E-nummer en FD-nummer
Geef wanneer u contact opneemt met de servicedienst altijd
het productnummer (E-nr.) en het fabricagenummer (FD-nr.)
van het apparaat op. Het typeplaatje met de nummers vindt u
op het identificatiebewijs van het apparaat.
Let erop dat het bezoek van een technicus van de servicedienst
in het geval van een verkeerde bediening ook tijdens de
garantietijd kosten met zich meebrengt.
Indicatie Fout Maatregel
Geen De stroomtoevoer is onderbroken. Controleer de zekering van het apparaat. Controleer aan de hand van
andere elektronische apparaten of er sprake is van een stroomuitval.
Alle indica-
ties knippe-
ren
Het bedieningsvlak is vochtig of er ligt
een voorwerp op.
Droog het bedieningsvlak of verwijder het voorwerp.
”ƒ De elektronica is oververhit, waardoor
de betreffende kookzone is uitgescha-
keld.
Wacht tot de elektronica voldoende afgekoeld is. Raak dan een bedie-
ningsvlak van de kookzone aan.
”… De elektronica is oververhit, waardoor
alle kookzones zijn uitgeschakeld.
Wacht tot de elektronica voldoende afgekoeld is. Raak dan een willekeurig
bedieningsvlak aan.
”‰ De kookzone is te lang in gebruik
geweest en is daarom uitgeschakeld.
U kunt de kookzone direct weer inschakelen.

11
ÚTable of contents
[en]Instructionmanual
Safety precautions ...................................................................11
Causes of damage .......................................................................... 12
Environmental protection ........................................................12
Environmentally-friendly disposal.................................................. 12
Energy-saving tips............................................................................ 12
Getting to know your appliance ..............................................13
The control panel ............................................................................. 13
Residual heat indicator ................................................................... 13
Setting the hob .........................................................................13
Switching the hob on and off ........................................................ 13
Setting a hotplate............................................................................. 13
Table of cooking times ................................................................... 14
Childproof lock ......................................................................... 15
Switching the childproof lock on and off..................................... 15
Automatic childproof lock .............................................................. 15
Timer..........................................................................................16
Automatic hotplate switch-off......................................................... 16
Automatic timer ................................................................................ 16
Kitchen timer..................................................................................... 16
Automatic time limit .................................................................16
Basic settings ........................................................................... 17
Changing the basic settings .......................................................... 17
Cleaning and care ....................................................................18
Ceramic ............................................................................................. 18
Hob surround.................................................................................... 18
Rectifying faults ....................................................................... 18
After-sales service ...................................................................19
: Safety precautions
Please read this manual carefully. Please
keep the instruction and installation manual
as well as the appliance certificate in a safe
place for later use or for subsequent
owners.
Check the appliance for damage after
unpacking it. Do not connect the appliance
if it has been damaged in transport.
Only a licensed professional may connect
appliances without plugs. Damage caused
by incorrect connection is not covered
under warranty.
This appliance is intended for domestic use
only. The appliance must only be used for
the preparation of food and drink. The
appliance must be supervised during
operation. Only use this appliance indoors.
Do not use covers. These can cause
accidents, due to overheating, catching fire
or materials shattering, for example.
Do not use inappropriate child safety
shields or hob guards. These can cause
accidents.
This appliance may be used by children
over the age of 8 years old and by persons
with reduced physical, sensory or mental
capabilities or by persons with a lack of
experience or knowledge if they are
supervised or are instructed by a person
responsible for their safety how to use the
appliance safely and have understood the
associated hazards.
Children must not play with, on, or around
the appliance. Children must not clean the
appliance or carry out general maintenance
unless they are at least 8 years old and are
being supervised.
Keep children below the age of 8 years old
at a safe distance from the appliance and
power cable.
Risk of fire!
■Hot oil and fat can ignite very quickly.
Never leave hot fat or oil unattended.
Never use water to put out burning oil or
fat. Switch off the hotplate. Extinguish
flames carefully using a lid, fire blanket or
something similar.
Risk of fire!
■The hotplates become very hot. Never
place combustible items on the hob.
Never place objects on the hob.
Risk of fire!
■The appliance gets hot. Do not keep
combustible objects or aerosol cans in
drawers directly underneath the hob.
Risk of fire!
■The hob switches off automatically and
can no longer be operated. It may switch
on unintentionally at a later point. Switch
off the circuit breaker in the fuse box.
Contact the after-sales service.
Risk of burns!
■The hotplates and surrounding area
(particularly the hob surround, if fitted)
become very hot. Never touch the hot
surfaces. Keep children at a safe distance.
Risk of burns!
■The hotplate heats up but the display does
not work. Switch off the circuit breaker in
the fuse box. Contact the after-sales
service.

12
Risk of electric shock!
■Incorrect repairs are dangerous. Repairs
may only be carried out by one of our
trained after-sales engineers. If the
appliance is faulty, unplug the mains plug
or switch off the fuse in the fuse box.
Contact the after-sales service.
Risk of electric shock!
■Do not use any high-pressure cleaners or
steam cleaners, which can result in an
electric shock.
Risk of electric shock!
■A defective appliance may cause electric
shock. Never switch on a defective
appliance. Unplug the appliance from the
mains or switch off the circuit breaker in
the fuse box. Contact the after-sales
service.
Risk of electric shock!
■Cracks or fractures in the glass ceramic
may cause electric shocks. Switch off the
circuit breaker in the fuse box. Contact the
after-sales service.
Risk of injury!
Saucepans may suddenly jump due to
liquid between the pan base and the
hotplate. Always keep the hotplate and
saucepan bases dry.
Causes of damage
Caution!
■Rough pot and pan bases scratch the ceramic.
■Avoid boiling pots dry. This may cause damage.
■Never place hot pots or pans on the control panel, the
display area or the surround. This may cause damage.
■Damage can occur if hard or pointed objects fall on the hob.
■Aluminium foil and plastic containers melt on hot hotplates.
Oven protective foil is not suitable for your hob.
Overview
The following table provides an overview of the most frequent
kinds of damage:
Environmental protection
Environmentally-friendly disposal
Dispose of packaging in an environmentally-friendly manner.
Energy-saving tips
■Always place suitable lids on saucepans. When cooking
without a lid, considerably more energy is required. A glass
lid means that you can see inside without having to lift the lid.
■Use pots and pans with even bases. Uneven bases increase
energy consumption.
■The diameter of pot and pan bases should be the same size
as the hotplate. In particular, small saucepans on the hotplate
cause energy losses. Please note: cookware manufacturers
often indicate the upper diameter of the saucepan. This is
usually bigger than the diameter of the base of the pan.
■Use a small saucepan for small quantities. A larger, less full
saucepan requires a lot of energy.
■Cook with only a little water. This will save energy. Vitamins
and minerals in vegetables are preserved.
■Always cover as large an area of the hotplate as possible
with your saucepan.
■Switch to a lower heat setting in good time.
Damage Cause Action
Stains Food spills Remove spills immediately with a glass scraper.
Unsuitable cleaning agents Only use cleaning agents which are suitable for ceramic
Scratches Salt, sugar and sand Do not use the hob as a work surface or storage space.
Rough pot and pan bases scratch the
ceramic.
Check your cookware.
Discolouration Unsuitable cleaning agents Only use cleaning agents which are suitable for ceramic
Pan abrasion (e.g. aluminium) Lift the pots and pans when moving them.
Blisters Sugar, food with a high sugar content Remove spills immediately with a glass scraper.
This appliance is labelled in accordance with European
Directive 2012/19/EU concerning used electrical and
electronic appliances (waste electrical and electronic
equipment - WEEE). The guideline determines the
framework for the return and recycling of used
appliances as applicable throughout the EU.

13
■Select a suitable ongoing cooking setting. You will waste
energy by using an ongoing cooking setting which is too
high.
■Use the residual heat of the hob. For longer cooking times,
you can switch the hotplate off 5-10 minutes before the end
of the cooking time.
Getting to know your appliance
The instruction manual is the same for various different hobs.
An overview of the models with their dimensions is given on
page 2.
The control panel
Notes
■When you touch a symbol, the respective function is
activated.
■Always keep the controls dry. Moisture reduces their
effectiveness.
■Do not pull pans close to the displays and sensors. The
electronics could overheat.
Residual heat indicator
The hob has a two-stage residual heat indicator for each
hotplate.
If •appears in the display the hob is still hot. It may be used,
for example, to keep a small meal warm or to melt cooking
chocolate. As the hotplate cools down further, the display
changes to œ. The display remains lit until the hotplate has
cooled sufficiently.
Setting the hob
This section informs you how to set the hotplates. The table
shows heat settings and cooking times for various meals.
Switching the hob on and off
The main switch is used to switch the hob on and off.
To switch on: Touch the #symbol. An audible signal sounds.
The indicator light above the main switch and the ‹displays
light up. The hob is ready for use.
To switch off: Touch the #symbol until the display light above
the main switch and the displays go out. All hotplates are
switched off. The residual heat indicator remains on until the
hotplates have cooled down sufficiently.
Notes
■The hob switches off automatically if all hotplates have been
switched off for more than 20 seconds.
■The settings remain stored for 4 seconds after the hob has
been switched off. If you switch it on again during this time,
the hob will operate using the previously stored settings.
Setting a hotplate
Use the +and -symbols to set the desired heat setting.
Heat setting 1 = lowest setting
Heat setting 9 = highest setting
There is an intermediate setting between each heat setting. This
is identified by a dot.
Displays
‚-ŠHeat settings
•/œResidual heat
‰‰ Timer
Controls
#Main switch
EChildproof lock
¡Hotplate selection
A @ Adjustment fields
0Timer

14
Setting the heat setting
The hob must be switched on.
1. Touch the ¡symbol to select the hotplate.
2. Touch the +or -symbol within the next 10 seconds. The
basic setting appears.
Symbol +heat setting 9
Symbol -heat setting 4
3. To change the heat setting: Touch the +or symbol until the
desired heat setting appears.
Switching off the hotplate
Use the ¡symbol to select the hotplate. Touch the +or -
symbol until ‹appears. After about 10 seconds, the residual
heat indicator appears.
Notes
■The last selected hotplate remains activated. You can set the
hotplate without selecting it again.
■Hotplate temperature is regulated by the heat switching on
and off. The heat may also switch on and off at the highest
setting.
Table of cooking times
The following table provides some examples.
Cooking times and heat settings may vary depending on the
type of food, its weight and quality. Deviations are therefore
possible.
For bringing liquids to the boil, use heat setting 9.
Stir thick liquids occasionally.
Ongoing cooking
setting
Ongoing cooking
time in minutes
Melting
Chocolate coating
Butter, honey, gelatine
1-1.
1-2
-
-
Heating and keeping warm
Stew (e.g. lentil stew)
Milk**
Heating sausages in water**
1-2
1.-2.
3-4
-
-
-
Defrosting and heating
Frozen spinach
Frozen goulash
2.-3.
2.-3.
10-20 min
20-30 min
Poaching, simmering
Dumplings
Fish
White sauces, e.g. béchamel sauce
Emulsified sauces, e.g. béarnaise sauce, hollandaise sauce
4.-5.*
4-5*
1-2
3-4
20-30 min
10-15 min
3-6 min
8-12 min
Boiling, steaming, braising
Rice (with double the quantity of water)
Rice pudding
Unpeeled boiled potatoes
Boiled potatoes
Pasta, noodles
Stew, soups
Vegetables
Frozen vegetables
Cooking in a pressure cooker
2-3
1.-2.
4-5
4-5
6-7*
3.-4.
2.-3.
3.-4.
4-5
15-30 min
35-45 min
25-30 min
15-25 min
6-10 min
15-60 min
10-20 min
10-20 min
-
* Ongoing cooking without a lid
** Without lid
*** Turn frequently

15
Childproof lock
You can use the childproof lock to prevent children from
switching on the hotplates.
Switching the childproof lock on and off
The hob must be switched off.
To switch on: Touch the E symbol for approx. 4 seconds.
The indicator light above the Esymbol lights up for
10 seconds. The hob is locked.
To switch off: Touch the E symbol for approx. 4 seconds.
The hob is unlocked.
Automatic childproof lock
This function automatically activates the childproof lock every
time you switch the hob off.
Switching on and off
You can find out how to switch the automatic childproof lock on
and off in the Basic settings section.
Braising
Roulades
Pot roasts
Goulash
4-5
4-5
2.-3.
50-60 min
60-100 min
50-60 min
Frying**
Escalope, plain or breaded
Escalope, frozen
Cutlet, plain or breaded***
Steak (3 cm thick)
Hamburger, rissoles (3 cm thick)***
Poultry breast (2 cm thick)***
Poultry breast, frozen***
Fish and fish fillet, plain
Fish and fish fillet, breaded
Fish and fish fillet, breaded and frozen, e.g. fish fingers
Scampi and prawns
Stir fry, frozen
Pancakes
Omelette
Fried eggs
6-7
6-7
6-7
7-8
4.-5.
5-6
5-6
5-6
6-7
6-7
7-8
6-7
6-7
3.-4.
5-6
6-10 min
8-12 min
8-12 min
8-12 min
30-40 min
10-20 min
10-30 min
8-20 min
8-20 min
8-12 min
4-10 min
6-10 min
consecutively
consecutively
3-6 min
Deep-fat frying (fry 150-200 g per portion continuously in 1-2 litres oil**)
Frozen products, e.g. chips, chicken nuggets
Croquettes
Meat, e.g. chicken portions
Fish, breaded or battered
Vegetables, mushrooms, breaded or battered
Small baked items, e.g. doughnuts, fruit in batter
8-9
7-8
6-7
5-6
5-6
4-5
-
-
-
-
-
-
Ongoing cooking
setting
Ongoing cooking
time in minutes
* Ongoing cooking without a lid
** Without lid
*** Turn frequently

16
Timer
The timer can be used in two different ways:
■To switch a hotplate off automatically
■As a kitchen timer
Automatic hotplate switch-off
Enter a cooking time for the relevant hotplate. When the
cooking time has elapsed, the hotplate switches off
automatically.
Setting the cooking time:
The hotplate must be switched on.
1. Use the ¡symbol to select the hotplate.
2. Touch the 0symbol. ‹‹ lights up on the timer display. The
indicator light for the desired hotplate lights up.
3. Touch the +or -symbol. The default value appears.
Symbol +: 30 minutes
Symbol -: 10 minutes
4. Touch the +or -symbol until the desired cooking time
appears on the timer display.
The cooking time counts down. If you have set a cooking time
for several hotplates, you can display each cooking time. To do
so, use the ¡symbol to select the relevant hotplate.
When the time has elapsed
When the cooking time has elapsed, the hotplate switches off.
‹lights up in the hotplate display. An audible signal sounds.
‹‹ lights up in the timer display for 10 seconds. Touch any
symbol. The displays go out and the audible signal ceases.
Changing or cancelling the cooking time
Select the hotplate. Touch the 0symbol and use the +or -
symbol to change the cooking time or set to ‹‹.
Automatic timer
You can use this function to preselect a cooking time for all
hotplates. Each time a hotplate is switched on, the preselected
cooking then counts down. When the cooking time has
elapsed, the hotplate switches off automatically.
You can find out how to switch on the automatic timer in the
Basic settings section.
Note: You can change the cooking time for a hotplate or switch
off the automatic timer for the hotplates.
Select the hotplate. Touch the 0symbol and use the +or -
symbol to change the cooking time or set to ‹‹.
Kitchen timer
You can use the kitchen timer to set a time of up to 99 minutes.
It runs independently of all the other settings.
Switching on the kitchen timer
There are 2 different ways to switch the kitchen timer on:
■If a hotplate has been selected, touch the 0symbol twice
within 10 seconds.
■If a hotplate has not been selected, touch the 0symbol.
‹‹ lights up in the timer display. The indicator light next to the
Vsymbol lights up.
Setting the time
1. Touch the +or -symbol. The default value appears.
+symbol: 10 minutes
-symbol: 05 minutes
2. Touch the +or -symbol until the desired time appears in the
timer display.
The time counts down.
An audible signal sounds once the time has elapsed. ‹‹ lights
up in the timer display for 10 seconds.
Displaying the time
Use the 0symbol to select the kitchen timer. The time is
displayed for 10 seconds.
Changing the time
Use the 0symbol to select the kitchen timer and reset the
time.
Automatic time limit
If a hotplate has been switched on for a long time without the
setting being changed, the automatic time limit is activated.
The hotplate stops heating. ”‰and the •/œresidual heat
indicator flash alternately on the hotplate display.
The display goes out when you touch any control. You can
make new settings.
When the time limit is activated depends on the heat setting
selected (1 to 10 hours).

17
Basic settings
Your appliance has various basic settings. You can adapt these
settings to your needs.
Changing the basic settings
The hob must be switched off.
1. Switch on the hob.
2. Within the next 10 seconds, press and hold the Esymbol
for 4 seconds
™and ‚flash alternately in the left-hand display; ‹lights up in
the right-hand display.
3. Touch the E symbol repeatedly until the desired symbol
appears on the left-hand display.
4. Touch the +or -symbol repeatedly until the desired setting
appears in the display.
5. Touch the E symbol continuously for 4 seconds.
The setting is activated.
Switching off
To exit the basic setting, switch off the hob with the main switch
and make new settings.
Display Function
™‚ Automatic childproof lock
‹Switched off.*
‚Switched on.
™ƒ Audible signal
‹ Confirmation signal and operation error signal are switched off.
‚Only the operation error signal is switched on.
ƒOnly the confirmation signal is switched on.
„Confirmation signal and operation error signal switched on.*
™† Automatic timer
‹ Switched off.*
‚-ŠŠ Cooking time, after which the hotplates switch off
™‡ Duration of the timer end signal
‚10 seconds.*
ƒ n 30 seconds
„ 1 minute.
™ˆ Activation of the filament circuits
‹Switched off.
‚Switched on.
ƒ Last setting before the hotplate was switched off.*
™Š Time for selecting the hotplate
‹Unlimited: The last selected hotplate can always be adjusted without having to select it again.*
‚ Once you select a hotplate, you have 10 seconds to adjust it, after which you will have to select it again in order to
be able to adjust it.
™‹ Reset to basic setting
‹Switched off.*
‚Switched on.
* Basic setting

18
Cleaning and care
The information in this section provides help on how best to
care for your hob.
Suitable maintenance and cleaning products can be purchased
from the after-sales service or in our e-Shop.
Ceramic
Clean the hob after each use. This will prevent spills from
burning onto the ceramic.
Only clean the hob when it has cooled down sufficiently.
Use only cleaning agents which are suitable for glass ceramic.
Follow the cleaning instructions on the packaging.
Never use:
■Undiluted washing-up liquid
■Detergent intended for dishwashers
■Scouring agents
■Harsh cleaning agents such as oven spray or stain remover
■Abrasive sponges
■High-pressure cleaners or steam jet cleaners
Ground-in dirt can be best removed with a glass scraper,
available from retailers. Please note the manufacturer's
instructions.
You can also obtain a suitable glass scraper from our after-
sales service or from the e-Shop.
Using special sponges to clean glass ceramic achieves great
cleaning results.
Hob surround
To prevent damage to the hob surround, observe the following
instructions:
■Use only hot soapy water.
■Wash new sponge cloths thoroughly before use.
■Do not use any sharp or abrasive agents.
■Do not use the glass scraper.
Rectifying faults
Malfunctions often have simple explanations. Please read the
following notes before calling the aftersales service.
If - flashes in the hotplate indicators:
If -flashes in the hotplate indicators when the appliance is
connected to the mains or following a power cut, the
electronics are malfunctioning. To acknowledge the fault, briefly
cover the controls with your hand.
Display Fault Measure
Blank There is no power supply. Check the household fuse for the appliance. Check whether there is a
power cut by trying other electronic appliances.
All displays
flash
The controls are damp or an object is
resting on them.
Dry the controls or remove the object.
”ƒ The electronics have overheated and
have switched off the corresponding
hotplate.
Wait until the electronics have cooled down sufficiently. Then touch a con-
trol for the hotplate.
”… The electronics have overheated and
have switched off all hotplates.
Wait until the electronics have cooled down sufficiently. Then touch any
control.
”‰ The hotplate was in operation for too
long and has switched itself off.
You can switch the hotplate back on again immediately.

19
After-sales service
Our after-sales service is there for you if your appliance should
need to be repaired. We are committed fo find the best solution
also in order to avoid an unnecessary call-out.
E number and FD number:
Please quote the E number (product number) and the FD
number (production number) of your appliance when
contacting the after-sales service. The rating plate bearing
these numbers can be found on the appliance certificate.
Please note that a visit from an after-sales service engineer is
not free of charge, even during the warranty period.

Contact:
Internet: www.belion.nl/service
930923*9000920187* 9000920187
Table of contents
Languages:
Other Belion Hob manuals
Popular Hob manuals by other brands
Omega Australia
Omega Australia OI64Z Installation and operating instructions

VOX electronics
VOX electronics EBC 200 MCB operating instructions
Candy
Candy CTPS63SCTTWIFI instruction manual
Electrolux
Electrolux EHH6540F9K user manual
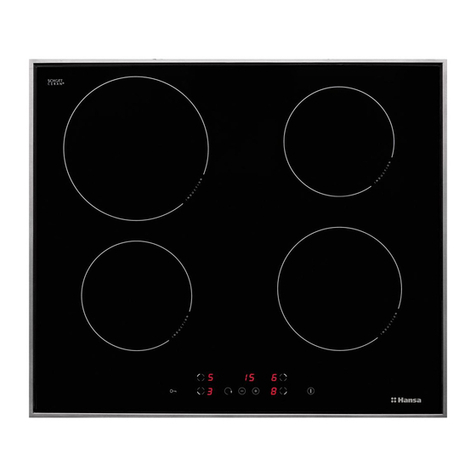
Hansa
Hansa BHI68014 instruction manual

Electrolux
Electrolux PB750UV user manual


