4
YOUR BABY PACIFIER
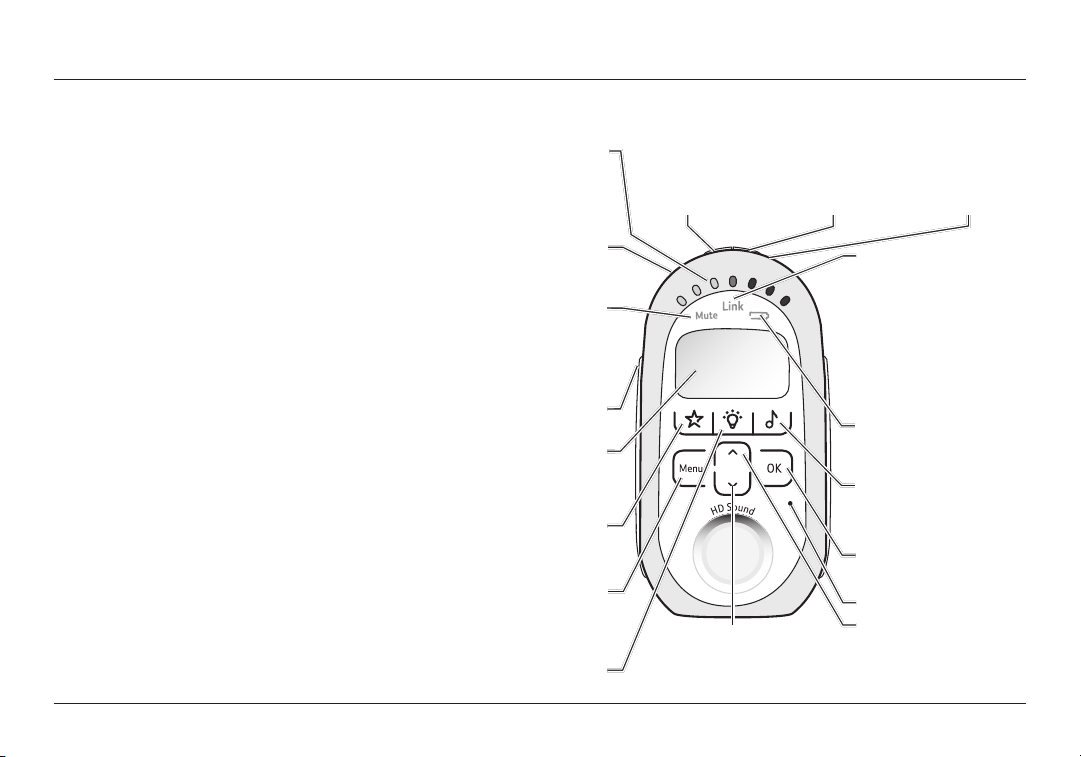
Parent unit
1. Baby sound level LEDs
Indicates the level of received sound. The LEDs will
light up progressively as the sound increases.
2. Torch (on back of unit)
Press to switch the torch feature on and off.
3. Mute LED
Red indicates that Mute All has been switched on. Amber
indicates that Mute Low has been switched on.
4. Talk (on side of unit)
Press to talk to your baby.
5. LCD Display
Power saving backlight turns on when you press any
button and then switches off after 15 seconds.
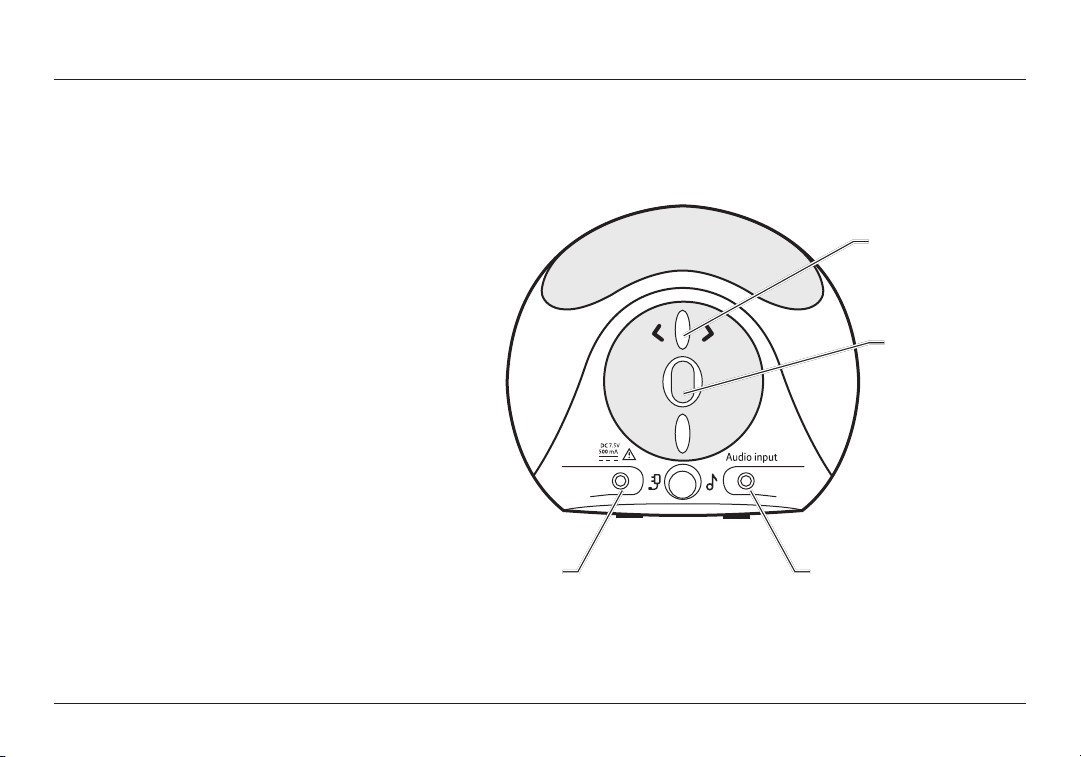
6. Press to switch the Lightshow on the Baby unit on or off.
7. Menu
Press to open the menu. Press and hold to exit
the menu and return to the idle screen.
8. Press to switch the Nightlight on the Baby unit on or off.
9. Down
Decrease speaker volume. Scroll through the menu options.
10. Mute Low (on top of unit)
11. Mute All (on top of unit)
Press to toggle the Parent unit receive volume between on and off.
12. Power on/off (on top of unit)
Press and hold to switch the power on or off. Press to toggle the Baby
unit microphone sensitivity between normal and Mute Low.
13. Link indicator
Steady green indicates that the Baby and Parent units are linked.
Flashes green if no link established for 30 seconds. Flashes red if no
link established after 30 seconds. Also flashes green when the Talk
button is pressed on the Parent unit to initiate parental talk back.
14. Battery status LED
Red light indicates the batteries are low and need re-charging.
15.
Press to switch the music on the Baby unit on or off.
16. OK
Press to confirm the menu option displayed.
17. Microphone
18. Up
Increase speaker volume. Scroll through the menu options.