Belkin F7C037 User manual

User Manual
F7C037_8830ed01744uk_Rev.A00
Digital ViDeo BaBy Monitor with night Vision
ENGLISH
FRANÇAIS
DEUTSCH
NEDERLANDS
ESPAÑOL
ITALIANO
PORTUGUÊS
POLSKI
TÜRKÇE
BaBy video

TABLE OF CONTENTS
....................................1
................................................7
.............................14
.................................19
....................................................32
....................................35
..............................................58

1
9
The Baby unit is also referred to as a CAM (camera) in this guide.
1
2
3
4
5
6
7
8
1
2
Back-up light for night vision.
3
Press and hold to turn on or off.
Red light is on when the Baby unit is powered by batteries.
Green light is on when the Baby unit is powered by the
power adaptor.
Flashes red when the Baby unit battery is low.
Flashes red and green alternately when
the Baby unit is in pairing mode.
4
Pull to adjust the camera angle.
5
Steady red indicates that Mute All has been switched
on.Amber indicates that Mute Low has been switched on.
6
Press to play and stop lullabies.
7
Press to increase or decrease the volume.
8
Press to skip to the next lullaby.
9

2
1
2
3
4
5
6
1
2
To listen to lullabies and parent’s voice when Talk feature is used.
3
(beneath the rubber cover)
4
5
6
Used for the wall mounting bracket supplied
or a tripod (not supplied).

3
1
2
34
5
6
7
8
9
10
11
12
1
On = strong signal is detected between the Parent and Baby unit.
Flashing = Parent unit cannot link to the Baby unit.
Off = Parent unit is turned off.
2
On = Parent unit battery is being charged.
Flashing = Parent unit battery is low and needs charging.
Off = Parent unit battery is fully charged (if connected to mains power)
or Parent unit battery is adequate (when operated using the battery).
3
On = Parent unit screen is in multi-CAM mode or the Parent unit
speaker volume is turned off.
4
On = Parent unit is talking to the Baby unit.
5 Talk
Whilst viewing in single-CAM mode, press
and hold to talk to the Baby unit.
6
To listen to sounds transmitted from the Baby unit.
7
(beneath the rubber cover).
8
Press repeatedly to view an individual camera or all cameras at the
same time. Press and hold to turn the screen off or press to turn it on.
9
Whilst viewing in single-CAM mode, press to zoom in or out.
10
Press and hold to turn on or off.
11
12

4
1
2
3
4
5
1
Press to increase the Parent unit speaker volume.
Press to scroll up a menu. Whilst viewing in zoom mode,
press to move up. Whilst viewing in multi-CAM mode,
press to scroll up to highlight a certain camera.
2
In menu mode, press to return to the previous menu.
Whilst viewing in zoom mode, press to move to
the left. Whilst viewing in multi-CAM mode, press
to move left to highlight a certain camera.
3
Press to enter the menu.In menu mode, press to select an option
or save a setting. Whilst viewing in multi-CAM mode, press to
select a certain camera.
4
Press to decrease the Parent unit speaker volume.Press to
scroll down a menu.Whilst viewing in zoom mode, press to move
down. Whilst viewing in multi-CAM mode, press to scroll down to
highlight a certain camera.
5
Whilst viewing in zoom mode, press to move right.In menu
mode, press to select an option. Whilst viewing in multi-CAM
mode, press to move right to highlight a certain camera.

5
18
oC
Displayed when the camera at the
Baby unit has been zoomed in.
Displayed when a lullaby is playing at the Baby unit.
Displayed when the temperature alert is set to on.
Displays the temperature in the
room where the Baby unit is.
Light up to indicate the level of sound
being transmitted from the Baby unit.
Light up when adjusting the speaker volume level.
displayed when strong signal strength is
detected between the Baby and Parent unit.
displayed when moderate signal strength is
detected between the Baby and Parent unit..
displayed when the link between the
Baby and Parent unit is lost.
CAM 1, 2, 3, 4
Displays the number of the Baby unit that is
being viewed when in single-CAM mode.
Displays the highlighted Baby unit
when in multi-CAM mode.
The icon does not appear when the
Parent unit has no paired Baby unit.
Displayed when the battery is fully charged.
The battery icon will scroll when charging.
Displayed when the battery is low and needs charging.
Displayed when no battery is installed but
is operating using the power adaptor, or the
battery has been installed incorrectly.

SETTING UP
WARNING
Only use the battery supplied. Using
another type could permanently damage
the unit.
Please note that new batteries do not reach
full capacity until they have been in normal
use for several days. The charge capacity
of rechargeable batteries will reduce
with time as they wear out, so reducing
the performance time of the Parent unit.
Eventually they will need to be replaced.*.
1.Remove the plastic protective
film from the front of the unit.
Insert the battery supplied into
the battery compartment. It
will only fit one way round.
2.Replace the battery compartment
cover by aligning the cover flat
against the battery compartment,
then slide it towards the centre of the
Parent unit until it clicks into place.
Antenna
Release
Antenna
Release

7
SETTING UP
The Parent unit rechargeable
battery will lose charge over a
period of time, even if switched o.
If the Parent unit is not going to be
used for a long time, remove the
battery to prevent any possible
leakage.
When the battery is low the screen
will display
and the icon. The
light will also ash and you will hear
a short alert beep. You will need to
recharge the Parent unit without
interruption for approximately 30
minutes to give the Parent unit
enough charge to use for a short
time. If the Parent unit is turned o
during charging, the battery will
charge more quickly.
If you ever need to remove the battery, unplug the power
adaptor and then open the battery compartment cover.
Move the battery release tab (see diagram on page 16
for position) to the right to release the battery.
3.Plug the power adaptor cable into the socked
marked on the side of the Parent unit and plug the other end
into the mains power and switch on. The light on the front
of the Parent unit will turn on while the battery is charging.
4.Leave the battery to charge continuously for 12 hours
before you switch the Parent unit on. When the battery is fully
charged the light on the side of the Parent unit will turn off.

8
SETTING UP
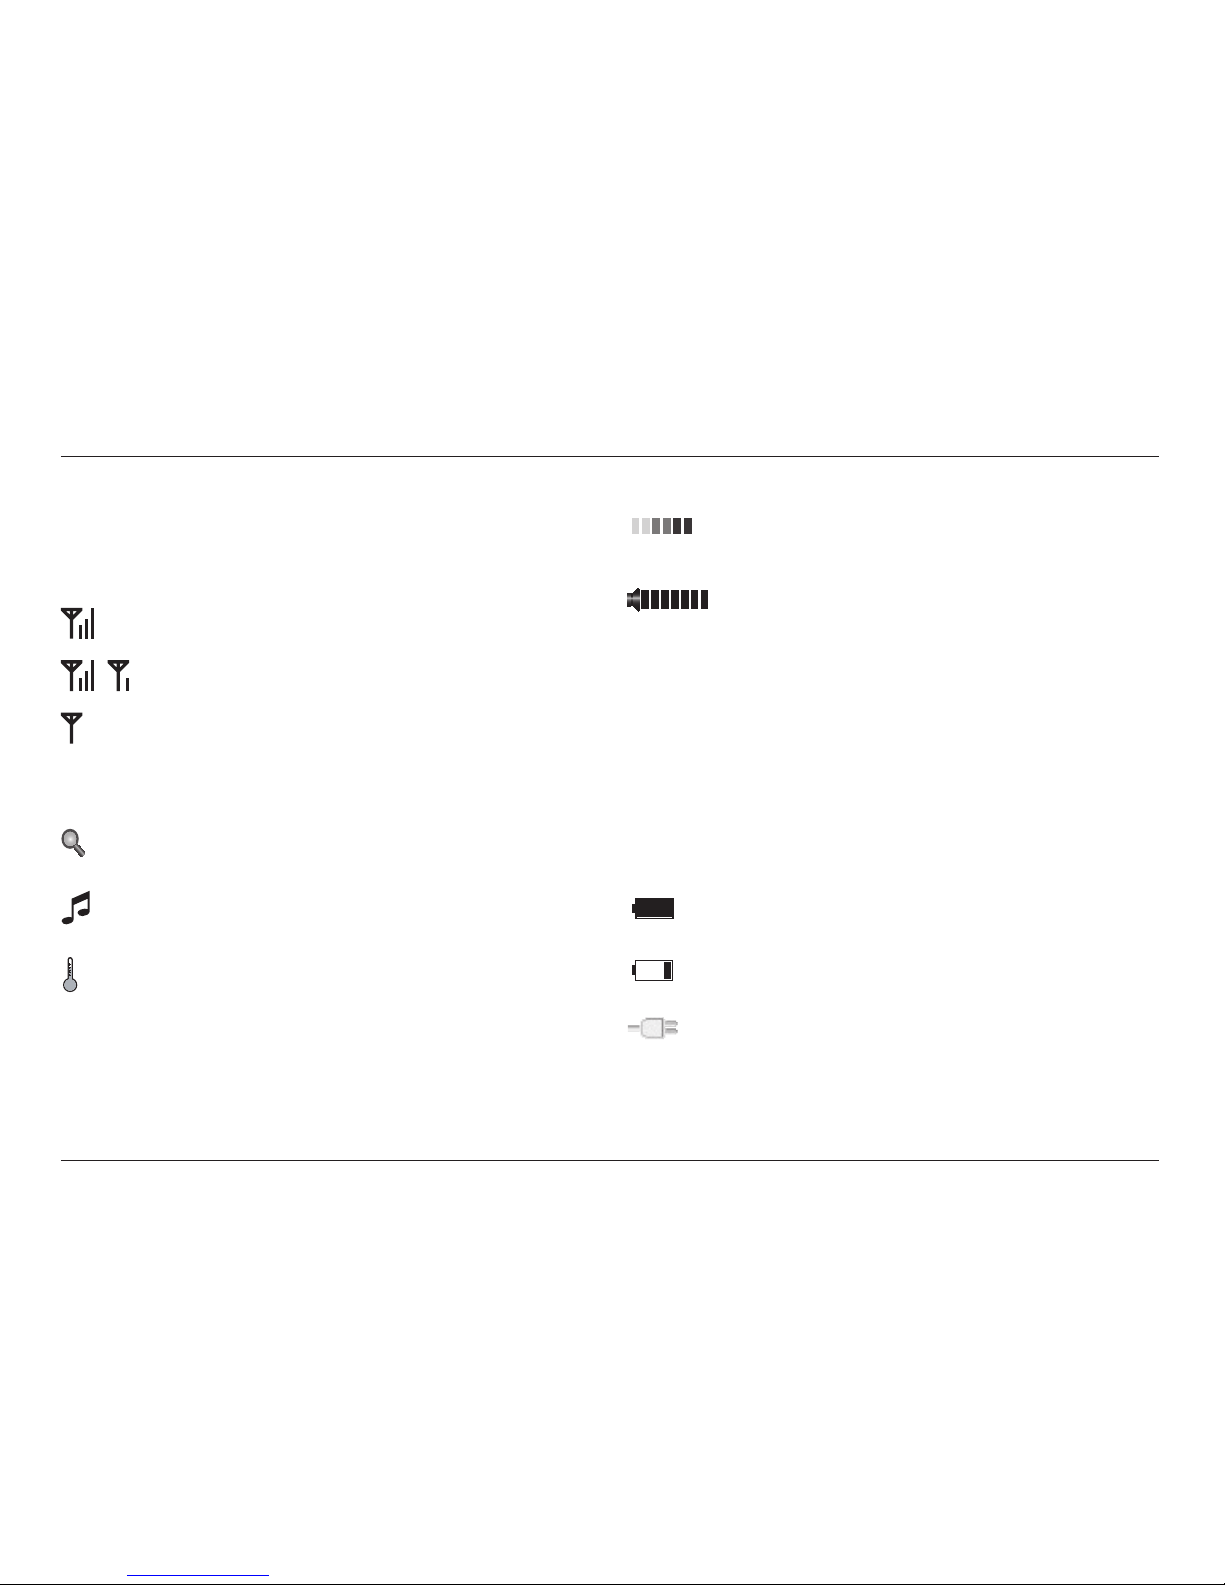
5. Once the Parent unit battery has fully charged, press
the button on the Parent unit until the screen becomes
active. The battery icon on the top line of the screen will be
solid to indicate that the battery is fully charged .
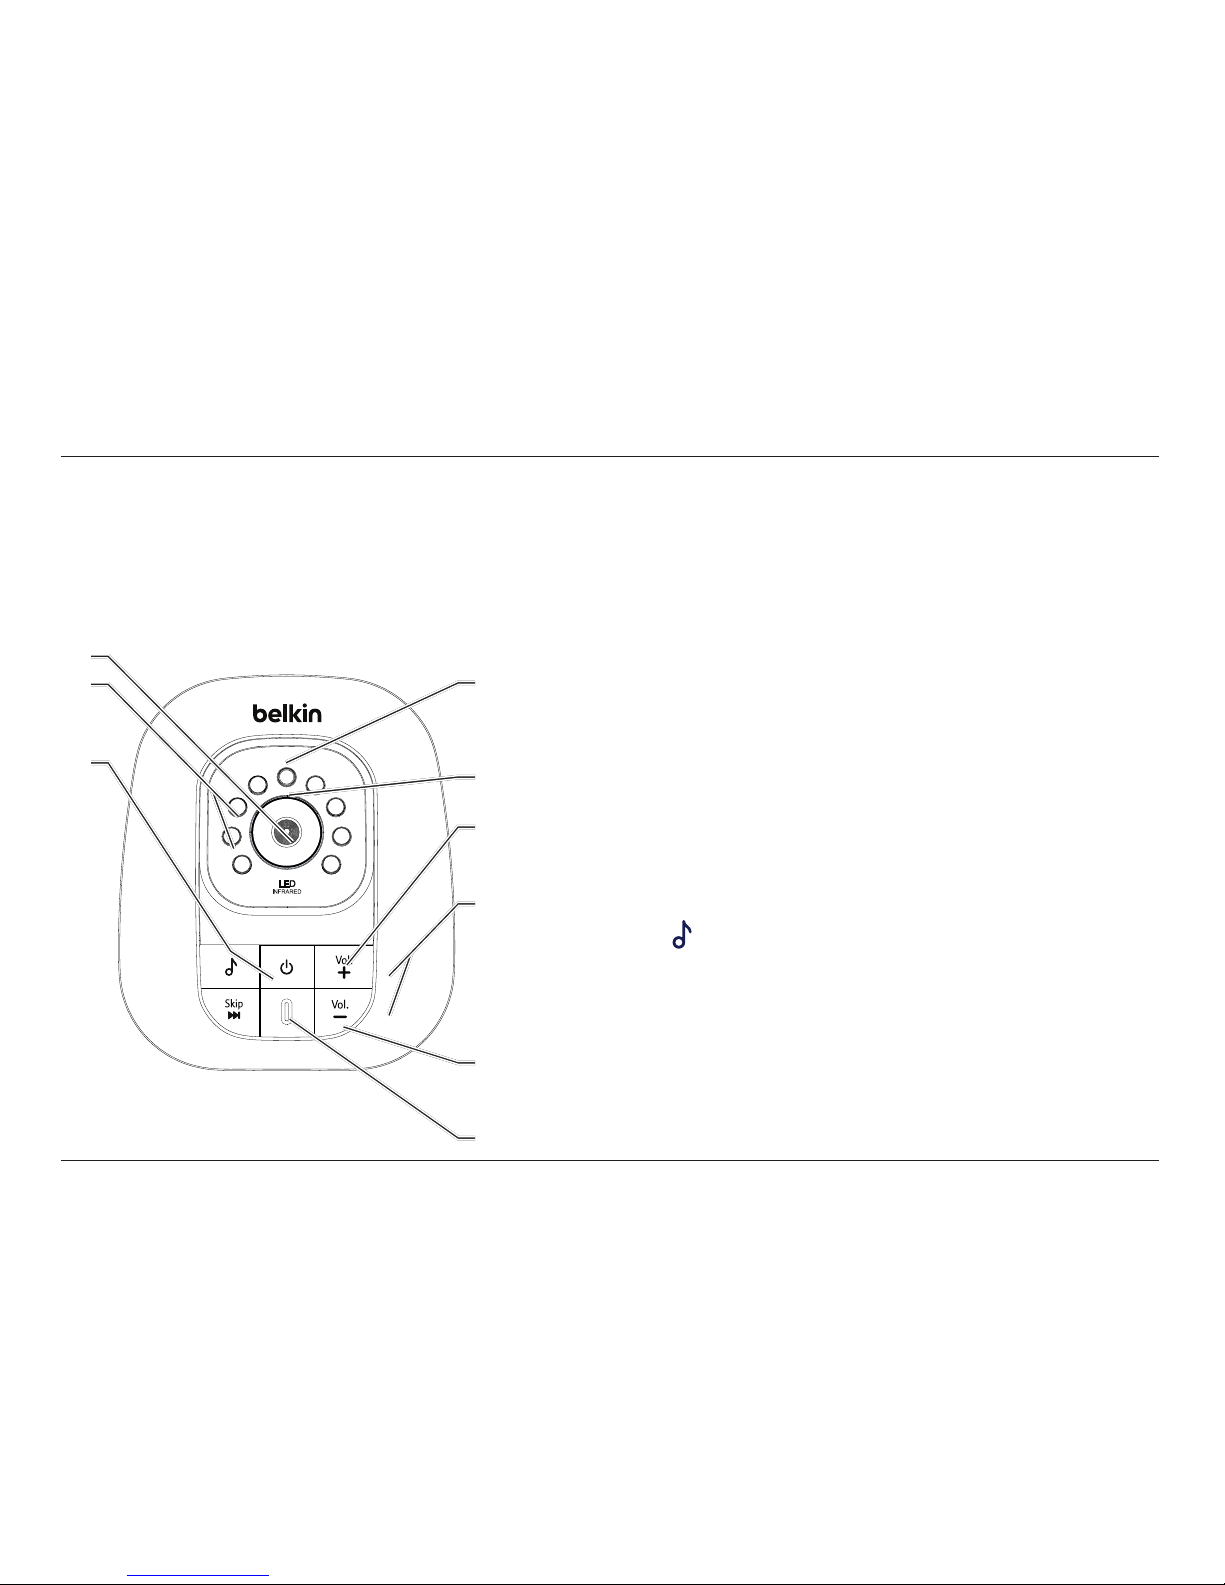
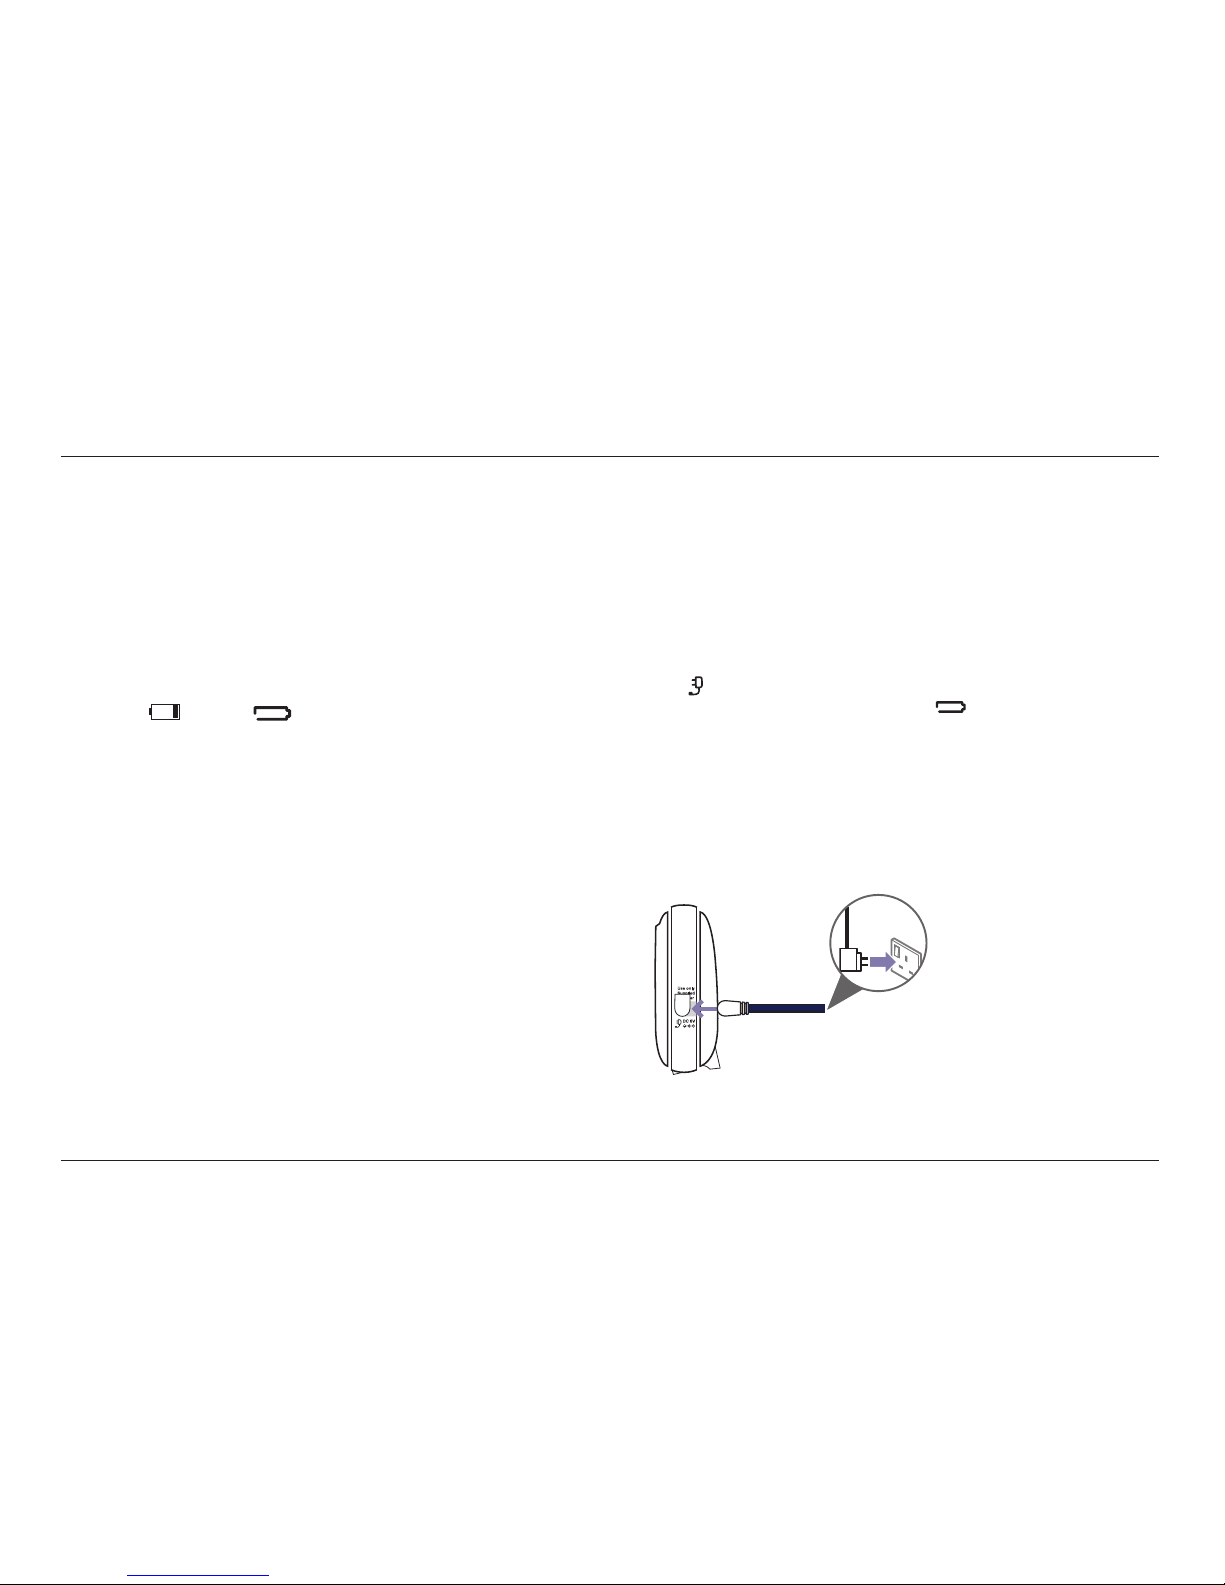
The Baby unit can be powered up using the power adaptor provided
or using 4 AA batteries (not supplied). Even if the power adaptor is
used, we recommend that you also install batteries to guarantee
continual operation in the case of a power cut. Battery condition
should be checked weekly to ensure leakage does not occur.
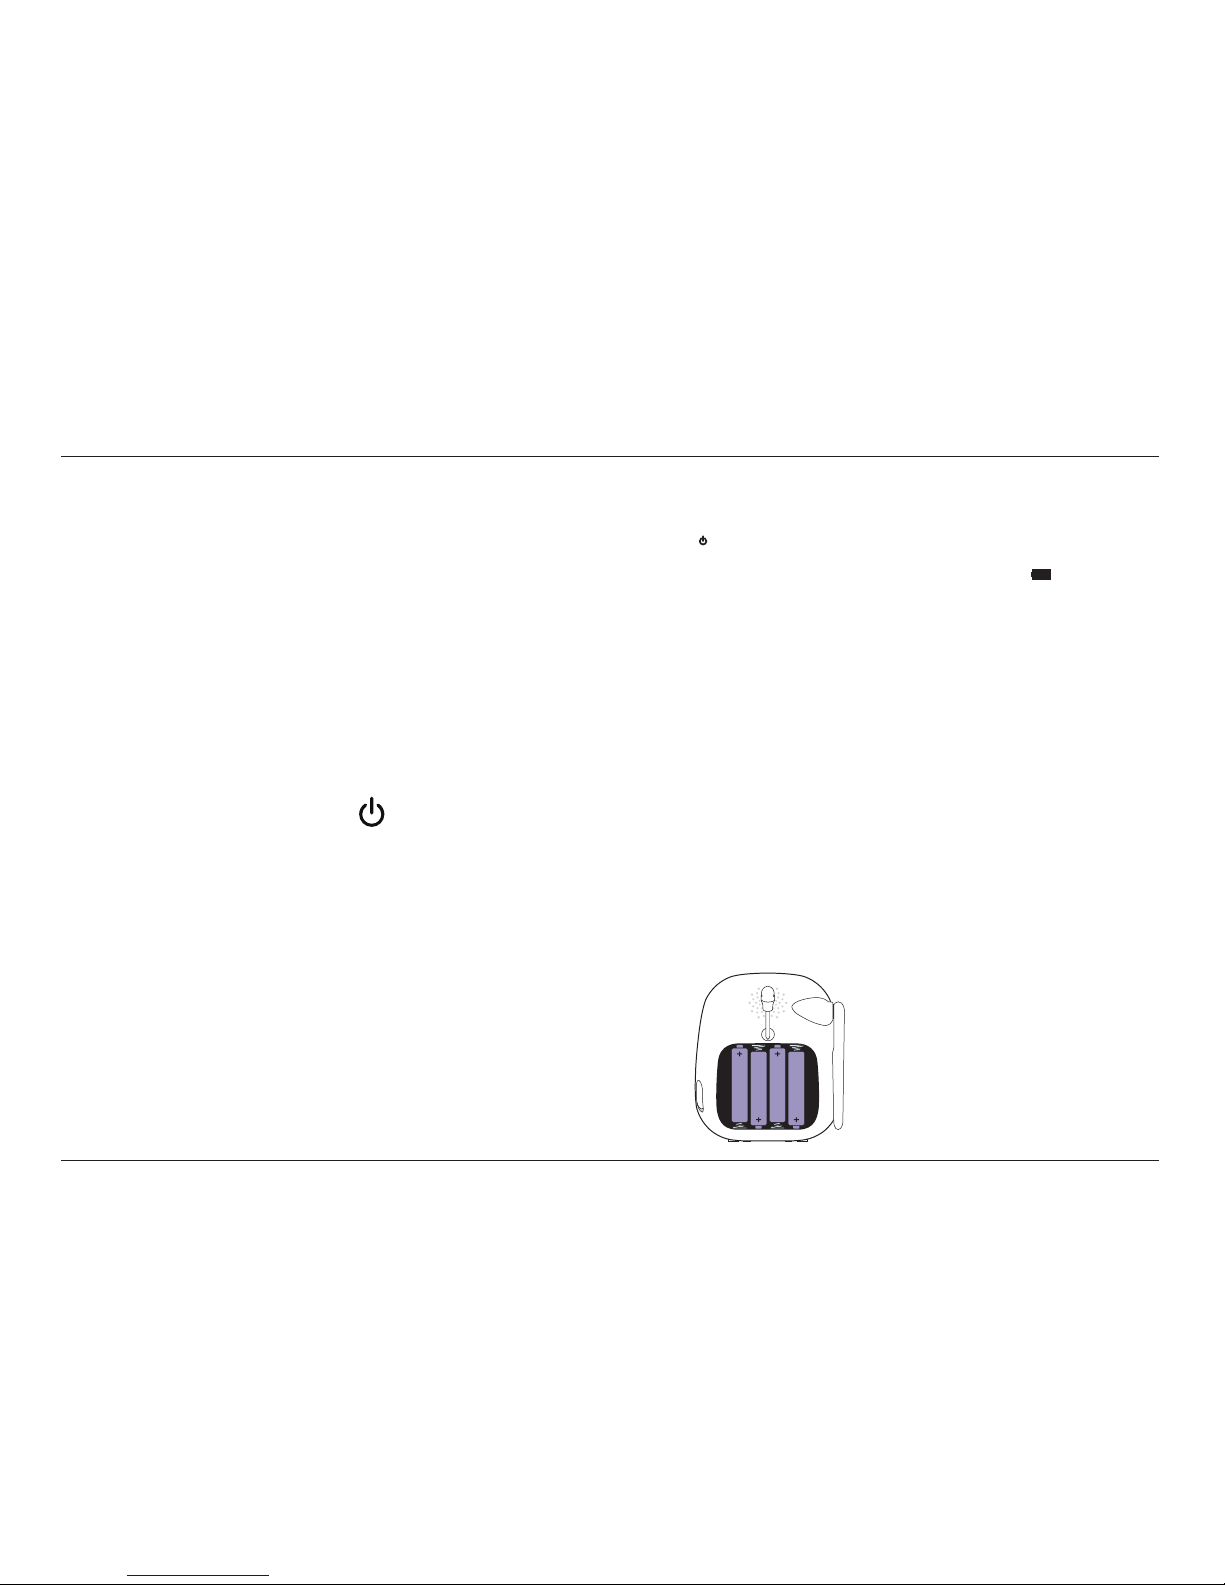
1.Install 4 AA batteries (not supplied) into the battery
compartment as shown observing the polarity markings
inside. Then replace the battery compartment cover.
WARNING
Do not mix old and new batteries. Only use the recommended type of 4 AA
batteries. Using other types could permanently damage the unit.
The operating time for using AA batteries is approximately 8 hours
depending on light conditions and feature usage. Therefore, if you want to
monitor your baby for long periods we strongly recommend you connect the
power adaptor to the Baby camera unit.
If the Baby unit is not going to be used for a long time, remove the batteries
to prevent any possible leakage.
Rechargeable batteries can be used but the Baby unit cannot charge the
rechargeable batteries.
When the batteries are low the light on the button of the Baby unit will
ash red. You will need to replace the batteries.
Battery condition should be checked weekly to ensure leakage does not
occur.
WARNING
Only use the power adaptor supplied. Using an incorrect power adaptor
could permanently damage your product.
Make sure the Baby unit and power adaptor cable are kept away from the
reach of children.

9
SETTING UP
When you need to remove the batteries, unplug the
power adaptor and then open the battery compartment
cover and use the ribbon to gently pull them out.
2. Plug the power adaptor cable into
the socked marked on the side of the Baby unit and plug
the other end into the mains power and switch on.

10
SETTING UP
We recommend you place the Baby unit between 1-2 metres
away from your baby for best performance. Make sure the unit
and cable is out
of reach of your baby.
Do not place the Parent and Baby units too close
together as you will hear a high-pitched noise, this
is normal. The units are designed to be located at a
distance from one another, e.g. in separate rooms.
The operating range is up to 300 metres outdoors and
50 metres indoors. The actual operating range may vary
depending on the environmental conditions and other
interferences such as walls, doors and other obstructions.
The Baby unit may not detect sounds when the sensitivity
level is set below a certain level so you may wish to increase
the sensitivity level, see page 32. You may also need to
turn the loudspeaker volume up on the Parent unit to hear
the sounds transmitted from the Baby unit, see page 27.

11
SETTING UP
If no connection can be
established, the Parent unit will
display for a
few seconds, then
The Link light will
continue to ash.
It is important that you test the units before use
and at regular times thereafter, especially if
they have not been used for some time.
1.Place the Parent and Baby units in the same room
but make sure they are at least 2 metres apart.
2.Press and hold the button on the Baby unit
until the Power light on the button turns on.
3.Press and hold the button on the Parent unit until the
display shows and the Link light flashes.
4.Press the button on the Parent unit to
view the image from the Baby unit.
The Parent and Baby unit supplied are already paired. You
can add or replace Baby units purchased separately to your
baby monitor system. You can pair a maximum of four Baby
units to your Parent unit. Each new Baby unit must be paired
to the Parent unit before use, see page 40 for instructions.

12
SETTING UP
Before you wall mount,
please check that:
• the wall can support the
weight of the product
• the power adaptor will reach
the power socket
• you are not drilling into any
hidden wiring or plumbing
Belkin are not responsible for
any damage/injury caused while
attempting to wall mount
your product.
The Baby unit is ready for tabletop use but you can
wall mount it using the wall mounting bracket supplied if you wish
to. Make sure you test the
units (see page 21) from the proposed
position before wall mounting.
1.Place the wall mounting bracket against the wall
where you want to wall mount the Baby unit and use
a pencil to mark the top two holes as shown.
2.Remove the wall mounting bracket and check the
reception strength of the Baby unit and camera angle
before drilling two holes in the wall using a 5mm drill bit.
Ð
Ð

13
SETTING UP
3.Align the wall mounting bracket and screws with the
holes in the wall as shown. Make sure you attach the screw
in the middle hole first so that the wall mounting position
is fixed, then attach the other screw in the top hole.
4.Place the Baby unit onto the wall mounting bracket
and tighten the screw into the threaded socket at
the bottom to secure the Baby unit in place. å
Your Belkin Digital Video Baby Monitor is now ready for use.

14
When the maximum or minimum
volume levels have been reached
you will hear an error tone.
1.Press and hold the button until the light on the button turns on.
2.To turn the Baby unit off, press and hold the
button for 2 seconds. The light will turn off.
You can adjust the loudspeaker volume from Level 1 to Level 5.
The default setting is Level 3. If you adjust the loudspeaker volume
it will also adjust the parent voice (Talk) playback volume.
1.Press the or button on the Baby unit at any time
to increase or decrease the loudspeaker volume.
The Baby unit has five lullabies that can be played to gently
soothe your baby. The total lullaby playback time is about 15
minutes and it starts from where you stopped it last time.

15
Lullaby playback will be paused
if the Talk feature is being used,
when nished lullaby playback will
resume.
The infrared LED’s may glow
red slightly when viewed in dark
conditions. This is normal.
Press the button to play.
Press the
Skip
button to skip to the next lullaby.
Press the button to stop playback.
To help you monitor your baby at night, the Baby unit automatically
uses the light from its infrared LEDs when it is turned on in a dark
room. However, it only transmits black and white images in
this mode.
1.Press and hold the button until the display screen turns on.
2.To turn the Parent unit off, press and hold the
button until the display screen turns off.

You can adjust the loudspeaker volume from Volume 1 to
Volume 7 or you can switch it off. The default setting is
Volume 4. When the loudspeaker volume is set to off, the
icon appears on the screen and the light turns on.
1.Press the or button on the Parent unit to
increase or decrease the loudspeaker volume.
You can zoom in or out while viewing images
transmitted from the Baby unit.
1.Press the button to zoom in. Use the , , or
button to move the zoomed image up, down, left or right.
2.To zoom out again, press the button.

17
Multi-CAM mode is not available if
only one Baby unit is paired to the
Parent unit.
You can change the screen to view images from different Baby units
(if you have more than one Baby unit), or you can turn the screen off.
1.Press the button to select the Baby unit you want:
CAM 1, CAM 2, CAM 3, CAM 4 or multi-CAM.
1.Use the , , or button to choose the
Baby unit you want, then press the or button.
2. Press the button again to zoom in. Use the , , or
button to move the zoomed image up, down, left or right.
3.To zoom out again, press the button.
1.Press and hold the button until the screen turns off.
2.To turn the screen back on, press any button.

18
The Talk feature will not work in
multi-CAM view mode. You will need
to select a Baby unit in single-CAM
view mode to use Talk.
If the loudspeaker volume on the
Parent unit is set to o, it will be
reset to the default volume setting
after you press and hold the
button.
Lullaby playback will be paused
if the Talk feature is being used,
when nished lullaby playback will
resume.
You can use the Parent unit Talk feature as a one-way intercom
to comfort and reassure your baby. By speaking into the
Parent unit your baby will hear your voice from the Baby unit.
Please note that when using the Talk feature you will not be
able to hear your baby until you release the button.
1.If you have more than one Baby unit you may need to press
the button first to select the Baby unit you want to talk to.
2.Press and hold the button to speak to your baby, you
should speak towards the MIC (microphone) on the Parent
unit. Your voice will be heard from the Baby unit and while
the button is depressed the Talk light will be on.
When using the Talk feature, hold the Parent unit approximately
30cm in front of your mouth when talking to baby.
Table of contents
Other Belkin Baby Monitor manuals