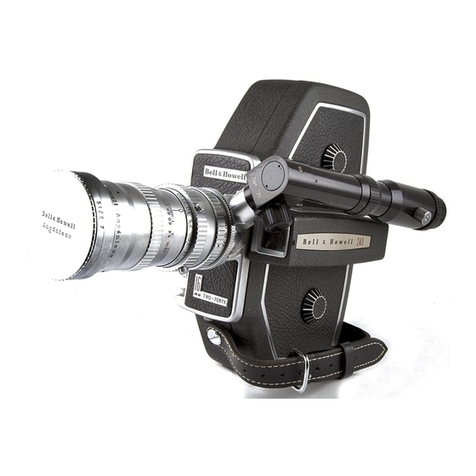
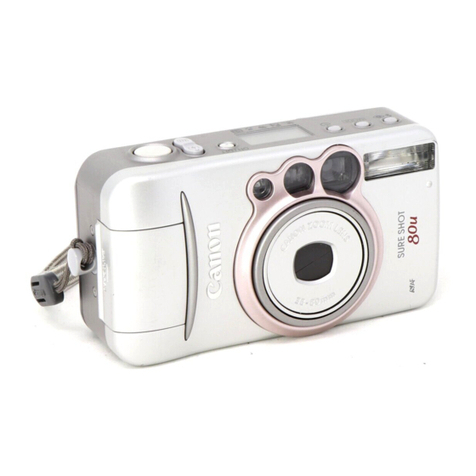
Bell and Howell Canon DIAL 35 Operating instructions

•
• •
• • • •
• • • •
•
•
DIAL
35
CAMERA
· • • •
• • • • • • • • • •
• • • • •
• •
•

aO"
&.
Howell
OWNERSHIP
•••
OPEN
THIS
FLAP
AND
THE
BACK
FLAP
OF
YOUR
INSTRUCTION
BOOKLET
Keep
the
flaps
open
as
you
reed
through
the
Instructions
that
follow.
They
will
give
you
a
quick
reference
to
all
the
working
parts
of
your
new
':)Ial
35
Camera.
Familiarity
with
these
names
before
operating
your
camera
will
assure
complete
success
with
your
very
first
roll
of
film.

Viewfinder
window
Footage scal8
~
Focusing lever
Film
sensitivity
adjusting
dial
Film
sensitivity
index
mark
lens
Manual
aperture
control
knob
Shutter
spee<;1
ring
Shutter
speed
index
mark
Exposure
counter
Shutter
release
button
Film
rewind
button
Spring
motor
winding
grip

FOLLOW
THESE
EASY
STEPS
...
~o
once
you
have
~
thoroughly read the
instruction book. 0
They provide a handy
reference to
easy
,
fun-filled photography.
~o

IMPORTANT
~o
NOTE
...
Set
Shutter
Speed
When
examinin.g
your camera keep the
following in mind.
~o
Select
a
• Unless there is film in the
Zone
Focus
camera, the Shutter
Mark
Button cannot be released
as turning the Spring
Motor Winding Grip does
Check
the
not Wind the Spring Meter
Needle
Motor.
and
press
®o
the
Shutter
Release
Button

2
THE
DIAL
35
CAMERA
Uses
standard
35mm
film
in
either 20 or
36
exposure cartridges. A 20 exposure roll
will produce
40
pictures, and a
36
exposure
roll will give
you
72 pictures.
LOADING
FILM
open
back
cover
Open
the back cover by pushing up
on
the
Cover Lock. Swing the cover open.

insert
cartridge
Rotate the Spring
!y1otor
Winding Grip
until the slot
in
the take up spool is straight
up. Fit the cartridge in place in the camera
by
aligning the inner slot
in
the cartridge
spindle with the pronged key of the camera.
engage
film
and
close
cover
Insert the film leader securely into the
film
slot. Engage the
film
sprocket hole
on
the
tooth of take up spool. Also make certain
film
sprocket holes engage teeth directly
above shutter opening. (Arrow) Remove any
slack
in
the
film
by
rotating the Spring
Motor Winding Grip Clockwise until the
film
is
taut.
Close
the back cover by simply
snapping shut.

PREPARING
FOR
THE
FIRST
EXPOSURE
set
exposure
counter
When
the back cover is closed, the
Exposure Counter Indicator will
be
on
"S".
Turning the Spring Motor Winding Grip
clockwise will advance the Indicator from "S"
to
"0"
placing the
film
in position for the
first
exposure.
wind
spring
motor
Continue turning the Spring Motor Winding
Grip until the motor
is
fully wound. A slip
clutch prevents over winding and indicates
when the motor is fully wound.
A fully wound spring motor has enough
power to transport 20 exposures. For a 20
exposure roll of
film
which takes
40
half
frame exposures, only two windings are
necessary to complete the full roll.

ELECTRIC
EYE
PHOTOGRAPHY
setting
the
film
sensitivity
dial
Hold the Shutter
Speed
Ring with the left
hand
and
rotate the Film Sensitivity Adjusting
Dial
with the right hand
as
illustrated. Turn
the Film Sensitivity Adjusting Dial until
the Correct AsA number is opposite the
black Index Mark
on
the Shutter
Speed
Ring.
The
recommended
ASA
Speed
is indicated
on
the literature packaged with the film.
An
ASA·DIN
Conversion table
is
located
on
the back of the camera.
Click Stops are provided at each
ASA
setting, and each setting' covers a limited
range of
ASA
Speeds. For
ASA
Speeds that
do
not fall within the available ranges, set
the Film Sensitivity Adjusting Dial to the
range speeds that are closest to the speed
of the film
you
are using.
Do
not attempt to

:;
set the dial between any of the click stops.
A Neutral Density Filter
(NO
.
2)
is
available to
convert the
ASA
200-250 setting to
ASA
160
for High
Speed
Ektachrome. Ask for
B&H part
No.
112752
HOLDING
THE
CAMERA
The Dial 35 Camera
is
specially designed
so
that when holding the camera in a vertical
position (Figure
1)
you
will take horizontal
format pictures, the same
as
you would with
any full frame
35mm
camera.

Figure 1 shows the correct
way
to hold the
camera for horizontal pictures, and Figure 2
illustrates the manner to take vertical
pictures. Both methods allow the camera to
rest against your forehead for
added steadiness.
7

8
TAKING
THE
PICTURE
The Data-Center Viewfinder
on
the
Dial
35
enables
you
to
see
at
a
glance, all the information
you
need
to know to get beautiful, sharp,
correctly exposed pictures.
The Data-Center Viewfinder
provides you with information on:
1.
Correct Exposure
2.
Focusing
3. Parallax Correction
4. Picture Composition.
1.
correct
exposure
Direct the camera toward the
subject and look through the
viewfinder eyepiece.
If
the meter
needle points to
anyone
of the
aperture stops
on
the scale (2.8 •
5.6 •
11
• 22)
you
will
be
sure
of correct exposure.
look
through
the
viewfinder
Parallax
Correction
Mark
Flash
Mark
~~2
•.
8
...
5~£
........
~
Red
Mark
Yellow
Me
Meter
Needle
Aperture
Stop
Correct
Exposure
Indicating
Window

INSUFFICIENT
LIGHT
-If
the needle stays
in
the
Red
Mark (Flash Mark), turn the Shutter
Speed
Ring to a
slower shutter speed, (Le.
if
on
250, turn the Shutter
Speed
Ring to 125, 60, or 30). Continue to use
slower shutter speeds until the exposure needle moves
out of the
Red
Mark that indicates insufficient light.
If, when the Shutter
Speed
Ring is turned to
30
,
the Meter Needle still will not move out of the
Red
Mark,
there
is
not sufficient light for Electric
Eye
Photography.
Additional light, such
as
flash
(see
Page
15) is needed.
TOO
MUCH
LIGHT
-If
the Exposure Needle stays in
the Yellow Mark (Over Exposure Warning Mark) turn the
Shutter
Speed
Ring to a faster shutter speed, (Le.
if
on
30, turn the Shutter
Speed
Ring to 60, 125, or 250).
Continue to increase the shutter speeds until the

10
exposure needle moves out of the yellow end of the scale.
If, when the Shutter
Speed
Ring
is
turned to 250, the
Exposure Needle still will not move off the Yellow Mark,
there is too much light and
one
of the Neutral Density
Filters (ND4 or ND8) available for the Dial 35 are
necessary. These filters merely screw over the entire lens
area and reduce
by
4 or 8 times the amount of light
allowed through the lens.
No
special adjustments are
necessary since the
filter
screws over the lens and
electric
eye,
thereby permitting normal electric
eye
photography.
IMPORTANT
NOTE:
Since the Shutter Release Button
does not lock
to
prevent you from taking pictures when
the exposure is not correct,
it
is important that the
Exposure Needle
is
in the Correct exposure area before
you press the Shutter Release Button.

2 .
focusing
Once
the proper exposure has been determined, focus
the lens and you're ready to take pictures. With the
Dial 35 Camera, either one of two methods may
be
used
to focus the lens.
a.
Measure or estimate the distance from the
camera to the subject and set the Focusing Lever to
the corresponding distance
on
the Footage Scale.
b.
Look
through the viewfinder.
On
the left side of
the viewfinder are the following three symbols:
...... for scenic or long distance photography.
~
(beyond 15 feet)
for group photography
or
full length pictures of one
person (8-15 feet).
for close-ups and portraiture (2.6 to 5 feet).

2
Since the
SE
28mm
f/ 2.8 lens has
a relatively deep depth of field,
you
can
be
quite sure of getting sharp
pictures by employing the Zone,
Focus System (Method B).
3.
composition
and
parallax
correction
When composing a picture, keep
the following in mind .
..
The area
in the
bright
frame finder
is
the area
covered and recorded
on
the
film.
When shooting at a close distance,
parallax error is unavoidable. Make
certain that your entire subject
is
within the parallax Correction
Mark to avoid cutting
off
part of the
picture you wish to take.

pressing
the
shutter
button
To
take the picture, press the Shutter Release
Button gently to avoid moving the camera
and
causing a blurred picture.
Releasing the Shutter Button activates the
Spring Motor
a~d
automatically winds the
film to the next frame, advances the
Exposure Indicator Counter, and cocks the
shutter for the next picture.
•
Do
not press the Shutter Release Button
While Winding.
• Avoid taking more than 2 exposures per
second. Very rapid sequence shooting
can damage the sensitive electric eye.

4
REWINDING
THE
FILM
When
the last frame of
film
has
been exposed, the
Shutter Release Button cannot
be
depressed
even
if
the spring motor is fully wound. The Exposure Counter
Indicator will show 40 or
70
depending
on
the
film
you
are
using.
Do
not attempt to force the Shutter
Release
Button. At this point the
film
must
be
rewound back
into the cartridge
so
it
may
be
sent in for processing.
Wind the Spring Motor Winding Grip fully. Then turn
the Film Rewinding Button slightly clockwise
so
that the two
white dots are aligned. Push in and hold.
The
Spring
Motor will rewind the
film
until its power is depleted. Affer
the spring motor stops rewinding the film, continue to '
hold the Film Rewinding Button in. Turn the grip until.the
exposure counter indicates "S". At this point, the
film
is
completely rewound into the cartridge.
Open
the back
cover by. sliding the Cover Latch in the direction of the
arrow.
Take
out the
film
cartridge. The
film
is
now
ready for processing.

FLASH
PHOTOGRAPHY
If
when
pointing the camera at the subject, the
Meter Needle stays in the
Red
Mark,
it
is
necessary to
use
flash to obtain proper exposure.
Slide the flash unit into the Accessory
Shoe
from
the rear of the camera.
Push
the c,ord into the
Flash
Terminal 'Socket
as
illustrated. The Dial 35
Camera
is
synchronized for
use
with various types of
flash bulbs at different shutter speeds
as
shown
in
the Flash Synchronization Table.
Shutt
er
Speed
1/30
1/60
1/125
1/250
FLASH
SYNCHRONIZATION
TABLE
Speed
light
(Strobe) F Class
X X
X X
X
X
X
Indicates
synchronization
at
that
speed
M Class
(Including
AG-1 &
AG-1B)
X
1

.6
determine
the
aperture
Both the
Canon
Flash Quint and J-3 Flash Guns
incorporate handy Flash Guide Scales calibrated for
1/30
shutter speed that enable
you
to quickly determine
the correct aperture setting.
When
using other types of
flash guns, the following formula will give
you
the
correct setting.
Aperture
Stop
=
Bulb
Guide
Number
Distance
(from
camera
to
subject)
The
Bulb Guide Number will
be
indicated
on
the
package of bulbs
you
buy.
The
correct Aperture Stop
is
equal to the Bulb Guide Number divided by the
Distance from camera to subject.
setting
the
camera
When
taking flash pictures, first focus the camera
as
described earlier. Set the Shutter
Speed
Ring to a
speed that synchronizes with the type of bulb
you
Table of contents
Other Bell and Howell Film Camera manuals
