BELLAGIO MT-NR1500 Guide
MODEL:MT-NR1500
SIZE:1440*1440*560mm
Massage Bathtub
Instructions of Installation

Dear Customer,
Thank you for choosing our product. For your safe concern, please take a few
minutes to read this manual before installation and use.
WARNING
1、Children and adolescent are only allowed to use the bathtub in accompany
with an adult.
2、People with hypertension, diabetes or cardiovascular diseases are not allowed
to use the bathtub.
3、Don’t hit or rub the bathtub with a hard object to avoid damage and scratches.
4、To avoid stumbling, please pay attention to the drop height when go in or out
of the appliance.
5、Watch out the appliance with suds to avoid slip.
6、Don’t use acidic and strong alkaline detergent, acetone, ammonia and so on.
Clean with alkalescent detergent and soft cloth.
7、If the sealant falls off from the glass, please glue it immediately to avoid the
leakage.
8、Specifications can be varied without notice.
.
.
Preparations
02
01
Please use tools to open the packing;
Make sure all accessories are in the packing
Drain 1pc
Accessory Box 2 :
Drain cover 1pc
A: Gradient B: Sealant C: Adjustable spanner D: Screwdriver E: PTFE tape
Installation Tools:(no included)
E
Accessory Box 1 :
Handheld shower 1pc
Handheld shower
hose 1pc
Waterfall faucet 1pc
04
03
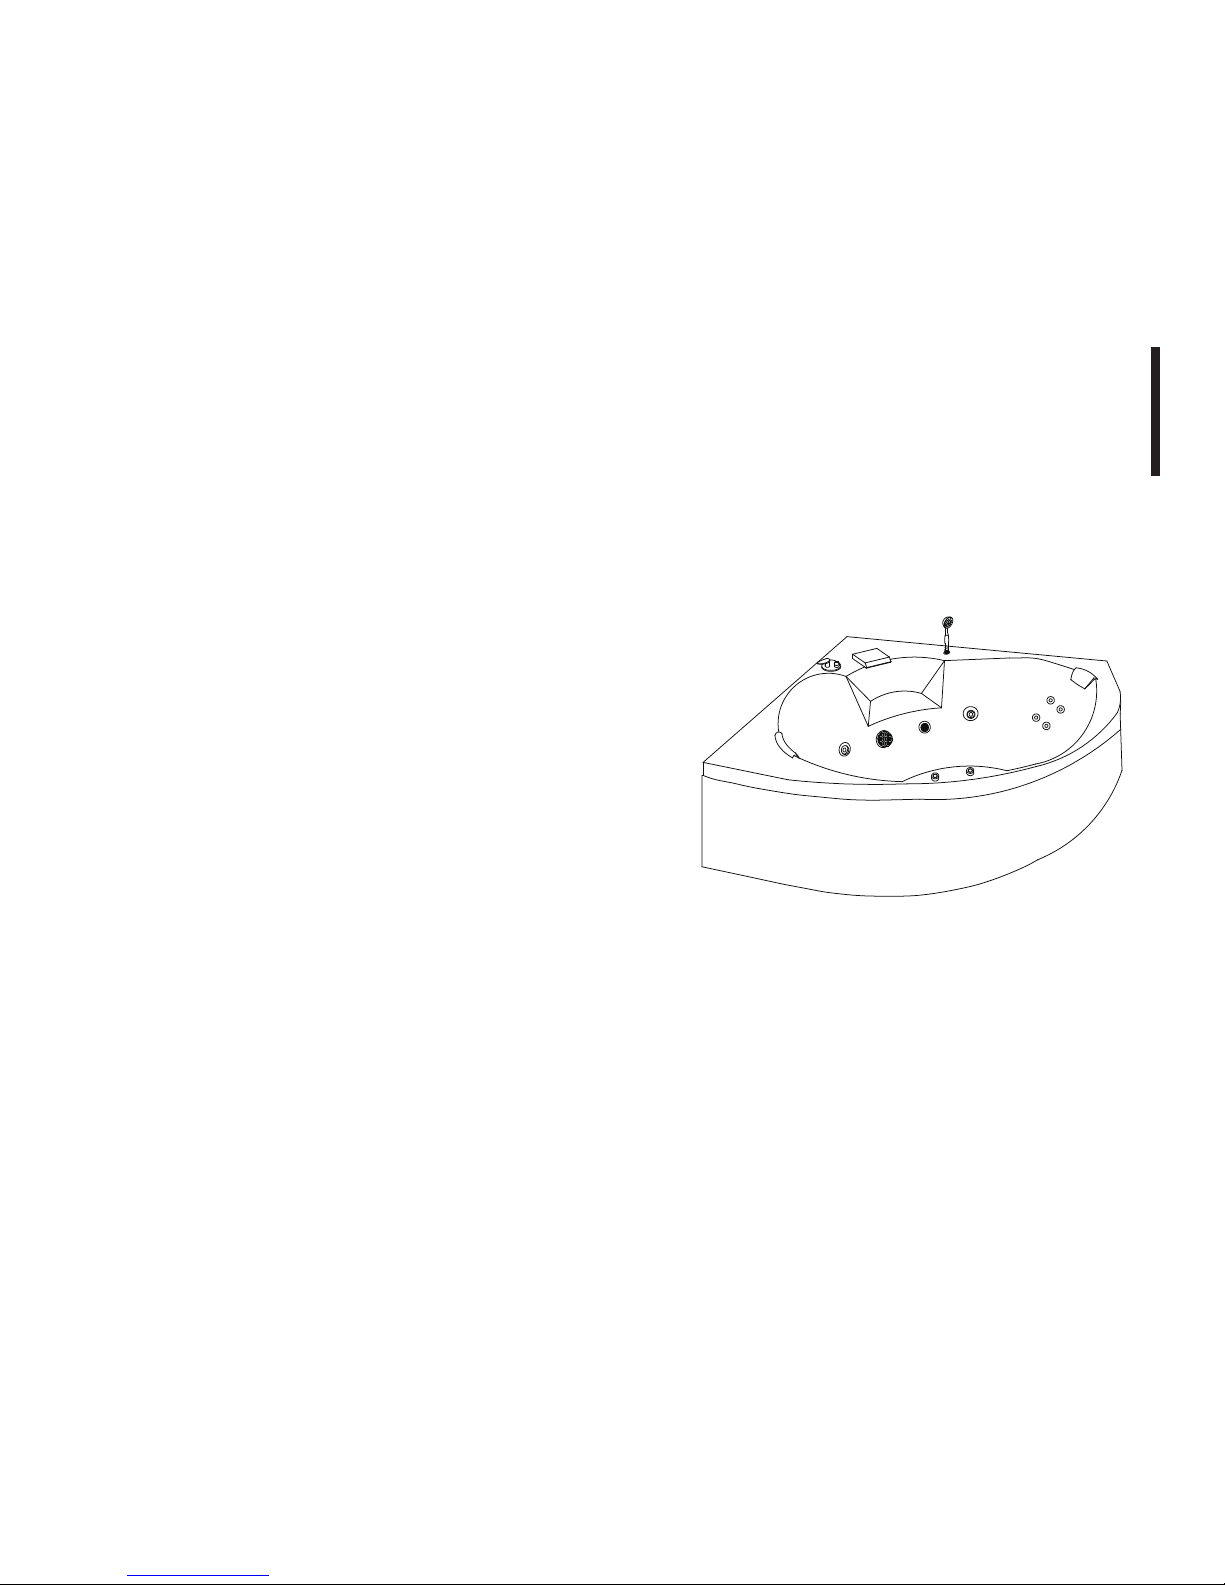
Preparations
Bathtub Configuration Installation of Electric Appliance
1. Electric Parameter
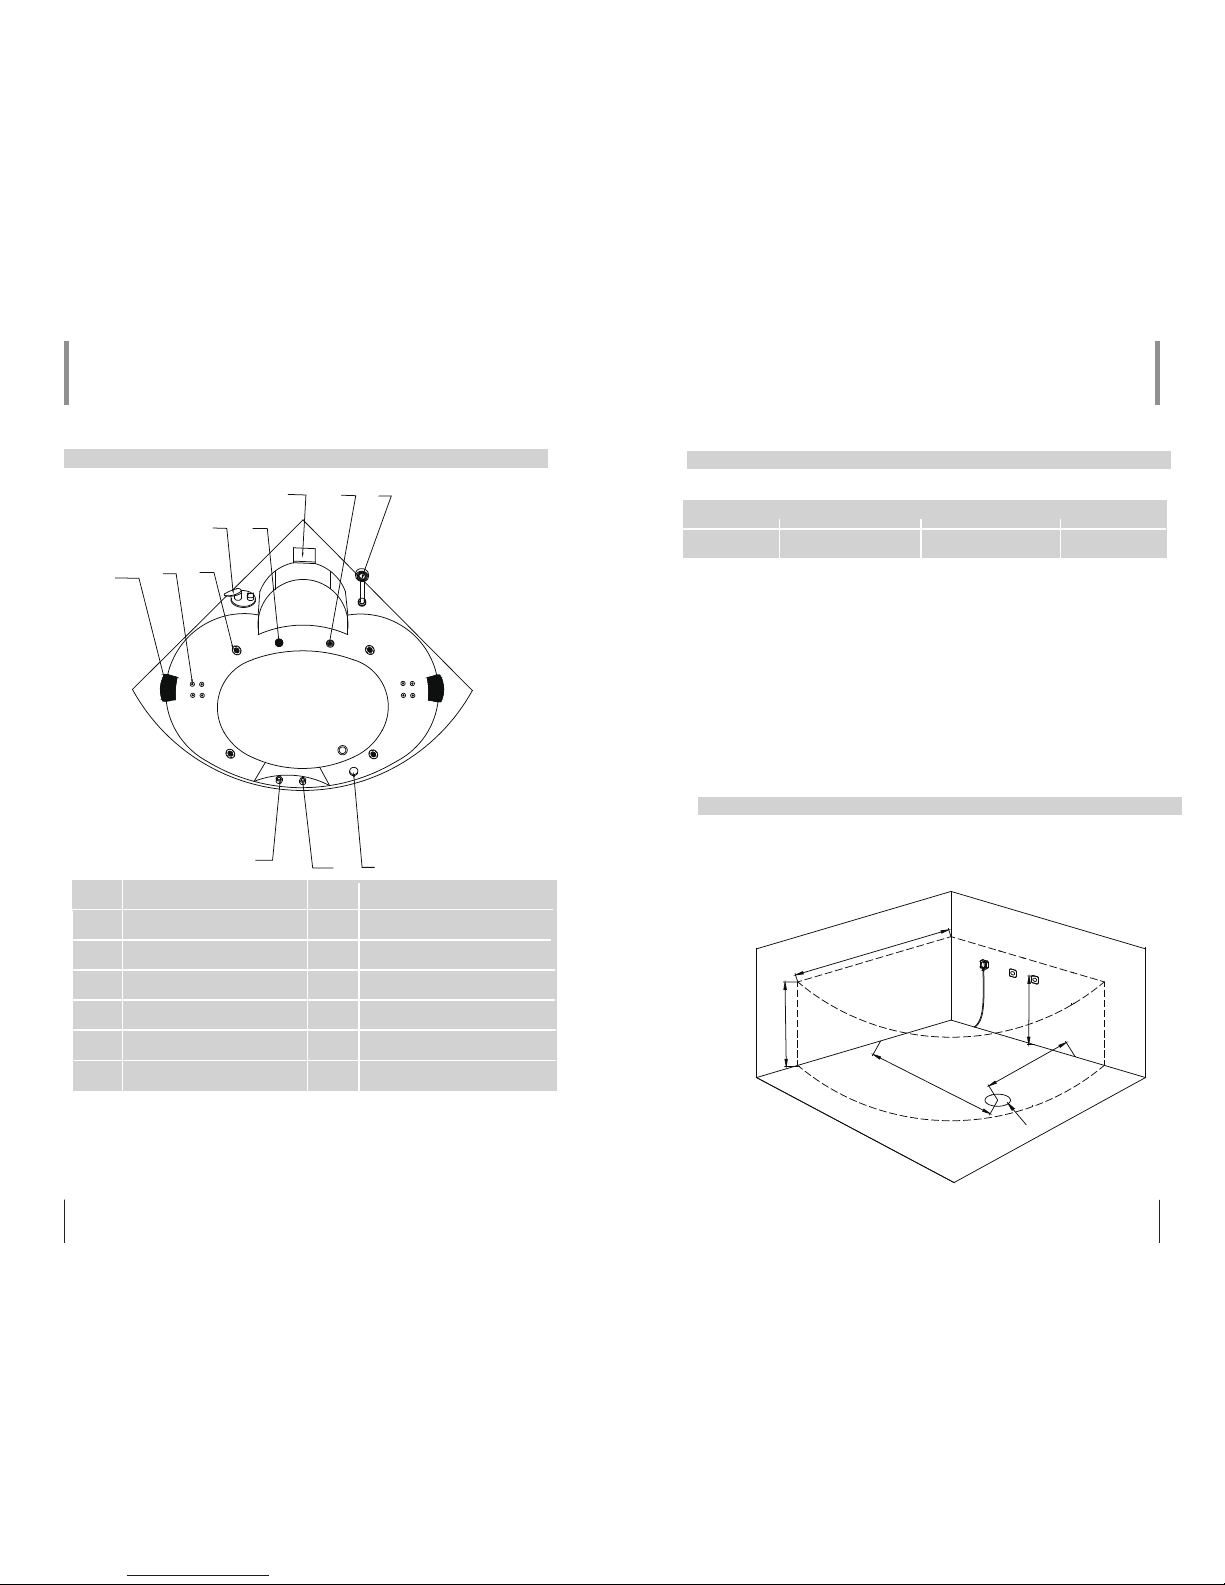
Installation of Water Supply
Preparations
Pillow Small jet
Faucet
Hand shower
Drainer
Waterfall
Suction
Underwater light
Regulator
Big jet
Rated Voltage Rated Frequency Max Rated Power Rated Current
220V 50Hz 2260W 10.3A
Cold water
Hot water
drain hole
electric outlet
Installation of Electric Appliance
1
3
8
Item Description Description
Item
6
7
9 10
11
5
2
4
3.There should be electric-leakage protector on the power supply. Power lines must be fixed
ones, which are with good ground line. The section of the electrical wire should not be less
than 2.5 m². The power supply appliance should be in accordance with the National Safety
Standard. And connect the protective ground line on the ground line- mark of bathtub frame
(The electric-leakage protector is prepared and connected by user).
2.All electrical connections should be made by a licensed ,locally certified electrician,In
accordance with the requirements of the requirements of the national electrical codes
and procedures.
4.Warning: when using electrical products, basic precautions should always be followed,
including the following.
5.Danger: risk of electric shock! connect only to circuits protected by a Ground Fault Circuit
Interrupter (GFCI). A GFCI is not supplied, however, we do specify its use. all known code
authorities require a GFCI.
12 3
45
678
10
11 9
Switch
1200MM
700MM
350-400MM
560mm
1440mm

06
05
Installation rocessP
Installation of Bathtub
1. As the picture shows below, turn over the bathtub, wrap the drainer hole with thread
PTFE tape, and then screw the drainer.
A: Cascade water inlet
B: Handheld Shower
C: shower and cascade Switch
D: Water Inlet(Cold/Hot)
1. Hose Connecting Way
The fittings of bathtub were already connected before shipment except faucet.
Users need to install the faucet according to the back procedures, and then
connect the cold/hot water hose to the corresponding water supply tube,
which should be in the shelter of the bathtub’s back.
Water Inlet Faucet Connecting
2. Water Supply Chart
Hot Water
Cold Water
Water Regulator
Switch Valve
Handheld shower
Cascade water inlet
connecting jets
Preparations
Hot waterCold water
Jet
A
B
DC

08
Installation Process
07
3. Seal the gap between the bathtub and the wall with sealant to avoid water leakage.
Installation rocessP
C
2. As the picture shows below, turn back the bathtub. Install the waterfall, pillow and
hand shower, and connect to the water hose. Move the bathtub to the wall corner;
put the drainer into sewer and seal the drainer. Adjust the tub feet to make the
bathtub horizontal.
sealant
Table of contents
Other BELLAGIO Bathtub manuals


Popular Bathtub manuals by other brands


Whirlpool
Whirlpool Ariel ARL-702 installation manual

Kohler
Kohler K-1151 Homeowner's guide

American Standard
American Standard 3052OD.X0X Installation instructions and owner's manual

Kohler
Kohler K-1111-H2 Roughing-In Guide

Kohler
Kohler K-1158 Roughing-In Guide

Kohler
Kohler Hourglass K-1209-LA Roughing-In Guide