manuals.online logo
Brands
  1. Home
  2. •
  3. Brands
  4. •
  5. Bellfires
  6. •
  7. Indoor Fireplace
  8. •
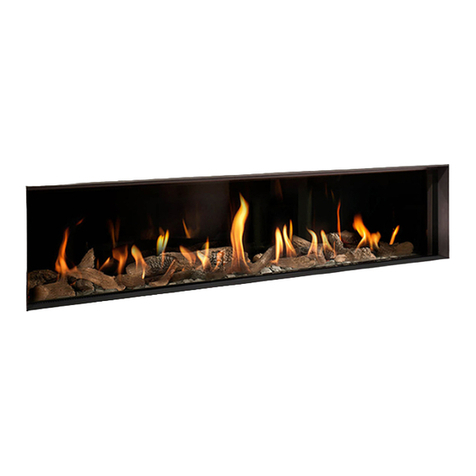
  9. Bellfires Horizon Bell Large Tunnel 3 Installation and operation manual

Bellfires Horizon Bell Large Tunnel 3 Installation and operation manual

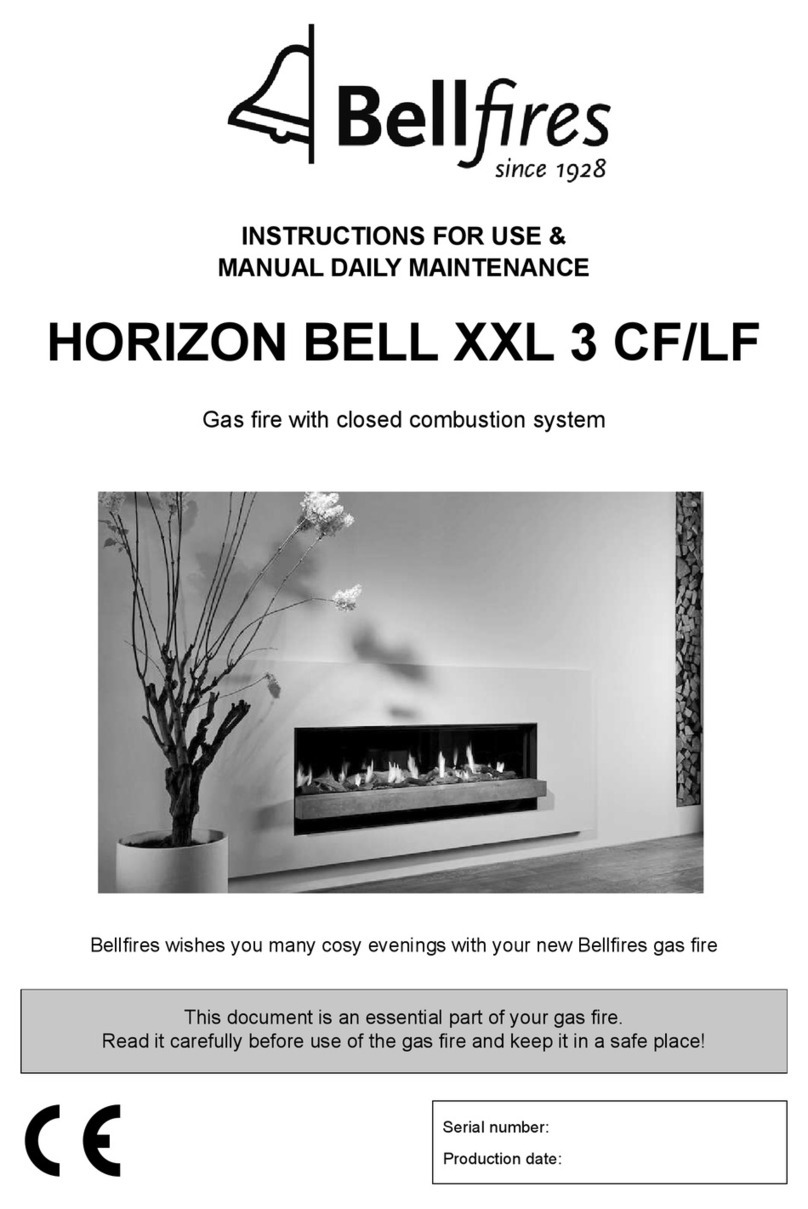
INSTRUCTIONS FOR USE &
MANUAL DAILY MAINTENANCE
HORIZON BELL LARGE
TUNNEL 3
Gas re with closed combustion system
Bellres wishes you many cosy evenings with your new Bellres gas re
This document is an essential part of your gas re.
Read it carefully before use of the gas re and keep it in a safe place"
3
Bellres English
Instructions for use
BELLFIRES GAS FIRE WITH CLOSED COMBUSTION SYSTEM:
Horizon Bell Large Tunnel 3 (HBLT3)
4
Bellres English
Instructions for use
5
Bellres English
Instructions for use
CONTENTS
Page
1. WARRANTY TERMS ................................................................................. 7
2. INSTRUCTIONS FOR USE ....................................................................... 9
3. USING THE APPLIANCE FOR THE FIRST TIME ..................................... 20
4. DAILY MAINTENANCE ......................................
...........
.........
.......
..
.
.
......
... 20
5. ANNUAL MAINTENANCE .
..............
...................................
................
........ 21
6
Bellres English
Instructions for use
7
Bellres English
Instructions for use
Ñ
1 WARRANTY TERMS
Bellres gas !re
Warranty
Bell!res guarantees the quality of the supplied hearth and the quality of the
materials used.
This warranty runs for a period of twelve (12) months from !rst use of the hearth
and covers defects which are a result of construction faults or the failure of
component parts.
Bell!res has an obligation under the terms of this warranty (at its discretion) not
to charge for the replacement of any component parts.
Note: The following aspects are not covered under the terms of the warranty:
- defects arising which are attributable in whole or in part to:
a Not paying due heed to installation, operating and maintenance
instructions
b Fitting/installation or repair by third parties (including the buyer)
c Discolouration in the ironwork as a result of heat transfer
- the sealing cord, the thermocouple and the glass of the product
Should you wish to claim under the warranty,
please contact your dealer.
Please carefully retain your invoice with this warranty"
Your Bell!res dealer: Date of installation:
Bellres
Hallenstraat 17
NL-5531 AB Bladel
Tel. + 31 497 339200 Fax. + 31 497 339210
8
Bellres English
Instructions for use
9
Bellres English
Instructions for use
2 INSTRUCTIONS FOR USE
2.1 INTRODUCTION
Congratulations on your purchase of this modern Bell!res gas !re. This quality product
will provide you with many years of enjoyment due to the "ame effect and warmth that
it provides. Please read the instructions for use carefully before using the appliance for
the !rst time. Keep this booklet in a safe place.
2.2 BUILT-IN PROTECTION OF THE APPLIANCE
The appliance is fully protected by means of a thermo-electric pilot light shut off in the
event of a gas escape from the main burner.
In addition, the appliance is !tted with a patented safety system, whereby the door will
extract any over-pressure that arises in a controlled way. In this, a spring system brie"y
causes the door to hinge forward a few centimetres.
A loud noise can occur. If this happens, immediately close the gas tap and contact the
!tter.
2.2.1 Safety
Do not place embers, vermiculite granules, wood logs or pebbles against
the pilot light burner. Make sure that the pilot "ame can burn at all times
freely over the main burner. Only in this way is proper ignition of the main
burner ensured.
Ignoring these directions could lead to a dangerous situation.
Do not place "ammable objects within 100 cm of the appliance. Pay
special attention to furnishings and ornaments around the !re.
When igniting the pilot light and burner, always keep a minimum
distance of 100 cm from the front of the appliance.
If the pilot "ame goes out for any reason, wait for 5 minutes before
attempting to re-light it.
It is essential that the appliance, the complete concentric "ue system and
the outlet are cleaned and inspected annually by a recognised !tter/gas
specialist. The safe operation of the appliance will thus remain guaranteed.
For this, please refer to the Installation instructions (Chapter 2:
Maintenance), that are supplied separately with each appliance.
The gas !re must never be used with the door open or the door glass
removed.
10
Bellres English
Instructions for use
Never place !ammable material on the ceramic log set.
The "lling of the main burner with embers, vermiculite granules,
wood logs or pebbles may not under any circumstances be changed
or added to.
Do not place easily-!ammable materials, such as nylon clothing or
!ammable liquids, in the vicinity of the gas "re.
Ensure at all times that children and other people who are not
aware of the operation of the gas appliance are only in the vicinity
of the appliance exclusively under supervision.
Use a "reguard to protect the people and children mentioned
above against possible burns.
2.3 OPERATION: REMOTE CONTROL
11
Bellres English
Instructions for use
2.3.1 General
Read these instructions carefully before lighting the !re ""
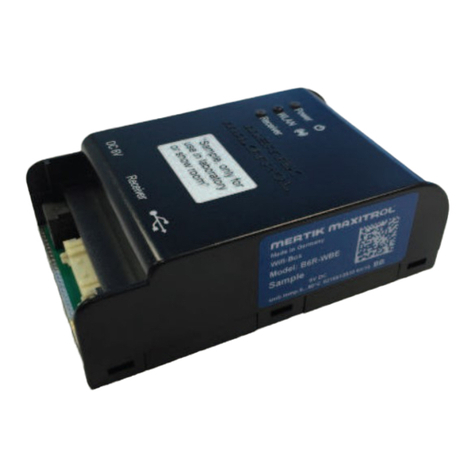
The appliance is opperated by radio remote control. This comprises a hand-held
transmitter and a receiver. The receiver is part of the gas control block assembly.
The receiver and the gas control block are behind the (white) panel door (operating unit)
next to the appliance. Press the door inwards to open; this will release the catch and the
door will spring out.
The hand-held transmitter and receiver are powered by batteries.
Hand-held transmitter : 1x 9V battery.
Receiver : 4x 1.5V battery type LR6 or AA.
Option: 6V adapter (230 VAC). Available from your !tter.
Note: Hand-held transmitter and receiver are not interchangeable with previous models.
The pilot light is situated in the front of the burner, behind a cowl. Should the pilot light
go out, you must wait ve (5) minutes before attempting to re-ignite the re.
Important
Once the !re is lit, it must burn at maximum for approx. 10 minutes to allow the chimney
to come up to temperature"
2.3.2 Hand-held transmitter
The remote control works by radio signal. The hand-held transmitter is con!gured in the
factory with a unique signal code.
Figure 1: Hand-held transmitter
12
Bellres English
Instructions for use
Figure 2: Receiver RESET button
Set the display
 Connect the batteries. By simultaneously pressing OFF and (small !ame), can be
switched from °F (and 12 hour clock) to °C (and 24 hour clock), or vice versa.
 The display will automatically return to mode after some time, but you may
immediately return to mode by pressing the OFF button.
Set the current time
 By simultaneously pressing (large !ame) and
(small !ame), the display !ashes.
You are in SET mode.
 While the screen is !ashing, you can adjust the time.
 Press (large !ame) to set the hour and (small !ame) to set the minute.
 Wait or press OFF to return to mode.
Important: Setting up signal code before using the appliance for the !rst time.
Before the appliance can be used, the receiver must "rst learn the hand-held
transmitters signal code.
 Press the RESET button on the receiver, and keep this pressed until 2 audio signals
are heard. See "gure 2.
Release the RESET button after the second (somewhat longer) audio signal.
 Press, within 20 seconds, the
(small !ame) button on the hand-held transmitter,
until 2 short signals are heard
.
The signal code has now been set up on the receiver
.
If, however, a single long sound is heard, this means that setting the signal code has
failed or that the wiring has been connected incorrectly.
You only need to set up the signal code once. It is not necessary when changing the
batteries of the hand-held transmitter or receiver.
13
Bellres English
Instructions for use
Manual operation
Here you can turn the burner on and off, and adjust the height of the !ames.
 Press (large !ame) to turn on the burner and to increase the !ame
height.
 Press
(small !ame) decrease the !ame height to turn the burner off.
The pilot light will keep burning. (Stand-by position)
 The appliance will automatically revert to stand-by if:
°the hand-held transmitter is outside the range of the receiver for more
than 6 hours.
°the batteries in the hand-held transmitter are almost depleted.
°the batteries in the receiver are fully depleted. (The pilot light will also
be turned off.)
This also applies to the Thermostat and Timer operation.
 When one of the buttons on the hand-held transmitter is pressed (except
the SET button), the transmission symbol
appears on the screen.
The receiver con"rms the transmission with an audio signal.
Operating day temperature thermostat
(Appliance is in the stand-by position and the pilot light is burning.)
Automatic temperature regulation of the pre-set day temperature.
The room temperature is measured and compared with the pre-set day
temperature. The !ame height is automatically regulated so as to reach the
pre-set day temperature.
Also see: Setting the desired temperature.
Operating possibilities
It is possible to use the remote control in 3 ways to operate the appliance:
1 :
2 : and
3 :
You can cycle through the menu with operating possibilities by repeatedly depressing
the SET button.
At the selected starting time (P1 or P2 ) or stopping time (P1
or P2
) is
also shown.
Returning to is also possible by pressing the (small !ame) or
(large !ame)
button.
14
Bellres English
Instructions for use
Operating the night temperature thermostat
(Appliance is in the stand-by position and the pilot light is burning.)
Automatic temperature regulation of the pre-set night temperature.
The room temperature is measured and compared with the pre-set night
temperature. The !ame height is automatically regulated so as to reach the
pre-set night temperature.
Also see: Setting the desired temperature.
Timer operation
(Appliance is in the stand-by position and the pilot light is burning.)
Appliance functions automatically according to the two pre-set heating periods;
P1 and P2. These heating periods repeat automatically every 24 hours.
Also see: Programming the timer: P1 and P2.
The appliance works thermostatically at the pre-set starting times P1 and
P2 and the room temperature is automatically regulated to the pre-set day
temperature .
The appliance works thermostatically at the pre-set stopping times P1
and
P2
and the room temperature is automatically regulated to the pre-set night
temperature
.
In order to allow the appliance to regulate the temperature at night, the night
temperature
must be set to at least 5°C.
If the setting is lowered to , the appliance will switch to stand-by
at night. The appliance will automatically operate at the following day cycle
.
N.B.: The pre-set temperature is shown on the screen every 30 seconds.
Setting the desired temperature
 Select the desired mode of operation or
by pressing the SET button
brie!y.
 Press the SET button until the temperature indication on the display begins to !ash.
 Set the temperature with (large !ame) or (small !ame).
 Wait or press the OFF button brie!y to go to mode.
 If the temperature control in should be off (lower battery consumption),
decrease the night temperature until appears on the display.
Important: Place the hand-held transmitter in a place that is not
in!uenced by direct sunlight, draught, heat from
the appliance and other heat sources.
15
Bellres English
Instructions for use
Programming the timer: P1 and P2
 Select the desired mode of operation by pressing the SET button brie!y.
 Press the SET button until P1 (heating period 1) and the time appear in the
display. (The time indication !ashes.)
 Set the time for the beginning of the "rst heating period by pressing (large !ame)
for houre and (small !ame) for minutesetting.
 Press the SET button brie!y; P1
appears on the display. Set the time for the end
of the "rst heating period.
 Press SET again to set the second heating period P2
(heat ON) and P2
(heat
OFF).
 Wait a moment or press OFF to switch back to
mode.
2.3.3 Operation (Remote Control)
Igniting the "re
 Open the gas supply valve in the gas pipe to the "re.
 Press the O I switch on the gas control block to the I position.
 Turn the operating knob on the gas control block to the ON position.
 Switch the hand-held transmitter to the
position.
 On the hand-held transmitter, press the OFF and
(large !ame) buttons
simultaneously. A short tone will signal the start. Release the buttons. Short beeps
will then follow until the pilot light and main burner are ignited. Once the main burner
has been ignited, the !ame height will automatically rise to the maximum position.
Important:  If the pilot !ame goes out for any reason, wait for 5 minutes
before attempting to re-light it.
 If the pilot light does not ignite after 3 ignition attempts;
close the gas tap and warn the "tter.
 Once the pilot light is burning, the main burner must ignite
within 10 seconds automatically.
If this does not happen, immediately close the gas tap and
warn the "tter.
 If the main burner ignites with a pop; immediately close the
gas tap and warn the "tter.
16
Bellres English
Instructions for use
Figure 3: Gas regulating block; Operating Knob in ON-position
Motor-Knob
(in maximum position)
Microswitch
Operating Knob
Connection Piezo Igniter
(only for MANual control)
ON/OFF Switch
8-wire
Receiver Jack
 Possible error messages:
* 3x short audio signal, audible when the motor-knob operates:
Receiver batteries need changing soon (having heard this signal, the
appliance can be ignited another ten times approximately).
* 5 second unbroken tone:
Error. For example, one of the cables may not be properly connected,
the O I switch is not in the I position.
* 5 short beeps:
Ignition of the pilot light and main burner failed. Possible cause: air in
the pilot light pipe.
Important: If the pilot !ame goes out, then wait for
at least 5 minutes before repeating the
above procedure.
Setting the !ame height / extinguishing the "re
 After ignition, the burner automatically sets the !ames to the maximum height
.
 Press button
(small !ame) to lower the !ames and to turn off the main burner
(Extinguishing the "re: small !ame button: pilot light remains burning (stand-by
position)#)
(Pressing brie!y the
(small !ame) button gradually lowers the !ames to the low
position.)
Pressing the (small !ame) button twice automatically lowers the !ames to the low
position. (When this happens, the !ames will "rst automatically go to maximum#)
This is indicated by LO on the display.
17
Bellres English
Instructions for use
 Press button
(large !ame) to increase the !ame level and to turn on the burner
from the stand-by position.
(Pressing brie!y the (large !ame) button gradually increases the !ames to the
high position.)
Pressing the (large !ame) button twice automatically increases the !ames to the
high position. This is indicated by HI on the display.
Important:  If you turn on the main burner by pressing the (large !ame)
button, it must ignite within 10 seconds.
If this does not happen, immediately close the gas tap and
warn the "tter.
 If the main burner ignites with a pop; immediately close the gas
tap and warn the "tter.
Switching off the appliance
 Press the
(small !ame) button to lower the !ames or to switch off the main burner.
 Then press the OFF button to switch off the appliance, including the pilot light.
 Press the O I switch (on the gas control block) to the O position. This conserves
battery life.
 If the appliance is not to be used for some time, please close the gas supply valve in
the gas pipe.
Important: If the pilot !ame goes out for any reason,
wait for 5 minutes before attempting to
re-light it.
Faults
 If the signals from the hand-held transmitter do not seem to be reaching the receiver,
the cause may be:
* Spent batteries: replace the batteries.
* An electronic problem: press the RESET button on the receiver.
 If the appliance regularly switches itself off, please contact your installer.
Replacing the batteries
 The hand-held transmitter/receiver batteries have a service life of approx. one year.
We recommend you use alkaline batteries.
Rechargeable batteries are not permitted.
 The batteries must be replaced whenever:
1 Hand-held transmitter : The battery symbol indicates this in the display.
: Battery fully charged
: Battery empty
2 Receiver: 3x short audio signal, audible when the motor-knob operates.
18
Bellres English
Instructions for use
1 Hand-held transmitter:
* Open the cover on the back of the transmitter.
*Carefully remove the 9V battery and disconnect it from the contact.
Do not pull the wires"
*Connect the new battery and replace in the battery compartment. Close the cover.
2 Receiver:
* Carefully pull the receiver assembly out of the compartment behind the (white)
panel door.
* Open the cover.
* Remove the batteries from the battery compartment.
* Place four new 1.5V batteries (LR6 or AA type) as indicated in the battery
compartment. The negative end (-) of the battery must always be at the contact
spring end of the compartment.
* Close the cover and place the receiver back in its holder.
 If the batteries are inserted incorrectly, the electronics or drive may be irreparably
damaged.
 Only replace the batteries when the appliance has been completely switched off.
Figure 4: Gas regulating block; Operating Knob in MAN-position
2.3.4 Operation (Hand control)
In an emergency it is possible to operate the appliance manually. To do so, the ignition
(piezo) cable must "rst be removed and transferred carefully to the piezo connector on
the gas control block.
Motor-Knob
(in maximum position)
Microswitch
Operating Knob
(in Position for
Manual Ignition)
Metallic Core for Manual
Ignition (recessed switch)
Connection Piezo Igniter
(only for MANual control)
ON/OFF Switch
8 Wire
Receiver Jack
Piezo button
(only for MANual control)
19
Bellres English
Instructions for use
Igniting the !re
 Open the gas supply valve in the gas pipe to the !re.
 Switch the O I switch on the gas regulating block to the I position.
 Turn the motor-knob on the gas regulating block completely to the right, in the OFF
position. The switch will audibly click.
 Turn the operating knob on the gas control block to the MAN position. A recessed
switch within the knob will become visible.
 Press the recessed switch. Use a pen or similar instrument to do this.
Gas will now "ow to the pilot light.
 While holding down the recessed switch, press the (square) piezo button several
times (the piezo button is alongside the O I switch) to ignite the pilot light.
Check whether the pilot light has been lit through the glass.
lOnce the pilot light is lit, the recessed switch must be kept down for a further ten
seconds, after which it can be released.
Important: If the pilot !ame goes out, then wait for
at least 5 minutes before repeating the
above procedure.
 Move the operating knob to the ON position. Depending on the position of the motor-
knob, the burner will either ignite or not.
 By turning the motor-knob anti-clockwise to the desired position, the burner will ignite
and the "ame height can be controlled.
Important:  When the main burner is switched on by turning
the motor knob to the left,
the burner must
ignite within 10 seconds.
If this does not happen, immediately close the
gas tap and warn the "tter.
 If the main burner ignites with a pop; immediately
close the gas tap and warn the "tter.
Extinguishing the !re
 Turn the motor-knob on the gas regulating block as far as it will go in a clockwise
direction. The knob will audibly click. The burner is now switched off. The pilot light
will remain lit.
Switching off the appliance
 Press the O I switch on the gas regulating block to the O position.
The pilot light will be extinguished.
 If the gas !re is not going to be used for a long period of time, it is
recommended to close the gas supply valve to the !re.
Important: If the pilot !ame goes out for any reason,
wait for 5 minutes before attempting to
re-light it.
20
Bellres English
Instructions for use
3 USING THE APPLIANCE FOR THE FIRST TIME
The gas !re is coated with a lacquer layer resistant to high temperature. During the !rst
hours of operation, the burning in of the lacquer may result in an unpleasant smell. This
is harmless, however. Operating the gas !re at full capacity for a few hours, while
ventilating the room, will eliminate the smell.
After using your gas !re for the !rst few times, you may be aware of a light deposit on
the inside off the glass. This is caused by the paint curing. Once your !replace has
cooled down, this deposit can be removed with glass cleaner or ceramic hob cleaner.
4 DAILY MAINTENANCE
 Ensure that as little dust, and as few particles of cigarette smoke, candles and oil
lamps as possible pollute the air in the room in which the appliance is used. Heating
of these particles by the convection system of the appliance could lead to
discoloration of the walls and ceiling. It is therefore very important to ensure that the
room in which the appliance is located is suf!ciently ventilated. Regularly remove
any dust deposits from behind the (white) panel door (operating unit) by means of a
vacuum cleaner.
Important:  Regularly clean the glass on the inside of the appliance with
glass spray or ceramic hob cleaner. This also applies to the
black mirror rear wall and side panels, if the appliance is !tted
with these.
Attention"" If the glass and the mirror walls are not cleaned
on time, this can result in them becoming dull and
dif!cult, if not impossible, to clean.
(See installation instructions for dismantling/
assembling the glass.)
 If the glass is broken or cracked, it must be
immediately replaced before operating the
gas !re again.
Ceramic heat-resistant glass may not be placed in
the glass container, but must be included in normal
household waste.
 If the appliance has two or more glasss, regularly
check whether the glass panes !t !rmly together.
Gaps between the glass panes can lead to the leakage
of #ue gasses into the living room"
 If anything is spilt on the !re, switch it off immediately and wait for it to cool
down suf!ciently before cleaning. Never use scouring powder, aggressive
cleaners or !re polish on the gas !re. Use only a dry lint free cloth.
 Heat resistant lacquer in aerosols can be obtained from your
distributor. During the yearly maintenance, the lacquer can be used to repair
small areas of damage.

This manual suits for next models

2

Other Bellfires Indoor Fireplace manuals
Bellfires MEDIUM 3 CF/LF Guide

Bellfires

Bellfires MEDIUM 3 CF/LF Guide

Bellfires VERTICAL BELL SMALL TUNNEL 3 CF Guide

Bellfires

Bellfires VERTICAL BELL SMALL TUNNEL 3 CF Guide

Bellfires Smart Bell 65 MF User manual

Bellfires

Bellfires Smart Bell 65 MF User manual

Bellfires VIEW BELL XXL 3 CF Guide

Bellfires

Bellfires VIEW BELL XXL 3 CF Guide

Bellfires VIEW BELL SMALL 3 CF/LF Guide

Bellfires

Bellfires VIEW BELL SMALL 3 CF/LF Guide

Bellfires BM 21 User manual

Bellfires

Bellfires BM 21 User manual

Bellfires BSV 19 User manual

Bellfires

Bellfires BSV 19 User manual

Bellfires Smart Bell 65 MF Manual

Bellfires

Bellfires Smart Bell 65 MF Manual

Bellfires BEL VBMT-3NG-SB User manual

Bellfires

Bellfires BEL VBMT-3NG-SB User manual

Bellfires UNICA-2 40 User manual

Bellfires

Bellfires UNICA-2 40 User manual

Bellfires SMART BELL 80 PF Guide

Bellfires

Bellfires SMART BELL 80 PF Guide

Bellfires CLASSIC BELL SMALL 3 PF Installation and operation manual

Bellfires

Bellfires CLASSIC BELL SMALL 3 PF Installation and operation manual

Bellfires Smart Bell 65/55 MF Operating instructions
Bellfires

Bellfires Smart Bell 65/55 MF Operating instructions

Bellfires SLIDE BELL Setup guide

Bellfires

Bellfires SLIDE BELL Setup guide

Bellfires VIEW BELL LARGE 3 CF Installation and operation manual

Bellfires

Bellfires VIEW BELL LARGE 3 CF Installation and operation manual

Bellfires UNICA-2 55 Installation and operation manual

Bellfires

Bellfires UNICA-2 55 Installation and operation manual

Bellfires Derby Setup guide

Bellfires

Bellfires Derby Setup guide

Bellfires HBXXL3 CF User manual

Bellfires

Bellfires HBXXL3 CF User manual

Bellfires VIEW BELL TOPSHAM 3 CF User manual

Bellfires

Bellfires VIEW BELL TOPSHAM 3 CF User manual

Bellfires UNICA-2 40 Installation and operation manual

Bellfires

Bellfires UNICA-2 40 Installation and operation manual

Bellfires UNC-2 40 Guide

Bellfires

Bellfires UNC-2 40 Guide

Bellfires horizon bell xl 3 cf User manual
Bellfires

Bellfires horizon bell xl 3 cf User manual

Bellfires SMART BELL 80 Guide

Bellfires

Bellfires SMART BELL 80 Guide

Bellfires VIEW BELL DERBY 3 LF Installation and operation manual

Bellfires

Bellfires VIEW BELL DERBY 3 LF Installation and operation manual

Popular Indoor Fireplace manuals by other brands

Heatilator A36R owner's manual

Heatilator

Heatilator A36R owner's manual

Faber Matrix FMG3326F instruction manual

Faber

Faber Matrix FMG3326F instruction manual

visionLINE Circle Installation and owner's manual

visionLINE

visionLINE Circle Installation and owner's manual

Integra FIREBOY eco 144010 operating instructions

Integra

Integra FIREBOY eco 144010 operating instructions

Enviro Westport IPI Steel owner's manual

Enviro

Enviro Westport IPI Steel owner's manual

Napoleon Vector Series installation manual

Napoleon

Napoleon Vector Series installation manual

UBERHAUS DESIGN 83035033 WW11994 Operator's manual

UBERHAUS DESIGN

UBERHAUS DESIGN 83035033 WW11994 Operator's manual

MHSC B-Vent 400BBVPV Installation & operating instructions

MHSC

MHSC B-Vent 400BBVPV Installation & operating instructions
Quadra-Fire HUDBAY-FS owner's manual

Quadra-Fire

Quadra-Fire HUDBAY-FS owner's manual

Montigo C42-DV Installation operation & maintenance

Montigo

Montigo C42-DV Installation operation & maintenance

Lennox Signature ESTATE EST-48 installation instructions

Lennox

Lennox Signature ESTATE EST-48 installation instructions

Travis Industries DVS GSR2 NB Insert owner's manual

Travis Industries

Travis Industries DVS GSR2 NB Insert owner's manual

livin flame Nottingham Installation instructions & operating manual

livin flame

livin flame Nottingham Installation instructions & operating manual

Next JEFFERSON FIRE SURROUND Assembly instructions

Next

Next JEFFERSON FIRE SURROUND Assembly instructions

kozy heat CARLTON 46 Installation and operation manual

kozy heat

kozy heat CARLTON 46 Installation and operation manual

Firenzo Topaz RURAL Installation and operation guide

Firenzo

Firenzo Topaz RURAL Installation and operation guide

StyleCrest Vexar C42MW OWNER'S OPERATION AND INSTALLATION MANUAL

StyleCrest

StyleCrest Vexar C42MW OWNER'S OPERATION AND INSTALLATION MANUAL

Napoleon Riverside Series Installation and operation manual

Napoleon

Napoleon Riverside Series Installation and operation manual

manuals.online logo
manuals.online logoBrands
  • About & Mission
  • Contact us
  • Privacy Policy
  • Terms and Conditions

Copyright 2025 Manuals.Online. All Rights Reserved.