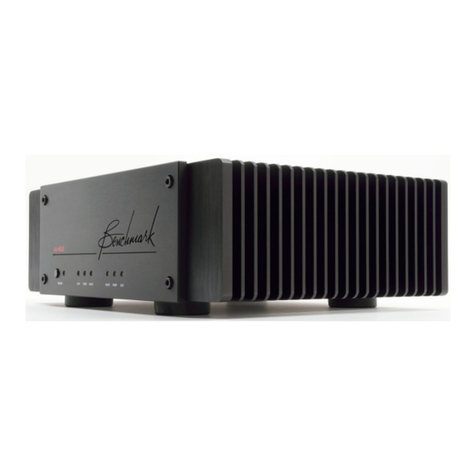
Benchmark LA4 User manual

Benchmark LA4
Instruction Manual
Reference Stereo
Line Amplifier
with
Relay Gain and Input Control

Instruction Manual for LA4 with 1.0.X Firmware – REV A Page 2
Safety Information
Fuses
CAUTION: FOR CONTINUED FIRE
HAZARD PROTECTION ALWAYS REPLACE
THE FUSES WITH THE CORRECT SIZE
AND TYPE (T 0.5A 250V 5 X 20 MM –
LITTELFUSE® SLO-BLO® HXP218.500 OR
EQUIVALENT). THE FUSE DRAWER
INCLUDES TWO FUSES. ALWAYS
REPLACE BOTH FUSES AT THE SAME
TIME.
AC Input Voltage Range
NOTE: THE LA4 IS EQUIPPED WITH A
UNIVERSAL POWER SUPPLY. THERE IS
NO VOLTAGE SELECTION SWITCH. AC
VOLTAGE RANGE IS 88-264 VAC, 50-60
HZ. THE PRODUCT MAY ALSO BE
OPERATED FROM DC POWER OVER A
VOLTAGE RANGE OF 125-373 VDC.
Power Cord
CAUTION: ALWAYS USE A GROUNDED
POWER CORD. THE PRODUCT IS
EQUIPPED WITH A STANDARD IEC
POWER ENTRY MODULE. USE AN IEC
POWER CORD THAT IS EQUIPPED WITH
THE APPROPRIATE CONNECTOR FOR
YOUR LOCATION. CORDS ARE AVAILABLE
FROM YOUR DEALER.
Modifications
CAUTION: DO NOT SUBSTITUTE PARTS
OR MAKE ANY MODIFICATIONS
WITHOUT THE WRITTEN APPROVAL OF
BENCHMARK MEDIA SYSTEMS, INC.
MODIFICATION MAY CREATE SAFETY
HAZARDS AND VOID THE WARRANTY.
CAUTION:CHANGES OR MODIFICATIONS
NOT EXPRESSLY APPROVED BY
BENCHMARK MEDIA SYSTEMS COULD
VOID THE USER'S AUTHORITY TO
OPERATE THE EQUIPMENT UNDER FCC
REGULATIONS.
Repairs
CAUTION: DO NOT SERVICE OR REPAIR
THIS PRODUCT UNLESS PROPERLY
QUALIFIED. ONLY A QUALIFIED
TECHNICIAN SHOULD PERFORM
REPAIRS.

Instruction Manual for LA4 with 1.0.X Firmware – REV A Page 3
Contents
Safety Information 2
Fuses 2
AC Input Voltage Range 2
Power Cord 2
Modifications 2
Repairs 2
Front Panel 4
Rear Panel 4
Features 5
Quick Start Guide 6
Main Screen 6
Balance Controls 7
Screen Navigation 8
Display Settings 9
Remote Control 10
Front Panel Controls 11
Connecting Other Audio Components 12
Use Balanced Interfaces When Possible 12
Balanced XLR Signal Levels 12
Selecting Components for Your System 12
Use the 12V Trigger Connections 12
Connecting Benchmark Components 13
Benchmark AHB2 Power Amp 13
Benchmark DAC 13
Basic Features 14
Input Selection 14
Volume Control 14
Balance Adjust 14
MUTE Function 14
-20 dB Audio DIM Function 14
Advanced Features (Settings Screens) 15
Settings Menu Screens 15
DISPLAY Settings 16
INPUT SETUP 18
RENAME INPUT 18
VOLUME SETUP 18
SETTINGS LOCK 18
POWER Settings 19
REMOTE Settings 20
ABOUT Screens 21
SPLASH SCREEN 21
RESET Screens 22
LA4 System Overview 23
The Ultimate Line Amplifier 23
Relay-Controlled Gain Stage 23
Balance Controls 23
100% Analog Signal Path 23
Fully-Balanced Signal Paths 23
Differential Amplifiers 23
Ultra-Wide Bandwidth 23
Rotary Encoder 24
Convenience Features 24
12V Trigger 24
Auto-On Function 24
Casework 24
Equipment Placement 24
Auto-Ranging Power Supply 25
Audio Line Inputs 26
Balanced XLR Interfaces 26
Unbalanced RCA Interfaces 26
Input Level Matching 26
Audio Line Outputs 26
Unity Gain at 0 dB 26
15.8 dB Offset Balanced vs. Unbalanced 26
Advanced Feature Details 27
PRESET Mode 27
Auto-On Function 27
Bi-directional 12V Trigger 27
Software Version Identification 28
Performance Graphs 29
Specifications 38
Balanced Analog Outputs 38
Unbalanced Analog Outputs 38
Balanced Analog Inputs 39
Unbalanced Analog Inputs 39
Status Display 39
AC Power Requirements 39
Dimensions 40
Weight 40
Model Numbers 40
AC Power-Entry and Fuse Module 41
Regulatory Compliance 42
FCC Notice (U.S. Only) 42
RoHS 3 Compliance Information 43
California Proposition 65 Statement 44
California Proposition 65 Warnings 45
CE Certificate of Compliance 46
Warranty Information 47
Benchmark 1-Year Warranty 47
Benchmark Extended Warranty Options 48
Notes on Warranty Repairs 48

Instruction Manual for LA4 with 1.0.X Firmware – REV A Page 4
Front Panel
Rear Panel

Instruction Manual for LA4 with 1.0.X Firmware – REV A Page 5
Features
256-Step Fully-Balanced Relay Gain Control, 0.5 dB Steps
Precision Timed Relay Closures
Precision Metal Film Resistors
Gold-Contact Relays
Balanced and Unbalanced I/O
0.1 Hz to 500 kHz frequency response
SNR > 135 dB
THD < 125 dB (0.00006%)
Full-Color 3.5" Capacitive Touch Screen
IR Remote Control (handset optional)
2 Balanced Stereo Line Inputs
2 Unbalanced Stereo Line Inputs
Balanced Stereo Line Output
Unbalanced Stereo Line Output
Balanced Mono Sum Output
12V Trigger I/O – two bi-directional 12V trigger ports
AUTO-ON Function - can be programmed to turn on when AC is applied
Power Switch – very low standby power , <0.5 W at 120 VAC
High-Efficiency Low-Noise Power Supplies – 100-240 VAC, 50-60 Hz
Meets FCC Class B and CE emissions requirements
Tested for immunity to radiated and conducted RF interference

Instruction Manual for LA4 with 1.0.X Firmware – REV A Page 6
Quick Start Guide
Main Screen

Instruction Manual for LA4 with 1.0.X Firmware – REV A Page 7
Balance Controls

Instruction Manual for LA4 with 1.0.X Firmware – REV A Page 8
Screen Navigation

Instruction Manual for LA4 with 1.0.X Firmware – REV A Page 9
Display Settings

Instruction Manual for LA4 with 1.0.X Firmware – REV A Page 10
Remote Control
The remote control is designed to control the
LA4 and any Benchmark D/A converter that
supports remote control.
The bottom six input selection buttons select
the DAC inputs if the DAC MODE is enabled
(on the REMOTE setup screen).
The LA4 inputs are controlled with the
INPUT ARROWS.
The chart at the right summarizes the
functions of the IR remote control.
ON
Turns the LA4 on. Any devices
slaved to the 12V TRIGGER will
also turn on in a controlled
sequence.
OFF
Turns the unit off. Any devices
slaved to the 12V TRIGGER will
turn off in a controlled sequence.
VOLUME
ARROWS
Turns the volume up or down.
Volume up cancels MUTE and
DIM.
-20 dB
DIM
Toggles the -20 dB audio DIM
function.
MUTE
Toggles the MUTE function.
INPUT
ARROWS
Scrolls through the enabled
inputs on the LA4.
D1
Selects input D1 on Benchmark
DAC if connected.
D2
Selects input D2 on Benchmark
DAC if connected.
D3
Selects input D3 on Benchmark
DAC if connected.
D4
Selects input D4 on Benchmark
DAC if connected.
USB
Selects USB input on Benchmark
DAC if connected.
Analog
Selects analog input(s) on
Benchmark DAC if connected.

Instruction Manual for LA4 with 1.0.X Firmware – REV A Page 11
Front Panel Controls
The front panel features a color touch screen,
a power switch and a volume knob.
The volume knob includes a push switch that
can be used to wake the screen if the screen
dim and/or sleep timers are enabled.
Tip: The IR remote sensor is located just to
the right of the power switch. Keep this
sensor unobstructed if you will be using the
optional remote control.
Tip: When AUTO-ON is enabled, a switched
AC outlet can be used to turn your system on
and off. The 12V TRIGGER I/O can be used
as a trigger output to control the power state
of additional components.
The chart at the right summarizes the
functions of the power button and
volume knob.
POWER
(button)
Turns the unit on or off.
Any devices slaved to the 12V
TRIGGER will also turn on or
off in a controlled sequence.
If AUTO-ON is enabled, the
POWER button will toggle
MUTE on and off (the unit will
remain on at all times).
VOLUME
(knob)
Adjusts the volume in 0.5 dB
steps.
The knob features an
acceleration function. Rotate
the knob quickly and the
volume will change in larger
steps.
Volume up automatically
cancels audio DIM and MUTE.

Instruction Manual for LA4 with 1.0.X Firmware – REV A Page 12
Connecting Other Audio
Components
Use Balanced Interfaces When
Possible
When possible, use balanced interfaces to
connect the primary devices in your system.
Balanced interfaces offer significant
performance advantages due to the
differential signals and higher voltage levels.
In most cases, balanced interfaces will reduce
noise in your system.
Balanced XLR Signal Levels
The LA4 Supports Professional Signal
Levels
The XLR line inputs and outputs on the LA4
support very high +28 dBu signal levels.
These high levels are used in professional
studio environments because of the high
performance that comes with using higher
voltages. All Benchmark products support
professional signal levels. Benchmark DACs
and power amplifiers will interface to the LA4
using peak signal levels between +22 dBu
and +24 dBu.
The LA4 Also Supports Consumer Signal
Levels
The stepped gain controls in the LA4 have
excellent noise performance and provide a
wide dynamic range. This allows the
simultaneous use of consumer-level and
professional-level balanced interfaces.
Professional XLR interfaces are usually 10 dB
hotter than consumer-level XLR interfaces.
The stepped gain control in the LA4 can
easily provide a 10 dB boost or cut without
sacrificing performance.
Selecting Components for Your
System
Select devices with balanced XLR inputs and
outputs. Balanced interfaces are vastly
superior to unbalanced RCA interfaces.
When possible, select devices that have
professional-level XLR interfaces. These will
usually have better SNR specifications than
devices with consumer-level XLR interfaces.
This difference in SNR is often about 10 dB.
Look for high signal levels when purchasing
audio components and check the SNR
specifications.
Use the 12V Trigger Connections
Trigger ports can be used to sequence the
power-up and power-down operations so that
all of your components turn on and off with a
single switch. The trigger ports can also
eliminate the loud pops that can occur when
devices are turned on or off in the wrong
sequence.
The trigger ports on the LA4 are bi-
directional and can be connected to inputs or
outputs on other devices. All Benchmark
trigger ports are bi-directional. Most other
products will have dedicated trigger inputs or
outputs.
If you want the LA4 to control your system,
connect the LA4 trigger ports to the trigger
inputs on the other devices. When the LA4
turns on, the other devices will follow.
If you want to use another device as a trigger
master, connect its trigger output to one of
the trigger ports on the LA4. When this other
device turns on or off, the LA4 will follow.
In an all-Benchmark system, just connect the
trigger ports in a star or daisy chain. The
system can be turned on or off using the
power switch on any Benchmark device. This
is one of the advantages provided by
Benchmark's bi-directional trigger ports.

Instruction Manual for LA4 with 1.0.X Firmware – REV A Page 13
Connecting Benchmark
Components
Benchmark AHB2 Power Amp
1. Set the SENSITIVITY switch on the
AHB2 to 22 dBu (switch in the down
position).
2. Connect either trigger port on the
AHB2 to either trigger port on the
LA4. If you are using two AHB2
amplifiers in bridged mono, the second
amplifier can be connected to an
unused trigger port on the LA4 or the
other amplifier.
3. Connect the left and right XLR outputs
on the LA4 to the left and right XLR
inputs on the amplifier. If you are
using two amplifiers in bridged mono
mode, connect the cables to the
MONO input on each amplifier.
4. If you are using a single AHB2, set
the MODE switch on the back of the
amplifier to STEREO. If you are using
two AHB2 amplifiers, set the MODE
on each to MONO.
Tip: If you turn the system on or off using
the LA4 or the remote control, the amplifiers
will follow.
Tip: If you want to shut down the entire
system using the POWER switch on an
amplifier, you will need to press and hold the
switch for 3 seconds.
Benchmark DAC
1. Set the XLR output attenuators in the
DAC to 0 dB. You will need to open
the cover on the DAC if these jumpers
need to be changed.
2. If your DAC has a trigger port, connect
it to either port on the LA4. This
trigger connection provides a control
link so that the remote, DAC or LA4
can be used to turn the entire system
on or off in a sequenced fashion.
3. Use XLR cables to connect the DAC to
INPUT 1 on the LA4. This input
supports a special DAC compatibility
mode.
4. If your Benchmark DAC has a
'DAC-ONLY MODE', enable this mode.
This will bypass the VOLUME, MUTE
and DIM controls on the DAC.
5. If your Benchmark DAC does not have
a 'DAC-ONLY MODE', set every input
on the DAC to 'HT' mode, or
'CALIBRATED' mode. This will bypass
the volume control on the DAC, but IR
remote MUTE and DIM controls may
still be active on some DAC models.
6. If you are using a Benchmark DAC3 B,
leave the CONTROL LOCK off unless
you only have one digital source.
If you have a Benchmark DAC with remote
control, the LA4 has a special mode of
operation that allows both devices to be
controlled from a single remote. If your
Benchmark DAC has remote control, follow
this additional step:
7. Go to the REMOTE settings screen on
the LA4 and select 'BENCHMARK
DAC ON XLR1'. The Benchmark IR
remote control will now control both
devices. The LA4 will provide volume
control and switching between analog
inputs. The DAC will provide switching
between digital inputs.
Tip: Use the dedicated digital input select
buttons (USB, D1, D2, D3 and D4) to select
digital inputs on the DAC. Use the INPUT
scroll buttons on the remote to select analog
inputs on the LA4. Use the dedicated
ANALOG button on the remote to select the
analog inputs on the DAC (if any).
Tip:We recommend using the direct analog
inputs on the LA4 before using the analog
inputs on the back of the DAC. The direct
connections on the back of the LA4 will
provide better performance.
Tip: Use the VOLUME UP key on the remote
if you wish to release the MUTE and DIM on
all devices.

Instruction Manual for LA4 with 1.0.X Firmware – REV A Page 14
Basic Features
Input Selection
Use the input selection arrows to scroll
through the enabled inputs. These arrows are
displayed on the HOME screen and are also
available on the REMOTE.
Volume Control
The volume bar graphs shows the current
gain between the line input and line output. 0
dB is unity gain. At 0 dB, the voltage at the
balanced input will match the voltage at the
balanced output. Likewise, there will be unity
gain between the unbalanced inputs and the
unbalanced outputs. The XLR outputs are
always 15.8 dB hotter than the RCA outputs.
15.8 dB is the standard difference between
professional balanced XLR outputs and
consumer unbalanced RCA outputs.
Tip: If an upstream device has consumer-
grade balanced XLR outputs, set the LA4
input BOOST to 10 dB on that XLR input. The
BOOST function makes it easy to mix
consumer and professional components in a
single system. It also compensates for the
level differences between balanced and
unbalanced inputs.
Balance Adjust
Press the BAL button on the HOME screen to
change the L/R balance of the line outputs.
MUTE Function
When MUTE is toggled on, the audio is
immediately muted. When MUTE is toggled
off, the volume will fade back up to the
original level.
Note: The ultra-fine 0.5 dB resolution of the
256-step relay gain control and the precision
timing of the relay closures give the
Benchmark system the ability to execute a
volume fade. This is a unique feature of this
system.
Tip: Turn the VOLUME up to release MUTE
and return to the prior volume setting.
-20 dB Audio DIM Function
The audio DIM function reduces the output
level by 20 dB. When DIM is toggled on, the
volume fades down by exactly 20 dB. When
DIM is toggled off, the volume fades back up
to the original level.
The volume bar graph will be displayed in
yellow when DIM is on.
Tip: Turn the VOLUME up to release DIM
and return to the prior volume setting.

Instruction Manual for LA4 with 1.0.X Firmware – REV A Page 15
Advanced Features (Settings Screens)
Press the gear icon on the HOME screen to access the advanced features.
If the advanced features have been locked, a locked gear icon will be displayed on the
HOME screen. Press and hold the locked gear icon for 3 seconds to access the advanced
features.
Settings Menu Screens
Settings 1
•Display Settings
•Input Setup
•Lock/Unlock Advanced Settings
Settings 2
•Power (Auto-On, Trigger)
•Remote (IR Enable, DAC Mode)
•About (System Information)
Settings 3
•Reset Advanced Settings
•Full Factory Reset

Instruction Manual for LA4 with 1.0.X Firmware – REV A Page 16
DISPLAY Settings
Display Settings 1
•Maximum Screen Brightness
•Screen Brightness when Dimmed
DISPLAY Settings 2
•Screen Dim Timer
•'WAKE ON VOLUME' Function

Instruction Manual for LA4 with 1.0.X Firmware – REV A Page 17
DISPLAY Settings 3
•Display Sleep Timer (screen off)
•Menu Timer (return to home page)

Instruction Manual for LA4 with 1.0.X Firmware – REV A Page 18
INPUT SETUP
•Rename Inputs
•Disable/Enable Inputs
•Volume Setup for Each Input
RENAME INPUT
•Input Name Edit
VOLUME SETUP
•Volume Preset - Enable/Disable
•Boost Adjust (input volume offset)
SETTINGS LOCK
•Lock/Unlock Advanced Settings

Instruction Manual for LA4 with 1.0.X Firmware – REV A Page 19
POWER Settings
•Auto-On - Enable/Disable
•12V Trigger Mode

Instruction Manual for LA4 with 1.0.X Firmware – REV A Page 20
REMOTE Settings
•Enable IR Remote Control
•Integrate with Benchmark DAC
Table of contents
Other Benchmark Amplifier manuals
Benchmark
Benchmark HPA4 Quick start guide

Benchmark
Benchmark HPA4 User manual
Benchmark
Benchmark DAC2 HGC User manual
Benchmark
Benchmark DA-101 User manual

Benchmark
Benchmark DAC2 HGC User manual

Benchmark
Benchmark DAC2 HGC User manual

Benchmark
Benchmark DAC2 HGC User manual
Benchmark
Benchmark DAC1 HDR User manual
Benchmark
Benchmark MPA1 User manual
Benchmark
Benchmark DAC2 D User manual
