Benelec 0610486B User manual

PROFESSIONAL WIRELESS PRODUCTS
BENELEC PTY. LTD ACN# 064708390 Telephone : 61-2-9364 7000
Unit 2/581-587 Gardeners Road, Mascot, Sydney, NSW 2020 Fax : 61-2-9364 7099
Mail : PO Box 21, Mascot, NSW 1460, Australia Mobile : 0418 646 595
Radio not included
0
06
61
10
04
48
86
6B
B
T
Tr
ri
i
C
Ch
he
em
mi
is
st
tr
ry
y
I
In
n
C
Ca
ar
r
C
Ch
ha
ar
rg
ge
er
r
Suitable Radios
Motorola GP328 / GP338
Suitable Batteries
AM8294, AM8294-17, AM8299N, AM8299N-27, AM8299N-40, AM8610Li, NTN8294,
NTN8923, NTN8295,NTN8610, RNN4006
Technical Specifications
Mechanical
Plastic Material ABS
Charge Display Status Dual LED display
Weight Approx. 260g
Dimension (W x D x H) 101.2 x 77.5 x 101.1 mm
Electrical
Chemistry Supported Ni-Cd, Ni-MH, Li-Ion
DC Input 12V DC or, 24V DC (Automatically detected by the charger)
Max. Charge Current 0.9A
Ni-Cd, Ni-MH: Constant current
Charging Algorithm Li-ion: Constant current followed by constant voltage.
Ni-Cd, Ni-MH: Peak voltage Detection (PVD)
Charge termination Li-ion: Minimum Current
Ni-Cd, Ni-MH: 170 minutes
Maximum Charging Time Li-ion: 360 minutes
General Characteristics:
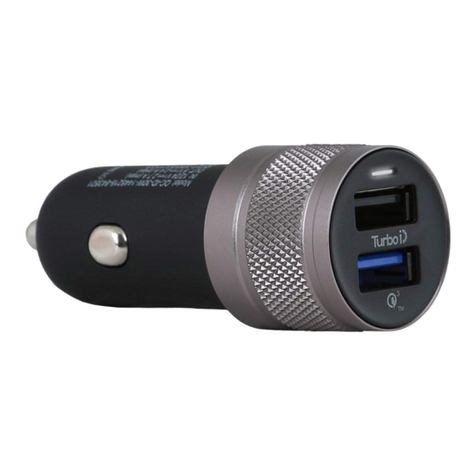
• 0610486B is a tri-chemistry IC controlled car
charger.
• It cans charges Nickel Cadmium (Ni-Cd),
Nickel Metal Hydride (Ni-MH), and Lithium Ion
(Li-ion) batteries.
• It can accept either 12V or 24V power input
from the vehicle (regulated by the internal IC).
• It can be used as a vehicle or desktop charger
(with an external AC/DC adapter) for charging
a spare battery or a battery attached to the
radio.
• The unit is designed to be used either as a loose
charging unit in the car or a fixed charging unit
when mounted on the glove box or dashboard, and
can fully function with radio either turned on or off.
Illustration
Page 2 of 2
I
In
ns
st
ta
al
ll
la
at
ti
io
on
n
I
In
ns
st
tr
ru
uc
ct
ti
io
on
ns
s
Thank you for choosing Benelec in-car charger. For your safety and reliable operation, please read this
important instruction manual and technical specification carefully before installing and operating the
product.
Caution:
1. To avoid risk of injury, please charge only approved Ni-Cd, Ni-MH and Li-ion battery packs.
Unapproved batteries with other chemistries or assembled without protection devices may damage
the battery, or cause a fire or explosion.
2. When disconnecting from the cigarette adapter or AC/DC adapter, please pull by the plug, not by
the cord to avoid damaging the unit.
3. If the product is damaged or broken in any part, please do not use it until the product is repaired by
your local distributor.
4. Do not, under any circumstance, disassemble or make alterations to the product. Such action may
result in fore or electric shock. Warranty is void if the product has been disassembled or altered
without authorization.
5. The product should be unplugged before any cleaning, repair and maintenance.
Safety Guideline for Operation and Installation:
• Use this charger indoors in a vehicle only.
• Do not leave the battery in the charger for more than 1 week as this may damage the battery pack.
• Output power from the vehicle’s power supply should not exceed the ratings specified in the
technical data.
• Connect this charger only to a fused and wired power supply with appropriate voltage (specified in
the technical data section).
• If the charger is not connected firmly to the vehicle’s power supply, disconnect the cord from the
cigarette lighter receptacle when nothing using the charger.
• Maximum ambient temperature around the power supply should not exceed 40°C when the
charger is under operation.
• Properly position the cord, so it is free from being stepped-on or exposed to possible damage,
excessive moisture, or stress.
• Make sure the mounting surface is clean and allows the screws to be securely anchored. Mounting
the unit on a weak surface may result in disengagement during collision and cause personal injury.
• Avoid mounting the charger onto a surface that has wires located underneath it, as the mounting
screws may damage the wires or cables. Consult your car manufacturer or local dealer if
necessary.
• If the vehicle is equipped with airbag(s), do not place or install the charger over the airbag(s) or
airbag’s deployment area. Force from deployment or the airbag(s) may seriously injure the
passenger(s) if the charger is placed at these areas.
• Installation of the charger should be carried out or supervised by professional technicians. Make
sure the airbag’s size and its deployment area is considered before installation of the charger as it
may vary from different makes, models, or year of the vehicle. Consult with technician or
manufacture of the vehicle if you do not know the dimension of the airbag(s).
• Ensure that both the charger contacts and battery contacts are free from dirt and dust before
charging.

Page 3 of 3
Operational Instructions:
1. Plug the cigarette lighter adapter (1) into the vehicle’s
cigarette lighter receptacle or connect the cable with the
vehicle’s power supply.
2. Insert the battery pack or a radio with a battery into the
charger adapter cup (2). Please make sure that the contacts
of battery pack are making proper contact with the adapter
cup’s contacts. Charging process start immediately and the
LED indicators (3) will indicate status of charging as follows:
Led Display
Status of Charging Red Led Green Led
Charger adapter unplugged; not charging Off Off
Charger adapter plugged; not charging Blinks 1-5 times Off
Fast charging On Off
Charging Completed Off On
Charging suspended (Under/over temp) 1Hz flash Off
Mounting the Bracket:
1. Select a mounting surface that allows the secure fixing of the screws
and will not interfere with any wiring underneath the surface on the
deployment of the airbag (s).
2. Apply the foam sticker (4) at the back of the charger adapter and
remove the protection film.
3. Fix 4 screws as illustrated in the picture. Two screws are located on
the top of the charger adapter cup; and two are located on each side
of the metal bracket.
Note: Mounting brackets are strongly recommended, as this will ensure
the charger to be securely positioned at all times.
Popular Automobile Accessories manuals by other brands

Hollywood Racks
Hollywood Racks HR3000 Assembly and installation guide
Antec
Antec 005584 Assembly instructions
Whispbar
Whispbar K482W Fitting instructions

Clarke
Clarke CTJ2LR instructions

Quadratec
Quadratec QuadraTop Adventure Top 1113.00 Series installation manual

Grid
Grid PORSCHE 911 GT3 CUP instruction manual
