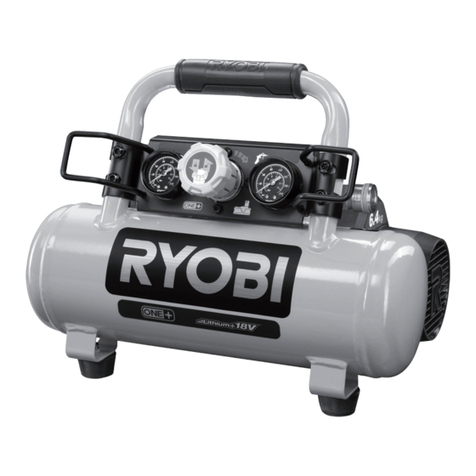
Benjamin Heating products TRAVELER BPTCA515 User manual

OWNER’S MANUAL
READ ALL INSTRUCTIONS AND WARNINGS IN THIS MANUAL BEFORE USING
Crosman Corporation
7629 Routes 5 & 20
Bloomeld, NY 14469
United States of America
www.crosman.com
1-800-7AIRGUN (724-7486)
Made in China BPTCA515
If you have any questions, contact Crosman at 1-800-724-7486, 585-657-6161 or crosman.com.
NOTE: Compressor is not designed for use with Airgun/Paintball cylinders larger than .6L (600cc).
NOTE: High altitude and certain air temperatures can impact the compressor’s performance.
1. IMPORTANT SAFETY INFORMATION
WARNING:
• EXPLOSION DANGER. NEVER EXCEED THE MANUFACTURER’S MAXIMUM ALLOWABLE PRESSURE
RATING OF PCP AIRGUNS OR AIRGUN/PAINTBALL CYLINDERS AT ROOM TEMPERATURE.
• IF YOU EXCEED THE PRESSURE RATING, THE PCP AIRGUN OR CYLINDER CAN FAIL, EXPLODE,
AND CAUSE SERIOUS INJURY OR DEATH. IF YOU EXCEED THE PRESSURE RATING, THIS AIR
COMPRESSOR CAN FAIL AND CAUSE SERIOUS INJURY OR DEATH.
• USE ONLY ACCESSORIES AND ATTACHMENTS INTENDED FOR THIS AIR COMPRESSOR.
• IF INCORRECT ACCESSORIES OR ATTACHMENTS OR USED, THIS AIR COMPRESSOR, THE
ACCESSORIES, THE ATTACHMENTS, THE PCP AIRGUNS, OR THE AIRGUN/PAINTBALL CYLINDERS
CAN FAIL, EXPLODE, AND CAUSE SERIOUS INJURY OR DEATH.
• NEVER USE THIS AIR COMPRESSOR TO INFLATE ANYTHING OTHER THAN PCP AIRGUNS OR AIRGUN/
PAINTBALL CYLINDERS, SUCH AS A CAR, TRUCK, OR BICYCLE TIRES OR OTHER LOW PRESSURE
INFLATABLE OBJECTS SUCH AS RAFTS AND TOYS, BECAUSE THOSE OBJECTS COULD BECOME
OVERINFLATED, FAIL, EXPLODE, AND CAUSE SERIOUS INJURY OR DEATH.
• ALWAYS WEAR EYE PROTECTION WHEN USING THIS AIRCOMPRESSOR TO SHIELD YOUR EYES.
• WHEN USING THIS AIR COMPRESSOR, ALWAYS USE COMMON SENSE AND FOLLOW BASIC SAFETY
PRECAUTIONS TO REDUCE THE RISK OF SERIOUS INJURY OR DEATH.
• DO NOT USE THIS AIR COMPRESSOR TO FILL A SCUBA TANK TO BE USED FOR SCUBA DIVING. THE
AIR FROM THIS AIR COMPRESSOR IS NOT BREATHABLE.
ADULT SUPERVISION IS ALWAYS REQUIRED WHEN USING THIS COMPRESSOR.
ALWAYS STORE COMPRESSOR IN A SAFE LOCATION OUT OF REACH OF CHILDREN AND ANYONE UNFAMILIAR WITH ITS PROPER USE OR CARE.
THE COMPRESSOR MAY BECOME HOT DURING USE. PLEASE USE CAUTION WHEN TOUCHING THE COMPRESSOR IN ORDER TO AVOID
BURNS. USE THE COMPRESSOR’S CARRY HANDLE WHEN HANDLING AND ALLOW THE UNIT TO COOL BEFORE STORING.
1.1 Risk of Electrical Shock
•OPERATE COMPRESSOR ONLY WITH A PROPERLY CONNECTED 12VOLT DC BATTERY (IF USING BATTERY
TERMINAL CLAMPS); OR (IF USING THE AC CONVERTER) WITH A PROPERLY GROUNDED OUTLET WHICH PRO-
VIDES CORRECT VOLTAGE (110V AC or 220V AC) AND ADEQUATE FUSE PROTECTION. DISCONNECT AFTER USE.
•DO NOT EXPOSE COMPRESSOR TO RAIN OR OPERATE IN A WET AREA.
•CHECK POWER CORDS, CABLES ANDTERMINAL CLAMPS FOR SIGNS OFWEAR ANDTEAR, CRUSHING OR HEAT
DAMAGE. REPLACE FAULTY ITEMS BEFORE USE.
•NEVER OPERATE COMPRESSOR WITH COVERS REMOVED.
•ALWAYS DISCONNECT COMPRESSOR FROM ELECTRICAL SUPPLY CIRCUIT BEFORE SERVICING. ANY WIRING
OR ELECTRIC REPAIRS DONE ON THIS COMPRESSOR SHOULD BE DONE ONLY BY AUTHORIZED SERVICE
PERSONNEL IN ACCORDANCE WITH NATIONAL AND LOCAL CODES.
1.2 Risk of Explosion or Fire
•ALWAYS OPERATE COMPRESSOR IN AWELLVENTILATED AREA FREE OF FLAMMABLEVAPORS, COMBUSTIBLE
DUST, GASES OR OTHER COMBUSTIBLE MATERIALS.
•DO NOT EXCEED 185⁰F (85⁰C).
•NEVER LEAVE THE COMPRESSOR UNATTENDED WHILE OPERATING.
•NEVER PLACE OBJECTS AGAINST OR ON TOP OF COMPRESSOR.
•OPERATE COMPRESSOR 12 INCHES AWAY FROM ANY WALL OR OBSTRUCTIONS THAT WOULD RESTRICT
PROPER VENTILATION.
•ALWAYS ALLOW THE UNIT TO COOL BEFORE STORING.
1.3 Risk of Inhalation
•AIR FROM THE AIRCOMPRESSOR MAY CONTAIN TOXIC VAPORS OR SOLID PARTICLES.
•NEVER INHALE AIR FROM THE AIRCOMPRESSOR EITHER DIRECTLY OR FROM A BREATHING DEVICE
CONNECTED TO THE AIRCOMPRESSOR.
•DO NOT USE THIS AIR COMPRESSOR TO FILL A SCUBA TANK TO BE USED FOR SCUBA DIVING. THE AIR FROM
THIS AIR COMPRESSOR IS NOT BREATHABLE.
1.4 Risk of Flying Objects
•ALWAYS WEAR EYE PROTECTION TO SHIELD THE EYES FROM FLYING DEBRIS.
•NEVER LEAVE PRESSURIZED AIR IN AIRCOMPRESSOR. SHUT OFF AIRCOMPRESSOR AND RELIEVE PRESSURE
WHEN STORING OR ATTEMPTING MAINTENANCE.
•AVOID HOSE WHIP BY BLEEDING HOSE FIRST BEFORE DISCONNECTING HOSE FROM AIRCOMPRESSOR.
•DO NOT MOVE THE AIR COMPRESSOR WHILE ANY PCP AIRGUNS OR AIRGUN/PAINTBALL CYLINDER IS
UNDER PRESSURE.
•DO NOT ATTEMPT TO MOVE THE AIR COMPRESSOR OR ANY AIRGUN OR CYLINDER ATTACHED TO IT BY
PULLING ON THE FILL HOSE.
1.5 Precautions when Working with 12 VOLT DC Batteries – Explosion and Fire Hazard
•MAKE SURE THE AREA AROUND THE BATTERY IS WELL VENTILATED.
•NEVER SMOKE OR ALLOW A SPARK OR FLAME IN VICINITY OF THE ENGINE OR BATTERIES.
•BE CAREFUL NOT TO DROP A METAL OBJECT ON THE BATTERY OR ALLOW A METAL TOOL TO
SIMULTANEOUSLY TOUCH THE POSITIVE AND NEGATIVE CABLE ENDS OR BATTERY TERMINALS. IT MIGHT
SPARK OR SHORT-CIRCUIT THE BATTERY OR OTHER ELECTRICAL PARTS AND CAUSE EXPLOSION.
•REMOVE PERSONAL METAL ITEMS SUCH AS RINGS, BRACELETS, NECKLACES, AND WATCHES WHEN
WORKING WITH BATTERIES. BATTERIES PRODUCE A SHORT-CIRCUIT CURRENT HIGH ENOUGH TO WELD A
RING OR OTHER SIMILAR OBJECT TO METAL AND CAUSE A SEVERE BURN.
WARNING: THIS PRODUCT CONTAINS ONE OR MORE CHEMICALS INCLUDING LEAD, WHICH IS KNOWN TO
THE STATE OF CALIFORNIA TO CAUSE CANCER AND BIRTH DEFECTS OR OTHER REPRODUCTIVE HARM. FOR MORE
INFORMATION GO TO WWW.P65WARNINGS.CA.GOV.
2. LEARNING THE PARTS OF YOUR COMPRESSOR
Learning the names of the parts of your compressor will help you understand your owner’s manual.
3. ASSEMBLY INSTRUCTIONS
1. Locate the male foster tting on the compressor (Fig.2A).
2. Connect the high pressure hose to the compressor using the quick connector (Fig.2B).
NOTE: Either end of the high pressure hose will work.
3. Depending on which power source option you choose, connect either the battery clamp
cables or the AC power cord to the compressor and follow the respective operating
instructions below in Section4.
NOTE: The compressor has an internal converter that can be set for 110V or 220V operations. Make
sure it is set to the output of your plug.
4. OPERATING INSTRUCTIONS
•IMPORTANT: To protect the air compressor’s fuse and to avoid hose whip, ALWAYS use the
Release Valve (Bleed Screw) to release (bleed o) the air in the Air Compressor/ Fill hose
after every use of the
air compressor.
A. Automatic Pressure Shut O Feature
•The air compressor is equipped with an automatic pressure cuto feature that will shut o
the air compressor when the air compressor reaches the set desired pressure.
•Rotate the knob on the pressure gauge to the desire pressure setting (Fig. 3). To increase
the pressure setting, rotate the knob clockwise. To decrease the pressure setting, rotate the
knob counter clockwise.
NOTE: To test the pressure setting feature, use the foster tting plug provided in your spare parts bag
and connect it to the end of the ll hose (Fig. 4).
IMPORTANT: If the air compressor does not shut o when the air compressor reaches the set desired
pressure, manually shut o
the air compressor, open the released valve, disconnect the hose and contact customer service before
using again.
B. 12Volt DC Battery Option
The compressor is designed to run o a 12Volt DC battery. ALWAYS have your vehicle running to
prevent draining the battery down.
1. Review your motor vehicle’s owner’s manual and battery’s owner’s before connecting the
compressor.
2. Keep clear of motor vehicle’s fan blades, belts, pulleys, and other parts that may cause injury.
3. While the vehicle is o, Place the compressor on a at, safe, area near the battery and plug in
the battery clamps to the back of the compressor.
4. Clamp the RED positive (+) clamp of the cables rst to the positive 12Volt terminal of the
enginebattery.
5. Clamp the BLACK negative (-) clamp to an unpainted and unmoving part of the chassis or
engineblock.
6. Connect your airgun/reservoir cylinder to the ll hose. Pull to ensure it secured and make
sure the bleed screw is hand tighten.
7. Set the air compressor to DC12V by pressing down on the “ I ” symbol on the DC/AC toggle switch (Fig. 5A).
8. Press the green Start/Stop button to start the compressor.
9. Monitor the compressor and airgun/paintball cylinder you are lling. DO NOT leave the compressor and airgun/paintball cylinder
being lled unattended.
10. The air compressor will automatically shut o after the set desired maximum ll pressure
is reached. However, it can be manually stopped by pressing the green Start/Stop
button. NEVER ll your airgun or air cylinder beyond the maximum ll pressure at room
temperature.
11. Using the release valve, BLEED the ll hose COMPLETELY to avoid hose whip from pressure in
the ll hose (Fig.6).
12. Disconnect the compressor’s ll hose from the ll nipple on the airgun/paintball cylinder.
13. Disconnect the Black negative (-) clamp and then the Red positive (+) clamp in that order.
14. Place the compressor in storage after it cools down.
C. Plug in Option
NOTE: The compressor has an internal converter that can be set for 110 V or 220 V operations. Make
sure it is set to the output of your plug. See Section 5 “Changing the Input Power Setting”.
1. Place the compressor on a at,safe, area near a properly grounded outlet.
2. Connect the AC power cord to the back of the compressor and plug into an outlet.
3. Connect your airgun/reservoir cylinder to the high pressure air hose. Pull to ensure it secured
and make sure the bleed screw is hand tighten.
4. Set the air compressor to AC by pressing down on the “II” symbol on the DC/AC toggle switch
(Fig.5B).
5. Press the green Start/Stop button to start the compressor.
6. Monitor the compressor and airgun/reservoir cylinder you are lling. DO NOT leave the
compressor and airgun/reservoir cylinder being lled unattended.
7. The air compressor will automatically shut o after the set desired maximum ll pressure
is reached. However, it can be manually stopped by pressing the green Start/Stop button.
NEVER ll your airgun, air cylinder beyond the maximum ll pressure at room temperature.
8. Using the release valve, BLEED the ll hose COMPLETELY to avoid hose whip from pressure in
the ll hose (Fig.6).
9. Disconnect the compressor’s ll hose from the ll nipple on the airgun/paintball cylinder.
10. Disconnect the AC power cord and place the compressor in storage.
5. CHANGING THE AC INPUT POWER SETTING FOR THE COMPRESSOR
1. Unplug the compressor and disconnect from any source of power.
2. Remove the black screws from the main cover. Do not remove the ones on the handle.
3. Carefully lift up the cover using the carrying handle while taking
4. Locate the input power switch window on the side of the converter (Fig.7).
5. Using a small screw driver, move the switch over to the proper input voltage of your outlet.
6. Replace cover and reinstall screws.
A. Compressor
B. Hose With Quick Connect Foster Fitting
C. Release Valve (Bleed Screw)
D. Burst Disc (Safety Valve)
E. Oil-Water Separator Filter
F. Pressure Gauge
G. Load Indicator
H. DC/AC Toggle Switch
I. Start / Stop Button
J. AC Power Cord
K. DC Power Cord With Battery Clamps
Fig. 3Fig. 3
Fig. 2A
Fig. 2A
Fig. 2B
Fig. 2B
Fig.4Fig.4
Fig. 5AFig. 5A
Fig. 6Fig. 6
Fig. 7
Fig. 7
Fig. 5BFig. 5B

6. MAINTAINING YOUR COMPRESSOR
IMPORTANT: Before doing any maintenance on your compressor make sure the unit is not pressurized by opening the release valve and
disconnect from any source of power.
•Use only a dampened cloth to clean exterior of compressor.
•Avoid using any detergent or solvents, which might contain chemical that could damage plastic components and/or painted
surfaces of the compressor.
•All other services should be performed by an Authorized Service Personnel.
A. Cotton Filter
It is recommended that you change the cotton air lter after the earlier of three (3) months, 50 hours of use or if they become deformed or
extremely dirty (lters sold separately).
IMPORTANT: Before using and/or storing the compressor, inspect its cotton lter in the oil/water separator as follows:
1. Remove the lter housing from the top of the compressor.
2. Using snap ring pliers, unscrew the brass lter cover and remove the cotton lter.
3. Squeeze the cotton lter dry to remove excessive amount of moisture.
4. Replace cotton lters if it become deformed or extremely dirty (lter sold separately).
B. Lubricating the compressor
This compressor is lubricated using solid lubricants. MP-3 or Multipurpose Lithium grease is the
recommended solid lubricant. It is recommended that you do this once a year.
1. Remove the cover from the compressor.
2. Locate the two lubrication port on the right side of the compressor (Fig. 8).
3. Remove rubber plugs and add 1oz of MP-3 grease to each lubrication port.
4. Re-install rubber plugs into housing and the cover on the compressor.
7. EXPLODED VIEW OF PARTS
Cleaning or replacing these parts can solve most of the compression problems. Spare parts, included with the compressor.
1
6
5
9
12
5
2
7
10
3
3
4
8
5
5
11
5
1. Black Plastic Ball
2. Black O-Ring (D46*2)
3. Green O-Ring (D12*2)
4. Low Pressure Check Valve
5. White Spacer
6. Middle Pressure Check-Valve Set
7. High Pressure Check Valve
8. Green O-Ring(D14*2)
9. Green O-Ring (D16*2)
10.Cotton Filter
11. POM Black Spacer
12.Copper Burst Disc
7 8 910 11 12
1 42 3 5 6
8. LOAD INDICATOR ERROR CODES
A. Issue – L
1. Resolution – The supply voltage is lower than 10.8v.
B. Issue – H1
1. Resolution – The supply voltage is higher than 14V.
C. Issue – H2
1. Resolution – The current is higher than 29 when the machine is working.
D. Issue – H3
1. Resolution – The temperature is above 85 when the machine is working.
9. TROUBLESHOOTING
A. Issue – Air Compressor will not start
1. Resolution – Check to make sure the air compressor is plugged into an active electrical outlet or charged 12V battery.
2. Resolution – Check to make sure the DC AC toggle switch is set on the proper setting for which you plan to power the compressor.
3. Resolution – Check to see if the fuse failed.
B. Issue – Air Compressor is not building pressure
1. Resolution – Make sure both release valve and moisture release valve is closed. It should be hand tightened.
2. Resolution – Check any noticeable air leaks around the ll hose and or ll adapters.
3. Resolution – Check to see if the burst disk failed.
C. Issue – Air Compressor shuts o before reaching desired pressure
1. Resolution – Make sure the Output Pressure (Auto Shut O) is set properly.
2. Resolution – Make sure the converter is switched to the right output voltage of the plug.
D. Issue – Burst Disc Failure
1. Resolution – Should the Burst Disc (Safety Valve) fail during use of the compressor, shut o the compressor. Open the Release
Valve (Bleed Screw) to vent the remaining air from the compressor. Remove the Burst Disc retention screw to verify the Burst Disc
has failed (there will be a hole in it). Remove the failed Burst Disc from the compressor. Additional Burst Discs are in the bag of spare
parts that comes with the compressor. Install a new Burst Disc and re-insert the Burst Disc retention screw by turning it clockwise.
SPECIFICATIONS
WorkingVoltage Direct Current 12V-15V
Motor Power DC12V 350W or AC 110V or 220V 450W
Working Pressure Up to 4,500 PSI
Application Range Airgun/Paintball Cylinders less than .6L (600cc)
LIMITED ONE YEAR WARRANTY
This product is warranted to be free of defects in materials and workmanship for 1 year. Buyer should retain the original sales receipt as
record of date of purchase. This warranty does not cover adaptors, lters, attachments or other accessories. In the event of a defect under this
warranty, Crosman will, at its option, repair or replace the product; provided, however, its inspection indicates that an original defect exists.
Crosman reserves the right to replace any product which is no longer available with a product of comparable value and function. If Crosman
determines the repair is not covered under the warranty guidelines, there could be a charge to you for the repair.
WHAT IS COVERED
1. Parts and Repair of any factory defect of material or workmanship.
2. Transportation charges to consumer for the repaired product and/or replacement product.
WHAT IS NOT COVERED
1. Transportation charges to the Authorized Service Personnel for defective product.
2. Normal wear and tear from regular use.
3. Damaged parts as a result from misuse, neglect or tampering.
4. Damage caused by abuse, modication or failure to perform normal maintenance – see Owner’s Manual.
5. Improper installation or maintenance performed by someone other than an Authorized service personnel.
6. Any other expense.
THIS LIMITED WARRANTY DOES NOT INCLUDE CONSEQUENTIAL DAMAGES, INCIDENTAL DAMAGES OR INCIDENTAL EXPENSES, INCLUDING
DAMAGE TO PROPERTY OR ANY OTHER EXPENSE. CROSMAN DISCLAIMS ANY IMPLIED WARRANTIES, INCLUDING THE IMPLIED WARRANTIES OF
MERCHANTABILITY AND FITNESS. SOME STATES DO NOT ALLOW THE EXCLUSION OR LIMITATION OF INCIDENTAL OR CONSEQUENTIAL DAMAGES,
OR ALLOW LIMITATIONS ON IMPLIED WARRANTIES SO THE ABOVE LIMITATIONS OR EXCLUSIONS MAY NOT APPLY TO YOU. TO THE EXTENT ANY
PROVISION OF THIS WARRANTY IS PROHIBITED BY FEDERAL, STATE OR MUNICIPAL LAW, IT SHALL NOT BE APPLICABLE. THIS WARRANTY GIVES
YOU SPECIFIC LEGAL RIGHTS, AND YOU MAY ALSO HAVE OTHER RIGHTS, WHICH VARY FROM STATE TO STATE AND COUNTRY TO COUNTRY.
STOP – BEFORE YOU RETURN THIS PRODUCT TO THE STORE
Save on gas and avoid the trip back to the store. Contact our Customer Service/Technical Support representatives for information and
trouble-shooting help. Call 1-800-7AIRGUN (1-800-724-7486) or nd answers to frequently asked questions at www.crosman.com.
WARRANTY CLAIM AND REPAIR SERVICE
If your compressor needs repair - DO NOT ATTEMPT TO DISASSEMBLE IT! Your compressor requires special tools and xtures to repair it. Any
disassembly or modication not performed by Authorized Service Personnel will void the warranty.
U.S. Customers - Contact Crosman Customer Service at 800-724-7486 or e-mail us via www.crosman.com. You will be instructed where and
how to send your compressor in for repair under warranty.
Crosman Corporation
Attn: Warranty Dept.
7629 Route 5 & 20
Bloomeld, NY 14469
Include with your product a copy of your receipt and a brief description of the problem. Be sure to indicate your name, mailing address, e-mail
address and telephone number. We recommend you use a method of shipping that provides you with a tracking number and insurance
options. Crosman is not liable for any damaged, lost or stolen merchandise during shipping.
Canadian Customers - Contact the Gravel Agency, in Quebec at 866-662-4869.
Outside U.S. Customers - Please contact your point of purchase dealer/distributor. If you do not know your dealer/distributor, contact our
International Dept. for assistance at 585-657-6161 or e-mail us via www.crosman.com.
Crosman, Traveler and Benjamin are trademarks of Crosman Corporation.
© 2021 Crosman Corporation 06-21 OM
Fig. 8
Fig. 8
Other Benjamin Heating products Air Compressor manuals
Popular Air Compressor manuals by other brands
mycom
mycom i125S instruction manual
Sullair
Sullair 125 Operators manual and parts lists
Grizzly
Grizzly G8695 parts list
Oshkosh Corporation
Oshkosh Corporation IMT CAS80R Installation, Operation, Maintenance & Parts Manual
Parkside
Parkside 73783 Operation and safety notes
Vmac
Vmac H600013 Installation and owner's manual
