BenQ PH460 System manual

Digital Signage / Interactive Flat Panel
Installation Handbook

2
Copyright
Copyright © 2014 by BenQ Corporation. All rights reserved. No part of this publication may
be reproduced, transmitted, transcribed, stored in a retrieval system or translated into any
language or computer language, in any form or by any means, electronic, mechanical, magnetic,
optical, chemical, manual or otherwise, without the prior written permission of BenQ
Corporation.
Disclaimer
BenQ Corporation makes no representations or warranties, either expressed or implied, with
respect to the contents hereof and specifically disclaims any warranties, merchantability or
fitness for any particular purpose. Further, BenQ Corporation reserves the right to revise this
publication and to make changes from time to time in the contents hereof without obligation of
BenQ Corporation to notify any person of such revision or changes.

3
Table of Contents
Copyright ......................................................................................................................................2
Disclaimer .....................................................................................................................................2
Video wall installation guide .....................................................................................................4
Precautions .................................................................................................................................................. 4
Notes on moving the display ................................................................................................................... 4
Installing ........................................................................................................................................................ 5
Installing edge finishing kit (optional) ...................................................................................... 9
Installation .................................................................................................................................................... 9
Cable extension guide ..............................................................................................................11
Extending the VGA connection using a VGA amplifier/repeater ..................................................12
Extending the HDMI connection using an HDMI amplifier/repeater ...........................................13
Connecting faceplate ...............................................................................................................................14
Extending USB connection .....................................................................................................................15
Additional information ............................................................................................................................19
Troubleshooting ........................................................................................................................22
Connections............................................................................................................................................... 22
Picture / video ........................................................................................................................................... 25
Audio........................................................................................................................................................... 28
Remote control......................................................................................................................................... 28
Touch function (selected models only) ...............................................................................................29
OSD menu / control panel / power button ....................................................................................... 30
LED indicators........................................................................................................................................... 31
Power.......................................................................................................................................................... 31
System .........................................................................................................................................................32
Wall mounting / video wall ....................................................................................................................33

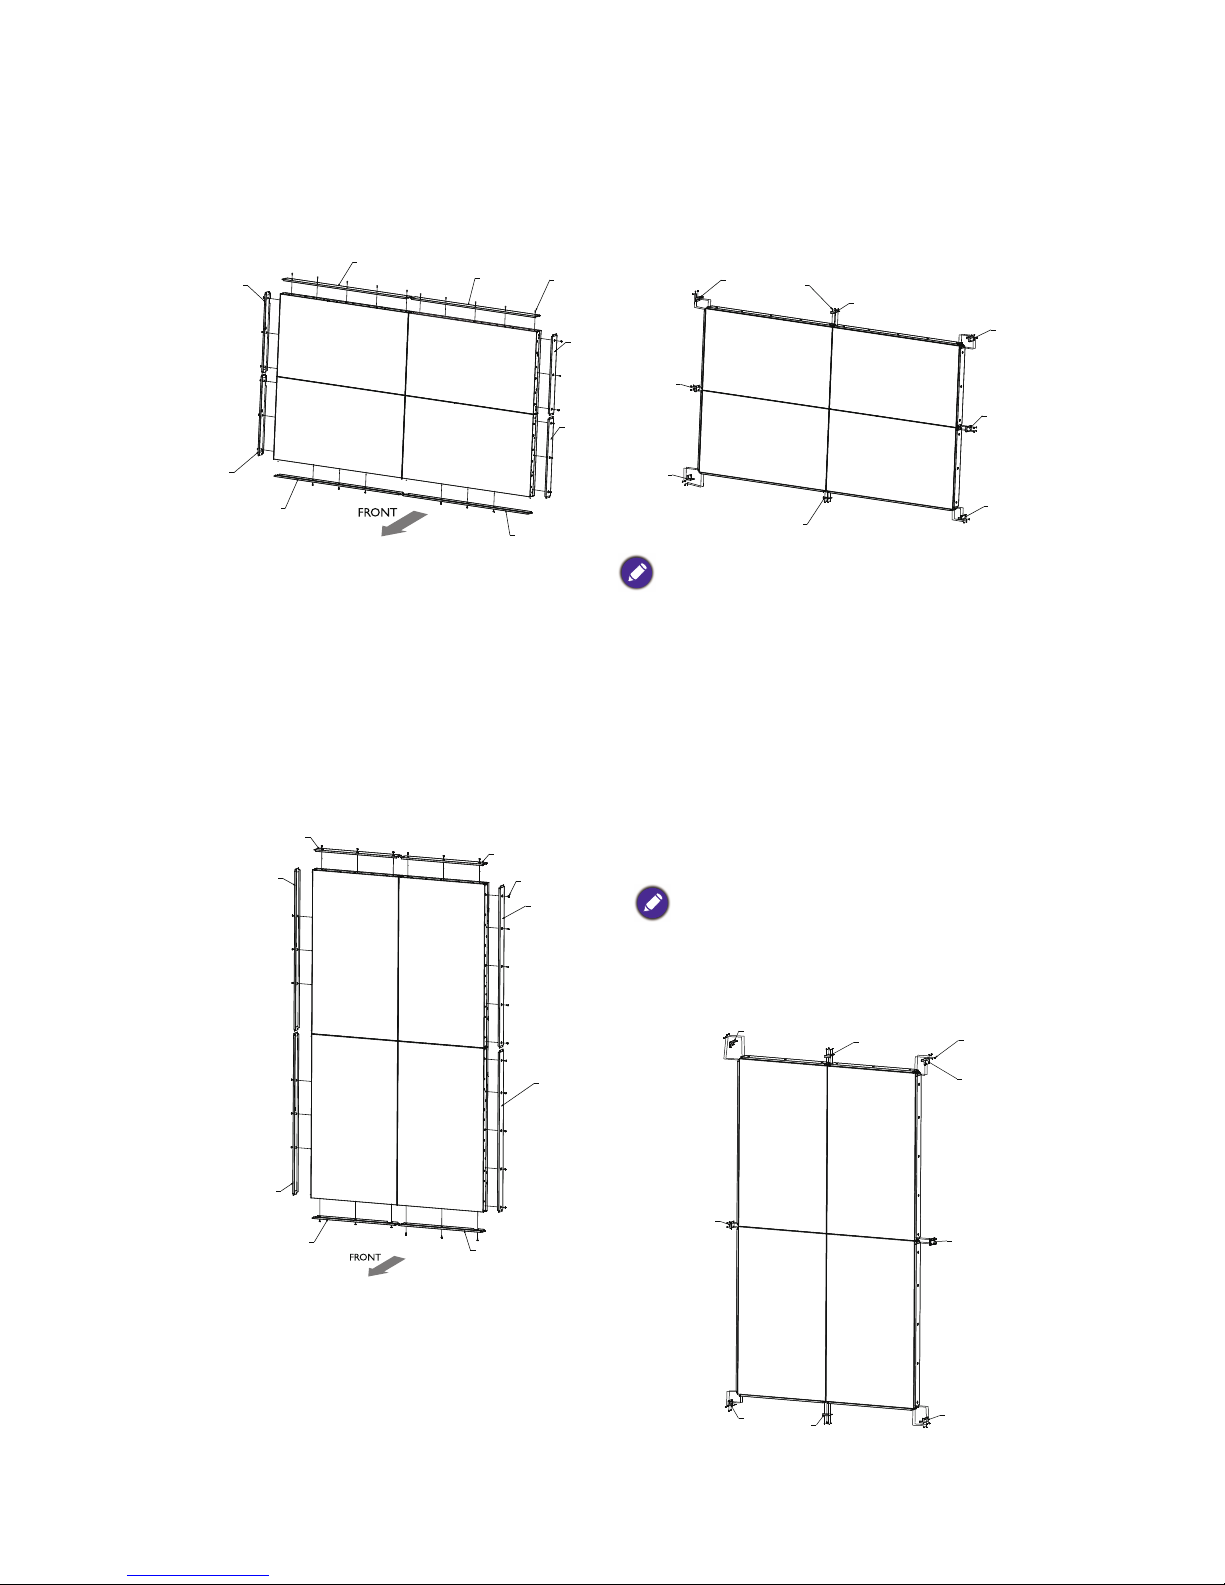
4 Video wall installation guide
Video wall installation guide
Precautions
To ensure safety, please read this manual carefully before installation and follow the instructions
herein. Store this installation guide in a secure place for future reference.
• The video wall must be installed on a flat and level surface which is strong enough to bear its
weight.
• If the video wall is mounted with mounting brackets, make sure the brackets are tightened and
secured on the wall and are strong enough to bear the weight of the video wall.
• The Liquid Crystal Display (LCD) panel of the display has a very thin protective layer of glass
which is liable to marking or scratching, and cracking if struck or pressured. Please protect the
display with cushions during video wall installation.
• Move a display by holding the handles on the back of the
display. Do not touch the LCD panel directly to avoid
possible scratches.
• To maintain proper ventilation and heat dissipation, keep at
least 60 mm of clear space from the mounted displays to
the wall.
• Ensure enough gap between displays to protect your LCD
screens from the damage through the direct transfer of
weight. See Checking the safe distance between displays on page 7 for details.
Notes on moving the display
The display has limited mechanical strength. To prevent the display from performance failure
caused by line defects, front bezel bending, glass scratch/broken, light leakage, etc, it must be
handled with care.
• Always move the display by at least two (2) adults.
• Keep the original shipping box and packaging in storage for use in the future when you may
need to transport the product.
• When you want to move the display, make sure the four (4) handles are held.
• When you want to place the display face down:
- Prepare a flat and horizontal surface that is larger than the display and spread a thick
protective sheet on it. (Fig. 1)
- Lay down the display gently and horizontally.
• When you want to upturn the display:
- Lift the display up horizontally by holding the four (4) handles. Do not lift the display
against its corner. (Fig. 2)
- Be careful not to scratch any parts of the display when upturning the display. (Fig. 3)

5Video wall installation guide
- Stand the display vertically to make sure the its weight spread evenly on the surface. (Fig.
4)
• Check the shock label on the outside of the product carton. The shock indicator on the label
will turn red if the display/package is improperly handled.
Installing
You can cascade the displays in landscape or portrait mode as desired. Mind the space between
displays during installation.
Cascading displays in landscape or portrait mode
(Fig.1) (Fig. 2)
(Fig. 3) (Fig. 4)
1. Install the mounting bracket to the wall following the instruction manual of the wall
mounting bracket. Make sure the mounting bracket is vertically and horizontally placed.
2. Attach the provided gap inspection pads to the display edges as instructed in Step 1~3 in
Checking the safe distance between displays on page 7.
3. Mount and fasten the display on the mounting bracket or stand by tightening the screws
through the respective holes with a Phillips (cross) screwdriver. Do not place one display
directly on another as the stacked LCD screens may be damaged by the weight.
Support surface

6 Video wall installation guide
4. Start your video wall from the bottom left or bottom right. Finish one row and then
move up to finish the next row. Once a display has been installed, check the horizontal
and vertical level immediately using a professional measuring tool.
5. Place your displays as close to each other
as possible but an appropriate space of at
least 0.5 mm should be kept. Check the
gap between displays as instructed in Step
4~5 in Checking the safe distance between
displays on page 7.
6. To maintain proper ventilation and heat
dissipation, keep at least 60 mm of clear
space from the mounted displays to the
wall.
Landscape mode Portrait mode
60mm
(1.52")
Various mounting brackets may be available to you, but only some of them are suitable for a video wall.
For height adjustment
For tilt adjustment 1
For tilt adjustment 2
For height adjustment
For tilt adjustment
(Recommended)
(Not recommended)

7Video wall installation guide
Checking the safe distance between displays
During video wall installation, you might want to place the displays as close to each other as
possible. Note the LCD screens may be damaged through the direct transfer of weight if an
appropriate distance is not kept between displays. The recommended gap between displays may
vary depending on your purchased models as listed below.
Actual bezel-to-bezel dimensions may exceed the listed minimum values (5.4mm for
PH460/PL460 and 5.3mm for PH550) due to different tiling methods.
You are provided with gap inspection pads to ensure appropriate space between the cascaded
displays during video wall installation.
Model name Recommended gap between displays
PH460 ≥0.5 mm
PL460 ≥0.5 mm
PH550 ≥0.5 mm
1. Get one of the provided gap inspection
pads and fold it as illustrated.
2. Remove the peeling sheet from the gap
inspection pad.
3. Stick the pad to the edge where another display will be stacked as illustrated. Each edge
should have 3 gap inspection pads attached.
Adhesive tape with peeling sheet
Front panel

8 Video wall installation guide
4. After the displays are mounted and
fastened, check if the space between each
display is just enough for removing the gap
inspection pad smoothly. If the pad is
trapped, adjust the screws to release
more space.
5. Insert the pad again and swipe the pad
horizontally and vertically between the gap
to ensure it can move smoothly. Ignore
the black tapes on the edge if they stop
you. Refer to Recommended gap between
displays on page 7 for the minimum
distance required for each model.

9Installing edge finishing kit (optional)
Installing edge finishing kit (optional)
Whether used as a standalone unit or as a part of a video wall, the edge finishing kit will
transform your display into a most stylish and elegant display.
Inside your edge finishing kit you will find the following components:
Installation
For standalone unit
Cosmetic Plates
Top (A) Bottom (B) Left (C) Right (D)
Flat Enclosure (E) Corner Enclosure (F) M3 x 5 mm Screw (G) M4 x 6 mm Screw (H)
1. Mount the cosmetic plates in their
respective places on the edge of your
display, and screw in to place using the 6
mm M4 screws.
2. On each corner, mount a corner enclosure
piece and fasten each one with 4 of the 5
mm M3 screws.
AH
D
B
C
GF

10 Installing edge finishing kit (optional)
For a landscape video wall
For a portrait video wall
1. Mount the cosmetic plates in their
respective places on the edge of your
display, and screw in to place using the
6mm M4 screws.
2. On each corner, mount a corner enclosure
piece and fasten each one with 4 of the
5mm M3 screws. Where the displays meet,
use a flat enclosure piece, and fasten each
of these too with 4 of the 5mm M3 screws.
When mounting, make sure that all edge enclosure
pieces are fitted to the respective positions (i.e.
bottom to bottom, etc.)
1. Mount the cosmetic plates in their respec-
tive places on the edge of your display, and
screw in to place using the 6mm M4
screws.
2. On each corner, mount a corner
enclosure piece and fasten each one with
4 of the 5mm M3 screws. Where the
displays meet, use a flat enclosure piece,
and fasten each of these too with 4 of the
5mm M3 screws.
When mounting, make sure that all edge
enclosure pieces are fitted to the respective
positions (i.e. bottom to bottom, etc). When
rotating, the RIGHT side of the displays should be
on the bottom.
A
AH
D
D
B
B
C
C
F
E
G
F
E
F
E
F
E
C
H
A
A
D
D
B
B
C
F
E
F
E
F
E
FEG

11Cable extension guide
Cable extension guide
This guide provides additional information about how to extend VGA, HDMI and USB
connections as required in the environment where you set up your BenQ digital signage and
interactive flat panel displays. Refer to the instructions in this guide and the User Manual of
your BenQ display to ensure stable and optimal performance.
Pay attention to the following notes when you connect cables:
• Turn off all devices before making connections.
• Use certified, high-quality cables and signal amplifiers/repeaters.
• Familiarize yourself with the ports and sockets on the display and the devices you want to
connect. Be aware that incorrect connections may adversely affect picture quality.
• Do not remove cables from the ports and sockets by pulling the cable itself. Always grasp and
pull the connectors at the end of the cable.
• Ensure that all cables are fully inserted and firmly seated for proper pin contact.

12 Cable extension guide
Extending the VGA connection using a VGA amplifier/repeater
If you need to connect the display to a computer or other VGA source devices over a long
distance (over 3 meters), a VGA signal amplifier must be used to boost the signal and prevent
potential display quality problems like interference and ghosting.
1. Connect the VGA input jack on the display to the VGA output jack on the VGA signal
amplifier/repeater using a D-Sub (15-pin) cable.
2. Connect the VGA output jack on the computer to the VGA input jack on the VGA signal
amplifier/repeater using a D-Sub (15-pin) cable.
3. Connect the computer’s audio output jack to the audio input jack on the display using a
suitable audio cable.
• Refer to the User Manual of your display for the location of VGA and corresponding audio input jacks.
• The audio cable, VGA signal amplifier/repeater and additional VGA cable are not supplied and should be
purchased separately.
D-Sub (15-pin)
cable
Audio cable
Computer
D-Sub (15-pin)
cable
VGA signal
amplifier/repeater
Display
Audio input jackVGA input
jack

13Cable extension guide
Extending the HDMI connection using an HDMI amplifier/
repeater
Although there is not an official limit on HDMI cable length (as it mainly depends on the quality
of the HDMI cable), in order to prevent potential display quality problems like interference and
ghosting, if you need to connect the display to a computer or an A/V device (such as a DVD or
Blu-ray player) over 5 meters, deployment of an HDMI signal amplifier is highly recommended.
1. Connect the HDMI input jack on the display to the HDMI output jack on the HDMI signal
amplifier/repeater.
2. Connect the HDMI input jack on the HDMI signal amplifier/repeater to the HDMI output
jack on the HDMI source device using an HDMI cable.
HDMI cable
HDMI cable
DVD/Blu-ray
HDMI signal
amplifier/repeater
HDMI input jack
Display
• Refer to the User Manual of your display for the location of HDMI input jacks.
• The HDMI cables and HDMI signal amplifier/repeater are not supplied and should be purchased
separately.

14 Cable extension guide
Connecting faceplate
1. Connect the mini-B plug of the supplied USB cable to the USB Mini-B port on the display,
and the type-A plug of the cable to the USB port on the faceplate.
2. Connect the computer to the faceplate using a suitable USB cable.
• Refer to the User Manual of your display for the location of USB port.
• Any cable used in prior installations for other displays and projectors in the same location should not be
used for a new installation of the display.
• Use only a high-quality faceplate.
• The total cable length between the display, computer and faceplate should not exceed 5 meters. If you
need to extend the length of USB connection, refer to "Extending USB connection" on page 15.
Faceplate
USB cable
Computer
USB cable
Display
USB port

15Cable extension guide
Extending USB connection
Extending USB connection using an active (powered) USB extension
cable
You can use a commercially available active (powered) USB extension cable on the market to
extend the length of USB connection. The active USB extension cable helps boost the USB
signal as well as provides sufficient bus power for the connected USB device.
1. Connect the mini-B plug of the supplied USB cable to the USB Mini-B port on the display, and
the type-A plug of the cable to the USB type-A port on the active USB extension cable.
2. Connect the type-A plug of the active USB extension cable to the USB port of a computer.
USB cable Active USB
extension cable
Computer
Display
USB port
• Refer to the User Manual of your display for the location of USB port.
• For best results, use only a certified active USB extension cable.
• The type of USB port and plug on the active USB extension cable may be different from the description
above. Use a USB cable that matches the USB jack on the display and the USB port on the extension
cable.
• The length of the USB cable used to connect the display to the USB extension cable should not exceed 5
meters.

16 Cable extension guide
Extending USB connection using an active (powered) USB-CAT
converter
You can use a commercially available active (powered) USB-CAT converter (extender) on the
market to extend the length of USB connection over a Category 5/5e/6 network cable.
1. Connect the mini-B plug of the supplied USB cable to the USB Mini-B port on the display, and
the type-A plug of the cable to the USB type-A port on the active USB-CAT converter.
2. Connect a Category 5/5e/6 network cable to the RJ-45 LAN ports on the converter.
3. Connect the converter to a computer using a suitable USB cable.
• Refer to the User Manual of your display for the location of USB port.
• Refer to the documentation of the active USB-CAT5 converter for the maximum length of the Category
5/5e/6 network cable.
• The type of USB port and plug on the active USB-CAT converter may be different from the description
above. Use a USB cable that matches the USB jack on the display and the USB port on the active USB-
CAT converter.
• Keep the Category 5/5e/6 network cable away from power lines and cables to avoid electronic
interference.
USB cable
Category 5/5e/6
network cable USB cable
USB-CAT converter
Computer
Display
USB port

17Cable extension guide
Extending USB connection using an active (powered) USB extension
cable and a faceplate
Depending on the environment where you install the display, you can use an active (powered)
USB extension cable to extend USB connection from a faceplate.
1. Connect the mini-B plug of the supplied USB cable to the USB Mini-B port on the display, and
the type-A plug of the cable to the USB type-A port on the active USB extension cable.
2. Connect the type-A plug of the active USB extension cable to the USB port on the
faceplate.
3. Connect the computer to the faceplate using a suitable USB cable.
USB cable
Active USB
extension cable
USB cable
Computer
Faceplate
Display
USB port
• Refer to the User Manual of your display for the location of USB port.
• For best results, use only a certified active USB extension cable and high-quality faceplate.
• The type of USB port and plug on the active USB extension cable may be different from the description
above. Use a USB cable that matches the USB jack on the display and the USB port on the extension
cable.
• The total length of the USB cables used to connect the display to the active USB extension cable and
computer to the faceplate should not exceed 5 meters.

18 Cable extension guide
Extending USB connection using an active (powered) USB-CAT
converter and a faceplate
Depending on the environment where you install the display, you can use an active (powered)
USB-CAT converter to extend USB connection from a faceplate.
1. Connect the mini-B plug of the supplied USB cable to the USB Mini-B port on the display,
and the type-A plug of the cable to the USB type-A port on the active USB-CAT converter.
2. Connect a Category 5/5e/6 network cable to the RJ-45 LAN port on the converter.
3. Connect the converter to the faceplate using a suitable USB cable.
4. Connect the computer to the faceplate using a suitable USB cable.
• Refer to the documentation of the active USB-CAT converter for the maximum length of the Category
5/5e/6 network cable.
• The type of USB port and plug on the active USB-CAT converter may be different from the description
above. Use a USB cable that matches the USB jack on the display and the USB port on the active USB-
CAT converter.
• Keep the Category 5/5e/6 network cable away from power lines and cables to avoid electronic
interference.
• The total length of the USB cables used to connect the display to the active USB-CAT converter,
converter to the faceplate and computer to the faceplate should not exceed 5 meters.
USB cable
USB-CAT converter
USB cable
Category 5/5e/6
network cable
Computer
USB cable
Faceplate
Display
USB port

19Cable extension guide
Additional information
Your LCD display provides USB 2.0 ports for connecting to various devices including
computers, flash drives and wireless LAN adapters. This section provides basic information
about the USB 2.0 interface and serves as a reference for the deployment of your USB
connections.
USB terminology
Te r m Description/explanation
Host,
Function
A USB network consists of one master and multiple slave devices in a
star topology as illustrated below:
The master device (referred to as the “Host”) is on top of all other
slave devices (called “Function”). A computer is the most common
USB host. Any device that has a USB host controller and related
hardware and software installed can also become a USB host. A USB
function can be a USB mouse, keyboard or storage device.
A maximum of 7 tiers (including the root tier) are allowed in a single
USB network. Note that a USB device that performs both as a hub and
a function occupies two tiers.
Tier 1 (root tier)
Tier 7
Tier 6
Tier 5
Tier 4
Tier 3
Tier 2 Function Function
Host
Root hub
Function FunctionFunction
Hub A
Hub A
Function Function Hub A
Hub C
Hub A
Hub B
Function
Function Function
Hub A
Hub D Function
Function Function Hub A
Hub E Function
Function Function Hub A
Hub F
Function

20 Cable extension guide
USB connectors and receptacles
USB connectors and receptacles are grouped into two types: Type-A and Type-B.
Te r m Description/explanation
Upstream The direction of data transmission from a USB function to a host
or hub.
Downstream The direction of data transmission from a USB host or hub to a
function.
Hub A USB device that provides upstream connection (port) to a host
and downstream connections (ports) to multiple functions.
Root hub A USB host that also performs the functions of a hub.
Speed (low-
speed, full-speed
and high-speed)
Three different speeds are currently defined in the USB 2.0
specification:
• Low-speed: data transmission at 1.5Mbps
• Full-speed: data transmission at 12Mbps
• High-speed: data transmission at 480Mbps
The actual transmission speed is determined by the device with
the lower (or lowest) speed. For example, if a low-speed
(1.5Mbps) USB peripheral is connected to a high-speed
(480Mbps) USB host, the maximum transmission speed between
these devices will be 1.5Mbps, not 480Mbps.
Active (self-
powered) device
A USB device that has it own power supply and can operate
without the power supplied by the USB host.
Passive (bus-
powered) device
A USB device that does not have its own power supply and solely
relies on the power supplied by the USB host.
Ty p e - A • Type-A receptacles are used as outputs from host
systems and hubs.
• Type-A plugs are always oriented towards the host
system and mate with Type-A receptacles.
Connect
or
Recepta
cle
Standard
Mini
Micro
Ty p e - B • Type-B receptacles are used as inputs to hubs or
devices.
• Type-B plugs are always oriented towards a USB
hub or device and mate with Type-B receptacles.
Connect
or
Recepta
cle
Standard
Mini
Micro
Other manuals for PH460
1
This manual suits for next models
2
Table of contents
Other BenQ Digital Signage manuals