EVERI Enrollment Kiosk User manual

Loyalty Enrollment Kiosk
Quick Reference
© 2021 Everi Holdings Inc. or its affiliates (“EVERI”)
This is proprietary and confidential material of EVERI. No part of this material may be disclosed in any manner to another party without the prior written consent of
EVERI.
Enrollment Kiosk: Basic Maintenance
This Quick Reference (QR) guide explains recommended basic maintenance for your Enrollment kiosks.
Best Practices
It is recommended to run the card printer through a full cleaning cycle with each ribbon change (after approx. 1,000
prints). Additionally, preventative maintenance should be conducted on all the above kiosk components at least once
a month and as needed based on kiosk usage. Daily checks to confirm cables are securely connected and the unit is
free from dust/spills are highly recommended. Any items should be addressed on the spot if needed rather than
waiting for the maintenance period to ensure kiosk functionality.
IMPORTANT
When completing maintenance, please note that any time the cabinet door of the kiosk is opened, we recommend
unplugging the USB for the touchscreen monitor and then plugging it back in before closing the cabinet door. This will
keep the monitor from building up static and losing calibration.
Handling the Enrollment program
1. Before performing any physical maintenance, the program must be closed to prevent false alerts from being
sent to email groups
2. Open the cabinet
3. Retrieve keyboard and press ESC – exit out of the Enrollment program with the red ‘X’ in the top right-hand
corner
4. Perform necessary maintenance
a. If cleaning a card jam from the embosser, power down the device for safety when clearing and to
allow the embosser to run its checks and balances when rebooting.
5. Restart the Enrollment program via the Desktop icon or reboot the kiosk when finished
6. Place keyboard back inside. Securely close and lock the cabinet.
Printer Maintenance - Monthly
1. Open the cabinet, retrieve the keyboard, and close the Enrollment program.
2. Remove Ribbon
a. Power off the printer and open the printer cover.
b. Remove the ribbon.
c. Close printer cover.

Loyalty Enrollment Kiosk
Quick Reference
© 2021 Everi Holdings Inc. or its affiliates (“EVERI”)
This is proprietary and confidential material of EVERI. No part of this material may be disclosed in any manner to another party without the prior written consent of
EVERI.
3. Use Short Cleaning Card
a. Power on the printer.
b. Simultaneously press/hold the ‘Ribbon Set’ and ‘Eject”
buttons to access printer Menu.
c. Use the ‘Ribbon Set’ button to scroll down, then select
User Mode by holding the ‘Ribbon Set’ button.
d. Select Diagnostics by holding the ‘Ribbon Set’ button, then
use the ‘Ribbon Set’ button to scroll to Clean Mode.
e. Open and insert the Short Cleaning Card into the card
presenter on the front of the printer.
f. Select Clean Mode by holding the ‘Ribbon Set’ button to start cleaning cycle. Discard the Short
Cleaning card once completed.
g. Press ‘Ribbon Set’ and ‘Eject” buttons simultaneously to exit cleaning mode.
4. Use Long ‘T-Shaped’ Cleaning Card
a. Open the Long Cleaning Card and insert the narrow end into the front card presenter.
b. Follow instruction 3d listed in the above section to access Clean Mode. Printer will run through the
cycle once selected.
c. It is recommended to run through this process twice, once with each side of the Long Cleaning Card.
5. Clean Card Picking Rollers
a. Locate the two silver knobs (pictured) on the side of the printer.
b. Turn each knob to expose the card picking rollers.
c. Use the end of the Long Cleaning Card to clean off any debris.
d. Rotate the knobs to return the rollers to their downward facing position.
6. Clean Rear Rollers
a. Insert the Long Cleaning Card into the top rear dispenser tray slot at the back of the printer.
b. Locate the top blue gear on the left side of the printer, turn 5-6 times to clean the rollers. You should
feel tension.
c. Reverse the turn on the blue wheel to guide the Long Cleaning Card out of the rear dispenser tray
slot. DO NOT pull manually.
d. Repeat these steps on the bottom rear dispenser tray slot by inserting the Long Cleaning Card and
turning the bottom blue wheel.
7. Replace Ribbon
a. Open the printer cover.
b. Line up the gears on the new Ribbon with the gears inside the printer
and place inside. Ensure there is tension on the ribbon.
8. Close the printer cover
9. Reopen the Enrollment program, place the keyboard back inside, securely close and lock the cabinet.

Loyalty Enrollment Kiosk
Quick Reference
© 2021 Everi Holdings Inc. or its affiliates (“EVERI”)
This is proprietary and confidential material of EVERI. No part of this material may be disclosed in any manner to another party without the prior written consent of
EVERI.
eSeek M500 Driver’s License Scanner Maintenance - Monthly
1. Open the cabinet, retrieve the keyboard, and close the Enrollment program
2. Cleaning
a. Open the eSeek M500 Cleaning Card and insert into the scanner
with the tab up. The scanner will run through a cleaning cycle. Repeat
this process twice, once on each side of the cleaning card.
b. Discard the cleaning card once complete.
3. Calibration
a. Insert the Calibration Card into the scanner with the arrow facing outward. The
card will automatically feed in and out of the scanner during the process.
b. Once complete, perform a test enroll/reprint to confirm images are clear and
streak free.
i. If images appear dirty, proceed to internal mirror cleaning.
4. Internal Mirror Cleaning
a. Open eSeek M500 side door and insert the Air Divider by positioning it under
the top grey spring-loaded line.
b. Align the Air Divider with the scanner’s side wall and push the Air Divider in
until it snaps into place.
c. Using canned air with a nozzle, blow a few short bursts of compressed air into
the scanner opening.
d. Remove the Air Divider and close the eSeek M500 side door.
5. Reopen the Enrollment program, place the keyboard back inside, securely close and lock the cabinet.
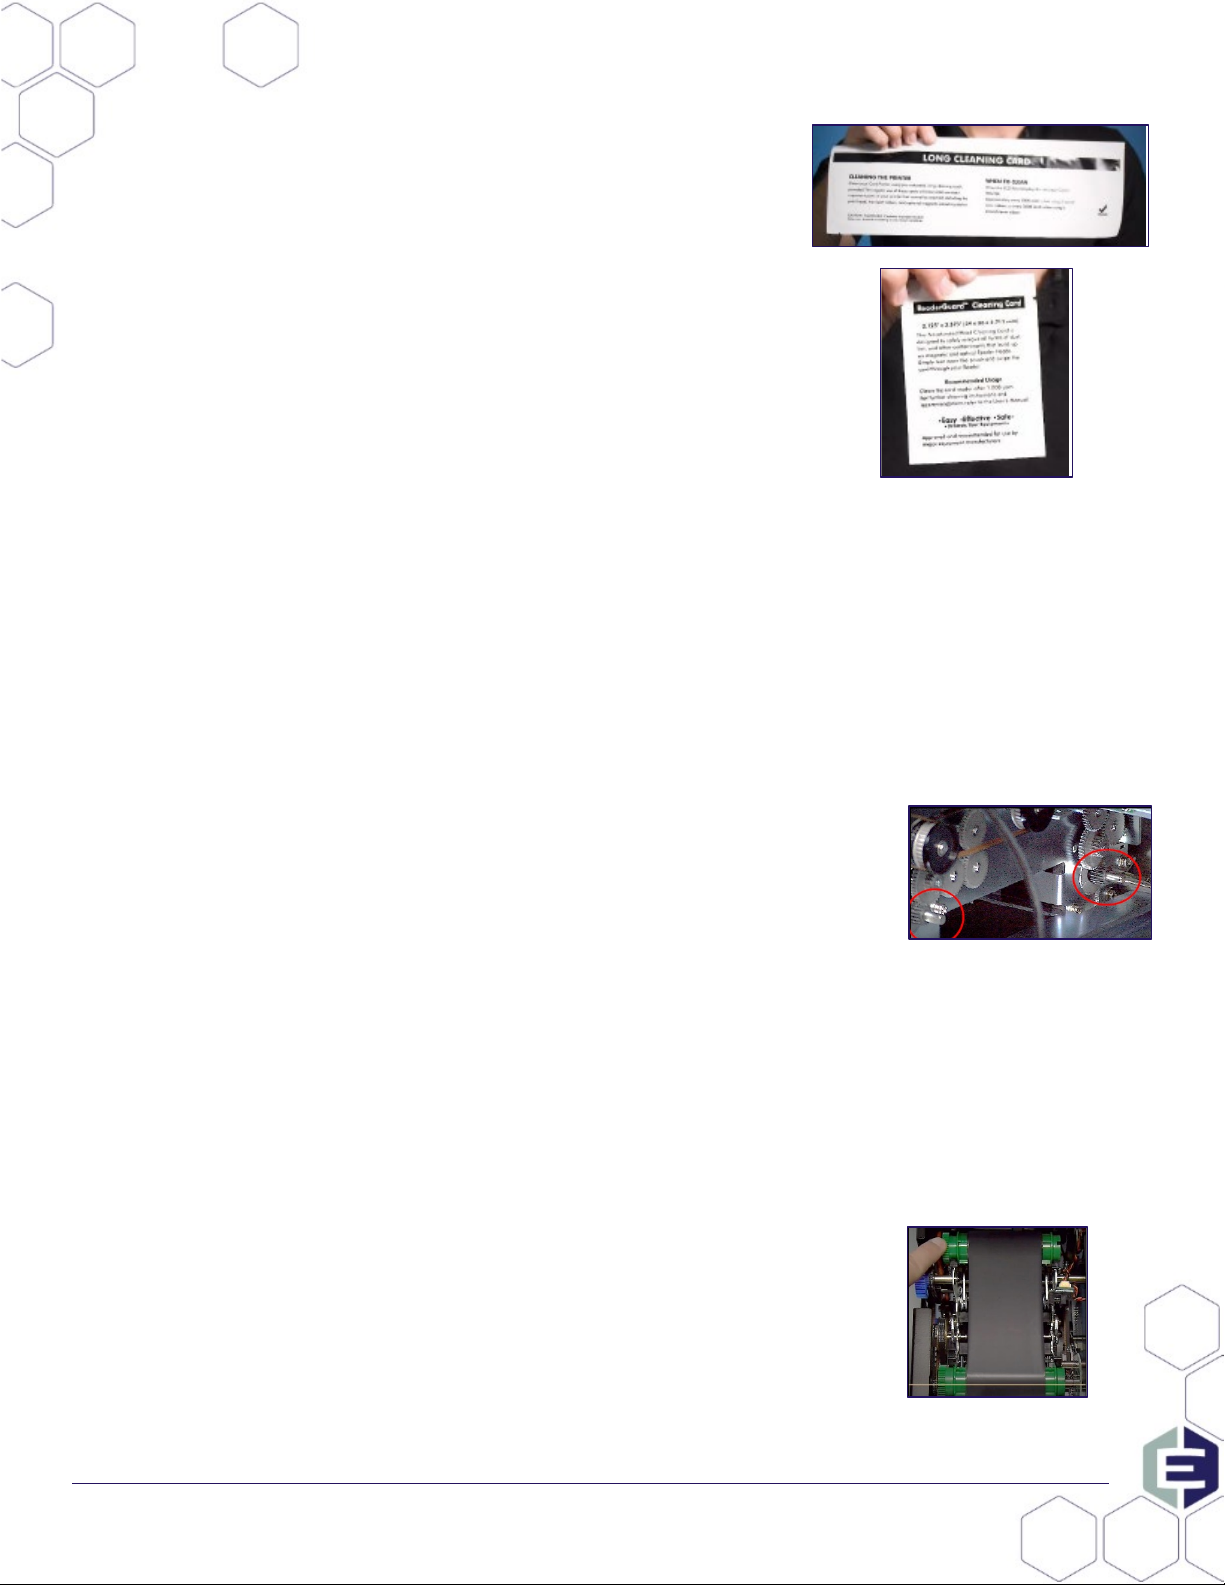
Printer Head and Sensor Cleaning - Monthly
1. Open the cabinet, retrieve the keyboard, and close the Enrollment program
2. Open an Alcohol Swab package and gently press the tip of the alcohol swab
against the thermal print head and 3 path sensors.
a. Only clean the portion located below the two marked lines.
b. DO NOT touch the thermal print heads with your hands.
3. Allow the alcohol to fully evaporate before continuing printer use.
4. Reopen the Enrollment program, place the keyboard back inside, securely
close and lock the cabinet.
Touchscreen Calibration/Linearization - Monthly
1. Open the cabinet, retrieve the keyboard, and close the Enrollment program
2. Double tap/click the Calibration icon on the desktop

Loyalty Enrollment Kiosk
Quick Reference
© 2021 Everi Holdings Inc. or its affiliates (“EVERI”)
This is proprietary and confidential material of EVERI. No part of this material may be disclosed in any manner to another party without the prior written consent of
EVERI.
3. Follow the on-screen prompts:
a. Complete the 3-target calibration process
b. Select ‘Yes’ to test the calibration after targeting is complete.
c. The test is completed by touching/dragging a finger across every available square on the screen and
around the edges of the screen.
d. Double tap the screen once completed to exit and answer the necessary prompts. Repeat test if
necessary.
4. Double tap/click the Control Panel icon to proceed with linearization (ONLY PERFORM IF CALIBRATION DOES
NOT WORK).
a. Select the Controller Tab then select Linearize.
b. Complete 25-target linearization process.
c. Test Linearization through 16-target test mode.
d. If successful, select Okay on the pop-up. If unsuccessful, select Retry on the pop-up.
5. Reopen the Enrollment program, place the keyboard back inside, securely close and lock the cabinet.
Out of Cleaning Supplies?
Kiosk cleaning supplies can be ordered directly through Everi’s Parts Department by emailing PartsOrder@everi.com
LOYALTY KIOSK SUPPORT: SUPPORT @ATRIENT.ZENDESK.COM
Everi 24-hour support line: (888) 532-3913 x3
Visit our website at http://www.everi.com
Table of contents
Other EVERI Digital Signage manuals