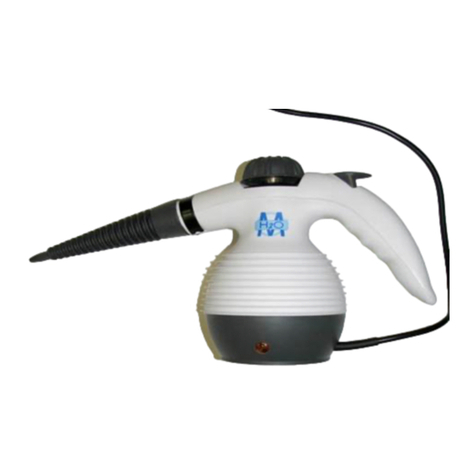
Bergstrom Max H008 User manual

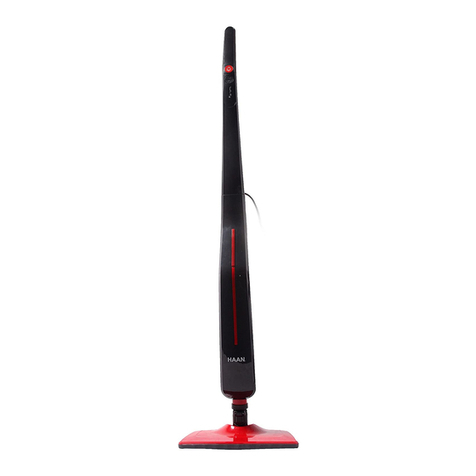
12 in 1 Steam Cleaner Max
H008 v01: 24/08/20
Please read and retain these instructions for future reference
Dimensions
126 high and 26cm wide (when used as a floor mop with the triangular
head on)
Technical Details
220-240V, 50/60Hz, 1300 W
A QUICK & EASY WAY TO HYGIENICALLY CLEAN WITHOUT THE
NEED FOR CLEANING CHEMICALS OR AEROSOLS
KILLS 99.9% OF GERMS, VIRUSES & BACTERIA, COMPLETELY NON-
TOXIC AND PET SAFE
WITH 1300W OF POWER IT HEATS UP IN JUST 30 SECONDS AND
WITH 4 STEAM SETTINGS OR LOW, MED, HIGH AND HOT SPRAY
CAN EASILY BE SWTCIHED FROM A STEAM MOP TO HANDHELD
STEAMER
CAPACITY 400ML
LIGHTWEIGHT AT JUST 2.75KG SO ITS EASY TO MOVE FROM ROOM
TO ROOM
STEAM TIME 15 MINUTES
USE ON A MULTITUDE OF SURFACES FROM HARDWOOD, CARPET,
TILES, LINO , STAINLESS STEEL
GREAT FOR CLEANING GROUT, WINDOWS, KITCHEN SINKS,
FLOORS, TILES, THE LIST IS ENDLESS!
ERGONOMICALLY DESIGNED TRIANGULAR MOP HEAD SO YOU CAN
REACH INTO ALL CORNERS, WHICH ALSO ROTATED 180 DEGREES
3.5M POWER LEAD
MAINS POWERED
LED INDICATOR LIGHT
Accessories
1pc jet nozzle
3 round brushes (2 nylon & 1 copper)
1pc triangular brush (nylon)
1pc scoop nozzle
1pc grout cleaning brush
1pc window cleaning tool
1pc carpet glider
1pc duster tool
1pc micro fibre cloth pad
1pc coral cloth for duster tool
1pc coral cloth for windows
1pc garment steaming cloth
1pc cleaning pin
1pc measuring cup

12 in 1 Steam Cleaner Max H008 Instructions for Use
Please read and retain these instructions for future reference v001: 24/08/20
Page No. 2
Contents
Technical Details ...................................................................................................................................... 1
WARNINGS AND SAFETY INSTRUCTIONS:.................................................................................................. 3
Parts........................................................................................................................................................ 4
Accessories .............................................................................................................................................. 5
How to assemble the steam mop.............................................................................................................. 5
How to use the steam cleaner .................................................................................................................. 7
How to assemble hand-held steamer...................................................................................................... 11
Garment Steaming Tool ......................................................................................................................... 13
Duster ................................................................................................................................................... 13
How to use hand-held steamer............................................................................................................... 14
How to use Optional Accessories............................................................................................................ 16
Window Cleaning Tool ........................................................................................................................... 16
Garment Steamer .................................................................................................................................. 16
Duster ................................................................................................................................................... 18
Coral Cloth for Mop Head....................................................................................................................... 19
Cleaning and Maintenance..................................................................................................................... 20
Troubleshooting..................................................................................................................................... 23
DISPOSAL............................................................................................................................................... 24

12 in 1 Steam Cleaner Max H008 Instructions for Use
Please read and retain these instructions for future reference v001: 24/08/20
Page No. 3
WARNINGS AND SAFETY INSTRUCTIONS:
WHEN USING ELECTRICAL APPLIANCES, BASIC SAFETY PRECAUTIONS SHOULD ALWAYS BE FOLLOWED:
READ ALL INSTRUCTIONS BEFORE USE.
FOR DOMESTIC INDOOR USE ONLY.
DO NOT USE OUTDOORS OR FOR COMMERCIAL USE.
BEFORE USE, CHECK THOROUGHLY FOR ANY DEFECTS AND DO NOT USE IF DEFECTS ARE FOUND. TAKE
CARE NOT TO DROP THE APPLIANCE AS HEAVY IMPACTS MAY CAUSE INTERNAL DAMAGE.
BEFORE CONNECTING THE APPLIANCE, CHECK IF THE VOLTAGE INDICATED ON THE BOTTOM OF THE
APPLIANCE IS IN ACCORDANCE WITH THE MAINS VOLTAGE IN YOUR HOME.
CHECK THE APPLIANCE AND POWER CABLE CAREFULLY FOR DAMAGE BEFORE EACH USE.
THIS APPLIANCE CAN BE USED BY CHILDREN AGED FROM 8 YEARS AND ABOVE AND PERSONS WITH
REDUCED PHYSICAL, SENSORY OR MENTAL CAPABILITIES OR LACK OF EXPERIENCE AND KNOWLEDGE IF
THEY HAVE BEEN GIVEN SUPERVISION OR INSTRUCTION CONCERNING USE OF THE APPLIANCE IN A SAFE
WAY AND UNDERSTAND THE HAZARDS INVOLVED. CHILDREN SHALL NOT PLAY WITH THE APPLIANCE.
CLEANING AND USER MAINTENANCE SHALL NOT BE MADE BY CHILDREN WITHOUT SUPERVISION.
CHILDREN OF LESS THAN 3 YEARS SHOULD BE KEPT AWAY UNLESS CONTINUOUSLY SUPERVISED.
SOME PARTS OF THIS PRODUCT CAN BECOME VERY HOT AND CAUSE BURNS. PARTICULAR ATTENTION
HAS TO BE GIVEN WHERE CHILDREN AND VULNERABLE PEOPLE ARE PRESENT.
THE USE OF ANY ACCESSORY ATTACHMENTS NOT RECOMMENDED BY COOPERS OF STORTFORD MAY
CAUSE INJURIES AND INVALIDATE ANY WARRANTY YOU MAY HAVE.
DO NOT LET THE POWER CABLE TOUCH HOT SURFACES.
DO NOT COVER THE ITEM IN ANY WAY WHEN IN USE AS THIS MAY CAUSE OVERHEATING.
DO NOT USE THIS APPLIANCE FOR ANY OTHER USE THAN THE INTENDED USE IT IS DESIGNED FOR.
TO PROTECT AGAINST ELECTRIC SHOCK, DO NOT IMMERSE POWER CABLE, PLUG OR APPLIANCE, IN
WATER OR ANY OTHER LIQUID.
UNPLUG FROM OUTLET WHEN NOT IN USE AND BEFORE CLEANING.
•NEVER DIRECT STEAM TOWARDS PEOPLE, ANIMALS OR PLANTS.
•THE LIQUID OR STEAM SHOULD NOT BE DIRECTED TOWARDS EQUIPMENT CONTAINING ELECTRICAL
COMPONENTS, SUCH AS THE INTERIOR OF OVENS.
•STOP USING THE STEAM CLEANER IF YOU OBSERVE WATER LEAKAGE, AND CONTACT A QUALIFIED
TECHNICIAN.
•DO NOT USE THE STEAM CLEANER IN ENCLOSED SPACES THAT ARE FILLED WITH FLAMMABLE,
EXPLOSIVE OR TOXIC VAOUR SUCH AS PAINT THINNER OR OIL-BASED PAINT.
•DO NOT USE ON LEATHER, WAX POLISHED FURNITURE OR FLOORS, UNSEALED HARDWOOD OR
PARQUET FLOORS, SYNTHETIC FABRICS, VELVET OR OTHER DELICATE STEAM-SENSITIVE MATERIALS.
•DO NOT USE FOR SPACE HEATING PURPOSES.
•DO NOT PLACE ON OR NEAR A HOT GAS OR ELECTRIC BURNER, OR IN A HEATED OVEN.
•CARE SHOULD BE TAKEN WHEN USING APPLIANCE DUE TO EMISSION OF STEAM.
•TO AVOID CIRCUIT OVERLOAD, DO NOT OPERATE ANOTHER APPLIANCE ON THE SAME SOCKET (CIRCUIT)
AS THE STEAM CLEANER.
•DO NOT OPERATE ANY APPLIANCE WITH A DAMAGED POWER CABLE OR PLUG OR AFTER THE APPLIANCE
MALFUNCTIONS, OR HAS BEEN DAMAGED IN ANY MANNER. WE RECOMMEND THAT THE POWER CABLE
IS NOT KINKED OR STORED IN A TWISTED MANNER, AND THAT YOU REGULARLY CHECK ITS CONDITION.
•ANY REPAIRS MUST BE CONDUCTED BY A QUALIFIED ELECTRICIAN OR ELECTRICAL SERVICE AGENT.

12 in 1 Steam Cleaner Max H008 Instructions for Use
Please read and retain these instructions for future reference v001: 24/08/20
Page No. 4
WARNING: DANGER OF SCALDING
ASSEMBLY INSTRUCTIONS / INSTRUCTIONS FOR USE:
Unpack the components carefully. Please check all parts have been removed from the packaging.
Parts

12 in 1 Steam Cleaner Max H008 Instructions for Use
Please read and retain these instructions for future reference v001: 24/08/20
Page No. 5
Accessories
How to assemble the steam mop
Please make sure that the unit is unplugged from an electrical outlet and the power switch is in the
“OFF” position (O) before assembling the unit or changing the accessories.
1. Attach the MOP head to the main body as follows:
Insert the swivel joint into designated hole in the main
body until it locks in place with the lock button on the
main body (you will hear a clicking sound).
Make sure that the mop head is securely locked
before usage

12 in 1 Steam Cleaner Max H008 Instructions for Use
Please read and retain these instructions for future reference v001: 24/08/20
Page No. 6
2. Insert the handle tube into the designated opening in
the main body until it gets locked in place with the handle
tube lock button.
3. Insert the handle into the designated opening of the
handle tube until it gets locked in place with the handle
lock button.
Make sure both parts, the handle and the handle tube,
are secured in place before usage.

12 in 1 Steam Cleaner Max H008 Instructions for Use
Please read and retain these instructions for future reference v001: 24/08/20
Page No. 7
Caution: Never use the carpet glider on surfaces that are prone to scratching.
Never assemble or remove accessories while the unit is in operation.
How to use the steam cleaner
Please read before use
The Steam Cleaner is designed to thoroughly clean floor surfaces, such as marble, ceramic, carpet, stone,
linoleum, and sealed hardwood floors and parquet. Not all floor types are suitable for steam cleaning.
The heat and steam action may remove the wax on surfaces treated with wax. Do not use on unsealed
flooring or let unit stand on any wood or heat sensitive floor for an extended period of time. This could cause
the wood grain to rise, in addition to other types of damage.
When using on vinyl, linoleum or any other heat sensitive floors, use extra caution. Too much heat can melt
glue in the flooring. Use only on laminated flooring that has been laid professionally and without any gaps or
cracks that would permit the entry of moisture.
Test the Steam Cleaner on a small isolated area of your flooring prior to overall use on any floor surface.
Always check the use and care instructions of your flooring manufacturer or distributor before using the
4. Place the micro fibre cloth on the bottom of the mop
head and make sure all the loops on the cloth are aligned
with the gripping hooks on the bottom of the mop head
then press the cloth against the mop head so the loops on
the cloth catch the gripping strips on the mop head and
hold the pieces together
When using the steam cleaner on carpet surfaces, place
the mop head with micro fibre cloth in place, on top of
the carpet glider as illustrated in Fig 6a. Do not attempt
to use the steam cleaner unit on carpet/rug surfaces
without the carpet glider in place.

12 in 1 Steam Cleaner Max H008 Instructions for Use
Please read and retain these instructions for future reference v001: 24/08/20
Page No. 8
Steam Cleaner.
When in doubt, please consult a flooring specialist. Only use the carpet glider on carpeting and rugs. Use the
carpet glider on other floor surfaces will cause streaking and possibly scratching.
This product emits steam and creates moisture. Water marks, discoloration or damage to the floor surface
can occur if the unit is left operating too long in one place.
5. Fill the Water tank with water
Caution: Make sure the Steam Cleaner is unplugged.
Turn the water tank cap anti-clockwise approximately 90 ° to the “OPEN” position and remove the cap as
illustrated below.
Hold the mop at 45 ° angle as illustrated and add water in the tank up to the MAX level by using the
measuring cup.
Do not overfill. The maximum tank capacity is 400ml/13.5 OZ.

12 in 1 Steam Cleaner Max H008 Instructions for Use
Please read and retain these instructions for future reference v001: 24/08/20
Page No. 9
6. Once the unit has been fully assembled and filled with water, plug in the power cord to an earthed
electrical outlet. The RED light –Power indicator will indicate when power is on. Power Switch (O/I) is on
the OFF (O) position.
Wait for the Ready-to-use indicator to turn Green –approximately 20-30 seconds. GREEN light will turn
on when the steam cleaner is ready for use.
When the Ready-to-use indicator light turns Green turn the power switch (O/I) to the ON (I) position.
The steam cleaner will start emitting steam.
To stop emitting steam turn OFF (O) the unit by turning the power switch (O/I) to the OFF position again.
If the power switch (O/I) is turned prior to the Ready-to-Use light indicator turning green, water from the
previous use will not be heated and will be forced out by present steam and will cause puddling.
This may also happen if the power switch was left in the ON (I) position from the previous use and the unit
was disconnected by unplugging only. Make sure to turn the unit OFF after each usage and then disconnect
from the electrical outlet so the unit is in the OFF (O) position when used next time.
Replace the water tank cap and turn clockwise
approximately 90 ° to the “CLOSE” position until the cap is
tightened securely.
The Steam Cleaner uses tap water. However in areas with
hard water, distilled water should be used for better
performance.
Make sure the copper cone inside the water tank is always
submerged in water (as illustrated) while operating the
Steam Cleaner.
Note:
Never put cleaning detergent or scented products into the
steam cleaner. This will make the operation unsafe and
damage the unit.

12 in 1 Steam Cleaner Max H008 Instructions for Use
Please read and retain these instructions for future reference v001: 24/08/20
Page No. 10
7. Select one of the following Steam Regulator positions:
1 –Low –2-Medium, 3-High and 4-Hot spray
1-Low and 2-Medium Setting: Ideal for cleaning all hard floors, such as
linoleum, ceramic , marble, wood etc
3 High Setting: Ideal for cleaning bathrooms, kitchens, window sills, car
wheels etc. You can change the steam regulator position and change the
steam output while operating the steam cleaner.
8. Slowly pass over the surface to be cleaned. The absorbent mop cloth picks up the dirt loosened by the
steam. Apply steam liberally. Keep a towel handy and wipe away any excess water that may accumulate.
9. When the steam cleaner stops emitting steam, simply turn OFF and unplug the appliance, refill the water
tank and continue cleaning.
WARNING
Never leave the steam cleaner unattended while plugged in.
For best results:
1. Sweep or vacuum floor prior to using the steam cleaner.
2. To avoid puddling of water, the micro fibre cloth must be clean and dry for use. To replace the cleaning
cloth proceed as follows: Let the cleaning cloth cool down, remove cloth from unit, replace with a new
micro fibre cloth and continue use. Select low steam regulator position.
3. To sanitize the area of your floor, leave the Steam Cleaner at high steam setting over the steam area for
about 10 seconds but no longer than 15 seconds.
Note:
Do not carry out this procedure on heat and steam sensitive floors.
IMPORTANT
Never steam at one spot for too long. This can cause floor surface damage.
Do not put hands or feet under the steam cleaner. The unit gets very hot.

12 in 1 Steam Cleaner Max H008 Instructions for Use
Please read and retain these instructions for future reference v001: 24/08/20
Page No. 11
During use a pulsing noise may be heard indicating that the mop is producing steam. This noise is
normal.
There may be some minor “spitting” of water mixed with the steam. This is also normal.
The force and heat of the steam may adversely affect certain materials. Always check the suitability of
using the steam mop on a surface by carrying out a preliminary test on a hidden area.
Hand held steamer
The hand-held steamer is an ideal portable cleaner for use on work surfaces, worktops, sinks, windows,
mirror, tiles and spot cleaning on floors, carpets and rugs. Use it with the jet nozzle, brass brush or nylon
brush attachments to spray away dirt, grease, mould and more.
How to assemble hand-held steamer
CAUTION
Make sure that the steam cleaner is unplugged before assembly.
1. Remove the power cord from the upper cord wrap and lower cord wrap.
2. Press the handle tube lock button and remove the handle tube from the main body.
3. Press the lock button on the main body and remove the mop head.

12 in 1 Steam Cleaner Max H008 Instructions for Use
Please read and retain these instructions for future reference v001: 24/08/20
Page No. 12
4. To attach the jet nozzle insert the jet nozzle into the designated hole
in the main body until it locks in place with the lock button on the
main body (you will hear a clicking sound), as illustrated.
Make sure that the jet nozzle is securely locked in place before usage.
5. Push either the round nylon brush or round copper brush or triangle brush in the channel until it reaches
the end of the jet nozzle as illustrated below.
To remove either round brush, pull out from the jet nozzle.
The round nylon brush is great for cleaning smooth hard surfaces, such as toilets, sinks and kitchen
counters etc
The round copper brush is great for cleaning coarse or metal surfaces, such as brick floors, car wheels,
metal doors, and metal frames etc
Both brushes can also effectively clean the grease on pans, stoves and ovens in the kitchen. They can be
used with soap or detergent to clean dirty areas.
NOTE:
Never use the round brass brush on surfaces that are prone to scratching. Remove the mop head by pressing
the lock button on the main body or remove the jet nozzle following the same procedure.

12 in 1 Steam Cleaner Max H008 Instructions for Use
Please read and retain these instructions for future reference v001: 24/08/20
Page No. 13
Garment Steaming Tool
To use the window cleaning tool as a garment steamer install the micro fibre cloth or the lint cloth over the
window/cleaner garment steamer (as illustrated)
Insert the window cleaning tool in the designated hole in the main body until it locks in place with the lock
button on the main body (you will hear a clicking sound).
To remove or replace, press the lock button on the main body and remove it.
Duster
Install the cleaning coral cloth onto the duster frame (as illustrated).
Insert the duster into the designated hole in the main body until it locks
in place with the lock button on the main body (you will hear a clicking
sound).
To remove or replace, press the lock button on the main body and
remove the duster.

12 in 1 Steam Cleaner Max H008 Instructions for Use
Please read and retain these instructions for future reference v001: 24/08/20
Page No. 14
How to use hand-held steamer
CAUTION
Make sure that the steam Cleaner is unplugged.
1. Fill the water tank with water. Please refer to the “HOW TO USE THE STEAM CLEANER” section in this
manual.
Attach either the round nylon brush or the round copper brush as explained in the “How to assemble h
and held steam cleaner” section in this manual.
2. Once the unit has been fully assembled and filled with water, plug in the power
cord into an earthed electrical outlet.
RED light –Power indicator will indicate when power is on.
GREEN light will turn on when the steam cleaner is ready for use.
When the ready-to-use indicator light turns green turn the power switch (O/I)
to the ON (I) position. The hand held steam cleaner will start emitting steam.
3. Select one of the following steam regulator option:
1 –Low, 2 –Medium, 3 –High or 4 –Hot Spray.
You can change the steam regulator position and the steam output while
operating the steam cleaner.
To stop emitting steam, turn OFF the unit by turning the power switch (O/I) to the
OFF (O) position. If the power switch is turned prior to the Ready-to-Use light indicator turning green, water
from previous use will not be heated and will be forced out by present steam.
This may also happen if the Power Switch (O/I) was left in the ON (I) position after previous use and the unit
was disconnected by unplugging only.
Make sure to turn the unit off after each use and then disconnect from the electrical outlet so the unit is in
the OFF (O) position when used next time.
4. Slowly pass over surfaces to be cleaned. Apply steam liberally. Keep a towel handy and wipe away any
excess water that may accumulate.
5. When the hand held steam cleaner stops emitting steam, simply turn OFF and unplug the unit, refill the
water tank and continue cleaning.

12 in 1 Steam Cleaner Max H008 Instructions for Use
Please read and retain these instructions for future reference v001: 24/08/20
Page No. 15
To sanitize your work surfaces, kitchen countertops, sinks, bathrooms, etc use the hand-held steam
cleaner over the same area for about 15 seconds.
NOTICE
Do not carry out this procedure on heat and steam sensitive surfaces. The force and heat of the steam
cleaner may adversely affect certain materials. Always check the suitability of using the steam cleaner on a
particular surface by first testing a hidden area.
WARNING
Never direct steam towards people, animals or plants.
NOTICE
Do not use the steam cleaner to clean frozen windows.
Be careful when using the steam cleaner on glass, as it may break.
Do not use steam cleaner on leather, wax polished furniture or waxed floors, synthetic fabrics, velvet or
other delicate steam sensitive materials.

12 in 1 Steam Cleaner Max H008 Instructions for Use
Please read and retain these instructions for future reference v001: 24/08/20
Page No. 16
How to use Optional Accessories
Window Cleaning Tool
Make sure the Steam Cleaner is unplugged.
1. Fill the water tank with water. Please refer to the “How to use the steam cleaner”
section in this manual.
2. Install the coral cloth onto the window cleaning tool and attach the window cleaning
tool to the main body as described in “How to assemble the optional accessions”
section in this manual.
3. Follow Steps 2 and 3 described in the”How to use the hand-held steam cleaner”
section in this manual.
4. Hold the hand-held steamer in one hand as illustrated.
5. Slowly pass over glass (or other similar) surface to be cleaned. Apply steam liberally.
6. When the hand-held steam cleaner stops emitting steam, simply turn off and unplug the unit, refill the
water tank and continue cleaning.
7. Once you finish cleaning, allow the coral cloth to cool down and carefully remove it from the window
cleaning tool, as cleaning cloth could still be hot.
NOTICE
Do not use the steam to clean frozen windows.
Be careful when using the steam cleaner on glass, as it may break.
Garment Steamer
Make sure the steam cleaner is unplugged.
1. Fill the water tank with water. Please refer to the “How to use the steam mop” section in this manual.
2. Install the garment steamer cloth onto the window cleaning/garment steaming tool and attach the
window cleaning/garment steaming tool to the main body as described in the “How to Assemble the
optional Accessories” section in this manual.
3. Select one of the following steam regulator position:

12 in 1 Steam Cleaner Max H008 Instructions for Use
Please read and retain these instructions for future reference v001: 24/08/20
Page No. 17
1 Low or 2 –Medium when using the garment steamer.
Do not use 3 –High and 4 –Hot Spray steam settings when using the garment steamer.
You can change the steam regulator position and steam output while operating the steam cleaner.
4. Follow Step 3 described in the “How to Use the Hand-Held Steamer” section in this manual.
5. To steam garment, place item of clothing on the hanger and steam the garment directly.
Slowly slide the garment steamer head vertically from the top to the
bottom of the garment. You may also reverse this motion and steam
from the bottom to the top.
Curtains and draperies can be steamed while they are hanging.
NOTICE
Please refer to the label on item of clothing to check if garment can be steamed.
Some fabrics like leather, suede, and velvet may not be suitable for steaming.
If you are not sure then steam a small part of the inside of the garment to test that it does not damage the
fabric before steaming the entire garment or fabric.
DANGER OF SCALDING
Do not touch the garment steamer tool/cloth during usage, as these components can get extremely hot.
Keep the extension hose away from your body and avoid touching the hose as it can get hot.
6. When the hand-held steamer stops emitting steam, simply turn off and unplug the unit, refill the water
tank and continue cleaning.
7. Once you finish cleaning allow the garment steamer cloth to cool down and carefully remove it from the
window cleaning tool, as the garment steamer cloth could still be hot.

12 in 1 Steam Cleaner Max H008 Instructions for Use
Please read and retain these instructions for future reference v001: 24/08/20
Page No. 18
Duster
Make sure the steam cleaner is unplugged.
1. Fill the water tank with water. Please refer to the “HOW TO
USE THE STEAM CLEANER” section in this manual.
2. Install the coral cloth onto the duster frame and attach the
duster to the main body as described in “How to Assemble the
Optional Accessories” section in this manual.
3. Select one of the following steam regulator positions
1 –Low, 2 –Medium or 3 –High
Do not use 4 –Hot Spray steam setting when using the
Duster.
You can change the steam regulator position and change the steam output while operating the Steam
Cleaner.
4. Follow Step 3 described in the “How to Use the Hand-Held Steamer” section in this manual.
Slowly pass over surface to be cleaned. The absorbent coral cloth picks up the dirt loosened by the steam.
Keep a towel handy and wipe away any excess water that may accumulate.
DANGER OF SCALDING
Do not touch the duster/coral cloth during usage, as these components can get extremely hot.
Keep the extension hose away from your body and avoid touching the hose as it can get hot.
5. When the hand-held steamer stops emitting steam, simply turn off and unplug the unit, refill the water
tank and continue cleaning.
WARNING DANGER OF SCALDING
Do not touch the window cleaning/garment steamer tool or the lint cloth during usage, as these
components can get extremely hot.
Keep the main body away from your body and avoid touching the hose, as it can get hot.
6. When the hand-held steamer stops emitting steam, simply turn off and unplug the unit, refill the water

12 in 1 Steam Cleaner Max H008 Instructions for Use
Please read and retain these instructions for future reference v001: 24/08/20
Page No. 19
tank and continue cleaning.
7. Once you finish cleaning allow the lint cloth to cool and carefully remove it from the window cleaning
tool as the lint cloth could still be hot.
Coral Cloth for Mop Head
Attach the triangle shaped coral cloth to the mop head following the same instructions as provided for the
micro fibre cloth with hook and loop tape in the “How to assemble the steam cleaner” section in this
manual.
The coral cloth is soft and durable with hundreds of absorbing fringes, ideal for your sealed hardwood,
ceramic and other types of flooring.
After use
1. Unplug power cord from outlet.
2. Allow mop pad/cloths to cool down and carefully remove cleaning cloth from mop head, as cleaning
cloth could still be hot.
3. Any water remaining in the water tank should be emptied prior to appliance storage. Always empty the
water tank at the end of each use.
4. Let any water (that may remain as a product of condensation) drain from the steam opening prior to
storing the appliance.
5. Wrap power cord around upper and lower cord wrap.
6. Wipe all surfaces of the steam cleaner with a soft cloth. Store in a protected, dry area.
7. Please store the unit in a cool and dry place when not in use. Do not leave it exposed to sunlight or rain.
8. Upright storage of the steam cleaner with a wet mop pad/cloth may result in the formation of white
marks on your floor. To remove the white marks, clean area with vinegar. Make sure to remove the mop
pad/cloth before storage.

12 in 1 Steam Cleaner Max H008 Instructions for Use
Please read and retain these instructions for future reference v001: 24/08/20
Page No. 20
Cleaning and Maintenance
Warning
Be sure that the unit is disconnected from the power outlet when performing cleaning.
Drain the remaining water in the water tank and clean the tank after every use.
Please use detergent to clean the accessories (jet nozzle and round brush)( when they are dirty, then wash
with clean water and air dry.
How to descale the water tank interior:
To clean calcium deposits that build up inside the water tank, add one or two tablespoons of white vinegar
to a full water tank, close the water tank cap and shake the contents. DO NOT TURN THE STEAM CLEANER
ON.
Let the unit sit for a few hours. Then, empty the water tank and refill with clean water and empty until it
rinses clear.
WARNING
DO NOT IMMERSE THE STEAM CLEANER IN WATER.
Cleaning procedures to remove lime scale
If your Steam Cleaner begins to product steam more slowly than usual or stops producing steam you may
need to remove the lime scale. Lime scale can develop over time on the metal parts and greatly affect mop
performance.
It is necessary to remove lime scale on a regular basis, every 25-50 times you use a full tank of water or at
least once a month, especially in areas with hard water.
The frequency of lime scale removal depends upon the hardness of your tap water and how often you use
the steam cleaner.
Table of contents
