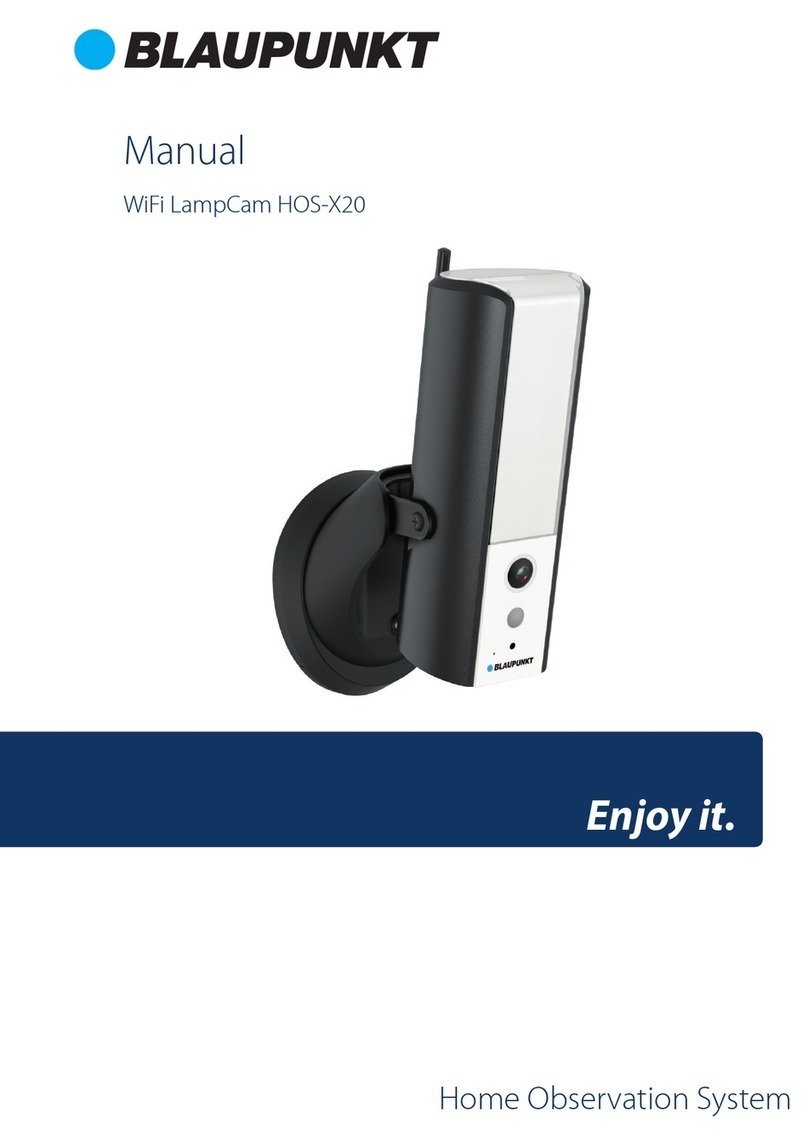
bewello BW2030 User manual

Smart CamAir
Überwachungskamera Smart
Smart biztonsági kamera
Smart bezpečnostní kamera
Smart bezpečnostná kamera
Cameră de supraveghere
inteligentă pentru interior
USER MANUAL
HUEN ROSKCZDE
Product Nr. BW2030
288ZD-2MP

2
English............................................... 3
Deutch .............................................. 11
Magyar.............................................. 19
Český................................................. 27
Slovenský.......................................... 35
Română ............................................ 43
CONTENTS
INHALT
TARTALOMJEGYZÉK
OBSAH
OBSAH
CONȚINUT

3
1. Main functions
2. Download application
Search for the‚Tuya’app in the Apple App Store / Google Play or scan the QR code below to
download.
EN
Smart CamAir
Full HD
1080p
Night Vision
Cloud StorageSD Card Slot Wi-Fi
Multi-User
Viewing
Encrypted
Protection
Two Way
Audio
To download the program, use your phone’s
camera to read the QR code below.

4
3. Register / Log in with an existing account
1. Registration
If you don’t already have an App account, you can sign up for an account or sign in with
an SMS verication code. Please read the current and next page for a description of the
registration.
Click„Create New Account”, go to the Privacy Policy page in theTuya App, read and click the
„Agree”button, and go to the phone number or Email registration page.

5
2. Log in with an existing acount
If you have previously registered an account, you can skip creating a new account, click the
„Sign in with an existing account”button, enter your login information.
1. The system automatically selects the current country / region or you can select the
country / region manually
2. Enter your registered mobile number or e-mail address, enter your password to log in
to the system.

6
3. Add device
QR code pairing (recommended)
The product only supports the 2.4 GHz Wi-Fi network. It does not support 5GHz Wi-Fi network.
Wi-Fi password can not contain ~!@#$%^&(),- special characters. Accordingly, congure the
router device if necessary. When setting up the camera’s Wi-Fi, make sure the router, mobile,
and camera are as close together as possible for quick conguration.
• The app supports QR code net pairing and Wi-Fi connection. Other options can be
selected by adding the tool. (Figure 0)
• Turn on the camera and wait for the“Wait forWi-Fi cong *”sound (if you did not hear
anything at all, click the“reset”button and try again to restore the factory settings).
• When your mobile phone is connected toWi-Fi, click the“Add Device or“ + ”button on
the Application home page (Figure 1), select the“ Security and Video Surveillance ”icon
(Figure 2) -»“Smart Camera”, click the“next step”button (Figure 3).
• Enter theWi-Fi name and password, click the„Conrm”button (Figure 4).
Figure 0 Figure 1 Figure 2

7
Figure 3 Figure 4
When you hear ”Connect Router”, click on the
”Connect Internet” button and wait for the
connection After successful pairing, you can
set the device name and location. (The latter
is important if you have many tools.) Follow
the steps above to connect the WiFi high-speed
network setting.
Hold the screen of your mobile phone in front
of the camera (Figure 5), the distance between
the two should be 15-20 cm. Do not shake
the mobile phone during scanning, you can
move it closer and farther in slow motion for
a successful scan.
Figure 5

8
4. Function description
Real time preview image
1. Setting and operation
2. Wi-Fi signal
3. Sound on/o
4. SD/HD resolution
5. Full screen
6. Screenshot
7. Voice chat
8. Capture live view
9. PlayVideo
10. Cloud Storage
11. PTZ control (The camera can be
rotated arbitrarily to get a dierent
perspective.You can move it up and
down to capture the corners you
want to view)
12. Motion Detection Alarm (You can
set the camera to notify you when
motion is detected or follow the
movement by turning the camera)
If you do not see the menu icon,
you may need to scroll down. If you
set the alarm level according to the
camera view, then you get more
accurate feedback.
13. Photo Album

9
Click the edit (pencil) button in the upper right corner of the control page to manage and
congure the device.
• Device name - changes the device name and location
• Share device share this device with others, enter people’s mobile numbers; (Note: the
mobile number entered must be registered with aTuya App account).
• Device info - to view: Device ID, Wi-Fi signal strength, IP address, Mac address,
Device time zone.
• Motion Detection: You can set the motion sensor switch and the motion
sensor alarm sensitivity.
• Memory card settings switch.
• Value-added service purchase - video cloud storage service (optional according to
customer needs).
• Firmware Information - Supports OTA
remote upgrade (do not disconnect
during upgrade).
• Video Cloud Storage: After purchasing
the service, the device can encrypt and
upload the video recording data to
the server, and the user can view the
recorded video on the App at any time.

10
Q: Fail to add device during net-pairing?
A: Please make sure the mobile phone and device are connected to 2.4GHz router. Make sure
the correctWi-Fi password is entered.
Q: Still fail to add device after re-scanning?
A: If fail to add device, it is recommended to restart the device or power o the device, and
try again.
Q: The device cannot preview?
A: Check for weak Wi-Fi signal.You can place the camera close to the router. If it still doesn’t
work, reset the device, and add it again.
Q: Why the device is still on the list after resetting the device?
A: The device resetting only resets the camera’s network conguration and cannot change the
conguration on the App.You must log in the App to delet the camera from the list
Q: How to connect the camera to another router?
A: First log in the App to delete and reset the device, and congure the device again through
the App.
Q: Why the device cannot identify microSD card?
A: It is recommended to insert and remove the microSD card after power o the device. Check
if the microSD card is under normal service conditions and the format is FAT32. The App shall
suggest „could not nd microSD card” under unstable network of the mobile phone or the
device.
Q: The device is online and has an alarm event, but the mobile phone cannot
receive the information?
A: First conrm that App allows notication in the settings of your mobile phone. Under
normalcircumstances,when an anomaly isdetected,a message will appearin the notication
bar of your mobile phone. Your should set a notication sound or vibration in your mobile
phone. In addition, when viewing the real-time video in the App, you cannot receive alarm of
the camera I being viewed. Because the device defaults the camera being viewed indicating
that the user is focusing on the monitoring video, and there is no need for an alarm. Using
the advanced intelligent alarm push algorithm to ensure that the alarm message will not be
frequently, but the camera will record all the alarm messages and videos.

11
1. Hauptfunktionen
2. Applikation herunterladen
Suchen Sie im Apple App Store/Android App Market nach der App ”Tuya”oder scannen Sie den
folgenden QR-Code, um die App herunterzuladen.
DE
Überwachungskamera Smart
Full HD
1080p
Nachtsicht
Cloud-SpeichermicroSD
Kartensteckplatz
Wi-Fi
Mehrbenutzer
anzeige
Verschlüsselter
Schutz
Sprachchat
Lesen Sie mit der Kamera Ihres Handys den folgenden
QR-Code, um die Applikation herunterzuladen.

12
3. Registrieren / Mit vorhandenem Benutzerkonto anmelden
1. Registrieren
Wenn Sie noch kein App-Konto haben, können Sie ein Konto registrieren oder sich mit
einem SMS-Bestätigungscode anmelden. Bitte lesen Sie die nächsten Schritte zur
Beschreibung des Registrierungsprozesses.
Klicken Sie auf „Neues Konto erstellen”, gehen Sie in der Tuya-App zur Seite
Datenschutzrichtlinie,lesen Sie sie durch. Klicken Sie dann aufdie Schaltäche„Zustimmen”
und klicken und gehen Sie zur Registrierungsseite fürTelefonnummer oder E-Mail-Adresse.

13
2. Mit vorhandenem Benutzerkonto anmelden
Wenn Sie bereits ein Konto registriert haben, können Sie das Erstellen eines neuen Kontos
überspringen, klicken Sie auf „Mit vorhandenem Benutzerkonto anmelden” und tragen Sie
Ihre Anmeldedaten ein.
1. Das System wählt automatisch das aktuelle Land / die aktuelle Region aus, oder Sie
können das Land / die Region manuell auswählen.
2. Geben Sie Ihre registrierte Handynummer oder E-Mail-Adresse ein und geben Sie Ihr
Passwort ein, um sich im System anzumelden.

14
4. Gerät hinzufügen
Verbindung per QR-Code (empfohlen)
Das Produkt unterstützt nur ein 2,4-GHz-WLAN-Netzwerk. Es unterstützt kein 5-GHz-WLAN-
Netzwerk. Das WLAN-Passwort sollte keine Sonderzeichen von ~!@#$%^&(),- enthalten.
Kongurieren Sie das Router-Gerät entsprechend, falls erforderlich. Stellen Sie bei der
Konguration von WLAN sicher, dass sich Router, Handy und Kamera so nahe wie möglich
benden, um eine schnelle Konguration des Geräts zu ermöglichen
• Die App unterstützt die Verbindung per QR-Code und WLAN-Verbindung. Sie können
das Gerät über andere Optionen hinzufügen. (Abbildung 0.)
• Schalten Sie die Kamera ein und Sie können den Laut „Wait for Wi-Fi cong” hören
(wenn Sie überhaupt nichts gehört haben, klicken und halten Sie die Taste„Reset“ 20
Sekunden lang gedrückt, um dieWerkseinstellungen wiederherzustellen).
• Wenn das Handy eine Verbindung zum WLAN herstellt, klicken Sie auf dem
Startbildschirm der App auf das Symbol „Gerät hinzufügen“ oder “+” (Abbildung 1),
wählen Sie „Sicherheit und Sensoren“ (Abbildung 2) -» „Intelligente Kamera“ und
klicken Sie auf„nächster Schritt“ (Abbildung 3).
• Geben Sie dem WLAN-Namen und das Passwort ein und klicken Sie auf„Bestätigen”
(Abbildung 4)
Abbildung 0 Abbildung 1 Abbildung 2

15
Abbildung 3 Abbildung 4
Wenn Sie ”Connect Router” hören, klicken Sie
auf ”Connect Internet“ und warten Sie, bis die
Verbindung hergestellt ist. Gerät erfolgreich
hinzugefügt, Sie können Sie Gerätenamen
und den Ort einstellen. (Letzteres ist nur dann
wichtig, wenn Sie viele Geräte haben.)
Halten Sie den Bildschirm Ihres
Handys vor die Kamera (Abbildung 5).
Der Abstand zwischen beiden sollte
15-20 cm sein. Schütteln Sie das Handy
während des Scannens nicht. Sie können es für
einen erfolgreichen Scan langsam näher und
ferner bewegen.
Abbildung 5

16
5. Funktionsbeschreibung
Echtzeit-Vorschau-Oberäche
1. Einstellung undVerwaltung
2. WLAN-Signalstärke
3. Tonschalter
4. SD/HD Bildqualität
5. Vollbild
6. Bildschirmfoto
7. Sprachchat
8. Echtzeitvideo aufnehmen
9. Videowiedergabe
10. Cloud-Speicher
11. PTZ-Steuerung (Die Kamera kann
gedreht werden, um eine andere
Perspektive zu erhalten. Sie können
sie nach oben und unten bewegen,
um jede Ecke zu erfassen, die Sie
anzeigen möchten.)
12. Bewegungserkennungsalarm
(Benachrichtigung durch
intelligente Bewegungserkennung
Alternativ können Sie der
Bewegung folgen, indem Sie die
Kamera drehen.)Wenn Sie den
Menüpunkt nicht sehen, müssen Sie
möglicherweise nach unten scrollen
13. Fotoalbum

17
Klicken Sie auf die Schaltäche Bearbeiten (Bleistift) in der oberen rechten Ecke der
Steuerungsseite, um das Gerät zu verwalten und zu kongurieren.
• Gerätename - Sie können den Gerätenamen und den Ort ändern;
• Gerät teilen - Teilen Sie dieses Gerät mit anderen, Sie können auch
Handynummern teilen. (Hinweis: Die eingetragene Handynummer muss mit Tuya
App-Konto registriert werden.)
• Geräteinformationen - zum Anzeigen: Geräte-ID,WLAN-Signalstärke, IP-Adresse, MAC-
Adresse, Gerätezeitzone.
• Bewegungserkennung Sie können den Schalter und die Alarmempndlichkeit des
Bewegungssensors einstellen.
• Einstellungen der Speicherkarte Schalter.
• Mehrwertdienste kaufen - Video-Cloud-Speicherdienst (optional je nach
Kundenwunsch).
• Firmware-Informationen - Unterstützt
dasOTA-Remote-Update(dieVerbindung
während des Updates nicht trennen).
• Video-Cloud-Speicherdienst: Nach dem
Kauf des Dienstes kann das Gerät die
Videoaufzeichnungsdaten verschlüsseln
und auf den Server hochladen, und der
Benutzer kann sich das aufgezeichnete
Video jederzeit in der App anschauen.

18
F: Haben Sie Fehler beim Hinzufügen des Geräts während des Netzkoppelns?
A: Bitte stellen Sie sicher, dass das Handy und das Gerät an einen 2,4-GHz-Router
angeschlossen sind. Stellen Sie sicher, dass das richtige WLAN-Passwort eingegeben wurde.
F:Können Siedas Gerätnach dem erneutenScannenimmer noch nichthinzufügen?
A: Wenn das Gerät nicht hinzugefügt werden kann, wird empfohlen, das Gerät neu zu starten
oder das Gerät auszuschalten und es erneut zu versuchen.
F: Kann das Gerät keine Vorschau anzeigen?
A: Überprüfen Sie, ob dasWLAN-Signal schwach ist. Sie können die Kamera näher am Router
platzieren. Wenn es immer noch nicht funktioniert, setzen Sie das Gerät zurück und fügen
Sie es erneut hinzu.
F : Warum ist das Gerät nach dem Zurücksetzen des Geräts immer noch in der Liste?
A : Das Zurücksetzen des Geräts setzt nur die Netzwerkkonguration der Kamera zurück und
kann die Konguration in der App nicht ändern. Sie müssen die Kamera aus der Liste löschen.
F: Wie kann ich die Kamera an einen anderen Router anschließen?
A: Melden Sie sich zuerst in der App an, um das Gerät zu löschen und zurückzusetzen, und
kongurieren Sie das Gerät erneut über die App.
F: Warum kann das Gerät die microSD-Karte nicht identizieren?
A: Es wird empfohlen, die microSD-Karte nach dem Ausschalten des Geräts einzulegen und zu
entfernen. Überprüfen Sie, ob sich die microSD-Karte unter normalen Betriebsbedingungen
bendet und das Format FAT32 ist.
F: Das Gerät ist online und hat ein Alarmereignis, aber das Handy kann die
Informationen nicht empfangen.
A: Stellen Sie zunächst sicher, dass die App eine Benachrichtigung in den Einstellungen
Ihres Handys zulässt. Wenn unter normalen Umständen eine Anomalie festgestellt wird,
wird in der Benachrichtigungsleiste Ihres Handys eine Meldung angezeigt. Sie sollten einen
Benachrichtigungston und eine Vibration auf Ihrem Handy einstellen. Außerdem können
Sie beim Anzeigen von Echtzeitvideos in der App keinen Alarm von der angezeigten Kamera
erhalten. Da die Kamera angezeigt wird, werden Sie keine Benachrichtigung oder Alarm
erhalten. Verwenden Sie den fortschrittlichen intelligenten Alarm-Push-Algorithmus, um
sicherzustellen, dass die Alarmmeldung nicht häug angezeigt wird, die Kamera jedoch alle
Alarmmeldungen undVideos aufzeichnet.

19
1. Főbb funkciók
2. Applikáció letöltése
Keressen rá a ”Tuya” applikációra az Apple App Store/Android App Market-ben, vagy
scannelje be az alábbi QR kódot a letöltéshez.
HU
Smart biztonsági kamera
Full HD
1080p
Éjjellátó
funkció
Felhő tárhelymicroSD
kártya
Wi-Fi
Többfelhasználós
megtekintés
Titkosított
védelem
Kétirányú
kommunikáció
A program letöltéséhez telefonja kamerájának
segítségével olvassa le az alább QR kódot.

20
3. Regisztráció / Létező felhasználói ókkal történő belépés
1. Regisztráció
Ha még nincs App-ókja, regisztrálhat egy ókot, vagy bejelentkezhet SMS-ellenőrző
kóddal. Kérjük, olvassa el az aktuális és a következő oldalt a regisztráció leírásához.
Kattintson az„Új ók létrehozása”elemre, lépjen be az Adatvédelmi irányelvek oldalra a
Tuya App alkalmazásban, olvassa el, majd kattintson az “Egyetértés” gombra, és lépjen
tovább a telefonszám vagy E-mail cím regisztrációs oldalra.
Table of contents
Languages:
