Bhaptics TACTOSY for Arms Guide

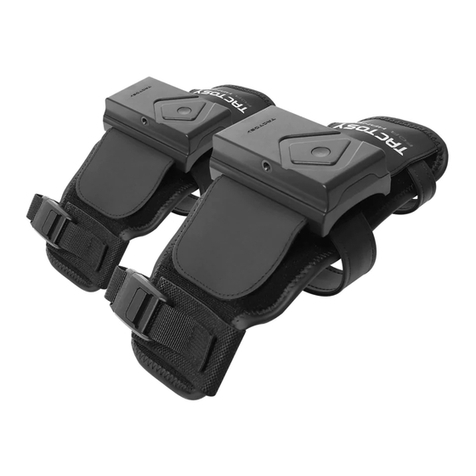
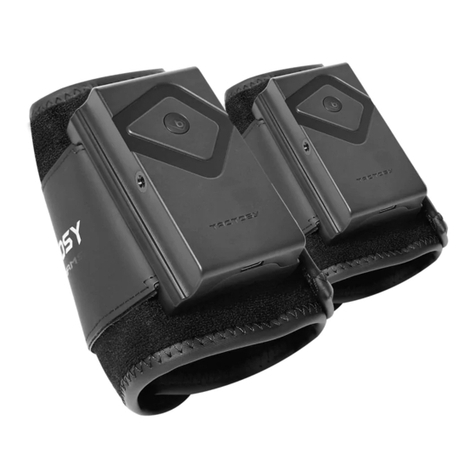
Haptics Sleeves for Arms
User Manual &
Warranty
www.bhaptics.com
© 2022 bHaptics Inc. All rights Reserved.

Before Getting Started
Be sure to read the user manual before using the product to ensure safe and
proper use of the product.
• Please read carefully the bHaptics Limited Warranty before using the product.
• Do not use the product for any purpose other than the intended purpose.
• Do not attempt to modify, disassemble or repair the product.
• Do not drop the product or subject the product to other forms of strong impacts.
• Users with sensitive skin should avoid wearing the product directly on the skin.
• Do not excessively pull on the main straps while putting on the product, as it may irritate
your body.
• This product is not waterproof. Store the product in a dry place free from humidity and
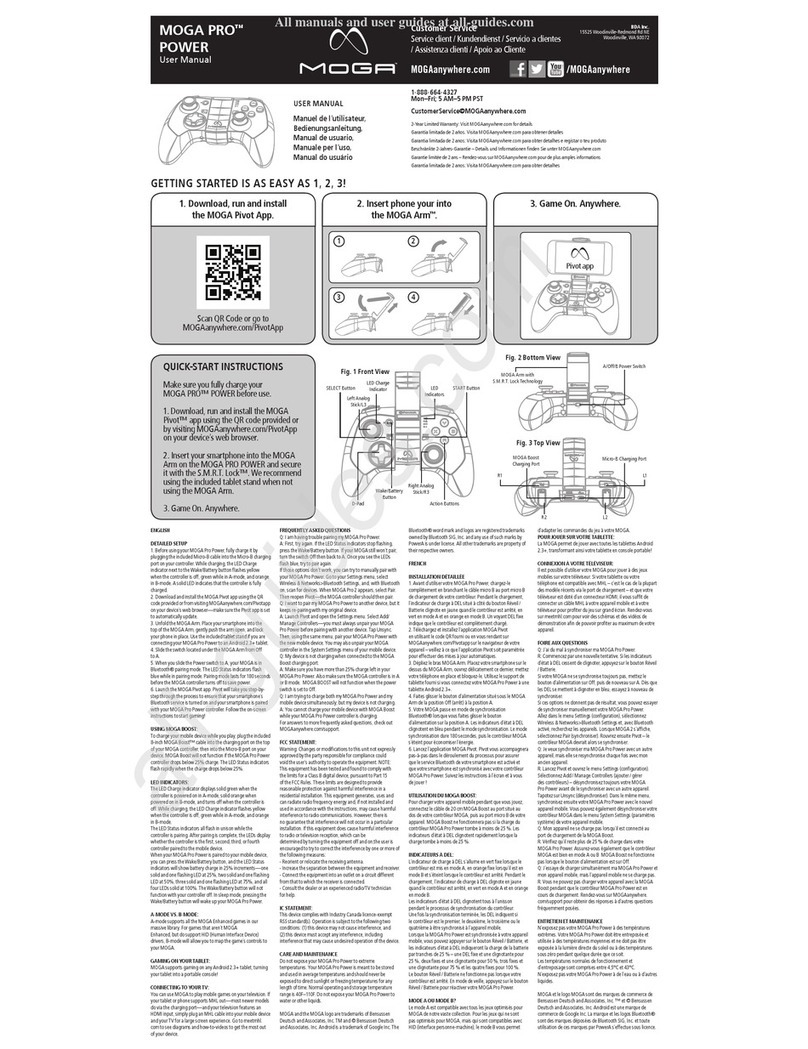
moisture.
• The main body of the product contains electronic components and must not be washed in
water under any circumstances. Should the product need to be cleaned, gently wipe it with
a soft cloth. The Inner lining may be removed, and machine washed with neutral detergent.
(Do not use strong chemicals or strong detergents.)
• The latest user manual for the device and related software can be found at https://www.
bhaptics.com/support/downloads.

Table of Contents
01 Overview General Information 4
What’s in the Box 4
Part Names 5
LED Indicator 6
02 Getting Started Product Charging 7
Product Fitting 8
Power On / Off 9
Enjoy 10
03 How to Play PC VR 12
Standalone VR 16
Music / Movie 17
04 bHaptics Software bHaptics Player (PC) 19
bHaptics Player (Mobile) 22
bHaptics Studio 24
bHaptics Designer 26
05 Appendix Product Specifications 27
Support 28
Health & Safety Warnings 30
Cautions 34
Limited Customer Warranty 39

4Overview
Basic Components
Tactosy for Arms
(Pair)
Inner
Lining*
Bluetooth
Dongle
USB Type C
Charging Cable (Pair)
User Manual
& Warranty
*Inner Lining is attached to the device
Tactosy for Arms is a haptic sleeve for arms. Feel gun
recoils and shied blocks in FPS games or bass/rhythm in
Music/Movie.
Additional Components (purchased separately)
Additional Components can be purchased from bHaptics online shop.
Additinal Inner Lining
What’s in the Box
bhaptics.com/shop
Overview
01

Overview 5
Part Names
Main Strap
Velcro
Metal Loop
Power Button
& LED Indicator
Haptic Motors * 6
Main Strap Inner Lining
This product uses 3.8V, 2900mAh, and 11Wh battery and charges to 5V (maximum 2A).
Charging Port
Velcro
Main Controller

6Overview
LED State Indication
Blue Blinking Bluetooth Pairing
Blue Solid Bluetooth Paired (Left)
Green Solid Bluetooth Paired (Right) / Updating Firmware
Red Solid Low Battery / Charging / Ready for Firmware Update
No Light Fully Charged
LED Indicator 02

Getting Started 7
Getting Started
02
Product Charging
Fully charge the device before using your Tactosy for the first time.
You can use 2A charging cable included in the package to charge the device. It takes about 1.5
hours to fully charge the device using 2A charging current. When fully chared, the LED indicator will
turn off.
Be sure to use an authorized AC adapter and included charging cable to charge the product. Use of an
unauthorized device or accessory may result in personnel injury, may cause damage of the product or
your property, and may void your warranty.
If the product is left unattended for a long time while the battery is discharged, the LED may not light
even if the charging cable is connected. In this case, the light turns on again after charging for more
than 1 hour.
Red Solid No Light
Charging Fully Charged

8Getting Started
Product Fitting
1
Loosen the main strap by detaching from the velcro.
2
Wear the device on your arm and then pull the main strap to adjust the fitting.
3
Attach the end of the main strap to the velcro to fasten the device around your
arm.
※ Size Control
To account for more variation of sizes,
unfold or fold the end of the strap
before securing the velcro.
※

Getting Started 9
Power On / Off
Power on
Click the power button on the main controller, the LED indicator will blink blue as it waits for
pairing.
Push Ready to be Paired
when Blinking Blue
If the Power does not turn on, check if it is sufficiently charged.
Power Off
Not Paired (Blinking LED)
A short click of the power button will turn off the device.
※The device will be turned off automatically if it is left unpaired for 3 minutes.
Paired (Solid LED)
A long press for 3 sec of the power button will turn off the device.
※Once the device is turned on again, it will automatically be connected to the previously
paired host device, such as VR HMD, PC, and Mobile.
※If ‘Turn off After’ feature is activated, the device will be turned off automatically when there
has been no vibration for a designated amount of time. The activation of the feature and the
time setting can be done from the bHaptics Player software.*
*Refer to p. 21 for more details

10 Getting Started
Enjoy
Enjoy state-of-the-art haptic feedback and seamless connectivity for VR and Movie/Music.
03

How to Play 11
How to Play
03
Playing Content without
Embedded Haptics
Playing Content with
Embedded Haptics
Audio-based Haptics
(Wireless)
Embedded Haptics
PC VR
Standalone VR
Music/Movie
Go to Setup

12 How to Play
Playing Content with Embedded Haptics
Embedded haptic feedback for this content will be delivered according to the events, enhancing
your immersion more than ever before.
1) Pairing the Tactosy with PC
PC VR
1
Install Bluetooth Driver
• Insert the provided dongle into a USB port on your Windows PC. The driver will be
automatically installed.
• If you have previously installed other Bluetooth drivers, open [Device Manager] >
[Bluetooth] on Windows, and disable all previously installed Bluetooth drivers except
‘Generic Bluetooth Radio’, ‘Bluetooth Enumerator’, ‘Bluetooth LE enumerator.’
Do NOT try pairing on Windows Settings.
2
Install and run bHaptics Player
www.bhaptics.com/support/download
3
Right click the blinking device icon and click “Pair”
The blue LED indicates the left side, and the green LED indicates the right side.
Paired
(Right)
4
(If necessary) Right click the device icon and click “Swap to Right/Left” to
swap the right and left sides of the paired devices.
Paired
(Left)

How to Play 13
2) Open “bHaptics Portal”
Be sure to disable the "Audio-based Haptics" feature. Leaving the feature ON will deliver
automatic feedback generated by the "Audio-based Haptics" function instead of the
content's embedded feedback.
PC VR
ClickClick
ClickClick
Not all listed content supports Tactosy for Arms. Please find the supported content for
each device from the official webpage (
https://www.bhaptics.com/experiences/vr
).
Some content requires mod tool installation.
The installation guide can be found by clicking “ ” icon from each game page.
3) Choose the content you want to play and install it

14 How to Play
Enjoying Audio-based Haptics (Wireless)
Audio-based Haptics feature creates haptic feedback in real time based on audio output of
content. You can now enjoy all content regardless of native integration.
2)
1)
3)
4)
Playing content without Embedded Haptics
PC VR

How to Play 15
PC VR
1) Pairing the Tactosy with PC*
* Refer to p. 12
2) Turn on Audio-to-Haptic function
When Audio-to-Haptic function and audio signals are on, the audio signal animation will
appear on the device icon.
3) Click to sync audio capturing device and playback device
of Windows
4) Select Content Type (VR / PC FPS / Music) and Profile you
will be using
※Click to customize frequency, threshold, activation area
using bHaptics Studio*
*Refer to p. 24 for more details

16 How to Play
Playing Content with Embedded Haptics
Check the Standalone VR content with embedded haptics at
www.bhaptics.com/games
.
Not all listed content supports Tactosy for Arms. Please find the supported content for each device
from the official webpage (
https://www.bhaptics.com/experiences/vr
).
Standalone VR
1) Pairing the Tactosy with Oculus Quest
① Go to oculus quest system [⚙Settings]
② Select [Experimental Features]
③ Find [Bluetooth Pairing] menu and click [Pair] button
④Select [+Pair new device] and pair your Tactosy
※You can sawp the right and left sides of the paried devices in in-game settings.
2) Run a native supported game and enjoy
Enjoy optimized haptic feedback pre-embedded in VR games.
※ You can manage more detailed settings of the Tactosy by
downloading 'bHaptics player' from Oculus Quest App Lab
Please search 'bHaptics player' on the Oculus Quest store or download from our website
(
https://www.bhaptics.com/support/downloads
).

How to Play 17
Enjoying Audio-based Haptics (Wireless)
Feel the trembling bass, beats, rhythm and action with audio-based haptics.
Music / Movie
Please refer to PC VR > Enjoying Audio-based Haptics (Wireless)*
*Refer to p. 14

18 bHaptics Software
https://studio.bhaptics.com/
bHaptics Studio
bHaptics Studio is an Audio-based haptic customization tool which allows
you to create or edit the profile by selecting range of frequencies, threshold
and activation area of the vest to feel the sound.
bHaptics Software
04
https://www.bhaptics.com/support/download
bHaptics Player
bHaptics Player is an essential software required to connect your device with
PC and mobile. You can manage the play mode (Embedded Haptics / Audio-
based Haptics), haptic intensity, visualization tool and access bHaptics Portal
using this software.
bHaptics Designer
bHaptics Designer is a web-based haptic feedback authoring tool that you
can use to create haptic patterns by clicking and dragging between visualized
haptic feedback points. Simply click on the “Export” button to integrate
haptic patterns into your content.
https://designer.bhaptics.com/
SDKs
SDKs are available for Unity and Unreal. The SDKs include a library of over
300 different haptic feedback. For more information, please refer to the
manual that is provided with respective plug-in.
https://www.bhaptics.com/support/developer/

bHaptics Software 19
1 Feedback Monitoring Monitor the haptic feedback in realtime
2 Content Portal Find, download and install the list of games with Embedded
Haptics
3 Audio-to-Haptic Activate wireless Audio-based Haptics
4 Pair/Unpair All Pair or Unpair all scanned or paired devices
5 Play & Pause Play & Pause haptic feedback
6 Device Panel List of devices which are paired and waiting to be paired
Pairs, unpairs and controls intensity of haptics for each devices
7 Settings Manage device pairing, run feedback test, find opensource
license and control settings
https://www.bhaptics.com/support/download
bHaptics Player (PC)

20 bHaptics Software
Device Control
Device Status
Scanned Connected
(Left)
Connected
(Right)
Audio-based
Haptics (Wireless) Notice
Device Pairing
1
Individual Pairing : Right Click on the device icon to pair/unpair.
2
Pair All : Click on Toolbox icon to pair/unpair all devices.
Device Information
Mouse over each device icon to check the device information.
Or you can also go to Settings( ) > Device
Connected
Tactosy2
Status : Connected
Battery : 35%
Feedback Intensity : 40%
Scanned
Tactosy2
RSSI -47dB
bHaptics Player (PC)
Other manuals for TACTOSY for Arms
1
Table of contents
Other Bhaptics Video Gaming Accessories manuals
