manuals.online logo
Brands
  1. Home
  2. •
  3. Brands
  4. •
  5. Big Backyard
  6. •
  7. Swing Set
  8. •
  9. Big Backyard F23100 User manual

Big Backyard F23100 User manual

INSTALLATION AND OPERATING INSTRUCTIONS
STONEYBROOK LODGE PLAY SYSTEM – F23100
10 - 14 Hrs
To reduce the risk of serious injury or death, you must read and
follow these instructions. Keep and refer to these instructions
often and give them to any future owner of this play system. Manufacturer contact information provided below.
OBSTACLE FREE SAFETY ZONE - 32’3” x 28’ (9.8 x 8.5 m) area requires Protective Surfacing. See page 3.
MAXIMUM VERTICAL FALL HEIGHT - 7’6” ft. (2.3 m)
CAPACITY - 12 Users Maximum, Ages 3to 10; Weight Limit 110 lbs. (49.9 kg) per child.
RESIDENTIAL HOME USE ONLY. Not intended for public areas such as schools, churches, nurseries,
day cares or parks
Rev 12/29/2010
3403100
Two person
assembly
Table of Contents
Warnings and Safe Play Instructions .......... pg. 2
Protective Surfacing Guidelines .............. pg. 3
Instructions for Proper Maintenance .......... pg. 4
About Our Wood – Limited Warranty.......... pg. 5
Keys to Assembly Success.................. pg. 6
Part ID .................................. pg. 7
Installation of I.D./Warning Plaque........ Final Step
WARNING
18’ 8” (5.7 m)
14’ 5” (4.4 m)
Solowave Design
375 Sligo Rd. West, PO Box 10
Mount Forest, ON Canada N0G 2L1
General Inquiries:
8:00am - 4:30pm EST
Toll Free: 1-877-966-3738
[email protected]
Square
Assembly
3650318 Box 1
A14
(6) Ground Stake 1-1/4 x 1-1/2 x 14" (2) Dormer Side Burst 1 x 3 x 6-3/4"
B12 3638072 Box 2
(2) Dormer Side 1 x 3 x 13-5/8"
B10 3638070 Box 2
3641414 Box 1
A11
(1) Table Top 5/4 x 6 x 45-1/2"
3631482 Box 2
(18) Siding 3/8 x 3-1/2 x 42-5/8"
B9
(2) Gable Board B 1 x 2 x 14"
B8 3631433 Box 2
(2) Gable Board A 1 x 2 x 17"
B7 3631432 Box 2
3631431 Box 2
B6
(1) Centre Gable Board 1 x 2 x 23"
3631415 Box 2
B4
(2) Lower Trim 1 x 2 x 19-5/8"
3631411 Box 2
B3
(4) Wall Trim 1 x 2 x 31-7/8"
(1) Dormer Centre 1 x 3 x 10-3/4"
B11 3638071 Box 2
(1) Dormer Bottom 1 x 2 x 22"
B13 3638073 Box 2
(4) Window Divider 1 x 2 x 10-3/4"
3631419 Box 2
B5
3630839 Box 2
B2
(21) CE Gap Board 1 x 4 x 38-3/4"
3638068 Box 1
3641247 Box 1
(1) SL Support 5/4 x 4 x 47"
A10
A8
(1) Short Upright 2 x 3 x 44-3/4"
3640826 Box 1
A9
3640825 Box 1
(1) SL Upright 2 x 3 x 55"
(1) Roof Side 2 x 6 x 49-1/2"
A12 3641434 Box 1
3681858 Box 1
A15
(4) Dowel Tennon 1 1/8 x 18-5/8"
(4) Wiggle Board A 1 x 6 x 24"
3631454 Box 1
A3
(2) Mid Wall Board 1 x 6 x 48-1/2"
3631422 Box 1
A1
3631457 Box 1
(1) Wiggle Bottom 1 x 3 x 19-7/8"
A6
(1) Wiggle Board C 1 x 6 x 25-9/16"
3631456 Box 1
A5
(1) Dormer Roof Set (Left/Right Dormer)
A7
3631430 Box 1
A2
(1) Sunburst 5/4 x 5 x 13"
(7) Wiggle Board B 1 x 6 x 25-9/16"
3631455 Box 1
A4
(2) SW Block 5/4 x 4 x 3-1/2"
A13 3644909 Box 1
3630705 Box 2
B1
(2) Cedar Wall 1 x 4 x 23-1/2"
1" x 2"
1" x 4"
1" x 5"
1" x 6"
5/4" x 6"
5/4" x 5"
5/4" x 4"
2" x 2"
2" x 3"
2" x 4"
2" x 6"
Nominal Size Actual Size
1½" x 5⅜"
1⅜" x 3⅜"
1⅜" x 2½"
1½" x 1½"
1" x 3½"
1" x 4½"
1" x 5½"
⅝" x 5⅜"
⅝" x 4½"
⅝" x 3⅜"
⅝" x 1⅜"
Part Identification (Reduced Part Size) A1 - B13
3641420 Box 2
B23
(2) Mid Wall Roof Support 1 x 3 x 10-7/8"
3641417 Box 2
B22
(4) Window Brace 2 x 2 x 38"
(2) Wiggle Joist 2 x 6 x 65-27/32"
B29
3641453 Box 2
3641406 Box 2
(1) Ground SL Side 1 x 5 x 41-1/2"
B17
3641405 Box 2
(2) Ground Front and Back 1 x 5 x 77"
B16
3641407 Box 2
(1) Ground SW Side 1 x 5 x 77-1/2"
B18
3641408 Box 2
B19
(1) Floor Joist 5/4 x 4 x 78"
3641409 Box 2
B20
(2) Floor Front Back 2 x 4 x 77-7/8"
3641413 Box 2
B21
(1) Table Support 2 x 2 x 45-1/2"
B15
(1) Ladder Bottom 5/4 x 4 x 20"
3640822 Box 2
3640369 Box 2
B14
(2) Lower Diagonal 2 x 3 x 37"
3641423 Box 2
B24
(6) Picket 5/4 x 3 x 32"
3641424 Box 2
B25
(4) Roof Support 2 x 3 x 40"
3641425 Box 2
B26
(2) Roof Joist 2 x 2 x 38-3/4"
3641428 Box 2
B27
(1) Left Access 2 x 4 x 62-7/8"
3641429 Box 2
B28
(1) Right Access 2 x 4 x 62-7/8"
3644921 Box 2
B30
(1) SW Support 5/4 x 4 x 48-1/2"
Part Identification (Reduced Part Size) B14 - B30
1" x 4½"
1" x 5½"
⅝" x 5⅜"
⅝" x 4½"
⅝" x 3⅜"
⅝" x 1⅜"
Actual Size
1½" x 5⅜"
1⅜" x 3⅜"
1⅜" x 2½"
1½" x 1½"
1" x 3½"
Nominal Size
2" x 6"
2" x 4"
2" x 3"
2" x 2"
5/4" x 4"
5/4" x 5"
5/4" x 6"
1" x 6"
1" x 5"
1" x 4"
1" x 2"
3638002 Box 3
C6
(1) Gable Block B 1 x 6 x 13-1/2"
(1) SL Floor 2 x 4 x 41-1/2"
3640834 Box 3
C12
3635155 Box 3
C4
(24) Cedar Roofing 3/8 x 3-1/2 x 47-1/2"
(1) Dormer Burst 1 x 4 x 5-1/2"
C8 3638074 Box 3
3641400 Box 3
C13
(4) Post 2 x 4 x 92-1/2"
3641401 Box 3
C14
(4) Lower Post 2 x 4 x 54"
3641402 Box 3
C15
(2) Mid Post 2 x 3 x 92-1/2"
3641404 Box 3
C17
(2) Roof Block 2 x 4 x 5-3/8"
3641412 Box 3
C19
(4) Window Sill 1 x 4 x 42-5/8"
3641416 Box 3
C20
(2) SL Roof Support 1 x 4 x 39-7/8"
3644922 Box 3
C27
(2) SW Post 2 x 4 x 92-1/2"
(2) Floor Gap 2 x 3 x 39-5/8"
3641418 Box 3
C21
(2) Wall Brace 2 x 4 x 7-3/8"
3641421 Box 3
C22
3641426 Box 3
C23
(2) Roof End 2 x 6 x 11"
3644919 Box 3
C25
(1) SW Rail Block 2 x 4 x 5-3/8"
3641410 Box 3
C18
(2) Top Back Front 5/4 x 6 x 77-1/2"
3641403 Box 3
C16
(2) Mid Roof Block 2 x 3 x 5-3/8"
3641427 Box 3
C24
(1) Wall Mount 2 x 4 x 38"
3644920 Box 3
C26
(1) SW Upright 2 x 4 x 50-1/2"
Part Identification (Reduced Part Size) C1 - C27
3631248 Box 3
C2
(1) Front Beam 2 x 6 x 94"
3631249 Box 3
C3
(1) Back Beam 2 x 6 x 94"
3638001 Box 3
C5
(1) Gable Block A 1 x 6 x 24"
3630840 Box 3
C1
(1) CE Gap Board 1 x 6 x 38-3/4"
(1) Dormer Cleat 2 x 4 x 10"
C7 3638069 Box 3
(2) Gusset 5/4 x 4 x 18-1/2"
C9 3640403 Box 3
3640436 Box 3
C10
(1) SW Top 5/4 x 6 x 41-1/2"
3640437 Box 3
C11
(1) SW Floor 5/4 x 6 x 41-1/2"
G4
(2) Hex Bolt 5/16 x 4" 9277340
5/16" Lock Washer - 5/16" Flat Washer - 5/16" T-Nut
H3
(8) Hex Bolt 1/4 x 2 1/2" 9277222
1/4" Lock Washer - 1/4" Flat Washer - 1/4" T-Nut
H7
(4) Hex Bolt 1/4 x 5 1/2" 9277252
1/4" Lock Washer - 1/4" Flat Washer - 1/4" T-Nut
G5
(7) Hex Bolt 5/16 x 4 1/2" 9277342 5/16" Lock Washer - 5/16" Flat Washer - 5/16" T-Nut
1/4" Lock Washer - 1/4" Flat Washer - 1/4" T-Nut
(12) Hex Bolt 1/4 x 4" 9277240
H4
G1
(4) Hex Bolt 5/16 x 1 1/2"
5/16" Lock Washer - 5/16" Flat Washer - 5/16" T-Nut 9277312
H2
(2) Hex Bolt 1/4 x 2" 9277220
1/4" Lock Washer - 1/4" Flat Washer - 1/4" T-Nut
H8
(1) Hex Bolt 1/4 x 4 1/4" 9277241
1/4" Lock Washer - 1/4" Flat Washer - 1/4" T-Nut
Hardware Identification (Actual Size)
H11
(6) Hex Bolt 1/4 x 2 3/4" 9277223
1/4" Lock Washer - 1/4" Flat Washer - 1/4" T-Nut
H6
(4) Hex Bolt 1/4 x 4 3/4 9277243
1/4" Lock Washer - 1/4" Flat Washer - 1/4" T-Nut
H5
(6) Hex Bolt 1/4 x 4 1/2" 9277242
1/4" Lock Washer - 1/4" Flat Washer - 1/4" T-Nut
H13
(8) Hex Bolt 1/4 x 3 1/2" 9277232
1/4" Lock Washer - 1/4" Flat Washer - 1/4" T-Nut
PL2
(4) Pan Bolt 1/4 x 1 1/4"
1/4" Lock Washer - 1/4" Flat Washer
1/4" T-Nut 9274211
Z(2) Hex Bolt 5/16 x 6" Zinc -(2) 5/16" Flat Washer & Lock Nut (9277360)
(12) Flat Head Screw #8 x 1 3/4" (9260513)
S15
-1/4" Flat Washer
LS2
(2) Lag Screw 1/4 x 2 1/2"
9262222
9277230
H12 (4) Hex Bolt 1/4 x 3" 1/4" Flat Washer,
1/4" Lock Washer, 1/4" T- Nut
S8 (4) Pan Screw #12 x 3/4" (9264603) S19
(2) Pan Bolt #12 x 1/2"
with #12 Lock Nut (9264602)
9277320
(2) Hex Bolt 5/16 x 2"
2-5/16" Flat Washer, 1- 5/16" Lock Nut
(1 pk of 4)
Bolt Thru Swing
Hangers
(3202000)
S6
(4)
1/4" Lock Nut
(9283200)
2 - 5/16" Flat Washer, 5/16" Lock Nut
(4) Hex Bolt 5/16 x 5 1/2"
9277352
(12)
5/16" Lock Nut
(9283300)
S4 (15) Flat Head Screw #8 x 3" (9290530)
(37)
5/16" Flat Washer
(9251300)
(55)
1/4" T-Nut
(9285200)
(2)
3/16" Flat Washer
(9251100)
(86)
1/4" Flat Washer
(9251200)
S7
S5
(55)
1/4" Lock Washer
(9253200)
(46) #8 Flat Washer
(9251500)
S3 (76) Flat Head Screw #8 x 2 1/2" (9260522)
(13)
5/16" T-Nut
(9285300)
(13)
5/16" Lock Washer
(9253300)
(11) Pan Screw #12 x 2" (9294620)
(275) Flat Head Screw #8 x 1 1/2" (9260512)
(18) Pan Screw #12 x 1" (9264610)
(66) Pan Screw #8 x 1/2" (9264504)
LS3
LS1
GL8
GL7
S0 (144) Truss Screw #8 x 7/8" (9229505)
S1 (18) Flat Head Screw #8 x 1 1/8" (9290514)
S2
9262230
(9) Lag Screw 1/4 x 3"-1/4" Flat Washer
Hardware Identification (Actual Size)
9262212
(4) Lag Screw 1/4 x 1 1/2"
1/4" Flat Washer
(1) Spiral Wave Bottom (3310103)
5' Spiral Wave Slide 7310102
(1) Spiral Wave Middle (3310102)
(1) BBY Plaque w/ screws
(3320351)
(1) Flower Box Set -Green (3320401)
(1) Yellow Hand Grip
(9320240)
1X 3320265 Wiggle Wall Cap Set -Yellow
1X 3200202
Glider Hanger (2pk)
1X 3200184
Triangle Plate (4pk)-Green
1X 3320188 Rocks (11pk)
3-Burgundy 4-Green 4-Yellow
(1) Spiral WaveTop (3310101)
Part Identification (Reduced Part Size)
1X 3320356
Big Backyard I.D
Plaque w hardware
2X 3320172
2 person Glider End
1X 3320273
2 person Glider Seat
Yellow
1X 3533859 Glider Rope & Chain (4pk)
2X 3724939
Long Belt Swing-Yellow
1X 3320190
Stool Seat Set (2pk)
1X 3200142 -Green
WW Mount Strap (2pk) 1X 3750100 Stonybrook Lodge
Tarp Set
1X 9201555
Wall Angle Bracket (2pk)
3X 9201500
Spiral Wave Bracket
PRODUCT NUMBER: F23100
CARTON I.D. STAMP: __ __ __ __ __ 14459 ___ (Box 1)
CARTON I.D. STAMP: __ __ __ __ __ 14459 ___ (Box 2)
CARTON I.D. STAMP: __ __ __ __ __ 14459 ___ (Box 3)
CARTON I.D. STAMP: __ __ __ __ __ 14459 ___ (Box 4)
CARTON I.D. STAMP: __ __ __ __ __ 14459 ___ (Box 5)
CARTON I.D. STAMP: __ __ __ __ __ 14459 ___ (Box 6)
D##
S##
W###
A6
B29
S2
Fig. 1.2
Fig. 1.1
Top
Bottom
B29
A: Place 2 (B29) Wiggle Joists side by side so they match each other and are 19-7/8” apart from the outside
edges. (g. 1.1)
B: Attach (A6) Wiggle Bottom to the bottom of each (B29) Wiggle Joist using 4 (S2) #8 x 1-1/2” Wood Screws.
The ends of (A6) Wiggle Bottom are ush to the sides of each (B29) Wiggle Joist and the bottom edge of (A6)
Wiggle Bottom is ush to the ends of (B29) Wiggle Joist as shown in (g. 1.1).
Step 1: Attach Wiggle Wall Bottom Board
1 x Wiggle Bottom 1 x 3 x 19-7/8”
2 x Wiggle Joist 2 x 6 x 65-27/32”
A6
B29
Hardware
Wood Parts
4 x #8 x 1-1/2” Wood Screw
S2
S2
19-7/8”
14
Step 2: Layout Top of Wiggle Wall and Attach Rocks
A: At the top of the (B29) Wiggle Joists place 1 (A5) Wiggle Board C then follow by 1 (A3) Wiggle Board A,
2 (A4) Wiggle Board B, 1 (A3) Wiggle Board A and then 1 (A4) Wiggle Board B as shown in (g. 2.2). Rock
holes should be staggered. (g. 2.1)
B: Make sure the pilot holes align vertically on both sides and are directly above the (B29) Wiggle Joists.
(g. 2.1 & 2.2). Do not fasten the boards to the joists yet.
C: Attach one rock to each (A3) & (A4) Wiggle Board starting at the top (A3) Wiggle Board A and following
each board down, using the included hardware. Be sure to attach the correct rocks to the specied boards.
(g. 2.3) When attaching the rocks, the screw must be installed in the hole directly under the Pan Bolt, this
will stop the rock from spinning. (g. 2.4)
Fig. 2.1
Fig. 2.2
Top
Bottom
A5
A5
A3
A3
A4
A4
A4
A3
A3
A4
A4
A4
Fig. 2.4
Fig. 2.3
Note: Holes
line vertically
on each board
Pan Screw
Pan Bolt
Lock
Washer
Rock Barrel Nut
Flat Washer
2 x Wiggle Board A 1 x 6 x 24”
3 x Wiggle Board B 1 x 6 x 25-9/16”
1 x Wiggle Board C 1 x 6 x 25-9/16”
A3
A5
A4
5 x Rocks (with hardware)
Wood Parts Other Parts
Note orientation of
boards when attaching
15
Step 3: Attach Top Wall Caps
A: Attach 1 - Wiggle Wall Cap Left to the left side of the Wiggle Boards as shown in g. 3.1.
B: The tab inside the cap should t between the Wiggle Boards so a slight gap will form. (g. 3.2)
C: Make sure the cap end is ush to the top of (B29) Wiggle Joist and then attach Wiggle Wall Cap Left to the
(B29) Wiggle Joist with 5 (S5) #8 x 1/2” Pan Screws. (g. 3.3)
D: Repeat Steps A - C for the Wiggle Wall Cap - Right.
Fig. 3.1
Fig. 3.2
Fig. 3.3
Cap
Tab inside Cap
Cap end ush
to board end
S5
Gap between boards
Hardware
10 x #8 x 1/2” Pan Screw
S5 1 x Wiggle Wall Cap Left
1 x Wiggle Wall Cap Right
Other Parts
B29
16
Step 4: Fasten Wiggle Boards
A: Make sure distance from outside of each (B29) Wiggle Joists measures 19-7/8” (g. 4.1) and then attach (A5)
Wiggle Board C to each (B29) Wiggle Joist using 4 (S2) #8 x 1-1/2” Wood Screws. (g. 4.2)
B: Reconrm the distance from outside of each (B29) Wiggle Joist measures 19-7/8” and then attach the bottom
(A4) Wiggle Board B to each (B29) Wiggle Joist using 4 (S2) #8 x 1-1/2” Wood Screws.
(g. 4.2)
C: Attach the remaining 4 Wiggle Boards to each (B29) Wiggle Joist using 4 (S2) #8 x 1-1/2” Wood Screws per
board. (g. 4.3)
S2
S2
19-7/8”
S2
S2
Fig. 4.1
Fig. 4.2
Fig. 4.3
S2
S2
19-7/8”
Hardware
24 x #8 x 1-1/2” Wood Screw
S2
x 8
x 8
Top
B29
A3
A5
A3
A4
A4
A4
17
Step 5: Layout Bottom of Wiggle Wall and Attach Rocks
A: Starting directly below the last (A4) Wiggle Board B, place another (A4), followed by 1 (A3) Wiggle Board
A, 2 (A4) Wiggle Board B, 1 (A3) Wiggle Board A and then the last (A4) Wiggle Board B. Rock holes should
be staggered as shown in g. 5.1.
B: Make sure the pilot holes align vertically on both sides and are directly above the (B29) Wiggle Joists.
(g. 5.1). Do not fasten the boards to the joists yet.
C: Attach one rock to each (A3) & (A4) Wiggle Board starting at the top (A4) Wiggle Board B and following
each board down, using the included hardware. Be sure to attach the correct rocks to the specied boards.
(g. 5.2) When attaching the rocks, the screw must be installed in the hole directly under the Pan Bolt, this
will stop the rock from spinning. (g. 5.3)
Fig. 5.1
Fig. 5.2 Fig. 5.3
Pan Screw
Pan Bolt
Lock
Washer
Rock Barrel Nut
Flat Washer
A3
A3
A4
A4
A4
A4
A3
A3
A4
A4
A4
2 x Wiggle Board A 1 x 6 x 24”
4 x Wiggle Board B 1 x 6 x 25-9/16”
A3
A4
6 x Rocks (with hardware)
Wood Parts Other Parts
A4
Note: Holes
line vertically
on each board
Note orientation of
boards when attaching
18
Step 6: Attach Bottom Wall Caps & Remaining Wiggle Boards
A: Attach 1 - Wiggle Wall Cap Left to the left side of the Wiggle Boards as shown in g. 6.1.
B: The tab inside the cap should t between the Wiggle Boards so a slight gap will form. (g. 6.2)
C: Make sure the cap end is tight to the bottom of the previously attached Wiggle Wall Cap - Left and then attach
the bottom Wiggle Wall Cap - Left to the (B29) Wiggle Joists with 5 (S5) #8 x 1/2” Pan Screws. (g. 6.3)
D: Repeat Steps A - C for the Wiggle Wall Cap - Right.
E: Attach the rest of (A3) Wiggle Wall A and (A4) Wiggle Wall B to each (B29) Wiggle Joist using 4 (S2) #8 x
1-1/2” Wood Screws per board. (g. 6.4)
Fig. 6.1
Fig. 6.2
S5
x 5 per side
Fig. 6.4
S2
Cap
Tab inside Cap
Gap between boards
Fig. 6.3
S2 x 12
1 x Wiggle Wall Cap Left
1 x Wiggle Wall Cap Right
Hardware Other Parts
10 x #8 x 1/2” Pan Screw
S5
24 x #8 x 1-1/2” Wood Screw
S2
B29
x 12
B29
19
Step 7: Dormer Assembly
A: Attach 1 Dormer Roof Set Right to 1 Dormer Roof Set Left with 1 Wall Angle Bracket with the hardware
provided at the inside peak as shown in (g. 7.1 and 7. 2).
B: Attach 1 (B10) Dormer Side to the inside edge of each Dormer Roof using 2 (S1) #8 x 1-1/8” Wood Screws
per board. (g. 7.3)
E: Place 1 (B12) Dormer Side Burst on each side of the (B11) Dormer Centre so they are tight to the sides and
ush to the bottom of (B13) Dormer Bottom and then attach to each (B10) Dormer Side with 1 (S1) #8 x 1-1/8”
Wood Screw per board. (g. 7.5)
F: On the outside of the Dormer Assembly and centred on the (B13) Dormer Bottom, attach 1 (C8)
Dormer Burst to each (B12) Dormer Side Burst and to (B11) Dormer Centre from the inside of the assembly using
3 (S1) #8 x 1-1/8” Wood Scews. (g. 7.5 & 7.6)
C: Attach 1 (B13) Dormer Bottom to the Dormer Assembly with 2 (S1) #8 x 1-1/8” Wood Screws, making sure the
top of (B13) is tight to the bottom of each (B10) Dormer Side. (g. 7.4)
D: Attach 1 (B11) Dormer Centre, centred and ush to the bottom of (B13) Dormer Bottom with 1 (S1) #8 x 1-1/8”
Wood Screw and to the tops of both (B10) Dormer Sides with 2 (S1) #8 x 1-1/8” Wood Screws. (g. 7.4)
Fig. 7.1 Fig. 7.2
Fig. 7.4
Fig. 7.3
Fig. 7.5
S1
B10
B10
Wall angle bracket
with Hardware
Dormer Roof
Set - Right
Dormer Roof
Set - Left
S1
B12
B10
B12
B11
B11
B13 S1
B13
2 x Dormer Side 1 x 3 x 13-5/8”
1 x Dormer Centre 1 x 3 x 10-3/4”
2 x Dormer Side Burst 1 x 3 x 6-3/4”
1 x Dormer Bottom 1 x 2 x 22”
1 x Dormer Burst 1 x 4 x 5-1/2”
B10
B11
Hardware
Wood Parts
14 x #8 x 1-1/8” Wood Screw
S1 1 x Wall Angle Bracket
1 x Dormer Roof Set Left
1 x Dormer Roof Set Right
Other Parts
B12
B13
C8
Fig. 7.6
C8
B10
B10
B10
20

This manual suits for next models

1

Other Big Backyard Swing Set manuals

Big Backyard F23475 User manual

Big Backyard

Big Backyard F23475 User manual

Big Backyard F23210 User manual

Big Backyard

Big Backyard F23210 User manual

Popular Swing Set manuals by other brands
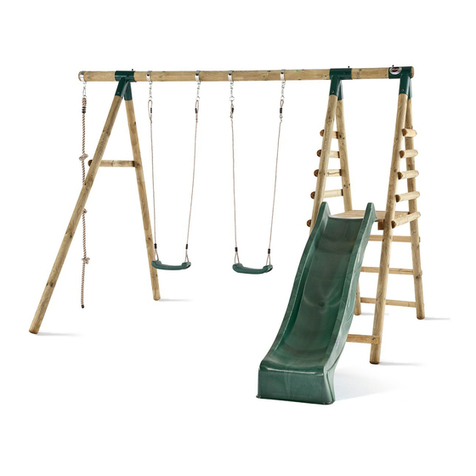
Plum Giant Baboon Assembly instructions
Plum

Plum Giant Baboon Assembly instructions

Forever Redwood BENCH SWING SETS Assembly instructions

Forever Redwood

Forever Redwood BENCH SWING SETS Assembly instructions

LifeSpan Kids AMBER PE83 owner's manual
LifeSpan Kids

LifeSpan Kids AMBER PE83 owner's manual

Plum 22100 Assembly instructions

Plum

Plum 22100 Assembly instructions

BOERPLAY Trio Swing XL manual

BOERPLAY

BOERPLAY Trio Swing XL manual

SportsPlay Equipment 381-404H installation instructions
SportsPlay Equipment

SportsPlay Equipment 381-404H installation instructions

Trigano KIMBO KI700 Assembling instructions
Trigano

Trigano KIMBO KI700 Assembling instructions

Lemeks Palmako KASPER MV100-3720-3 Assembly, installation and maintenance instructions

Lemeks

Lemeks Palmako KASPER MV100-3720-3 Assembly, installation and maintenance instructions
Backyard Discovery Heavy Duty Durango Wooden Swing Set owner's manual
Backyard Discovery

Backyard Discovery Heavy Duty Durango Wooden Swing Set owner's manual

Lemeks Palmako HOLGER Assembly, installation and maintenance instructions
Lemeks

Lemeks Palmako HOLGER Assembly, installation and maintenance instructions

Lemeks Palmako BRENDA MV80-5120 Assembly, installation and maintenance instructions

Lemeks

Lemeks Palmako BRENDA MV80-5120 Assembly, installation and maintenance instructions

Trigano TE505 Assembling instructions

Trigano

Trigano TE505 Assembling instructions
Lifetime MONKEY BAR ADVENTURE Assembly instructions
Lifetime

Lifetime MONKEY BAR ADVENTURE Assembly instructions

Rompa TheraGym Over the Moon Swing Set A 21581 manual
Rompa

Rompa TheraGym Over the Moon Swing Set A 21581 manual

Backyard Discovery SHENANDOAH 65413B owner's manual
Backyard Discovery

Backyard Discovery SHENANDOAH 65413B owner's manual

Backyard Discovery EAGLES NEST ELITE manual

Backyard Discovery

Backyard Discovery EAGLES NEST ELITE manual

LifeSpan Kids AMBER 3 owner's manual

LifeSpan Kids

LifeSpan Kids AMBER 3 owner's manual
Cedar Summit F25630 Installation and operating instructions
Cedar Summit

Cedar Summit F25630 Installation and operating instructions

manuals.online logo
manuals.online logoBrands
  • About & Mission
  • Contact us
  • Privacy Policy
  • Terms and Conditions

Copyright 2025 Manuals.Online. All Rights Reserved.