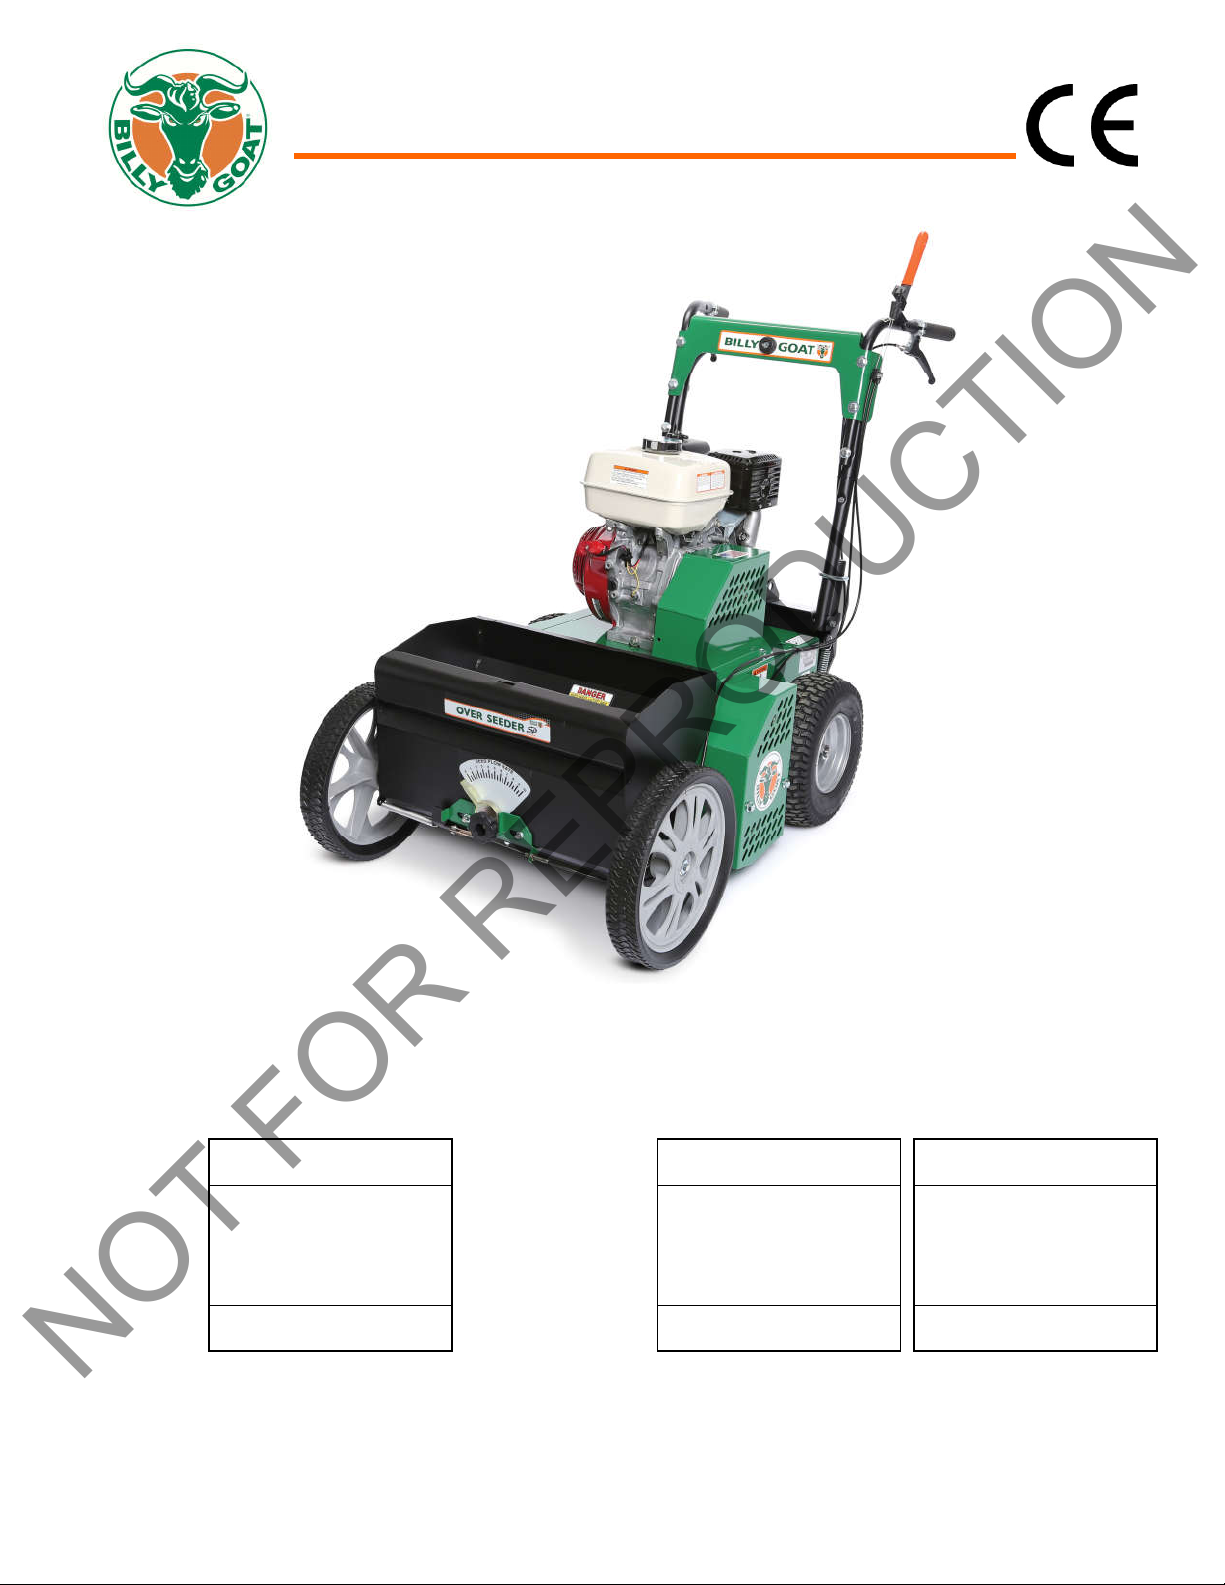
Billy Goat OS901SPHD User manual

OSSP Owner’s Manual
F022818 1 351528_A_HI
SELF PROPELLED OVERSEEDER Owner's Manual
OS901SPHD
Beginning Serial #: 021218001
Accessories Replacement Parts
Original Instructions
IMPORTANT- READ CAREFULLY BEFORE USE AND KEEP FOR FUTURE REFERENCE
CHARIOT KIT
REEL KIT
Allows the user to ride
behind the unit and
decrease fatigue from
walking.
P/N 351601
Use to replace worn or
damaged reels.
P/N 351621
BLADE KIT
Use to replace worn or
damaged blades on the
reel.
P/N 351622
NOT FOR REPRODUCTION

OSSP Owner’s Manual
F022818 351528_A_HI
2
CONTENTS
SPECIFICATIONS AND SAFETY 3
INSTRUCTION LABELS 4
PACKING CHECKLIST 5
ASSEMBLY 6
OPERATION 7-8
MAINTENANCE & TROUBLESHOOTING 9-10
PARTS LIST 11-22
NOT FOR REPRODUCTION

OSSP Owner’s Manual
F022818 351528_A_HI
3
SPECIFICATIONS
OS901SPHD
Engine: HP’
9.0 HP (6.7kW)
Engine: Model
GX270UTQA2
Engine: Type
Honda
Engine: Fuel Capacity
5.6 qt. (5.3 L)
Engine: Oil Capacity
1.16 qt. (1.1 L)
Total Unit Weight:
323# (147 kg)
Max. operating slope
20o
SAFETY
WARNING
This product can expose you to chemicals including gasoline engine exhaust, which is known to the State
of California to cause cancer, and carbon monoxide, which is known to the State of California to cause
birth defects or other reproductive harm. For more information go to www.P65Warnings.ca.gov.
NOT FOR REPRODUCTION

OSSP Owner’s Manual
F022818 351528_A_HI
4
INSTRUCTION LABELS
The labels shown below were installed on your BILLY GOAT®Overseeder. If any labels are damaged or missing, replace them
before operating this equipment. Item numbers from the Illustrated Parts List and part numbers are provided for convenience in
ordering replacement labels. The correct position for each label may be determined by referring to the Figure and Item numbers
shown.
LABEL DANGER KEEP HANDS LABEL CLUTCH ITEM #142 LABEL TRANS. RELEASE
AND FEET AWAY P/N 500177 ITEM #146 P/N 351507
ITEM #145 P/N 400424
LABEL CAUTION GUARDS LABEL DEPTH GAUGE
ITEM #133 P/N 900327 ITEM #59 P/N 351504
LABEL INSTRUCTIONS SEEDER BOX LABEL SEED METERING
ITEM #56 P/N 351501 ITEM #66 P/N 351503
(pg 12) (pg 12)
ENGINE LABELS
.
SUBARU HONDA
NOT FOR REPRODUCTION

OSSP Owner’s Manual
F022818 351528_A_HI
7
OPERATION
ADJUSTING BLADE DEPTH
The depth of the blades can be raised or lowered by rotating the knob located at the rear of the
machine. The relative depth of the blades can be gauged by using the depth scale located on
the rear of the machine and the bar next to it. (See Fig. 1)
NOTE: Items in ( ) can be referenced in the Parts Illustrations and Parts Lists on pages 11-22.
FOLDING HANDLE
This unit is equipped with a folding upper handle for easier storage and transportation. The handle can be folded by sliding the
handle lock loops (item 35) up. This releases the upper handle, allowing it to be folded over the unit.
BLADE POSITION & DEPTH CONTROL LEVER
The blades can be raised or lowered into the ground by the height adjustment foot pedal at the
rear of the unit. The blades will be in lowered position when the foot pedal is unlocked from the
bracket and will be in transport position when the pedal is locked to the bracket. See Fig. 2 & 3
for operation. The resulting blade depth can be adjusted higher or lower.
VERTI-CUTTING OPERATION
SET DEPTH: With engine off, set the raking depth so that the blades just touch on a flat surface (i.e. driveway, or sidewalk).
ENGAGE BLADES: Push the Reel Lever down on the operator handle (upper left side). NOTE: When engaging the blades in
heavy load conditions (i.e. heavy thatch, or very uneven turf), push down on the operator handle lifting the front wheels slightly.
Engage the blades. Slowly lower the unit into the turf.
SLICE: Verti-cut a small test area and examine the results. Some thatch and cut stems should be removed and deposited on top
of the healthy grass. Grass runners should be cut and ready for removal. If excessive damage occurs to healthy grass, adjust
the blade depth to decrease damage. Continue raking the yard, working in one direction (i.e. north-south, or east-west). NOTE: If
a large drop in engine RPM occurs, or bounces during operation, the blade depth is set too low.
REMOVE THATCH/STEMS: After verti-cutting, a layer of thatch and cut stems will be deposited over the top of the lawn. We
suggest the use of a lawn vacuum or wheeled blower for collection and removal of the thatch/stems.
OVERSEEDING OPERATION
DRY: Be sure grass is dry. Wet conditions can cause increased damage to healthy grass.
SEED:Spread grass seed according to the seed suppliers directions (e.g. 10 lbs. per 1000 ft2[4.5 kg. per 93 m2]) Adjustments to
the seed drop is located on the front of the unit on the seed dial and should be used in conjunction with the seed chart on the
console.
SET DEPTH: With engine off, set the raking depth so that the blades reach 1/4"-1/2" (6-12 mm) below a flat surface (i.e. driveway,
or sidewalk).
ENGAGE REEL AND SEED DROP: Push down on the reel lever on the operators handle. NOTE: When engaging the reel in heavy
load conditions (i.e. heavy thatch, or very uneven turf), push down on the operators handle lifting the front wheels slightly. Engage
the reel. Slowly lower the unit into the turf.
SLICE: Run machine over the area that has been seeded to incorporate the seed into the soil. If excessive damage occurs to
healthy grass, adjust the blade depth to decrease damage. Continue raking the yard, working in one direction (i.e. north-south, or
east-west). NOTE: If a large drop in engine RPM occurs, or bounces during operation, the blade depth is set too low.
WATER/FERTILIZE: After the seed has been worked into the soil, water and fertilize according to the seed supplier’s directions.
Pressing on the outside tabs of the pedal will allow it to unlock
from the bracket and lower into position. (See Fig. 2)
Pressing on the center of the pedal and pushing it into the bracket
will allow it to be locked in transport position. (See Fig. 3)
Fig. 1
Fig. 2
Fig. 3
NOT FOR REPRODUCTION

OSSP Owner’s Manual
F022818 351528_A_HI
8
Fig. 6
Fig. 5
ADJUSTING SEED RATE
INSTRUCTION LABEL P/N 351501
To set the seed flow rate, loosen the knob on the indicator dial and turn it to the
corresponding stop setting on the seed application chart (below or on the console) for the
type and amount of seed being used. (See Fig. 4)
*****TIPS*****
Before beginning, it is best to evaluate the condition of the lawn by cutting one or more core samples from area to be treated. A core can
be cut using a piece of PVC, or metal pipe. Hammer the pipe into the ground, remove it, push the core out of the pipe and inspect it to
determine the depth of thatch in your yard.
MOW
Mow the lawn to its normal cut height. Be sure grass is dry. Wet conditions can cause increased damage to healthy grass.
INSPECT
Check the lawn before beginning work. Remove all rocks, wire, string, or other objects that can present a hazard during work.
IDENTIFY
Mark all fixed objects to be avoided during work, such as sprinkler heads, water valves, buried cables, or clothes line anchors, etc.
THATCH
Thatch is a dense layer of dead grass, clippings, and roots that builds up over time at the base of the lawn preventing air, water, and
fertilizer from reaching the soil. This can cause shallow root development and make a lawn more susceptible to drought and disease.
Thatch also provides an ideal environment for insects to hide and multiply. Periodic removal of thatch will keep your lawn in good health.
HEAVY THATCH
Lawns with an excessive amount of thatch will require multiple treatments for effective removal. Trying to remove excessive thatch
(greater than 3/4"[19 mm] deep) in one treatment will damage or destroy the living part of the lawn. It is best to remove heavy thatch in
seasonal treatments (i.e. spring, and fall).
SLOPES
Rake slopes across not up and down the slope. This is much easier and safer for the operator and is better for the lawn. Raking across
will help to reduce runoff during watering and allow the sloped ground to hold more seed, fertilizer, and water. The unit’s maximum
operating slope is 35% or 19°.
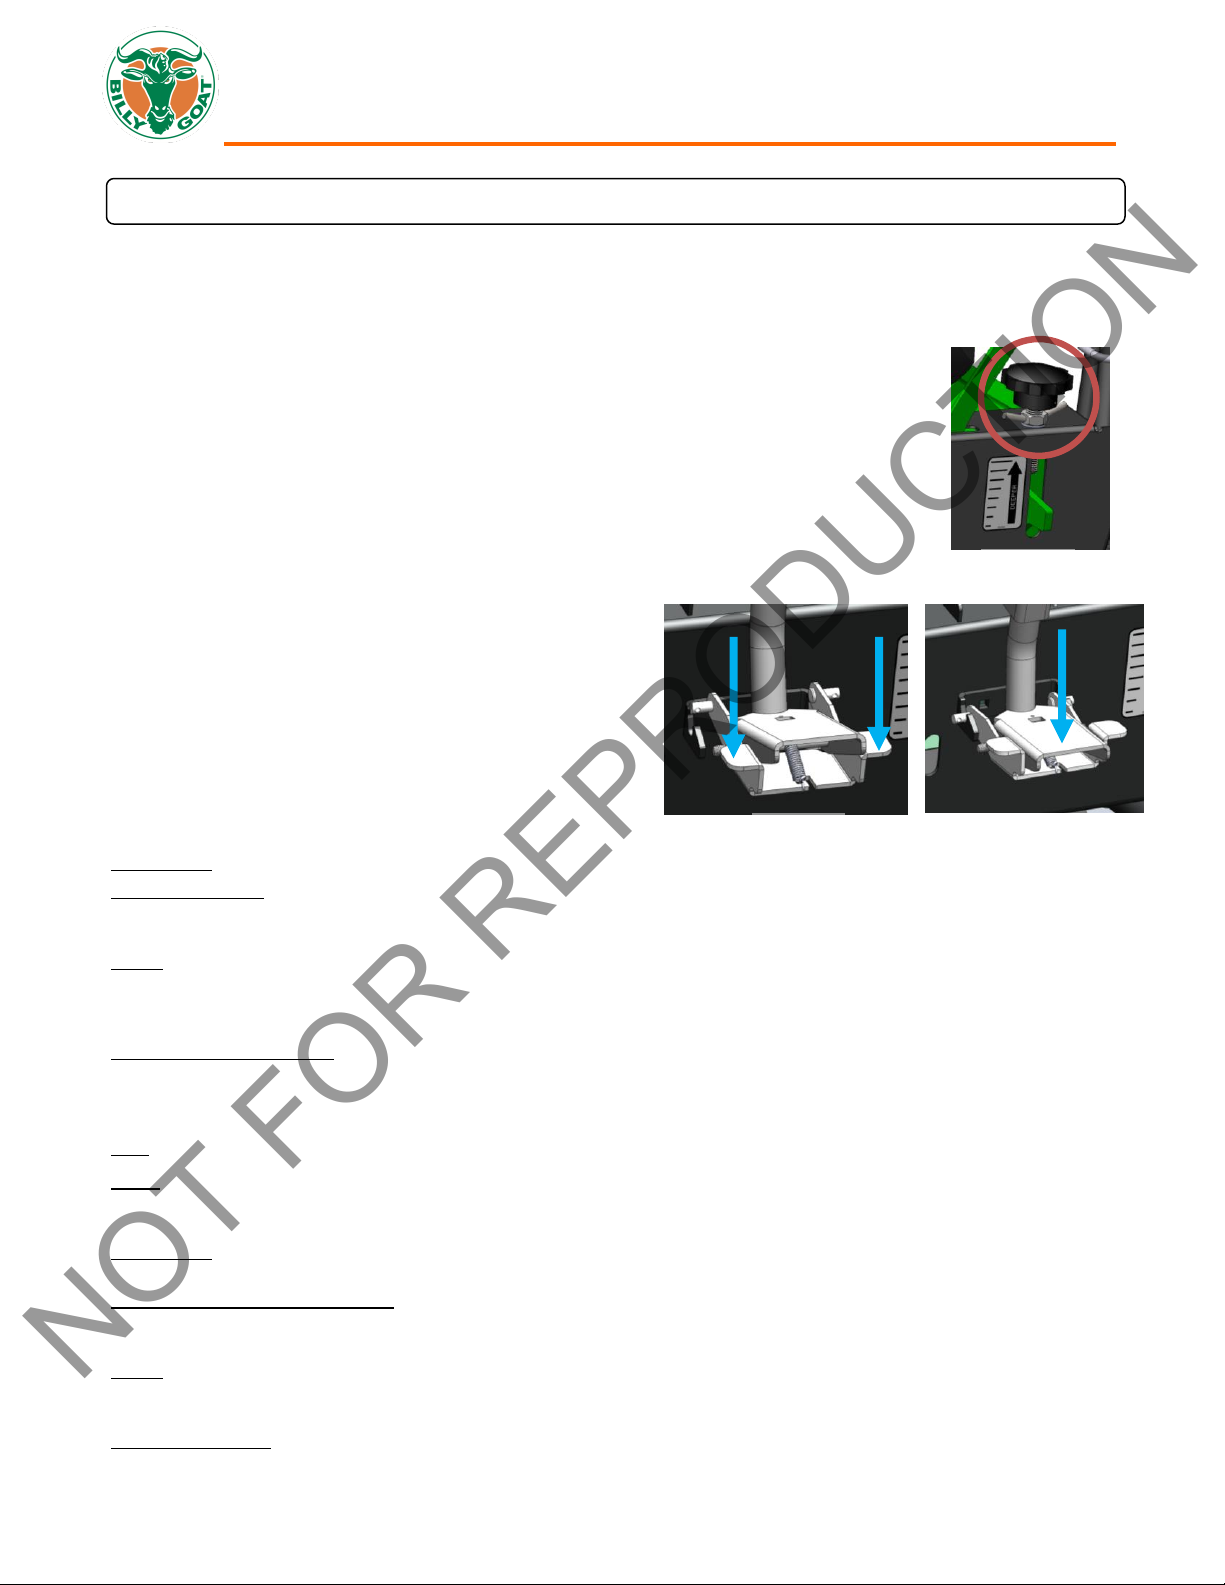
DEPTH
The wide range of depth adjustment on your unit is provided to allow for blade wear. Setting the reel deeper will not produce better results.
The flail reel is intended to be set so it just touches the surface on flat ground. The slicing reel should be set even with the ground for verti-
slicing work, and set to a maximum 1/2" depth for overseeding. Setting the reel deeper will only result in premature wear on the unit (i.e.
failed belt). If you desire to work the ground deeper than the above guidelines, it should be done gradually in multiple passes.
SLICING / OVERSEEDING: Mow the lawn to shorter than the normal cut height before starting (i.e. approximately 2" tall for fescue grass).
For the best result, slice/overseed in single pass pattern (See Fig. 5 & 6).
Fig. 4
NOT FOR REPRODUCTION

MANUAL del propietario de OSSP
Pieza n.° 351520 1 351520_E_HI
Manual del propietario de SEMBRADORA AUTOPROPULSADA
OS901SPS, OS901SPH
Número de serie de inicio: 020416001
Accesorios Repuestos
Instrucciones originales
IMPORTANTE: LEA CUIDADOSAMENTE ANTES DE USAR Y CONSÉRVELO PARA
REFERENCIAS FUTURAS
KIT DE CARRO KIT DE BOBINA
Permite al usuario
conducir detrás de la
unidad y disminuir la
fatiga al caminar.
P/N 351601
Utilícelo para reemplazar
las bobinas desgastadas
o dañadas.
P/N 351621
KIT DE CUCHILLAS
Utilícelo para reemplazar
las cuchillas desgastadas
o dañadas en la bobina.
P/N 351622
NOT FOR REPRODUCTION

MANUAL del propietario de OSSP
Pieza n.° 351520
351520_E_HI
2
CONTENIDOS
ESPECIFICACIONES Y SEGURIDAD 3
ETIQUETAS DE INSTRUCCIONES 4
LISTADO DE CONTROL EN EL EMPAQUETADO 5
ENSAMBLAJE 6
FUNCIONAMIENTO 7-9
MANTENIMIENTO Y SOLUCIÓN DE PROBLEMAS 9-11
LISTA DE PARTES 12-24
NOT FOR REPRODUCTION

MANUAL del propietario de OSSP
Pieza n.° 351520
351520_E_HI
3
ESPECIFICACIONES
OS901SPS OS901SPH
Motor: HP 9,0 HP (6,7 kW) 9,0 HP (6,7 kW)
Motor: Modelo EX270DE5032 GX270UTQA2
Motor: Tipo Subaru Honda
Motor: Capacidad de combustible 6,4 qt (6,1 l) 5,6 qt (5,3 l)
Motor: Capacidad de aceite 1,06 qt (1 l) 1,16 qt (1,1 l)
Peso total de la unidad: 314 lb (142 kg) 323 lb (147 kg)
Inclinación máxima de
funcionamiento
15
o
20
o
SEGURIDAD
ADVERTENCIA
Esta unidad puede emitir sustancias químicas, tales como los gases de escape del motor y el monóxido
de carbono que causan cáncer, y defectos al nacer u otros daños reproductivos, respectivamente, según
el Estado de California. Para obtener más información, visite www.P65Warnings.ca.gov.
NOT FOR REPRODUCTION

MANUAL del propietario de OSSP
Pieza n.° 351520
351520_E_HI
4
ETIQUETAS DE INSTRUCCIONES
Las etiquetas que aparecen a continuación se encuentran en la sembradora BILLY GOAT
®
. Si falta alguna etiqueta o está
dañada, sustitúyala antes de utilizar este equipo. Se proporcionan los números de los artículos en la lista de piezas ilustradas y
los números de las piezas para su conveniencia al momento de colocar las etiquetas de reemplazo. Se puede determinar la
posición correcta de cada etiqueta al consultar las figuras y los números del artículo en este manual.
ETIQUETA DE PELIGRO MANTENER ETIQUETA DE EMBRAGUE ETIQUETA DE TRANSMISIÓN
LAS MANOS Y PIES ALEJADOS ARTÍCULO N.° 142 P/N 500177 ARTÍCULO N.° 146 P/N 351507
ARTÍCULO N.° 145 P/N 400424
ETIQUETA PRECAUCIÓN DE PROTECTORES ETIQUETA DE MEDIDOR DE PROFUNDIDAD
ARTÍCULO N.° 133 P/N 900327 ARTÍCULO N.° 59 P/N 351504
ETIQUETA INSTRUCCIONES DE CAJA DE LA SEMBRADORA ETIQUETA DE CONTEO DE SEMILLAS
ARTÍCULO N.° 56 P/N 351501 ARTÍCULO N.° 66 P/N 351503
(pág. 12) (pág. 12)
ETIQUETAS DEL MOTOR
.
SUBARU HONDA
HONDA MOTOR CO. , LTD. MADE IN JAPAN
READ OWNER’S MANUAL BEFORE OPERATION.
LIRE LE MANUEL D UTILISATEUR AVANT USAGE.
VOR INBETRIEBNAHME UNBEDINGHT BEDIENUNGSANLEITUNG DURCHLESEN.
NO UTILIZAR SINANTES NO HABER LEIDO EL MANUAL
WHEN OIL LEVEL LOW,
ENGINE STOPS IMMEDIATELY.
OIL ALERT
NOT FOR REPRODUCTION

MANUAL del propietario de OSSP
Pieza n.° 351520
351520_E_HI
7
FUNCIONAMIENTO
AJUSTE DE LA PROFUNDIDAD DE LA CUCHILLA
La profundidad de las cuchillas se puede aumentar o disminuir girando la perilla ubicada en la
parte posterior de la máquina. La profundidad relativa de las cuchillas puede medirse mediante
la escala de profundidad ubicada en la parte posterior de la máquina y la barra al lado de ella.
(Véase Figura 1)
NOTA: Los artículos entre ( ) aparecen en las ilustraciones de las piezas y en las listas de piezas en las páginas 11-22.
MANGO PLEGABLE
Esta unidad está equipada con un mango superior plegable para facilitar el almacenamiento y el transporte del equipo. El mango
se puede plegar deslizando los sujetadores de bloqueo (artículo 35) hacia arriba. Esto libera el mango superior, lo que permite
plegarlo sobre la unidad.
POSICIÓN DE LA CUCHILLA Y PALANCA DE CONTROL DE PROFUNDIDAD
Las cuchillas se pueden subir o bajar al suelo con el pedal de ajuste de altura en la parte
posterior de la unidad. Las cuchillas estarán en la posición baja cuando el pedal esté
desbloqueado del soporte y estarán en posición de transporte cuando el pedal esté bloqueado
en el soporte. Véase las Figuras 2 y 3 para el funcionamiento. La profundidad de la cuchilla se
FUNCIONAMIENTO DE CORTE VERTICAL
AJUSTE DE LA PROFUNDIDAD: Con el motor apagado, establezca la profundidad de rastrillado para que las cuchillas solo
rocen una superficie plana, como una calzada o acera.
ENGRANAJE DE LAS CUCHILLAS: Empuje la palanca de la bobina hacia abajo en el mango del operador (lado superior
izquierdo). NOTA: Cuando utilice las cuchillas en condiciones de carga pesada, es decir, pasto seco denso o césped muy
irregular, empuje hacia abajo la palanca del mango del operador levantando ligeramente las ruedas delanteras. Engrane las
cuchillas. Baje lentamente la unidad hacia el césped.
CORTE: Realice un corte vertical en un área pequeña de prueba y examine los resultados. Se debe quitar pasto seco y cortes
de tallos y depositarlos sobre el césped en buen estado. Los estolones deben cortarse para luego quitarlos. Si se daña en
exceso al césped en buen estado, ajuste la profundidad de la cuchilla para disminuir el daño. Continúe con el rastrillado del
jardín y trabaje en una sola dirección (es decir, de norte a sur o de este a oeste). NOTA: Si las rpm del motor disminuyen
considerablemente, o dan un salto durante la operación, significa que la profundidad de la cuchilla es demasiado baja.
REMOCIÓN DE PASTO SECO/TALLOS: Después del corte vertical, quedará una capa de pasto seco y tallos cortados
depositada sobre la superficie del césped. Sugerimos el uso de una aspiradora de césped o un soplador con ruedas para
recoger y retirar el pasto seco y los tallos.
SOBRESEMBRADO
SECADO: Asegúrese de que el césped esté seco. Las condiciones de humedad pueden causar un daño mayor en el césped en
buen estado.
SIEMBRA: Esparza las semillas de césped según las indicaciones del proveedor de semillas (por ejemplo, 10 lb por 1000 pies
cuadrados, es decir, 4,5 kg por 93 m
2
). Los ajustes para el esparcimiento de semillas se encuentran en la parte frontal de la
unidad de la línea de montaje de semillas y deben utilizarse en conjunto con la tabla de semillas en la consola.
AJUSTE DE LA PROFUNDIDAD: Con el motor apagado, ajuste la profundidad de rastrillado de modo que las cuchillas alcancen
1/4-1/2 pulgadas (6-12 mm) por debajo de una superficie plana, como una calzada o acera.
ENGRANAJE DE LA BOBINA Y ESPARCIMIENTO DE SEMILLAS: Empuje hacia abajo la palanca de la bobina en el mango del
operador. NOTA: Al utilizar la bobina en condiciones de carga pesada, es decir, pasto seco denso o césped muy irregular, empuje
hacia abajo el mango del operador levantando ligeramente las ruedas delanteras. Engrane la bobina. Baje lentamente la unidad
hacia el césped.
Presionar las lengüetas exteriores del pedal permitirá que este se
libere del soporte y descienda hasta su posición. (Véase Figura
2)
Si presiona el centro del pedal y lo empuja hacia el soporte,
podrá trabarlo en la posición de transporte. (Véase Figura 3)
Figura 1
Figura 2 Figura 3
NOT FOR REPRODUCTION

MANUAL del propietario de OSSP
Pieza n.° 351520
351520_E_HI
8
Figura 6
Figura 5
AJUSTE DEL ÍNDICE DE SEMILLAS
ETIQUETA DE INSTRUCCIONES P/N 351501
Para establecer el índice de flujo de semillas, afloje la perilla en el dial indicador y gírelo
hacia la configuración correspondiente en el cuadro de aplicación de semillas (a
continuación o en la consola) según el tipo y la cantidad de semillas que se utilicen. (Véase
*****CONSEJOS*****
Antes de comenzar, es mejor evaluar el estado del césped cortando una o más muestras del área en la que se trabajará. La muestra se
puede tomar con una pieza de PVC o tubo de metal. Martille el tubo en el suelo, retírelo, empuje la muestra hacia afuera del tubo e
inspecciónela para determinar la profundidad del pasto seco en su jardín.
CORTAR EL CÉSPED
Corte el césped a su altura normal. Asegúrese de que el césped esté seco. Las condiciones de humedad pueden causar un daño mayor
en el césped en buen estado.
INSPECCIÓN
Revise el césped antes de comenzar a trabajar. Quite toda piedra, alambre, hilo o cualquier otro objeto que pueda resultar peligroso al
momento de trabajar.
IDENTIFICACIÓN
Identifique todos los objetos fijos que deben esquivarse durante el trabajo, como aspersores, válvulas de agua, cables enterrados, bases
de tendales, etc.
PASTO SECO
El pasto seco es una capa densa de césped muerto, recortes y raíces que se acumulan con el tiempo en la base del césped y evita que
el aire, el agua y los fertilizantes lleguen al suelo. Esto puede resultar en un desarrollo de raíces poco profundas y hacer que el césped
corra riesgo de sequía y enfermedades. El pasto seco también es el ambiente ideal para que los insectos se escondan allí y se
multipliquen. La eliminación periódica de pasto seco mantendrá su césped en buenas condiciones.
PASTO SECO DENSO
Los jardines con una cantidad excesiva de pasto seco requerirán de múltiples tratamientos para una eliminación efectiva. Si trata de
eliminar el exceso de pasto seco (más de 3/4 pulgadas [19 mm] de profundidad) en un solo intento, dañará o destruirá la parte viva del
césped. Es mejor eliminar el pasto seco denso mediante tratamientos estacionales, es decir, primavera y otoño.
Figura 4
CORTE: Pase la máquina sobre el área que ha sido sembrada para integrar la semilla al suelo. Si se daña en exceso al césped
en buen estado, ajuste la profundidad de la cuchilla para disminuir el daño. Continúe con el rastrillado del jardín y trabaje en una
sola dirección (es decir, de norte a sur o de este a oeste). NOTA: Si las rpm del motor disminuyen considerablemente, o dan un
salto durante la operación, significa que la profundidad de la cuchilla es demasiado baja.
RIEGO/FERTILIZACIÓN: Después de que se haya introducido la semilla en el suelo, riegue y fertilice según las indicaciones del
proveedor de semillas.
NOT FOR REPRODUCTION
Table of contents
Languages:
Other Billy Goat Seeder manuals
Popular Seeder manuals by other brands

horsch
horsch Maestro 16 SW operating instructions

HE-VA
HE-VA Terra-seeder Series operating instructions

Land Pride
Land Pride 313-308M Operator's manual

Landoll
Landoll Brillion SSP4 Operator's manual

Husqvarna
Husqvarna DT22 Operator's manual

Prodana Seeds
Prodana Seeds Proseeder HP600 operating instructions