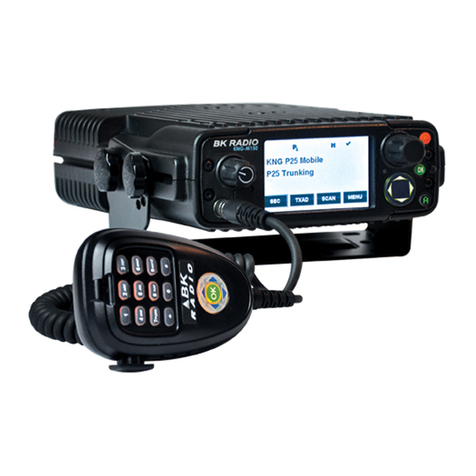
BK Radio KNG-P150S User manual

Welcome to the
KNG-P150S

Features and Specs
•512 Channels
–32 Groups of 16 Channels
•High/Low Power
–5 Watts High
–2 Watts Low
•Multi-line Alphanumeric Display
•3 year warranty

Buttons and
Switches

Buttons and Switches cont.

Functions
•Zone (Group) Select
–Press the “Zone Select” button (Display changes to zone list)
–Scroll to desired Zone with up/down arrows, or enter number with
keypad and wait for the select arrow to jump to that Zone
–Press Enter
•Squelch Adjust
–Press the “Squelch Adjust” Button
–Select “Preset” or “User Select”
•In “User Select”, adjust slider bar with up/down arrows just like the legacy BK
radio squelch knob.

Functions (continued)
•Transmit Code Guard (Tone) Select
–Press the TCG button to access Tone Pick List
–Scroll to desired Tone with up/down arrows or enter number with keypad
and wait for the select arrow to jump to that Tone
–Press Enter ; “TCG” will be highlighted when a Tone is selected from
the pick list. Assigns on a Per-Channel basis.
–In the TCG menu, select “Default” to use the pre-programmed tone
•Same as “zero-ing” out your tone on a DPH/GPH)
•High/Low Power Select
–“LPW” is displayed above the Diamond key
–When “LPW” is highlighted, radio is set to Low Power (2W)
–When “LPW” is not highlighted, radio is set to High Power (5W)

Functions (continued)
•Keypad Lock
–The collar switch is used to lock the keypad from operation.
–O = Unlocked, = Locked
–While Locked, “Keys Locked” displays when a key is pressed
•Priority Channel Select
–“PRI” is shown above the button
–Select Priority 1 or 2
–Choose “Use Per Zone”, Not Global
•“Main” – Priority channel will follow the Channel Select Switch
•Use up/down arrows to scroll to desired channel, Press Enter

Menu
•The Menu is accessed by pressing the button.
–Scan List Editing
–Cloning Menu
–Keypad Programming
–Version
–Contrast Adjust
–Radio Status

Scan List
•To Add/Delete channels from your scan list
–Press Menu
–Highlight “Scan List” and press ENT
–Current Zone will be displayed
–To Add a channel, press the +/- button
•A +sign will be displayed to the left of the channel name
•Continue through the channel list to add the rest
–To Delete a channel, highlight channel with the + sign
•Press the +/- button , + sign disappears.
•Continue through the channel list to remove the rest

Cloning
•Press Menu
•Highlight “Cloning”, Press ENT
•Select one of the 3 cloning options
–Active Zone
•Clones the current active source zone to active target zone
•Only valid option when cloning to/from Legacy radios
–Zone-to-Zone
•Allows for selection of source and target zones
–Entire Radio
•Clones all non-radio specific data to target radio
•Radio specific data includes Serial Number, Encryption Keys, P25ID,
and Passwords.

Enable/Disable Cloning
•You can enable and disable cloning on a per-Zone
basis.
–Why? – To protect a custom group from accidentally being
cloned over.
–How?
•Change the radio to the desired Zone
•Enter Keypad Programming
•Select “Zone Params”
•Arrow down until you see “Disable Clone”, Enter
•Select either “On” or “Off” to enable/disable feature
–On – Disable incoming cloning
–Off – Enable incoming cloning

Cloning Issue
•Problem:
–Due to the KNG utilizing a Tone Pick List, when you clone
to a Legacy radio, it will disable the “User Code Guard”
Feature on that radio for that Group.
–In short, you can’t select tones.
–Only affects the Group you just cloned to, not the whole
radio
–KNG Firmware issue – no fix at this time

Cloning Issue – Resolution #1
•Re-enable “User Code Guard” Feature in that Group
–On your affected Legacy Radio:
•Enter Program Mode with a programming plug
•Enter the Password “000000”, press Enter
•You will see “CH 00” on your Display
•Press “FCN” until you see “2--12345”
–Press the #1 key – the #1 in the display will start flashing
–You have just enabled “User Code Guard”
•Cycle power on the radio and your done.

Cloning Issue – Resolution #2
•Make your edits in a DPH and then use that radio as
your Master Cloner for both Legacy and KNG radios
–In KNG radios:
•Tones will populate in the individual group’s channels, just like in a
DPH/GPH
•Cloned tones will not affect the Tone Pick List
–Example: Incident Communications
•Get clone on a DPH from COMMO, or program from 205
•Clone to your other radios
•On the KNG, make sure you set your Tone Pick List to “Default” –
Basically Zero out your tone
•This tells the radio to use the tones programmed into that Zone

Keypad Programming
•Press Menu
•Highlight “Keypad Prog”, Press ENT
•Repeat on next screen
•Enter Password, Press ENT
•Highlight desired area to Edit/Program
–Channels
–Zone Parameters
–Global Parameters
•Press ENT

Keypad Programming:
Channels
•Highlight “Channels”, Press ENT
–Select Zone to edit
–Select Channel to edit
•On each setting, Press CLR before you can enter new data.
•Press ENT to save each setting before moving on.
–Channel Label - Enter name using keys, like cell phone
–Rx Freq – Receive Frequency
–Rx Mode – Analog, Digital, Mixed Mode
–RX Guard – Receive Tone, Analog Mode
–RX NAC – Receive Tone, Digital Mode

Keypad Programming:
Channels (continued)
–Squelch Mode – Digital setting, not used in Analog
–Tx Freq – Transmit Frequency
–Tx Mode – Analog, Digital, Mixed Mode
–Bandwidth – 12.5 khz (Narrow), 25 khz (Wide)
–Tx Guard – Transmit Tone, Analog Mode
–Tx NAC – Transmit Tone, Digital Mode
•TGID, Secure Mode, Key, Key Lock are all settings that
relate to full Digital operation and encryption that we
do not and will not use.

Keypad Programming:
Zone Parameters
•Highlight “Zone Params”, Press ENT
•Scroll to and select desired Zone, Press ENT
•On each setting, Press CLR before you can enter new data.
•Press ENT to save each setting before moving on.
–Zone Label – Edited similar to Channel Label
–Pri 1 Chan – Select your Priority 1 Channel for Zone
•Main defaults to Channel Select Switch
•Scroll to and select desired channel.
–Tx on Pri 1 – Radio will always transmit on Pri 1
–Pri 2 Chan – Same options as Pri 1

Keypad Programming:
Zone Parameters (continued)
–ANI Mode and ANI ID not used
–Disable Clone – used to enable/disable incoming cloning
for selected Zone
–Disable Plist – used to enable/disable access to Tone Pick
List for selected Zone

Keypad Programming:
Global Parameters
•These are set via software universally. Do Not change these
settings.
–Priority 1 Channel and Zone
–Tx on Priority 1
–Priority 2 Channel and Zone
–Scan Hold Time
–Busy Channel Mode
–Tx Time-Out Timer
–Backlight Mode and Duration
–Battery Saver
–Password
–P25 Unit ID
–Tx Max and Low Power
–Priority Scan Hold Time
Table of contents
Other BK Radio Two-way Radio manuals

