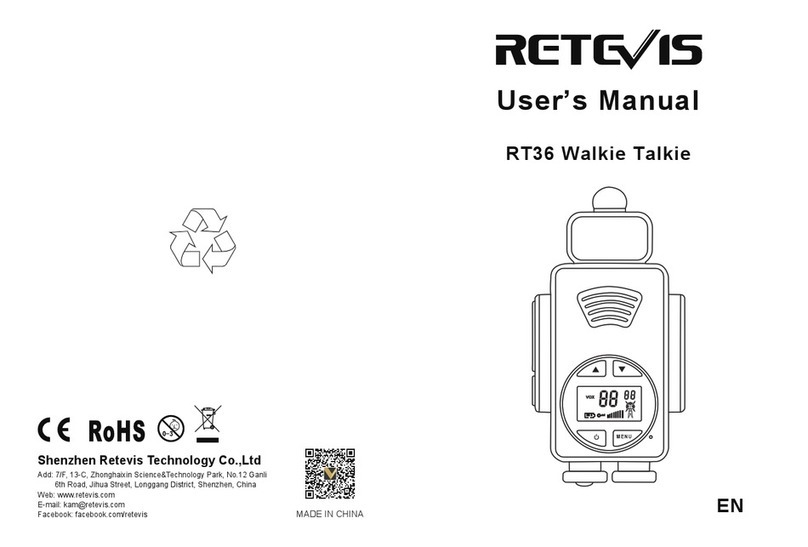
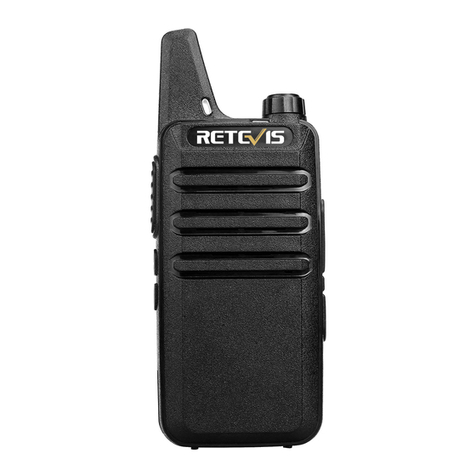
Retevis RT45 User manual

Two Way Radio
RT45
User’s Manual
MADE IN CHINA
Web:www.retevis.com
E-mail:[email protected]
Facebook:facebook.com/retevis

1
TO CUSTOMERS
Thank you very much fo using our two-way radios.
This product has a newly developed function menu and
humanism operation design, making it easy to use. It will
meet your requirement by the compact size and reasonable
price.
EU

PTT
(Push-To-Talk)
Button
LED Torch
Button
Micro USB Jack
Control and Function
3
Antenna
Microphone
LED Light
Headset Jack
(Headset not included)
Speaker
(Call) Button
(Volume/Channel
Down) Button
(Volume/Channel
Up) Button
(Monitor) Button (Lock) Button
/ (Menu/
Power) Button
Package Contents
• 2 x RT45 Two Way Radio
• 2 x Belt Clip
• 1 x Micro-USB Charging Cable
• 6 x 650mAh AA NiMH Rechargeable Batteries
• 1 x RT45 User Manual
Features and Specifications
16 PMR Channel
121 Sub-Codes(38 CTCSS Codes&83 DCS Codes)
VOX Function
10 Selectable Call Tone Alerts
Backlit LCD Display
Headset jack for Optional Headset
Roger Beep
Room Monitor
Battery Charger
Battery Level Meter
Channel Monitor
Channel Scan
Dual Watch
Keypad Lock
LED Torch
Battery Low Alert
Power Source: 6 AA NIMH Rechargeable Batteries
2

until a channel number appears and the radio Beeps . Press and
hold POWER ON/OFF button until the display goes blank to turn
off.
Monitor Function
It is good radio etiquette to monitor the channel for activity before
you transmit, to ensure that you do not interrupt other users already
on the channel. Press and hold "Mon" to check for channel activity.
If you hear static, the channel is clear for use.
The Battery Meter
The battery meter located in the display indicates how much
battery power you have remaining, to protect the rechargeable
battery, when battery power is low, the final bar in the Battery
Low icon will blink and an audible tone will sound twice before
the radio shuts off. Your batteries should be replaced or
recharged, if using rechargeable batteries.
TALKING AND LISTENING
Read this manual carefully before use.
Your radio has 8 channels. If you are in a group and you wish to
talk to each other, all radios must be set to the same channel
and interference eliminator code (CTCSS). If you experience
interference and need to change channel, ensure that you change
the channel and code of all radios in your group.
• For maximum clarity, hold radio 5 to 7 centimeters from mouth.
• Press and hold “PTT” and speak into the microphone. LED
indicator light glows continuously when transmitting.
• To receive messages, release “PTT”.
Display
1
2
3
4
5
6
8
7
9
10
1. Room Monitor
2. Battery Level Meter
3. Channel Indicator
4. Scan Indicator
5. Dual Watch Indicator
6. Volume Level Indicator
7. Sub-code Indicator
8. Keypad Lock Indicator
9. Transimit/Receive
Indicator
10. VOX Indicator
45
YOUR NEW RADIO
The two-way radios operate on PMR446 frequencies, and can
be used in any country where PMR446 frequencies are
authorized, subject to applicable regulations.
Turning Your Radio On And Off
To turn on the radio press and hold the POWER ON/OFF button

Keypad Lock
The keypad lock disables the “MENU”, “UP” and “DOWN” buttons.
It also disables the scan function, but allows you to use the “MON”
button to monitor the channel.
Press and hold the “LOCK” button for three seconds to lock or
unlock the keypad. When the radio is locked the lock icon will
show in the display.
Scan
By scanning, you can monitor channels and codes for transmissi-
ons and lock in on the one that interests you. More importantly,
you can find someone in your group who has accidentally changed
channels and is talking during your scan.
• To start scanning, briefly press and release the “MON” button.
• If you activate scan while your code is set to 0, then the radio will
check for any activity on each channel, regardless of the code in
use on that channel.
• If you activate scan while the code is set on 1 to 121, then the
radio will check for any activity on each channel, except the code
0 in use on that channel.
• While the radio is scanning, Scan Icon will display and the radio
will scroll through the channels.
• When activity is detected on a channel, the radio will stop
scanning and you will hear whatever transmissions are detected.
The radio’s display will show the channel and code on which
activity was detected.
• If you want to respond to the transmission, press “PTT” button
within 5 seconds and you can respond.
• The radio will resume scanning after 5 seconds of inactivity on
the channel.
• To stop scanning, briefly press and release “MON” button.
Volume
Press Up button to increase or DOWN button to decrease the
volume .The volume level icon v is displayed. Select volume level
1-8.
Channel
• Press “MENU” button the channel number will begin to flash.
• Use “UP” or “DOWN” button to change channel.
• Press “PTT” button to set new channel.
Interference Eliminator Code
Interference eliminator codes help minimize interference by
providing you with a choice of code combinations.
• Press “MENU” button until the code number begins to flash.
• Use “UP” or “DOWN” button to change the code.
• Press “PTT” to set new code.
You can specify a different code for each channel.
• To set a channel and code combination, press “MENU” button
and then press “UP” or “DOWN” button to select the channel.
• Press “MENU” button again and then press “UP” or “DOWN”
button to select a code.
• Press “PTT” to exit the menu and to save the channel and code
combination.
To set another channel and code combination, repeat these steps.
Time-out Timer
The Time-out Timer feature helps extend battery life by preventing
accidental transmission. The radio will emit a continuous warning
tone after “PTT” button is pressed for 3 minutes and will stop
transmitting.
67

2. Press the “UP” and “DOWN” button to change the setting.
3. Choose one of the following:
a. Press the Menu/Power button to enter the new setting and
proceed to other functions.
b. Press “PTT” button to save the setting and return to Standby
mode.
Call Tone
Press “CALL” button to transmit your call tone, alerting users on
the same channel and code that you are about to talk. Your radio
has 10 call tones (depend on model) to choose from.
To Set the Call Tone
• With the radio on, press “MENU” button until "C" appears in the
display.
• Current call tone setting will begin to flash.
• Press “UP” or “DOWN” to change and hear call tones while the
setting number is flashing.
• Press “PTT” to set new call tone.
Room Monitor
Enables your radio to detect voice/noises ( according to the
sensitivity level set) and transmit back to the listening radio
without pushing the PTT button. The monitoring radio is not able
receive any transmissions in this mode.
TO turn Room Monitor ON/OFF
1. Press MENU button until the Room monitor icon blinks,
2. Press the "UP" or "DOWN" button to turn the room monitor On or
Off.
3. Choose one of the following:
Scan Advance
If scan stops on a channel that you don’t want to listen to, briefly
press “UP” or “DOWN“ button to resume scanning for the next
active channel.
Hands Free Use (VOX)
VOX allows you to transmit "hands-free" by talking while using
VOX accessories connected to the radio.
Note: When using audio accessories with your radio, turn your
radio off before you place the accessory on your head or in your
ear.
How To Use The VOX Feature
In VOX mode, your radio can be used“hands-free,” automatically
transmitting when you speak. You can set the VOX sensitivity level
to fit the volume of your voice and avoid transmissions triggered by
background noise.
To turn VOX mode on or off
1. Press the Menu/Power button until the VOX iconflashes on the
display. The current On or Off setting is displayed.
2. Press the “UP” and “DOWN” button to turn VOX On or Off.
3. Choose one of the following:
a. Press the Menu/Power button to enter the new setting and
proceed to other functions.
b. Press “PTT” button to save the setting and return to Standby
mode.
To set VOX sensitivity
1. Press the Menu/Power button until the VOX sensitivity icon
flashes and the current sensitivity level is displayed.
89

Dual watch receiver [dual scan]
Dual Scan is a user selectable feature. In dual scan, the radio looks
for activity on home channel and selected dual scan channel in the
radio.
[Dual scan:1] The user can select dual scan channel through menu,
when dual scan channel was selected, the dual scan
code is the code in dual scan channel, because our
radio have different code in each channel through
menu setting.
[Dual scan:2] when dual scan feature is enable(user selected a
dual scan channel through menu) , a dual icon
“2CH” is displayed in LCD.
[Dual scan:3] In dual scan mute state(no signal in home channel
and dual scan channel), the home channel with home
channel’s code and dual scan icon in display. If home
channel is actively , the display do not change. If dual
scan channel is actively, the radio will display dual
scan channel with dual scan channel’s code and dual
scan icon. After RX hang time, the radio will return
to home channel display.
[Dual scan:4] The dual scan is same as normal scan except this
scan have not CSQ feature.Reference scan
description , dual scan have scan mute, scan
unmute, RX hang time ,TXhang time state..
Reset function
Turn off the radio, press LOCK Button and POWER Button to
turn on the radio.
a. Press the Menu/Power button to enter the new setting and
proceed to other functions.
b. Press “PTT” button to save the setting and return to Standby
mode.
Note: When the voice / noise in the monitored room continues for
more than 60 seconds,the monitoring radio stop monitoring
for 5 seconds,and resumes.
To set Room Monitor sensitivity
1. Press the Menu/Power button until the Room Monitor sensitivity
icon flashes and the current sensitivity level is displayed.
2. Press the “Up” or “Down” button to change the setting.
3. Choose one of the following:
a. Press the Menu/Power button to enter the new setting and
proceed to other functions.
b. Press “PTT” button to save the setting and return to Standby
mode.
To turn Key Tone & Roger Beep On or Off
1. Press the Menu/Power button until “P” (the Key tone& Roger
beep) icon flashes on the display. The current On or Off setting is
displayed.
2. Press the “UP” and “DOWN” button to turn Key tone&Roger beep
On or Off.
3.Choose one of the following:
a. Press the Menu/Power button to return to Standby mode.
b. Press “PTT” button to save the setting and return to Standby
mode.
10 11

CDCSS CODE WORD TABLE (83 groups)
12
Technical specifications and warnings
Technical specifications:
Operating frequency:446.0~446.2MHz
Output Power:≤0.5W
Channels:16 PMR (Note: Only Channels 1 to 8 are available by default.
Channels 9 to 16 need to be activated by user before they can
be selected. Channels 9 to 16 should only be used in countries
where these frequencies are allowed by government authorities.
Channels 9 to16 are not allowed in Russia.)
Modulation type:F3E
Power source:AAAlkaline 4.5V DC /
NiMH battery 3.6V DC 650mAh
Channel and frequency correspondence list:
Code
Number
Octal
Code
Bit Pattern
MSB LSB
13
CTCSS FREQUENCY (38 groups)
1
2
3
4
5
6
7
8
9
10
11
12
13
14
15
16
17
18
19
20
67.0
71.9
74.4
77.0
79.7
82.5
85.4
88.5
91.5
94.8
Code Frea(Hz) Code Frea(Hz) Code Frea(Hz) Code Frea(Hz)
97.4
100.0
103.5
107.2
110.9
114.8
118.8
123.0
127.3
131.8
21
22
23
24
25
26
27
28
29
30
136.5
141.3
146.2
151.4
156.7
162.2
167.9
173.8
179.9
186.2
31
32
33
34
35
36
37
38
192.8
203.5
210.7
218.1
225.7
233.6
241.8
250.3
39
40
41
42
43
44
45
56
47
48
49
50
51
52
53
54
55
56
57
58
59
60
61
62
63
64
65
66
67
68
69
70
71
72
73
74
75
76
77
78
79
80
023
025
026
031
032
043
047
051
054
065
071
072
073
074
114
115
116
125
131
132
134
143
152
155
156
162
165
172
174
205
223
226
243
244
245
251
261
263
265
271
306
311
11101100011100000010011
11010110111100000010101
11001011101100000010110
10100011111100000011001
10111110101100000011010
10110110110100000100011
00011111101100000100111
11111001010100000101001
11011110100100000101100
10111010001100000110101
11001111001100000111001
11010010011100000111010
01011100110100000111011
11101000111100000111100
01101011110100001001100
11100101011100001001101
11111000001100001001110
00001111011100001010101
01111010011100001011001
01100111001100001011010
01011101101100001011100
01101111010100001100011
00111101100100001101010
10001001101100001101101
10010100111100001101110
11010111100100001110010
01100011101100001110101
00001011111100001111010
00110001011100001111100
11011101001100010000101
11010001110100010010011
11110110000100010010110
10001011011100010100011
00111111010100010100100
10110001111100010100101
11000100111100010101001
00101110111100010110001
10111101000100010110011
10000111100100010110101
11110010100100010111001
00011001111100011000110
01110001101100011001001
Code
Number
Octal
Code
Bit Pattern
MSB LSB
81
82
83
84
85
86
87
88
89
90
91
92
93
94
95
96
97
98
99
100
101
102
103
104
105
106
107
108
109
110
111
112
113
114
115
116
117
118
119
120
121
315
331
343
346
351
364
365
371
411
412
413
423
431
432
445
464
465
466
503
506
516
532
546
565
606
612
624
627
631
632
654
662
664
703
712
723
731
732
734
743
754
11011000110100011001101
01000111110100011011001
01010010111100011100011
01110101001100011100110
00011101011100011101001
11010000101100011110100
01011110000100011110101
00101011000100011111001
11101110110100100001001
11110011100100100001010
01111101001100100001011
10010111001100100010011
11011000101100100011001
11000101111100100011010
11110111000100100100101
01001111110100100110100
11000001011100100110101
11011100001100100110110
01111000110100101000011
01011111000100101000110
10000011011100101001110
00011100011100101011010
00110011110100101100110
00011000111100101110101
10111011001100110000110
11001110001100110001010
00011110101100110010100
00000011111100110010111
11100101000100110011001
11111000010100110011010
10011000011100110101100
01001000111100110110010
01110010011100110110100
01000101011100111000011
00010111101100111001010
01110011000100111010011
00111100100100111011001
00100001110100111011010
00011011010100111011100
00101001101100111100011
01000001111100111101100
Ch. Freq. (MHz) Ch. Freq.(MHz) Ch. Freq. (MHz) Ch. Freq.(MHz)
1 446.00625 5 446.05625
2 446.01875 6 446.06875
3 446.03125 7 446.08125
4 446.04375 8 446.09375
9 446.10625 13 446.15625
10 446.11875 14 446.16875
11 446.13125 15 446.18125
12 446.14375 16 446.19375

Use only RETEVIS’s approved supplied or replacement belt clip,
batteries, charger and accessories. Use of non-manufacturer-name
approved batteries, and accessories may exceed the RF exposure
guidelines.
1) The antenna in the packing is unique, please do not optional
change.
2) For safe operation, the antenna for the product shall be least
25mm away from your face, when speaking.
3) Switching to other antennas is prohibited and will affect the
radio performance.
4) DO NOT use any portable radio that has a damaged antenna.
If a damaged antenna comes into contact with your skin, a
minor burn can result.
For adapter: Shall be installed near the equipment and shall be
easily accessible.
For battery: Risk of explosion battery is replaced by an incorrect
type, dispose of used batteries according to the instructions.
WARNING
Use the two way radio in the environment with the temperature
between -10℃ and 40℃, otherwise, it may damage your two way
radio. It can be operating under 2000m.
For the following equipment: two way radio
Is in compliance with the essential requirements and other relevant
provisions of Directive 2014/53/EU.
EU Declaration of Conformity:
Refer to article 10(9), shall be provided as follows:
Hereby, Shenzhen Retevis Technology Co., Ltd declares that the
radio equipment type RT45 is in compliance with Directive
2014/53/EU.
The full text of the EU declaration of conformity is available at the
following internet address: www.retevis.com.
Test position and configuration Head SAR was performed with the
device configured in the positions according to IEEE1528, and face
up SAR was performed with the device 25mm from the phantom,
Body SAR was performed with the belt clip on the device 0 mm from
the phantom. Body SAR was also performed with the headset
attached and without.
14 15
CAUTION
CAUTION
WARNING
WARNING

16 17
Only can use the adapter as below:
Manufacturer: Dongguan Guanjin Elecrtonics Technology Co., Ltd.
Address: Block 16 Qiantou New Industrial Part Niushan,
Dongcheng District Dongguan City, Guangdong, Province,
China.
Model Name: K05S050055G
Rated Input & Output: Input: 100-240V 50/60Hz, 0.2A;
Output: 5.0V --- 0.55A
The plug considered as disconnect device of adapter.
Only can use the rechargeable Batteries as below:
Nominal voltage: 1.2V DC
Batteries and chargers safety information
This document contains important safety and operating instructions.
Read these instructions carefully and save them for future reference.
Before suing the battery charger, read all the instructions and
cautionary markings on
• The charger
• The battery
• The radio using the battery
1) To reduce risk of injury, charge only the rechargeable
Retevis-authorized batteries. Other batteries may explode,
causing personal injury and damage.
2) Use of accessories not recommended by Retevis may result
in risk of fire, electric shock, or injury.
3) To reduce risk of damage to the electric plug and cord, pull by
the plug rather than the cord when disconnecting the charger.
CAUTION
4) An extension cord should not be used unless absolutely
necessary. Use of an improper extension cord could result in
risk of fire and electric shock, If an extension cord must be
used, make sure that the cord size is 18AWG for lengths up
to 6.5 feet(2.0m), and 16AWG for lengths up to 9.8 feet(3.0m).
5) To reduce risk of fire, electric shock, or injury, do not operate
the charger if it has been broken or damaged in any way.
Take it to a qualified Retevis service representative.
6) Do not disassemble the charger: it is not repairable and
replacement parts are not available. Disassembly of the
charger may result in risk of electrical shock or fire.
7) To reduce risk of electric shock, unplug the charger from the
AC outlet before attempting any maintenance or cleaning.
8) Do not attempt to charge alkaline batteries.
Operational safety guidelines
• Turn the radio OFF when charging battery.
• The charger is not suitable for outdoor use. Use only in dry
locations/conditions.
• Connect charger only to an appropriately fused and wired supply
of the correct voltage (as specified on the product).
• Disconnect charger from line voltage by removing main plug.
• The outlet to which this equipment is connected should be nearby
and easily accessible.
• Maximum ambient temperature around the power supply
equipment must not exceed 40°C (104°F).
• Make sure that the cord is located where it will not be stepped
on, tripped over, or subjected to water, damage, or stress.
• Ensure that the end of the antenna does not touch your eyes.
• When the transceiver is used for long transmissions, the radiator
and chassis will become hot.
• Don not touch these locations when replacing the battery pack.
• Do not immerse the transceiver in water.
• Always switch the transceiver power off before installing optional
accessories.
• The charger is the Device that disconnects the units from the AC
mains line, the AC plug should be readily accessible.
• Do not transmit too long, for the radio may heat and hurt the user
TURN THE TRANSCEIVER POWER OFF IN THE FOLLOWING
LOCATIONS:
• In explosive atmospheres (inflammable gas, dust particles,
metallic powders, grain powders, etc.)
• While taking on fuel or while parked at gasoline service stations.
• Near explosives or blasting sites.
• In aircraft. (Any use of the transceiver must follow the
instructions and regulations provided by the airline crew.)
• Where restrictions or warnings are posted regarding the use of
the radio devices, including but not limited to medical facilities.
• Near persons using pacemakers.
Warning: CHOKING HAZARD – Small Parts. Not for children
under 3 years.
Attention! RISQUE D’ÉTOUFFEMENT – Contient de petits
éléments. Ne convient pas aux enfants de moins de 3 ans.
Advertencia: PELIGRO DE ASFIXIA – Contiene piezas
pequeñas. No conveniente para niños menores de 3 años.
When the conductive metals such as jewellery, key or decorative
chains touch the battery terminals, all the batteries are likely to
cause damage to the items or personal injury. These conductive
metals may form a short circuit and generates much heat. Do deal
with any battery carefully, especially when put it into pocket, wallet
or other metallic containers.
Please read the following brief instructions, non-compliance
with these rules may cause danger or violate the law.
• Obey the local government regulation before using this radio,
improper use may violate the law and the punished.
• Do not charge the transceiver and battery pack when they are
wet.
• Ensure that there are no metallic items located between the
transceiver and the battery pack.
• Don not use the options not specified by Retevis
• If the die-cast chassis or other transceiver part is damaged, do
not touch the damaged parts.
• If the headset or headphone is connected to the transceiver,
reduce the transceiver volume. Pay attention to the volume level
when turning the squelch off.
• Do not place the microphone cable around your neck while near
machinery that may catch the cable.
• Do not please the transceiver on unstable surfaces.
18 19
WARNING WARNING
DANGER

Achtung: ERSTICKUNGSGEFAHR – Kleinteile. Nicht für
Kinder unter 3 Jahren geeignet.
Waarschuwing: VERSTIKKINGSGEVAAR – Bevat kleine
onderdelen. Niet geschikt voor kinderen jonger dan 3 jaar.
Attenzione: RISCHIO DI SOFFOCAMENTO – Contiene
pezzi di piccole dimensioni. Non adatto a bambini di età
inferiore a 3 anni.
Aviso: RISCO DE ASFIXIA – Peças pequenas. Produto não
recomendado para crianças com menos de 3 anos.
20
ZU KUNDEN
Vielen Dank für die Nutzung unserer Funkgeräte.
Dieses Produkt verfügt über ein neu entwickeltes
Funktionsmenü und ein humanistisches
Bedienungsdesign, wodurch es einfach zu
bedienen ist. Es wird Ihre Anforderung durch die
kompakte Größe und günstigen Preis erfüllen.
1
Deutsch

PTT
(Push-To-Talk)
Taste
LED-Taschenlampe
Taste
Micro USB Jack
Steuerung und Funktion
3
Antenne
Mikrofon
LED Lampe
Headset-Buchse
(Headset nicht enthalten)
Lautsprecher
(Anruf) Taste
(Volumen/Kanal
abwärts) Taste
(Volumen/Kanal
aufwärts) Taste
(Monitor) Taste (Tastensperre) Taste
/ (MENÜ/
Power) Taste
Lieferumfang
• 2 x RT45 Funkgerät
• 2 x Gürtelclip
• 1 x Mikro-USB Ladekabel
• 6 x 650mAh AA NiMH wiederaufladbare Akkus
• 1 x RT45 Bedienungsanleitung
Besonderheiten und Spezifikationen
PMR446 16 Kanal
121 Sub-Codes(38 CTCSS Codes&83 DCS Codes)
VOX Funktion
10 wählbare Anrufton
LCD-Display mit Hintergrundbeleuchtung
Headset-Buchse für optionales Headset
Roger Beep
Raummonitor
USB Ladekabel
Batteriestandanzeige
Kanal Monitor
Kanal Scan
Dual-Standby
Tastensperre
LED-Taschenlampe
Niedriger Batterie Alarm
Stromversorgung: 6 AA NiMH wiederaufladbare Akkus
2

1
2
3
4
5
6
8
7
9
10
1. Raummonitor
2. Batteriestandanzeige
3. Kanal-Anzeige
4. Scan-Anzeige
5. Dual-Standby Anzeige
6. Lautstärkeanzeige
7. Sub-Code Anzeige
8. Tastatursperr Anzeige
9. Sende- /
Empfangsanzeige
10. VOX-Anzeige
gedrückt, bis eine Kanalnummer erscheint und das Funkgerät
piept. Wenn Sie das Funkgerät ausschalten möchten, bitte
halten Sie die Taste MENU gedrückt, bis die Anzeige leer ist.
Monitor Funktion
Es ist gut, um den Kanal vor der Übertragung auf Aktivität zu
überwachen, und um sicherzustellen, dass andere Benutzer, die
sich bereits auf dem Kanal befinden, nicht unterbrochen werden.
Halten Sie "Mon" gedrückt, um nach Kanalaktivität zu suchen.
Wenn Sie statisch hören, ist der Kanal zur Verwendung frei.
Batterieanzeiger
Der im Display angezeigte Batterieanzeiger zeigt an, wie viel
Batteriestrom verblieben ist, um den wiederaufladbar Akku zu
schützen. Wenn der Akku fast leer ist, blinkt der letzte Balken
im Symbol Battery Low und ein akustisches Signal ertönt
zweimal, bevor das Funkgerät abschaltet. Ihre Batterien sollten
ausgetauscht oder aufgeladen werden, wenn wiederaufladbare
Batterien verwendet werden.
SPRECHEN UND HÖREN
Lesen Sie diese Anleitung vor dem Gebrauch sorgfältig durch.
Das Funkgerät hat 16 Kanäle. Wenn Sie sich in einer Gruppe
befinden und miteinander sprechen möchten, müssen alle
Funkgeräte auf denselben Kanal und CTCSS eingestellt sein.
Wenn Sie gestört sind, müssen Sie den Kanal ändern, stellen Sie
aber sicher, dass Sie den Kanal und den CTCSS aller Funkgeräte
in Ihrer Gruppe ändern.
• Halten Sie das Funkgerät 5 bis 7 cm vom Mund fern, um eine
maximale Klarheit zu erhalten.
• Halten Sie "PTT" gedrückt und sprechen Sie ins Mikrofon. Die
Display
45
IHR NEUES FUNKGERÄT
Das Zweiwege-Funkgerät arbeitet mit PMR446 Frequenzen
und können in jedem Land verwendet werden, in dem
PMR446-Frequenzen zugelassen sind, aber muss unter
Beachtung von einschlägiger Vorschriften sein.
Ein- und Ausschalten Ihres Funkgeräts
Um das Funkgerät einzuschalten, halten Sie die Taste MENU

Wiederholen Sie diese Schritte, um eine andere Kombination aus
Kanal und Code festzulegen.
Time-out Timer
Die TOT-Funktion verlängert die Batterielebensdauer, indem eine
versehentliche Übertragung verhindert wird. Das Funkgerät gibt
einen kontinuierlichen Warnton aus, nachdem die "PTT"-Taste 3
Minuten lang gedrückt wurde, und hört auf zu senden.
Tastensperre
Die Tastensperre deaktiviert die Tasten "MENU", "UP" und
"DOWN". Außerdem wird die Scan-Funktion deaktiviert, aber
Sie können mit der Taste "MON" den Kanal überwachen.
Halten Sie die Taste "LOCK" drei Sekunden lang gedrückt, um
diese Funktion zu aktivieren oder deaktivieren. Wenn das
Funkgerät gesperrt ist, erscheint das Schlosssymbol im Display.
Scannen
Durch Scannen können Sie Kanäle und Codes für Übertragungen
überwachen und auf demjenigen, der Sie interessiert, stoppen.
Wichtiger noch: Sie können jemanden in Ihrer Gruppe finden, der
versehentlich Kanäle gewechselt hat und während Ihres
Scanvorgangs spricht.
• Bitte drücken Sie die Taste "MON" kurz, um den Scan zu starten
• Wenn Sie den Scanvorgang aktivieren, während der Code auf 0
eingestellt ist, wird das Funkgerät die Aktivität auf jedem Kanal
prüfen, unabhängig von dem auf diesem Kanal verwendeten Code
• Wenn Sie den Scanvorgang aktivieren, während der Code auf 1
bis 121 eingestellt ist, wird das Funkgerät die Aktivität auf jedem
Kanal prüfen, mit Ausnahme des Codes 0, der auf diesem Kanal
verwendet wird.
maximale Klarheit zu erhalten.
• Halten Sie "PTT" gedrückt und sprechen Sie ins Mikrofon. Die
LED-Kontrollleuchte leuchtet beim Senden kontinuierlich.
• Um Nachrichten zu empfangen, lassen Sie "PTT" los.
Lautstärke
Drücken Sie die Up-Taste, um die Lautstärke zu erhöhen oder
drücken Sie die DOWN-Taste, um die Lautstärke zu verringern.
Das Lautstärke-Symbol v wird angezeigt. Wählen Sie den
Lautstärkepegel 1-8.
Kanal
• Drücken Sie die Taste "MENU", die Kanalnummer beginnt zu blinken.
• Mit der Taste "UP" oder "DOWN" den Kanal zu wechseln.
• Drücken Sie die "PTT" -Taste, um einen neuen Kanal einzustellen.
Interferenz Eliminator Code(CTCSS)
Die Interferenz Eliminator Code hilft Ihnen die Störungen zu
reduzieren, und Sie könnten die Codekombinationen auswählen.
• Drücken Sie die Taste "MENU", die Codenummer beginnt zu
blinken.
• Verwenden Sie die Taste "UP" oder "DOWN", um den Code zu ändern.
• Drücken Sie "PTT", um den neuen Code einzustellen.
Sie können für jeden Kanal einen anderen Code angeben.
• Um eine Kanal- und Codekombination einzustellen, drücken
Sie die Taste "MENU" und dann die Taste "UP" oder "DOWN",
um den Kanal auszuwählen.
• Drücken Sie erneut die Taste "MENU" und anschließend die
Taste "UP" oder "DOWN", um einen Code auszuwählen.
• Drücken Sie "PTT", um das Menü zu verlassen und die
Kombination von Kanal und Code zu speichern.
67

Display blinkt. Die aktuelle Einstellung für "Ein" oder "Aus" wird
angezeigt.
2. Drücken Sie die Taste Up oder Down, um VOX ein- oder
auszuschalten.
3. Wählen Sie eine der folgenden Optionen:
a. Drücken Sie die Taste Menu/Power, um die neue Einstellung
aufzurufen und mit anderen Funktionen fortzufahren.
b. Drücken Sie die PTT-Taste, um die Einstellung zu speichern
und in den Standby-Modus zurückzukehren.
So stellen Sie die VOX-Empfindlichkeit ein:
1. Drücken Sie die Taste Menu / Power, bis das
VOX-Empfindlichkeitssymbol blinkt und die aktuelle
Empfindlichkeitsstufe angezeigt wird.
2. Drücken Sie die Up oder Down Taste, um die Einstellung zu
ändern.
3. Wählen Sie eine der folgenden Optionen:
a. Drücken Sie die Taste Menu / Power, um die neue
Einstellung aufzurufen und mit anderen Funktionen
fortzufahren.
b. Drücken Sie die Taste PTT, um die Einstellung zu speichern
und in den Standby-Modus zurückzukehren.
Rufton
Drücken Sie die "CALL" -Taste, um Ihren Rufton zu senden, und
alarmiert den Benutzer auf demselben Kanal und Code, den Sie
gerade sprechen. Das Funkgerät verfügt über 10 Anruftöne (je
nach Modell) zur Auswahl.
So stellen Sie den Anrufton ein
• Drücken Sie bei eingeschaltetem Funkgerät die Taste "MENU",
bis das Display "C" erscheint.
• Während das Funkgerät scannt, wird das Scan-Symbol angezeigt
und das Funkgerät blättert durch die Kanäle.
•Wenn auf einem aktiver Kanal erkannt wird, hört das Funkgerät auf
zu scannen und Sie können die Übertragungen hören. Die Anzeige
des Funkgeräts zeigt den Kanal und den Code des aktiver Kanal an.
• Wenn Sie auf die Übertragung reagieren möchten, drücken Sie
innerhalb von 5 Sekunden die Taste "PTT" und Sie können darauf
antworten.
• Das Funkgerät wird nach 5 Sekunden Inaktivität auf dem Kanal
erneut gescannt.
• Um den Scanvorgang anzuhalten, drücken Sie kurz die Taste "MON".
Scan Advance
Wenn der Scanvorgang auf einem Kanal endet, den Sie nicht hören
möchten, drücken Sie kurz die Taste "UP" oder "DOWN", um den
Scanvorgang für den nächsten aktiven Kanal fortzusetzen.
VOX
Mit VOX können Sie "Freisprechen" durch Sprechen übertragen,
während Sie Zubehör an das Funkgerät anschließen.
Hinweis: Wenn Sie das Funkgerät-Zubehör verwenden, schalten
Sie Ihr Funkgerät aus, bevor Sie das Zubehör auf Ihren
Kopf oder Ihr Ohr legen.
Wie verwenden Sie die VOX-Funktion
Im VOX-Modus kann die Übertragungen automatisch "freihändig"
gesendet werden, wenn Sie sprechen. Sie können die
VOX-Empfindlichkeit einstellen, um die Lautstärke Ihrer Stimme
zu passen und vermeiden die Übertragungen, die durch
Hintergrundgeräusche ausgelöst werden.
So schalten Sie den VOX-Modus ein oder aus:
1. Drücken Sie die Taste Menu/Power, bis das VOX-Symbol im
89

3. Wählen Sie eine der folgenden Optionen:
a. Drücken Sie die Taste MENU, um die neue Einstellung
einzugeben und mit anderen Funktionen fortzufahren.
b. Drücken Sie die Taste "PTT", um die Einstellung zu speichern
und in den Standby-Modus zurückzukehren.
Um den Tastenton und den Roger-Beep ein- oder
auszuschalten
1. Drücken Sie die Taste MENU, bis das Symbol "P" (Tastenton
und Roger-Piepton) auf dem Display blinkt. Die aktuelle
Einstellung Ein oder Aus wird angezeigt.
2. Drücken Sie die Taste "Oben" oder "Unten", um den
Tastenton und den Roger-Beep ein- oder auszuschalten.
3. Wählen Sie eine der folgenden Optionen:
a. Drücken Sie die Taste MENU, um in den Standby-Modus
zurückzukehren.
b. Drücken Sie die Taste "PTT", um die Einstellung zu
speichern und in den Standby-Modus zurückzukehren.
Dual Scan
Dual Scan ist eine wählbare Funktion vom Benutzer. Beim
Dual-Scan sucht das Funkgerät nach Aktivität auf dem Hauptkanal
und dem ausgewählten Dual-Scan-Kanal im Funkgerät.
[Dual Scan: 1] Der Benutzer kann den Dual Scan-Kanal über das
Menü auswählen. Wenn der Dual Scan-Kanal ausgewählt
wurde, ist der Dual Scan-Code der Code im Dual
Scan-Kanal, da unser Funkgerät einen verschiedenen
Code in jedem Kanal über die Menüeinstellung hat.
[Dual Scan: 2] Wenn die Dual-Scan-Funktion aktiviert ist (Benutzer
hat einen Dual-Scan-Kanal über das Menü ausgewählt),
wird ein duales Symbol "2CH" im LCD angezeigt.
• Die aktuelle Ruftoneinstellung beginnt zu blinken.
• Drücken Sie "UP" oder "DOWN", um die Anruftöne zu ändern
und zu hören, während die Einstellnummer blinkt.
• Drücken Sie "PTT", um einen neuen Rufton einzustellen.
Monitor
Die Funktion ermöglicht Ihrem Funkgerät, die Stimme / Geräusche
zu erkennen (gemäß der eingestellten Empfindlichkeit) und zurück
zum Hörfunkgerät zu übertragen, ohne die PTT-Taste zu drücken.
Das Überwachungsfunkgerät kann in diesem Modus keine
Übertragungen empfangen.
Um den Raummonitor ein-oder auszuschalten
1. Drücken Sie die Taste MENU, bis das Raummonitor-Symbol blinkt.
2. Drücken Sie die Taste "Oben" oder "Unten", um den Raummonitor
ein- oder auszuschalten.
3. Wählen Sie eine der folgenden Optionen:
a. Drücken Sie die Taste MENU, um die neue Einstellung
einzugeben und mit anderen Funktionen fortzufahren.
b. Drücken Sie die Taste "PTT", um die Einstellung zu speichern
und in den Standby-Modus zurückzukehren.
Hinweis: Wenn die Stimme/Störgeräusche im überwachten Raum
länger als 60 Sekunden andauern, stoppt das Funkgerät
die Überwachung für 5 Sekunden und wird fortgesetzt.
Um die Empfindlichkeit des Raummonitors einzustellen
1. Drücken Sie die Taste MENU, bis das Symbol Empfindlichkeit der
Raumüberwachung blinkt und die aktuelle Empfindlichkeitsstufe
angezeigt wird.
2. Drücken Sie die Taste "Oben" oder "Unten", um die Einstellung
zu ändern.
10 11

13
12
Kan. Freq. (MHz) Kan. Freq.(MHz) Kan. Freq. (MHz) Kan. Freq.(MHz)
1 446.00625 5 446.05625
2 446.01875 6 446.06875
3 446.03125 7 446.08125
4 446.04375 8 446.09375
9 446.10625 13 446.15625
10 446.11875 14 446.16875
11 446.13125 15 446.18125
12 446.14375 16 446.19375
Kanal und Frequenz- Korrespondenztabelle:
1
2
3
4
5
6
7
8
9
10
11
12
13
14
15
16
17
18
19
20
67.0
71.9
74.4
77.0
79.7
82.5
85.4
88.5
91.5
94.8
Code Frea(Hz) Code Frea(Hz) Code Frea(Hz) Code Frea(Hz)
97.4
100.0
103.5
107.2
110.9
114.8
118.8
123.0
127.3
131.8
21
22
23
24
25
26
27
28
29
30
136.5
141.3
146.2
151.4
156.7
162.2
167.9
173.8
179.9
186.2
31
32
33
34
35
36
37
38
192.8
203.5
210.7
218.1
225.7
233.6
241.8
250.3
CTCSS FREQUENZ (38 Gruppen)
[Dual Scan: 3] Im Dual-Scan-Mute-Zustand (kein Signal im
Hauptkanal und Dual-Scan-Kanal), Der Code des
Hauptkanals und das Dual-Scan-Symbol werden im
Display angezeigt. Wenn der Hauptkanal aktiv st, ändert
sich die Anzeige nicht. Wenn der Dual-Scan-Kanal
aktiv ist, zeigt das Funkgerät einen Dual-Scan-Kanal
mit Dual-Scan-Kanalcode und Dual-Scan-Symbol an.
Nach Ablauf der RX-Zeit kehrt das Funkgerät zur
Anzeige des Hauptkanals zurück.
[Dual Scan: 4] Der Dual Scan entspricht dem normalen Scan,
außer dass dieser Scan keine CSQ-Funktion hat.
Reset-Funktion
Bei der Ausschaltung, bitte drücken Sie die Tasten "LOCK" und
"MENU", um das Walkie Talkie einzuschalten.
Technische Spezifikationen und Warnungen
Technische Spezifikationen:
Betriebsfrequenz: 446.0-446.2MHz
Ausgangsleistung: ≤0.5W
Kanal: 16 PMR446
(Hinweis: Standardmäßig sind nur die Kanäle 1 bis 8 verfügbar.
Die Kanäle 9 bis 16 müssen vom Benutzer aktiviert werden,
bevor sie ausgewählt werden können. Die Kanäle 9 bis 16
sollten nur in Ländern verwendet werden, in denen diese
Frequenzen von Regierungsbehörden zugelassen sind. Die
Kanäle 9 bis 16 sind in Russland nicht erlaubt.)
Modulationstyp: F3E
Stromquelle: AA Alkaline 4.5V DC /
NiMH Batterie 3.6V DC 650mAh

Code
Number
Octal
Code
Bit Pattern
MSB LSB
39
40
41
42
43
44
45
56
47
48
49
50
51
52
53
54
55
56
57
58
59
60
61
62
63
64
65
66
67
68
69
70
71
72
73
74
75
76
77
78
79
80
023
025
026
031
032
043
047
051
054
065
071
072
073
074
114
115
116
125
131
132
134
143
152
155
156
162
165
172
174
205
223
226
243
244
245
251
261
263
265
271
306
311
11101100011100000010011
11010110111100000010101
11001011101100000010110
10100011111100000011001
10111110101100000011010
10110110110100000100011
00011111101100000100111
11111001010100000101001
11011110100100000101100
10111010001100000110101
11001111001100000111001
11010010011100000111010
01011100110100000111011
11101000111100000111100
01101011110100001001100
11100101011100001001101
11111000001100001001110
00001111011100001010101
01111010011100001011001
01100111001100001011010
01011101101100001011100
01101111010100001100011
00111101100100001101010
10001001101100001101101
10010100111100001101110
11010111100100001110010
01100011101100001110101
00001011111100001111010
00110001011100001111100
11011101001100010000101
11010001110100010010011
11110110000100010010110
10001011011100010100011
00111111010100010100100
10110001111100010100101
11000100111100010101001
00101110111100010110001
10111101000100010110011
10000111100100010110101
11110010100100010111001
00011001111100011000110
01110001101100011001001
Code
Number
Octal
Code
Bit Pattern
MSB LSB
81
82
83
84
85
86
87
88
89
90
91
92
93
94
95
96
97
98
99
100
101
102
103
104
105
106
107
108
109
110
111
112
113
114
115
116
117
118
119
120
121
315
331
343
346
351
364
365
371
411
412
413
423
431
432
445
464
465
466
503
506
516
532
546
565
606
612
624
627
631
632
654
662
664
703
712
723
731
732
734
743
754
11011000110100011001101
01000111110100011011001
01010010111100011100011
01110101001100011100110
00011101011100011101001
11010000101100011110100
01011110000100011110101
00101011000100011111001
11101110110100100001001
11110011100100100001010
01111101001100100001011
10010111001100100010011
11011000101100100011001
11000101111100100011010
11110111000100100100101
01001111110100100110100
11000001011100100110101
11011100001100100110110
01111000110100101000011
01011111000100101000110
10000011011100101001110
00011100011100101011010
00110011110100101100110
00011000111100101110101
10111011001100110000110
11001110001100110001010
00011110101100110010100
00000011111100110010111
11100101000100110011001
11111000010100110011010
10011000011100110101100
01001000111100110110010
01110010011100110110100
01000101011100111000011
00010111101100111001010
01110011000100111010011
00111100100100111011001
00100001110100111011010
00011011010100111011100
00101001101100111100011
01000001111100111101100
DCS FREQUENZ (83 Gruppen)
14 15
WARNUNG
Verwenden Sie das Funkgerät in der Umgebung mit Temperatur
zwischen -10 ℃ und 40 ℃, andernfalls kann es Ihr Funkgerät
beschädigen. Es kann unter 2000m betrieben werden.
Für die folgende Ausrüstung: Das Funkgerät
Entspricht den grundlegenden Anforderungen und anderen
relevanten Bestimmungen der Richtlinie 2014/53 / EU.
EU-Konformitätserklärung:
Siehe Artikel 10 Absatz 9 wird wie folgt:
Hiermit erklärt die Shenzhen Retevis Technology Co., Ltd, dass
das Funkgerät RT45 der Richtlinie 2014/53 / EU entspricht.
Den vollständigen Wortlaut der EU-Konformitätserklärung finden
Sie unter folgender Internetadresse: www.retevis.com.
Testposition und Konfiguration Der Kopf-SAR wurde mit dem in
den Positionen gemäß IEEE1528 konfigurierten Gerät durchgeführt,
und das Gesicht SAR wurde mit dem Gerät 25 mm vom Phantom
durchgeführt, Körper-SAR wurde mit dem Gürtelclip am Gerät 0 mm
vom Phantom durchgeführt. Body SAR wurde auch mit dem
Headset angebracht und ohne durchgeführt.
VORSICHT

16 17
Typ verursacht, verbrauchte Batterien gemäß den Anweisungen
entsorgen.
Nur kann der Adapter wie folgt verwendet werden:
Hersteller: DongguanGuanjin Elecrtonics Technology Co.,Ltd
Adresse: Block 16 Qiantou New Industrial Park Niushan,
Dongcheng District Dongguan City,Guangdong Province,
China
Modellbezeichnung: K05S050055G
Nenneingang& Nennausgang: Eingang: 100-240V 50/60Hz 0.2A;
Ausgang 5.0V~0.55A
Der Stecker gilt als Trennvorrichtung des Adapters.
Nur können die wiederaufladbaren Batterien wie folgt verwendet
werden:
Nennspannung: 1,2 V DC
Sicherheitsinformationen für Batterien und Ladegeräte
Dieses Dokument enthält wichtige Sicherheits- und
Betriebsinformationen. Lesen Sie diese Anweisungen sorgfältig
durch und bewahren Sie sie zum späteren Nachschlagen auf.
Bevor Sie das Ladegerät und die Batterie verwenden, lesen Sie
alle Anweisungen und Warnungen auf
• Das Ladegerät
• Die Batterie und
• Das Funkgerät mit der Batterie
1) Um das Verletzungsrisiko zu reduzieren, dürfen nur von Retevis
autorisierte Akkus aufgeladen werden. Andere Batterien können
explodieren und Verletzungen und Schäden verursachen.
VORSICHT
Verwenden Sie nur den von RETEVIS zugelassenen
mitgelieferten oder Ersatz-Gürtelclip, Batterien, Ladegerät und
Zubehör. Die Verwendung von nicht vom Hersteller zugelassenen
Batterien und Zubehör kann die HF-Expositionsrichtlinien
überschreiten.
1) Die Antenne in der Verpackung ist einzigartig, bitte nicht ändern.
2) Für einen sicheren Betrieb muss die Antenne für das Produkt
beim Sprechen mindestens 25 mm von Ihrem Gesicht entfernt
sein.
3) Das Umschalten auf andere Antennen ist verboten, sonst
beeinträchtigt es die Funkleistung.
4) Verwenden Sie KEIN tragbares Funkgerät mit einer
beschädigten Antenne. Wenn eine beschädigte Antenne Ihre
Haut behührt, kann es zu kleineren Verbrennungen kommen.
Für Adapter: Es wird in der Nähe des Geräts installiert und muss
leicht zugänglich sein.
Für Batterie: Explosionsgefahr-Batterie wird durch einen falschen
VORSICHT
WARNUNG
WARNUNG
Table of contents
Languages:
Other Retevis Two-way Radio manuals

Retevis
Retevis H777S User manual

Retevis
Retevis RA85 User manual

Retevis
Retevis RB86 User manual

Retevis
Retevis RT21 User manual

Retevis
Retevis RB616 User manual

Retevis
Retevis RA19 User manual

Retevis
Retevis RT669 User manual

Retevis
Retevis RT49P User manual

Retevis
Retevis RT6 User manual

Retevis
Retevis RT30M User manual

Retevis
Retevis RT622 User manual

Retevis
Retevis RT76P User manual

Retevis
Retevis RA685 User manual

Retevis
Retevis RT619 User manual

Retevis
Retevis RT30 User manual

Retevis
Retevis RT75 User manual

Retevis
Retevis RT66 User manual

Retevis
Retevis RT37 User manual

Retevis
Retevis RT-628 User manual

Retevis
Retevis RT665 User manual