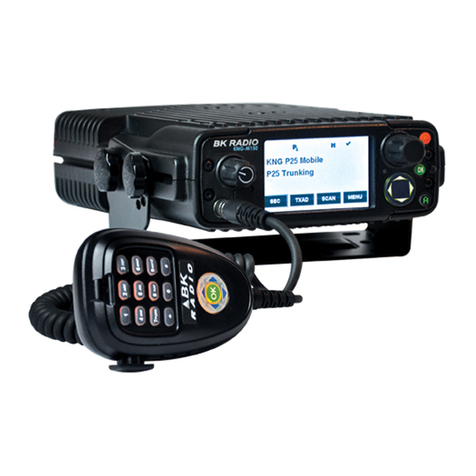
BK Radio KNG User manual

Contents
Federal Communications Commission Regulations......................... 5
Compliance with RF Exposure Standards........................................ 5
Industry Canada Compliance ........................................................... 5
FCC Requirements ...................................................................... 6
RF Exposure Compliance and Control Guidelines........................... 8
Radio Controls........................................................................... 10
LCD Display ............................................................................... 11
Status Indicators ..............................................................................11
Alphanumeric Label Options............................................................11
Buttons and Labels ..........................................................................12
Battery Installation and Removal............................................. 13
Installing the Battery ........................................................................13
Removing the Battery ......................................................................13
Battery Care and Maintenance ................................................ 14
Antenna Installation and Removal........................................... 14
Programmable Switch and Button Functions......................... 15
Switch Options.................................................................................15
Buttons Options ...............................................................................15
Menu Options...................................................................................15
Preset Menu Items...........................................................................15
Keypad Menu Operation..................................................................16
Preset Menu Items...........................................................................16
Basic Radio Operation.............................................................. 17
Receive ............................................................................................17
Transmit ...........................................................................................17
Channel Zone Selection............................................................ 18
Code Guard Operation.............................................................. 19
Analog Squelch Control...................................................................19
APCO Project 25 Squelch Control...................................................19
Code Guard Receive ...................................................................... 20
Code Guard Transmit...................................................................... 20

Mixed Mode Operation.............................................................. 21
Mixed Mode Talkback ......................................................................21
DTMF/ANI Operation ................................................................. 22
ANI Only.......................................................................................... 22
DTMF Only...................................................................................... 22
Both................................................................................................. 22
Encryption Operation............................................................... 22
Required Setup ............................................................................... 22
Operation ........................................................................................ 23
Transmit Encryption Key Selection ................................................. 23
Zeroization ...................................................................................... 24
Over-the-Air-Rekeying (OTAR) ....................................................... 25
Keyset Viewing and Selecting......................................................... 26
Tactical OTAR Option (KZA0584)................................................... 27
General Options......................................................................... 29
Backlight (LIGT) .............................................................................. 29
Keypad Lock ................................................................................... 29
Monitor (MON) ................................................................................ 29
Repeater Talkaround (TA)............................................................... 30
Surveillance Mode (SURV)..............................................................31
Squelch Adjust (SQL) ......................................................................31
Tx Digital (TXD)............................................................................... 32
Tx Power (LPW).............................................................................. 32
Zone Select (ZON).......................................................................... 33
Scan Options ............................................................................. 33
Channel Scan (SCAN).................................................................... 33
Scanning Code Guarded Channels................................................ 34
Nuisance Channel Delete ............................................................... 34
Transmitting with Scan On ............................................................. 34
Talkback Scan................................................................................. 35
Priority Scan (PRI).......................................................................... 35
Scan List Add/Delete ...................................................................... 38
Zone Scan (ZSCN) ......................................................................... 38
Zone Scan List Add/Delete ............................................................ 39
Vote Scan (KZA0581) ..................................................................... 39

Emergency Signalling Options ................................................ 40
Placing an Emergency Call ............................................................ 40
Receiving an Emergency Signal..................................................... 40
Unit-to-Unit Call Options........................................................... 41
Individual Call (U2U) ........................................................................41
Unit-to Unit Callback ....................................................................... 42
Call List Programming..................................................................... 42
Encryption Options ................................................................... 43
Tx Secure (TXS) ............................................................................ 43
Zeroize Keys (ZER) ....................................................................... 43
Rekey Request (RKY) (OTAR equipped radios)..................................... 44
Keyset Viewing and Selecting......................................................... 45
3.4.7 Tactical OTAR Option (KZA0584).......................................... 46
Pick List Options ....................................................................... 49
Picklist- TX CxCSS (UTON) ........................................................... 49
Picklist – TX NAC (UNAC) ..................................................................
Picklist – TGID (UTG) .........................................................................
Picklist – Key (UKEY) .........................................................................
Picklist – Key Set (UKST) ...................................................................
Programming P25 ID Unit Call/Receive List .................................. 50
Programming User Selectable Transmit Tones .............................. 52
Programming User Selectable Network Access Codes ................. 53
Programming User Selectable Talkgroup IDs................................. 54
Keypad Programming ............................................................... 55
Programming Channel Information................................................. 55
Programming Zone Parameters...................................................... 62
Programming Global Parameters .................................................. 65
Radio Cloning ............................................................................ 71
Warranty..................................................................................... 73
Service........................................................................................ 73
Denitions and Acronyms........................................................ 74
Your Radio Settings .................................................................. 76

4KNG User’s Manual

5
RELM/BK Radio
FEDERAL COMMUNICATIONS COMMISSION REGULATIONS
The FCC rules require manufacturers to comply with the FCC RF
energy exposure limits for portable 2-way radios before they can be
marketed in the U.S. When 2-way radios are used as a consequence
of employment, the FCC requires users to be fully aware of and able to
control their exposure to meet occupational requirements. Exposure
awareness can be facilitated by the use of a product label directing users
to specic user awareness information. Your BK Radio 2-way radio has
a RF exposure product label. Also, your BK Radio owner’s and service
manuals include information and operating instructions required to
control your RF exposure and to satisfy compliance requirements.
COMPLIANCE WITH RF EXPOSURE STANDARDS
Your BK Radio 2-way radio is designed and tested to comply with a
number of national and international standards and guidelines (listed
below) for human exposure to radio frequency electromagnetic energy.
This radio complies with the IEEE and ICNIRP exposure limits for
occupational/controlled RF exposure environment at operating duty
factors of up to 50% transmitting and is authorized by the FCC for
occupational use only. In terms of measuring RF energy for compliance
with the FCC exposure guidelines, your radio radiates measurable
RF energy only while it is transmitting (during talking), not when it is
receiving (listening) or in Standby Mode. Note: The approved batteries
supplied with this radio are rated for a 5-5-90 duty factor (5% talk - 5%
listen - 90% standby), even though this radio complies with the FCC
occupational RF exposure limits and may operate at duty factors of up to
50% talk.
Your BK Radio 2-way radio complies with the following RF energy
exposure standards and guidelines:
United States Federal Communications Commission, Code of•
Federal Regulations; 47 CFR §§ 1.1307, 1.1310, 2.1091 and
2.1093
American National Standards Institute (ANSI) / Institute of•
Electrical and Electronic Engineers (IEEE) C95. 1-1992
Institute of Electrical and Electronic Engineers (IEEE) C95.1-•
1999 Edition
INDUSTRY CANADA COMPLIANCE
This Class B digital apparatus complies with Canadian ICES-003. Cet
appareil numerique de la classe B est conforme à la norme NMB-003
Canada.

6KNG User’s Manual
Introduction
Congratulations on your purchase of the BK Radio KNG Portable radio
from RELM Wireless.
The KNG APCO Project 25 radio offers an array of programmable
functionality to help radio users get the most out of their portable
communications. Check with your RELM/BK Radio dealer or
communications ofcer for information on the programmed functions of
your radio prior to operation.
This manual contains information concerning the operation procedures
for the BK Radio KNG Portable radio. The KNG has been designed to
meet the tough requirements of today’s communications environment.
Please take a moment to read the information in this manual so you can
get optimum performance from your new radio.
FCC Requirements
Your radio must be properly licensed by the Federal Communications
Commission prior to use. Your BK Radio dealer can assist you in meeting
these requirements. Your dealer will program each radio with your
authorized frequencies, signaling codes, etc., and will be there to meet
your communications needs as your system expands.
Safety Precautions
• Do not operate the transmitter in close
proximity to blasting caps.
• Do not operate the radio in an explosive
atmosphere (petroleum fuels, solvents, dust,
etc.) unless your radio is an intrinsically safe
model designed for such use.

7
RELM/BK Radio
RF ENERGY EXPOSURE AWARENESS AND CONTROL
INFORMATION, AND OPERATIONAL INSTRUCTIONS FOR
FCC OCCUPATIONAL USE REQUIREMENTS
BEFORE USING YOUR PORTABLE 2-WAY RADIO,
READ THIS IMPORTANT RF ENERGY AWARENESS AND CONTROL
INFORMATION AND OPERATIONAL INSTRUCTIONS TO ENSURE
COMPLIANCE WITH THE FCC’S RF EXPOSURE GUIDELINES.
NOTICE: This radio is intended for use in occupational/controlled
conditions, where users have full knowledge of their exposure and
can exercise control over their exposure to meet FCC limits. This
radio device is NOT authorized for general population, consumer, or
any other use.
This 2-way radio uses electromagnetic energy in the radio frequency
(RF) spectrum to provide communications between two or more users
over a distance. It uses radio frequency (RF) energy or radio waves
to send and receive calls. RF energy is one form of electromagnetic
energy; other forms include electric power, radar, sunlight and x-rays.
RF energy, however, should not be confused with these other forms
of electromagnetic energy, which when used improperly can cause
biological damage. Very high levels of x-rays, for example, can damage
tissues and genetic material. The energy levels associated with radio
waves from portable 2-way radios, when properly used, are not great
enough to cause biological damage.
Experts in science, engineering, medicine, health and industry work with
organizations to develop standards for exposure to RF energy. These
standards provide recommended levels of RF exposure for both workers
and the general public. These recommended RF exposure levels include
substantial margins of protection. All 2-way radios marketed in North
America are designed, manufactured and tested to ensure they meet
government established RF exposure levels. In addition, manufacturers
also recommend specic operating instructions to users of 2-way radios.
These instructions are important because they inform users about RF
energy exposure and provide simple procedures on how to control
it. Please refer to the following websites for more information on what
RF energy exposure is and how to control your exposure to assure
compliance with established RF exposure limits.
http://www.fcc.gov/oet/rfsafety/rf-faqs.html
http://www.osha.gov/SLTC/radiofrequencyradiation/index.html

8KNG User’s Manual
RF EXPOSURE COMPLIANCE AND CONTROL GUIDELINES
AND OPERATION INSTRUCTIONS
To control your exposure and ensure compliance with the occupational/
controlled environment exposure limits always adhere to the following
procedures.
Guidelines:
Do not remove the RF Exposure Label from the device.•
User awareness instructions must accompany device when•
transferred to other users. Do not use this device if the operational
requirements described herein are not met.
Operating Instructions:
Transmit no more than the rated duty factor of 50% of the time. To
transmit (talk), push the Push-To-Talk (PTT) button. To receive calls,
release the PTT button. Transmitting 50% of the time, or less, is
important because this radio generates measurable RF energy exposure
only when transmitting (in terms of measuring for standards compliance).
Hold the radio in a vertical position in front of face with the•
microphone (and the other parts of the radio, including the
antenna) at least one inch (2.5 cm) away from the nose. Keeping
the radio at the proper distance is important because RF
exposures decrease with distance from the antenna. Antenna
should be kept away from eyes.
When worn on the body, always place the radio in a BK Radio•
approved clip, holder, holster, case, or body harness for this
product. Using approved body-worn accessories is important
because the use of BK Radio or other manufacturer’s non-
approved accessories may result in exposure levels which
exceed the FCC’s occupational/controlled environment RF
exposure limits.
If you are not using a body-worn accessory and are not using•
the radio in the intended use position in front of the face, then
ensure the antenna and the radio are kept at least one inch (2.5
cm) from the body when transmitting. Keeping the radio at the
proper distance is important because RF exposures decrease
with increasing distance from the antenna.
Use only BK Radio approved supplied or replacement antennas,•
batteries, and accessories. Use of non-BK Radio approved
antennas, batteries, and accessories may exceed the FCC RF
exposure guidelines.
For a list of BK Radio approved accessories visit the following website:
http://www.relm.com.

9
RELM/BK Radio
The AMBE® voice compression software included in this product is
protected by intellectual property rights including patent rights, copyrights
and trade secrets of Digital Voice Systems, Inc. The user of this software
is explicitly prohibited from attempting to decompile, reverse engineer, or
disassemble the object code, or in any other way convert the object code
into a human-readable form. This software is licensed solely for use within
this product. US Patent Nos. #6,912,495 B2, #5,870,405, #5,826,222,
#5,754,974, #5,715,365, #5,701,390, #5,649,050, #5,630,011, #5,581,656,
#5,517,511, #5,491,772, #5,247,579, #5,226,084, and #5,195,166.
CONTACT INFORMATION
For additional information on exposure requirements or other information,
visit website http://www.relm.com.

10 KNG User’s Manual
KNG
ABC DEF
GHI JKL MNO
PQRS TUV WXYZ
*
#
123
4
789
56
0
BK RADIO
15
1
2
3
4
5
6
7
89
1 1
10
12
13
14
16
SCAN
PRI
VOL
On/Off Volume
Channel Select Collar Switch
Antenna
Connector
Emergency
Button
Toggle Switches
LED Indicator
Ch 1
KNG-P25
171.58500 MHz
LIGT T/A MENU LCK
TXD SCN
Programmable
Side Buttons
Push-to-Talk
Speaker
Accessory
Connector
Alphanumeric
Display
Microphone
Diamond
Button
Up Arrow
Button
Down Arrow
Button
Square
Button
Keypad
Radio Controls

11
RELM/BK Radio
LCD Display
Ch 1
KNG - P25
171.58500 MHz
LIGT T/A MENU LCK
RXD SCN
Status Indicators
Programmable
Alphanumeric
Labels
Programmed
Button Labels
The KNG display can be
programmed for a variety of
options and functionality.
Check with your RELM/BK
Radio dealer or communica-
tions ofcer for information
on the programmed func-
tions of your radio.
Status Indicators
Receiver Signal Strength
RXD, RXA Receive Digital, Receive Analog, Hold Time Active
TXD, TXA Transmit Digital, Transmit Analog
P1, P2 Priority 1 Channel, Priority 2 Channel
, Encrypted, Clear
SCN Scan Channel, Flashing 'SCN' = Scan in Progress.
RTA Repeater Talkaround enabled
Unit-to-Unit operation active
Battery Level Indicator
Alphanumeric Label Options
NOTE: Three channel information lines are programmable with PC Radio Editor.
Channel Number Channel Number of Currently Selected Channel or
Active Scanned Channel
Channel Label Alphanumeric Label of Currently Selected Channel
or Active Scanned Channel
Frequency Operating Frequency of Currently Selected Channel
or Active Scanned Channel
Received Unit ID P25 ID of the radio transmitting the message cur-
rently being received
If the received ID is programmed in your radio's Call
List, the corresponding label will be displayed
Received Talk Group ID P25 Talk Group ID of the radio transmitting the mes-
sage currently being received
Pick List Selection NAC, TGID or Code Guard currently selected from
the programmable Pick Lists
Zone Label Label of Currently Selected Zone
Zone and Channel Currently Selected Zone and Channel Numbers

12 KNG User’s Manual
Buttons and Labels
NOTE: The Diamond, Up Arrow, Down Arrow, and Square buttons are
programmable with PC Radio Editor Software. The programmed functions are
activated by pressing the associated button. Active functions are indicated by
a highlighted background. SCN = Active, SCN = Inactive.
EMR Emergency Operation
LCK Keypad Lockout
LIGT Keypad and Display Backlight
LPW Transmit in Low Power Mode
MENU Open the programmed radio menu
MON Monitor
NUIS Nuisance Channel Delete
PRI Set Priority Channels
PSCN Priority Scan
RKY Request OTAR Encryption Rekey
RNAC User Selectable Receive NAC
RCG User Selectable RX CTCSS/CDCSS Code Guard
(Analog or Mixed Mode Operation)
SCN Channel Scan
SURV Surveillance Mode
SQL Squelch Adjust
T/A Repeater Talkaround
TXD Transmit Digital
(Mixed Mode Operation)
TXS Transmit Secure
(Encrypted Models)
U2U Unit-to-Unit Call
(Digital Operation Only)
UKEY User Selectable Encryption Key
(Encrypted Models)
UKST User Selectable Encryption Keyset
(Encrypted OTAR Models)
TNAC User Selectable TX NAC
(Digital or Mixed Mode Operation)
UTG User Selectable Talk Group
(Digital or Mixed Mode Operation)
TCG User Selectable TX CTCSS/CDCSS Code Guard
(Analog or Mixed Mode Operation)
ZER Zeroize Encryption Keys and Password
(Encrypted Models)
ZON Channel Zone Select
ZSCN Zone Scan

13
RELM/BK Radio
Battery Installation and Removal
NOTE: For safety reasons, rechargeable battery packs are shipped
uncharged or only partially charged. Therefore, a rechargeable battery
pack should be properly charged in an approved battery charger before
use.
Installing the Battery
1. Turn the radio off.
2. Align the tabs on the bottom of the
battery with the slots on the radio.
3. Push the top of the battery toward the
radio until release tab "clicks" into place.
Removing the Battery
+TS ON
-
Release Tab
1. Slide the release tab toward the
bottom of the radio.
2. Pull the top of the battery out.
(Approximately 30o)
3. Pull up to remove the battery pack.
NOTE: All information programmed into the radio is maintained even
when the battery pack is removed.

14 KNG User’s Manual
Battery Care and Maintenance
BK Radio battery packs are available in a variety of capacities and types
for special applications. Rechargeable battery packs can be charged
separately or while attached to a radio.
Periodically check the contacts on the battery pack for dirt that could
prevent a good electrical contact with the charging base.
WARNING!
Do not drop a battery pack into re.
An explosion may occur
Antenna Installation and Removal
NOTE: Transmitting without an antenna could result in damage to your
radio.
Use RELM/BK Radio approved antennas only. Use of non-qualied
or mismatched antennas could result in diminished radio operation.
Published radio specications cannot be guaranteed with non-approved
antennas. Bent, broken or damaged antennas should be replaced.
Installing the Antenna
Insert the radio's antenna connector into the
threaded connector of the antenna and turn it
clockwise until it is rmly seated.
Removing the Antenna
Holding the base, turn the antenna
counterclockwise until released.

15
RELM/BK Radio
Programmable Switch and Button Functions
The KNG portable radio is equipped with seven programmable control
buttons and three programmable switches. Switch and button functions
are assigned via PC programming.
15
1
2
3
4
5
6
7
89
1 1
10
12
13
14
16
SCAN
PRI
VOL
Right ToggleCollar Switch
Left ToggleOrange Button
KNG
ABC DEF
GHI JKL MNO
PQRS TUV WXYZ
*
#
123
4
789
56
0
BK RADIO
Square
Diamond
Up Down
Side Buttons
15
1
2
3
4
5
6
7
89
11
10
12
13
14
16
SCAN
PRI
On Off
On Off
Switch Options
Channel Scan Priority Scan Zone Scan
Backlight Talkaround Tx Power
Monitor Tx Digital Tx Secure*
Keypad Lock
Buttons Options
Channel Scan Priority Scan Keypad Lock
Zone Scan Menu Backlight
Tx Power Monitor Tx Digital
Tx Secure* Unit Call Zeroize Keys*
Rekey Request** PRI CH Select Picklist-CxCSS
Picklist-NAC Picklist-TGID Picklist-Key*
Picklist-Key Set** Zone Select Squelch Set
Repeater
Talkaround
Surveillance
Mode
Nuisance
Channel
Emergency
Menu Options
Channel Scan Priority Scan Keypad Lock
Zone Scan Backlight Tx Power
Monitor Tx Digital Tx Secure*
Unit Call Zone Select Zeroize Keys
Keypad
Programming
Surveillance
Mode
Picklist-CxCSS
Picklist-NAC Picklist-TGID Picklist-Key*
Picklist-Key Set** Squelch Set PRI CH Select
Repeater
Talkaround
Channel
Scan List
Zone
Scan List
Cloning Tactical OTAR*** Rekey Request**
Preset Menu Items
Version Radio Status
* Requires Encryption option.
** Requires Over-the-Air rekeying option.
*** Requires Tactical OTAR option.

16 KNG User’s Manual
LIGT T/A MENU TXD
Functions assigned to the diamond, square or up/down
buttons will be highlighted on the display when turned on.
Keypad Menu Operation
One button can be programmed as 'Menu'. Items shown in
the previous table can be programmed and arranged via PC
programming. These items can then be accessed with the 'Menu'
button.
To select from the menu:
Channel Scan
Tx Digital
PRI Scan
ESC ▲ ▼ ENT
TXDN
Tx Power
→High
Low
ESC ▲ ▼ ENT
1. Press the programmed "Menu" button.
2. Scroll to the desired menu item using the
up/down buttons.
3. Press the square button marked 'ENT' to
open the selected item.
4. Use the up/down buttons to highlight the
desired operation.
5. Press the square button marked 'ENT' to
set the selection.
6. Press and hold the diamond button
marked 'ESC' to return to normal radio
operation.
Preset Menu Items
Version - Selecting "Version" from the menu list will display
information on the installed radio rmware.
Radio Status - selecting "Radio Status" displays the programmed
P25 unit ID number and current radio functions status.
Radio Status
P25 ID 12345
+ Pri Scan
ESC ▲ ▼
Currently active functions will be indicated by
a "+" icon next to the function.

17
RELM/BK Radio
Basic Radio Operation
Receive
15
1
2
3
4
5
6
7
89
1 1
10
12
13
14
16
SCAN
PRI
VOL
1. Turn power on by turning the Volume knob
clockwise. A beep sounds, indicating the radio is
operational. The LCD display shows the
programmed information of the currently selected
channel. Programmable channel information
options include channel number, channel label
and channel frequency.
15
1
2
3
4
5
6
7
89
1 1
10
12
13
14
16
SCAN
PRI
VOL
2. Select a channel by rotating the Channel
Selector knob.
3. Open the squelch to adjust the volume
(Open squelch can be achieved by selecting the
programmed Monitor function.)
Ch 1
KNG - P25
171.58500 MHz
LIGT T/A MENU LCK
RXD
When a signal is received, the unprogrammable
top line of the display indicates the current
channel’s operating mode. RXA = analog, RXD
= digital.
Transmit
Ch 1
KNG - P25
171.58500 MHz
LIGT T/A MENU LCK
TXD
KNG
ABC DEF
GHI JKL MNO
PQRS TUV WXYZ
*
#
123
4
789
56
0
BK RADIO
Microphone
PTT
1. Press the PTT (Push-To-Talk) switch. When
the radio is transmitting the indicator LED glows
red and TXD or TXA appears in the display.
2. Talk in a normal voice with the microphone one
to two inches from your mouth.
3. Release the PTT switch to stop transmitting.
If the length of your message exceeds the
programmed Time-Out Timer setting, the
transmitter automatically shuts off and a tone
sounds. To continue transmission, release the
PTT switch, then press it again and continue
talking.
If the Transmit Indicator does not glow and a tone
sounds, you are on a receive-only channel or the

18 KNG User’s Manual
channel is busy (see Busy Channel Lockout). Select an authorized
transmit channel.
NOTE: When using a channel programmed for mixed mode transmit
the signal will be transmitted in the mode selected by the TX Digital
selection. Or if programmed for Mixed Mode Talkback, the radio will
transmit in the mode of the last received channel while the “RX” icon
is displayed. (See Mixed Mode Operation.)
Channel Zone Selection
The KNG P-150 can be programmed with up to 512 individual channels.
These 512 channels can be divided into up to 32 zones of one or more
channels. Zone selection can be assigned to any of the programmable
buttons or as a menu item.
Use the following steps to access the Zones.
If programmed to a button:
Select Zone
Zone 1
Rescue Team
ESC ▲ ▼ ENT
1. Press the button programmed for Zone
Selection (ZON). The display shows the active
Zone Number and its programmed label.
2. Use the up/down arrows to scroll to the
desired zone or use the numeric keypad to
enter the desired zone number.
3. Press the ENT button to select the group.
4. Press the ESC button to return to normal
operation.
If programmed to the Menu button:
Channel Scan
TX Keys
PRI Scan
ESC ▲ ▼ ENT
TXDN
Se le c t Z o ne
Zone 1
Rescue Team
ESC ▲ ▼ ENT
1. Press the Menu button.
2. Use the up/down buttons to highlight the
"Zone Select" selection. The display shows
the active Zone Number and its programmed
label.
3. Press the ENT to open the menu.
4. Use the up/down arrows to scroll to the
desired zone or use the numeric keypad to
enter the desired zone number.
5. Hold the 'ESC' button to return to normal
operation..

19
RELM/BK Radio
Code Guard Operation
Analog Squelch Control
Sub-audible signaling (CTCSS/CDCSS) is used to allow a group of
radios to be selectively called in an analog system. Programming the
receive code guard equal to zero allows for Carrier Squelch operation,
where the radio will unmute whenever a carrier is detected regardless
of the transmitted Code Guard.
APCO Project 25 Squelch Control
Network Access Codes (NACs) provide the digital equivalent of analog
sub-audible signaling (CTCSS/CDCSS) allowing a group of radios to
be selectively called within a system.
Users in the same area (using the same NAC) can be further divided
into Talk Groups, with each group having its own Talk Group ID
(TGID). Group Calls are made by designating both the users’ NAC
and TGID.
Each radio also has an individual P25 unit ID. A Unit-to-Unit call
contains the addressee’s NAC, and uses the addressee’s P25 unit ID
instead of the TGID.
When operating in Digital Mode, each channel can be programmed to
use either Normal squelch or Selective squelch.
Normal squelch is used to mimic analog operation. Signals are
only qualied with the programmed NAC. TGIDs and P25 Unit IDs
are ignored. Each digital channel is programmed with a receive NAC
and a transmit NAC. When an incoming signal’s NAC matches the
channel’s programmed receive NAC, the radio unmutes. The default
NAC is 0659 ($293 hex).
The digital equivalent of carrier squelch is achieved by programming
the receive NAC = 3966($F7E hex). The radio will unmute when a
digital signal with any NAC is detected. The 3966 ($F7E hex) NAC is
reserved for receivers and is not allowed as a transmit NAC.
Selective squelch is used for processing Group Calls and Unit-to-
Unit Calls. TGIDs are assigned on a per-channel basis. Users can
be separated into Talk Groups with each group having its own TGID.
Then, on channels programmed for Selective squelch, the incoming
signal’s NAC and TGID must match the channels programmed

20 KNG User’s Manual
receive NAC and TGID for the radio to unmute. The default TGID
is 1.
The TGID value 65535 ($FFFF hex) is used to effect an “All Call”.
If the radio receives a signal with a matching NAC and the TGID =
65535 ($FFFF hex), it will unmute. Also, if the radio’s programmed
TGID is 65535 ($FFFF hex), it will open on any signal with a matching
NAC, ignoring the incoming TGID. A TGID = 0 means “no one”. If
the radio is programmed with the TGID = 0, it will accept incoming
group calls containing the “All Call” TGID, and correctly addressed
Unit-to-Unit calls only.
Code Guard Receive
Analog channels programmed with a receive code guard will be heard
only when the proper frequency and Code Guard value is received.
Analog and mixed mode receive channels will also unmute when the
radio is in monitor mode.
Code Guard Transmit
15
1
2
3
4
5
6
7
89
1 1
10
12
13
14
16
SCAN
PRI
VOL
Busy Channel/Transmit
Indicator
Ch 1
KNG - P25
171.58500 MHz
LIGT T/A MENU LCK
TXA
The frequency must be clear prior to transmitting
on a Code Guarded channel. If the LED Indicator
is yellow do not transmit. Busy Channel Lockout
can be programmed to disallow transmitting while
a channel is busy.
1. Press the PTT switch. When the transmitter is
on, the LED Indicator glows red and TX appears
in the display.
2 Talk in a normal voice with the microphone one
to two inches from your mouth.
3. Release the PTT switch to stop transmitting.
Other manuals for KNG
1
Table of contents
Other BK Radio Two-way Radio manuals
