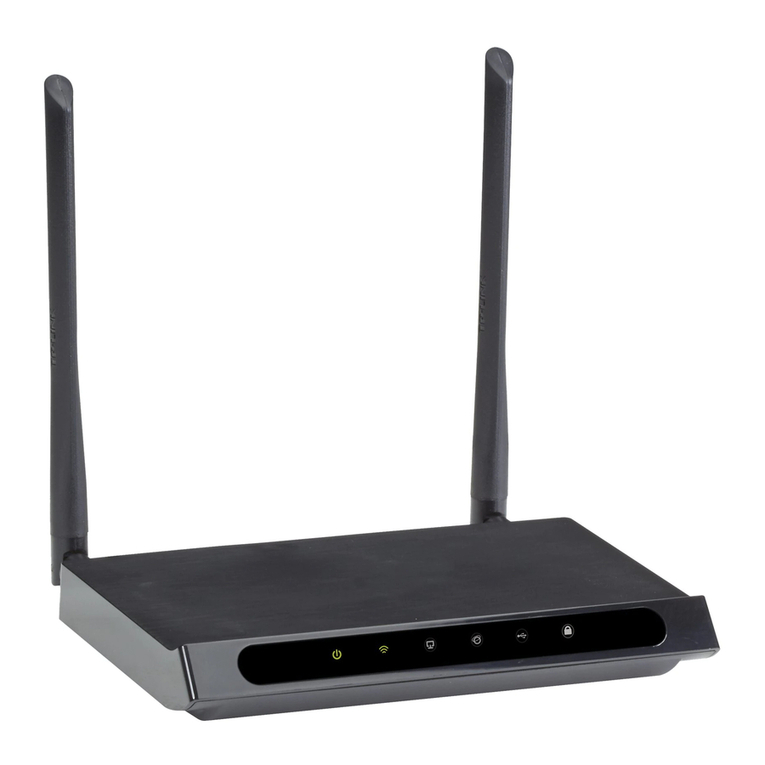
Black Box LR9603A User manual

CUSTOMER
SUPPORT
INFORMATION
Order toll-free in the U.S.: Call 877-877-BBOX (outside U.S. call 724-746-5500)
FREE technical support 24 hours a day, 7 days a week: Call 724-746-5500 or fax 724-746-0746
Mailing address: Black Box Corporation, 1000 Park Drive, Lawrence, PA 15055-1018
JULY 2004
LR9603A
Pure Networking Broadband Router
Users’ Guide


1
FCC AND IC RFI STATEMENTS/CE NOTICE
FEDERAL COMMUNICATIONS COMMISSION
AND
INDUSTRY CANADA
RADIO FREQUENCY INTERFERENCE STATEMENTS
This equipment generates, uses, and can radiate radio-frequency energy, and if not
installed and used properly, that is, in strict accordance with the manufacturer’s
instructions, may cause interference to radio communication. It has been tested
and found to comply with the limits for a Class A computing device in accordance
with the specifications in Subpart B of Part 15 of FCC rules, which are designed to
provide reasonable protection against such interference when the equipment is
operated in a commercial environment. Operation of this equipment in a
residential area is likely to cause interference, in which case the user at his own
expense will be required to take whatever measures may be necessary to correct
the interference.
Changes or modifications not expressly approved by the party responsible
for compliance could void the user’s authority to operate the equipment.
This digital apparatus does not exceed the Class A limits for radio noise emission from
digital apparatus set out in the Radio Interference Regulation of Industry Canada.
Le présent appareil numérique n’émet pas de bruits radioélectriques dépassant les limites
applicables aux appareils numériques de la classe A prescrites dans le Règlement sur le
brouillage radioélectrique publié par Industrie Canada.
EUROPEAN UNION DECLARATION OF CONFORMITY
This equipment complies with the requirements of the European EMC Directive
89/336/EEC.

2
PURE NETWORKING BROADBAND ROUTER
NORMAS OFICIALES MEXICANAS (NOM)
ELECTRICAL SAFETY STATEMENT
INSTRUCCIONES DE SEGURIDAD
1. Todas las instrucciones de seguridad y operación deberán ser leídas antes de
que el aparato eléctrico sea operado.
2. Las instrucciones de seguridad y operación deberán ser guardadas para
referencia futura.
3. Todas las advertencias en el aparato eléctrico y en sus instrucciones de
operación deben ser respetadas.
4. Todas las instrucciones de operación y uso deben ser seguidas.
5. El aparato eléctrico no deberá ser usado cerca del agua—por ejemplo, cerca
de la tina de baño, lavabo, sótano mojado o cerca de una alberca, etc..
6. El aparato eléctrico debe ser usado únicamente con carritos o pedestales que
sean recomendados por el fabricante.
7. El aparato eléctrico debe ser montado a la pared o al techo sólo como sea
recomendado por el fabricante.
8. Servicio—El usuario no debe intentar dar servicio al equipo eléctrico más allá
a lo descrito en las instrucciones de operación. Todo otro servicio deberá ser
referido a personal de servicio calificado.
9. El aparato eléctrico debe ser situado de tal manera que su posición no
interfiera su uso. La colocación del aparato eléctrico sobre una cama, sofá,
alfombra o superficie similar puede bloquea la ventilación, no se debe colocar
en libreros o gabinetes que impidan el flujo de aire por los orificios de
ventilación.
10. El equipo eléctrico deber ser situado fuera del alcance de fuentes de calor
como radiadores, registros de calor, estufas u otros aparatos (incluyendo
amplificadores) que producen calor.
11. El aparato eléctrico deberá ser connectado a una fuente de poder sólo del
tipo descrito en el instructivo de operación, o como se indique en el aparato.

3
NOM STATEMENT
12. Precaución debe ser tomada de tal manera que la tierra fisica y la polarización
del equipo no sea eliminada.
13. Los cables de la fuente de poder deben ser guiados de tal manera que no
sean pisados ni pellizcados por objetos colocados sobre o contra ellos,
poniendo particular atención a los contactos y receptáculos donde salen del
aparato.
14. El equipo eléctrico debe ser limpiado únicamente de acuerdo a las
recomendaciones del fabricante.
15. En caso de existir, una antena externa deberá ser localizada lejos de las lineas
de energia.
16. El cable de corriente deberá ser desconectado del cuando el equipo no sea
usado por un largo periodo de tiempo.
17. Cuidado debe ser tomado de tal manera que objectos liquidos no sean
derramados sobre la cubierta u orificios de ventilación.
18. Servicio por personal calificado deberá ser provisto cuando:
A: El cable de poder o el contacto ha sido dañado; u
B: Objectos han caído o líquido ha sido derramado dentro del aparato; o
C: El aparato ha sido expuesto a la lluvia; o
D: El aparato parece no operar normalmente o muestra un cambio en su
desempeño; o
E: El aparato ha sido tirado o su cubierta ha sido dañada.

4
PURE NETWORKING BROADBAND ROUTER
TRADEMARKS USED IN THIS MANUAL
Macintosh is a registered trademark of Apple Computer, Inc.
pcANYWHERE is a registered trademark of Dynamic Microprocessor Associates,
Inc.
Linux is a registered trademark of Linus Torvalds.
Microsoft, Windows, and Windows NT are either registered trademarks or
trademarks of Microsoft Corporation in the United States and/or other countries.
Netscape Navigator is a registered trademark of Netscape Communications
Corporation.
Sun is a registered trademark of Sun Microsystems, Inc.
Any other trademarks mentioned in this manual are acknowledged to be the property of the
trademark owners.

5
CONTENTS
Contents
Chapter Page
1. Specifications . . . . . . . . . . . . . . . . . . . . . . . . . . . . . . . . . . . . . . . . . . . . . . . . . . 7
2. Introduction . . . . . . . . . . . . . . . . . . . . . . . . . . . . . . . . . . . . . . . . . . . . . . . . . . . 8
2.1 Overview . . . . . . . . . . . . . . . . . . . . . . . . . . . . . . . . . . . . . . . . . . . . . . . . . . 8
2.2 The Router’s Back Panel . . . . . . . . . . . . . . . . . . . . . . . . . . . . . . . . . . . . . 9
2.3 The Router’s Front Panel. . . . . . . . . . . . . . . . . . . . . . . . . . . . . . . . . . . . 10
2.4 What’s Included . . . . . . . . . . . . . . . . . . . . . . . . . . . . . . . . . . . . . . . . . . . 12
2.5 What You Need to Supply . . . . . . . . . . . . . . . . . . . . . . . . . . . . . . . . . . . 12
3. Getting Started. . . . . . . . . . . . . . . . . . . . . . . . . . . . . . . . . . . . . . . . . . . . . . . . . . 13
4. Quick Setup Wizard . . . . . . . . . . . . . . . . . . . . . . . . . . . . . . . . . . . . . . . . . . . . 26
4.1 Setup . . . . . . . . . . . . . . . . . . . . . . . . . . . . . . . . . . . . . . . . . . . . . . . . . . . . 26
4.2 Time Zone. . . . . . . . . . . . . . . . . . . . . . . . . . . . . . . . . . . . . . . . . . . . . . . . 26
4.3 Broadband Type . . . . . . . . . . . . . . . . . . . . . . . . . . . . . . . . . . . . . . . . . . . 27
4.3.1 Cable Modem. . . . . . . . . . . . . . . . . . . . . . . . . . . . . . . . . . . . . . . . 29
4.3.2 Fixed-IP xDSL . . . . . . . . . . . . . . . . . . . . . . . . . . . . . . . . . . . . . . . 30
4.3.3 PPPoE xDSL. . . . . . . . . . . . . . . . . . . . . . . . . . . . . . . . . . . . . . . . . 32
4.3.4 PPTP xDSL. . . . . . . . . . . . . . . . . . . . . . . . . . . . . . . . . . . . . . . . . . 34
5. General Setup. . . . . . . . . . . . . . . . . . . . . . . . . . . . . . . . . . . . . . . . . . . . . . . . . 37
5.1 System . . . . . . . . . . . . . . . . . . . . . . . . . . . . . . . . . . . . . . . . . . . . . . . . . . . 39
5.1.1 Time Zone . . . . . . . . . . . . . . . . . . . . . . . . . . . . . . . . . . . . . . . . . . 40
5.1.2 Password Settings. . . . . . . . . . . . . . . . . . . . . . . . . . . . . . . . . . . . . 42
5.1.3 Remote Management . . . . . . . . . . . . . . . . . . . . . . . . . . . . . . . . . 44
5.2 WAN. . . . . . . . . . . . . . . . . . . . . . . . . . . . . . . . . . . . . . . . . . . . . . . . . . . . . 46
5.2.1 Dynamic IP. . . . . . . . . . . . . . . . . . . . . . . . . . . . . . . . . . . . . . . . . . 47
5.2.2 PPPoE . . . . . . . . . . . . . . . . . . . . . . . . . . . . . . . . . . . . . . . . . . . . . . 48
5.2.3 PPTP . . . . . . . . . . . . . . . . . . . . . . . . . . . . . . . . . . . . . . . . . . . . . . . 48
5.2.4 Static IP Address . . . . . . . . . . . . . . . . . . . . . . . . . . . . . . . . . . . . . 48
5.2.5 Bridge . . . . . . . . . . . . . . . . . . . . . . . . . . . . . . . . . . . . . . . . . . . . . . 48
5.2.6 DNS. . . . . . . . . . . . . . . . . . . . . . . . . . . . . . . . . . . . . . . . . . . . . . . . 50
5.2.7 DDNS . . . . . . . . . . . . . . . . . . . . . . . . . . . . . . . . . . . . . . . . . . . . . . 51
5.2.8 L2TP . . . . . . . . . . . . . . . . . . . . . . . . . . . . . . . . . . . . . . . . . . . . . . . 53
5.2.9 Telstra Big Pond . . . . . . . . . . . . . . . . . . . . . . . . . . . . . . . . . . . . . 56
5.3 LAN . . . . . . . . . . . . . . . . . . . . . . . . . . . . . . . . . . . . . . . . . . . . . . . . . . . . . 58
5.3.1 Interface . . . . . . . . . . . . . . . . . . . . . . . . . . . . . . . . . . . . . . . . . . . . 58
5.3.2 UPnP. . . . . . . . . . . . . . . . . . . . . . . . . . . . . . . . . . . . . . . . . . . . . . . 61

6
PURE NETWORKING BROADBAND ROUTER
Contents (continued)
Chapter Page
5.3.3 Print Server . . . . . . . . . . . . . . . . . . . . . . . . . . . . . . . . . . . . . . . . . 62
5.4 NAT . . . . . . . . . . . . . . . . . . . . . . . . . . . . . . . . . . . . . . . . . . . . . . . . . . . . . 64
5.4.1 Address Mapping. . . . . . . . . . . . . . . . . . . . . . . . . . . . . . . . . . . . . 65
5.4.2 Virtual Server . . . . . . . . . . . . . . . . . . . . . . . . . . . . . . . . . . . . . . . . 67
5.4.3 Special Applications . . . . . . . . . . . . . . . . . . . . . . . . . . . . . . . . . . 69
5.4.4 ALG Settings . . . . . . . . . . . . . . . . . . . . . . . . . . . . . . . . . . . . . . . . 73
5.5 Firewall. . . . . . . . . . . . . . . . . . . . . . . . . . . . . . . . . . . . . . . . . . . . . . . . . . . 74
5.5.1 Access Control . . . . . . . . . . . . . . . . . . . . . . . . . . . . . . . . . . . . . . . 75
5.5.2 URL Blocking. . . . . . . . . . . . . . . . . . . . . . . . . . . . . . . . . . . . . . . . 79
5.5.3 Schedule Rule . . . . . . . . . . . . . . . . . . . . . . . . . . . . . . . . . . . . . . . 81
5.5.4 Intrusion Detection . . . . . . . . . . . . . . . . . . . . . . . . . . . . . . . . . . . 84
5.5.5 DMZ . . . . . . . . . . . . . . . . . . . . . . . . . . . . . . . . . . . . . . . . . . . . . . . 90
6. Status Information . . . . . . . . . . . . . . . . . . . . . . . . . . . . . . . . . . . . . . . . . . . . . 92
6.1 Status and Information. . . . . . . . . . . . . . . . . . . . . . . . . . . . . . . . . . . . . . 93
6.2 Internet Connection. . . . . . . . . . . . . . . . . . . . . . . . . . . . . . . . . . . . . . . . 94
6.3 Device Status . . . . . . . . . . . . . . . . . . . . . . . . . . . . . . . . . . . . . . . . . . . . . . 95
6.4 Security Log. . . . . . . . . . . . . . . . . . . . . . . . . . . . . . . . . . . . . . . . . . . . . . . 96
6.5 DHCP Client Log . . . . . . . . . . . . . . . . . . . . . . . . . . . . . . . . . . . . . . . . . . 97
7. Tools . . . . . . . . . . . . . . . . . . . . . . . . . . . . . . . . . . . . . . . . . . . . . . . . . . . . . . . . 99
7.1 Configuration Tools . . . . . . . . . . . . . . . . . . . . . . . . . . . . . . . . . . . . . . . 100
7.2 Firmware Upgrade . . . . . . . . . . . . . . . . . . . . . . . . . . . . . . . . . . . . . . . . 102
7.3 Reset . . . . . . . . . . . . . . . . . . . . . . . . . . . . . . . . . . . . . . . . . . . . . . . . . . . 103
8. Print Server. . . . . . . . . . . . . . . . . . . . . . . . . . . . . . . . . . . . . . . . . . . . . . . . . . 105
8.1 Install the Print Server Network Driver. . . . . . . . . . . . . . . . . . . . . . . . 105
8.2 Add a Network Printer . . . . . . . . . . . . . . . . . . . . . . . . . . . . . . . . . . . . . 110
Appendix A. How to Manually Find Your PC’s IP and MAC Addresses . . . . . 113
Appendix B. Troubleshooting . . . . . . . . . . . . . . . . . . . . . . . . . . . . . . . . . . . . . . 115
B.1 Calling Black Box . . . . . . . . . . . . . . . . . . . . . . . . . . . . . . . . . . . . . . . . . 115
B.2 Shipping and Packaging. . . . . . . . . . . . . . . . . . . . . . . . . . . . . . . . . . . . 115
Appendix C. Glossary . . . . . . . . . . . . . . . . . . . . . . . . . . . . . . . . . . . . . . . . . . . . . 116

7
CHAPTER 1: Specifications
1. Specifications
Memory: Flash: 2-MB NOR; RAM: 16-MB SDRAM
Protocols Supported: TCP/IP, UDP, ICMP, PPPoE, PPTP, NAT/PAT, DHCP,
PAP/CHAP/MS-CHAP, L2TP, PPTP, IPSec passthrough
Throughput: 40 Mbps
Standards: IEEE 802.3 10BASE-T, IEEE 802.3u 100BASE-TX
User Controls: (1) Reset button
Connectors: LAN: (4) RJ-45;
WAN: (1) RJ-45;
Printer: (2) USB Type A
Indicators: (11) LEDs: (1) Power, (1) WAN 10/100, (1) WAN LNK/ACT,
(4) LAN 10/100, (4) LAN LNK/ACT
Power: 120 VAC, 60 Hz, external
Size: 1.2"H x 7.4"W x 3.9"D (3 x 18.8 x 9.9 cm)
Weight: 0.6 lb. (0.3 kg)

8
PURE NETWORKING BROADBAND ROUTER
2. Introduction
2.1 Overview
The Pure Networking Broadband Router is an incredibly fast router with 40-Mbps
LAN-to-WAN throughput. It enables multiple users (up to 253!) to share one
broadband Internet connection through an ADSL or cable modem.
Configure your Internet connection settings in the Pure Networking Broadband
Router. Then plug your PC into the LAN port, and you’re ready to share files and
access the Internet. You can even access private LAN servers from the public
network. Plus, remote management allows configuration and upgrades from a
remote site (over the Internet).
Monitor the router’s status, such as DHCP client log, security log, and
device/connection status. An easy-to-use, Web-based GUI simplifies configuration
and management.
As your network grows, you can connect another hub or switch to the router’s four
LAN ports and one WAN port, allowing you to easily expand your network. The
router is also equipped with a print server that supports LPD printing protocol, so
you can share your printer with all Intranet users.
The router gives you firewall protection between network users and the Internet. It
also supports advanced features, such as special applications, DMZ, virtual servers,
access control, and bridge mode.

9
CHAPTER 2: Introduction
2.2 The Router’s Back Panel
Figure 2-1 shows the Pure Networking Broadband Router’s back panel. It has a
power connector, two USB Type A printer ports, four LAN ports, a WAN port, and
a reset button. Numbers 1–5 in Figure 2-1 correspond to numbers 1–5 in Table 2-1.
Figure 2-1. Back panel.
Table 2-1. The router’s back-panel connectors and buttons.
Connector or Button Function
➀ Power connector Connect the router’s 12-VDC power supply here.
➁(2) USB Type A printer ports Connect the router to printers via these ports.
➂(4) RJ-45 LAN ports Use the four LAN ports to connect LAN PCs,
printer servers, hubs, and switches to the router.
➃(1) RJ-45 WAN port The WAN port connects to the segment that links
your xDSL or cable modem to the Internet. If the
modem port is an uplink port, use a crossover
cable to link the WAN port to the modem. If the
modem port is a regular port, use a straight-
through cable to link the WAN port to the
modem.
➂➃➄
➁
➀

10
PURE NETWORKING BROADBAND ROUTER
Table 2-1 (continued). The router’s back-panel connectors and buttons.
Connector or Button Function
➄Reset button The Reset button has a dual function.
1. If problems occur with your router, press the
router’s Reset button with a pencil tip for less
than four seconds. The router will reboot itself,
keeping your original configuration.
2. If problems persist, you experience extreme
problems, or you forgot your password, press
the Reset button for longer than four seconds.
The router will reset itself to factory-default
settings.
2.3 The Router’s Front Panel
On the router’s front panel, there are LEDs that inform you of the router’s current
status (see Figure 2-2). Numbers 1–5 in Figure 2-2 correspond to numbers 1–5 in
Table 2-2.
Figure 2-2. Front-panel LEDs.
➄
➁➃
➂
➀

11
CHAPTER 2: Introduction
Table 2-2. The router’s front-panel LEDs.
LED Light Status Description
➀PWR On The router’s power supply is on.
Off The router’s power supply is off.
➁WAN Green The WAN port is running at 100 Mbps.
10/100M
Yellow The WAN port is running at 10 Mbps.
Off No WAN connection.
Flashing Data is being sent to the WAN port.
➂ WAN On WAN is connected.
LNK/ACT
Off No WAN connection.
Flashing WAN port has activity (ACT), data is
being sent.
➃LAN Green The LAN port is running at 100 Mbps.
10/100M
(Ports 1–4) Yellow The LAN port is running at 10 Mbps.
Off No LAN connection.
Flashing Data is being sent to the LAN port.
➄ LAN On LAN is connected.
LNK/ACT
(Ports 1-4)
Off No LAN connection.
Flashing LAN port has activity (ACT), data is
being sent.

12
PURE NETWORKING BROADBAND ROUTER
2.4 What’s Included
Your package should contain the following items.
• (1) Pure Networking Broadband Router
• (1) Straight-through UTP cable
• (1) Power adapter
• (1) CD-ROM containing print server drivers
• This users’ manual
If anything is missing or damaged, please contact Black Box at 724-746-5500.
2.5 What You Need to Supply
• (1) External xDSL (ADSL) or cable modem with an Ethernet port (RJ-45).
• (1) Network Interface Card (NIC) for each PC.
• Each PC should have a Web browser installed (Internet Explorer 4.0 or higher,
or Netscape Navigator®4.7 or higher).

13
CHAPTER 3: Getting Started
3. Getting Started
Follow these instructions to set up the router and get connected to the Internet.
1. Set up your network as shown in Figure 3-1.
Figure 3-1. Typical LAN setup.
2. Set your LAN PC clients so that they can obtain IP addresses automatically.
Each LAN client requires an IP address; it allows LAN clients to find one
another. (If you have already configured your PC to obtain an IP
automatically, proceed to step 3 on page 21.)
Configure your PC to obtain an IP address automatically.
By default the router’s DHCP is on, which enables it to obtain an IP address
automatically once your PC is configured to do so. This section shows you
how to configure your PC so that it can obtain an IP address automatically for
either Windows®95/98/Me (step 2a), Windows XP (step 2b), Windows 2000
(step 2c), or Windows NT®(step 2d) operating systems. For other operating
systems (Macintosh®, Sun®, etc.), follow the manufacturer’s instructions.
2a. Windows 95/98/Me
1. Click the Start button and select Settings, then click Control Panel. The
Control Panel window will appear.
Switch/Hub
ADSL or
cable
modem
Internet
AC power
(2) USB
Type A ports

14
PURE NETWORKING BROADBAND ROUTER
2. Double-click the Network icon. The Network window will appear.
3. Check your list of Network Components. If TCP/IP is not installed, click
the Add button to install it now. If TCP/IP is installed, go to step 6.
4. In the Network Component Type dialog box, select Protocol and click
the Add button.
5. In the Select Network Protocol dialog box, select Microsoft and TCP/IP
and then click the OK button to start installing the TCP/IP protocol.
You may need your Windows CD to complete the installation.
6. After installing TCP/IP, go back to the Network dialog box. Select
TCP/IP from the list of Network Components, then click on the
Properties button. Figure 3-2 appears.
Figure 3-2. TCP/IP properties.

15
CHAPTER 3: Getting Started
7. Check each of the tabs and verify the following settings.
• Bindings: Check client for Microsoft Networks, and File and Printer
Sharing for Microsoft Networks.
• Advanced: Select the router’s configuration.
• NetBIOS: Select the NetBIOS protocol.
• DNS Configuration: Select Disable DNS.
• Gateway: All fields are blank.
• WINS Configuration: Select Disable WINS Resolution.
• IP Address: Select Obtain IP Address Automatically.
8. Reboot the PC. Your PC will now obtain an IP address automatically
from your Pure Networking Broadband Router’s DHCP server.
NOTE
Make sure that the Pure Networking Broadband Router’s DHCP server is
the only DHCP server available on your LAN.
Once you’ve configured your PC to obtain an IP address automatically, proceed
to step 3 on page 21.
2b. Windows XP
1. Click on the Start button and select Settings, then click on Network
Connections. The Network Connections window will appear.
2. Double-click on the Local Area Connection icon. The Local Area
Connection window will appear.
3. Check your list of Network Components. You should see Internet Protocol
[TCP/IP] on your list. Select it, and click on the Properties button. Figure
3-3 appears.
4. In the Internet Protocol (TCP/IP) Properties window, select Obtain an IP
address automatically and Obtain DNS server address automatically as
shown in Figure 3-3.

16
PURE NETWORKING BROADBAND ROUTER
Figure 3-3. Internet Protocol (TCP/IP) Properties screen, General tab.
5. Click on the OK button to confirm the setting. Your PC will now obtain an
IP address automatically from your router’s DHCP server.
NOTE
Make sure that the router’s DHCP server is the only DHCP server
available on your LAN.
Once you’ve configured your PC to obtain an IP address automatically,
proceed to step 3 on page 21.

17
CHAPTER 3: Getting Started
2c. Windows 2000
1. Click the Start button and select Settings, then Control Panel. The
Control Panel window will appear.
2. Double-click the Network and Dial-up Connections icon. In the
Network and Dial-up Connection window, double-click the Local Area
Connection icon. The Local Area Connection window will appear.
3. In the Local Area Connection window, click on the Properties button.
4. Check your list of Network Components. You should see Internet
Protocol (TCP/IP) on your list. Select it and click on the Properties
button.
5. In the Internet Protocol (TCP/IP) Properties window, select Obtain an
IP Address Automatically and Obtain DNS Server Address
Automatically as shown in Figure 3-4.

18
PURE NETWORKING BROADBAND ROUTER
Figure 3-4. Internet protocol (TCP/IP) properties, General tab.
6. Click on OK to confirm the setting. Your PC will now obtain an IP
address automatically from your Pure Networking Broadband Router’s
DHCP server.
NOTE
Make sure that the Pure Networking Broadband Router’s DHCP server is
the only DHCP server available on your LAN.
Once you’ve configured your PC to obtain an IP address automatically, proceed
to step 3 on page 21.
Other manuals for LR9603A
1
Table of contents
Other Black Box Wireless Router manuals

Black Box
Black Box LR9603A User manual

Black Box
Black Box WRT4001A User manual

Black Box
Black Box LRB500A User manual

Black Box
Black Box LW6005A User manual

Black Box
Black Box LW6005A User manual

Black Box
Black Box LW6005A-R2 User manual

Black Box
Black Box LW0050A User manual

Black Box
Black Box WRT750A User manual