BLACK STAR Blackfire 200 User manual

Blackstar Amplification Ltd, Beckett House, 14 Billing Road, Northampton, NN1 5AW, UK
For the latest information go to: www.blackstaramps.com
Whilst the information contained herein is correct at the time of publication, due to our policy of constant improvement
and development, Blackstar Amplification Ltd reserves the right to alter specifications without prior notice.
Designed and Engineered by
Blackstar Amplification UK
Owner’s Manual
HBK-1040 06/12

3
IMPORTANT SAFETY INSTRUCTIONS
1. Read these instructions.
2. Keep these instructions.
3. Heed all warnings.
4. Follow all instructions.
5. Do not use this apparatus near water.
6. Clean only with dry cloth.
7. Do not block any ventilation openings.
8. Install in accordance with the manufacturer’s instructions.
9. Do not install near any heat sources such as radiators, heat registers, stoves, or
other apparatus (including amplifiers) that produce heat.
10. Do not defeat the safety
purpose of the polarized or grounding-type plug. A
polarized plug has two blades with one wider than the other. A grounding
type plug has two blades and a third grounding prong. The wide blade or the
third prong are provided for your safety. If the provided plug does not fit into
your outlet, consult an electrician for replacement of the obsolete outlet.
11. Protect the power cord from being walked on or pinched particularly at plugs,
convenience receptacles, and the point where they exit from the apparatus.
12. Only use attachments/accessories specified by the manufacturer.
13. Unplug this apparatus during lightning storms or when unused for long periods
of time.
14. Refer all servicing to qualified service personnel. Servicing is required when the
apparatus has been damaged in any way, such as power-supply cord or plug is
damaged, liquid has been spilled or objects have fallen into the apparatus, the
apparatus has been exposed to rain or moisture, does not operate normally, or
has been dropped.
“TO COMPLETELY DISCONNECT THIS APPARATUS FROM THE AC MAINS,
DISCONNECT THE POWER SUPPLY CORD PLUG FROM THE AC RECEPTACLE”.
“WARNING: TO REDUCE THE RISK OF FIRE OR ELECTRIC SHOCK, DO
NOT EXPOSE THIS APPARATUS TO RAIN OR MOISTURE AND OBJECTS
FILLED WITH LIQUIDS, SUCH AS VASES, SHOULD NOT BE PLACED ON THIS
APPARATUS”.
This symbol is intended to alert the user to the presence of
uninsulated “dangerous voltage” within the product’s enclosure that
may be of sufficient magnitude to constitute a risk of electric shock
to persons.
This symbol is intended to alert the user to the presence of important
operation and maintenance (servicing) instructions in the literature
accompanying the appliance.
USA / Canada

The U.S. Government´s Occupational Safety and Health Administration (OSHA) has
specified the following permissible noise level exposures:
According to OSHA, any exposure in excess of the above permissible limits could
result in some hearing loss.
Ear plug protectors in the ear canals or over the ears must be worn when operating
this amplification system in order to prevent a permanent hearing loss if exposure is
in excess of the limits as set forth above. To ensure against potentially dangerous
exposure to high sound pressure levels, it is recommended that all persons
exposed to equipment capable of producing high sound pressure levels such as
this amplification system be protected by hearing protectors while this unit is in
operation.
54
Warning!
Important safety information!
READ THE FOLLOWING INFORMATION CAREFULLY. SAVE ALL
INSTRUCTIONS FOR FUTURE REFERENCE!
Follow all warnings and instructions marked on the product!
Danger! High internal operating voltages.
Do not open the equipment case. There are no user serviceable parts in this
equipment. Refer all servicing to qualified service personnel.
Clean only with a dry cloth.
Condensation can form on the inside of an amplifier if it is moved from a cold
environment to a warmer location. Before switching the unit on, it is recommended
that the unit be allowed to reach room temperature.
Unauthorised modification of this equipment is expressly forbidden by Blackstar
Amplification Ltd.
Never push objects of any kind into ventilation slots on the equipment casing.
Do not expose this apparatus to rain, liquids or moisture of any type.
Do not place this product on an unstable trolley, stand or table. The product may
fall, causing serious damage to the product or to persons!
Do not cover or block ventilation slots or openings.
This product should not be placed near a source of heat such as a stove, radiator,
or another heat producing amplifier.
Use only the supplied power cord which is compatible with the mains voltage supply
in your area.
Power supply cords should always be handled carefully and should be replaced if
damaged in any way.
Never break off the earth (ground) pin on the power supply cord.
The power supply cord should be unplugged when the unit is to be unused for long
periods of time.
Before the unit is switched on, the loudspeaker should be connected as described
in the handbook using the lead recommended by the manufacturer.
Always replace damaged fuses with the correct rating and type.
Never disconnect the protective mains earth connection.
High loudspeaker levels can cause permanent hearing damage. You should
therefore avoid the direct vicinity of loudspeakers operating at high levels. Wear
hearing protection if continuously exposed to high levels.
If the product does not operate normally when the operating instructions are
followed, then refer the product to a qualified service engineer.
All electrical and electronic products should be disposed of separately
from the municipal waste stream via designated collection facilities
appointed by the government or the local authorities.
Duration Per Day In Hours Sound Level dBA, Slow Response
8 90
6 92
4 95
3 97
2 100
1 1/2102
1 105
1/2110
1/4 or less 115
English
English

Features
The Blackfire 200 sees the distillation of decades of guitar amplifier design
experience into the ultimate 200W valve head for metal. Every control has been
honed for maximum sonic benefit through hundreds of hours of listening.
The Blackfire 200 Clean Channel sets the precedent for no-compromise design, by
featuring the unique Bright / Warm switch. This modestly named control actually
reconfigures the preamplifier voicing and power amplifier damping to reproduce
either ringing Class A performance in the Bright mode, or crunchy Class AB tones
in the Warm setting.
Careful attention was paid to the levels of overdrive available when designing the
Blackfire 200 Crunch Channel. We thought it important to cover the widest range
of crunch gain levels from just on the edge clean break-up, to crushing modern
rhythm tones. To this end the Crunch / Super Crunch switch alters both gain levels
and tonal shaping for maximum crunch flexibility.
The overdrive channels are named after the Firewind fan-favourite track ‘The Fire
And The Fury’. The Fire channel delivers a high gain classic distortion, while the
Fury channel takes you to screaming lead and beyond.
The overdrive channels are characterised by a tone which is high in gain, but lacks
any of the detached top-end often found in many similar designs. This is a result
of unique preamplifier and power amplifier shaping techniques, which also benefit
the player in the way the overdrives clean up beautifully as the guitar volume is
reduced. Even at the most extreme settings, the overdrive channels remain natural
sounding.
The patented ISF control is unique to Blackstar Amplification and represents a
major step forward in tone shaping flexibility. The ISF control shifts the response of
the three control tone stack between, at one end a US response, and at the other
a UK response. Importantly, an infinite number of alternative tone choices lies in
between that would be otherwise unavailable.
Completing the tonal feature set is another unique patented Blackstar innovation –
the patented DPR (Dynamic Power Reduction) system. DPR reduces the power of
the output stage from full power (200W) down to 10% (20W) and any power output
in between. This means that the full tonal depth of the KT88 power amplifier can
be enjoyed at any volume, making the Blackfire 200 ideal for recording, smaller
gigs and even home practice use. Working in conjunction with the power amplifier
voltages, this method of power reduction suffers none of the loss in tone of other
power reduction systems.
The tonal flexibility of the Blackfire 200 is augmented by full MIDI implementation
of the main channel switching functions. Used in conjunction with outboard gear
such as multi-effects units, MIDI allows a whole new level of creative performance
to be explored.
7
INTRODUCTION From Gus G.
Hey! Thanks for buying the BLACKFIRE 200. I’ve been out on
the road with Ozzy for over two years now and it’s been the most
amazing experience. My playing style has really developed and so
has my showmanship on stage. No day is ever the same on tour; the
days are packed with interviews, photo shoots and sold out shows in
some of the biggest venues in the world.
One constant on tour has been the tone of my Blackstar amps or
‘Church of Distortion’ as I’ve named it. I have received compliments
worldwide for my tone and with this in mind I didn’t want to stray
from what has become my sound.
The Series One BLACKFIRE 200 has the same functionality as the
S1-200 but I have worked closely with the Blackstar Engineers to define
the OD1 and OD2 channels to the Gus G. tone of my HT-BLACKFIRE pedal.
I love the heavy chunk of the rhythm channel and the clarity of the lead
channel. It’s the best tone I have ever heard and I’mvery pleased with what the
Blackstar team and I have developed.
I will be using the head on the road and in the studio with Ozzy and
Firewind, so expect to hear it on the new material.
I’ve really enjoyed working with the Blackstar team on my second
signature project and I’m very proud of this amp. I hope playing through
it inspires you to create great music!
See you soon and STAY METAL!
6
English
English

8. Crunch Select
Press this switch to select the Crunch Channel.
9. Crunch Gain
The Crunch Gain control adjusts the amount of the Crunch Channel’s overdrive or
distortion. Low settings, counter clockwise, will deliver a clean sound on the edge of
break-up. As the Crunch Gain control is increased clockwise the sound will become
more overdriven, moving through beautiful crunch tones.
10. Super Crunch Switch
The Super Crunch switch allows the selection between a lower gain crunch with a
looser bass response (Super Crunch – out) and a higher gain crunch setting (Super
Crunch – in), which has a tighter bottom end for modern rhythm playing.
11. Crunch Volume
This controls the volume of the Crunch Channel. Turning it clockwise increases the
volume.
Clean and Crunch Channel EQ
12. Bass
The Bass control adjusts the amount of low-end frequencies in your tone. This amp
has an advanced tone shaping circuit which allows the tone to be tight and cutting,
counter clockwise, to warm and thumping, clockwise.
13. Middle
The Middle control adjusts the amount of middle frequencies in your tone. The middle
frequencies are particularly important in setting the amount of ‘body’ your tone has.
With the Middle control set to its minimum position (fully counter clockwise) the
sound will be aggressive and scooped, a tone ideal for aggressive rhythm playing.
As the Middle control is increased (clockwise) the amount of ‘body’ is increased,
which is more suitable for sustained lead guitar tones.
14. Treble
The Treble control allows exact adjustment of the treble frequencies within the
sound. At low settings (counter clockwise) the sound will be warm and darker in
character. As the Treble control is increased (clockwise) the sound will become
brighter. At the maximum settings the sound will be aggressive and cutting.
9
Front Panel
1. Input
Plug your guitar in here. Always use a good quality screened guitar lead.
Clean Channel
2. Clean Indicator
When the green LED is on the Clean Channel is selected.
3. Clean Select
Press this switch to select the Clean Channel.
4. Clean Gain
The Clean Gain control adjusts the amount of the Clean Channel’s overdrive or
distortion. Low settings, counter clockwise, will deliver a clean sound. As the Clean
Gain control is increased clockwise the sound will begin to break up, delivering a
subtle overdrive.
5. Bright / Warm Switch
The Bright / Warm Switch reconfigures both preamplifier and power amplifier circuits
to deliver Class A or Class AB style tones.
The table below describes the operation of the two modes:
6. Clean Volume
This controls the volume of the Clean Channel. Turning it clockwise increases the
volume.
Crunch Channel
7. Crunch Indicator
When the yellow LED is on the Crunch Channel is selected.
8
RESONANCE DPR
FIRE
STANDBY POWER
ON ON
PRESENCE
MASTER POWER
FURY
VOLUME
CLEAN
BRIGHT /
WARM
GAIN ISF
BASS MIDDLE TREBLE
VOLUME
CRUNCH
SUPER
CRUNCH
GAIN
INPUT
VOLUME
200W20W
100100100
100100100100100100100100
100 100 100 100 100 100 100 100
Developed in
partnership with
GA
IN
1
1
1
10
10
10
10
10
0
VOLU
ME
1
1
1
10
10
10
10
10
0
0
GAIN
1
1
1
1
10
10
10
10
0
0
VOLUME
1
1
1
10
10
10
10
10
0
BASS
1
1
1
10
10
10
10
10
0
MIDD
LE
1
1
1
10
10
10
10
10
0
TREBLE
1
1
1
10
10
10
10
10
0
ISF
1
1
1
1
10
10
10
10
0
0
BRIG
H
WA
R
GA
IN
1
1
1
10
10
10
10
10
0
0
GA
IN
VOLU
ME
H
T
/
R
M
1
1
1
10
10
10
10
0
0
VOLU
ME
H
R
S
UP
E
C
RU
N
GAIN
1
1
1
10
10
10
10
10
0
GAIN
VOLUME
E
R
N
CH
1
1
1
10
10
10
10
10
0
0
VOLUME
E
N
BASS
1
1
1
10
10
10
10
10
0
BASS
MIDD
LE
1
1
1
10
10
10
10
10
0
0
MIDD
LE
TREBLE
1
1
1
1
1
10
10
10
10
0
0
TREBLE
IS
F
1
1
1
10
10
10
10
10
0
ISF
RESONANCE
1
1
10
10
10
10
10
10
10
10
0
PRESENCE
1
1
1
10
10
10
10
10
10
10
0
0
0
VOLUME
1
1
10
10
10
10
10
10
10
10
0
DP
R
2
2
2
20
20
20
200
200
200
200
00
200
200
2
0
W
W
W
W
W
20W
W
W
W
W
W
Mode Preamp Character Power Amp Damping Use For
Bright Tighter bass, chiming mids
and highs
Low (greater emphasis on
lows and highs)
Ringing clean and jangly
rhythm
Warm Looser bass, glassy highs Medium (tighter bottom-
end for crunch)
Warm cleans and crunchy
rhythms
English
English

Fire and Fury Channel EQ
24. Bass
The Bass control adjusts the amount of low-end frequencies in your tone. This amp
has an advanced tone shaping circuit which allows the tone to be tight and cutting,
counter clockwise, to warm and thumping, clockwise.
25. Middle
The Middle control adjusts the amount of middle frequencies in your tone. The
middle frequencies are particularly important in setting the amount of ‘body’ your
tone has.
With the Middle control set to its minimum position (fully counter clockwise) the
sound will be aggressive and scooped, a tone ideal for aggressive rhythm playing.
As the Middle control is increased (clockwise) the amount of ‘body’ is increased,
which is more suitable for sustained lead guitar tones.
26. Treble
The Treble control allows exact adjustment of the treble frequencies within the
sound. At low settings (counter clockwise) the sound will be warm and darker in
character.
As the Treble control is increased (clockwise) the sound will become brighter. At the
maximum settings the sound will be aggressive and cutting.
27. ISF (Infinite Shape Feature)
The patented ISF control works in conjunction with
the Bass, Middle and Treble controls. It allows you
to choose the exact tonal signature you prefer.
Fully counter clockwise has a more American
characteristic with a tight bottom-end and more
aggressive middle, and fully clockwise has a British
characteristic which is more ‘woody’ and less
aggressive.
Unlike conventional ‘contour’ controls and parametric equalisation systems, the
Bass, Middle and Treble controls remain interactive with each other just like in a
traditional guitar amplifier tone stack. This leads to a very familiar, musical response.
Master
28. Resonance
The Resonance control sets the overall bass response of the Blackfire 200. At
lower settings the cleans will be tight and funky and overdrives will be focussed in
their bass response. At increased settings the clean sounds will be become full and
warm, whilst the crunch and overdrive tones will be more bass heavy and resonant.
29. Presence
The Presence control sets the overall treble response of the Blackfire
200. Percussive high-end can be accentuated on clean sounds and the
amount of aggressive treble controlled with crunch and overdrive settings.
11
15. ISF (Infinite Shape Feature)
The patented ISF control works in conjunction with
the Bass, Middle and Treble controls. It allows you
to choose the exact tonal signature you prefer. Fully
counter clockwise has a more American characteristic
with a tight bottom-end and more aggressive middle,
and fully clockwise has a British characteristic which
is more ‘woody’ and less aggressive.
Unlike conventional ‘contour’ controls and parametric equalisation systems, the
Bass, Middle and Treble controls remain interactive with each other just like in a
traditional guitar amplifier tone stack. This leads to a very familiar, musical response.
Fire Channel
16. Fire Channel Indicator
When the orange LED is on, the Fire Channel is selected.
17. Fire Select
Press this switch to select the Fire Channel.
18. Fire Gain
This Gain control adjusts the amount of overdrive or distortion that the Fire Channel
will deliver. As the Gain control is increased clockwise the sound will become
more overdriven moving through crunch tones until, at its maximum position, a full
distorted crunch tone is arrived at.
19. Fire Volume
This controls the volume of the Fire Channel. Turning it clockwise increases the
volume.
Fury Channel
20. Fury Indicator
When the red LED is on, the Fury Channel is selected.
21. Fury Select
Press this switch to select the Fury Channel.
22. Fury Gain
This Gain control adjusts the amount of overdrive or distortion that the Fury Channel
will deliver. As the Gain control is increased clockwise the sound will become
more overdriven moving through crunch tones until, at its maximum position, a full
distorted lead tone is reached.
23. Fury Volume
This controls the volume of the Fury Channel. Turning it clockwise increases the
volume.
10
USA UK
USA UK
English
English

Crunch DPR Operation
The DPR control allows you to pin-point exactly how much valve overdrive you want
to come from the preamplifier section and how much is coming from the KT88s in
the power amplifier section.
Overdrive DPR Operation
The DPR control allows you to add power amplifier compression to your high gain
lead and rhythm tones. This is superb for encouraging really fluid lead playing rich in
power amplifier sustain and feel.
32. Power Indicator Light
The power indicator will light when the amplifier is switched on.
33. Standby
This switch enables the output stage. Always turn this switch on at least 30 seconds
after the Power switch (34). During short breaks in playing use just this switch to turn
‘off’ and ‘on’ the amplifier’s output.
34. Power
This switch is used to turn the amplifier on and off. You should always turn this
switch on before turning on the Standby switch (33).
13
30. Volume
This controls the overall volume of your amplifier. Turning it clockwise increases the
volume.
31. DPR (Dynamic Power Reduction)
The patented DPR control allows the output power of the
Blackfire 200 to be reduced anywhere from 200W (100%) down
to 20W (10%) of the rated power.
DPR works by controlling the power supply voltages to the KT88
output valves and also the level of drive signal into the power
amplifier stage. Importantly, there are no components placed
in between the output valves, the output transformer and the
loudspeaker – a relationship which is essential in the delivery of
valve tone.
In addition to reducing the output power of the Blackfire 200,
the DPR system actually controls the amount of power amplifier compression
too. Power amplifier compression is a key ingredient in the characteristics of low
powered valve amplifier tone and gives a very playable ‘feel’ to the Blackfire 200 at
reduced power settings.
We would recommend experimenting with the channel Gain and Volume, Master
Volume and DPR Control to achieve various combinations of preamplifier and power
amplifier distortion / compression.
Note: Generally speaking the more DPR is applied (i.e. power is reduced) the more
dynamic compression and power amp clipping will be experienced at any given
volume.
Clean DPR Operation
The DPR control is extremely powerful in fine-tuning the exact dynamic compression
characteristics of the power amplifier.
12
Channel Channel Gain Channel
Volume
Master
Volume
DPR Description/Sound Character
Clean Low Mid Mid High Maximum pre and power amplifier
headroom yields extremely dynamic
clean sounds.
Clean Low High High Low Increasing drive to the power amplifier
and reducing output power gives a
compressed clean sound rich in power
amplifier induced harmonics.
Clean High High High Low Higher channel gain further increases
the power amplifier drive producing a
‘full stack’ crunch tone at only 20W
output power.
Channel Channel
Gain
Channel
Volume
Master
Volume
DPR Description/Sound Character
Crunch Low/Mid Mid Mid High Lower gain settings provide a dynamic
crunch utilising the full 200W of available
headroom.
Crunch Mid High High Mid At these settings there is a blend of the
distortion and compression generated in the
preamplifier and power amplifier valves. We
recommend that youexperiment to find your
‘sweet-spot’.
Crunch High Mid Mid Low Here maximum preamplifier gain is
combined with the lowest power amplifier
output for maximum valve saturation.
Channel Channel
Gain
Channel
Volume
Master
Volume
DPR Description/
Sound Character
Overdrive Mid Mid Mid High The maximum headroom from the KT88
power amplifier will yield incredibly tight
and dynamic overdrive at extreme volume
settings.
Overdrive High Mid Mid Low With maximum overdrive gain there is
loads of sustain from the preamplifier
which is augmented by the increased
power amplifier compression as the DPR
is set to minimum. Again, we recommend
that you experiment to find your ‘sweet-
spot’.
English
English

1. The amp must be powered on with either the Standby switch set to on, a jack
in the Input socket, or both.
2. Send the appropriate Program Change message to the amp.
3. Press and hold in the appropriate front panel Channel Select switch for
2 seconds.
The corresponding channel will be selected and its LED will flash three times in quick
succession to indicate it has been assigned to the last received Program Change.
The amplifier will now remember the selection. Repeat the operation until all your
Program Changes have the desired amp channel assigned to them.
MIDI Receive Channel Selection
As mentioned previously, the default mode is set to OMNI and the amplifier will
respond to MIDI Program Changes on all MIDI channels. You may wish to set
the amplifier to respond to Program Changes on just a single MIDI channel. The
Blackfire 200 can be set to respond in this way for any of the first seven MIDI
channels as follows:
1. The unit must be in standby (Power (34) on and Standby (33) off), and no lead
connected to the Input jack.
2. Simultaneously press and hold the Clean (3) and FIRE (17) Select switches.
3. After 2 seconds the LED for FURY (20) will begin to flash continuously (2 flashes
per second) to indicate that the unit is in MIDI Receive Channel Program Mode.
4. Release the Clean (3) and FIRE (17) Select switches and select the required MIDI
channel by using the Channel Select switches as shown in the table below:
The corresponding Channel Select LEDs will illuminate to show the selection and
each press of the Channel Select switches will toggle the state of its associated
LED.
5. To store the desired selection press the FURY (21) Select switch. The FURY (20)
Select LED will flash quickly four times when the operation is complete. The unit
will then revert to normal operation, and will respond only to Program Changes
on the newly selected MIDI Channel.
15
MIDI Channel Switching
The Blackfire 200 offers the ability to control channel selection via MIDI Program
Change messages and interfacing with most MIDI controllers is a straight
forward process. The Blackfire 200 can be placed in a MIDI chain allowing you to
simultaneously select a channel on the amplifier and change the patch on a MIDI
effects processor connected to the effects loop. There are 128 available Program
Changes, giving you the possibility to access a vast number of tonal combinations.
To set-up MIDI channel switching, simply connect the MIDI controller’s MIDI Out
socket to the MIDI In socket on the rear of the amplifier. The controller should be
set to transmit Program Change messages (this is usually the case). From new,
a Blackfire 200 amplifier is set to OMNI mode and responds to Program Change
messages on all MIDI channels. Changing ‘patches’ on the controller will change
the selected channel on the amp. The default settings for each Program Change
number are shown in the table below:
Program Change Assignment
To change the default assignments and set the amp up to respond to a different set
of Program Changes:
14
Program Channel
Change
1 CLEAN
2 CRUNCH
3 FIRE
4 FURY
5 CLEAN
6 CRUNCH
7 FIRE
8 FURY
9 CLEAN
10 CRUNCH
11 FIRE
12 FURY
13 CLEAN
14 CRUNCH
15 FIRE
16 FURY
17 CLEAN
18 CRUNCH
19 FIRE
20 FURY
21 CLEAN
22 CRUNCH
23 FIRE
24 FURY
25 CLEAN
26 CRUNCH
27 FIRE
28 FURY
29 CLEAN
30 CRUNCH
31 FIRE
32 FURY
33 CLEAN
34 CRUNCH
35 FIRE
36 FURY
37 CLEAN
38 CRUNCH
39 FIRE
40 FURY
41 CLEAN
42 CRUNCH
43 FIRE
44 FURY
45 CLEAN
46 CRUNCH
47 FIRE
48 FURY
49 CLEAN
50 CRUNCH
51 FIRE
52 FURY
53 CLEAN
54 CRUNCH
55 FIRE
56 FURY
57 CLEAN
58 CRUNCH
59 FIRE
60 FURY
61 CLEAN
62 CRUNCH
63 FIRE
64 FURY
65 CLEAN
66 CRUNCH
67 FIRE
68 FURY
69 CLEAN
70 CRUNCH
71 FIRE
72 FURY
73 CLEAN
74 CRUNCH
75 FIRE
76 FURY
77 CLEAN
78 CRUNCH
79 FIRE
80 FURY
81 CLEAN
82 CRUNCH
83 FIRE
84 FURY
85 CLEAN
86 CRUNCH
87 FIRE
88 FURY
89 CLEAN
90 CRUNCH
91 FIRE
92 FURY
93 CLEAN
94 CRUNCH
95 FIRE
96 FURY
97 CLEAN
98 CRUNCH
99 FIRE
100 FURY
101 CLEAN
102 CRUNCH
103 FIRE
104 FURY
105 CLEAN
106 CRUNCH
107 FIRE
108 FURY
109 CLEAN
110 CRUNCH
111 FIRE
112 FURY
113 CLEAN
114 CRUNCH
115 FIRE
116 FURY
117 CLEAN
118 CRUNCH
119 FIRE
120 FURY
121 CLEAN
122 CRUNCH
123 FIRE
124 FURY
125 CLEAN
126 CRUNCH
127 FIRE
128 FURY
English
English
Clean Crunch Fire MIDI CHANNEL
OFF OFF OFF OMNI
ON OFF OFF 1
OFF ON OFF 2
ON ON OFF 3
OFF OFF ON 4
ON OFF ON 5
OFF ON ON 6
ON ON ON 7

Rear Panel
1. Mains Input
The supplied detachable mains lead is connected here. The lead should only
be connected to a power outlet that is compatible with the voltage, power and
frequency requirements stated on the rear panel. If in doubt get advice from a
qualified technician.
2. Mains Fuse
The value of the Mains Fuse is specified on the rear panel. Never use a fuse of the
incorrect value or attempt to bypass it.
3. H.T. Fuse
The value of the H.T. Fuse is specified on the rear panel. Never use a fuse of the
incorrect value or attempt to bypass it.
4. Output Valves Fuse
The value of the Output Valves Fuse is specified on the rear panel. Never use a fuse
of the incorrect value or attempt to bypass it.
5. Footswitch
The supplied footswitch is connected here. The footswitch enables you to switch
between the Clean, Crunch, Fire and Fury channels.
6. MIDI Thru
Any MIDI data received at the MIDI In socket is passed out of the MIDI Thru socket
so that other MIDI devices can be placed in a chain. The MIDI Thru socket also
serves as a way of dumping Channel Select/Program Change data to a suitable
MIDI storage device. Refer to the MIDI Channel Switching section for more details.
Always use a good quality MIDI lead.
7. MIDI In
If channel switching using MIDI is required, connect the MIDI device here. Refer
to the MIDI Channel Switching section for more details. Always use a good quality
MIDI lead.
17
MIDI Dump Out
You may wish to back up the MIDI channel select settings so you can transfer them
to another amplifier, for example. To do this you will need a MIDI Sysex librarian,
which is usually a piece of software running on a PC or MAC with a suitable MIDI
interface.
1. The unit must be in standby (Power (34) on and Standby (33) off), with no
lead connected to the Input jack and the MIDI Thru on the rear of the amplifier
connected to the MIDI In of the recording device.
2. Simultaneously press and hold the Crunch (8) and FURY (21) Select switches.
After 2 seconds the LED for FIRE (16) will flash continuously to indicate that the
unit is in MIDI Dump Mode.
3. Prepare the receiving equipment for the transfer. For example, if using a MIDI
Sysex librarian this must be put into file receive mode.
4. Start the file transfer by pressing and quickly releasing the FIRE (17) Select
switch. During the file transfer the FIRE (16) Select LED will flash quickly. When
the flashing stops the transfer operation is complete and the amplifier will revert
to normal operation. The file should be saved as a MIDI System Exclusive file.
MIDI Dump In
To load in previously saved Program Change assignments:
1. Connect the MIDI Out of the MIDI recording device to the MIDI In on the rear of
the amplifier and use the MIDI Sysex librarian to send the previously stored MIDI
System Exclusive file.
The amplifier overwrites the current Program Change assignments with the new
ones. If the operation completes successfully all four channel LEDs flash quickly four
times. If the dump is unsuccessful or incomplete the four LEDs will flash slowly in an
alternating pattern and then the unit will revert to normal operation.
Note: During reception of the System Exclusive file the amplifier will temporarily
cease to pass data to the MIDI Thru socket.
Restoring Factory Settings
To return the amplifier to its factory default state:
1. With the amplifier Power off, press and hold in the Crunch (8) and FURY (21)
Select switches.
2. While holding in the switches turn on the amplifier. After 2 seconds all channel
select LEDs flash once to confirm the factory defaults have been restored.
16
EFFECTS LOOPEMULATED OUTPUT
FOOTSWITCH
RETURN SEND
LEVEL
+4dBV
-10dBV
4Ω16Ω
8Ω
MIDI
THRU IN
SPEAKER OUTPUTS
H.T. FUSE TUPTUOTUPNISNIAM
VALVES FUSE
MAINS FUSE
T1AL 250V F1.6A 250V
230V/240V - T3.15AL 250V
100V/120V - T6.3AL 250V
100V~50/60Hz
500 WATTS
CONNECT SPEAKERS BEFORE USE
OUTPUT: 200 WATTS RMS
MODEL: BLACKFIRE 200
WARNING!: RISK OF HAZARDOUS ENERGY
AVIS!: ENERGIE ELECTRIQUE DANGEREUSE!
WARNING!: SHOCK HAZARD. DO NOT OPEN. TO REDUCE THE RISK OF FIRE OR ELECTRIC SHOCK
DO NOT EXPOSE THIS EQUIPMENT TO RAIN OR MOISTURE. THIS APPARATUS MUST BE EARTHED.
AVIS!: RISQUE DE CHOC ELECTRIQUE. NE PAS OUVRIR. POUR EVITER LES RISQUES D’INCENDIE ET
DE DECHARGES ELECTRIQUES, N’EXPOSEZ JAMAIS CET APPAREIL A L’HUMIDITE OU A LA PLUIE.
CONNECTER CET APPAREIL A LA TERRE.
This device complies with Part 15 of the FCC Rules. Operation is subject to the following two
conditions: (1) this device may not cause harmful interference, and (2) this device must accept
any interference received, including interference that may cause undesired operation.
This Class B digital apparatus complies with Canadian ICES-003.
Cet appareil numérique de la classe B est conforme à la norme NMB-003 du Canada.
CAUTION!: TO REDUCE THE RISK OF ELECTRIC SHOCK DO NOT REMOVE COVER. NO USER
SERVICEABLE PARTS INSIDE. REFER SERVICING TO QUALIFIED SERVICE PERSONNEL.
ATTENTION!: POUR EVITER LES RISQUES DE DECHARGES ELECTRIQUES, NE PAS OUVRIR LE
COUVERCLE. CET APPAREIL NE COMPORTE AUCUNE PIECE SUSCEPTIBLE D’ETRE REPAREE PAR
VOS SOINS. FAITES TOUJOURS APPEL A UN TECHNICIEN QUALIFIE POUR TOUTE REPARATION.
WARNING!: DO NOT OBSTRUCT VENTILATION GRILLES
ATTENTION!: NE PAS OBSTRUER LES GRILLES DE VENTILATION
Blackstar Amplification Ltd
Designed and Engineered by
Northampton, England
Made under license in Korea
IMPEDANCE
N16549
Developed in
partnership with
1 2 10 119 12 133 4 5 6 7 8
English
English

Technical Specification
Power (RMS): 200 Watts
Valves: 4 x KT88, 4 x ECC83, 1 x ECC82
Weight (kg): 27.2
Dimensions (mm): 705 x 285 x 278.5
Footswitch: FS-1BF supplied
19
8. Impedance Selector
This control matches the amplifier’s impedance to that of the connected speakers.
Always ensure that the selected impedance matches that of the speaker cabinets
connected. See table below.
A speaker cabinet of less than 4 Ohms, or 2 x 4 Ohm cabinets, should not be used
together with this amplifier.
WARNING: The amplifier must always be completely powered down before
adjusting the setting of the Impedance Selector. Failure to do this, or to correctly
match the impedance of the amplifier and speakers, will damage the amplifier.
9. Speaker Outputs
There are two parallel speaker outputs for connecting external speaker cabinets.
When connecting speakers always ensure that the Impedance Selector (8) is set
correctly.
10. Speaker Emulated Output
This output emulates the tonal characteristics of a guitar speaker cabinet and
provides a natural valve overdrive tone for connection to a recording device or
mixing desk. Always use a good quality screened lead. There is both a jack and a
balanced XLR output.
NOTE: To ‘silently’ record, turn the amp to standby mode. You may also record
from this output while in standby mode without a loudspeaker connected, but
ensure that no loudspeaker leads are connected to either of the loudspeaker output
jack sockets of the amplifier, as this will defeat the load protection circuit and cause
damage to the amplifier.
11. Effects Loop Level
The Effects Loop Level switch sets the effects loop to either +4dBV/-10dBV, which
enables you to use it with either professional equipment (+4dBV setting), or with
guitar level effects such as effects pedals (-10dBV setting).
12. Effects Loop Return
Connect the (mono) output of an external effects unit here.
13. Effects Loop Send
Connect the (mono) input of an external effects unit here.
18
English
English
Cabinets Connected Impedance Selected
1 x 16 Ohm cabinet 16 Ohms
2 x 16 Ohm cabinets 8 Ohms
1 x 8 Ohm cabinet 8 Ohms
2 x 8 Ohm cabinets 4 Ohms
1 x 4 Ohm cabinet 4 Ohms

Hohe Lautsprecherpegel können permanente Hörschäden verursachen. Sie sollten
daher die direkte Nähe zu Lautsprechern, die auf hohen Pegeln betrieben werden,
vermeiden. Tragen Sie einen Hörschutz, wenn Sie kontinuierlich hohen Pegeln
ausgesetzt sind.
Wenn das Produkt nicht normal funktioniert, während die Betriebsanleitung befolgt
wird, übergeben Sie das Produkt an einen qualifizierten Servicetechniker.
Die Verwaltung zur Gesundheit und Sicherheit am Arbeitsplatz der US-Regierung
(OSHA) hat die folgenden zulässigen Lärmpegelbelastungen festgelegt:
Laut der OSHA kann jede Belastung oberhalb der oben genannten zulässigen
Grenzwerte zu gewissen Hörverlusten führen.
Wenn dieses Verstärkersystem betrieben wird, müssen Ohrschützer im Ohrkanal
oder über den Ohren getragen werden, um permanenten Hörverlust zu vermeiden,
wenn die Belastung oberhalb der oben festgelegten Grenzwerte liegt. Um sich
gegen potenziell gefährliche Belastungen durch hohe Schalldruckpegel zu schützen,
wird empfohlen, dass alle Personen, die Geräten wie diesem Verstärkersystem
ausgesetzt sind, die in der Lage sind, hohe Schalldruckpegel zu entwickeln, während
des Betriebs dieses Geräts durch Ohrschützer geschützt werden.
21
Alle Elektro- und Elektronik-Altgeräte müssen getrennt vom Hausmüll
über dafür staatlich vorgesehenen Stelen entsorgt werden.
Wichtige Informationen zur Sicherheit!
LESEN SIE DIE FOLGENDEN INFORMATIONEN SORGFÄLTIG DURCH.
BEWAHREN SIE ALLE ANLEITUNGEN FÜR DIE ZUKÜNFTIGE BEZUGNAHME
AUF
Befolgen Sie alle auf dem Produkt ausgewiesenen Warnungen und
Anleitungen!
Gefahr! Hohe interne Betriebsspannungen
Öffnen Sie nicht das Gehäuse des Geräts. Es befinden sich keine vom Anwender zu
wartende Teile in diesem Gerät. Überlassen Sie alle Servicearbeiten qualifiziertem
Wartungspersonal.
Nur mit einem trockenen Lappen reinigen
Auf der Innenseite eines Verstärkers kann sich Kondensationsnässe bilden, wenn er
von einer kalten Umgebung an einen wärmeren Ort bewegt wird. Es wird empfohlen,
dass das Gerät vor dem Einschalten Zimmertemperatur erreicht.
Unerlaubte Änderungen an diesem Gerät sind ausdrücklich von Blackstar
Amplification Ltd verboten.
Stecken Sie niemals Objekte jeglicher Art in die Lüftungsschlitze des Gehäuses.
Setzen Sie dieses Gerät nicht Regen, Flüssigkeiten oder Feuchtigkeit jeglicher
Art aus.
Befolgen Sie alle auf dem Produkt ausgewiesenen Warnungen und Anleitungen!
Platzieren Sie dieses Produkt nicht auf einem instabilen Rollwagen, Ständer oder
Tisch. Das Produkt kann herunterfallen und dem Produkt oder Personen ernsthaften
Schaden zufügen!
Blockieren oder verdecken Sie nicht die Lüftungsschlitze oder -öffnungen.
Dieses Produkt sollte nicht in der Nähe einer Wärmequelle wie einem Ofen,
Heizkörper oder einem anderen Hitze entwickelnden Verstärker platziert werden.
Verwenden Sie nur das zum Lieferumfang gehörende Netzkabel, das mit der
Netzstromversorgung in Ihrer Region kompatibel ist.
Netzkabel müssen stets mit Vorsicht gehandhabt und ersetzt werden, wenn sie in
irgendeiner Weise beschädigt werden.
Brechen Sie niemals den Erdungsstift (Erde) am Netzkabel ab.
Das Netzkabel sollte aus der Steckdose gezogen werden, wenn das Gerät längere
Zeit nicht verwendet wird.
Bevor das Gerät eingeschaltet wird, muss der Lautsprecher entsprechend der
Beschreibung im Handbuch unter Verwendung des vom Hersteller empfohlenen
Kabels angeschlossen werden.
Ersetzen Sie beschädigte Sicherungen stets mit der korrekten Spannung und Art.
Trennen Sie niemals die schützende Netz/Erde-Verbindung.
20
Dauer pro Tag in Stunden Lärmpegel dBA, Langsame Reaktion
8 90
6 92
4 95
3 97
2 100
1 1/2102
1 105
1/2110
1/4 oder weniger 115
Deutsch
Deutsch

Merkmale
Im Blackfire 200 haben wir jahrzehntelange Erfahrung in der Entwicklung von
Gitarrenverstärkern in dem ultimativen 200-Watt-Röhren-Topteil umgesetzt. Jeder
Regler wurde in unzähligen Stunden intensiven Hörens auf maximale Klanggüte
getrimmt.
Der Clean-Kanal des Blackfire 200 Clean ist ein Beispiel für absolut kompromissloses
Design und bietet eine Bright-/Warm-Schaltung. Mit diesem eher unscheinbaren
Regler stellen Sie tatsächlich das jeweilige Vorverstärker-Voicing und die Endstufen-
Dämpfung ein, um die kraftvolle Class-A-Performance im Bright-Modus oder die
crunchigen Class-AB-Sounds in der Betriebsart Warm zu erzielen.
Besondere Sorgfalt wurde während der Entwicklungsphase des Blackfire 200 auf
die verfügbaren Overdrive-Stufen im Crunch-Kanal gelegt. Für uns war es besonders
wichtig, ein möglichst breites Spektrum an Crunch-Gain-Pegeln von knackigen
Clean-Sounds bis hin zu drückend-modernen Rhythmus-Sounds abzudecken.
Entsprechend verändern Sie mit dem Schalter Crunch/Super Crunch sowohl die
Gain-Stufen als auch das tonale Shaping und erzielen so größtmögliche Flexibilität
im Bereich von Crunch-Sounds.
Die Overdrive Kanäle wurden nach einem der beliebtesten Firewind Stücke "The Fire
And The Fury" benannt. Der "Fire" Kanal liefert eine klassische High Gain Verzerrung,
während der "Fury" Kanal in Sachen Gain noch einiges zulegt.
Die von Blackstar Amplification für ein Patent angemeldete ISF-Steuerung ist
einzigartig und stellt einen großen Fortschritt in bezug auf eine flexible Klangregelung
dar. Der ISF-Regler erlaubt es, die Klangfarbe der Klangregelung mit ihren drei
Reglern zwischen einem US- und einem UK-typischen Charakter zu variieren.
Natürlich liegen zwischen diesen beiden Charakteristika unendlich viele andere
Klangfärbungen, die bei anderen Verstärkern definitiv nicht zur Verfügung stehen.
Komplettiert wird das Klangspektrum durch eine weitere, von Blackstar zum
Patent angemeldete Neuerung – das DPR-System (Dynamic Power Reduction).
DPR senkt die Leistung der Ausgangsstufe von 100 % (200W) stufenlos auf bis zu
10% (20W) ab. Das bedeutet, dass Sie den Druck und die Klangtiefe der KT88-
Ausgangsstufe bei jeder beliebigen Lautstärke nutzen können, wodurch sich der
Blackfire 200 bestens für Aufnahmen, kleinere Gigs oder auch das Üben zuhause
empfiehlt. Da diese Schaltung direkt mit der Spannungsversorgung der Endstufe
zusammenarbeitet, treten bei diesem Verfahren keine Klangverluste auf, wie man
sie von anderen Systemen zur Leistungsreduktion kennt.
Die akustische Vielfalt des Blackfire 200 wird durch eine komplette MIDI-
Implementation zur Umschaltung des Hauptkanals vervollständigt. In Verbindung
mit anderen Outboard-Geräten wie Multi-Effekten eröffnet Ihnen MIDI so völlig neue
kreative Möglichkeiten.
23
Einleitung
Vielen Dank, dass Sie sich für den Blackfire 200 Verstärker entschieden haben.
Dieser Amp ist wie alle unsere Verstärker das Ergebnis unzähliger Stunden
akribischer Arbeit durch unser erstklassiges Entwickler-Team. Blackstar hat seinen
Sitz in Northampton (UK) und setzt sich aus einem Team erfahrener Musiker
zusammen, die nur ein Ziel verfolgen: Gitarristen mit den Werkzeugen zu versorgen,
die ihnen dabei helfen, sich selbst zu verwirklichen.
Alle Blackstar-Produkte wurden sowohl in unseren Labors als auch im Live-Betrieb
auf Herz und Nieren getestet, um sicherzustellen, dass sie in punkto Zuverlässigkeit,
Qualität und KLANG absolut kompromisslose Ergebnisse liefern.
Das hochflexible Design des Blackfire 200 mit vier Kanälen zeichnet sich zusätzlich
durch die einzigartigen DPR- (Dynamic Power Reduction) und ISF-Schaltungen
(Infinite Shape Feature) aus. Dabei bleibt der Verstärker trotz umfangreicher
Regelmöglichkeiten stets einfach und intuitiv zu bedienen. Bitte lesen Sie dieses
Handbuch aufmerksam durch, um Ihr neues Blackstar-Produkt optimal nutzen zu
können.
Wenn Sie mehr über die Blackstar-Produktreihe erfahren möchten, besuchen Sie
unsere Webseite unter www.blackstaramps.com.
Vielen Dank!
Das Blackstar-Team
22
Deutsch
Deutsch

Crunch-Kanal
7. Crunch-Anzeige
Wenn die gelbe LED leuchtet, ist der Crunch-Kanal aktiv.
8. Crunch-Wahlschalter
Mit diesem Schalter aktivieren Sie den Crunch-Kanal.
9. Crunch-Gain
Mit dem Crunch-Gain-Regler steuern Sie den Übersteuerungs- oder Verzerrungsgrad
im Crunch-Kanal. Niedrige Einstellungen (gegen den Uhrzeigersinn) liefern einen
cleanen Sound mit viel Druck und Durchsetzungsvermögen. Wenn Sie den Regler
Crunch Gain im Uhrzeigersinn aufdrehen, nimmt der Verzerrungsgrad immer mehr
zu und deckt dabei alle Facetten an attraktiven Crunch-Sounds ab.
10. Super-Crunch-Wahlschalter
Mit dem Wahlschalter Super Crunch haben Sie die Auswahl zwischen einem Crunch-
Sound mit weniger Gain und einem schlankeren Bassfundament (Super Crunch
– inaktiv) und einem Crunch-Sound mit höheren Gain-Reserven (Super Crunch –
aktiv), der ein druckvolles Fundament für modernen Rhythmus-Parts bietet.
11. Crunch Volume
Mit diesem Regler steuern Sie die Lautstärke im Crunch-Kanal. Im Uhrzeigersinn
heben Sie die Lautstärke an.
Clean- und Crunch-Kanal-EQ
12. Bass
Der Bass-Regler steuert den Anteil der Bassfrequenzen im Gesamt-Sound. Dieser
Verstärker bietet eine umfangreiche Klangregelung, mit der Sie den Ton zwischen
knackig und aggressiv (gegen den Uhrzeigersinn) oder warm und druckvoll (im
Uhrzeigersinn) einstellen können.
13. Middle
Der Mitten-Regler steuert den Anteil der Mittenfrequenzen im Gesamt-Sound. Die
Mitten sind insbesondere für den ‚Grundsound’ entscheidend. In der Minimalposition
(komplett gegen den Uhrzeigersinn) ist der Sound sehr aggressiv und hohl, was sich
speziell für knackige Rhythmus-Parts eignet. Wenn der Mitten-Regler angehoben
wird (im Uhrzeigersinn), nimmt der Grundton-Anteil zu, was sich für singende Lead-
Gitarren-Sounds empfiehlt.
2524
Vorderseite
1. Eingang
Hier schließen Sie Ihre Gitarre an. Verwenden Sie in jedem Fall hochwertige
geschirmte Gitarrenkabel.
Clean-Kanal
2. Clean-Anzeige
Wenn die grüne LED leuchtet, ist der Clean-Kanal aktiv.
3. Clean-Wahlschalter
Mit diesem Schalter aktivieren Sie den Clean-Kanal.
4. Clean Gain
Mit dem Gain-Regler steuern Sie den Übersteuerungs- oder Verzerrungsgrad im
Clean-Kanal. Niedrige Einstellungen (gegen den Uhrzeigersinn) sorgen für einen
cleanen Sound. Wenn Sie den Regler Clean Gain im Uhrzeigersinn aufdrehen, steigt
die Übersteuerung bis hin zu einem dezenten Overdrive-Sound an.
5. Bright/Warm-Wahlschalter
Der Wahlschalter Bright/Warm konfiguriert sowohl den Vorverstärker als auch
die Endstufe so, dass sie wahlweise typische Class-A- oder Class-AB-Sounds
erzeugen.
In der folgenden Tabelle ist der Betrieb der beiden Modi beschrieben:
6. Clean Volume
Mit diesem Regler steuern Sie die Lautstärke im Clean-Kanal. Im Uhrzeigersinn
heben Sie die Lautstärke an.
Betriebsart Preamp-Charakter Endstufen-Dämpfung Geeignet für
Bright Knackige Bässe, offene
Mitten und Höhen
Gering (Bässe und Höhen
werden stärker betont)
Durchdringende
Clean-und treibende
Rhythmus-Sounds
Warm Weniger Bässe,
glockige Höhen
Mittel (knackiges undament
für Crunch-Sounds)
Warme Clean- und
Crunch-Rhythmus-
Sounds
Deutsch
Deutsch
RESONANCE DPR
FIRE
STANDBY POWER
ON ON
PRESENCE
MASTER POWER
FURY
VOLUME
CLEAN
BRIGHT /
WARM
GAIN ISF
BASS MIDDLE TREBLE
VOLUME
CRUNCH
SUPER
CRUNCH
GAIN
INPUT
VOLUME
200W20W
100100100
100100100100100100100100
100 100 100 100 100 100 100 100
Developed in
partnership with
GA
IN
1
1
1
10
10
10
10
10
0
VOLU
ME
1
1
1
10
10
10
10
10
0
0
GAIN
1
1
1
1
10
10
10
10
0
0
VOLUME
1
1
1
10
10
10
10
10
0
BASS
1
1
1
10
10
10
10
10
0
MIDD
LE
1
1
1
10
10
10
10
10
0
TREBLE
1
1
1
10
10
10
10
10
0
ISF
1
1
1
1
10
10
10
10
0
0
BRIG
H
WA
R
GA
IN
1
1
1
10
10
10
10
10
0
0
GA
IN
VOLU
ME
H
T
/
R
M
1
1
1
10
10
10
10
0
0
VOLU
ME
H
R
S
UP
E
C
RU
N
GAIN
1
1
1
10
10
10
10
10
0
GAIN
VOLUME
E
R
N
CH
1
1
1
10
10
10
10
10
0
0
VOLUME
E
N
BASS
1
1
1
10
10
10
10
10
0
BASS
MIDD
LE
1
1
1
10
10
10
10
10
0
0
MIDD
LE
TREBLE
1
1
1
1
1
10
10
10
10
0
0
TREBLE
IS
F
1
1
1
10
10
10
10
10
0
ISF
RESONANCE
1
1
10
10
10
10
10
10
10
10
0
PRESENCE
1
1
1
10
10
10
10
10
10
10
0
0
0
VOLUME
1
1
10
10
10
10
10
10
10
10
0
DP
R
2
2
2
20
20
20
200
200
200
200
00
200
200
2
0
W
W
W
W
W
20W
W
W
W
W
W

22. Fury Gain
Dieser Regler ist für die Zerrintensität des "Fury" Kanals zuständig. In
Uhrzeigerrichtung gedreht durchläuft der Sound viele Overdrive Nuancen bis zum
massiven High Gain Lead Sound bei Rechtsanschlag.
23. Fury Volume
Mit diesem Regler steuern Sie die Lautstärke im Kanal Fury. Im Uhrzeigersinn heben
Sie die Lautstärke an.
Kanal Fire und Fury
24. Bass
Der Bass-Regler steuert den Anteil der Bassfrequenzen im Gesamt-Sound. Dieser
Verstärker bietet eine umfangreiche Klangregelung, mit der Sie den Ton zwischen
knackig und aggressiv (gegen den Uhrzeigersinn) oder warm und druckvoll (im
Uhrzeigersinn) einstellen können.
25. Middle
Der Mitten-Regler steuert den Anteil der Mittenfrequenzen im Gesamt-Sound. Die
Mitten sind insbesondere für den ‚Grundsound’ entscheidend. In der Minimalposition
(komplett gegen den Uhrzeigersinn) ist der Sound sehr aggressiv und hohl, was sich
speziell für knackige Rhythmus-Parts eignet. Wenn der Mitten-Regler angehoben
wird (im Uhrzeigersinn), nimmt der Grundton-Anteil zu, was sich für singende Lead-
Sounds empfiehlt.
26. Treble
Mit dem Regler Treble können Sie gezielt der Höhenanteil im Gesamt-Sound
einstellen. Bei niedrigen Einstellungen (gegen den Uhrzeigersinn) erhält der Sound
einen wärmeren und dumpferen Charakter. Wenn der Treble-Regler angehoben
wird (im Uhrzeigersinn), wird der Sound immer höhenreicher. In der Maximalposition
klingt der Sound schließlich aggressiv und schneidend.
27. ISF (Infinite Shape Feature)
er ISF-Regler arbeitet mit den Reglern für Bass, Middle und Treble zusammen. Mit
seiner Hilfe finden Sie die genau die Klangfärbung, die Sie suchen. Bei Einstellungen
gegen den Uhrzeigersinn besitzt der Amp einen
“amerikanischen” Sound-Charakter mit einem
knackigen Bassfundament und aggressiveren Mitten.
Bei Einstellungen im Uhrzeigersinn erzeugt der Amp
einen “britischen” Sound, der deutlich ‚erdiger’ und
weniger aggressiv klingt.
Im Gegensatz zu herkömmlichen ‚Contour’-Reglern
und parametrischen EQ-Systemen beeinflussen sich
die Regler für Bass, Middle und Treble gegenseitig -
so wie man das aus klassischen Gitarren-Stacks her
kennt. Das führt letztlich zu einem vertrauten, musikalischen Verhalten.
27
14. Treble
Mit dem Regler Treble können Sie gezielt der Höhenanteil im Gesamt-Sound
einstellen. Bei niedrigen Einstellungen (gegen den Uhrzeigersinn) erhält der Sound
einen wärmeren und dumpferen Charakter. Wenn der Treble-Regler angehoben
wird (im Uhrzeigersinn), wird der Sound immer höhenreicher. In der Maximalposition
klingt der Sound schließlich aggressiv und schneidend.
15. ISF (Infinite Shape Feature)
Der ISF-Regler arbeitet mit den Reglern für Bass,
Middle und Treble zusammen. Mit seiner Hilfe finden
Sie die genau die Klangfärbung, die Sie suchen. Bei
Einstellungen gegen den Uhrzeigersinn besitzt der
Amp einen „amerikanischen“ Sound-Charakter mit
einem knackigen Bassfundament und aggressiveren
Mitten. Bei Einstellungen im Uhrzeigersinn erzeugt
der Amp einen „britischen“ Sound, der deutlich
‚erdiger’ und weniger aggressiv klingt.
Im Gegensatz zu herkömmlichen ‚Contour’-Reglern und parametrischen EQ-
Systemen beeinflussen sich die Regler für Bass, Middle und Treble gegenseitig – so
wie man das aus klassischen Gitarrenverstärker-Stacks her kennt. Das führt letztlich
zu einem vertrauten, musikalischen Verhalten.
Kanal Fire
16. Kanalanzeige Fire
Wenn die orange LED leuchtet, ist der Kanal Fire angewählt.
17. Wahlschalter Fire
Mit diesem Schalter aktivieren Sie den Kanal Fire.
18. Fire Gain
Dieser Regler ist für die Zerrintensität des "Fire" Kanals zuständig. In Uhrzeigerrichtung
gedreht durchläuft der Sound viele Crunch Nuancen bis zum massiven Overdrive
bei Rechtsanschlag.
19. Fire Volume
Mit diesem Regler steuern Sie die Lautstärke im Kanal Fire. Im Uhrzeigersinn heben
Sie die Lautstärke an.
Kanal Fury
Kanalanzeige 20. Fury
Wenn die rote LED leuchtet, ist der Kanal Fury angewählt.
Wahlschalter 21. Fury
Mit diesem Schalter aktivieren Sie den Kanal Fury.
26
USA UK
USA UK
Deutsch
Deutsch

DPR im Clean-Betrieb
Mit dem DPR-Regler lässt sich die dynamische Kompression der Endstufe extrem
genau einstellen.
DPR im Crunch-Betrieb
Mit dem DPR-Regler können Sie exakt bestimmen, wie viel Röhrenverzerrung in
der Vorstufe erzeugt wird und wie stark zudem die KT88-Röhren in der Endstufe
übersteuert werden.
DPR im Overdrive-Betrieb
Mit dem DPR-Regler können Sie Ihre High-Gain-Lead- und Rhythmus-Sounds in die
Sättigung fahren. Das ist ideal für Solo-Parts, die dank dem Sustain der Endstufe
und dem damit verbundenen Feeling extrem flüssig spielen lassen.
32. Power-Leuchte
Die Power-Kontrollleuchte ist aktiv, wenn Sie den Verstärker einschalten.
29
Master
28. Resonance
Mit dem Regler Resonance steuern Sie die grundlegende Basswiedergabe des
Blackfire 200. Bei niedrigen Einstellungen klingen cleane Sounds knackig und
funky, während bei angezerrten Sounds die Basswiedergabe angehoben wird. Bei
höheren Einstellungen klingen Clean-Sounds voll und warm, während sich Crunch-
und Overdrive-Sounds durch wuchtige Bässe und Druck auszeichnen.
29. Presence
Mit dem Regler Presence steuern Sie die grundlegende Höhenwiedergabe des
Blackfire 200. Perkussive Höhen werden bei cleanen Sounds betont, aggressive
Höhen lassen sich bei Crunch- und Overdrive-Sounds gezielt steuern.
30. Volume
Dieser Regler steuert die Gesamtlautstärke Ihres Verstärkers. Im Uhrzeigersinn
heben Sie die Lautstärke an.
31. DPR (Dynamic Power Reduction)
Mit dem DPR-Regler können Sie die Ausgangsleistung des Blackfire 200 stufenlos
im Bereich von 200W (100%) bis hinunter auf 20W (10%) der angegebenen Leistung
drosseln.
DPR regelt die Versorgungsspannung der KT88-Ausgangsröhren
und zudem den Pegel des Drive-Signals, der auf die Endstufe
gespeist wird. Dabei werden keine zusätzlichen Komponenten in
den Signalfluss zwischen Ausgangsröhren, Ausgangsöbertrager
und Lautsprecher geschaltet - was extrem wichtig ist, um den
typischen Röhrensound zu erhalten.
Neben der Reduktion der Ausgangsleistung des 200 steuert das
DPR-System zudem die Kompression in der Ausgangsstufe.
Diese Endstufen-Kompression ist ein Hauptmerkmal der
Klangcharakteristik bei pegelbegrenzten Röhrenverstärker-
Sounds und sorgt beim Blackfire 200 für ein sehr authentisches
‚Spielgefühl’ bei reduzierter Leistungsabgabe.
Wir empfehlen Ihnen, mit den Reglern für Gain und Volume im Kanal, dem Master
Volume sowie dem DPR-Regler zu experimentieren, um die unterschiedlichen
Kombinationen aus Vor- und Endverstärker-Übersteuerung/Sättigung
kennenzulernen.
Anmerkung: Grundsätzlich gilt, dass höhere Werte für DPR (und damit eine
reduzierte Leistung) für eine höhere dynamische Sättigung und Übersteuerung der
Endstufe in der aktuellen Lautstärke sorgen.
28
Kanal Kanal
Gain
Kana
Volume
Master
Volume
DPR Beschreibung/Klangcharakter
Clean Niedrig Mittel Mittel Hoch Ein maximaler Headroom bei der Vor- und Endstufe
sorgt für extrem dynamische Clean-Sounds.
Clean Niedrig Hoch Hoch Niedrig Durch eine stärkere Ansteuerung der Endstufe
bei reduzierter Ausgangsleistung entsteht ein
komprimierter Clean-Sound mit vielen harmonischen,
für Röhrenverstärker typischen Obertönen.
Clean Hoch Hoch Hoch Niedrig Höhere Gain-Werte im Kanal steuern die Endstufe
stärker an und sorgen so für einen vollwertigen‚
Stack’-Crunch-Sound bei nur 20W Ausgangsleistung.
Kanal Kanal
Gain
Kanal
Volume
Master
Volume
DPR Beschreibung/Klangcharakter
Crunch Niedrig
/Mittel
Mittel Mittel Hoch Niedrigere Gain-Settings sorgen für einen
dynamischen Crunch-Sound, der den verfügbaren
Headroom von 200 W ausnutzt.
Crunch Mittel Hoch Hoch Mittel In diesen Settings entsteht eine Mischung aus
Distortion - und Kompression-Sounds, die mit den
Röhren der Vor- und Endstufe erzeugt werden.
Experimentieren Sie selbst und finden Sie so Ihren‚
Sweet-Spot’.
Crunch Hoch Mittel Mittel Niedrig Hierbei wird das maximale Gain der Vorstufe mit der
minimalen Leistung der Endstufe kombiniert: Das
Ergebnis ist die maximale Röhrensättigung.
Kanal Kanal
Gain
Kanal
Volume
Master
Volume
DPR Beschreibung/Klangcharakter
Overdrive Mittel Mittel Mittel Hoch Der maximale Headroom der KT88-Ausgangsstufe
sorgt für unglaublich fette und dynamische
Übersteuerungen bei extremen Lautstärke-Settings.
Overdrive Hoch Mittel Mittel Niedrig Bei maximaler Übersteuerung sorgt der Preamp
für endloses Sustain, das noch einmal durch die
Kompression in der Ausgangsstufe verstärkt wird,
wenn Sie DPR auf ein Minimum einstellen. Auch hier
empfehlen wir: Experimentieren Sie selbst und finden
Sie so Ihren‚ Sweet-Spot’.
Deutsch
Deutsch

31
33. Standby
Mit diesem Schalter aktivieren Sie die Ausgangsstufe. Schalten Sie den Standby
frühestens 30 Sekunden nach dem Power-Schalter (34) ein. Während kurzer
Spielpausen können Sie den Verstärkerausgang mit diesem Schalter an- und
abschalten.
34. Power
Mit diesem Schalter schalten Sie den Verstärker ein bzw. aus. Aktivieren Sie diesen
Schalter in jedem Fall vor dem Standby-Schalter (33).
Kanalumschaltung über MIDI
Der Blackfire 200 bietet die Möglichkeit, die Kanalwahl über MIDI-
Programmwechselbefehle zu steuern und kann entsprechend direkt mit den
meisten MIDI-Controllern betrieben werden. Der Blackfire 200 kann in eine MIDI-
Kette integriert werden, wodurch Sie beispielsweise zeitgleich einen Kanal am
Verstärker auswählen und ein Patch in einem MIDI-Effektprozessor umschalten
können, der an der Effektschleife angeschlossen ist. Über die 128 verfügbaren
Programmwechselbefehle können Sie auf unendlich viele Klangoptionen zugreifen.
Um die Kanalumschaltung via MIDI einzurichten, müssen Sie lediglich die Buchse
MIDI Out am MIDI-Controller mit der Buchse MIDI In auf der Rückseite des
Verstärkers verbinden. Zudem müssen Sie den Controller so einstellen dass der
Programmwechselbefehle ausgibt (was normalerweise der Fall ist). Ein Blackfire
200-Verstärker ist ab Werk auf den OMNI-Modus eingestellt und reagiert daher
auf Programmwechselbefehle auf allen MIDI-Kanälen. Durch Auswahl eines
‚Patches’ am Controller wird der entsprechende Kanal am Verstärker aktiviert. Die
Voreinstellungen für jeden Programmwechselbefehl finden Sie in der Liste unten:
30
Programmwechsel-Zuordnung
So ändern Sie die vorgegebenen Zuordnungen und stellen den Verstärker ein, so
dass er auf andere Programmwechselbefehle reagiert:
1. Der Verstärker muss eingeschaltet sein. Zusätzlich muss der Standby-Schalter
(23) auf ON gestellt und/oder ein Kabel an der Input-Buchse eingesteckt sein.
2. Geben Sie den gewünschten Programmwechselbefehl an den Verstärker aus.
3. Drücken und halten Sie den gewünschten Kanalwahlschalter auf der Front für 2
Sekunden.
Der zugehörige Kanal wird angewählt und seine LED blinkt dreimal kurz hintereinander:
Das zeigt, dass er dem zuletzt empfangenen Programmwechselbefehl zugeordnet
wurde. Der Verstärker wird sich diese Verknüpfung nun merken. Wiederholen Sie
diesen Vorgang, bis alle gewünschten Programmwechsel den jeweiligen Kanälen
am Amp zugewiesen sind.
Auswahl des MIDI-Empfangskanals
Wie erwähnt ist die Voreinstellung OMNI: Der Verstärker empfängt also MIDI-
Programmwechsel auf allen MIDI-Kanälen. Vielleicht möchten Sie den Verstärker
aber so einstellen, dass er nur auf Programmwechsel auf einem bestimmten MIDI-
Kanal reagiert. Der Blackfire 200 kann folgendermaßen auf einen der ersten sieben
MIDI-Kanäle eingestellt werden:
1. Das Gerät muss auf Standby (Power (34) ist aktiv, Standby (33) inaktiv) geschaltet
sein. Zudem darf kein Kabel an der Eingangsbuchse angeschlossen sein.
2. Drücken und halten Sie gleichzeitig die Wahlschalter für Clean (3) und FIRE (17).
3. Nach zwei Sekunden beginnt die LED für FURY (20) dauerhaft zu blinken
(zweimal pro Sekunde): Nun ist das Gerät in den Programmier-Modus für den
MIDI-Empfangskanal geschaltet.
4. Lassen Sie die Taster Bright Clean (3) und FIRE (17) los und wählen Sie
den gewünschten MIDI-Kanal wie in der Tabelle unten gezeigt Über die
Kanalwahlschalter aus:
Die entsprechenden Channel-Select-LEDs leuchten und zeigen so die
Auswahl an. Mit jedem Drücken der Channel-Select-Taster wird der Status der
zugehörigen LED umgeschaltet.
Programm Kanal
-wechsel
Deutsch
Deutsch
1 CLEAN
2 CRUNCH
3 FIRE
4 FURY
5 CLEAN
6 CRUNCH
7 FIRE
8 FURY
9 CLEAN
10 CRUNCH
11 FIRE
12 FURY
13 CLEAN
14 CRUNCH
15 FIRE
16 FURY
17 CLEAN
18 CRUNCH
19 FIRE
20 FURY
21 CLEAN
22 CRUNCH
23 FIRE
24 FURY
25 CLEAN
26 CRUNCH
27 FIRE
28 FURY
29 CLEAN
30 CRUNCH
31 FIRE
32 FURY
33 CLEAN
34 CRUNCH
35 FIRE
36 FURY
37 CLEAN
38 CRUNCH
39 FIRE
40 FURY
41 CLEAN
42 CRUNCH
43 FIRE
44 FURY
45 CLEAN
46 CRUNCH
47 FIRE
48 FURY
49 CLEAN
50 CRUNCH
51 FIRE
52 FURY
53 CLEAN
54 CRUNCH
55 FIRE
56 FURY
57 CLEAN
58 CRUNCH
59 FIRE
60 FURY
61 CLEAN
62 CRUNCH
63 FIRE
64 FURY
65 CLEAN
66 CRUNCH
67 FIRE
68 FURY
69 CLEAN
70 CRUNCH
71 FIRE
72 FURY
73 CLEAN
74 CRUNCH
75 FIRE
76 FURY
77 CLEAN
78 CRUNCH
79 FIRE
80 FURY
81 CLEAN
82 CRUNCH
83 FIRE
84 FURY
85 CLEAN
86 CRUNCH
87 FIRE
88 FURY
89 CLEAN
90 CRUNCH
91 FIRE
92 FURY
93 CLEAN
94 CRUNCH
95 FIRE
96 FURY
97 CLEAN
98 CRUNCH
99 FIRE
100 FURY
101 CLEAN
102 CRUNCH
103 FIRE
104 FURY
105 CLEAN
106 CRUNCH
107 FIRE
108 FURY
109 CLEAN
110 CRUNCH
111 FIRE
112 FURY
113 CLEAN
114 CRUNCH
115 FIRE
116 FURY
117 CLEAN
118 CRUNCH
119 FIRE
120 FURY
121 CLEAN
122 CRUNCH
123 FIRE
124 FURY
125 CLEAN
126 CRUNCH
127 FIRE
128 FURY
Clean Crunch FIRE MIDI-KANAL
AUS AUS AUS OMNI
AN AUS AUS 1
AUS AN AUS 2
AN AN AUS 3
AUS AUS AN 4
AN AUS AN 5
AUS AN AN 6
AN AN AN 7

5. Um die gewünschte Auswahl zu speichern, lösen Sie den Wahltaster Super FURY
(21) aus. Die LED FURY (20) blinkt daraufhin viermal schnell, wenn der Vorgang
abgeschlossen ist. Das Gerät kehrt in den Normalbetrieb zurück und kann nun
nur über Programmwechselbefehle auf dem neu gewählten MIDI-Kanal
angesprochen werden.
MIDI Dump Out
Bei Bedarf können Sie Ihre MIDI-Einstellungen extern sichern, um sie beispielsweise
auf einen anderen Verstärker zu übertragen. Dazu benötigen Sie einen MIDI-Sysex-
Librarian, der normalerweise in jeder PC- oder Mac-Software mit einem zugehörigen
MIDI-Interface enthalten ist.
1. Das Gerät muss auf Standby (Power (34) ist aktiv, Standby (33) inaktiv) geschaltet
sein. Zudem darf kein Kabel an der Eingangsbuchse angeschlossen sein und
die Buchse MIDI Thru auf der Rückseite des Verstärkers muss mit dem MIDI In
des Aufnahmegeräts verbunden sein.
2. Drücken und halten Sie gleichzeitig die Wahlschalter für Crunch (8) und FURY
(21). Nach zwei Sekunden blinkt die FIRE-LED (16) dauerhaft und zeigt so an,
dass sich das Gerät im MIDI-Dump-Modus befindet.
3. Bereiten Sie das Empfangsgerät für die Übertragung vor. Bei einem MIDI-Sysex-
Librarian müssen Sie diesen beispielsweise auf Empfang schalten.
4. Starten Sie den Datentransfer, indem Sie den Wahlschalter FIRE (17) ganz kurz
drücken. Während der Datenübertragung blinkt die FIRE-LED (16) in kurzen
Abständen. Wenn die LED nicht mehr blinkt, ist der Vorgang abgeschlossen
und der Verstärker kehrt in den Normalbetrieb zurück. Die Daten sind nun als
MIDI-System-Exclusive-Datei gespeichert.
MIDI Dump In
So laden Sie extern gespeicherte Programmwechsel-Zuordnungen:
1. Verbinden Sie den MIDI Out des MIDI-Aufnahmegeräts mit dem MIDI In auf der
Rückseite des Verstärkers und verwenden Sie den MIDI-Sysex-Librarian, um die
gespeicherte MIDI-System-Exclusive-Datei auszugeben.
Der Verstärker überschreibt die aktuellen Programmwechsel-Zuordnungen mit den
neuen Daten. Wenn die Übertragung erfolgreich abgeschlossen ist, leuchten alle
vier Kanal-LEDs viermal hintereinander schnell auf. Wenn der Dump nicht oder nur
teilweise durchgeführt wurde, leuchten die vier LEDs in verschiedenen Mustern
langsam auf und das Gerät kehrt in den Normalbetrieb zurück.
Anmerkung: Während dem Empfang der System-Exclusive-Daten gibt der
Verstärker vorübergehend keine Daten über die Buchse MIDI Thru aus.
3332
Wiederherstellen der Werkseinstellungen
So setzen Sie den Verstärker auf die Werkseinstellungen zurück:
1. Drücken und halten Sie die Wahltaster für Crunch (8) und FURY (21) bei
ausgeschaltetem Verstärker.
2. Halten Sie die Tasten weiterhin gedrückt und schalten Sie den Verstärker ein.
Nach zwei Sekunden leuchten alle Kanalauswahl-LEDs einmalig auf, um das
Zurücksetzen auf die Werkseinstellungen zu bestätigen.
Rückseite
1. Netzanschluss
Hier wird das mitgelieferte Kaltgerätenetzkabel angeschlossen. Das Kabel muss
an einer Netzsteckdose angeschlossen werden, die in punkto Spannung, Leistung
und Netzfrequenz den auf der Rückseite vermerkten Spezifikationen entspricht. Im
Zweifelsfall wenden Sie sich an einen qualifizierten Techniker/Elektriker.
2. Sicherung
Der Wert für die Sicherung ist auf der Rückseite vermerkt. Verwenden Sie in keinem
Fall eine Sicherung mit falschen Werten und versuchen Sie nicht, die Sicherung zu
umgehen.
3. H.T.- Sicherung
Der Wert für die H.T.- Sicherung ist auf der Rückseite vermerkt. Verwenden Sie
in keinem Fall eine Sicherung mit falschen Werten und versuchen Sie nicht, die
Sicherung zu umgehen.
4. Sicherung für die Ausgangsröhren
Der Wert für die Sicherung der Ausgangsröhren ist auf der Rückseite vermerkt.
Verwenden Sie in keinem Fall eine Sicherung mit falschen Werten und versuchen
Sie nicht, die Sicherung zu umgehen.
5. Fußschalter
Hier wird der mitgelieferte Fußschalter angeschlossen. Mit dem Fußschalter können
Sie zwischen den Kanälen Clean, Crunch, Fire und Fury umschalten.
6. MIDI Thru
Alle MIDI-Daten, die an der Buchse MIDI In anliegen, werden auf die Buchse MIDI
Thru durchgeschliffen, so dass weitere MIDI-Geräte in der Kette angesteuert
werden können. Die Datei MIDI Thru dient zudem zur Ausgabe der Kanalwahl-/
Programmwechsel-Daten auf ein geeignetes MIDI-Speichergerät. Weitere
EFFECTS LOOPEMULATED OUTPUT
FOOTSWITCH
RETURN SEND
LEVEL
+4dBV
-10dBV
4Ω16Ω
8Ω
MIDI
THRU IN
SPEAKER OUTPUTS
H.T. FUSE TUPTUOTUPNISNIAM
VALVES FUSE
MAINS FUSE
T1AL 250V F1.6A 250V
230V/240V - T3.15AL 250V
100V/120V - T6.3AL 250V
100V~50/60Hz
500 WATTS
CONNECT SPEAKERS BEFORE USE
OUTPUT: 200 WATTS RMS
MODEL: BLACKFIRE 200
WARNING!: RISK OF HAZARDOUS ENERGY
AVIS!: ENERGIE ELECTRIQUE DANGEREUSE!
WARNING!: SHOCK HAZARD. DO NOT OPEN. TO REDUCE THE RISK OF FIRE OR ELECTRIC SHOCK
DO NOT EXPOSE THIS EQUIPMENT TO RAIN OR MOISTURE. THIS APPARATUS MUST BE EARTHED.
AVIS!: RISQUE DE CHOC ELECTRIQUE. NE PAS OUVRIR. POUR EVITER LES RISQUES D’INCENDIE ET
DE DECHARGES ELECTRIQUES, N’EXPOSEZ JAMAIS CET APPAREIL A L’HUMIDITE OU A LA PLUIE.
CONNECTER CET APPAREIL A LA TERRE.
This device complies with Part 15 of the FCC Rules. Operation is subject to the following two
conditions: (1) this device may not cause harmful interference, and (2) this device must accept
any interference received, including interference that may cause undesired operation.
This Class B digital apparatus complies with Canadian ICES-003.
Cet appareil numérique de la classe B est conforme à la norme NMB-003 du Canada.
CAUTION!: TO REDUCE THE RISK OF ELECTRIC SHOCK DO NOT REMOVE COVER. NO USER
SERVICEABLE PARTS INSIDE. REFER SERVICING TO QUALIFIED SERVICE PERSONNEL.
ATTENTION!: POUR EVITER LES RISQUES DE DECHARGES ELECTRIQUES, NE PAS OUVRIR LE
COUVERCLE. CET APPAREIL NE COMPORTE AUCUNE PIECE SUSCEPTIBLE D’ETRE REPAREE PAR
VOS SOINS. FAITES TOUJOURS APPEL A UN TECHNICIEN QUALIFIE POUR TOUTE REPARATION.
WARNING!: DO NOT OBSTRUCT VENTILATION GRILLES
ATTENTION!: NE PAS OBSTRUER LES GRILLES DE VENTILATION
Blackstar Amplification Ltd
Designed and Engineered by
Northampton, England
Made under license in Korea
IMPEDANCE
N16549
Developed in
partnership with
1 2 10 119 12 133 4 5 6 7 8
Deutsch
Deutsch

3534
Einzelheiten finden Sie im Abschnitt zur MIDI-Kanalumschaltung. Verwenden Sie in
jedem Fall hochwertige MIDI-Kabel.
7. MIDI In
Wenn Sie den Kanal über MIDI umschalten möchten, schließen Sie das MIDI-Gerät
hier an. Weitere Einzelheiten finden Sie im Abschnitt zur MIDI-Kanalumschaltung.
Verwenden Sie in jedem Fall hochwertige MIDI-Kabel.
8. Impedance-Wahlschalter
Mit diesem Schalter passen Sie die Impedanz des Verstärkers an den
Lastwiederstand des Lautsprechers an. Stellen Sie in jedem Fall sicher, dass die
gewählte Impedanz mit der des angeschlossenen Lautsprechers übereinstimmt.
Siehe Tabelle unten.
Verwenden Sie keine externen Lautsprecher, deren Impedanz weniger als 4 Ohm
oder 2 x 4 Ohm beträgt.
WARNUNG: Der Verstärker muss immer vollkommen ausgeschaltet sein, bevor Sie
den Impedance-Wahlschalter verändern. Andernfalls (oder wenn die Impedanz von
Verstärker und Lautsprecher nicht übereinstimmen) können ernsthafte Schäden am
Verstärker auftreten.
9. Speaker-Ausgänge
Zum Anschluss externer Lautsprecher(-boxen) stehen zwei parallele
Lautsprecherausgänge zur Verfügung. Bevor Sie einen Lautsprecher anschließen,
stellen Sie bitte sicher, dass der Impedance-Wahlschalter (8) richtig eingestellt ist.
10. Speaker Emulated Output
Dieser Ausgang emuliert den Klangcharakter einer Gitarren-Lautsprecherbox und
sorgt in Kombination mit einem Aufnahmegerät oder Mischpult für eine natürliche
Röhren-Übersteuerung. Verwenden Sie in jedem Fall hochwertige geschirmte Kabel.
Der Ausgang kann sowohl mit Klinken- als auch symmetrischen XLR-Kabeln belegt
werden.
ANMERKUNG: Um ‚ohne Lautsprecher’ aufzunehmen, schalten Sie den Verstärker
auf Standby. Sie können diesen Ausgang auch dann zur Aufnahme verwenden,
wenn der Standby-Modus aktiv und kein Lautsprecher angeschlossen ist. Stellen
Sie jedoch sicher, dass in diesem Fall auch keine Lautsprecherkabel an einem der
Lautsprecherausgänge am Verstärker angeschlossen ist, da in diesem Fall die Last-
Schutzschaltung umgangen wird und ernsthafte Schäden am Verstärker auftreten
können.
11. Effects Loop Level
Mit dem Schalter Effects Loop Level können Sie den Effekt-Loop wahlweise mit
+4dBV oder -10dBV betreiben: Entsprechend können Sie professionelles Equipment
(Einstellung +4dBV) oder Effektpedale mit einem für Gitarren ausgelegten Pegel
(Einstellung -10dBV) anschließen.
12. Effects Loop Return
Hier schließen Sie den (Mono-)Ausgang eines externen Effektgeräts an.
13. Effects Loop Send
Hier schließen Sie den (Mono-)Eingang eines externen Effektgeräts an.
Technische Spezifikationen
Leistung (RMS): 200 Watt
Röhren: 4 x KT88, 4 x ECC83, 1 x ECC82
Gewicht (kg): 27.2
Abmessungen (mm): 705 x 285 x 278.5
Fußschalter: FS-1BF wird mitgeliefert
Deutsch
Deutsch
Angeschlossene Lautsprecherboxen Gewählte Impedanz
1 Lautsprecherbox mit 16 Ohm 16 Ohm
2 Lautsprecherboxen mit 16 Ohm 8 Ohm
1 Lautsprecherbox mit 8 Ohm 8 Ohm
2 Lautsprecherboxen mit 8 Ohm 4 Ohm
1 Lautsprecherbox mit 4 Ohm 4 Ohm

À des niveaux élevés, le volume des enceintes peut causer des pertes auditives
définitives. Par conséquent, évitez de rester à proximité des enceintes lorsque le
volume est élevé. Portez des protecteurs d’oreilles en cas d’exposition continue à
des niveaux sonores élevés.
Si le produit ne fonctionne pas normalement alors que vous respectez la notice
d’emploi, confiez-le à un réparateur qualifié.
La loi américaine sur la santé et la sécurité du travail indique la durée d’exposition
autorisée à différents niveaux sonores :
D’après cette loi, toute exposition d’une durée supérieure aux limites autorisées ci-
dessus peut entraîner une perte auditive.
Des protecteurs d’oreilles doivent être portés dans le canal auditif ou sur l’oreille
lors de l’utilisation de ce système d’amplification afin d’éviter toute perte auditive
permanente si l’exposition dépasse les limites susmentionnées. Afin d’éviter toute
exposition potentiellement dangereuse à des niveaux de pression acoustique
élevés, il est conseillé que toutes les personnes exposées à des appareils capables
de produire des niveaux de pression acoustique élevés tels que ce système
d’amplification utilisent des protecteurs d’oreilles lors de l’utilisation de l’appareil.
37
Consignes de sécurité importantes !
LISEZ LES INFORMATIONS SUIVANTES ATTENTIVEMENT. CONSERVEZ
TOUTES LES CONSIGNES POUR RÉFÉRENCE ULTÉRIEURE !
Respectez tous les avertissements et toutes les consignes figurant sur le
produit !
Danger ! Hautes tensions internes.
N’ouvrez pas le boîtier de l’appareil. Cet appareil ne possède aucune pièce sur
laquelle l’utilisateur puisse intervenir. Confiez toutes les réparations à un réparateur
qualifié.
Nettoyez l’appareil avec un chiffon sec uniquement.
Il est possible que de la condensation se forme à l’intérieur d’un amplificateur s’il est
transféré d’un environnement froid à un endroit plus chaud. Il est conseillé d’attendre
que l’appareil ait atteint la température ambiante avant de l’allumer.
La modification non autorisée de cet appareil est expressément interdite par
Blackstar Amplification plc.
N’introduisez jamais d’objets dans les fentes de ventilation du boîtier de l’appareil.
N’exposez pas cet appareil à la pluie, à des liquides ni à aucune forme d’humidité.
Respectez tous les avertissements et toutes les consignes figurant sur le produit !
Ne placez pas ce produit sur un chariot, un guéridon ou une table instable. Il pourrait
tomber et ce faisant sérieusement s’endommager ou causer des blessures !
Ne couvrez pas les fentes de ventilation ni les ouvertures et ne les obstruez pas
non plus.
Évitez de placer ce produit près d’une source de chaleur telle qu’un poêle, un
radiateur ou un autre amplificateur produisant de la chaleur.
Utilisez uniquement le cordon d’alimentation fourni car il est compatible avec la
tension de l’alimentation générale de votre secteur.
Manipulez toujours les cordons d’alimentation avec le plus grand soin. Remplacez-
les s’ils sont endommagés.
Ne détachez jamais la prise de terre du cordon d’alimentation.
Débranchez le cordon d’alimentation en cas d’inutilisation prolongée de l’appareil.
Avant d’allumer l’appareil, branchez l’enceinte de la manière décrite dans la notice
d’emploi à l’aide du cordon recommandé par le fabricant.
Remplacez toujours les fusibles endommagés par des fusibles du type et du calibre
appropriés.
Ne débranchez jamais la connexion à la terre de protection.
36
Les éléments électriques et électroniques doivent être jetés séparément,
dans les vide-ordures prévus à cet effet par votre municipalité.
Durée par jour en heures Niveau sonore (dBA), réponse lente
8 90
6 92
4 95
3 97
2 100
1 1/2102
1 105
1/2110
1/4 ou moins de 115
Français
Français

Features
L’ampli Blackfire 200 regroupe des années d’expérience en termes de conception
et de fabrication en une ultime tête 200 Watts. Chaque fonctionnalité et réglage a
été conçu pour apporter le maximum de bénéfice sonore grâce à des centaines
d’heure d’écoute.
La canal clair du Blackfire 200 se positionne en référence dans sa conception
sa compromis en proposant des modes Bright et Warm bien distincts. Chaque
mode reconfigure la couleur tonale et le grain du préampli ET l’interaction entre le
haut-parleur et l’ampli de puissance pour reproduire soit des sonorités Classe A
cristallines en mode Bright, soit des sons crunch en mode Warm.
Une attention très particulière a été apportée aux niveaux d’overdrive lors de la
conception du canal Crunch du Blackfire 200. Celui-ci couvre la totalité plage de
gain, du son clean crunchy aux puissantes sonorités rythmiques modernes.
Le switch Crunch / SuperCrunch propose une configuration différente et modifie les
niveaux de gains et les possibilités de réglages afin de disposer d’une très grande
flexibilité en matière de distortion.
Les canaux d'overdrive portent le nom du morceaux préféré des fans de Firewind
«The Fire And The Fury». Le canal "Fire" délivre une distorsion Hi gain classique,
tandis que le canal "Fury" vous entraine vers des lead hurlants et au-delà.
Même dans les réglages les plus extrêmes, la distorsion sonne naturelle.
Le contrôle ISF breveté par Blackstar Amplification représente véritablement un pas
en avant en terme de flexibilité de son. Le réglage ISF définit le grain de son, d’un
grain US à un grain UK mais aussi toutes les possibilités situées entre les deux et
qui n’existent sur aucun autre ampli.
Pour compléter ces possibilités tonales exemplaires, cet ampli est équipé du système
breveté DPR (Dynamic Power Reduction). Ce système dynamique de réduction de
puissance de 100% à 10% et toutes les puissances intermédiaires ! Cela signifie que
la présence, la réponse et la dynamique d’un ampli de puissance à base de KT88
peuvent être obtenues à n’importe quel volume, faisant du Blackfire 200 un ampli
idéal pour la scène mais aussi utilisable pour les enregistrements, les petits concerts
ou la pratique à domicile. Travaillant en conjonction avec les voltages de l’ampli
de puissance, cette méthode de réduction de puissance n’entraîne aucune perte
qualitative contrairement aux autres systèmes de réduction de puissance existants
sur le marché.
La flexibilité tonale du Blackfire 200 est agrémentée d’une implémentation midi
totale des fonctions de switch de canaux ou modes. Utilisée avec des effets
supplémentaires, cette implémentation Midi apporte un nouveau niveau de créativité
à explorer.
39
Introduction
Merci d’avoir acheté cet ampli Blackfire 200 de Blackstar.
Comme tous nos produits ces amplis sont le fruit du travail soigné et acharné en
Recherche et développement de notre équipe de concepteurs professionnels de
classe mondiale.
Basée à Northampton (R.-U.), l’équipe Blackstar est composée de musiciens
expérimentés. Le seul et unique objectif du développement consiste à offrir aux
guitaristes des produits qui leur permettront d’exprimer tout leur talent.
Tous les produits Blackstar sont soumis à de vastes essais en laboratoire et sur le
terrain pour s’assurer de leur qualité en termes de fiabilité, de qualité et surtout de
SONORITÉ !
Le Blackfire 200 est un ampli quatre canaux polyvalent, doté des systèmes DPR
(Dynamic Power Reduction) et ISF (Infinite Shape Feature), de plus il propose un
panneau de contrôle compréhensible et est simple et intuitif d’utilisation.
Nous vous invitons à lire attentivement ce manuel d’utilisation afin de pouvoir profiter
au maximum de votre ampli Blackstar.
Si vous aimez ce que vous entendez et que vous voulez en savoir plus sur
les gammes de produits Blackstar, nous vous invitons à visiter notre site
www.blackstaramps.com
Merci !
L’équipe Blackstar
38
Français
Français
Other manuals for Blackfire 200
1
Table of contents
Languages:
Other BLACK STAR Musical Instrument Amplifier manuals

BLACK STAR
BLACK STAR FLY 3 User manual
BLACK STAR
BLACK STAR HT-1 User manual

BLACK STAR
BLACK STAR ID:15TVP User manual
BLACK STAR
BLACK STAR HT-408 User manual

BLACK STAR
BLACK STAR HT-5C User manual

BLACK STAR
BLACK STAR Artisan 30H User manual
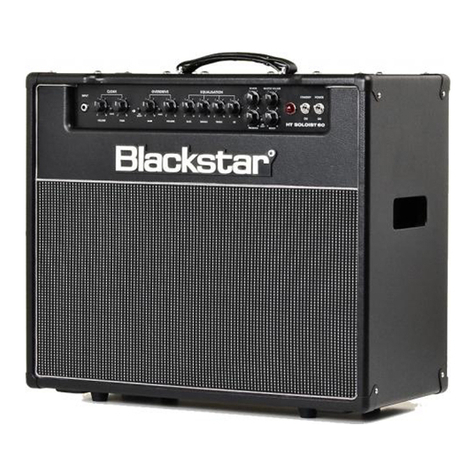
BLACK STAR
BLACK STAR HT Soloist 60 User manual
BLACK STAR
BLACK STAR HT-1R MkII User manual
BLACK STAR
BLACK STAR HT-1 User manual
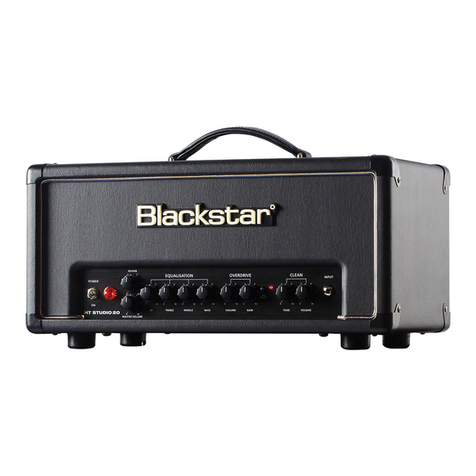
BLACK STAR
BLACK STAR HT Studio 20 Combo User manual
