BLACK STAR HT Studio 20 Combo User manual

1
Owner’s Manual
Blackstar Amplification Ltd, Beckett House, 14 Billing Road, Northampton, NN1 5AW, UK
For the latest information go to: www.blackstaramps.com
Whilst the information contained herein is correct at the time of publication, due to our policy of constant improvement
and development, Blackstar Amplification Ltd reserves the right to alter specifications without prior notice.
Designed and Engineered by
Blackstar Amplification UK
HBK-1019 08/12
HT STUDIO 20/20H

32
USA / Canada
IMPORTANT SAFETY INSTRUCTIONS
1. Read these instructions.
2. Keep these instructions.
3. Heed all warnings.
4. Follow all instructions.
5. Do not use this apparatus near water.
6. Clean only with dry cloth.
7. Do not block any ventilation openings.
8. Install in accordance with the manufacturer’s instructions.
9. Do not install near any heat sources such as radiators, heat registers, stoves, or
other apparatus (including ampliers) that produce heat.
10. Do not defeat the safety purpose of the polarized or grounding-type plug. A
polarized plug has two blades with one wider than the other. A grounding type
plug has two blades and a third grounding prong. The wide blade or the third
prong are provided for your safety. If the provided plug does not t into your outlet,
consult an electrician for replacement of the obsolete outlet.
11. Protect the power cord from being walked on or pinched particularly at plugs,
convenience receptacles, and the point where they exit from the apparatus.
12. Only use attachments/accessories specied by the manufacturer.
13. Unplug this apparatus during lightning storms or when unused for long periods of
time.
14. Refer all servicing to qualied service personnel. Servicing is required when
the apparatus has been damaged in any way, such as power-supply cord or plug
is damaged, liquid has been spilled or objects have fallen into the apparatus, the
apparatus has been exposed to rain or moisture, does not operate normally, or has
been dropped.
“TO COMPLETELY DISCONNECT THIS APPARATUS FROM THE AC MAINS,
DISCONNECT THE POWER SUPPLY CORD PLUG FROM THE AC RECEPTACLE”.
“WARNING: TO REDUCE THE RISK OF FIRE OR ELECTRIC SHOCK, DO NOT
EXPOSE THIS APPARATUS TO RAIN OR MOISTURE AND OBJECTS FILLED WITH
LIQUIDS, SUCH AS VASES, SHOULD NOT BE PLACED ON THIS APPARATUS”.
This symbol is intended to alert the user to the presence of important operation
and maintenance (servicing) instructions in the literature accompanying the
appliance.
This symbol is intended to alert the user to the presence of uninsulated
“dangerous voltage” within the product’s enclosure that may be of sufcient
magnitude to constitute a risk of electric shock to persons.

54
English
English
Warning!
Important safety information!
READ THE FOLLOWING INFORMATION CAREFULLY. SAVE ALL
INSTRUCTIONS FOR FUTURE REFERENCE!
Follow all warnings and instructions marked on the product!
Danger! High internal operating voltages.
Do not open the equipment case. There are no user serviceable parts in this
equipment. Refer all servicing to qualied service personnel.
Clean only with a dry cloth.
Condensation can form on the inside of an amplier if it is moved from a cold
environment to a warmer location. Before switching the unit on, it is recommended
that the unit be allowed to reach room temperature.
Unauthorised modication of this equipment is expressly forbidden by Blackstar
Amplication Ltd.
Never push objects of any kind into ventilation slots on the equipment casing.
Do not expose this apparatus to rain, liquids or moisture of any type.
Do not place this product on an unstable trolley, stand or table. The product may
fall, causing serious damage to the product or to persons!
Do not cover or block ventilation slots or openings.
This product should not be placed near a source of heat such as a stove, radiator,
or another heat producing amplier.
Use only the supplied power cord which is compatible with the mains voltage
supply in your area.
Power supply cords should always be handled carefully and should be replaced if
damaged in any way.
Never break off the earth (ground) pin on the power supply cord.
The power supply cord should be unplugged when the unit is to be unused for long
periods of time.
Before the unit is switched on, the loudspeaker should be connected as described
in the handbook using the lead recommended by the manufacturer.
Always replace damaged fuses with the correct rating and type.
Never disconnect the protective mains earth connection.
High loudspeaker levels can cause permanent hearing damage. You should
therefore avoid the direct vicinity of loudspeakers operating at high levels. Wear
hearing protection if continuously exposed to high levels.
If the product does not operate normally when the operating instructions are
followed, then refer the product to a qualied service engineer.
The U.S. Government´s Occupational Safety and Health Administration (OSHA) has
specied the following permissible noise level exposures:
Duration Per Day In Hours Sound Level dBA, Slow Response
8 90
6 92
4 95
3 97
2 100
1½ 102
1 105
½ 110
¼ or less 115
According to OSHA, any exposure in excess of the above permissible limits could
result in some hearing loss.
Ear plug protectors in the ear canals or over the ears must be worn when operating
this amplication system in order to prevent a permanent hearing loss if exposure
is in excess of the limits as set forth above. To ensure against potentially dangerous
exposure to high sound pressure levels, it is recommended that all persons
exposed to equipment capable of producing high sound pressure levels such as
this amplication system be protected by hearing protectors while this unit is in
operation.
All electrical and electronic products should be disposed of separately
from the municipal waste stream via designated collection facilities
appointed by the government or the local authorities.

76
English
English
Introduction
Thank you for purchasing this Blackstar HT Studio 20 amplier. Like all our products,
this amp is the result of countless hours of painstaking Research and Development
by our world-class design team. Based in Northampton (UK), the Blackstar team
are all experienced musicians themselves and the sole aim of the development
process is to provide guitarists with products which are the ultimate tools for self-
expression.
All Blackstar products are subjected to extensive laboratory and road testing to
ensure that they are truly uncompromising in terms of reliability, quality and above
all TONE.
The HT Studio 20’s exible two channel design features the unique patented ISF
(Innite Shape Feature) control and although it has a comprehensive control set, it
is still simple and intuitive to use. Please read through this handbook carefully to
ensure you get the maximum benet from your new Blackstar product.
If you like what you hear and want to nd out more about the Blackstar range of
products please visit our website at www.blackstaramps.com.
Thanks!
The Blackstar Team
Features
The HT Studio 20 is a highly versatile amplier suited to a wide range of playing
styles and situations.
The Clean Channel provides a wide range of clean and moderately overdriven
tones. The voicing is typical of many ‘boutique’ style ampliers with a ringing Class
A type performance. The overall character may be adjusted with the Tone control
from dark and warm through to bright and sparkling.
The HT Studio 20 Overdrive Channel is characterised by a tone which is high in gain,
but lacks any of the detached top-end ‘zz’ often found in many similar designs.
This is a result of unique preamplier and power amplier shaping techniques,
which also benet the player in the way the overdrive cleans up beautifully as the
guitar volume is reduced. Even at the most extreme settings, the Overdrive Channel
remains natural sounding.
The HT Studio 20 Overdrive Channel also has its own highly exible EQ section
providing a variety of overdriven tones. The patented ISF (Innite Shape Feature)
control is unique to Blackstar Amplication and represents a major step forward in
tone shaping exibility. The ISF control shifts the response of the three control tone
stack between a US type response at one end, and at the other a UK type response.
Importantly, in between the two extremes lie an innite number of alternative tone
choices that would be otherwise unavailable.
The HT Studio 20’s two channel design has been optimised for either preamp or
power amp overdrive, or a combination of both. The carefully voiced preamp and
cathode biased dual EL34 power amp conguration provides the user with the
ability to create wonderfully lush valve tones. From mild overdrive that cleans up by
backing off the guitar volume control, to highly saturated distortion, this amp does
it all.
The HT Studio 20 also features a completely natural sounding digital reverb, which
is outstandingly musical on both clean and crunch tones and raises the benchmark
for guitar amplier specic reverb design.

98
English
English
Front Panel
1. Input
Plug your guitar in here. Always use a good quality screened guitar lead.
2. Clean Volume
This controls the volume of the Clean Channel. Turning it clockwise increases the
volume. At higher settings the channel will start to overdrive, particularly with higher
output pickups.
3. Clean Tone
The Tone control allows adjustment of the balance between treble and bass
frequencies within the sound. At low settings (counter clockwise) the sound will be
warmer and darker in character. As the Tone control is rotated clockwise the sound
will become brighter.
4. Overdrive Indicator
When the red LED is on, the Overdrive Channel is selected. When the LED is off, the
Clean Channel is in operation.
5. Overdrive Select
Press this switch to select the Overdrive Channel.
NOTE: This switch must be ‘in’ for the footswitch to work.
6. Overdrive Gain
The Gain control adjusts the amount of overdrive or distortion on the Overdrive
Channel. Low settings (counter clockwise) will deliver a clean sound on the edge
of break-up. As the Gain control is increased clockwise the sound will become
more overdriven, moving through crunch tones until, at its maximum position, a full
distorted lead tone is arrived at.
7. Overdrive Volume
This control adjusts the volume of the Overdrive Channel. Turning it clockwise
increases the volume.
8. Bass
The Bass control adjusts the amount of low-end frequencies in your tone. This amp
has an advanced tone shaping circuit which allows the tone to be varied from tight
and cutting when counter clockwise, to warm and thumping when fully clockwise.
9. Middle
The Middle control adjusts the amount of middle frequencies in your tone. The
middle frequencies are particularly important in setting the amount of ‘body’
your tone has. With the Middle control set to its minimum position (fully counter
clockwise) the sound will be aggressive and scooped, a tone ideal for aggressive
rhythm playing. As the Middle control is increased (clockwise) the amount of ‘body’
is increased, which is more suitable for sustained lead guitar tones.
10. Treble
The Treble control allows exact adjustment of the treble frequencies within the
sound. At low settings (counter clockwise) the sound will be warm and darker in
character. As the Treble control is increased (clockwise) the sound will become
brighter. At the maximum setting the sound will be aggressive and cutting.
11. ISF (Innite Shape Feature)
The patented ISF control works in conjunction with
the Bass, Middle and Treble controls. It allows you to
choose the exact tonal signature you prefer. Fully counter
clockwise has a more American characteristic with a
tight bottom-end and more aggressive middle, and fully
clockwise has a British characteristic which is more
‘woody’ and less aggressive.
Unlike conventional ‘contour’ controls and parametric equalisation systems, the Bass,
Middle and Treble controls remain interactive with each other just like in a traditional
guitar amplier tone stack. This leads to a very familiar, musical response.
12. Master Volume
The Master Volume sets the overall volume of the Amp. Turning it clockwise
increases the volume.
13. Reverb
The Reverb control sets the overall level of the reverb effect. With the control fully
counter clockwise there will be no reverb. Turning the control clockwise will increase
the amount of reverb.
14. Power Indicator Light
The power indicator will light when the amplier is switched on.
15. Power
This switch is used to turn the amplier on and off.
US
AU
K

1110
Rear Panel
1. Mains Fuse
The value of the Mains Fuse is specied on the rear panel. Never use a fuse of the
incorrect value or attempt to bypass it.
2. Mains Input
The supplied detachable mains lead is connected here. The lead should only be
connected to a power outlet that is compatible with the voltage, power and frequency
requirements stated on the rear panel. If in doubt get advice from a qualied technician.
3. H.T. Fuse
The value of the H.T. Fuse is specied on the rear panel. Never use a fuse of the
incorrect value or attempt to bypass it.
4. Speaker Outputs
The output marked ‘1x16 Ohm’ is for the connection of a single 16 Ohm extension
speaker cabinet. (or the internal loudspeaker of the HT Studio 20 combo).
The outputs marked ‘1x8 Ohm or 2x16 Ohm’ are for the connection of either a single
8 Ohm extension cabinet or two 16 Ohm cabinets. Also, the internal loudspeaker
of the HT Studio 20 combo must be plugged in here if it is used with a 16 Ohm
extension cabinet. See table below.
‘1x16 Ohm’ output ‘1x8 Ohm or 2x16 Ohm’ outputs
Internal 16 Ohm combo speaker ✓ X X
Internal 16 Ohm combo speaker X ✓ ✓
plus one 16 Ohm extension cab
One 16 Ohm extension cabinet
✓ X X
Two 16 Ohm extension cabinets
X ✓ ✓
Single 8 Ohm extension cabinet
X ✓ X
WARNING: The output marked ‘1x16 Ohm’ should never be used at the same time
as any of the outputs marked ‘1x8 Ohm or 2x16 Ohm’. Failure to correctly match
the impedance of the amplier and speakers will damage the amplier.
5. Speaker Emulated Output
This output emulates the tonal characteristics of a guitar speaker cabinet and
provides a natural valve overdrive tone for connection to a recording device or
mixing desk. Always use a good quality screened lead.
NOTE: To record ‘silently’, simply set the master volume to zero. You may also
record from this output without a loudspeaker connected, but ensure that no
loudspeaker leads are connected to any of the loudspeaker output jack sockets of
the amplier, as this will defeat the load protection circuit and will cause damage to
the amplier.
6. Effects Loop Return
Connect the (mono) output of an external effects unit here.
7. Effects Loop Send
Connect the (mono) input of an external effects unit here.
8. Effects Loop Level
The Effects Loop Level switch sets the effects loop to either +4dBV/-10dBV, which
enables you to use it with either professional equipment (+4dBV setting), or with
guitar level effects such as effects pedals (-10dBV setting).
9. Footswitch
The supplied footswitch is connected here. The footswitch enables you to switch
between the Clean Channel and the Overdrive Channel.
NOTE: Overdrive Select switch (Front Panel 5) must be in for the footswitch to work.
Technical Specification
HT Studio 20 Combo
Power (RMS): 20 Watts
Valves: 2 x ECC83, 2 x EL34
Weight (kg): 19.2
Dimensions (mm): 573 x 522 x 292
Footswitch: FS-4 supplied
HT Studio 20 Head
Power (RMS): 20 Watts
Valves: 2 x ECC83, 2 x EL34
Weight (kg): 12.2
Dimensions (mm): 517 x 281 x 279
Footswitch: FS-4 supplied
English
English

1312
Deutsch
Deutsch
Alle Elektro- und Elektronik-Altgeräte müssen getrennt vom Hausmüll
über dafür staatlich vorgesehenen Stelen entsorgt werden.
Wichtige Informationen zur Sicherheit!
LESEN SIE DIE FOLGENDEN INFORMATIONEN SORGFÄLTIG DURCH.
BEWAHREN SIE ALLE ANLEITUNGEN FÜR DIE ZUKÜNFTIGE
BEZUGNAHME AUF
Befolgen Sie alle auf dem Produkt ausgewiesenen Warnungen und
Anleitungen!
Gefahr! Hohe interne Betriebsspannungen
Öffnen Sie nicht das Gehäuse des Geräts. Es benden sich keine vom Anwender
zu wartende Teile in diesem Gerät. Überlassen Sie alle Servicearbeiten qualiziertem
Wartungspersonal.
Nur mit einem trockenen Lappen reinigen
Auf der Innenseite eines Verstärkers kann sich Kondensationsnässe bilden, wenn er
von einer kalten Umgebung an einen wärmeren Ort bewegt wird. Es wird empfohlen,
dass das Gerät vor dem Einschalten Zimmertemperatur erreicht.
Unerlaubte Änderungen an diesem Gerät sind ausdrücklich von Blackstar Amplication
Ltd verboten.
Stecken Sie niemals Objekte jeglicher Art in die Lüftungsschlitze des Gehäuses.
Setzen Sie dieses Gerät nicht Regen, Flüssigkeiten oder Feuchtigkeit jeglicher Art aus.
Befolgen Sie alle auf dem Produkt ausgewiesenen Warnungen und Anleitungen!
Platzieren Sie dieses Produkt nicht auf einem instabilen Rollwagen, Ständer oder
Tisch. Das Produkt kann herunterfallen und dem Produkt oder Personen ernsthaften
Schaden zufügen!
Blockieren oder verdecken Sie nicht die Lüftungsschlitze oder -öffnungen.
Dieses Produkt sollte nicht in der Nähe einer Wärmequelle wie einem Ofen, Heizkörper
oder einem anderen Hitze entwickelnden Verstärker platziert werden.
Verwenden Sie nur das zum Lieferumfang gehörende Netzkabel, das mit der
Netzstromversorgung in Ihrer Region kompatibel ist.
Netzkabel müssen stets mit Vorsicht gehandhabt und ersetzt werden, wenn sie in
irgendeiner Weise beschädigt werden.
Brechen Sie niemals den Erdungsstift (Erde) am Netzkabel ab.
Das Netzkabel sollte aus der Steckdose gezogen werden, wenn das Gerät längere
Zeit nicht verwendet wird.
Bevor das Gerät eingeschaltet wird, muss der Lautsprecher entsprechend der
Beschreibung im Handbuch unter Verwendung des vom Hersteller empfohlenen
Kabels angeschlossen werden.
Ersetzen Sie beschädigte Sicherungen stets mit der korrekten Spannung und Art.
Trennen Sie niemals die schützende Netz/Erde-Verbindung.
Hohe Lautsprecherpegel können permanente Hörschäden verursachen. Sie sollten
daher die direkte Nähe zu Lautsprechern, die auf hohen Pegeln betrieben werden,
vermeiden. Tragen Sie einen Hörschutz, wenn Sie kontinuierlich hohen Pegeln
ausgesetzt sind.
Wenn das Produkt nicht normal funktioniert, während die Betriebsanleitung befolgt
wird, übergeben Sie das Produkt an einen qualizierten Servicetechniker.
Die Verwaltung zur Gesundheit und Sicherheit am Arbeitsplatz der US-Regierung
(OSHA) hat die folgenden zulässigen Lärmpegelbelastungen festgelegt:
Dauer pro Tag in Stunden Lärmpegel dBA, Langsame Reaktion
8 90
6 92
4 95
3 97
2 100
1½ 102
1 105
½ 110
¼ oder weniger 115
Laut der OSHA kann jede Belastung oberhalb der oben genannten zulässigen
Grenzwerte zu gewissen Hörverlusten führen.
Wenn dieses Verstärkersystem betrieben wird, müssen Ohrschützer im Ohrkanal
oder über den Ohren getragen werden, um permanenten Hörverlust zu vermeiden,
wenn die Belastung oberhalb der oben festgelegten Grenzwerte liegt. Um sich gegen
potenziell gefährliche Belastungen durch hohe Schalldruckpegel zu schützen, wird
empfohlen, dass alle Personen, die Geräten wie diesem Verstärkersystem ausgesetzt
sind, die in der Lage sind, hohe Schalldruckpegel zu entwickeln, während des
Betriebs dieses Geräts durch Ohrschützer geschützt werden.

1514
Deutsch
Deutsch
Einleitung
Vielen Dank, dass Sie sich für den Blackstar HT Studio 20 Verstärker entschieden
haben. Dieser Amp ist wie alle unsere Verstärker das Ergebnis unzähliger Stunden
akribischer Arbeit durch unser erstklassiges Entwickler-Team. Blackstar hat seinen Sitz
in Northampton (UK) und setzt sich aus einem Team erfahrener Musiker zusammen,
die nur ein Ziel verfolgen: Gitarristen mit den Werkzeugen zu versorgen, die ihnen
dabei helfen, sich selbst zu verwirklichen.
Alle Blackstar-Produkte wurden sowohl in unseren Labors als auch im Live-Betrieb
auf Herz und Nieren getestet, um sicherzustellen, dass sie in punkto Zuverlässigkeit,
Qualität und KLANG absolut kompromisslose Ergebnisse liefern.
Das exible zweikanalige Design des HT Studio 20 wird durch die einzigartige
ISF-Schaltung (Innite Shape Feature) ergänzt und glänzt trotz umfangreicher
Steuermöglichkeiten durch eine einfache und intuitive Bedienung. Bitte lesen Sie
dieses Handbuch aufmerksam durch, um Ihr neues Blackstar-Produkt optimal nutzen
zu können.
Wenn Sie mehr über die Blackstar-Produktreihe erfahren möchten, besuchen Sie
unsere Webseite unter www.blackstaramps.com.
Vielen Dank!
Ihr Blackstar-Team
Merkmale
Der HT Studio 20 ist ein extrem vielseitiger Verstärker, der sich für sehr unterschiedliche
Spieltechniken und -situationen empehlt.
Der Clean-Kanal liefert die ganze Bandbreite von cleanen bis hin zu dezent
übersteuerten Sounds. Das Voicing ähnelt dabei dem vieler ‚Boutique’-artiger
Verstärker mit dem einem leicht glockigen Class-A-Charakter. Der Gesamtcharakter
kann aber mit dem Tone-Regler zwischen ‚bassig’ und ‚warm’ bis ‚höhenreich’ und
‚frisch’ eingestellt werden.
Der Overdrive-Kanal des HT Studio 20 zeichnet sich durch einen Sound aus, der
ausreichend Gain-Reserven bietet, jedoch kein übertrieben „kratziges“ Top-End
liefert, wie man es von ähnlichen Schaltungen her kennt. Das ist das Ergebnis der
einzigartigen Shaping-Technologie in der Vor- und Endstufe: Dabei werden Sie
als Gitarrist sicher zu schätzen wissen, dass Sie allein mit Hilfe des Volume-Potis
zwischen Overdrive- und wunderschönen Clean-Sounds variieren können. Selbst bei
extremen Einstellungen klingt der Overdrive-Kanal immer natürlich und offen.
Der Overdrive-Kanal des HT Studio 20 verfügt über eine eigene exible EQ-Sektion,
mit der sich zahlreiche unterschiedliche übersteuerte Sounds erzielen lassen. Die
patentierte Blackstar ISF-Schaltung (Innite Shape Feature) ist einzigartig und stellt
einen großen Fortschritt in Bezug auf eine exible Klangregelung dar. Der ISF-Regler
erlaubt es, die Klangfarbe der Klangregelung mit ihren drei Reglern zwischen einem
US-typischen Charakter auf der einen Seite und einem UK-typischen Charakter auf
der anderen Seite zu variieren. Natürlich liegen zwischen diesen beiden Charakteristika
unendlich viele andere Klangfärbungen, die bei anderen Verstärkern denitiv nicht zur
Verfügung stehen.
Das zweikanalige Design des HT Studio 20 wurde wahlweise für eine Übersteuerung
der Vor-, der Endstufe oder einer Mischung aus beidem optimiert. Der sorgfältig
getunte Preamp erlaubt es dem Anwender in Verbindung mit der über zwei EL34-
Kathoden übersteuerten Endstufe, wunderbar satte Röhrensounds zu erzeugen.
Von dezentem Overdrive, das sich mit Hilfe des Lautstärke-Potis an der Gitarre auch
absolut clean gestalten lässt, bis hin zu massiv übersteuerter Distortion hat dieser
Amp einfach alles drauf.
Der HT Studio 20 verfügt zudem über ein absolut natürlich klingendes Digital Reverb,
das bei cleanen und Crunch-Sounds absolut musikalisch klingt und die Messlatte für
Gitarrenverstärker-spezische Reverbs deutlich nach oben setzt.

1716
gegen den Uhrzeigersinn) ist der Sound sehr aggressiv und etwas hohl, was sich
speziell für knackige Rhythmus-Parts eignet. Wenn der Mitten-Regler angehoben
wird (im Uhrzeigersinn), nimmt der Grundton-Anteil zu, was sich für singende Lead-
Sounds empehlt.
10. Treble
Mit dem Regler Treble können Sie gezielt den Höhenanteil im Gesamt-Sound
einstellen. Bei niedrigen Einstellungen (gegen den Uhrzeigersinn) erhält der Sound
einen wärmeren und stumpferen Charakter. Wenn der Treble-Regler angehoben wird
(im Uhrzeigersinn), wird der Sound immer höhenreicher. In der Maximalposition klingt
der Sound schließlich aggressiv und schneidend.
11. ISF (Innite Shape Feature)
Der ISF-Regler arbeitet mit den Reglern für Bass,
Middle und Treble zusammen. Mit seiner Hilfe nden
Sie die genau die Klangfärbung, die Sie suchen. Bei
Einstellungen gegen den Uhrzeigersinn besitzt der Amp
einen „amerikanischen“ Sound-Charakter mit einem
knackigen Bassfundament und aggressiveren Mitten. Bei
Einstellungen im Uhrzeigersinn erzeugt der Amp einen
„britischen“ Sound, der deutlich erdiger und weniger
aggressiv klingt.
Im Gegensatz zu herkömmlichen ‚Contour’-Reglern und parametrischen EQ-
Systemen beeinussen sich die Regler für Bass, Middle und Treble gegenseitig - so
wie man das von klassischen Gitarren-Stacks kennt. Das führt letztlich zu einem
vertrauten, musikalischen Verhalten.
12. Master Volume
Das Master Volume steuert die Gesamtlautstärke des Verstärkers. Im Uhrzeigersinn
heben Sie die Lautstärke an.
13. Reverb
Der Reverb-Regler steuert den Gesamtpegel des Reverb-Effekts. Im Linksanschlag
des Reglers ist kein Reverb hörbar. Im Uhrzeigersinn heben Sie den Reverb-Anteil an.
14. Power-Leuchte
Die Power-Kontrollleuchte ist aktiv, wenn Sie den Verstärker einschalten.
15. Power
Mit diesem Schalter schalten Sie den Verstärker ein bzw. aus.
Vorderseite
1. Input
Hier schließen Sie Ihre Gitarre an. Verwenden Sie in jedem Fall ein hochwertiges
geschirmtes Gitarrenkabel.
2. Clean Volume
Mit diesem Regler steuern Sie die Lautstärke im Clean-Kanal. Im Uhrzeigersinn
heben Sie die Lautstärke an. Bei höheren Einstellungen beginnt der Kanal speziell in
Verbindung mit leistungsstarken Pickups zu übersteuern.
3. Clean Tone
Über den Tone-Regler stellen Sie Verhältnis zwischen den Höhen- und Bassanteilen
im Gesamtsound ein. Bei niedrigen Einstellungen (gegen den Uhrzeigersinn) erhält
der Sound einen wärmeren und stumpferen Charakter. Wenn Sie den Tone-Regler im
Uhrzeigersinn aufdrehen, wird der Sound immer höhenreicher.
4. Overdrive-Anzeige
Wenn die ROTE LED leuchtet, ist der Overdrive-Kanal angewählt. Wenn die LED nicht
leuchtet, ist der Clean-Kanal aktiv.
5. Overdrive Select
Mit diesem Schalter aktivieren Sie den Overdrive-Kanal.
ANMERKUNG: Dieser Schalter muss ‚aktiv’ sein, damit die Steuerung über den
Fußschalter erfolgen kann.
6. Overdrive Gain
Mit dem Gain-Regler steuern Sie das Maß der Verzerrung oder Distortion im
Overdrive-Kanal. Niedrige Einstellungen (gegen den Uhrzeigersinn) liefern einen
cleanen Sound mit viel Druck und Durchsetzungsvermögen. Wenn der Gain-Regler
im Uhrzeigersinn aufgedreht wird, nimmt der Verzerrungsgrad mehr und mehr zu und
wechselt von crunchigen Sounds bis hin zu einem stark verzerrten Lead-Sound in
der Extremposition.
7. Overdrive Volume
Mit diesem Regler steuern Sie die Lautstärke des Overdrive-Kanals. Im Uhrzeigersinn
heben Sie die Lautstärke an.
8. Bass
Der Bass-Regler steuert den Anteil der Bässe im Gesamt-Sound. Dieser Verstärker
bietet eine effektive Klangregelung, mit der Sie den Ton zwischen knackig und
aggressiv (gegen den Uhrzeigersinn) oder warm und druckvoll (im Uhrzeigersinn)
einstellen können.
9. Middle
Der Middle-Regler steuert den Anteil der Mitten im Gesamt-Sound. Die Mitten sind
insbesondere für den Grundsound entscheidend. In der Minimalposition (komplett
Deutsch
Deutsch
US
AU
K

1918
Rückseite
1. Sicherung
Der Wert für die Sicherung ist auf der Rückseite vermerkt. Verwenden Sie in keinem
Fall eine Sicherung mit falschen Werten und versuchen Sie nicht, die Sicherung zu
überbrücken.
2. Netzanschluss
Hier wird das mitgelieferte Kaltgerätenetzkabel angeschlossen. Das Kabel muss
an einer Netzsteckdose angeschlossen werden, die in punkto Spannung, Leistung
und Netzfrequenz den auf der Rückseite vermerkten Spezikationen entspricht. Im
Zweifelsfall wenden Sie sich an einen qualizierten Techniker/Elektriker.
3. H.T.- Sicherung
Der Wert für die H.T.- Sicherung ist auf der Rückseite vermerkt. Verwenden Sie
in keinem Fall eine Sicherung mit falschen Werten und versuchen Sie nicht, die
Sicherung zu überbrücken.
4. Speaker-Ausgänge
Der mit ‚1x16 Ohm’ bezeichnete Ausgang dient zum Anschluss einer externen
Lautsprecherbox mit 16 Ohm (der des internen Lautsprechers des HT Studio 20
Combos).
Die mit ‚1x8 Ohm’ oder ‚2x16 Ohm’ beschrifteten Ausgänge dienen zum Anschluss
einer einzelnen 8-Ohm- oder von zwei 16-Ohm-Lautsprecherboxen. Zudem können
Sie hier den internen Lautsprecher des HT Studio 20 Combos anschließen, sofern Sie
ihn gemeinsam mit einer 16-Ohm-Lautsprecherbox betreiben. Siehe Tabelle unten.
‘1x16 Ohm’ Ausgang ‘1x8 Ohm oder 2x16 Ohm’ Ausgänge
Interner 16 Ohm Combo-Speaker ✓ X X
Interner 16 Ohm Combo-Speaker mit X ✓ ✓
einer externen 16-Ohm-Lautsprecherbox
Eine externe 16-Ohm-Lautsprecherbox ✓ X X
Zwei externe 16-Ohm-Lautsprecherboxen X ✓ ✓
Eine externe 8-Ohm-Lautsprecherbox X ✓ X
WARNUNG: Der mit ‚1x16 Ohm’ bezeichnete Ausgang darf niemals parallel mit den
Ausgängen ‚1x8 Ohm’ oder ‚2x16 Ohm’ betrieben werden. Wenn die Impedanz von
Verstärker und Lautsprecher nicht übereinstimmen, können ernsthafte Schäden am
Verstärker auftreten.
5. Speaker Emulated Output
Dieser Ausgang emuliert den Klangcharakter einer Gitarren-Lautsprecherbox und
sorgt in Kombination mit einem Aufnahmegerät oder Mischpult für eine natürliche
Röhren-Übersteuerung. Verwenden Sie in jedem Fall ein hochwertiges geschirmtes
Kabel.
ANMERKUNG: Für ‚lautlose’ Aufnahmen stellen Sie das Master Volume einfach
auf 0 ein. Sie können diesen Ausgang auch dann zur Aufnahme verwenden, wenn
kein Lautsprecher angeschlossen ist. Stellen Sie jedoch sicher, dass in diesem Fall
auch keine Lautsprecherkabel an einem der Lautsprecherausgänge am Verstärker
angeschlossen ist, da in diesem Fall die Last-Schutzschaltung umgangen wird und
ernsthafte Schäden am Verstärker auftreten können.
6. Effects Loop Return
Hier schließen Sie den (Mono-)Ausgang eines externen Effektgeräts an.
7. Effects Loop Send
Hier schließen Sie den (Mono-)Eingang eines externen Effektgeräts an.
8. Effects Loop Level
Mit dem Schalter Effects Loop Level können Sie den Effekt-Loop wahlweise mit
+4dBV oder -10dBV betreiben: Entsprechend können Sie professionelles Equipment
(Einstellung +4dBV) oder Effektpedale mit einem für Gitarren ausgelegten Pegel
(Einstellung -10dBV) anschließen.
9. Footswitch
Hier wird der mitgelieferte Fußschalter angeschlossen. Mit dem Fußschalter können
Sie zwischen den Kanälen Clean und Overdrive umschalten.
ANMERKUNG: Der Schalter Overdrive Select (5) muss aktiv sein, um die Kanäle
über den Fußschalter umzuschalten.
Technische Spezifikationen:
HT Studio 20 Combo
Leistung (RMS): 20 Watt
Röhren: 2 x ECC83, 2 x EL34
Gewicht (kg): 19.2
Abmessungen (mm): 573 x 522 x 292
Fußschalter: FS-4 wird mitgeliefert
HT Studio 20 Head
Leistung (RMS): 20 Watt
Röhren: 2 x ECC83, 2 x EL34
Gewicht (kg): 12.2
Abmessungen (mm): 517 x 281 x 279
Fußschalter: FS-4 wird mitgeliefert
Deutsch
Deutsch

2120
Français
Français
Les éléments électriques et électroniques doivent être jetés séparément, dans les
vide-ordures prévus à cet effet par votre municipalité.
Consignes de sécurité importantes !
LISEZ LES INFORMATIONS SUIVANTES ATTENTIVEMENT. CONSERVEZ
TOUTES LES CONSIGNES POUR RÉFÉRENCE ULTÉRIEURE !
Respectez tous les avertissements et toutes les consignes gurant sur
le produit !
Danger ! Hautes tensions internes.
N’ouvrez pas le boîtier de l’appareil. Cet appareil ne possède aucune pièce sur
laquelle l’utilisateur puisse intervenir. Conez toutes les réparations à un réparateur
qualié.
Nettoyez l’appareil avec un chiffon sec uniquement.
Il est possible que de la condensation se forme à l’intérieur d’un amplicateur s’il
est transféré d’un environnement froid à un endroit plus chaud. Il est conseillé
d’attendre que l’appareil ait atteint la température ambiante avant de l’allumer.
La modication non autorisée de cet appareil est expressément interdite par
Blackstar Amplication plc.
N’introduisez jamais d’objets dans les fentes de ventilation du boîtier de l’appareil.
N’exposez pas cet appareil à la pluie, à des liquides ni à aucune forme d’humidité.
Respectez tous les avertissements et toutes les consignes gurant sur le produit !
Ne placez pas ce produit sur un chariot, un guéridon ou une table instable. Il pourrait
tomber et ce faisant sérieusement s’endommager ou causer des blessures !
Ne couvrez pas les fentes de ventilation ni les ouvertures et ne les obstruez pas
non plus.
Évitez de placer ce produit près d’une source de chaleur telle qu’un poêle, un
radiateur ou un autre amplicateur produisant de la chaleur.
Utilisez uniquement le cordon d’alimentation fourni car il est compatible avec la
tension de l’alimentation générale de votre secteur.
Manipulez toujours les cordons d’alimentation avec le plus grand soin. Remplacez-
les s’ils sont endommagés.
Ne détachez jamais la prise de terre du cordon d’alimentation.
Débranchez le cordon d’alimentation en cas d’inutilisation prolongée de l’appareil.
Avant d’allumer l’appareil, branchez l’enceinte de la manière décrite dans la notice
d’emploi à l’aide du cordon recommandé par le fabricant.
Remplacez toujours les fusibles endommagés par des fusibles du type et du calibre
appropriés.
Ne débranchez jamais la connexion à la terre de protection.
À des niveaux élevés, le volume des enceintes peut causer des pertes auditives
dénitives. Par conséquent, évitez de rester à proximité des enceintes lorsque le
volume est élevé. Portez des protecteurs d’oreilles en cas d’exposition continue à
des niveaux sonores élevés.
Si le produit ne fonctionne pas normalement alors que vous respectez la notice
d’emploi, conez-le à un réparateur qualié.
La loi américaine sur la santé et la sécurité du travail indique la durée d’exposition
autorisée à différents niveaux sonores :
Durée par jour en heures Niveau sonore (dBA), réponse lente
8 90
6 92
4 95
3 97
2 100
1½ 102
1 105
½ 110
¼ ou moins de 115
D’après cette loi, toute exposition d’une durée supérieure aux limites autorisées ci-
dessus peut entraîner une perte auditive.
Des protecteurs d’oreilles doivent être portés dans le canal auditif ou sur l’oreille
lors de l’utilisation de ce système d’amplication an d’éviter toute perte auditive
permanente si l’exposition dépasse les limites susmentionnées. An d’éviter toute
exposition potentiellement dangereuse à des niveaux de pression acoustique
élevés, il est conseillé que toutes les personnes exposées à des appareils capables
de produire des niveaux de pression acoustique élevés tels que ce système
d’amplication utilisent des protecteurs d’oreilles lors de l’utilisation de l’appareil.

2322
Français
Français
Introduction
Merci d’avoir fait l’acquisition de cet amplicateur HT Studio 20 Blackstar. Comme
tous nos produits, cet ampli est le résultat d’innombrables heures de recherche et
développement minutieux par notre équipe de conception, une des meilleures du
monde. Basée à Northampton (R-U), l’équipe Blackstar est composée de musiciens
chevronnés dont le seul but est de fournir aux guitaristes des produits qui soient
leurs outils d’expression ultimes.
Tous les produits Blackstar sont soumis à des tests intensifs en laboratoire et sur la
route an d’assurer une abilité et une qualité sans compromis, et par dessus tout
LE son !
La conception souple à deux canaux du HT Studio 20 comprend l’exceptionnelle
commande ISF (Innite Shape Feature) et bien qu’il possède un jeu de commandes
complet, il reste néanmoins intuitif et simple d’emploi. Veuillez lire attentivement la
totalité de ce mode d’emploi pour vous assurer un rendement maximum de votre
nouveau produit Blackstar.
Si vous aimez ce que vous entendez et voulez en savoir plus sur la gamme de
produits Blackstar, veuillez visiter notre site internet à l’adresse www.blackstaramps.
com.
Merci !
L’équipe Blackstar
Caractéristiques
Le HT Studio 20 est un amplicateur très polyvalent convenant à un large éventail
de styles de jeu et de situations.
Le canal clair (Clean) fournit une large gamme de sons clairs et modérément saturés.
Son harmonisation est typique de nombreux amplicateurs de style “boutique” avec
des performances retentissantes de type Classe A. Son caractère général peut être
réglé avec la commande Tone, de sourd et chaud à brillant et éclatant.
Le canal saturé (Overdrive) du HT Studio 20 est caractérisé par un son à gain
élevé, mais sans aucun des froids “crépitements” d’aigus souvent présents dans
des modèles similaires. C’est le résultat de techniques uniques de façonnage
du préamplicateur et de l’amplicateur de puissance dont bénécie le musicien
puisque la saturation est superbement épurée quand on réduit le volume de la
guitare. Même avec les réglages les plus extrêmes, le canal Overdrive garde un son
naturel.
Le canal Overdrive du HT Studio 20 a aussi sa propre section égaliseur, d’une
grande exibilité, apportant une large variété de sons saturés. La commande ISF
(Innite Shape Feature), en instance de brevet, est propre à l’amplication Blackstar
et représente une avancée majeure pour la souplesse de façonnage du son. La
commande ISF fait alterner la réponse des trois commandes de tonalité entre d’un
côté une réponse de type américain et de l’autre une réponse de type britannique.
Et ce qui est important, c’est qu’il y a entre ces deux extrêmes un choix inni de
sonorités alternatives autrement inaccessibles.
La conception à deux canaux du HT Studio 20 a été optimisée pour la saturation
du préampli ou de l’ampli de puissance, ou une combinaison des deux. La
conguration avec préampli soigneusement harmonisé et ampli de puissance à
double EL 34 à cathode polarisée donne la possibilité à l’utilisateur de créer des
sons lampes merveilleusement riches. D’une légère saturation qui s’estompe en
baissant la commande de volume de la guitare à une distorsion par forte saturation,
cet ampli sait tout faire.
Le HT Studio 20 possède aussi une reverb numérique au son totalement naturel,
remarquablement musicale à la fois sur les sons clairs et sur les sons crunch, et qui
hausse la barre de référence pour les reverbs dédiées aux amplicateurs de guitare.

2524
rythmique agressif. Quand on monte (dans le sens horaire) la commande Middle, le
“corps” augmente, ce qui convient mieux aux sons de guitare “lead”.
10. Treble
La commande Treble permet de régler exactement les hautes fréquences (aigus)
de votre son. Avec des réglages bas (dans le sens anti-horaire), le son aura un
caractère chaud et sourd. Plus on monte la commande Treble (sens horaire) et plus
le son devient brillant. Au maximum, le son sera agressif et tranchant.
11. ISF (Innite Shape Feature)
La commande ISF fonctionne en conjonction avec les commandes Bass, Middle
et Treble. Elle vous permet de choisir exactement la signature tonale que vous
préférez. À fond dans le sens anti-horaire, les caractéristiques sont plus américaines
avec des graves ns et des médiums plus agressifs, tandis qu’à fond dans le sens
horaire, elles sont plus britanniques, c’est-à-dire plus “boisées” et moins agressives.
Contrairement aux commandes conventionnelles de “contour” et de systèmes
d’égalisation paramétrique, les commandes Bass, Middle et Treble continuent
d’interagir entre elles comme dans un réseau de correction d’ampli guitare
traditionnel. Cela entraîne une réponse musicale, très familière.
12. Master Volume
Le volume Master gère le volume général de l’ampli. Le tourner dans le sens horaire
augmente le volume.
13. Reverb
La commande Reverb règle le niveau général de l’effet reverb. Avec la commande à
fond dans le sens anti-horaire, il n’y aura pas de reverb. Tourner la commande dans
le sens horaire fait augmenter la quantité de reverb.
14. Power Indicator Light
Cet indicateur vous informe que l’ampli est allumé.
15. Power
Ce switch vou permet d’allumer ou éteindre votre ampli.
Face avant
1. Entrée
Branchez ici votre guitare. Utilisez toujours un câble de guitare blindé de bonne
qualité.
2. Clean Volume
Cette commande contrôle le volume du canal Clean. La tourner dans le sens horaire
augmente le volume. Avec des réglages élevés, le canal commencera à saturer,
particulièrement avec des micros à haut niveau de sortie.
3. Clean Tone
La commande Tone règle la balance entre les hautes fréquences (aigus) et les
basses fréquences (graves) dans votre son. Avec des réglages bas (dans le sens
anti-horaire), le son aura un caractère plus chaud et plus sourd. Plus on tourne la
commande Tone dans le sens horaire et plus le son devient brillant.
4. Témoin Overdrive
Quand la DEL rouge est allumée, le canal Overdrive est sélectionné. Quand la DEL
est éteinte, c’est le canal Clean qui est en service.
5. Overdrive Select
Pressez ce commutateur pour sélectionner le canal Overdrive.
NOTE : ce commutateur doit être enclenché pour que le pédalier fonctionne.
6. Overdrive Gain
La commande Gain règle la quantité de saturation ou de distorsion sur le canal
Overdrive. Les réglages bas, dans le sens anti-horaire, donneront un son clair à la
limite de la rupture. Quand on monte la commande Gain dans le sens horaire, le son
devient plus saturé, passant par des sons crunch jusqu’à, en position maximum, un
son “lead” à distorsion totale.
7. Overdrive Volume
Cette commande règle le volume du canal Overdrive. La tourner dans le sens
horaire augmente le volume.
8. Bass
La commande Bass règle la quantité de basses fréquences (graves) de votre son.
Cet ampli a un circuit de façonnage sonore perfectionné qui permet au son de varier
d’un timbre ténu et tranchant, pour une rotation anti-horaire, à un timbre chaud et
énorme à fond dans le sens horaire.
9. Middle
La commande Middle règle la quantité de fréquences moyennes (médiums) de
votre son. Les fréquences moyennes sont particulièrement importantes pour régler
le “corps” de votre son. Avec la commande Middle en position minimum (à fond
dans le sens anti-horaire), le son sera agressif et creusé, un timbre idéal pour le jeu
Français
Français

2726
Face arrière
1. Fusible d’alimentation
La valeur du fusible d’alimentation est spéciée sur la face arrière. N’utilisez jamais
un fusible de valeur incorrecte et n’essayez jamais de le court-circuiter.
2. Entrée d’alimentation
Le cordon d’alimentation détachable fourni se connecte ici. Le cordon ne doit être
branché qu’à une prise secteur compatible avec les impératifs de tension, puissance
et fréquence indiqués en face arrière. En cas de doute, faites vous conseiller par un
technicien qualié.
3. Fusible H.T.
La valeur du fusible H.T. est spéciée sur la face arrière. N’utilisez jamais un fusible
de valeur incorrecte et n’essayez jamais de le court-circuiter.
4. Sorties pour bafe
La sortie “1x16 Ohm” sert à la connexion d’un simple bafe
d’extension 16 ohms (ou des haut-parleurs internes du HT
stage 60 combo).
Les sorties “1x8 Ohm or 2x16 Ohm” servent à la connexion
d’un simple bafe d’extension 8 ohms ou de deux bafes
16 ohms.
Les sorties “1x4 Ohm or 2x8 Ohm” servent à la connexion
d’un simple bafe d’extension 4 ohms ou de deux bafes 8
ohms. Le bafe interne du HT Stage 60 peut être branché ici s’il est utilisé en même
temps qu’un bafe d’extension 8 ohms. Voir tableau ci-dessous.
Sortie “1x16 Ohm” Sorties “1x8 Ohm or 2x16 Ohm”
Bafe combo interne 16 Ohms ✓ X X
Bafe combo interne 16 Ohms X ✓ ✓
plus bafe d’extension 16 Ohms
Un bafe d’extension 16 Ohms ✓ X X
Deux bafes d’extension 16 Ohms X ✓ ✓
Simple bafe d’extension 8 Ohms X X ✓
AVERTISSEMENT : la sortie “1x16 Ohm” ne doit jamais être utilisée en même
temps qu’une des sorties “1x8 Ohm or 2x16 Ohm”. Ne pas faire correspondre
correctement l’impédance de l’amplicateur et celle des bafes endommagera
l’amplicateur.
5. Sortie avec émulation de bafe
Cette sortie émule les caractéristiques tonales d’un bafe pour guitare et produit un
son naturel de saturation à lampes pour un raccordement à un enregistreur ou à
une table de mixage. Utilisez toujours un câble blindé de bonne qualité.
NOTE : pour enregistrer “silencieusement”, réglez simplement le volume master à
zéro. Vous pouvez aussi enregistrer depuis cette sortie sans bafe connecté, mais
assurez-vous d’abord qu’aucun cordon de bafe n’est branché à une quelconque
prise de sortie pour bafe de l’amplicateur, car cela empêcherait le fonctionnement
du circuit de protection de charge et causerait des dommages à l’amplicateur.
6. Effects Loop Return (retour de boucle d’effets)
Branchez ici la sortie (mono) d’une unité d’effets externe.
7. Effects Loop Send (départ de boucle d’effets)
Branchez ici l’entrée (mono) d’une unité d’effets externe.
8. Effects Loop Level (niveau de boucle d’effets)
Le commutateur Effects Loop Level règle la boucle d’effets sur +4 dBV ou -10 dBV,
ce qui vous permet de l’utiliser avec un équipement professionnel (réglage +4 dBV)
ou des effets de niveau guitare tels que des pédales d’effet (réglage -10 dBV).
9. Pédalier
Le pédalier fourni se branche ici. Le pédalier vous permet d’alterner entre les canaux
Clean et Overdrive.
NOTE : le commutateur Overdrive Select (5) doit être enclenché pour que le
pédalier fonctionne.
Caractéristiques techniques :
HT Studio 20 Combo
Puissance (RMS) : 20 watts
Lampes : 2 x ECC83, 2 x EL34
Poids (kg) : 19.2
Dimensions (mm) : 573 x 522 x 292
Pédalier : FS-4 fourni
Tête HT Studio 20
Puissance (RMS) : 20 watts
Lampes : 2 x ECC83, 2 x EL34
Poids (kg) : 12.2
Dimensions (mm) : 517 x 281 x 279
Pédalier : FS-4 fourni
Français
Français
US
AU
K

2928
Español
Español
Todos los aparatos eléctricos o electrónicos se deben desechar de
forma distinta del servicio municipal de recogida de basura, a través
de puntos de recogida designados por el gobierno o las autoridades
locales.
¡AVISO!
Importante Información de seguridad
LEA LA SIGUIENTE INFORMACIÓN DETENIDAMENTE Y CONSERVE LAS
INSTRUCCIONES PARA FUTURAS CONSULTAS.
SIGA TODOS LOS AVISOS E INSTRUCCIONES MARCACADAS EN LOS
PRODUCTOS.
¡PELIGRO! Alto voltaje interno.
NO ABRA LA TAPA DEL EQUIPO. NO HAY PARTES UTILIZABLES PARA OTROS
FINES EN ESTE EQUIPO. REMITA CUALQUIER ANOMALÍA AL SERVICIO
TÉCNICO CUALIFICADO.
UTILICE TRAPOS SECOS PARA LIMPIAR.
SE PUEDE FORMAR CONDENSACIÓN DENTRO DEL AMPLIFICADOR SI ESTE
SE HA MOVIDO DE UN LUGAR FRIO A OTRO MÁS CALIDO. EN EL CASO DE
QUE SE MOVIERA EL AMPLIFICADOR DE UN SITIO MÁS FRIO A OTRO MÁS
CALIDO O A LA INVERSA, DEJE UN RATO EL AMPLIFICADOR SIN ENCENDER
PARA QUE ESTE ALCANCE LA TEMPERATURA MEDIA DEL NUEVO LUGAR.
LAS MODIFICACIONES NO AUTORIZADAS ESTÁN EXPRESAMENTE PROHIBIDAS
POR BLACKSTAR AMPLIFICATIO LTD.
NUNCA APOYE OBJETOS EN NINGUNO DE LOS AGUJEROS DE VENTILACIÓN
LOCALIZADOS EN LAS TAPAS DEL EQUIPO.
NO EXPONGA LOS EQUIPOS A LA LLUVIA, LIQUIDOS O HUMEDAD DE
CUALQUIER TIPO.
SIGA TODOS LOS AVISOS E INSTRUCCIONES MARCADAS EN EL PRODUCTO.
NO PONGA LOS EQUIPOS EN CARRETILLAS INESTABLES O MESAS
NORMALES. EL EQUIPO PUEDE CAER CAUSANDOSE SERIOS DAÑOS ASÍ
COMO A PERSONAS.
NO CUBRA O BLOQUEE LOS AGUJEROS DE APERTURA Y VENTILACIÓN.
ESTE PRODUCTO NO DEBE SER PUESTO CERCA DE UNA FUENTE DE CALOR
COMO PUEDE SER UN RADIADOR, ESTUFA O CUALQUIER PRODUCTOR O
AMPLIFICADOR DE CALOR.
USE SOLO LA FUENTE DE ALIMENTACIÓN QUE SEA COMPATIBLE CON LOS
VOLTAJES UTILIZADOS EN EL ARE EN DONDE ESTÉ.
LA FUENTE DE ALIMENTACIÓN DEBE DE SER MANEJADA CON CUIDADO Y
DEBE DE SER REMPLAZADA EN CASO DE CUALQUIER DAÑO.
NUNCA ROMPA LA TOMA DE TIERRA SOBRE EL CABLE DE CORRIENTE.
EL CABLE DE CORRIENTE DEBERÁ DE SER DESCONECTADO CUANDO LA
UNIDAD NO VAYA A SER USADA DURANTE UN TIEMPO.
ANTES DE ENCENDER UN CABEZAL, LA PANTALLA DEBERA ESTAR CONECTADA
COMO SE DESCRIBE EN EL LIBRO DE INSTRUCCIONES UTILIZANDO LOS
CONDUCTORES RECOMENDADOS POR EL FABRICANTE.
REEMPLAZE SIEMPRE LOS FUSIBLES DAÑADOS POR OTROS DE
CARACTERISTICAS IDENTICAS.
NUNCA DESCONECTE EL PROTECTOR DE LA TOMA DE TIERRA.
LA POTENCIA DE SONIDO DE LOS ALTAVOCES CUANDO LOS NIVELES SON
ALTOS PUEDEN CAUSAR UN DAÑO PERMANENTE. USTED DEBERÁ POR
TANTO EVITAR LA EXPOSICIÓN DIRECTA A LOS ALTAVOCES CUANDO ESTOS
ESTÉN OPERANDO A UN NIVEL ALTO. PONGASE PROTECTORES DE OIDOS SI
DEBE DE ESTAR CONTINUAMENTE EXPUESTO.
SI EL PRODUCTO NO FUNCIONARA UNA VEZ SEGUIDAS TODAS LAS
INSTRUCCIONES, REMÍTALO AUN SERVICIO TÉCNICO CUALIFICADO.
LA OFICINA AMERICANA DE PROTECCIÓN DE LA SALUD HA ESPECIFICADO
LOS SIGUIENTES NIVELES ADMISIBLES DE EXPOSICIÓN DE RUIDO.
DURACIÓN POR DIA Y HORAS NIVEL DE SONIDO DBA BAJA RESPUESTA
8 90
6 92
4 95
3 97
2 100
1½ 102
1 105
½ 110
¼ ó Menos 115
CUALQUIER EXPOSICIÓN POR ENCIMA DE LOS LIMITES MENCIONADOS
PUEDEN PROVOCAR PERDIDAS AUDITIVAS.
LOS TAPONES PROTECTORES DEBEN DE SER UTILIZADOS CUANDO SE OPERE
ESTE SISTEMA DE AMPLIFICACIÓN PARA PREVENIR DE UNA PERMANENTE
PERDIDA DE OIDO SI LA EXPOSICIÓN ES EXCESIVA O ESTÁ POR ENCIMA DE
LOS LIMITES DESCRITOS ARRIBA. PARA PREVENIR CONTRA UNA EXPOSICIÓN
PELIGROSA A ALTOS NIVELES DE SONIDO SE RECOMIENDA A TODAS LAS
PERSONAS QUE PUEDAN ESTAR EXPUESTAS A NIVELES PRODUCIDOS POR
UN SISTEMA DE AMPLIFICACIÓN COMO ESTE QUE PROTEJAN SUS OIDOS
MIENTRAS LA UNIDAD ESTÁ EN FUNCIONAMIENTO.

3130
Español
Español
Introducción
Gracias por comprar este amplicador Blackstar HT Studio 20. Como todos
nuestros productos, este amplicador es el resultado de incontables horas de
meticulosa Investigación y Desarrollo por parte de nuestro prestigioso equipo de
diseño. Con base en Northampton (Reino Unido), todo el equipo de Blackstar
está compuesto precisamente por músicos experimentados y el único objetivo
del proceso de desarrollo es proporcionar a los guitarristas productos que sean lo
ultimo en herramientas de autoexpresión.
Todos los productos Blackstar están sujetos a extensas pruebas de laboratorio y
rodaje para asegurarnos que realmente están fuera de compromiso en términos de
abilidad, calidad y sobre todo, TONO.
El diseño altamente exible de dos canales del HT Studio 20 está equipado con
un control ISF (Innite Shape Feature) único y aunque dispone de un set de control
completo, sigue siendo intuitivo y fácil de usar. Te pedimos que leas rápidamente
esta guía con cuidado para asegurarte de que consigues el máximo rendimiento de
tu nuevo producto Blackstar.
Si te gusta lo que oyes y quieres saber más sobre la variedad de productos
Blackstar, visita nuestro sitio web www.blackstaramps.com
¡Gracias!
El equipo de Blackstar
Características
El HT Studio 20 es un amplicador muy versátil apto para una amplia variedad de
estilos y situaciones musicales.
El canal Clean proporciona una amplia gama de tonos limpios y moderadamente
saturados. La sonoridad es típica de muchos amplicadores estilo “boutique” conun
excelente rendimiento típico de Clase A. El carácter global puede ajustarse con
elcontrol de tono, desde oscuro y cálido hasta un sonido brillante y rico en agudos.
El canal Overdrive del HT Studio 20 se caracteriza por un tono de alta ganancia,
pero que carece del ‘burbujeo’ en agudos que a menudo encontramos en muchos
diseños similares. Esto es el resultado de una formación de preamplicador y etapa
de potencia únicas, que también benecian al músico con la manera en que la
distorsión rompe a medida que el volumen de la guitarra se reduce. Incluso en los
ajustes más extremos, el canal Overdrive sigue sonando natural.
El canal Overdrive del HT Studio 20 también tiene su propia ecualización altamente
exible, proporcionando una gran variedad de sonidos distorsionados. El control
ISF (Innite Shape Feature) patentado por Blackstar Amplication, representa un
gran paso adelante en la exibilidad de formación de tonos. El control ISF cambia la
respuesta de la red de ecualización entre una respuesta de tipo americana en uno
de sus ajustes y una respuesta de tipo británica en el otro. Es importante destacar
que entre los dos extremos podemos encontrar un innito número de ajustes de
tonos alternativos que no estarían disponibles normalmente.
El diseño de dos canales del HT Studio 20 ha sido optimizado para proporcionar
una distorsión de previo o etapa de potencia, o una combinación de ambas.
Un preamplicador cuidadosamente diseñado y una etapa de potencia de bias
por cátodo con una pareja de EL34 garantizan al usuario la habilidad de crear
espectaculares tonos valvulares. Desde una distorsión suave que se limpia a
medida que disminuye el volumen de la guitarra hasta una distorsión altamente
saturada, este amplicador puede con todo.
El HT Studio 20 cuenta también con una reverb digital que suena completamente
natural, la cual es excepcionalmente musical tanto en tonos limpios como saturados
y que eleva la cota de referencia en el diseño de reverb especíco de amplicadores
de guitarra.

3332
frecuencias medias, son especialmente importantes en la jación de la cantidad de
‘cuerpo’ que tiene tu tono. Con el control de medios ajustado en su posición mínima
(completamente en sentido antihorario) el sonido será agresivo y recogido, un tono
ideal para ritmos contundentes. Según aumenta el control de Medios (sentido
horario) la cantidad de ‘cuerpo’ aumenta, lo cual es más adecuado para tonos de
guitarra sostenidos.
10. Agudos
El control de agudos permite el ajuste exacto de las frecuencias altas en el sonido. En
ajustes bajos (sentido horario) el sonido será de carácter cálido y oscuro. Según se
aumenta el control de agudos (sentido horario) el sonido se vuelve más brillante. En
el ajuste máximo el sonido será agresivo y cortante.
11. ISF (Innite Shape Feature)
El control ISF funciona en conjunto con los controles de Graves, Medios y Agudos.
Te permite elegir la rma tonal exacta que preeras. Si se gira completamente en
sentido antihorario tiene un carácter más americano con un fondo nal apretado y
unos medios más agresivos, y girado completamente en sentido horario tiene un
carácter británico, que es más compacto y menos agresivo.
A diferencia de los controles convencionales ‘contorno’ y los sistemas de
ecualización paramétrica, los controles de Graves, Medios y Agudos interactuan
los unos con los otros igual que como en red de ecualización de guitarra tradicional.
Esto conduce a una respuesta muy familiar y musical.
12. Volumen maestro
El volumen maestro ajusta el volumen general del amplicador. Girarlo en sentido
horario aumenta el volumen.
13. Reverberación
El control de reverbn ajusta el nivel general del efecto de reverberación. Con el control
totalmente en sentido antihorario, no habrá de reverberación. Girando el control de
las agujas del reloj en sentido horario aumentará la cantidad de reverberación.
14. Luz de Indicador de Encendido
Se ilumina cuando el amplicador está conectado.
15. Power
Se utiliza este interruptor para conectar/desconectar el amplicador.
Panel frontal
1. Entrada
Conecta tu guitarra aquí. Use siempre un cable de guitarra apantallado de buena
calidad.
2. Volumen limpio
Controla el volumen del Clean Channel. Grarlo en sentido horario aumenta el
volumen. En ajustes más altos, el canal comienza a ser distorsionado, especialmente
con guitarras cuya salida sea más alta.
3. Tono limpio
El control de tono permite el ajuste del equilibrio entre las frecuencias de graves
y agudos en el sonido. En ajustes bajos (sentido anti-horario) el sonido será más
cálido y más oscuro en el carácter. Según el control de tono se gira en sentido
horario, el sonido se vuelve más brillante.
4. Indicador de superdirecta
Cuando se selecciona el canal Overdrive el LED ROJO está encendido. Cuando el
LED está apagado, el canal Clean estará seleccionado.
5. Selección de superdirecta
Presiona este interruptor para seleccionar el canal Overdrive.
NOTA: este interruptor debe estar dentro para que funcione el pedal.
6. Ganancia de Overdrive
El control de ganancia ajusta la cantidad de saturación o distorsión en el canal
Overdrive. Ajustes bajos, sentido anti-horario, ofrecerán un sonido limpio al borde
de la ruptura. Según aumenta el control de ganancia en sentido horario, el sonido
se hará más directo moviéndose a través de tonos más crujientes hasta que, en su
posición máxima, se obtiene un tono completamente distorsionado.
7. Volumen del Overdrive
Este control ajusta el volumen del canal Overdrive. Girarlo en sentido horario
aumenta el volumen.
8. Graves
El control de Medios ajusta la cantidad de frecuencias medias en tu sonido. Las
frecuencias medias, son especialmente importantes en la jación de la cantidad
de ‘cuerpo’ que tiene tu tono. Con el control de medios ajustado en su posición
mínima (completamente en sentido antihorario) el sonido será agresivo y recogido,
un tono ideal para ritmos contundentes. Según aumenta el control de Medios
(sentido horario) la cantidad de ‘cuerpo’ aumenta, lo cual es más adecuado para
tonos de guitarra sostenidos.
9. Medios
El control de Medios ajusta la cantidad de frecuencias medias en tu sonido. Las
Español
Español

3534
Panel posterior
1. Fusible de la toma de la red
El valor del fusible de la toma de la red se especica en el panel posterior. No
usesnunca un fusible del valor incorrecto ni intente puentearlo.
2. Entrada de la red
El cable de alimentación suministrado desmontable se conecta aquí. El cable sólo
debe conectarse a una toma de corriente que sea compatible con el voltaje, la
potencia y requisitos de frecuencia indicados en el panel posterior. En caso de
duda, consulte con un técnico cualicado.
3. Fusible H.T.
El valor del fusible H.T. se especica en el panel posterior. No use nunca un fusible
del valor incorrecto ni intente puentearlo.
4. Salidas del altavoz
La salida marcada ‘1x16 Ohm’ es para la conexión de
una única pantalla de extensión de 16 Ohm. (o el altavoz
interno del HT Studio 20 combo).
Las salidas marcadas con ‘1x8 Ohm o 2x16 Ohm’ son
para la conexión de una pantalla de extension de 8 Ohm o
dos pantallas de 16 Ohm. Además, el altavoz interno del
HT Studio 20 puede conectarse aquí si se utiliza con una pantalla de extensón de
16 Ohm de extensión. Ver tabla de abajo:
Salida ‘1x16 Ohm’ Salidas ‘1x8 Ohm o 2x16 Ohm’
Altavoz interno de 16 Ohm combo ✓ X X
Altavoz interno de 16 Ohm combo X ✓ ✓
más una extensión 16 ohm
Una extensión de 16 Ohm ✓ X X
Dos extensiones de 16 Ohm X ✓ ✓
Una extensión de 8 Ohm X ✓ X
ADVERTENCIA: La salida marcada como ‘1x16 Ohm’ no debe utilizarse nunca al
mismo tiempo que cualquiera de las salidas marcadas con ‘1x8 Ohm o 2x16 Ohm’.
No hacer coincidir correctamente la impedancia del amplicador y los altavoces
puede dañar el amplicador.
5. Salida emulada de altavoz
Este amplicador emula las características tonales de un altavoz de guitarra
y proporciona un sonido natural de distorsión a válvulas para conexión a un
dispositivo de grabación o mesa de mezclas. Utilice siempre un cable apantallado
de buena calidad.
NOTA: Para grabar ‘en silencio’, basta con poner el volumen principal a cero.
También puedes grabar desde esta salida sin tener un altavoz conectado, pero
asegúrate de que no hay conectado ningún cable de altavoz a ninguna de las
tomas de salida de altavoz del amplicador, puesto que ello afectarí al circuito de
protección de carga, causando daños al amplicador.
6. Retorno de bucle de efectos
Conecta la salida (mono) de una unidad externa de efectos aquí.
7. Envío del bucle de efectos
Conecta la entrada (mono) de una unidad externa de efectos aquí.
8. Nivel del bucle de efectos
El interruptor del nivel de bucle de efectos establece el nivel bucle de efectos a
+4dBV/-10dBV, lo cual le permite utilizarlo con cualquier equipo profesional (ajuste
+4 dBV), o con efectos a nivel de guitarra, como por ejemplo pedales externos
(ajuste -10dBV)..
9. Pedal
El pedal suministrado se conecta aquí. El pedal le permite cambiar entre el canal
Clean y Overdrive.
NOTA: el interruptor (5) Overdrive Select debe estar en la posición Overdrive para
que el pedal pueda funcionar.
Ficha técnica:
HT Studio 20 Combo
Potencia (RMS): 20 Watios
Válvulas: 2 x ECC83, 2 x EL34
Peso (kg): 19.2
Dimensiones (mm): 573 x 522 x 292
Pedal: FS-4 incluido
HT Studio 20 Head
Potencia (RMS): 20 Watios
Válvulas: 2 x ECC83, 2 x EL34
Peso (kg): 12.2
Dimensiones (mm): 517 x 281 x 279
Pedal: FS-4 incluido
Español
Español
US
AU
K

3736
Japanese
Japanese

3938
Japanese
Japanese
⼊๔㧍
ోߦ↪ߚߛߊߚߩ㊀ⷐߥ߅⍮ࠄߖޕ
⸥タߩᵈᗧ㗄ࠍචಽߦℂ⸃ߚߛߊߣߣ߽ߦޔ᧪ߦ߅ߡ߽ޔᧄขᛒ⺑ߩᦠߩ▤ޔ߅ࠃ߮
ᵈᗧ㗄ߩ෩ࠍ߅ߎߥࠊߥߌࠇ߫ߥࠅ߹ߖࠎޕ
ෂ㒾㧍ޓຠౝㇱߦߪ㜞㔚ㇱ߇ሽߒ߹ߔ
ຠᄖⵝࠤࠬࠍߌߥߢߊߛߐޕޓ࡙ࠩߦࠃࠆ឵߇⸵ߐࠇߡࠆㇱຠߪሽߒߡ߹
ߖࠎޕޓߔߴߡߩୃℂޔ߅ࠃ߮ࠕࡈ࠲ࠨࡆࠬߪޔᱜⷙߩࠨࡆࠬࡑࡦߦࠃߞߡ߅ߎߥࠊࠇ
ߥߌࠇ߫ߥࠅ߹ߖࠎޕ
ᱜߥᡷㅧߪޔBLACKSTAR AMPLIFICATION ␠ߦࠃߞߡ⏕ߦᱛߐࠇߡ߹ߔޕ
ຠㇱࠤࠬߩᾲⓣ㧔ࠬ࠶࠻㧕߆ࠄޔ߆ߥࠆ‛߽ຠౝㇱ߳ࠇߡߪߥࠅ߹ߖࠎޕ
㔎߿ޔ߆ߥࠆᶧޔ߹ߚߪ᳓ಽ㧔㜞Ḩᐲ㧕ߦߐࠄߐࠇߚ⁁ᴫߢߩ↪ࠍᱛߚߒ߹ߔ
BLACKSTAR␠ߦᛚߐࠇߚ㧭㧯ࠕ࠳ࡉ࠲㧔㔚Ḯࠕ࠳ࡊ࠲㧕ߩߺࠍ↪ߒߡߊߛߐޕ
߹ߚޔ↪ߒߥߣ߈ߪޔᔅߕ㔚Ḯࠦࡦࡦ࠻߆ࠄ㧭㧯ࠕ࠳ࡉ࠲ࠍᛮߡ߅ߡߊߛߐޕ
ߪߓߦ
BLACKSTAR ࡃ࡞ࡉࠛࡈࠚࠢ࠻ࠍ⾼ߚߛ߈ޔࠅ߇ߣ߁ߏߑ߹ߔޕߎߩຠߪޔઁߩᒰ␠ߩ
ຠห᭽ޔ⇇⊛ߦฬߥ⸳⸘࠴ࡓߦࠃࠅޔ㐳ᦼ㑆ߦࠊߚࠆᔀᐩߒߚ⎇ⓥޔ⺞ᩏࠍరߦ⸳⸘ߐࠇߡ
߹ߔޕ
ߔߴߡߩBLACKSTAR ຠߪޔຠ⾰ޔߣࠅࠊߌࠨ࠙ࡦ࠼ࠢࠝ࠹ࠖߦ߅ߡᅷදࠍߒߥߚޔᄙ
ߊߩᬌᩏᯏ㑐ߢߩ⹜㛎ޔ߅ࠃ߮ࡠ࠼࠹ࠬ࠻㧔ታ࠹ࠬ࠻㧕ࠍⴕߥߞߡ߹ߔޕޓ
ߐࠄߦઁߩBLACKSTARຠߦ㑐ߒߡ⥝߇ࠆ႐วߦߪޓࠗࡦ࠲ࡀ࠶࠻ߩࠨࠗ࠻ߦߗ߭ࠄߒߡ
ߊߛߐޕޓ
URL: www.blackstaramps.com
BLACKSTAR࠴ࡓࠃࠅᗵ⻢ࠍߎߡ
ߥ․ᓽ
HTDUALߪ⥄↱ᐲߩ㜞ᯏ⢻ࠍ߽ߞߚޓ㜞㔚⌀ⓨ▤࠺ࠖࠬ࠻࡚ࠪࡦߢߔޕ
࠴ࡖࡦࡀ࡞㧝ߩޓCLEAN,߅ࠃ߮CRUNCHޓࡕ࠼ࠬࠗ࠶࠴ߪޔࠢࡦࠨ࠙ࡦ࠼߆ࠄࠢࡦ࠴ࠨ࠙
ࡦ࠼߳ߩಾࠅᦧ߃ࠍታߒ߹ߔޕޓ࠴ࡖࡦࡀ࡞㧞ߢߪޔ߿߿ࡂࠗࠥࠗࡦߩࠢࡦ࠴ࠨ࠙ࡦ࠼߆ࠄࠃ
ࠅࡂࠗࠥࠗࡦߩ࠼ࠨ࠙ࡦ࠼߹ߢࠍࠅߔߎߣ߇ߢ߈߹ߔޕ
ޓ߹ߚޔᅷදߥߊ⸳⸘ߐࠇߚޓࠬࡇࠞࠛࡒࡘ࠲ജࠍ㍳㖸ᯏེߦ⋥ធធ⛯ߔࠇ߫ޔࠨ࠙ࡦ
࠼ࠢࠝ࠹ࠖࠍߘߎߥߊߎߣߥߊޔTAPE, CDߥߤߩ߳ߩ࠳ࠗࠢ࠻ࠦ࠺ࠖࡦࠣ߇น⢻ߢߔ
GPFQHYCTPKPIU
ߪߓߦ
$NCEMUVCT*65VWFKQࠕࡦࡊࡈࠔࠗࠕࠍ߅⾈ߍߚߛ߈ޔ⺈ߦࠅ߇ߣ߁ߏߑ
߹ߔޕ
ߎߩຠߪޔઁߩᒰ␠ߩຠห᭽ޔᚒޘߩ⇇⊛ߦ߽࠻࠶ࡊࡌ࡞ߩ⸳⸘࠴ࡓߦࠃࠅ
ޔ㐳ᦼ㑆ߦࠊߚࠆᔀᐩߒߚ⎇ⓥޔ⺞ᩏࠍరߦ⸳⸘ߒߡࠅ߹ߔޕ
⧷࿖ࡁࠩࡦࡊ࠻ࡦࠍὐߣߔࠆޔࡉ࠶ࠢࠬ࠲␠ߪోຬ߇ࡒࡘࠫࠪࡖࡦߣߒߡߩ
⚻㛎߇ࠅޔࠡ࠲ࠬ࠻ߩࡌࠬ࠻ࡄࡈࠜࡑࡦࠬࠍታߔࠆߚߩޟⓥᭂߩࠡ࠲࠷
࡞ޠࠍឭଏߔࠆߎߣࠍ໑৻ߩ⋡⊛ߣߒߡ߹ߔޕ
ోߡߩࡉ࠶ࠢࠬ࠲ຠߪޔຠ⾰ޔߣࠅࠊߌࠨ࠙ࡦ࠼ࠢࠝ࠹ࠖߦ߅ߡᅷදߖߕޔ
ᄙߊߩᬌᩏᯏ㑐ߢߩ⹜㛎ޔ߅ࠃ߮ࡠ࠼࠹ࠬ࠻㧔ታᣉ࠹ࠬ࠻㧕ࠍⴕߞߡ߹ߔޕ
*65VWFKQߪ㜞ᨵエᕈࠍᜬߟߟߩ࠴ࡖࡦࡀ࡞ߣ࡙࠾ࠢߥ+5(+PHKPKVG5JCRG
(GCVWTGࠦࡦ࠻ࡠ࡞ࠍ․ᓽߣߒᐢ▸࿐ߦ㖸ࠍࠦࡦ࠻ࡠ࡞ߢ߈ޔߒ߆߽ࠪࡦࡊ࡞ߦ
⋥ᗵ⊛ߦᠲߢ߈ࠆࠃ߁ߦߥߞߡ߹ߔޕࡉ࠶ࠢࠬ࠲ຠࠍᦨᄢ㒢ߦ↪ߒߡߚ
ߛߊߚߦޔߎߩࡂࡦ࠼ࡉ࠶ࠢࠍᵈᗧߊ߅⺒ߺߊߛߐޕ
ߐࠄߦ$NCEMUVCTຠߦ㑐ߒߡ⥝߇ࠆ႐วߪޔࠗࡦ࠲ࡀ࠶࠻ߩࠨࠗ࠻ࠍߏⷩߊߛߐ
ޕޓ74.YYYDNCEMUVCTCORUEQO
ࡉ࠶ࠢࠬ࠲࠴ࡓࠃࠅ
ߥ․ᓽ
*65VWFKQߪᐢ▸࿐ߥ↪ㅜ߿ࡊࠬ࠲ࠗ࡞ߦኻᔕߢ߈ࠆࡃࠨ࠲ࠗ࡞㧔ᨵエᕈ㧕
ߩࠆࠕࡦࡊߢߔޕ
%NGCP࠴ࡖࡦࡀ࡞ߪࡢࠗ࠼ࡦࠫߩࠢࡦ࠻ࡦߣࡑࠗ࡞࠼ߥࠝࡃ࠼ࠗࡉࠨ࠙
ࡦ࠼ࠍ↢ߺߔߎߣ߇ߢ߈߹ߔޕࡏࠗࠪࡦࠣߪࠢࠬ#࠲ࠗࡊߩ߈ࠄ߮߿߆ߥౖဳ⊛ߥ
ࡉ࠹ࠖ࠶ࠢ࠻ࡦߢߔޕోߩࠠࡖࠢ࠲ߪ࠻ࡦࠦࡦ࠻ࡠ࡞ߢᥧߊᥦ߆࠻
ࡦ߆ࠄࠆߊߪߓߌࠆࠃ߁ߥ࠻ࡦ߹ߢ⺞ᢛߢ߈߹ߔޕ
1XGTFTKXG࠴ࡖࡦࡀ࡞ߪࡂࠗࠥࠗࡦߥ࠻ࡦࠠࡖࠢ࠲ࠍᜬߚߖޔߐࠄߦห࠲ࠗࡊߩ
ࠕࡦࡊߦࠅ߇ߜߥ࠻࠶ࡊࠛࡦ࠼ߩ⡊㓚ࠅߥ㖸ࠍขࠅߞߡࠅ߹ߔޕࡊࠕࡦࡊߣ
ࡄࡢࠕࡦࡊߩ࡙࠾ࠢߥࠪࠚࠗࡇࡦࠣߦࠃࠅࠡ࠲ᧄߩࡏࡘࡓࠍ⛉ࠆߣࠝ
ࡃ࠼ࠗࡉࠍ߈ࠇߥࠢࡦ࠻ࡦߦߔࠆߎߣ߇ߢ߈߹ߔޕᭂ┵ߥ࠶࠹ࠖࡦࠣ
ࠍߒߡ߽ࠝࡃ࠼ࠗࡉ࠴ࡖࡦࡀ࡞ߪ⥄ὼߥࠨ࠙ࡦ࠼ࠍߟߎߣ߇ߢ߈ࠆߩߢߔޕ
߹ߚ1XGTFTKXG࠴ࡖࡦࡀ࡞ߦߪᨵエᕈߩࠆࠗࠦࠗࠩࠍタߒߡ߅ࠅޔࠄࠁࠆ
㖸ࠅ߇น⢻ߢߔޕߐࠄߦ․⸵↳⺧ߩ+5(ࠦࡦ࠻ࡠ࡞ߪࡉ࠶ࠢࠬ࠲⁛⥄ߩࠦࡦ
࠻ࡠ࡞ߢޔ࠻ࡦࠪࠚࠗࡊࠍ⥄↱ߦࠦࡦ࠻ࡠ࡞ߔࠆ߽ߩߣߒߡ㜞⹏ଔࠍᓧߡ
߹ߔޕ+5(ࠦࡦ࠻ࡠ࡞ߪߟߩ࠻ࡦࠦࡦ࠻ࡠ࡞ߣㅪേߒߡ߈ޔࡉ࠹ࠖ࠶ࠪࡘ
ࠨ࠙ࡦ࠼߆ࠄࠕࡔࠞࡦࠨ࠙ࡦ࠼߹ߢ⥄↱ߦࠦࡦ࠻ࡠ࡞ߢ߈߹ߔޕ㊀ⷐߥߩߪ߃
ࠆ࠻ࡦ߇ߎࠇࠄߩࠨ࠙ࡦ࠼ߩ㑆ߦή㒢ᄢߦሽߔࠆߎߣߥߩߢߔޕ
*65VWFKQߩߟߩ࠴ࡖࡦࡀ࡞ߪࡊࠕࡦࡊߣࡄࡢࠕࡦࡊߩߕࠇ߆ޔ߹ߚߪߘߩ
ᣇߩ⚵ߺวࠊߖࠍᦨᄢ㒢ߦ↢߆ߔࠃ߁࠺ࠩࠗࡦߐࠇߡ߹ߔޕᔨߦࡏࠗࠪࡦࠣߐ
ࠇߚࡊࠕࡦࡊߣࡄࡢࠕࡦࡊߩ'.ߩ⚵ߺวࠊߖߢߔ߫ࠄߒࡃ࡞ࡉ࠻ࡦࠍ↢ߺ
ߔߎߣ߇ߢ߈ࠆߩߢߔޕࠡ࠲ߩࡏࡘࡓߢᱡߺౕวࠍࠦࡦ࠻ࡠ࡞ߢ߈ޔ
ߋࠄߩࠝࡃ࠼ࠗࡉ߆ࠄࡈ࡞ߦᱡࠎߛ࠺ࠖࠬ࠻࡚ࠪࡦ߹ߢޔߎߩࠕࡦࡊߢో
ߡ߇ߢ߈ࠆߩߢߔޕ
ߐࠄߦᭂߡ⥄ὼߥࠨ࠙ࡦ࠼ࠍߟߊࠆ࠺ࠫ࠲࡞ࡃࡉ߽ⵝߒߡ߅ࠅޔࠢࡦ࠴ߢ
߽ࠢࡦ࠻ࡦߢ߽⟲ࠍᛮߡ⥄ὼߥ㗀߈ࠍࠅޔࠡ࠲ࠕࡦࡊߦ߅ߌࠆࡃࡉ
ߩၮḰࠍᒁ߈ߍࠆߎߣߦߥࠆߢߒࠂ߁ޕ
(TQPV2CPGN
+PRWV
ߎߎߦࠡ࠲߆ࠄߩࠤࡉ࡞ࠍᝌߒߡߊߛߐޕᏱߦ⦟⾰ߩࠤࡉ࡞ࠍ߹ߒࠂ
߁ޕ
%NGCP8QNWOG
%NGCP8QNWOGߢ%NGCP࠴ࡖࡦࡀ࡞ߩ㖸㊂ࠍ⺞▵ߒ߹ߔޕฝߦ࿁ߔߦᓥߞߡ㖸㊂߇Ⴧ߃߹
ߔޕฝߦᭂ┵ߦ࿁ߔߣࡊࠕࡦࡊߪࠝࡃ࠼ࠗࡉߒᆎߡౖဳ⊛ߥࡉ࠹ࠖ࠶ࠢ࠻
ࡦߦߥࠅ߹ߔޕ
%NGCP6QPG
㜞㖸ߣૐ㖸ߩࡃࡦࠬࠍ⺞▵ߒ߹ߔޕᏀ࿁ࠅߦ࿁ߒߚૐ࠶࠹ࠖࡦࠣߢ߆ߊ࠳
ࠢߥ㖸⦡ߦߥࠅ߹ߔޕฝߦ࿁ߔ߶ߤߦࠆ㖸⦡ߦߥࠅ߹ߔޕ
1XGTFTKXG+PFKECVQT
1XGTFTKXG࠴ࡖࡦࡀ࡞ࠍㆬᛯߔࠆߣ⿒⦡ߩ.'&߇ὐἮߒ߹ߔޕὐἮߒߡߥߣ߈ߪ
%NGCP࠴ࡖࡦࡀ࡞ߣߥࠅ߹ߔޕ
1XGTFTKXG5GNGEV
1XGTFTKXG࠴ࡖࡦࡀ࡞ࠍㆬᛯߔࠆ႐วޔߎߩࠬࠗ࠶࠴ࠍߒߡߊߛߐޕ
ᵈᗧ㧦ࡈ࠶࠻ࠬࠗ࠶࠴ࠍ↪ߔࠆ႐วޔߎߩࠬࠗ࠶࠴ߪࠗࡦߦߒߡߊߛߐޕ
1XGTFTKXG)CKP
1XGTFTKXG࠴ࡖࡦࡀ࡞ߩ࠼ࠗࡉߩ㊂ࠍࠦࡦ࠻ࡠ࡞ߒ߹ߔޕᏀߦ࿁ߒߚૐ࠶࠹
ࠖࡦࠣߢߪࠛ࠶ࠫߩലߚࠢࡦߥࠨ࠙ࡦ࠼ߢޔฝߦ࿁ߔߦᓥޔ࠼ࠗࡉ߇Ⴧߒ
ߚࠢࡦ࠴ߥ࠻ࡦߦߥࠅޔ࿁ߒ߈ߞߚࡐ࡚ࠫࠪࡦߢࡈ࡞ߦ࠺ࠖࠬ࠻࡚ࠪࡦߩല
ߚ࠻ࡦߦߥࠅ߹ߔޕ
1XGTFTKXG8QNWOG
1XGTFTKXG࠴ࡖࡦࡀ࡞ߩ㖸㊂ࠍࠦࡦ࠻ࡠ࡞ߒ߹ߔޕฝߦ࿁ߔ߶ߤᄢ߈ߊߥࠅ߹ߔޕ
$CUU
ૐၞࠍࠦࡦ࠻ࡠ࡞ߒ߹ߔޕߎߩࠕࡦࡊߪㅴᱠߒߚ࠻ࡦࠪࠚࠗࡊ࿁〝タߦࠃࠅᏀ
࿁ࠅᣇะߢ࠲ࠗ࠻ߥಾࠇ⦟ࠨ࠙ࡦ࠼ޔฝ࿁ࠅᣇะߦ߹ࠊߔߣᥦ߆ߺߩࠆߤߞߒ
ࠅߣߒߚ࠻ࡦߦߥࠅ߹ߔޕ
/KFFNG
ࡒ࠼࡞ࡦࠫࠍࠦࡦ࠻ࡠ࡞ߒ߹ߔޕࡒ࠼࡞ࡦࠫߪ․ߦ㖸⦡ࠍቯߔࠆ㊀ⷐߥࠦࡦ
࠻ࡠ࡞ߢߔޕࠦࡦ࠻ࡠ࡞ࠍᏀ࿁ࠅߦ࿁ߔߣࠨ࠙ࡦ࠼ߪࠕࠣ࠶ࠪࡉߦߥࠅޔ࠭
ࡓࡊߦߪᦨㆡߢߔޕࠦࡦ࠻ࡠ࡞ࠍฝߦ࿁ߔߦᓥࡏ࠺ࠖᗵ߇ᒝ⺞ߐࠇࠨࠬ࠹ࠗ
ࡦߩࠆ࠼ࠡ࠲ߦߪᦨㆡߩ࠻ࡦߦߥࠅ߹ߔޕ
6TGDNG
㜞ၞࠍࠦࡦ࠻ࡠ࡞ߒ߹ߔޕᏀ࿁ࠅᣇะߢ࠙ࠜࡓߥࠨ࠙ࡦ࠼ߦߥࠅޔฝߦ࿁ߔߦᓥ
ߞߡࠆߐ߇Ⴧߒߡ߈߹ߔޕฝߦ࿁ߒ߈ߞߚ࠶࠹ࠖࡦࠣߢߪࠕࠣࠪ࠶ࡉߢಾࠇ
ߩࠆࠨ࠙ࡦ࠼ߦߥࠅ߹ߔޕ
+5(+PHKPKVG5JCRG(GCVWTG
+5(ߪࡌࠬޔࡒ࠼࡞ޔ࠻ࡉ࡞ߣㅪേߒߡ߈ޔ⥄ಽ⁛⥄ߩ㖸⦡ࠍㆬ߱ߎߣ߇᧪߹
ߔޕᏀߦ࿁ߒ߈ߞߚ⟎ߢ࠲ࠗ࠻ߥࡏ࠻ࡓࠛࡦ࠼ߣࠕࠣ࠶ࠪࡉߥࡒ࠼࡞ߩࡕ࠳ࡦߥ
ࠕࡔࠞࡦࠨ࠙ࡦ࠼ޔฝߦ࿁ߒ߈ࠆߣࠃࠅ▫㡆ࠅᗵߩࠆࡉ࠹ࠖ࠶ࠪࡘࠨ࠙ࡦ࠼ߦ
ߥࠅ߹ߔޕ
ᓥ᧪ߩࠦࡦ࠷ࠕ߿ࡄࡔ࠻࠶ࠢ'3ߣ⇣ߥࠅޔࡌࠬޔࡒ࠼࡞ޔ࠻ࡉ࡞ࠦࡦ࠻ࡠ
࡞ߪ࠻࠺࡚ࠖࠪ࠽࡞ߥࠕࡦࡊߩࠃ߁ߦലᨐ⊛ߦ߈߹ߔޕ
/CUVGT8QNWOG
ࠕࡦࡊ߆ࠄࠆ㖸㊂ࠍ⺞ᢛߒ߹ߔޕฝߦ࿁ߔߦᓥᄢ߈ߊߥࠅ߹ߔޕ
4GXGTD
4GXGTDࠦࡦ࠻ࡠ࡞ߢోߩࡃࡉ㊂ࠍ⺞▵ߒ߹ߔޕᏀߦ࿁ߒ߈ࠆߣࡃࡉലᨐ
ߪήߊߥࠅ߹ߔޕฝߦ࿁ߒߡߊߣലᨐ߇Ⴧടߒ߹ߔޕ
2QYGT+PFKECVQT.KIJV
ࠕࡦࡊߩ㔚Ḯࠬࠗ࠶࠴ࠍࠝࡦߦߔࠆߣὐἮߒ߹ߔޕ
2QYGT
ࠕࡦࡊߩ㔚Ḯࠬࠗ࠶࠴ߢߔޕ
4GCT2CPGN
/CKP(WUG
ࡔࠗࡦࡅࡘ࠭ߩ୯ߪࠕࡄࡀ࡞ߦ⸥タߒߡ߹ߔޕᱜߒߊߥࡅࡘ࠭ߩ↪߿ޔ
ࡃࠗࡄࠬߐߖࠆߎߣߪ⛘ኻߦߒߥߢߊߛߐޕ
/CKPU+PRWV
㔚Ḯࠦ࠼ࠍߎߎߦⵝ⌕ߒ߹ߔޕࠕࡄࡀ࡞ߦ⸥タߐࠇߡࠆᚲቯߩ㔚ޔᵄᢙࠍ
ḩߚߒߚࠦࡦࡦ࠻ߦࠇࠆࠃ߁ߦߒߡߊߛߐޕߥ႐วߪޔ⾗ᩰߩࠆᛛⴚ⠪
߆ࠄࠕ࠼ࡃࠗࠬࠍᓧߡߊߛߐޕ
*6(WUG
*6ࡅࡘ࠭ߩ୯ߪࠕࡄࡀ࡞ߦ⸥タߒߡ߹ߔޕᱜߒߊߥࡅࡘ࠭ߩ↪߿ޔࡃࠗ
ࡄࠬߐߖࠆߎߣߪ⛘ኻߦߒߥߢߊߛߐޕ
5RGCMGT1WVRWVU
ޟ1JOޠࠕ࠙࠻ࡊ࠶࠻ߪ㧝บߩ1JOᄖㇱࠬࡇࠞࠠࡖࡆࡀ࠶࠻↪ߢߔޕ
㧔*65VWFKQEQODQߩౝ⬿ࠬࡇࠞߪߎߎߦធ⛯ߒߡߊߛߐ㧕
ޟ1JO߹ߚߪ1JOޠࠕ࠙࠻ࡊ࠶࠻ߪ㧝บߩ1JOᄖㇱࠬࡇࠞࠠࡖࡆࡀ࠶
࠻߹ߚߪบߩ1JOᄖㇱࠠࡖࡆࡀ࠶࠻↪ߢߔޕ߹ߚౝ⬿ࠬࡇࠞߣ㧝บߩ1JOᄖ
ㇱࠬࡇࠞࠠࡖࡆࡀ࠶࠻ࠍหᤨߦ↪ߔࠆ႐วߪߟଏߎߎߦធ⛯ߒߡߊߛߐޕ
⼊๔㧦ޓޟ1JOޠࠕ࠙࠻ࡊ࠶࠻ߪޟ㧝1JOQT1JOޠߣߪหᤨߦ⛘ኻߦ
↪ߒߥߢߐޕᱜߒࠗࡦࡇ࠳ࡦࠬࡑ࠶࠴ࡦࠣࠍᕃߞߚធ⛯ߪࠕࡦࡊࠍ㓚
ߐߖࠆߎߣ߇ࠅ߹ߔޕ
5RGCMGT'OWNCVGF1WVRWV
ࠦ࠺ࠖࡦࠣ߿ࡒࠠࠨធ⛯↪ߩࡃ࡞ࡉࠝࡃ࠼ࠗࡉ࠻ࡦߢࠬࡇࠞ
ࠠࡖࡆࡀ࠶࠻߆ࠄߩ㖸ࠍࠪࡒࡘ࠻ߒߚࠕ࠙࠻ࡊ࠶࠻ߢߔޕ⦟⾰ߩࠤࡉ࡞ࠍ↪
ߒߡߊߛߐޕ
ᵈᗧ㧦ޓޟ㕒߆ߥޠࠦ࠺ࠖࡦࠣߩߚߦߪࡑࠬ࠲ࡏࡘࡓࠍࡠߦߒߡߊߛ
ߐޕࠬࡇࠞߦធ⛯ߖߕߦ5RGCMGT'OWNCVGF1WVRWV߆ࠄࠦ࠺ࠖࡦࠣߔࠆߎߣ
߽ߢ߈߹ߔޕૉߒࠬࡇࠞ߆ࠄߩࠤࡉ࡞߇ࠕࡦࡊᧄߩࠬࡇࠞࠕ࠙࠻ߦធ⛯
ߐࠇߡߥߎߣࠍ⏕ߒߡߊߛߐޕ⽶⩄⼔࿁〝ߦ⽶ᜂ߇߆߆ࠅࠕࡦࡊ㓚ߩේ
࿃ߣߥࠅ߹ߔޕ
'HHGEV.QQR4GVWTP
ᄖㇱࠛࡈࠚࠢ࠲ߩ㧔ࡕࡁ࡞㧕ࠕ࠙࠻ߣធ⛯ߒ߹ߔޕ
'HHGEV.QQR5GPF
ᄖㇱࠛࡈࠚࠢ࠲ߩ㧔ࡕࡁ࡞㧕ࠗࡦߣធ⛯ߒ߹ߔޕ
'HHGEV.QQR.GXGN
ࠛࡈࠚࠢ࠻࡞ࡊߩࡌ࡞ࠍF$8߆F$8ߦಾࠅᦧ߃߹ߔޕᄙߊߩ႐วޔ࠶ࠢᑼࠛ
ࡈࠚࠢ࠲ࠍធ⛯ߔࠆ႐วߪF$8ޔࡍ࠳࡞ᑼࠛࡈࠚࠢ࠲ߪF$8ߢߔޕ
(QQVUYKVEJ
ઃዻߩࡈ࠶࠻ࠬࠗ࠶࠴ࠍߎߎߦធ⛯ߒޔ%NGCPߣ1XGTFTKXGߩ࠴ࡖࡦࡀ࡞ㆬᛯ߇ߢ߈߹
ߔޕ
ᵈᗧ㧦1XGTFTKXGࠬࠗ࠶࠴㧔㧕ߪࡈ࠶࠻ࠬࠗ࠶࠴߇േߢ߈ࠆࠃ߁ߦࠗࡦࡐ࡚ࠫࠪ
ࡦߦߒߡߐޕ
6GEJPKECN5RGEKHKECVKQP
*65VWFKQ%QODQ
2QYGT4/59CVVU
8CNXGUZ'%%Z'.
9GKIJVMI
&KOGPUKQPUOOZZ
(QQVUYKVEJ(5UWRRNKGF
*65VWFKQ*GCF
2QYGT4/59CVVU
8CNXGUZ'%%Z'.
9GKIJVMI
&KOGPUKQPUOOZZ
(QQVUYKVEJ(5UWRRNKGF
Other manuals for HT Studio 20 Combo
1
This manual suits for next models
1
Table of contents
Languages:
Other BLACK STAR Musical Instrument Amplifier manuals
BLACK STAR
BLACK STAR HT-5 User manual
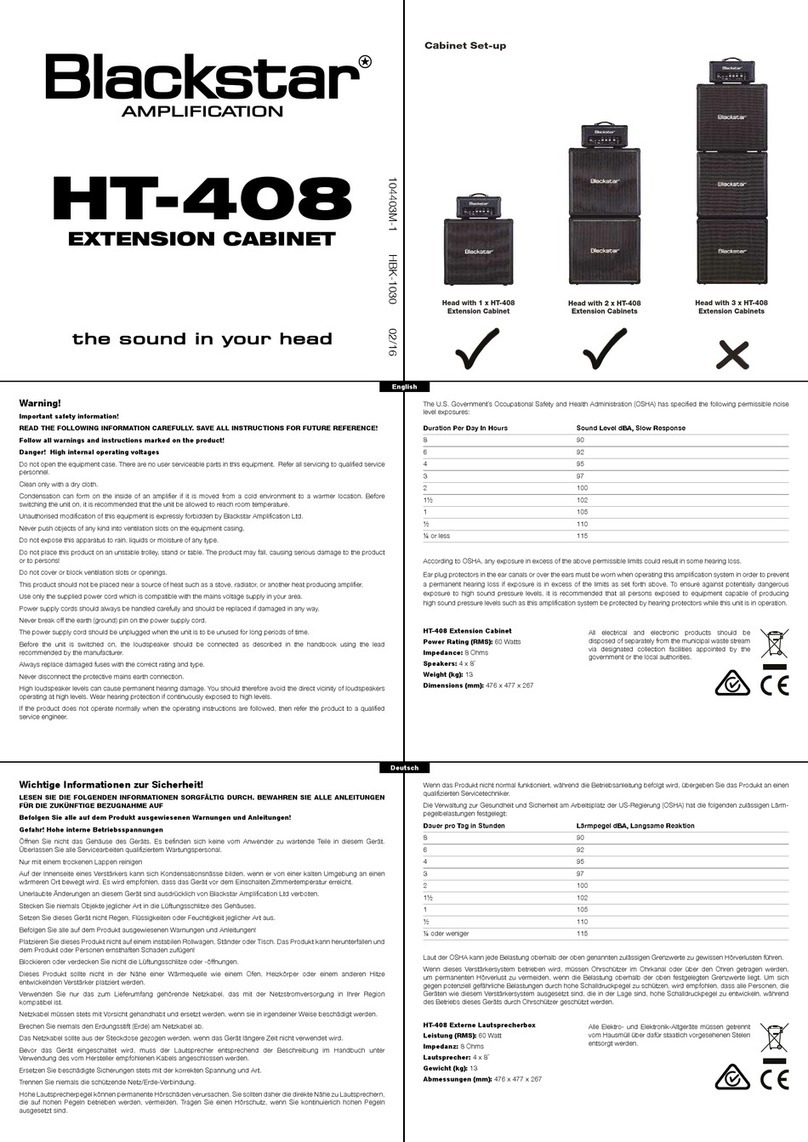
BLACK STAR
BLACK STAR HT-408 User manual

BLACK STAR
BLACK STAR HT METAL 1 User manual
BLACK STAR
BLACK STAR S1-100 User manual

BLACK STAR
BLACK STAR ID:15TVP User manual

BLACK STAR
BLACK STAR S1-104EL34 User manual
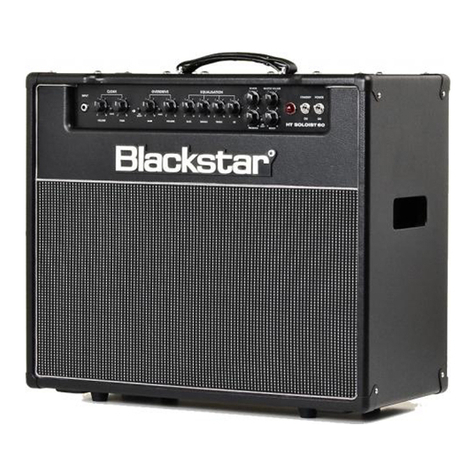
BLACK STAR
BLACK STAR HT Soloist 60 User manual
BLACK STAR
BLACK STAR Artisan 30H User manual
BLACK STAR
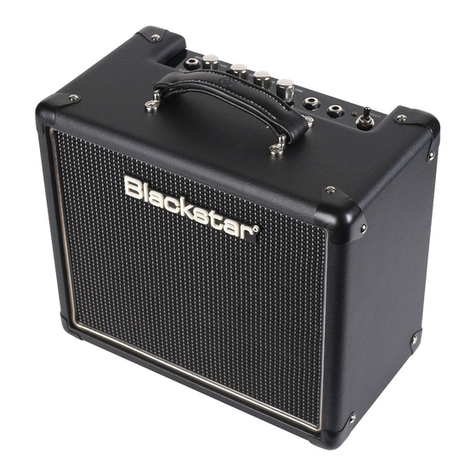
BLACK STAR HT-1 User manual

BLACK STAR
BLACK STAR FLY 3 User manual

