S
H
O
R
T
L
O
N
G
LR
Elementos principales
• Amplificador de guitarra sofisticado con una simulación que existe gracias a la tecnología
VCM original de Yamaha
• THR30IIA Wireless es compatible con el transmisor inalámbrico Relay G10T de Line 6.
(se vende por separado)
• La funcionalidad de Bluetooth® permite tocar música desde un dispositivo inteligente
• La batería recargable integrada permite utilizar el producto sin adaptador de CA
Especificaciones
* Para conocer más detalles del producto, descargue el manual de referencia de THR30IIA Wireless del
sitio web especial: https://download.yamaha.com/
Alimentación
Los THR30IIA Wireless pueden funcionar con alimentación de CC (por medio del adaptador
de CA) o con la batería recargable integrada.
Cuando se utilice el adaptador de CA
Conecte el adaptador de CA incluido a la toma DC IN situada en la parte posterior del THR30IIA
Wireless. Conecte la toma de CA a un enchufe.
* Siga las instrucciones de seguridad antes de establecer las conexiones.
Encendido y apagado
Pulse el botón de encendido [ ] en la parte superior del THR30IIA Wireless durante un
segundo para encender el equipo. El LED del botón de alimentación se ilumina al activar el
botón de encendido. El LED del THR30IIA Wireless se ilumina en color verde durante la
carga. Si no, se ilumina en color rojo.
Carga de la batería recargable integrada
Conecte el adaptador de CA incluido a la toma DC IN situada en la parte posterior del
THR30IIA Wireless. El LED del botón de encendido se ilumina en color verde durante la carga.
Conexión
Puede conectarlo con un cable estándar del instrumento o con el Relay G10T de Line 6.
Conexión inalámbrica con la guitarra
El THR30IIA Wireless puede conectarse con el Relay G10T de forma inalámbrica. El canal
óptimo se configura automáticamente al conectar el Relay G10T en la toma INPUT situada en
la parte superior del THR30IIA Wireless durante al menos 10 segundos. Para obtener infor-
mación detallada sobre la conexión inalámbrica, consulte el manual de referencia.
Conexión al micrófono y al instrumento musical electrónico
El THR30IIA Wireless puede conectarse con un micrófono y con un instrumento musical
electrónico por cable. Para obtener información detallada, consulte el manual de referencia.
Carga del Relay G10T
Conecte el Relay G10T a la toma INPUT situada en la parte superior del THR30IIA Wireless.
La batería recargable integrada empieza a cargarse automáticamente.
Conexión a un dispositivo inteligente mediante Bluetooth
Pulse el botón Bluetooth situado en la parte superior del THR30IIA Wireless y utilice el dis-
positivo inteligente del modo indicado en la tabla siguiente.
* Para obtener información detallada sobre la configuración de Bluetooth, consulte el manual del disposi-
tivo inteligente.
Encendido y apagado del afinador
Pulse el botón TUNER TAP durante un segundo para encender el afinador. Vuelva a pulsar el
botón TUNER TAP para apagarlo. Para obtener información detallada, consulte el manual de
referencia.
Guardado de los ajustes de usuario
Los ajustes de los mandos de la parte superior del THR30IIA Wireless (a excepción de los
mandos [VOLUME] y [MIC/ INST VOLUME]) se guardan en la memoria de usuario. Pulse
uno de los botones [USER MEMORY] durante 2 segundos para guardar los ajustes en esa
posición predefinida. Consulte en el manual de referencia información detallada de la memo-
ria de usuario.
Aplicaciones
También puede editar el tono y los ajustes del THR30IIA Wireless con la aplicación THR
Remote. La THR Remote se puede usar (además de los controles del panel superior) para
editar ajustes tales como el compresor.
Para Windows y Mac, descargue e instale THR Remote desde el sitio web especial:
https://download.yamaha.com/
Para Android e iOS, instale THR Remote en la tienda de aplicaciones correspondiente.
Para obtener información detallada sobre el uso del THR30IIA Wireless con un ordenador, con-
sulte el manual de referencia.
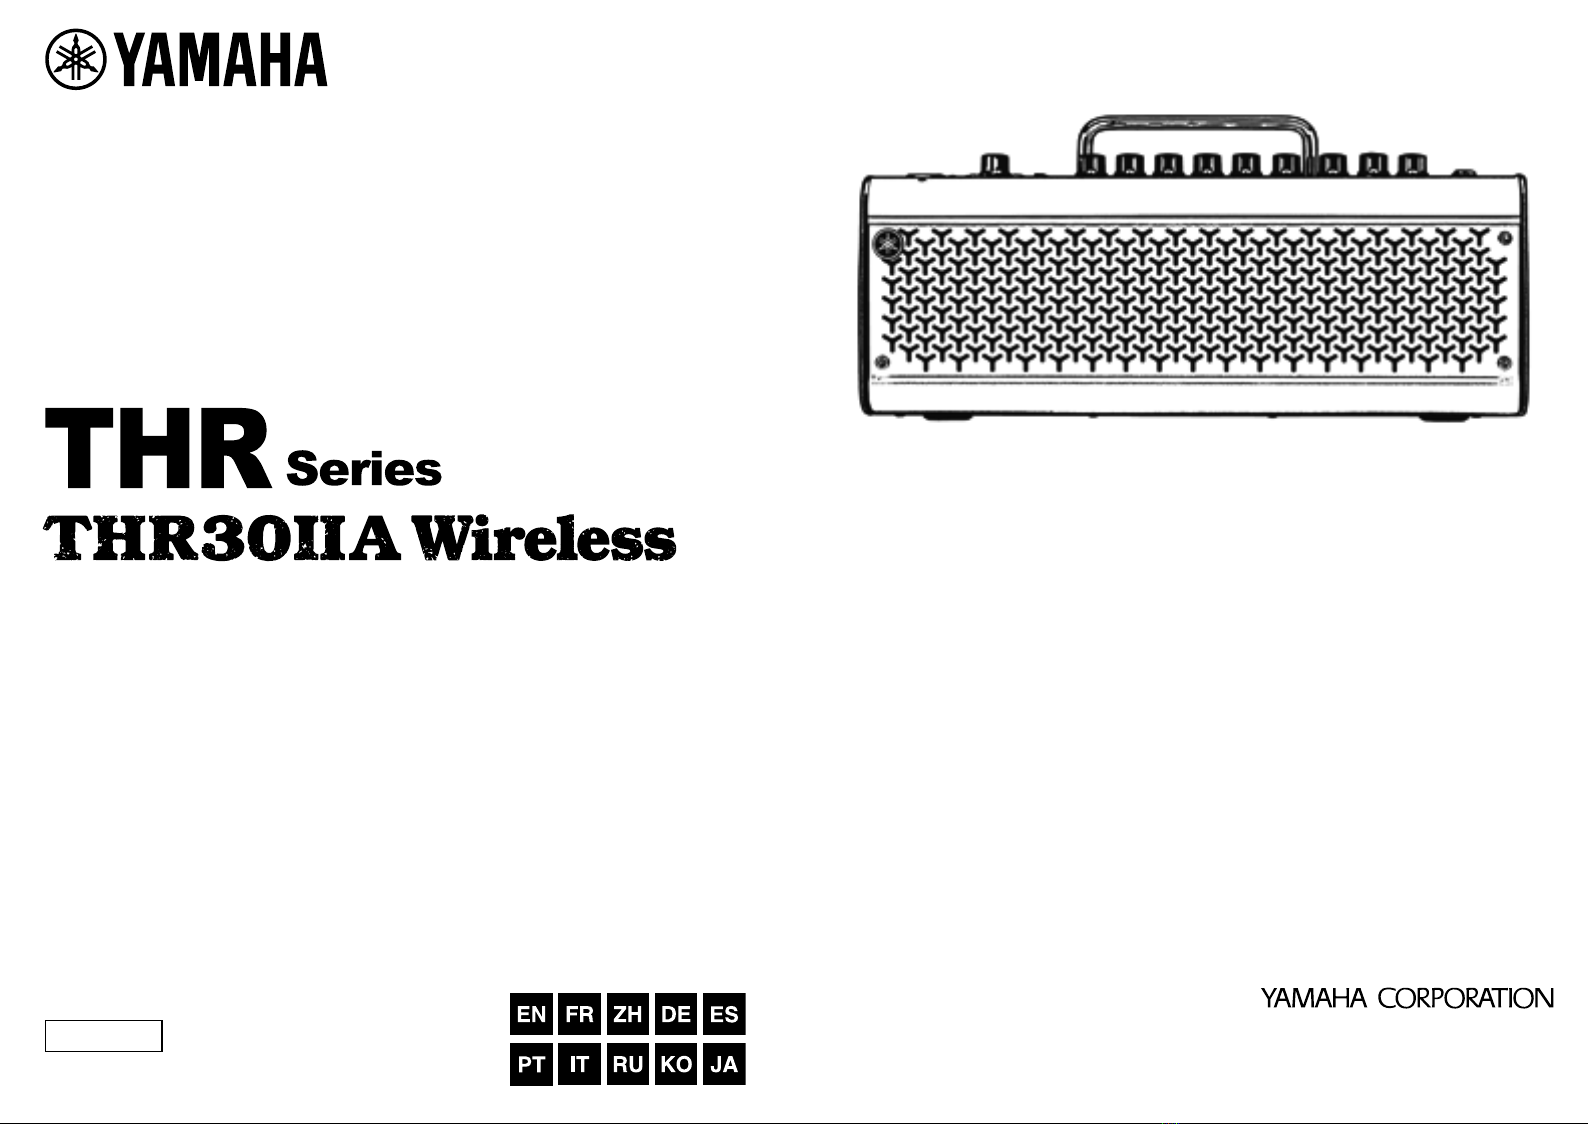
Dimensiones (An x Al x P) 420 x 195 x 155 mm
Peso 4,4 kg
Consumo de energía 22 W
Salida nominal 30 W (15 W + 15 W)
Fuente de alimentación Adaptador de CA o batería recargable integrada
Acessórios
• Adaptador de CA (YNT345-1530)
• Guía rápida (esta ficha)
• Ficha de instrucciones de seguridad: Incluye PRECAUCIONES y
AVISO. Léalos atentamente antes de continuar.
• Lista de sucursales del servicio técnico
• Información para descargar Cubase AI: Incluye un código de
acceso para descargar el software DAW de Steinberg Cubase AI.
Consulte en el manual de referencia las instrucciones de des-
carga, instalación y configuración.
Temperatura de carga 5 – 35 °C
Toma DC IN
Enchufe
Toma de CC
Adaptador de CA
(incluido)
LED Operación
LED después de la
operación
Estado
Apagado Pulsar durante tres segundos Parpadea en
color verde Modo de empa-
rejamiento
Parpadea en
color verde Configurar Bluetooth en el dispositivo
inteligente en los tres minutos siguientes Se ilumina en
color verde Conectado
Se ilumina en
color verde Tocar música en el dispositivo inteligente Se ilumina en
color verde Conectado
S
H
O
R
T
L
O
N
G
LR
S
H
O
R
T
L
O
N
G
LR
Hauptmerkmale
• Anspruchsvoller Gitarrenverstärker mit Modeling durch Original VCM-Technologie von
Yamaha
• THR30IIA Wireless ist kompatibel mit dem drahtlosen Gitarrensender Relay G10T von
Line 6 (separat erhältlich)
• Bluetooth®-Funktion ermöglicht das Abspielen von Musik von einem Smart Device
• Eingebauter Akku ermöglicht den Gebrauch ohne Netzadapter
Beschreibung
* Für weitere Produktinformationen laden Sie bitte das Referenzhandbuch THR30IIA Wireless auf unserer
Internetseite herunter: https://download.yamaha.com/
Strom
Der THR30IIA Wireless kann entweder mit Gleichstrom (über den Netzadapter) oder mit dem
eingebauten Akku betrieben werden.
Benutzen des Netzadapters
Stecken Sie den mitgelieferten Netzadapter in die Gleichstrom-Eingangsbuchse IN auf der Rück-
seite des THR30IIA Wireless. Stecken Sie den Wechselstrom-Stecker in eine Steckdose ein.
* Beachten Sie vor dem Anschließen die Sicherheitshinweise.
Ein- und Ausschalten der Netzspannung
Drücken Sie eine Sekunde lang den An/Aus-Schalter [ ] auf der Oberseite des THR30IIA
Wireless, um das Gerät einzuschalten. Die LED des An/Aus-Schalters leuchtet beim Einschal-
ten auf. Die LED des THR30IIA Wireless leuchtet beim Laden grün. Andernfalls leuchtet sie rot.
Aufladen des eingebauter Akkus
Stecken Sie den mitgelieferten Netzadapter in die Gleichstrom-Eingangsbuchse IN auf der
Rückseite des THR30IIA Wireless. Die LED des An/Aus-Schalters leuchtet beim Laden grün.
Anschluss
Sie können das Gerät an ein herkömmliches Instrumentenkabel oder an den Relay G10T von
Line 6 anschließen.
Drahtlose Verbindung mit einer Gitarre
Sie können den THR30IIA Wireless drahtlos mit dem Relay G10T verbinden. Der optimale
Kanal wird automatisch eingestellt, indem Sie den Relay G10T mindestens 10 Sekunden an
die INPUT-Buchse auf der Oberseite des THR30IIA Wireless anschließen. Einzelheiten zum
drahtlosen Anschluss finden Sie im Referenzhandbuch.
Verbindung mit einem Mikrofon und elektronischen Musikinstrumenten
Sie können den THR30IIA Wireless über Kabel an ein Mikrofon oder elektronische Musikins-
trumente anschließen. Einzelheiten finden Sie im Referenzhandbuch.
Aufladen des Relay G10T
Schließen Sie den Relay G10T an die INPUT-Buchse auf der Oberseite des THR30IIA Wire-
less an. Der eingebaute Akku beginnt automatisch mit dem Laden.
Anschließen an ein Smart Device über Bluetooth
Drücken Sie den Bluetooth-Knopf auf der Oberseite des THR30IIA Wireless und bedienen Sie das
Smart Device wie in der nachstehenden Tabelle angegeben.
* Nähere Informationen zum Konfigurieren des Bluetooth finden Sie in der Bedienungsanleitung des
Smart Device.
Ein- und Ausschalten des Tuners
Drücken Sie den TUNER TAP-Knopf eine Sekunde lang, um das Gerät einzuschalten. Drücken
Sie den TUNER TAP-Knopf noch einmal, um das Gerät auszuschalten. Einzelheiten finden Sie
im Referenzhandbuch.
Speichern der Benutzereinstellungen
Die Einstellungen für die Knöpfe auf der Oberseite des THR30IIA Wireless (mit Ausnahme
der [VOLUME]- und [MIC/INST VOLUME]-Knöpfe) werden im Anwenderspeicher abgespei-
chert. Drücken Sie zwei Sekunden lang einen der [USER MEMORY]-Knöpfe, um Ihre Einstel-
lungen am voreingestellten Speicherort zu sichern. Nähere Informationen zum
Anwenderspeicher finden Sie im Referenzhandbuch.
Anwendungssoftware
Klangfarbe und Einstellungen des THR30IIA Wireless können auch mit der THR Remote-App
bearbeitet werden. THR Remote kann (zusätzlich zu den oberseitigen Bedieneinheiten) zur Bear-
beitung der Einstellungen z. B. des Kompressors genutzt werden.
Für Windows und Mac: Laden Sie THR Remote von unserer Internet-Seite herunter und
installieren Sie die App: https://download.yamaha.com/
Für Android und iOS: Installieren Sie THR Remote aus dem entsprechenden App Store.
Nähere Informationen zur Nutzung des THR30IIA Wireless mit einem Computer finden Sie
im Referenzhandbuch.
Maße (B x H x T) 420 x 195 x 155 mm
Gewicht 4,4 kg
Stromverbrauch 22 W
Nennleistung 30 W (15 W + 15 W)
Stromquelle Netzadapter oder eingebauter Akku
Zubehör
• Netzadapter (YNT345-1530)
• Kurzanleitung (vorliegendes Blatt)
• Sicherheitshinweise: Enthält VORSICHTSMASSNAHMEN und
HINWEISE. Bitte vor Gebrauch sorgfältig durchlesen.
• Liste der Servicestellen
• Cubase AI Download-Informationen: Enthält einen Zugangscode
zum Herunterladen der DAW-Software „Cubase AI“ von Stein-
berg. Die Anleitung für das Herunterladen, Installieren und Konfi-
gurieren finden Sie im Referenzhandbuch.
Ladetemperatur 5 – 35 °C
Gleichstrom-Ein-
gangsbuchse IN Netzsteck-
dose
Gleichstromstecker
Netzadapter
(mitgeliefert)
LED Betrieb
LED nach Betrieb
Zustand
Unbeleuchtet Drücken Sie drei Sekunden lang Blinkt grün
Pairing-Modus
Blinkt grün
Konfigurieren Sie das Bluetooth am
Smart Device innerhalb drei Minuten
Leuchtet grün Verbindung
hergestellt
Leuchtet grün Spielen Sie Musik auf dem Smart
Device ab. Leuchtet grün Verbindung
hergestellt
Caractéristiques principales
• Amplificateur pour guitare sophistiqué avec technique de modélisation disponible grâce à
la technologie VCM originale de Yamaha
• Les modèles THR30IIA Wireless sont compatibles avec le transmetteur sans fil Line 6
Relay G10T (vendu séparément)
• Fonctionnalité Bluetooth® permettant d'écouter de la musique depuis un appareil intelligent
• Batterie rechargeable intégrée permettant une utilisation sans adaptateur secteur.
Caractéristiques techniques
* Pour plus d'informations sur le produit, téléchargez le Manuel de référence de l'amplificateur THR30IIA
Wireless sur le site Web : https://download.yamaha.com/
Alimentation
L'amplificateur THR30IIA Wireless fonctionne sur le secteur (par l'intermédiaire d'un adapta-
teur secteur) ou avec la batterie rechargeable intégrée.
Lors de l'utilisation de l'adaptateur secteur
Connectez l’adaptateur secteur fourni à la prise DC IN située sur la face arrière du THR30IIA
Wireless. Branchez la prise secteur sur une fiche secteur.
* Suivez les instructions de sécurité avant tout branchement.
Mise sous tension et hors tension
Mettez l'amplificateur sous tension en appuyant pendant une seconde sur le bouton d'alimenta-
tion [ ] situé dans la partie supérieure du THR30IIA Wireless. Le voyant du bouton d'alimenta-
tion s'allume lorsque vous mettez l'amplificateur sous tension. Le voyant LED du THR30IIA
Wireless s'allume en vert pendant la charge. Dans les autres cas, il s'allume en rouge.
Chargement de la batterie intégrée
Connectez l’adaptateur secteur fourni à la prise DC IN située sur la face arrière du THR30IIA
Wireless. Le voyant du bouton d'alimentation s'allume en vert pendant la charge.
Connexion
Vous pouvez établir la connexion à l'aide d'un câble d'instrument standard ou du transmet-
teur Line 6 Relay G10T.
Connexion sans fil à la guitare
Le THR30IIA Wireless peut être connecté par liaison sans fil à l'aide du Relay G10T. Le canal
optimal est automatiquement défini lorsque vous connectez le transmetteur Relay G10T à la
prise INPUT située dans la partie supérieure de l'amplificateur THR30IIA Wireless pendant
au moins 10 secondes. Pour plus de détails sur la connexion sans fil, reportez-vous au
Manuel de référence.
Connexion au microphone et à l'instrument musical électronique
L'amplificateur THR30IIA Wireless peut se connecter par câble à un microphone et à un ins-
trument musical électronique. Pour plus de détails, reportez-vous au Manuel de référence.
Chargement du transmetteur Relay G10T
Connectez le transmetteur Relay G10T à la prise INPUT située dans la partie supérieure de
l'amplificateur THR30IIA Wireless. La batterie rechargeable intégrée commence à se rechar-
ger automatiquement.
Connexion à un appareil intelligent par Bluetooth
Appuyez sur le bouton Bluetooth situé dans la partie supérieure du THR30IIA Wireless et uti-
lisez l'appareil intelligent en suivant les indications du tableau ci-dessous.
*
Pour plus d'informations sur la configuration du Bluetooth, reportez-vous au manuel de l'appareil intelligent.
Activation et désactivation du tuner
Appuyez pendant une seconde sur le bouton TUNER TAP pour activer le tuner. Appuyez de
nouveau sur le bouton TUNER TAP pour désactiver le tuner. Pour plus de détails, reportez-
vous au Manuel de référence.
Stockage des réglages utilisateur
Les réglages des boutons qui se trouvent dans la partie supérieure du THR30IIA Wireless (à
l'exception des boutons [VOLUME] et [MIC/INST VOLUME]) sont stockés dans la mémoire
utilisateur. Appuyez sur l'un des boutons [USER MEMORY] pendant 2 secondes afin d'enre-
gistrer vos paramètres dans cet emplacement prédéfini. Pour plus de détails sur la mémoire
utilisateur, reportez-vous au Manuel de référence.
Application
Vous pouvez également modifier le son et les réglages du THR30IIA Wireless grâce à l'appli-
cation THR Remote. L'utilisation de l'application THR Remote (en plus des commandes du
panneau supérieur) permet de modifier les réglages, notamment du compresseur.
Pour Windows et Mac, téléchargez et installez THR Remote depuis ce site Web :
https://download.yamaha.com/
Pour Android et iOS,
installez THR Remote à l'aide du magasin d'applications approprié.
Pour plus de détails sur l'utilisation du THR30IIA Wireless avec un ordinateur, reportez-vous
au Manuel de référence.
Dimensions (l x h x p) 420 x 195 x 155 mm
Poids 4,4 kg
Consommation d'énergie 22 W
Puissance nominale 30 W (15 W + 15 W)
Source d'alimentation Adaptateur secteur ou batterie rechargeable intégrée
Accessoires
• Adaptateur secteur (YNT345-1530)
• Guide de référence rapide (la présente fiche)
• Fiche d'instructions de sécurité : Comprend des PRÉCAUTIONS
D'USAGE et un AVIS. À lire attentivement avant toute manipulation.
• Liste des bureaux de service clientèle
• Informations sur le téléchargement de Cubase AI : contient le code
d'accès nécessaire au téléchargement du logiciel DAW Cubase AI de
Steinberg. Pour obtenir des instructions sur le téléchargement, l'ins-
tallation et la configuration, reportez-vous au Manuel de référence.
Température de chargement
5 – 35 °C
Guide de référence rapide FR
Prise DC IN Fiche
secteur
Fiche CC
Adaptateur
secteur
(fourni)
Voyant LED Opération
Voyant LED après
le fonctionnement
État
Éteint Appuyez pendant trois secondes Clignote en vert
Mode d'appa-
riement
Clignote en vert
Configurez la fonctionnalité Bluetooth
sur l'appareil intelligent en trois minutes
S'allume en vert Connecté
S'allume en vert Écoutez de la musique sur l'appareil
intelligent S'allume en vert Connecté
Main Features
• Sophisticated guitar amplifier with modeling made possible by Yamaha’s original
VCM technology
• THR30IIA Wireless is compatible with the Line 6 Relay G10T wireless transmitter. (sold
separately)
• Bluetooth®capability enables playing music from a smart device
• Built‐in rechargeable battery enables use without AC adaptor
Specifications
* For further details on the product, download the THR30IIA Wireless reference manual from the
website: https://download.yamaha.com/
Power
THR30IIA Wireless can operate on either DC power (via the AC adaptor) or with the built‐in
rechargeable battery.
When using the AC adaptor
Connect the supplied AC adaptor to the DC IN jack located on the rear side of the
THR30IIA Wireless. Connect the AC plug to a power outlet.
* Follow the Safety Instructions before making connections.
Turning the power on and off
Press the power button [ ] on the top of THR30IIA Wireless for one second to turn the
power on. The LED of the power button lights when turning the power button on. The
LED of the THR30IIA Wireless lights in green while charging. Otherwise, it lights in red.
Charging the built‐in rechargeable battery
Connect the supplied AC adaptor to the DC IN jack located on the rear side of the
THR30IIA Wireless
. The LED of the power button lights in green while charging.
Connection
You can connect with a standard instrument cable or the Line 6 Relay G10T.
Connecting to guitar by wireless
The THR30IIA Wireless can connect with the Relay G10T by wireless. The optimal chan-
nel is set automatically by connecting the Relay G10T to the INPUT jack located on the
top of the THR30IIA Wireless for at least 10 seconds. For details on wireless connection,
refer to the reference manual.
Connecting to microphone and electronic musical instrument
THR30IIA Wireless
Wireless can connect with a microphone and an electronic musical
instrument by wire. For details, refer to the reference manual.
Charging the Relay G10T
Connect the Relay G10T to the INPUT jack located on the top of the
THR30IIA Wireless
.
The built‐in rechargeable battery starts charging automatically.
Connecting to a smart device via Bluetooth
Press the Bluetooth button located on the top of the THR30IIA Wireless and operate
the smart device as indicated the following table.
* For details on Bluetooth configuration, refer to the manual of the smart device.
Turning the tuner on and off
Press the TUNER TAP button for one second to turn on. Press the TUNER TAP button
again to turn off. For details, refer to the reference manual.
Storing user settings
The settings for the knobs on the top of the THR30IIA Wireless (excepting the [VOL-
UME] and [MIC/INST VOLUME] knobs) are stored in user memory. Press one of the
[USER MEMORY] buttons for 2 seconds to save your settings to that preset location.
For details on the user memory, refer to the reference manual.
Application software
You can also edit the tone and settings of the THR30IIA Wireless with the THR Remote
app. The THR Remote can be used (in addition to the top panel controls) to edit set-
tings such as compressor.
For Windows and Mac, download and install THR Remote from the website:
https://download.yamaha.com/
For Android and iOS, install THR Remote through the appropriate app store.
For details on the using THR30IIA Wireless with a computer, refer to the reference
manual.
Dimensions (W x H x D) 420 x 195 x 155 mm
Weight 4.4 kg
Power Consumption 22 W
Rated Output 30 W (15 W + 15 W)
Power Source AC adaptor or built‐in rechargeable battery
Accessories
• AC adaptor (YNT345-1530)
• Quick Guide (this sheet)
• Safety Instructions Sheet: Includes PRECAUTIONS and
NOTICE. Please read carefully before proceeding.
• Service offices list
• Cubase AI Download Information: Includes an access code
for downloading Steinberg’s DAW software Cubase AI. For
instructions on downloading, installing and setting up, refer
to the reference manual.
Charging temperature 5 – 35 °C
DC IN Jack Power
Outlet
DC Plug
AC adaptor
(supplied)
LED Operation LED after operation Status
Unlit Press for three seconds Flashes in green Pairing mode
Flashes in green Configure Bluetooth on the smart
device within three minutes Lights in green Connected
Lights in green Play music on the smart device Lights in green Connected
* The illustrations and LCD screens as shown in this manual are for instructional purposes only,
and may appear somewhat different from those on your instrument.
NOTE
If a cable is connected to the
INPUT jack, the wireless guitar
receiver cannot be used.
• Playing music/audio
• Wireless tone editing with the iOS/
Android app (THR Remote).
NOTE
Make sure to adjust the device’s level
appropriately to avoid distortion.
• Wireless control with a third-party
Bluetooth footswitch.
Bluetooth
Wireless
Connection
Audio output from
an audio player or
computer
Computer, Tablets and Smartphones
USB Cable
AC adaptor
External Audio Devices
Power
Outlet
LED display
When connecting Blue-
tooth, check LED lighting
in this area.
• Order for turning the power on
THR30IIA Wireless Mixer Amp (or powered speaker)
• Order for turning the power off
Amp (or powered speaker) Mixer THR30IIA Wireless
Dynamic
Microphone
Connection Example
• Make sure that all devices to be connected to the unit
by cable are turned off.
• When connecting the unit to an external device, use
an appropriate cable that matches with the jack’s
specifications and connect it securely.
Troubleshooting
No power:
•
Is the AC adaptor properly connected?
•
If the AC adaptor is disconnected, has the
THR30IIA Wireless been properly charged?
Cannot connect to the smart device by Bluetooth:
•
Is the LED display turned off or flashes in green?
Refer to the reference manual.
•
Is the Bluetooth setting correct on the smart device?
Refer to the user guide of your smart device.
No sound is output by wireless connection with a
guitar:
•
Are you using the Relay G10T? THR30IIA Wireless can-
not connect to any guitar wireless transmitter except for
the Relay G10T.
•
Did you connect the Relay G10T to the INPUT jack
located on the top of the THR30IIA Wireless for at least
10 seconds? The appropriate channel is set automati-
cally.
•
Is the volume control on the instrument turned up?
•
Is the Tuner function switched OFF? When the tuner
function is set ON, the guitar sound is muted. Press the
TUNER TAP button (less than one second) to turn OFF
the tuner function.
Notice
• Use an AB type USB cable of less than 3 meters.
USB 3.0 cables cannot be used.
• Be sure to wake the computer from suspended/
sleep/standby mode before connecting a computer
to the USB jack.
• Always quit all applications that are running on the
computer before connecting or disconnecting the
USB cable and set the volume output on the com-
puter to its minimum level.
• When connecting or disconnecting the USB cable,
be sure to set the OUTPUT controls ([VOLUME] and
[MIC/INST VOLUME]) on the THR30IIA Wireless to
their minimum levels.
• Wait at least 6 seconds between connecting or dis-
connecting the USB cable.
Precautions for using the USB jack
Make sure to follow the points at right when connecting
a computer to the THR30IIA Wireless USB jack to avoid
loss of data by the computer or the THR30IIA Wireless
freezing or shutting down.
Anschlussbeispiel
• Stellen Sie sicher, dass alle Geräte, die mit einem Kabel
an die Anlage angeschlossen werden sollen, ausge-
schaltet sind.
• Wenn Sie die Anlage an ein externes Gerät anschließen,
überprüfen Sie die Form der Buchse und verwenden Sie
ein Kabel, das den Vorgaben der Buchse entspricht,
bevor Sie es sicher anschließen.
Störungsbehebung
Kein Strom:
•Ist der Netzadapter korrekt angeschlossen?
•Falls der Netzadapter nicht genutzt wird, wurde der
THR30IIA Wireless richtig geladen?
Anschluss an das Smart Device über Bluetooth funkti-
oniert nicht:
•Ist das LED-Display ausgeschaltet oder blinkt es grün?
Siehe Referenzhandbuch
•Ist die Bluetooth-Einstellung am Smart Device richtig
vorgenommen? Siehe Benutzerhandbuch Ihres Smart
Device.
Keine Sound-Ausgabe bei drahtlosem Anschluss an eine
Gitarre:
•Verwenden Sie den Relay G10T? THR30IIA Wireless
kann ausschließlich an den drahtlosen Gitarrensender
Relay G10T angeschlossen werden.
•Haben Sie den Relay G10T mindestens 10 Sekunden
lang in die INPUT-Buchse auf der Oberseite des
THR30IIA Wireless eingesteckt? Der richtige Kanal wird
automatisch eingestellt.
•Ist die Lautstärke am Instrument aufgedreht?
•Ist die Tuner-Funktion auf OFF gestellt? Wenn die Tuner-
Funktion auf ON steht, ist der Gitarrensound stumm
geschaltet. Drücken Sie den TUNER TAP-Knopf (weniger
als eine Sekunde lang), um die Tuner-Funktion auf OFF
zu schalten.
Achtung
• Verwenden Sie ein USB-Kabel vom Typ AB, das kürzer
als 3 Meter ist. USB 3.0-Kabel dürfen nicht verwendet
werden.
• Achten Sie darauf, den Computer aus dem Suspend/
Sleep/Standby-Modus aufzuwecken, bevor Sie ihn an
die USB-Buchse anschließen.
• Schließen Sie grundsätzlich alle auf dem Computer
laufenden Anwendungen, bevor Sie das USB-Kabel
ein- oder ausstecken, und stellen Sie die Lautstärke
am Computer auf den Minimalwert ein.
• Achten Sie beim Ein- oder Ausstecken des USB-Kabels
darauf, dass die OUTPUT-Regler [VOLUME] und [MIC/
INST VOLUME] am THR30IIA Wireless auf den Mini-
malwert eingestellt sind.
• Warten Sie mindestens 6 Sekunden zwischen dem Ein-
und Ausstecken des USB-Kabels.
Vorsichtsmaßnahmen bei der Verwendung der USB-Buchse
Achten Sie darauf, dass Sie die Punkte auf der rechten Seite
beim Anschließen eines Computers an die THR30IIA Wire-
less USB-Buchse befolgen, um zu vermeiden, dass der Com-
puter oder der THR30IIA Wireless blockiert oder
herunterfährt und dabei die Daten verliert.
* Die Abbildungen und LCD-Bildschirme in dieser Anleitung dienen ausschließlich zu Anleitungszwecken;
die Ausführungen an Ihrem Instrument können hiervon leicht abweichen.
HINWEIS
Wenn ein Kabel an den [INPUT]-
Anschluss angeschlossen wird, kann
der drahtlose Gitarren-Receiver nicht
verwendet werden.
• Musik/Audio abspielen
• Drahtloses Bearbeiten der Klangfarbe mit
der iOS/Android-App (THR Remote)
HINWEIS
Um Verzerrung zu vermeiden, stellen Sie die
Lautstärke des Geräts entsprechend ein.
• Drahtlose Steuerung über einen Blue-
tooth-Fußschalter
Bluetooth
Drahtloser
Anschluss
Audioausgabe von
einem Audioplayer oder
Computer
Computer, Tablets und Smartphones
USB-Kabel
Netzadapter
Externe Audiogeräte
Netzsteckdose
LED-Display
Bei der Verbindung mit
Bluetooth überprüfen Sie
bitte die LED-Leuchten in
diesem Feld.
• Reihenfolge für das Einschalten des Geräts
THR30IIA Wireless Mischer Verstärker (oder Aktivlautsprecher)
• Reihenfolge für das Ausschalten des Geräts
Verstärker (oder Aktivlautsprecher) Mischer THR30IIA Wireless
故障排除
无电:
•
AC 电源适配器是否正确连接?
•
AC 电源适配器断开连接时,THR30IIA Wireless 是否正
常充电?
无法通过蓝牙连接到智能设备:
•LED 显示器是否关闭或闪烁绿灯?请参见参考说明书。
•智能设备上的蓝牙设置是否正确?请参见您智能设备的用
户指南。
与吉他进行无线连接时,无声音输出:
•使用的是否是 Relay G10T? THR30IIA Wireless 无法
连接到 Relay G10T 所需的任何吉他无线发射器。
•您是否将 Relay G10T 连接到位于 THR30IIA Wireless
顶部的 INPUT 插孔至少 10 秒钟?系统将自动设置相应
的通道。
•仪器上是否出现音量控制器?
•调音器功能是否切换为 OFF?当调音器功能设置为 ON
时,吉他声音静音。按 TUNER/TAP 按钮(不到一秒钟)
关闭调音器功能。
须知
•使用长度小于 3 米的 AB 型 USB 电缆。不得使用 USB
3.0 电缆。
•将计算机连接到 USB 插孔之前,确保将计算机从暂停/睡
眠/待机模式唤醒。
•在连接或断开 USB 电缆并将计算机上的音量输出设置为
最低级别前,务必退出计算机上运行的所有应用程序。
•连接或断开 USB 电缆时,确保将 THR30IIA Wireless
上的 OUTPUT 控制器([VOLUME] 和 [MIC/INST
VOLUME])设置为最低级别。
•连接或断开 USB 电缆时,请您等待至少 6 秒钟。
使用 USB 插孔的注意事项
将计算机连接到 THR30IIA Wireless USB
插孔时,请务必遵循右侧的要点,以避免计
算机数据丢失,或造成 THR30IIA Wireless
冻结或关闭。
注
如果将线缆连接到 INPUT
(输入)插孔,则无法使用
无线吉他接收器。
•播放音乐/音频
•使用 iOS/Android 应用程序 (THR
Remote) 进行无线音调编辑。
注
确保适当调整设备的电平,以避免失真。
•使用第三方蓝牙踏板开关进行无线
控制。
蓝牙
无线连接
音频播放器或
计算机的音频输出
计算机、平板电脑和智能手机
USB 电缆
AC 电源适配器
外部音频设备
插座
LED 显示器
连接蓝牙时,请检查此
区域内的 LED 照明。
•打开电源的顺序
THR30IIA Wireless 混音器 扩音器(或电动扬声器)
•关闭电源的顺序
扩音器(或电动扬声器) 混音器 THR30IIA Wireless
主要功能
•Yamaha 原创的 VCM 技术能够帮助实现这款精巧的吉他扩音器
的建模技术。
•THR30IIA Wireless 与 Line 6 Relay G10T 无线传输器兼容。
(另售)
•配备 Bluetooth® 功能,可通过智能设备播放音乐
•内置可充电电池,无需 AC 电源适配器即可使用
规格
* 有关产品的更多详细信息,请从官网下载 THR30IIA Wireless 参
考说明书:
https://download.yamaha.com/:
外形尺寸(宽×高×深) 420 × 195 × 155 mm
重量 4.4 kg
功耗 22 W
额定输出功率 30 W (15 W + 15 W)
电源 AC 电源适配器或内置可充电电池
附件
•AC 电源适配器 (YNT345-1530)
•快速指南(本表)
•安全说明表:包括“注意事项”和“须
知”。在操作使用前,请仔细阅读。
•维修点清单
•Cubase AI 下载信息:包含下载
Steinberg 的 DAW 软件 Cubase AI
的访问代码。有关下载、安装和设置的
说明,请参见参考说明书。
充电温度 5 – 35 °C
电源
THR30IIA Wireless 可使用 DC 电源(通过 AC 电源适配器)或内
置可充电电池进行操作。
使用 AC 电源适配器时
请将随附的 AC 电源适配器连接到位于 THR30IIA Wireless 背面的
DC IN 插孔。将 AC 插头连接到插座。
* 连接前请遵循安全说明。
打开和关闭电源
按下 THR30IIA Wireless 顶部的电源按钮 [ ] 一秒钟以打开电源。
当打开电源按钮时,电源按钮的 LED 灯点亮。充电时,THR30IIA
Wireless的 LED 灯亮绿灯。否则,亮红灯。
为内置可充电电池充电
请将随附的 AC 电源适配器连接到位于 THR30IIA Wireless 背面的
DC IN 插孔。充电时,电源按钮的 LED 灯亮绿灯。
连接
您可以使用标准化乐器线缆或 Line 6 Relay G10T 进行连接。
通过无线方式连接吉他
THR30IIA Wireless 可以通过无线方式与 Relay G10T 进行连接。
此外,通过将 Relay G10T 连接到位于 THR30IIA Wireless 顶部的
INPUT 插孔至少 10 秒钟自动设置最佳通道。有关无线连接的详细
信息,请参见参考说明书。
连接到麦克风和电子乐器
THR30IIA Wireless 可以通过线缆连接麦克风和电子乐器。有
关详细信息,请参见参考说明书。
为 Relay G10T 充电
将 Relay G10T 连接到位于 THR30IIA Wireless 顶部的 INPUT 插
孔。内置可充电电池将自动开始充电。
DC IN 插孔
插座
DC 插头
AC 电源适配器
(随附)
通过蓝牙连接到智能设备
按下位于 THR30IIA Wireless 顶部的蓝牙按钮,然后按照下表所示
操作智能设备。
* 有关蓝牙配置的详细信息,请参见智能设备说明书。
打开和关闭调音器
按下 TUNER TAP 按钮一秒钟打开调音器。按下 TUNER TAP 按
钮关闭调音器。有关详细信息,请参见参考说明书。
储存用户设置
THR30IIA Wireless 顶部的旋钮([VOLUME] 和 [MIC/INST
VOLUME] 旋钮除外)的设置均储存在用户存储器中。按下 [USER
MEMORY] 按钮两秒钟以保存当前设置。有关用户存储器的详细信
息,请参见参考说明书。
应用软件
您还可以使用 THR Remote 应用程序编辑 THR30IIA Wireless 的
音调和设置。可使用 THR Remote(除顶部面板控制器以外)
编辑压缩器等设置。
对于 Windows 和 Mac 设备,请从以下网站下载 THR Remote:
https://download.yamaha.com/
对于 Android 和 iOS 设备,请从应用程序商店搜索安装 THR Remote。
有关在计算机上使用 THR30IIA Wireless 的详细信息,请参见参考
说明书。
LED 操作
操作后的 LED
状态
熄灭 按住三秒钟 闪烁绿灯 配对模式
闪烁绿灯
三分钟内在智能设备上配置蓝牙
亮绿灯 已连接
亮绿灯 在智能设备上播放音乐 亮绿灯 已连接
连接示例
•确保通过电缆连接到装置的所有设备均已
关闭。
•将装置连接到外部设备时,请使用与插孔规
格相符的适当电缆并牢固连接。
Ejemplo de conexión
• Asegúrese de que todos los dispositivos que se van a
conectar mediante un cable a la unidad estén apagados.
• Al conectar la unidad a un dispositivo externo, utilice un
cable adecuado que coincida con las especificaciones
de la toma y conéctelo firmemente.
Resolución de problemas
No hay alimentación:
•¿Está bien conectado el adaptador de CA?
•Si el adaptador de CA está desconectado, ¿se ha car-
gado bien el THR30IIA Wireless?
No se puede conectar al dispositivo inteligente
mediante Bluetooth:
•¿Está el visualizador de LED apagado o parpadea en
verde? Consulte el manual de referencia.
•
¿Es correcto el ajuste de Bluetooth en el dispositivo inteli-
gente? Consulte la guía de usuario del dispositivo inteligente.
No se emite ningún sonido mediante la conexión ina-
lámbrica con una guitarra:
•¿Está usando el Relay G10T? Los THR30IIA Wireless no
se pueden conectar a ningún transmisor inalámbrico
para guitarras a excepción del Relay G10T.
•¿Ha conectado el Relay G10T a la toma INPUT situada
en la parte superior del THR30IIA Wireless durante un
mínimo de 10 segundos? El canal correcto se configura
automáticamente.
•¿Está el control de volumen del instrumento en la posi-
ción máxima?
•
¿Está desactivada la función de afinador? Cuando la función
de afinador está ACTIVADA, el sonido de la guitarra queda
silenciado. Pulse el botón TUNER TAP (durante menos de
un segundo) para desactivar la función de afinador.
Aviso
• Utilice un cable USB de tipo AB de menos de 3 metros.
No se pueden usar cables USB 3.0.
• Asegúrese de hacer salir el ordenador del modo en
suspensión/hibernación/espera antes de conectar un
ordenador a la toma USB.
• Salga siempre de todas las aplicaciones que estén
ejecutándose en el ordenador antes de conectar o des-
conectar el cable USB y ajuste la salida de volumen
del ordenador en el nivel mínimo.
• Al conectar o desconectar el cable USB, asegúrese de
ajustar los controles OUTPUT ([VOLUME] y [MIC/ INST
VOLUME]) del THR30IIA Wireless en los niveles míni-
mos.
• Espere al menos 6 segundos antes de conectar o des-
conectar el cable USB.
Precauciones de uso de la toma USB
Asegúrese de seguir los puntos de la derecha al conectar un
ordenador a la toma USB del THR30IIA Wireless para evitar
que el ordenador pierda datos o el THR30IIA Wireless se
congele o se apague.
* Las ilustraciones y las pantallas LCD que aparecen en este manual solamente tienen fines didácticos,
y pueden tener un aspecto diferente al que tendrán en su ordenador.
NOTA
Si hay un cable conectado en la
toma INPUT, no se puede usar el
receptor inalámbrico de la guitarra.
• Tocar música/audio
• Editar por vía inalámbrica el tono con la
aplicación para iOS/Android (THR Remote).
NOTA
Asegúrese de ajustar debidamente el nivel del
dispositivo para evitar distorsiones.
• Control inalámbrico con pedal con
conexión Bluetooth de terceros.
Bluetooth
Conexión
inalámbrica
Salida de audio de un
reproductor de audio o
un ordenador
Ordenador, tabletas y teléfonos inteligentes
Cable USB
Adaptador de CA
Dispositivos de audio externos
Enchufe
Visualización de LED
Al conectar Bluetooth,
fíjese en las luces LED
de esta área.
• Orden de encendido
THR30IIA Wireless
Mezclador
Amplificador (o altavoz con alimentación eléctrica)
• Orden de apagado
Amplificador (o altavoz con alimentación eléctrica)
Mezclador
THR30IIA Wireless
Guitar Amplifier / Amplificateur pour guitare /
吉他扩音器 / Gitarrenverstärker /
Amplificador de guitarra / Amplificador de guitarra /
Amplificatore per chitarra / Гитарный усилитель /
기타 앰프 / ギターアンプ
10-1 Nakazawa-cho, Nakaku, Hamamatsu, 430-8650 Japan
Manual Development Group
© Yamaha Corporation
VDU9280
Published 9/2020 2020年9月发行 POES-A0
Quick Guide / Guide de référence rapide /
快速指南 / Kurzanleitung / Guía rápida /
Guia Rápido / Guida rapida /
Краткое руководство /
간편설명서 / クイックガイド
Please read Safety Instructions Sheet carefully before proceeding.
Veuillez lire attentivement la fiche d'instructions de sécurité avant de poursuivre.
Bitte lesen Sie die Sicherheitshinweise vor Gebrauch sorgfältig durch.
Leia a Folha de Instruções de Segurança com atenção antes de prosseguir.
Lea atentamente la ficha de instrucciones de seguridad antes de continuar.
Leggere attentamente le istruzioni di sicurezza prima di procedere.
Внимательно прочитайте Инструкцию по технике безопасности, прежде чем
приступать к эксплуатации.
在操作使用前,请仔细阅读安全说明表。
사용하기 전에 안전 지침을 주의 깊게 읽어 보십시오.
ご使用の前にセーフティインストラクションズシートを必ずお読みください。
Exemple de connexion
• Vérifiez que tous les appareils à connecter à l'unité par
câble sont mis hors tension.
• Lorsque vous connectez l'unité à un appareil externe,
utilisez un câble approprié correspondant aux caracté-
ristiques techniques de la prise et branchez-la soigneu-
sement.
Résolution des problèmes
Aucune alimentation :
•L'adaptateur secteur est-il correctement branché ?
•Lorsque l'adaptateur secteur est déconnecté, l'amplifi-
cateur THR30IIA Wireless est-il correctement chargé ?
Impossible d'établir une connexion Bluetooth à
l'appareil intelligent :
•L'écran LED est-il éteint ou clignote-t-il en vert ? Repor-
tez-vous au Manuel de référence.
•Le réglage Bluetooth sur l'appareil intelligent est-il cor-
rect ? Reportez-vous au guide de l'utilisateur de votre
appareil intelligent.
La guitare n'émet aucun son avec la connexion sans fil :
•Utilisez-vous le transmetteur Relay G10T ? L'amplifica-
teur THR30IIA Wireless ne peut se connecter qu'au
transmetteur sans fil pour guitare Relay G10T.
•Avez-vous connecté le transmetteur Relay G10T à la
prise INPUT située dans la partie supérieure du
THR30IIA Wireless pendant au moins 10 secondes ? Le
canal approprié est réglé automatiquement.
•Le volume sur l'instrument est-il activé ?
•La fonction Tuner est-elle hors service (OFF) ? Lorsque
la fonction Tuner est ACTIVÉE, le son de la guitare est
coupé. Appuyez sur le bouton [TUNER/TAP] (moins
d'une seconde) pour DÉSACTIVER la fonction Tuner.
Avis
• Utilisez un câble USB de type AB de moins de 3 mèt-
res. Les câbles USB 3.0 ne doivent pas être utilisés.
• Veillez à sortir l’ordinateur du mode suspension/veille/
attente avant de le brancher sur la prise USB.
• Fermez toujours toutes les applications en cours
d'exécution sur l'ordinateur avant de connecter ou de
déconnecter le câble USB et réglez le volume en sortie
sur l'ordinateur au niveau minimum.
• Lors de la connexion ou de la déconnexion du câble
USB, veillez à régler les commandes OUTPUT
([VOLUME] et [MIC/INST VOLUME]) sur l'amplificateur
THR30IIA Wireless à leur niveau minimum.
• Attendez au moins 6 secondes avant de connecter ou
de déconnecter le câble USB.
Précautions concernant l'utilisation de la prise USB
Veillez à suivre les points figurant à droite lorsque vous
connectez un ordinateur à la prise USB du THR30IIA Wire-
less afin d'éviter toute perte de données sur l'ordinateur, ou
encore le gel ou l'arrêt du THR30IIA Wireless.
* Les illustrations et les captures d'écran figurant dans ce manuel sont uniquement proposées à titre
d'information et peuvent être différentes de celles de votre instrument.
NOTE
Si un câble est connecté à la prise
INPUT, le récepteur de guitare sans
fil ne peut pas être utilisé.
• Écoute de musique/son
• Modification du son par commande sans
fil avec l'application iOS/Android (THR
Remote).
NOTE
Afin d'éviter toute distorsion, réglez correcte-
ment le niveau de l'appareil.
• Commande sans fil avec un sélecteur au
pied Bluetooth tiers.
Bluetooth
Connexion
sans fil
Sortie audio depuis un
lecteur audio ou un
ordinateur
Ordinateur, tablettes et smartphones
Câble USB
Adaptateur secteur
Périphériques audio externes
Fiche
secteur
Écran LED
Lors de la connexion en
mode Bluetooth, vérifiez
que le voyant LED
s'allume.
• Commande de mise sous tension
THR30IIA Wireless Console de mixage Amplificateur
(ou haut-parleur amplifié)
• Commande de mise hors tension
Amplificateur (ou haut-parleur amplifie)
Console de mixage THR30IIA Wireless
Microphone
dynamique
Dynamisches
Mikrofon
Micrófono
dinámico


