6Getting Started
Introducing Blackmagic URSA
Blackmagic URSA is a user upgradable digital film camera designed for large crews or single camera
operators. On the URSA camera, the controls are arranged into “stations” that make it easy for multiple
people to access controls and use the camera all at the same time. The left side of the camera we call the
DOP station and is where the director of photography would use the camera. On the other side of the
camera we have the camera assist and audio stations where a camera assistant and an audio engineer
can operate the camera.
The DOP station features a large 10 inch fold out monitor with buttons for recording and playback, plus
display control for confirming focus and viewing SDI video from a switcher. Two CFast 2.0 recorders record
HD or 4K video at up to 80 frames per second. A 5 inch touch screen is provided for camera settings,
monitoring clips, camera status and scopes.
The camera assist and audio station features a separate touch screen for camera settings, monitoring
clips, status and scopes, plus audio meters and adjustment knobs. Professional BNC, TRS and XLR
connectors are provided for external audio, headphones monitoring, LANC control, SDI in and out,
reference in, timecode in and out, and power.
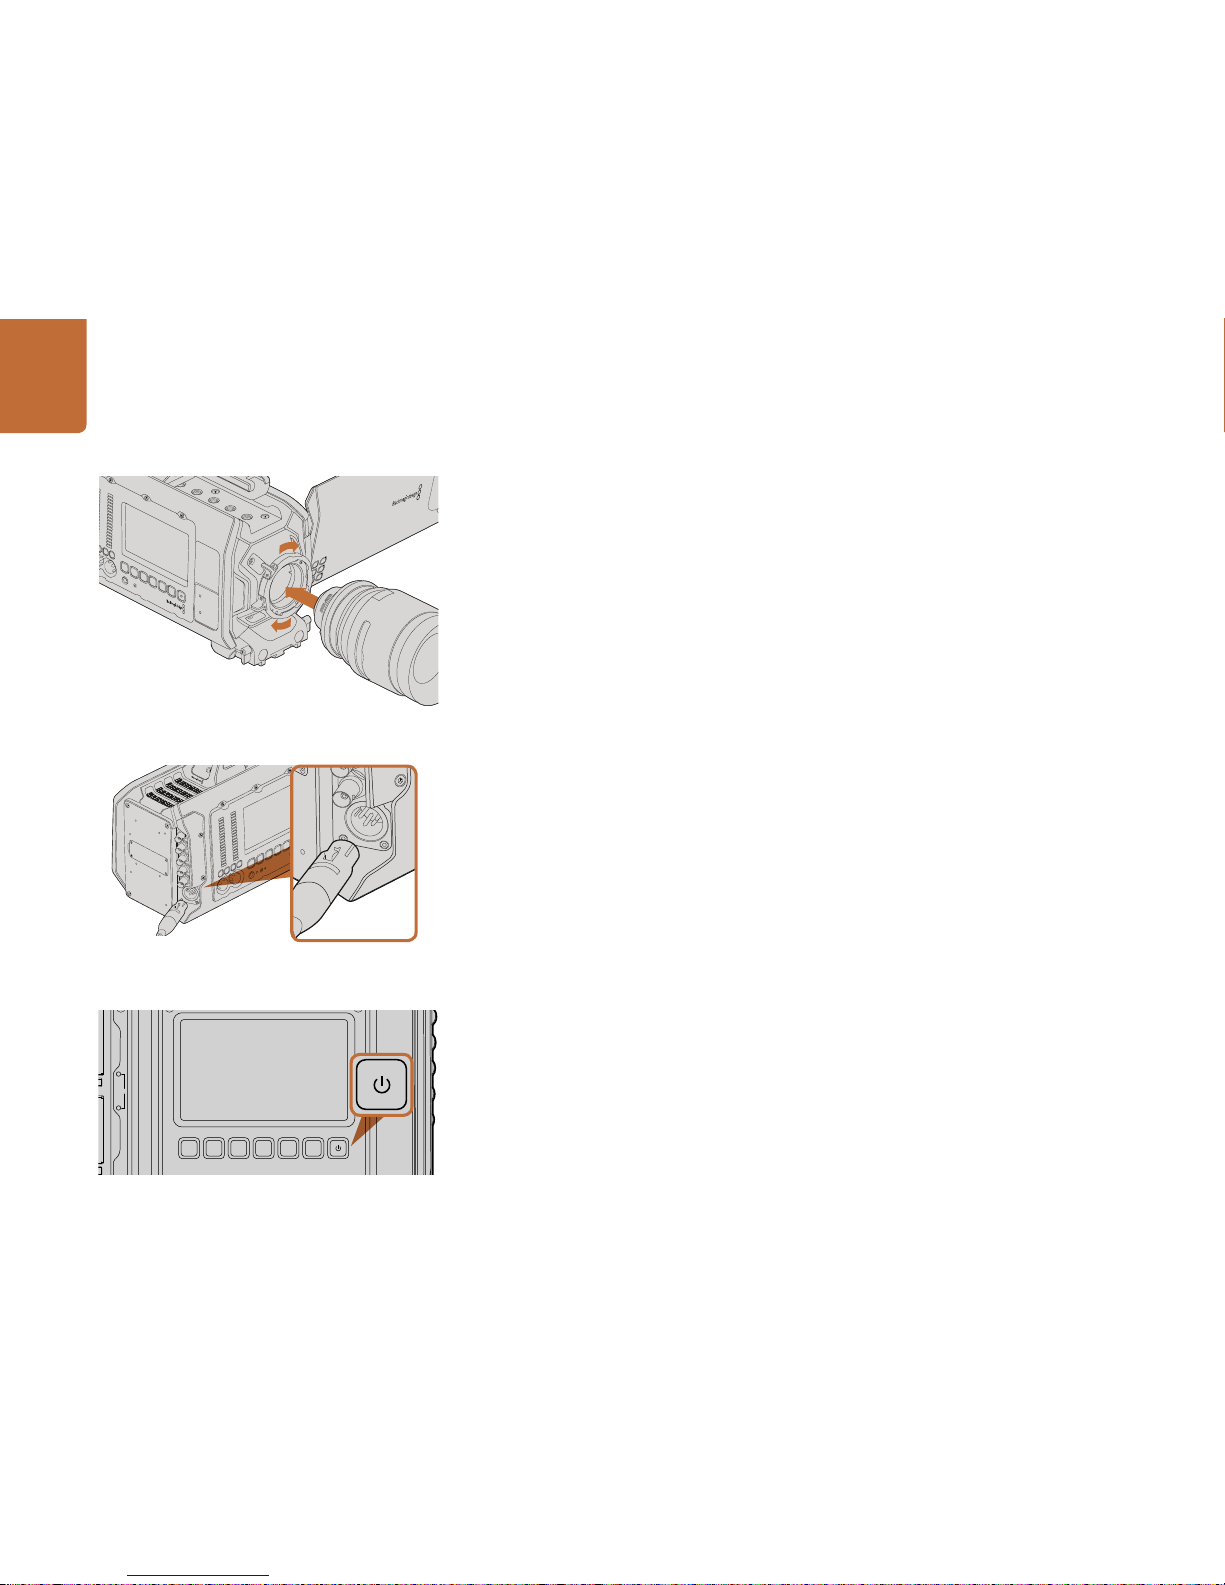
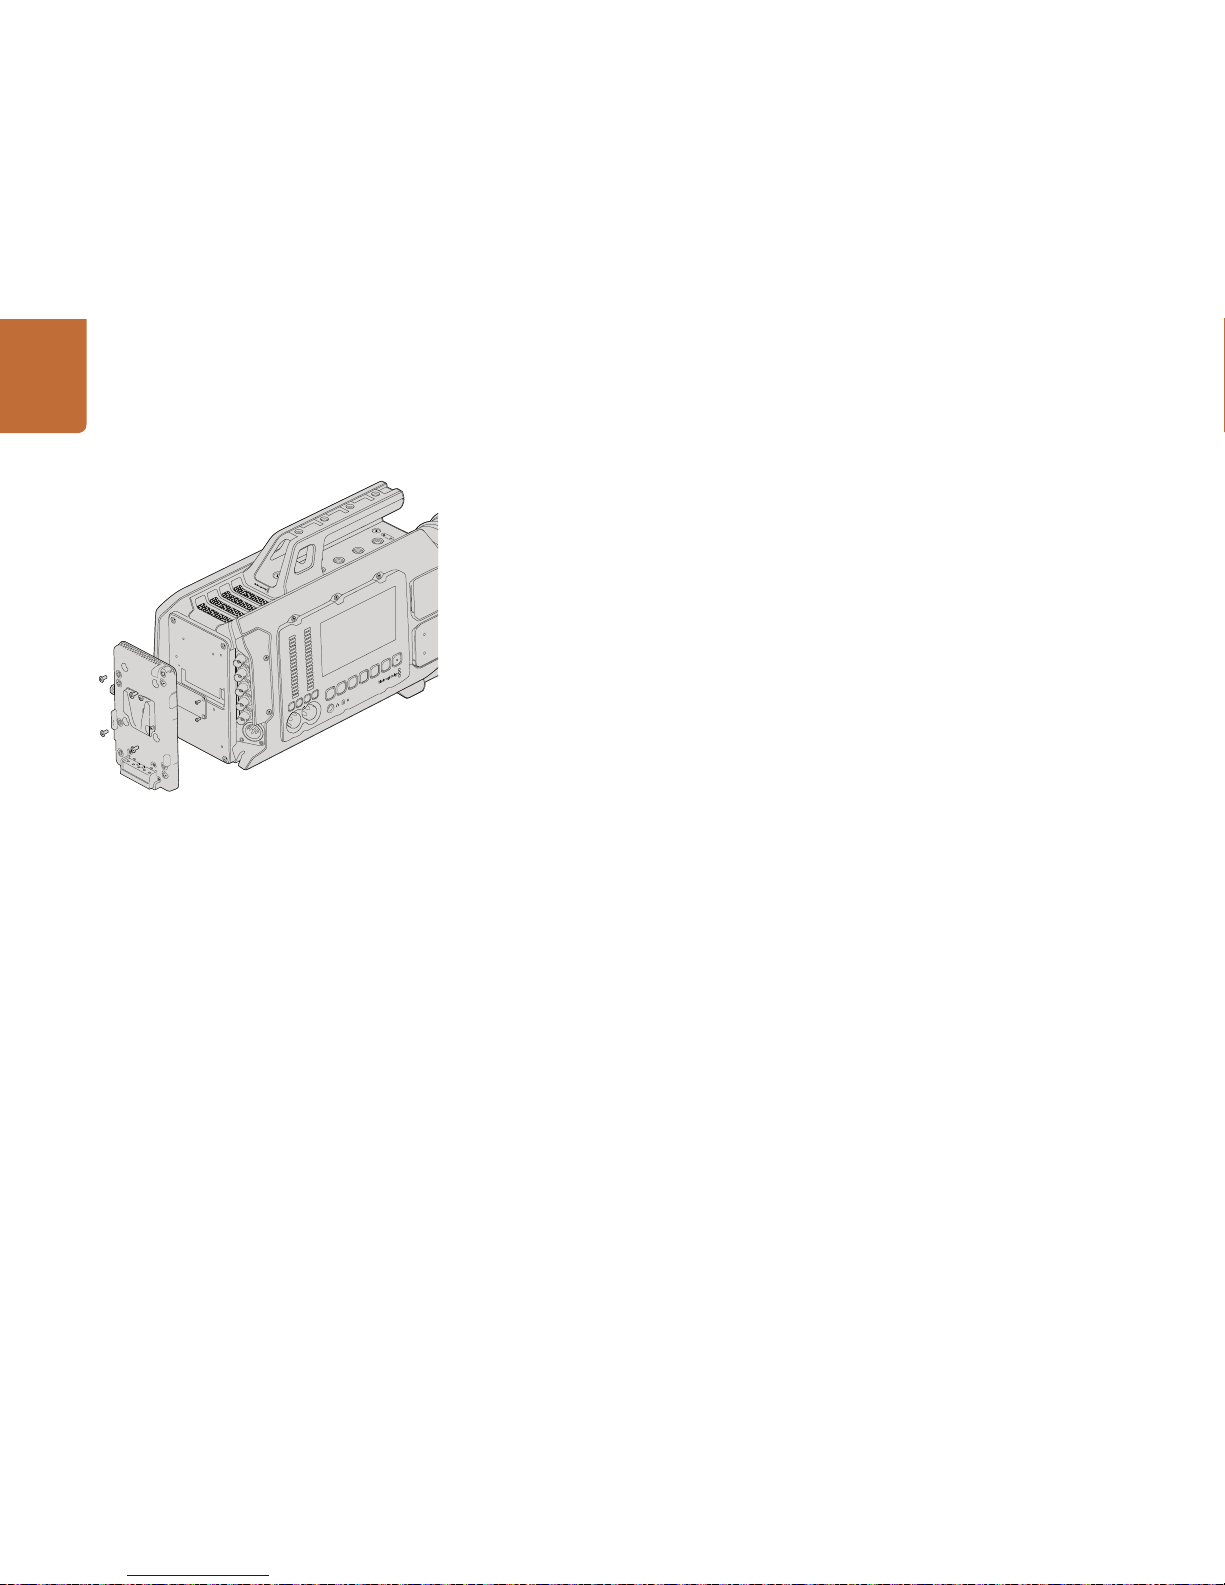
Attaching the Handle
Getting started with your Blackmagic URSA is as simple as attaching the handle, mounting a lens, and
powering your camera.
To attach Blackmagic URSA's handle to the camera body, simply slide the base of the handle along
Blackmagic URSA's handle ridges and screw the handle to one of the 3/8" mounting points. Choose a
mounting point that provides the best weight balance for your camera.
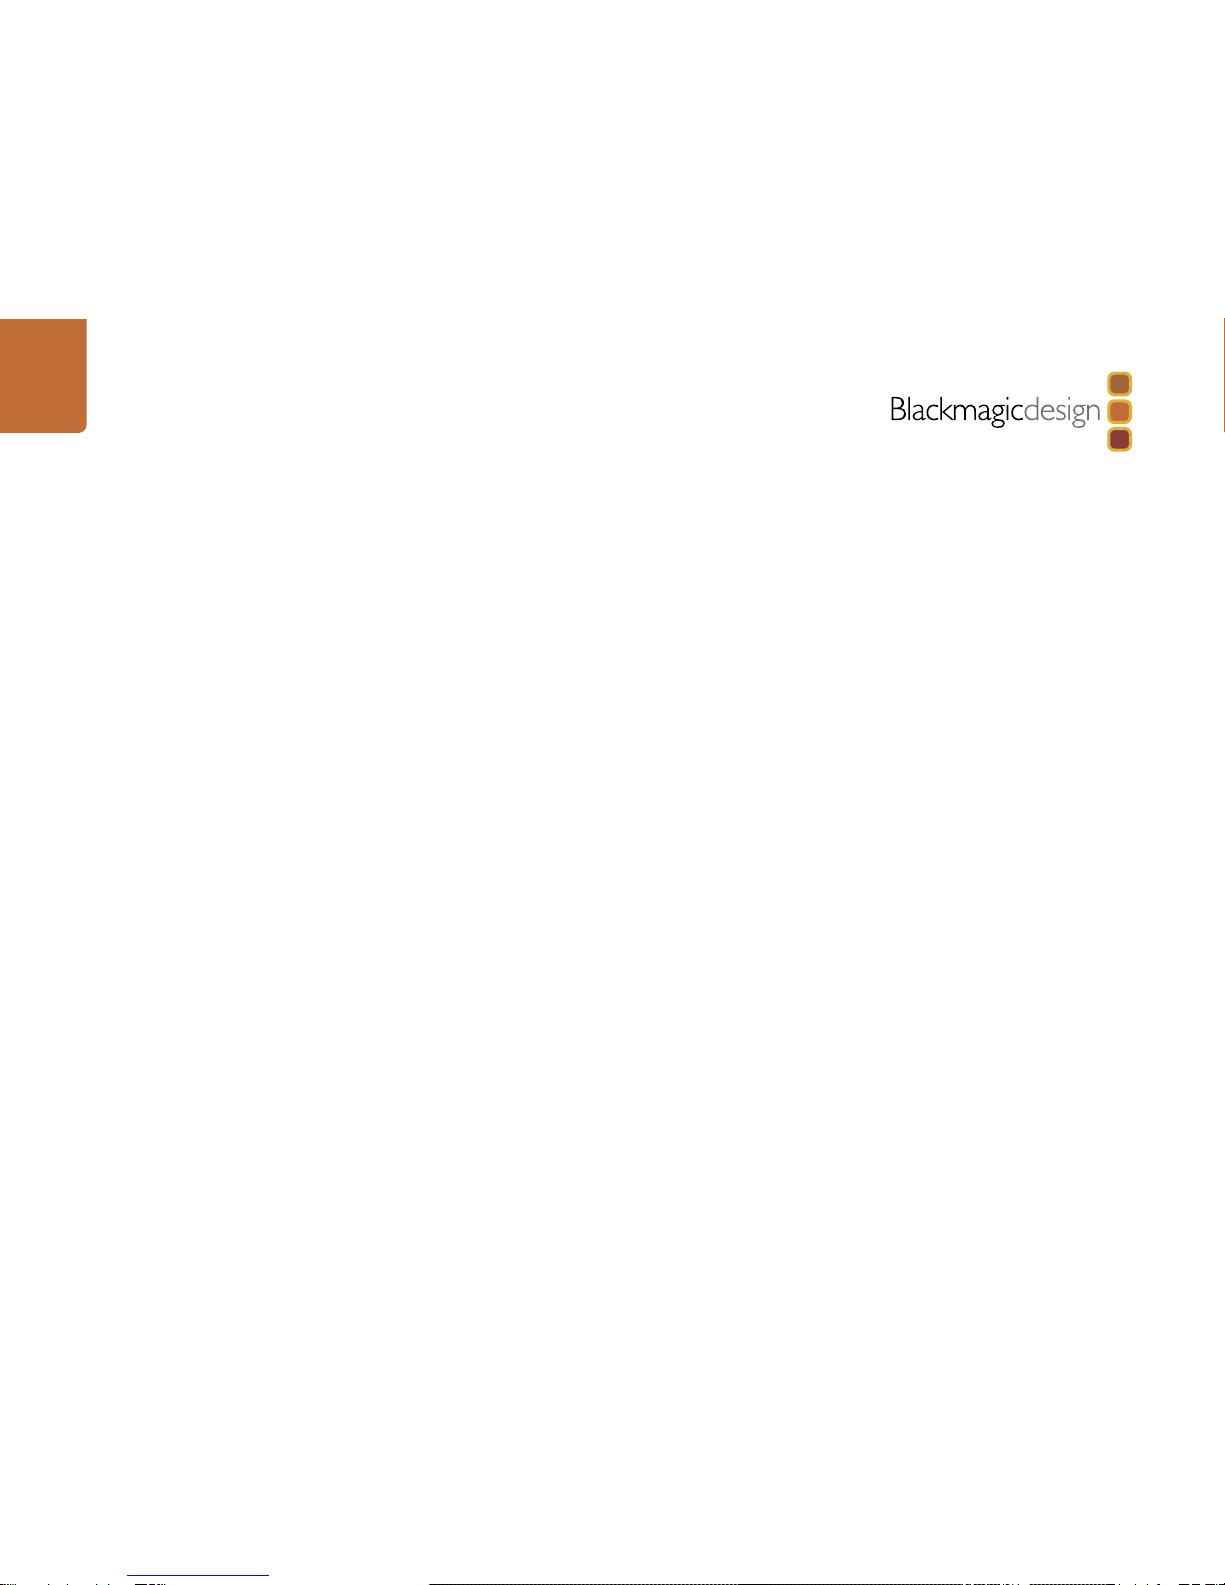
Attaching a Lens
To remove the protective dust cap from the EF lens mount, hold down the locking button and rotate the
cap counterclockwise until it is released. For the PL mount, rotate the PL locking ring counterclockwise.
We recommend always turning off Blackmagic URSA prior to attaching or removing a lens.
To attach an EF mount lens:
Step 1. Align the dot on your lens with the dot on the camera mount. Many lenses have a visual indicator,
for example a blue, red or white dot.
Step 2. Twist the lens clockwise until it locks into place.
Step 3. To remove the lens, hold down the locking button, rotate the lens counterclockwise until its
dot or indicator reaches the 12 o’clock position, and gently remove.
Getting Started
IRIS FOCUS PEAK DISP MENU SLATE
REC
ZOOM
DISP
PGM