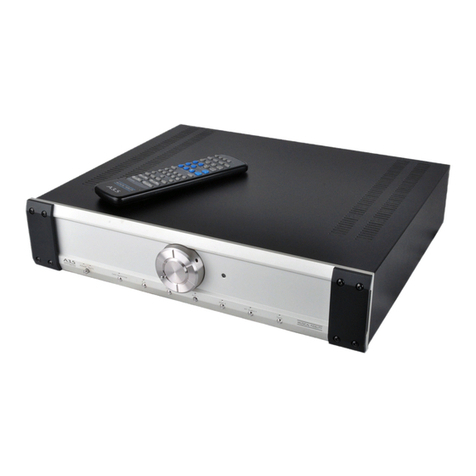
BLAM Express EX 500 User manual

USER MANUAL
NOTICE D’UTILISATION
EX 500

TECHNICAL FEATURE
Compatible with OEM head units
• RCA low level inputs
• High level inputs
• RMS Power (4 Ω): 4x80 W
• RMS Power (2 Ω): 4x100 W
• Bridged RMS Power (4 Ω): 2x240 W
• RMS Power subwoofer channel (D class) : 200 W (4 Ω) / 300 W (2 Ω)
• Low pass crossover: 50 Hz – 250 Hz
• High pass crossover: 50 Hz – 3 kHz
• Signal/noise ratio > 90 dB
• Protections: short circuit / low impedance / heat protection
• External wired remote control
• Dimensions (L x W x H):
427.5 x 216 x 53 mm – 16.8’’ x 8.5’’ x 2.1’’
GB
2
CAUTION
Thank you for using the EX 500 amplifier, to ensure the best
performance from your amplifier, please read the Operating
Manual before using the amplifier.

3
POWER CONNECTIONS
Connect an empty fuse holder within 18” (45 cm) of the car battery,
and run 8 gauge (or heavier) cable from this fuse to the amplier
location. Then connect the fuse holder to the “BATT+”.
Connect the ground terminal to the closest point on the chassis of
the vehicle. Keep this ground wire to less than 39” (100 cm) in length.
Ensure that the contact surface is free of paint or rust so that the
connection between the terminal and the chassis is effective.
BATTERY
Ground
Headunit

GB
LOW LEVEL INPUT WIRING
Low-level (RCA) input wiring is preferred for best audio performance.
Always use a high-quality cable.
NOTE: do not connect BOTH the high level and low-level inputs from
your receiver to your amplier at the same time!
4
LEFT
RIGHT
HIGH INPUT
LEFT
RIGHT
HIGH INPUT
LEFT
RIGHT
HIGH INPUT
POWER
MIN MAX
Remote Level Control
Headunit
Install the remote control securely under
the dash or in a similar location where
using it will not distract the driver.

HIGH LEVEL INPUT WIRING
The high level input(s) should only be use if the RCA output are not
present, connect the speaker outputs from the receiver to the
high-level input connector of the amplier. Be sure to observe
polarity to avoid audio phase problems.
NOTE: do not connect BOTH the high-level signal and low-level inputs
from your receiver to your amplier at the same time!
5
LEFT
RIGHT
HIGH INPUT
LEFT
RIGHT
HIGH INPUT
LEFT
RIGHT
HIGH INPUT
To Speaker Terminals of
head unit
GREY L+
GREY/BLACK L-
R+ WHITE
R- WHITE/BLACK
GROUND
GREY L+
GREY/BLACK L-
R+ WHITE
R- WHITE/BLACK
GROUND
GREY L+
GREY/BLACK L-
R+ WHITE
R- WHITE/BLACK
GROUND
POWER
MIN MAX
Remote Level Control
Install the remote control securely under
the dash or in a similar location where
using it will not distract the driver.

GB
2-4 OHM SPEAKERS WIRING CONFIGURATION
4 OHM BRIDGED SPEAKERS WIRING CONFIGURATION
6
4 Ω Minimum bridged
speakers
++
+
2-4 Ω Subwoofer
2-4 Ω Speakers
+
+
+
+
+

TROUBLE SHOOTING
This amplier has multi-layer protection features to prevent
damage from misuse or faulty conditions to ensure long lasting life
of your investment. If the unit senses excessive heat, short circuited
speakers, overload, or voltage uctuation outside of the working
range the protection indicator light will turn red and the unit will
turn off. In order to solve this problem, you should turn all levels
down, power off the unit, then carefully check the installation for
wiring mistakes or shorts. If the amplier is excessively warm the
protection light will not turn on as the unit will turn off to protect
itself from overheating. Let the unit cool down for 30 minutes and
try again. If the unit work, try moving the amplier or make sure
nothing is covering it so it can vent heat off of the heatsink. Before
you remove or uninstall the amplier, refer to the list below for
suggested solutions.
Amplifier doesn’t turn on or not output:
• Check the fuse(s), not just visually , but with a continuity meter
and all 12+ volt, remov e and ground connection. It is possible f or
a fuse to have poor internal connections, take the fuse out of the
holder for the testing.
• Check the input signal from the source unit using an AC voltmeter
to measure the voltage while it’s being played. The voltage should
be from 0.5 to 15 volts from the RCA cables.
• Check the putput of the amplier, test for output at the speaker
output of the amplier.
• Check to ensur e that the speak er wires are making a good
connection to the amplier and the subwoof ers.
Amplifier goes into protection:
• Check the chassis ground connections.
• Check amplier controls for errors, input level or crossover
setting.
• Check the speaker wires for a possible short, either between the
positive and negative leads or between a speaker lead and the
vehicle’s chassis ground.
• Check the nominal load impedance to verify that the amplier is
driving a load equal or greater than 2 ohm.
• Check the input signal cables to make sure signal is present at
the amplier inputs and the cables are not pinched or loose.
Ot may be helpful to try a different set of cables/or a different
signal source to be sure.
• Check speaker wiring for reverse polarity .
7

CARACTÉRISTIQUES TECHNIQUES
Compatible avec les autoradios d’origine
• Entrées RCA bas niveau
• Entrées haut-niveau
• Puissance RMS (4 Ω) : 4x80 W
• Puissance RMS (2 Ω) : 4x100 W
• Puissance RMS bridge (4 Ω) : 2x240 W
• Puissance RMS canal subwoofer (Class D) : 200 W (4 Ω) / 300 W (2 Ω)
• Filtre passe-bas : 50 Hz – 250 Hz
• Filtre passe-haut : 50 Hz – 3 kHz
• Rapport signal/bruit > 90 dB
• Protections : court-circuit / impédance basse / protection
thermique
• Télécommande laire fournie
• Dimensions (L x l x H) :
427.5 x 216 x 53 – 16.8’’ x 8.5’’ x 2.1’’
F
8
MISE EN GARDE
Merci d’utiliser l’amplificateur BLAM EX 500. Afin de garantir
les meilleures performances de votre amplificateur, nous
vous recommandons de lire ce manuel avant d’utiliser
l’amplificateur.

CONNEXION DE L’ALIMENTATION
Connection à la batterie (+12 Volts) : Connectez un câble de 8mm2
minimum avec un porte-fusible placé à moins de 45 cm de la
batterie de la voiture et reliez le à la connexion “BATT +”.
Connectez la masse (-) au châssis du véhicule au point le plus
proche. Gardez ce l de masse d’une longueur inférieure à un
mètre. Utilisez un câble de 8mm2 (minimum) (AWG 8). S’assurer que
la surface de contact est exempt de peinture ou de rouille an que
le connexion entre la cosse et le chassis soit efcace.
9
BATTERIE
Masse
Autoradio

F
CÂBLAGE DES ENTRÉES BAS NIVEAU
Les entrées bas niveau (RCA) sont préférables pour de meilleures
performances audio, si votre autoradio est équipé de sorties RCA. Il
est recommandé d’utiliser un câble de bonne qualité.
REMARQUES : Ne connectez jamais les entrées haut niveau et bas
niveau en même temps.
10
LEFT
RIGHT
HIGH INPUT
LEFT
RIGHT
HIGH INPUT
LEFT
RIGHT
HIGH INPUT
POWER
MIN MAX
Télécommande
Autoradio
Fixez solidement sous le tableau de
bord de manière à ce que la
télécommande soit facilement
accessible.

CÂBLAGE DES ENTRÉES HAUT NIVEAU
Les entrées haut niveau ne doivent être utilisées que lorsque
votre autoradio ne dispose pas de sorties RCA. Connectez les
sorties haut-parleur au connecteur d’entrée haut niveau de
l’amplicateur. Assurez-vous d’observer les polarisés pour éviter
les problèmes de phase. Le l de masse peut-être connecté à la
masse de l’autoradio.
REMARQUES : Ne connectez jamais les entrées haut niveau et bas
niveau en même temps.
11
LEFT
RIGHT
HIGH INPUT
LEFT
RIGHT
HIGH INPUT
LEFT
RIGHT
HIGH INPUT
Connectez aux sorties
haut-parleurs de l’autoradio
GRIS L+
GRIS/NOIR L-
R+ BLANC
R- BLANC/NOIR
MASSE
GRIS L+
GRIS/NOIR L-
R+ BLANC
R- BLANC/NOIR
MASSE
GRIS L+
GRIS/NOIR L-
R+ BLANC
R- BLANC/NOIR
MASSE
POWER
MIN MAX
Télécommande
Fixez solidement sous le tableau de
bord de manière à ce que la
télécommande soit facilement
accessible.

CONFIGURATION DU CÂBLAGE DE HAUT-PARLEURS 2-4 OHMS
CONFIGURATION DU CÂBLAGE DE HAUT-PARLEURS BRIDGE 4 OHMS
12
F
Haut-parleurs 2-4 Ω
+
+
+
+
+
++
+
Haut-parleur bridge 4 Ω
minimum
Subwoofer 2-4 Ω

13
RÉSOLUTIONS DES PROBLÈMES
Cet amplicateur possède des caractéristiques de multiples protections
pour éviter les dommages dus à une mauvaise utilisation ou à des
conditions défectueuses an d’assurer une longue durée de vie à votre
investissement. Si l’appareil détecte une chaleur excessive, des haut-
parleurs court-circuités, une surcharge ou une uctuation de tension en
dehors de la plage de fonctionnement, le voyant lumineux de protection
devient rouge et l’appareil s’éteint. Pour résoudre ce problème,
vous devez baisser tous les niveaux, éteindre l’appareil, puis vérier
soigneusement l’installation pour détecter les erreurs de câblage ou les
courts-circuits. Si l’amplicateur est trop chaud, le voyant de protection
ne s’allumera pas car l’appareil s’éteindra pour se protéger de la
surchauffe. Laisser refroidir l’appareil pendant 30 minutes et réessayer.
Si l’appareil fonctionne, essayez de déplacer l’amplicateur ou assurez-
vous que rien ne le recouvre pour qu’il puisse évacuer la chaleur du
radiateur. Avant de retirer ou de désinstaller l’amplicateur, reportez-
vous à la liste ci-dessous pour les solutions proposées.
L’amplificateur ne s’allume pas ou pas de sortie :
• V ériez le(s) fusible(s), non seulement visuellement, mais aussi à l’aide
d’un indicateur de continuité et de toutes les connexions 12+ volts,
vériez la masse. Il est possible qu’un fusible ait de mauvaises
connexions internes, retirez le fusible du support pour le test.
• V ériez le signal d’en trée de l’unité source à l’aide d’un voltmètre
CA pour mesurer la tension pendant la lectur e. La tension doit être
comprise entre 0,5 et 15 volts à partir des câbles RCA.
• V ériez que les ls des enceinte s sont bien connectés à l’amplicateur
et aux subwoof ers.
L’amplificateur entre en protection :
• Vériez les connexions de masse au châssis de tous les équipements
audio.
• V érier les commandes de l’amplicateur pour détecter les erreurs, le
niveau d’entrée ou le réglage du ltre répartiteur.
• V ériez que les ls des haut-parleurs ne sont pas court-circuités, soit
entre les ls positif et négatif, soit entre un l des haut-parleurs et
la masse du châssis du véhicule.
• V ériez l’impédance de charge nominale pour vérier que
l’amplicateur alimente une charge égale ou supérieure à 2 ohms.
• V ériez les câbles de signal d’entrée pour vous assurer que le signal est
présent aux entrées de l’amplicateur et que les câbles ne sont pas
pincés ou desserrés. Il peut être utile d’essayer un autre jeu de câbles
ou une autre source de signal pour être sûr.
• V ériez le câblage des enceintes pour vérier l’inversion de polarité.

14
Conditions of guarantee
All BLAM loudspeakers are covered by guarantee drawn up by the
ofcial BLAM distributor in your country. Your distributor can provide
all details concerning the conditions of guarantee. Guarantee cover
extends at least to that granted by the legal guarantee in force in
the country where the original purchase invoice was issued.
Conditions de garantie
En cas de problème, adressez-vous en premier lieu à votre revendeur
BLAM.
La garantie pour la France sur tout matériel BLAM est de 2 ans. En
cas de matériel défectueux, celui-ci doit être expédié à vos frais,
dans son emballage d’origine auprès du revendeur, lequel analysera
le matériel et déterminera la nature de la panne. Si celui-ci est
sous garantie, le matériel vous sera rendu ou remplacé en “franco
de port”. Dans le cas contraire, un devis de réparation vous sera
proposé. La garantie ne couvre pas les dommages résultant d’une
mauvaise utilisation ou d’un branchement incorrect (bobines mobile
brûlées par exemple...).
En dehors de la France, le matériel BLAM est couvert par une garantie
dont les conditions sont xées localement par le distributeur ofciel
BLAM de chaque pays, en accord avec les lois en vigueur sur le
territoire concerné.
Garantiebedingungen
Alle BLAM Lautsprecher sind durch eine vom ofziellen BLAM
Vertragshändler in Ihrem Landgewährten Garantie abgedeckt.
Einzelheiten bezüglich der Garantie bedingungen erhalten Sie
von Ihrem Vertragshändler. Die Gewährleistung erstreckt sich
mindestens auf die geltende gesetzlicheGarantie des Landes, in dem
der Original-Kaufbeleg ausgestellt wurde.
Condiciones de la garantra
Todos los altavoces BLAM están cubiertos por la garantía extendida
por el distribuidor ocial de BLAM de su país. Su distribuidor le
proporcionará detalles concernientes a las condiciones de la
garantía. La cobertura de la garantía alcanza por menos hasta la
concedida por la garantía legal en vigor en el país en donde se emitió
la factura de compra original.
INTERNATIONAL GUARANTEE
GB
F
DE
E

15
Condiçoes da garantia
Todos os altifalantes BLAM são abrangidos por uma garantia redigida
pelo distribuidor ocial da BLAM no seu país. O seu distribuidor pode
fornecer todos os pormenores relativamente às condições da
garantia. A cobertura da garantia estende-se pelo menos ao que é
concedido pela garantia legal em vigor no país em que o recibo de
compra original foi emitido.
Condizioni di garanzia
Tutti gli altoparlanti BLAM sono coperti dalla garanzia rilasciata dal
distributore ufciale BLAM del vostro paese. Il vostro distributore
potrà fornirvi tutti i dettagli riguardanti le condizioni di garanzia. La
copertura della garanzia comprende almeno ciò che è contemplato
dalla garanzia legale in vigore nel paese in cui è stata rilasciata la
fattura originale d’acquisto.
Garantievoorwaarden
Alle BLAM luidsprekers vallen onder een garantie die door de ofciële
BLAM -distributeur in uw land is opgesteld. Uw distributeur kan u
alle details leveren met betrekking tot de garantievoorwaarden.
Garantiedekking geldt ten minste voor de wettelijke toegekende
garantie die van kracht is in het land waar de originele aankoopbon
is uitgegeven.
Warunki gwarancyjne
Wszystkie głośniki BLAM są objęte gwarancją wydawaną przez
ocjalnego dystrybutora BLAM wTwoim kraju. Dystrybutor
poinformuje Cię o wszystkich szczegółach związanych z warunkami
gwarancyjnymi. Zakres gwarancji obejmuje przynajmniej gwarancję
ustawową oferowaną w kraju, w którym wydano oryginalną fakturę
zakupu.
Условия гарантии
Все динамики BLAM обеспечиваются гарантийным обслуживанием,
осуществляемым официальным дистрибьютором BLAM в
Вашей стране. Ваш дистрибьютор может сообщить Вам все
детали, относящиеся к условиям гарантийного обслуживания.
Территорией действия условий гарантии является, как минимум,
территория той страны где было приобретено данное изделие
BLAM в соответствии с оригинальным счетом-фактурой.
P
I
NL
PL
RU
Table of contents
Languages:
Other BLAM Amplifier manuals
Popular Amplifier manuals by other brands
Altec Lansing
Altec Lansing 9444B POWER AMPLIFIER SERVICE Operating and service instructions
Hafler
Hafler DH-120 Operation and assembly instructions
Technics
Technics SU-V4 manual
Marshall Amplification
Marshall Amplification PA400 user manual

Bazooka
Bazooka ELA1300 installation manual

Laney
Laney VC30-112-210-212 instructions

