1
Safety Information
Read the assembly instruction and safety precaution sections of this booklet
before removing the contents of the carton.
Please retain this instruction booklet.
When you receive your machine
Check for any damage to your machine or to its packaging. Never start a machine damaged in any
way, make sure to contact an authorised service.
Unwrap the packaging materials as indicated and dispose of them responsibly.
Safety Precautions
The appliance is not intended for use by persons (including children) with reduced physical, sensory
or mental capabilities, or lack of experience and knowledge, unless they have been given supervised
or instruction concerning use of the appliance by a responsible person for their safely.
Young children should be supervised to ensure that they do not play with the appliance.
If the supply cord is damaged, it must be replaced by the manufacturer or its service agent or a
similarly qualified person in order to avoid a hazard.
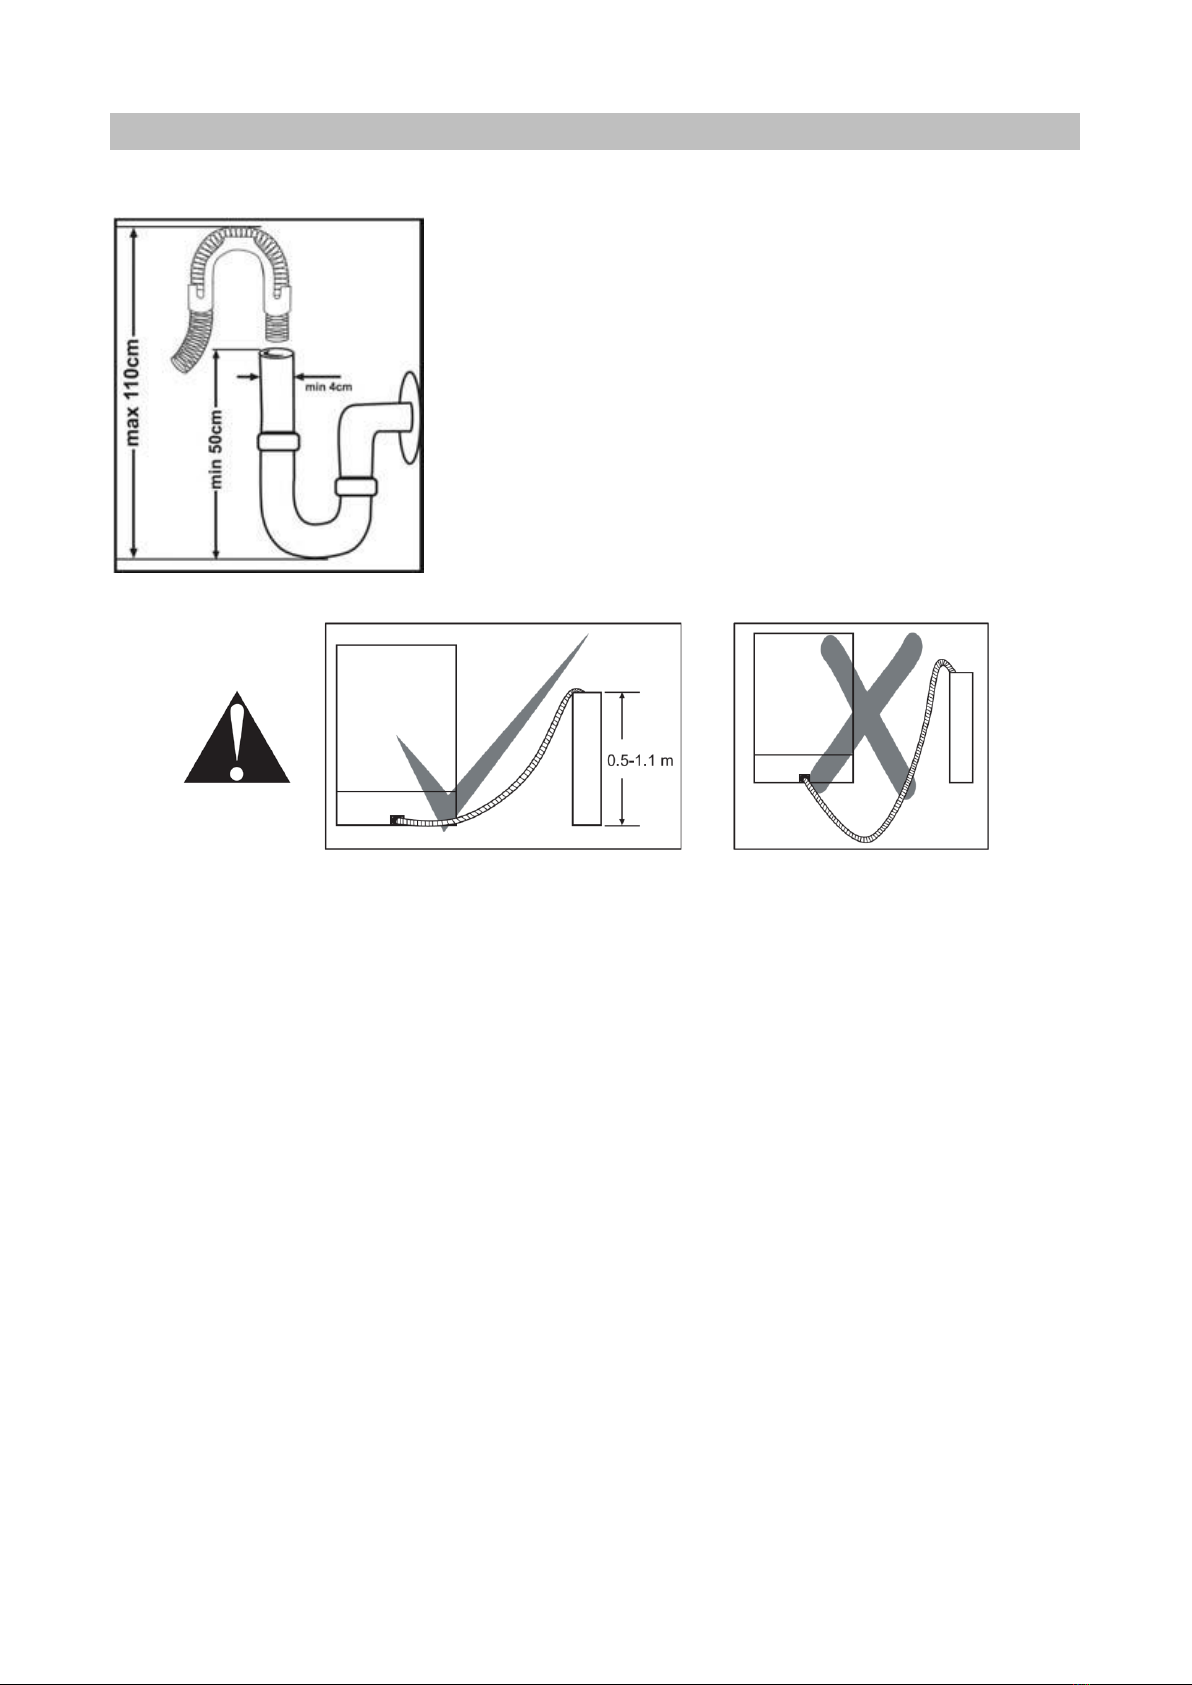
If the appliance is installed on a carpet floor, take care that the openings in its base are not
obstructed.
This machine should be installed and repaired by an authorised service only.
Only original spare parts should be used with the machine.
Before installing, be sure that the machine is unplugged.
Check whether the indoor electrical fuse system is connected according to local regulations.
All electrical connections must match the values indicated on the rating plate.
Ensure that the machine does not rest on the electricity supply cable.
Never use an extension cord or a multiple socket for connecting the machine to the electrical supply.
The plug should be comfortably accessible after the machine has been installed.
After installing the machine to a suitable place, run it unloaded for the first time.
This machine is for household use; do not use it for any other purpose. Commercial usage of the
dishwasher will void the warranty.
Do not place a load on the open door of the machine. It can damage the door or cause the machine
to tip over.
Do not put anything other than detergent or rinse aids into the detergent or rinse aid dispensers of
your machine. Blanco will not be responsible for any damage caused by incorrect substances being
put into the dispensers.
The water inside the machine is not drinking water. Do not drink it.
Due to danger of explosion, do not put any chemical dissolving agents, such as solvents, into the
machine’s washing section.
Check whether plastic items are heat-resistant before washing them in the machine.
Do not put into your machine those items which are not suitable for dishwashing.
Do not fill any basket above its capacity. Blanco is not responsible for any scratches or rust on the
interior of your machine due to basket movement.
This appliance is intended to be used in household and similar applications such as:
- Staff kitchen areas in shops, offices and other working environments.
- Farm houses.
- By clients in hotels, motels and other residential type environments.
- Bed and breakfast type environments.