Blaupunkt BP 3.0 User manual

BP 3.0 D GPSFH
1131 599 130 001
G-Sensor
Built-in GPS
140°Wide Angle Lens
Support up to 64 GB SDHC


English------------------------------------------------------------ 1—18
Deutsch--------------------------------------------------------- 19—36
Français--------------------------------------------------------- 37—54
Polski------------------------------------------------------------ 55—72
Español----------------------------------------------------------73—90
Português -----------------------------------------------------91—108
Nederlands --------------------------------------------------109—126
Italiano-------------------------------------------------------127—144
Suomi---------------------------------------------------------145—162
čeština ------------------------------------------------------- 163 180
Român--------------------------------------------------------181—198
Русский------------------------------------------------------ 199—216
—
Index


1
User manual

2
Before using the product, please read this manual carefully.
The manual is to guide your usage of this product specially.
Caution:
1. Please strictly abide by the relevant national law. This product can not be used for illegal
purposes; otherwise take the responsibility by yourself.
2. Please insert the micro SD card in right direction to avoid damage the card or DVR. If DVR
writes'Please Insert SD Card Again', please enter into setting menu and format micro SD
card. If it is still the same, please change another micro SD card.
Note: Format micro SD card will delete all files. Please backup the important files before
format it.
3. Recommend to use CLASS 6 or above micro SD card. Owing to 64GB micro SD card doesn't
have unified standard in the market, not all 64GB micro SD card can be compatible to this
DVR.Please test it on DVR before purchase.
4. It is suggested to backup files in micro SD card once a week. This product is not the
exclusive storage device, so please backup the important files timely to avoid files is
missing.
5. Please check the bracket carefully after installation to avoid damage.
6. The working time of the built-in battery will shrink with the using time increased. If the DVR
will not work for a long time, please charge it every two months to avoid over-discharged
which shortens lifespan of battery.
7. Please do not take the product under the moist environment. It is not waterproof.
8. Please do not take pictures or movie directly to the sun.
9. Please do not use this product in excessive dust environment in case of the lens and other
components to be contaminated and affect the video quality. Please keep lens clean with
soft cloth or exclusive wipes.
10. This product belongs to precision electronic products which can not bear heavy hit and
do not use it in high magnetic and electronic working environment.
11. Working temperature for this device is -10℃-50℃ and storage temperature is -20℃
-70℃. Continuous exposure to direct sunlight for an extended period of time, may
cause the device to malfunction, color change, housing and image distortion,
especially in locked cars where cabin temperature exceeds 70℃.

3
UP ME NU OK MOD E DOWN
°
m
1
4
0
m
W
0
.
i
3
d
=
e
f
A
;
2
n
.
g
2
l
/
e
F
6 7 8 9 10
13
2
3
4
5
14
15
1
17
16
11
12
1. Bracket Hole
2. USB Port
3. RESET
4. Microphone
5. Micro SD Card Slot
6. UP Key
7. MENU
8. OK Key
9. MODE Key
10.DOWN Key
11.LCD
12.Working Indicator Light
Key 13.Power Indicator Light
14.ON/OFF Key
15.HDMI Output
16.Lens
17.Speaker
1. Structure

MODE In standby mode,short press MODE key to switch Movie/Still Capture/Playback
mode; In setting mode, short press MODE key to switch different mode menu;
In playback mode, short press MODE key to back to preview mode.
4
2. Features
1. Support multiple video resolutions, such as 1080P, 720P and etc with superior video and
image quality;
2. Support 60fps for high-speed recording;
3. High definition CMOS lens module with wide viewing angle;
4. Built-in microphone/speaker;
5. With Voice/Mute Recording shortcut Key;
6. With LCD OFF shortcut Key;
7. Support high capacity micro SD card;
8. Support seamless loop recording and as recording as charging;
9. Automatically take video when car engines on and turn off when car engines off;
10.Support motion detection;
11.Support SOS and G-Sensor to prevent important files from being overwritten;
12.Support HDMI output;
13.Support parking monitoring function;
14.Support GPS tracking function;
15.Support driver ID;
16.Support multi-language.
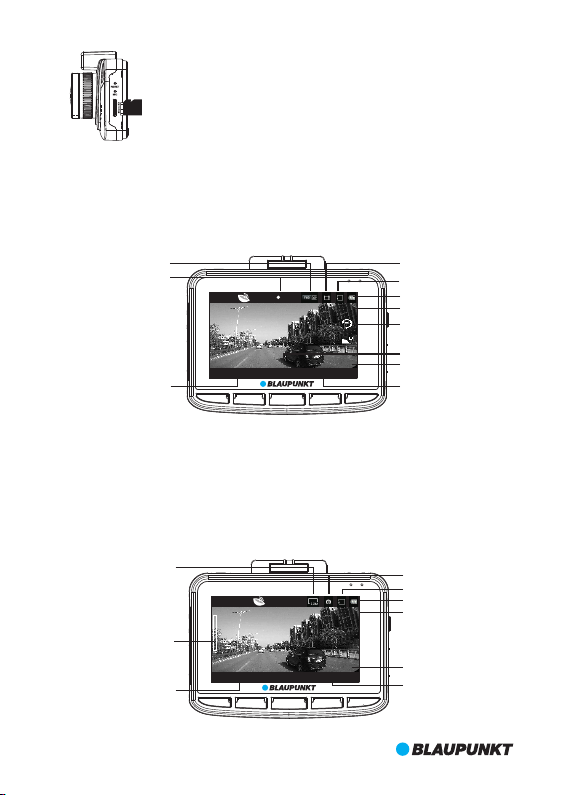
3. Key Definition and Function
Definition
ON/OFF
MENU
UP
DOWN
OK
RESET
Function
Long press to power on/off.
In standby mode, short press MENU key to enter into setting mode and press
it again to quit when setting is completed; In recording, short press MENU key
to activate SOS function, and press it again to deactivate.
In Movie or standby mode, short press UP key to turn on/off voice recording;
In Still Capture mode, short press UP key to zoom in; In setting mode and
preview mode, short press UP key to select; In video playing or pause status,
short press UP key to fast backward.
In Movie mode, short press DOWN key to turn on/off LCD OFF; In Still Capture
mode, short press DOWN key to zoom out; In setting mode and preview mode,
short press DOWN key to select; In video playing or pause status, short press
DOWN key to fast forward.
In Movie mode, short press OK key to pause or record; In Still Capture mode,
short press OK key to take photo; In Playback mode, short press OK key to play
video/pause; In setting mode, short press OK key to confirm.
Pock it when DVR software crashes down.
Picture
UP
MENU
OK
MODE
DOWN

5
4. Indicator Light Definition
Indicator Light
Red
Green
Definition
Long steady on means DVR is charging; After full charge, red light is off.
Long steady on means DVR is in standby mode; flicking means DVR is recording.
I.ON/OFF
(1)Power on
A. In off state, long press ON/OFF key for 3 seconds to power on and start recording autom-
atically with green light flashing.
B. DVR is connecting with car charger to start recording.
Note: If there is a pop-up window to show 'SD card is not inserted', please insert micro SD
card before use. When micro SD card is inserted in power on status, DVR will automatically
power off.
(2)Power OFF
A. In working status, long press ON/OFF key for 3 seconds to power off.
B. In working status, DVR will automatically save the current file and power off automatically
when unplug the car charger.
C. In low battery status, DVR will automatically save the current file and power off
automatically.
II.Battery Charging
(1)Two ways to charge
A.with USB cable B.with car charger(suggested)
5. Function
Full
Low
Medium
Empty
(2)Battery Status Definition
III.Micro SD Card Insertion
Straightly insert micro SD card into the slot as indicated below until hearing 'click' sound.

IV.Movie Mode
Power on DVR to enter into movie mode directly with green light flashing. Short press OK
key to saved the current file and stop recording. The DVR enters into standby mode with
green indicator light steady on. In standby mode, short press OK key to restart recording.
V.Still Capture Mode
In standby mode, short press MODE key to enter into still capture mode and press OK key
to take photos.
In still capture mode, short press UP or DOWN key to zoom in or zoom out (Max. x 4).
6
Pop up Micro SD Card: Push forward micro SD card first and then take it
out(it is suggested to do it with DVR off )
Recording
Time & Date
Resolution&Frame
UP ME NU OK MOD E DOW N
Movie Mode
REC
BP 3.0 FH D GPS 0 KM/ H ACD 1010
2015/09/08 15:12:45 0:01:44
Movie Time
Driver ID
Speed
Micro SD Card in
Battery Status
Time & Date
Image Size
UP ME NU OK MOD E DOWN
Still Capture Mode
ACD 101 0
2015/09/08 15:12:45 1819 Photo Left
Driver ID
Micro SD Card in
Battery Status
T
W
1X
EV: 0.00
EV: 0.00 Exposure
Exposure
Digital Zoom
Movie Clip Time

7
VI.Playback and Preview Mode
A. In standby mode,short press MODE key twice to enter into preview mode.Short press UP
or DOWN key to select the video file and then press OK key to play. In video playing status,
short press UP key to fast reverse and DOWN key to fast forward (max. x8). Press OK key to
pause in video playing status. Short press MODE key to stop playing and go back to
preview mode.
In preview mode, short press MODE key to preview photos. Short press UP or DOWN key to
select the photos. OK key is pressed for full-screen preview and press UP or DOWN key to
go to next or previous photo.
B. In preview mode, short press MENU key to enter into playback mode to adjust volume,
delete or protect files. Short press UP or DOWN key to select 'Volume', 'Delete' or 'Protect',
and press OK key to enter into submenu. Short press UP or DOWN key to select and OK key
for confirmation. Then short press MENU key to quit and go back to preview mode.
VII. G-SENSOR
In movie mode, the car brakes suddenly or is hit heavily, G-sensor will be activated to
prevent the current video clip from being overwritten. Three-step sensitivity (high,
medium, low) are to cater for different car owners and can be set in 'Protect Level' in
General Settings.
Note: If G-sensor is activated to work in the first 10seconds of the video clip,the current and
previous video clip are saved. If in the last 10seconds of the video clip,the current and the
next video clip are saved. If in the middle of video clip, only the current video clip is saved.
UP ME NU OK MOD E DOWN
2015 /09/08 15:1 2:45 [00:01 :44]
100_DSC/PICT0011.AVI
3
3
/
UP ME NU OK MOD E DOWN
2015 /09/08 15:1 2:45
100_DSC/PICT0011.J PG
3
3
/
Photo Preview
Movie Preview Current Movie
UP ME NU OK MOD E DOW N
Playback
Volume
1/1 Delete
Prot ect
5
Current Photo

8
VIII.SOS
In movie mode, short press MENU key to lock the current file manually in case of the
important file is overwritten in loop recording. Press MENU key again to unlock the current
file.
Note: If SOS is activated to work in the first 10 seconds of the video clip, the current and
previous video clip are saved. If in the last 10 seconds of the video clip, the current and the
next video clip are saved. If in the middle of video clip, only the current video clip is saved.
IX.Voice/Mute Recording
In standby or movie mode, short press UP shortcut key to be voice recording or mute
recording, or press MENU key to go to Movie Mode to set up.
UP ME NU OK MODE D OWN
Movi e Mode
Movi e Off Time
2/3 Motion event REC
Soun d Record
1min
5sec
On
UP ME NU OK MODE D OWN
Gene ral Setting s
Prot ect Level
4/6 Parking Monitoring
Moti on Detectio n
Midd le
Off
Off
G-sensor Sensitivity
UP ME NU OK MODE D OWN
REC
BP 3.0 FH D GPS 0 KM/ H ACD 1010
2015 /09/08 15:1 2:45 0:01:4 4
EV: 0.00
UP ME NU OK MOD E DOW N
REC
BP 3.0 FH D GPS 0 KM/ H ACD 1010
2015/09/08 15:12:45 0:01:44
EV: 0.00
SOS ON
UP ME NU OK MODE D OWN
BP 3.0 FH D GPS 0 KM/ H ACD 1010
2015/09/08 15:12:45 0:01:4 4
EV: 0.00
STBY

9
UP ME NU OK MOD E DOW N
Gene ral Settings
Prot ect Level
4/6 Parking Monitoring
Moti on Detection
High
Middle
Off
UP ME NU OK MOD E DOW N
BP 3.0 FH D GPS 0 KM/ H ACD 1010
2015/09/08 15:12:45 0:01:44
REC
EV: 0.00
P
Parking Monitoring ON
XI.GPS Tracking
This DVR is built in GPS module and can record the driving track, longitude and latitude
information as well as real-time speed, which are very important driving information.
When DVR is on, it will position automatically. There is GPS status icon on the top left.
When it turns green, GPS positions successfully; when it is red, GPS is still in positioning
status. Please go to GPS status in Gerneral Settings to view detailed GPS information.
Please select correct time zone before use this function. Please enter into General Settings
to set it up. After GPS positions successfully, GPS satellite time will synchronize to show on
the screen.
Note: Please position outdoor. GPS is hard to position indoor because of weak GPS signal.
Driving track can be reviewed with exclusive GPS player. Please refer to 'Part 7 BP GPS VP
3.0 Instruction'.
X.Parking Monitoring
Enter into General Setting to turn on parking monitoring function and there are three-step
settings(High, Middle and Low).Middle is suggested when parking monitoring turning on.
When parking monitoring is at work, DVR will show 'P' on the top left.
A. After the car engines off, DVR will be automatically power off too, but once DVR detects
vibration, it will power on automatically and record 10 seconds and then turn off again. If
other functions are working at same time,parking monitoring is top priority.
B.When parking monitoring turning on while driving, DVR will power on automatically
once it detects vibration and record circlely with the first file locked.
Note: Saved file will be saved until users delete from micro SD card.
Go to General Setting to turn off parking monitoring and 'P' will disappear.

10
UP ME NU OK MOD E DOW N
Driv er ID Settings
UP ME NU OK MOD E DOW N
Gene ral Settings
Driv er ID Setting s
2/6 Date For mat
Language
YYYY MM DD
English
OK
A C D 1 0 1 0 .
XII.Driver ID
In standby mode, short press MENU key to enter into settings, and press MODE key to go
to General Settings. Select 'Driver ID Settings' and press OK key to input numbers. There
are total 9 characters available and press UP/DOWN key to select '0-9', 'A-Z', '.' and space.
After confirmation, press OK key to go to next character or back to General Settings.
UP ME NU OK MOD E DOW N
GPS St atus
02 05 06 09 12 20 2 0 00 00 00 00 00
09 00 00 00 00 0043 30 26 26 26 00
LAT : N 22 3 6' 35"
LON: E 113 5 1' 7"
USE: 4
UP ME NU OK MODE D OWN
REC
BP 3.0 FH D GPS 0 KM/ H ACD 1010
2015 /09/08 15:1 2:45 0:01:4 4
EV: 0.00
GPS Status Icon
Speed Unit

11
UP ME NU OK MOD E DOW N
Gene ral Settings
Prot ect Level
4/6 Parking Monitoring
Moti on Detection
Middle
Off
Middle
Motion Detection Icon
UP ME NU OK MOD E DOW N
Movi e Mode
Movi e Off Time
2/3 Motion Event REC
Sound Record
5sec
1min
On
UP ME NU OK MOD E DOW N
BP 3.0 FH D GPS 0 KM/ H ACD 1010
2015/09/08 15:12:45 0:01:44
STBY
EV: 0.00
P
XIII.Motion Detection
In standby mode, press MENU key to enter into setting in Movie Mode and select 'Motion
Event REC' to choose recording time of every movie clip in motion detection.
After confirmation, press OK key to quit 'Motion Event REC' and then press MODE key to go
to General Settings. Select 'Motion detection' and press OK key to select the sensitivity.
Here are 3 steps sensitivity, 'High', Middle' and 'Low'. Middle is suggested when motion
detection turning on. Press OK key to confirm and then press MENU key to quit. DVR starts
to automatically countdown from 9 second to activate motion detection. If there is any
movement detected, DVR will record automatically in preseted recording time of movie
clip. In motion detection mode, press any key to quit and go back to standby mode. Press
MODE key 4 times can go back to mode detection mode again.
To turn off motion detection, please go to General Settings.

12
UP ME NU OK MOD E DOW N
USB Fu nction
USB Fu nction
MSDC P C Cam
XIV.Video and Photo Management
Please go to General Settings to select USB Function before connecting with the computer
via USB cable in the package. Here are two options, 'MSDC' and 'PC Cam'.
1)MSDC is for video and photo backup and delete.
2)PC Cam is for video call.

13
6. System setting Table
Mode Sub-Category Remark
1920X1080 30fps
1280x720 30fps
1280x720 60fps
640x480 30fps
Super Fine/Fine
Off/1min/3min/5min
0min/5sec/30sec/1min/3min
5sec/10sec/30sec/1min
On/Off
-2~+2
12M/8M/5M/3M/2M/1.2M/VGA
-2~+2
Auto/ISO100/ISO200/ISO400
Natural/Vivid/Pale
1~10
Delete One/Delete All
YES/NO
Time/Photo Left
On/Off
Never/1min/5min
YYYY MM DD HH MM SS
0~9/A~Z/'.'/space
None/YYYY MM DD/MM DD YYYY/
DD MM YYYY
Protect One/Protect All/Unprotect
One/Unprotect All
Super Fine/Fine
Auto/Daylight/Cloudy/Fluoresc./
Fluoresc.1/ Fluoresc.2/Incandesc.
Setting
Menu
Movie
Mode
Still
Capture
Playback
General
Settings
Media Tool
Category
Resolution
Movie Quality
Movie Clip Time
Movie Off Time
Motion event REC
Sound Record
Exposure
Still Image Size
Exposure
ISO Sensitivity
Color
Volume
Delete
Format SD card
SD Card INFO
Beep
Power Off
Clock Settings
Driver ID Settings
Date Format
Protect
Still Quality
White Balance
Default:
1920X1080
30fps
Default:
Super Fine
Default:1min
Default: 5sec
Default:1min
Default:On
Default:0
Default:12M
Default:0
Default: Auto
Default: Natural
Default: 5
Default:
Super Fine
Default: Auto
Default:Never
Default: DD
MM YYYY

14
Motion Detection
GPS Status
Time Zone Select
Off/Low/Middle/High
GPS Positioning Information
Setting
Menu
General
Settings
Default: Off
Reset Setup
FW Version
YES/NO
Current Software Version
7. BP GPS VP 3.0 Instruction
USB Function
LCD Power Save
Protect Level
MSDC/PC Cam
Off/1min/3min
Off/High/Middle/Low
Default: MSDC
Default:Off
Default: Middle
Parking Monitoring Off/High/Middle/Low Default: Off
GMT-12:00/GMT-11:00/GMT-10:00/
GMT-09:00/GMT-08:00/GMT-07:00/
GMT-06:00/GMT-05:00/GMT-04:00/
GMT-03:30/GMT-03:00/GMT-02:00/
GMT-01:00/GMT/GMT+01:00/
GMT+02:00/GMT+03:00/
GMT+03:30/GMT+04:00/
GMT+04:30/GMT+05:00/
GMT+05:30/GMT+05:45/
GMT+06:00/GMT+06:30/
GMT+07:00/GMT+08:00/
GMT+09:00/GMT+09:30/
GMT+10:00/GMT+11:00/
GMT+12:00/GMT+13:00
English/Français/Deutsch/Italiano/
Polski/Português/Español/
Nederlands/Suomi
Language Default:
English
I. Installation
① Install GPS player-”BP GPS VP 3.0” on MAC OS
Double click 'BP GPS VP 3.0.zip' to install automatically.
② Install GPS player-”BP GPS VP 3.0” on WINDOWS OS
Copy 'BP GPS VP 3.0.zip' to desktop and unzip to 'BP GPS VP 3.0'.
II. How to Start
① In MAC OS, double click “BP GPS VP 3.0” to start.
② In WINDOWS OS, double click ‘BP GPS VP 3.0.exe’ to start.
III.User Interface Definition
Here's user interface of BP GPS VP 3.0 WINDOWS version. MAC version is almost same.
Speed Unit KM/H MPH
Frequency 50HZ/60HZ
Daylight Saving
Time On/Off Default: Off

15
① Driving Speed: show real-time driving speed; double click to switch KM/H and MPH
② Video Play Window: double click any place in this window to view in full screen mode;
double click again, it will be back to the current mode
③ Scroll Bar: show the current point of the video; drag it to move forward or backward
④ Real-time G-sensor Information
⑤ Video Group: Videos taken in sequence will be one group
⑥ Select Video to Play
⑦ Image Capture: capture the current point of the video
⑧ Save to: select one video from Video List to save it into one folder on PC
⑨ Delete: select one video from Video List to delete
⑩ Settings: select language
⑩ Fast Backward: 0.9/0.8/0.7/0.6/0.5/0.4/0.3 times
⑩ Stop
⑩ Play/Pause
⑩ Fast Forward: 1.2/1.4/1.6/1.8/2.0/2.4/2.8/3.2/3.6/4.0 times
⑩ Volume
⑩ Autoplay: click to play next video automatically after finish; click again to turn it off
⑩ Save to KML Format: select one video from Video List to save it in KML format
⑩ Unlock Video: select one locked video from Video List to unlock it
⑩ Video List: show video size, length and etc.; double click the video to play
⑩ Map Window: show real-time movement track of vehicle with internet
⑩ MapType: plane map/satellite map/3D map
⑩ Map Scroll Bar: drag it to zoom in and out
⑩ Direction Navigation
Note: all windows can be dragged to adjust
1
3
5
2
6 7 8 9 10 11 16 17 18
19
20
12 13 14 15
4
21
22
23
Plane Map Satellite Map 3D Map
1
2
3
4
5
6
7
8
9
20
21
22
23

16
8. Product Specification
Specification may change due to upgrade without prior notice. Please take the objects as
standard.
LCD Size
CMOS Sensor
Viewing Angle
Video Resolution
Image Resolution
Minimum Illumination
Video Format
Image Format
Memory Card
Memory Card Capacity
Digital zoom
Frequency
Output
Power Port
Battery Capacity
Microphone/Speaker
Loop Recording
LCD Off
Parking Monitoring
G-Sensor&SOS
Motion Detection
Parking Monitoring
GPS Tracking
Driver ID
Language
DVR N.W.
DVR Size
2.7” HD TFT screen(16:9)
OV2710
140° diagonal ultra wide viewing angle
1920X1080 30fps/1280x720 30fps/1280x720 60fps/640x480 30fps
12M/8M/5M/3M/2M/1.2M/VGA
1 LUX
AVI/H.264
JPG
Micro SD Card
Max. 64GB
X4
50HZ/60HZ
HDMI
USB 5V 1000mA
600mAH
Built-in
Off/1min/3min/5min
Support
Support
Support
Support
Support
Support
Support
105g
81.4(L)X64.7(W)X41.0(H)mm
English/Français/Deutsch/Italiano/Polski/Português/Español/
Nederlands/Suomi
Table of contents
Languages:
Other Blaupunkt Dashcam manuals

Blaupunkt
Blaupunkt AHDC-2.0 User manual

Blaupunkt
Blaupunkt RC 2.0 User manual

Blaupunkt
Blaupunkt BP 2.1 FHD User manual

Blaupunkt
Blaupunkt BP 4.0 - FHD Product guide

Blaupunkt
Blaupunkt AHDC-1.1 User manual

Blaupunkt
Blaupunkt BPDV142 User manual

Blaupunkt
Blaupunkt BC TY 1.0 User manual

Blaupunkt
Blaupunkt RC1.0 User manual

Blaupunkt
Blaupunkt RVC 4.1 KH User manual

Blaupunkt
Blaupunkt BPDV165 User manual