manuals.online logo
Brands
  1. Home
  2. •
  3. Brands
  4. •
  5. Blaupunkt
  6. •
  7. Subwoofer
  8. •
  9. Blaupunkt XLf 10A User manual

Blaupunkt XLf 10A User manual

BPIN Private Limited
47, Atlanta Society, Nariman PointMumbai‐ 400 021. India.
Toll Free: 1800 209 6820 | info@blaupunktcar.in
Shop Online at www.blaupunktcar.in
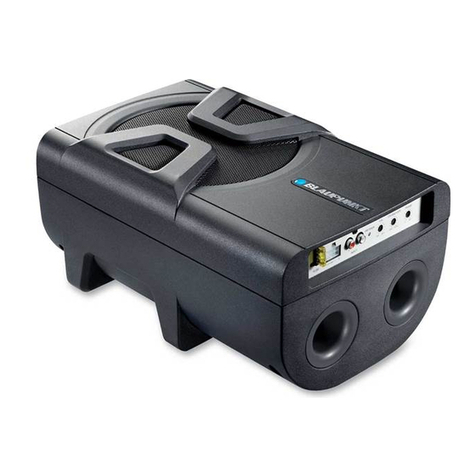
10" (254 mm) | 600 W MAX. POWER
UNDERSEAT ACTIVE SUBWOOFER
XLf 10A
Xlf 10A
Introduction
Xlf 10A, is a slim prole underseat amplied subwoofer. It comes with a slim enough prole to easily t
below the seat of most vehicles. This system offers a quick and easy way to add a high-powered
subwoofer system to any audio system.
The integrated amplier in the XLf 10A features low pass crossover and a control for adjusting the input
sensitivity from 0.12V to 3.5V.
This device comes equipped with both high-level (speaker level) and low level (RCA type) inputs,
making this a universal solution for use with any head unit (factory or aftermarket) or any other input
source.
To ne tune and adjust the level of the subwoofer an external bass controller is included. This external
bass controller is wired directly to the sub and usually located in the front close to the driver to allow for
easy adjustment.
Mounting the Subwoofer
1. Find a suitable location in the vehicle-preferably under the driver or front passenger seat to mount
the amplier.
A typical location is shown below:
Xlf 10A
Vehicle seat
2. Make sure there is sufficient air circulation at the intended mounting location.
3. Securely mount the device at the preferred location using the screws and mounting brackets
included in the packaging. Ensure that the device is not loosely mounted.
Control Panel and Features
4. Low pass lter: This control permits you dene the frequency range you want the subwoofer to
receive from the built-in amplier module (preferably set to ~80-90Hz). The subwoofer will
reproduce all frequencies below the frequency you set.
5. Bass boost: This bass boost feature will increase the level the bass frequency – usually set at 45Hz.
6. Input gain control: Once the HU and all other components of the audio system have been
installed, turn down this control to minimum. Turn the head unit on and the under seat subwoofer
should turn on. Turn the head unit volume to about 2/3 level and play mono pink noise. Slowly turn
up the subwoofer input gain control until you hear a small amount of distortion. Reduce the gain
level until the distortion is completely gone. At this point, play some test tracks and ascertain that
the output from the device sounds clean. Leave the control at this setting.
7. Remote level control port: Attach the included remote level control to control the level of the
subwoofer independently.
8. High level (speaker level) inputs: If the installed head unit does not have low level (RCA) outputs,
this device can be connected using the speaker level output from the head unit. Use the supplied
connector and connect the outputs properly as shown in the connection diagram in this manual.
9. Low level RCA inputs: Low level inputs are the recommended way to introduce the audio signal to
the subwoofer if RCA outputs are present on your head unit or other signal source (such as a sound
processor).
10. Fuse: The fuse is rated at 25A. Do not use a fuse with a different value and NEVER replace the fuse
with a wire or coin.
11. Power terminals
1. Power on LED indicator
2. Protect LED indicator
3. Phase shift: Use this switch to help compensate for time alignment problems in the system. Such
problems usually result from having the subwoofer at a different distance from the listener than the
other speakers in the system.
Xlf 10A
Low Level Input Wiring
Low-level (RCA) input wiring is preferred for best audio performance. Most trunk or hatchback
installations will require a 15-17 foot RCA cable, while pickup trucks and under-seat installations will
require a 6-12 foot RCA cable. Always use a high quality cable.
NOTE: Do not connect BOTH the high level and low level inputs from your head unit to the
amplier at the same time.
High Level Input Wiring
The high level input(s) should only be used when the head unit lacks RCA outputs. If the RCA outputs
are not present, connect the speaker outputs from the receiver to the high level input connector of the
amplier. Be sure to observe correct polarity to avoid audio phase problems.
NOTE: Do not connect BOTH the high level and low level inputs from your receiver to your
amplier at the same time!
Xlf 10A
To Audio outputs of head
unit or signal processor
Grey L+
White R+
Grey/Black L-
White/Black R-
To Speaker Terminals
Power Connections
Connect the ground terminal to the closest point on the chassis of the vehicle. Keep this ground wire to
less than 39” (100 cm) in length. Use 8 gauge (or heavier) wire. Connect the remote terminal to the
remote output of the head unit using 16 gauge (or heavier) wire. For +12V connect a 30A fuse holder
within 18” (45 cm) of the car battery, and run 8 gauge (or heavier) cable from this fuse to the amplier
location.
Remote Level Control Connection
FUSE
+
Chassis ground point
To REMOTE TURN-ON
terninal of head unit
Remote
Level Control
Install the external bass controller at a location under
the dash or similar where convenient access.
Xlf 10A
Xlf 10A
Troubleshooting
If the device should malfunction or should there be an issue with it’s performance, please refer to the
below trouble shooting guide and wiring diagram mentioned above. Should the issue persist, please
visit a Blaupunkt Authorized Service Center.
Xlf 10A
Notes
Features:
• Subwoofer: 10” (254mm)
• Integrated Amplier: 150 watts RMS / 600 watts MAX Power
• Amplier type: Class A/B
• Enclosure type: Slim Underseat Form Factor (Sealed)
• Woofer Cone Material: Aluminium with Rubber surround
• Nominal Impedance: 3 Ohms
• Frequency Response: 32-5K Hz
• Tone Controls: Gain, Bass Boost (0, +12dB)
• Signal Input: Low Level (RCA pair), High Level (Left/Right)
• Visual Indicators: POWER/PROTECT
• Crossover Controls: Variable (50-150Hz)
• Phase Select: 0°-180°
• DC Offset: Built in-Auto Turn ON
• Fuse Rating: 25A
• External Remote Controller included in packaging
PROBLEM
Not switching on.
Power LED not ‘ON’
Not working, but
status LED ‘ON’
No sound
POSSIBLE REASON
NO + 12v to power wire
NO power to remote wire
Fuse broken
Fuse blown
Amplier too hot
Head Unit
Gain control not set up
Connections
Check Fuse and Connection at Battery
Check Remote turn on from headunit
Replace fuse with correct type and
amperage.
Replace fuse with correct type and
amperage.
Move unit to ventilated area. Turn head
unit down.
Check head unit volume level.
Ensure you have set up the amplier
gain level control
Check all power, remote on and
ground connections
SOLUTION

Other Blaupunkt Subwoofer manuals

Blaupunkt GTs 6902 A User manual

Blaupunkt

Blaupunkt GTs 6902 A User manual

Blaupunkt XLf 10150 AD User manual

Blaupunkt

Blaupunkt XLf 10150 AD User manual

Blaupunkt GTr 100 A User manual

Blaupunkt

Blaupunkt GTr 100 A User manual

Blaupunkt VPW 460 Owner's manual

Blaupunkt

Blaupunkt VPW 460 Owner's manual

Blaupunkt GTw 190 A User manual

Blaupunkt

Blaupunkt GTw 190 A User manual

Blaupunkt PC85 User manual

Blaupunkt

Blaupunkt PC85 User manual

Blaupunkt Velocity VCS 10 Owner's manual

Blaupunkt

Blaupunkt Velocity VCS 10 Owner's manual

Blaupunkt Blue Magic Xlb 250 A User manual

Blaupunkt

Blaupunkt Blue Magic Xlb 250 A User manual

Blaupunkt XLf 200 ATS User manual

Blaupunkt

Blaupunkt XLf 200 ATS User manual

Blaupunkt GTb 1200 SC User manual

Blaupunkt

Blaupunkt GTb 1200 SC User manual

Blaupunkt XLb 200 A User manual

Blaupunkt

Blaupunkt XLb 200 A User manual

Blaupunkt GTb 8 A User manual

Blaupunkt

Blaupunkt GTb 8 A User manual

Blaupunkt GTr 96 A User manual

Blaupunkt

Blaupunkt GTr 96 A User manual

Blaupunkt TSw 300 User manual

Blaupunkt

Blaupunkt TSw 300 User manual

Blaupunkt GTb 1200 DE Instruction manual

Blaupunkt

Blaupunkt GTb 1200 DE Instruction manual

Blaupunkt XLf 180 A User manual

Blaupunkt

Blaupunkt XLf 180 A User manual

Blaupunkt GTr 130 A User manual

Blaupunkt

Blaupunkt GTr 130 A User manual

Blaupunkt XLf 180 A User manual

Blaupunkt

Blaupunkt XLf 180 A User manual

Blaupunkt IC 10 SM User manual

Blaupunkt

Blaupunkt IC 10 SM User manual

Blaupunkt Blue Magic Xlb 250 A User manual

Blaupunkt

Blaupunkt Blue Magic Xlb 250 A User manual

Blaupunkt XLf 150 A User manual

Blaupunkt

Blaupunkt XLf 150 A User manual

Blaupunkt GTb 1200 Mystic Series User manual

Blaupunkt

Blaupunkt GTb 1200 Mystic Series User manual

Blaupunkt XLf 8A User manual

Blaupunkt

Blaupunkt XLf 8A User manual

Blaupunkt GTW 11004 D User manual

Blaupunkt

Blaupunkt GTW 11004 D User manual

Popular Subwoofer manuals by other brands

Kicker BassStation PT8 manual

Kicker

Kicker BassStation PT8 manual

Alpine PLV-7 owner's manual

Alpine

Alpine PLV-7 owner's manual

PRESONUS Temblor T8 owner's manual

PRESONUS

PRESONUS Temblor T8 owner's manual

ESX QUANTUM QXB6A manual

ESX

ESX QUANTUM QXB6A manual

JL Audio 10W1-4 Specifications

JL Audio

JL Audio 10W1-4 Specifications

Kicker DCompR10 Quick information guide

Kicker

Kicker DCompR10 Quick information guide

Velodyne CHT-10R user manual

Velodyne

Velodyne CHT-10R user manual

DB Drive WDX G3 user manual

DB Drive

DB Drive WDX G3 user manual

JBL SUB 560P owner's manual

JBL

JBL SUB 560P owner's manual

Hifonics MR8DUAL Instruction

Hifonics

Hifonics MR8DUAL Instruction

PYLE Audio PYLE Gear X Series PLG54 Specification sheet

PYLE Audio

PYLE Audio PYLE Gear X Series PLG54 Specification sheet

Sony SA-WX90 operating instructions

Sony

Sony SA-WX90 operating instructions

Sony XS-L1037 Operating Instructions / Manual de instrucciones / Mode... instructions

Sony

Sony XS-L1037 Operating Instructions / Manual de instrucciones / Mode... instructions

Pioneer SW-8 Operation guide

Pioneer

Pioneer SW-8 Operation guide

Infinity BU-120 Service manual

Infinity

Infinity BU-120 Service manual

Tannoy B400 user manual

Tannoy

Tannoy B400 user manual

Precision Acoustics HD12S user guide

Precision Acoustics

Precision Acoustics HD12S user guide

RE Audio SE Pro10 owner's manual

RE Audio

RE Audio SE Pro10 owner's manual

manuals.online logo
manuals.online logoBrands
  • About & Mission
  • Contact us
  • Privacy Policy
  • Terms and Conditions

Copyright 2025 Manuals.Online. All Rights Reserved.