Blodgett Combi BCX14G Programming manual
BCX14G AND BX14G
COMBINATION OVEN STEAMER
TROUBLESHOOTING MANUAL
BLODGETT COMBI
www.blodgett.com
44 Lakeside Avenue, Burlington, Vermont 05402 USA ~ Tel.(802) 658-6600 Fax (802) 652-2814
PN 52051 Rev B (12/15/2010)
COMBI

TABLE OF CONTENTS
Section 1 Controls
Manual Control Operation………………………………………………………………1-3
Manual Control Second Level Programming……………………………………………..4
New Manual Control Operation………………………………………………………...5-7
New Manual Control Second Level Programming……………………………………..8-9
New Manual Control Factory Level Programming…………………………………..10-11
MenuSelect Control Operation……………………………………………………….12-15
MenuSelect Control Second Level Programming……………………………………16-17
Notes……………………………………………………………………………………..18
Section 2 Troubleshooting
Troubleshooting Guide……………………………………………………………….19-22
Incoming Power Supply………………………………………………………………….23
Logic Board Dcv Test Points…………………………………………………………….24
Cool Down Flow Chart…………………………………………………………………..25
Hot Air Operation Flow Chart…………………………………………………………...26
Steam Operation Flow Chart…………………………………………………………….27
Combi Mode Operation Flow Chart……………………………………………………..28
Door Switch Troubleshooting Flow Chart……………………………………………….29
Float Switch Troubleshooting Flow Chart……………………………………………….30
Convection Motor Direction Flow Chart………………………………………………...31
Drain Valve Troubleshooting Flow Chart……………………………………………….32
Logic Board LED Designations Flow Chart…………………………………………33-34
IFB (LED) Designations Flow Chart…………………………………………………….35
Point to Point Troubleshooting……………………………………………………….36-38
Symbol Designations…………………………………………………………………….39
Notes……………………………………………………………………………………..40
Section 3 Motor Speed Inverter Troubleshooting
Manual Control Inverter Programming………………………………………………41-42
MenuSelect Control Inverter Programming.................................................................43-44
Inverter Fault Codes and Stored Fault Codes…………………………………………...45
Section 4 Wire Schematic & Wire Harness
Manual Control Schematic W/Float P/n 39680………………………………………….47
Manual Control Schematic W/Level Board P/n 52853………………………………….48
New Manual Control Schematic 120V P/n 53849……………………………………….49
New Manual Control Schematic 208V – 240V P/n 53850………………………………50
MenuSelect Control Schematic W/Float P/n 51228……………………………………..51
MenuSelect Control Schematic W/Spritzer P/n 52855…………………………………..52
MenuSelect Control Schematic 480V P/n 53852………………………………………..53
BX14G Manual Control Schematic P/n 50546…………………………………………..54
BX14G MenuSelect Control Schematic P/n 51155……………………………………...55

Section 5 Error Codes
Manual Control W/Meat Probe Error Codes…………………………………………….56
New Manual Control W/Meat Probe Error Codes……………………………………….57
MenuSelect Control Error Codes………………………………………………………...58
Probe Chart
BCX14G with Manual Control
Part number 39800 located at the rear of the oven cavity below the blower motor a two
wire probe 1K value. At 75° 1090 ohm’s and at 300° 1575 ohm’s
BCX14G with MenuSelect Control
Part number 50310 located at the rear of the oven cavity below the blower motor a two
wire probe right angle 1K value. At 75° 1090 and at 300° 1575 ohm’s
(BX14G) with MenuSelect Control
Part number 50310 all the same as above for the BCX14G with MenuSelect Control.
(BX14G/BCX14G with the New Manual)
Part number 50310 all the same as the above for MenuSelect Controls.
(BX14G) with Manual Control
Part number 50636 located at the rear of the oven cavity below the blower motor a 4 wire
probe 1K value. At 75° 1090 ohm’s and at 300° 1575 ohm’s
Meat Probes
All Controls use the same Meat probes
Part number 39797 a 6” removable probe the plugs into the blue meat probe jack at the
bottom of the control panel.
This is a 1K probe at 75° 1090 ohm’s and at 300° 1575 ohm’

Operation
Standard Controls for Models BCX 14 and BX 14
2
3
5
6
7
10
13
15
18
Standard Controls for Models BCX 14 and BX 14
1
4
5
8
9
11
12
14
16
17
CONTROLS IDENTIFICATION
1. POWER ON LAMP -
when lit indicates
power to the unit is turned on.
2. MODE SELECTOR SWITCH
-
the oven on or off. Allows selection of
Steam, Hot Air, Combi or Cool Down Modes.
3. TEMPERATURE DIAL -
desired cooking temperature.
4. DISPLAY -
displays time and temperature
in formation.
5.
UP & DOWN ARROW KEYS
enter values in the display.
6. ACTUAL TEMP KEY -
press to display the ac
tual probe temperature during core cooking or
actual cavity temperature in timer mode.
7.
TIME/PROBE TOGGLE KEY
select either timer or probe cooking.
8. CLEAR/STOP KEY -
use to clear or stop
the timer and silence the buzzer.
9. START KEY -
press to start the timer.
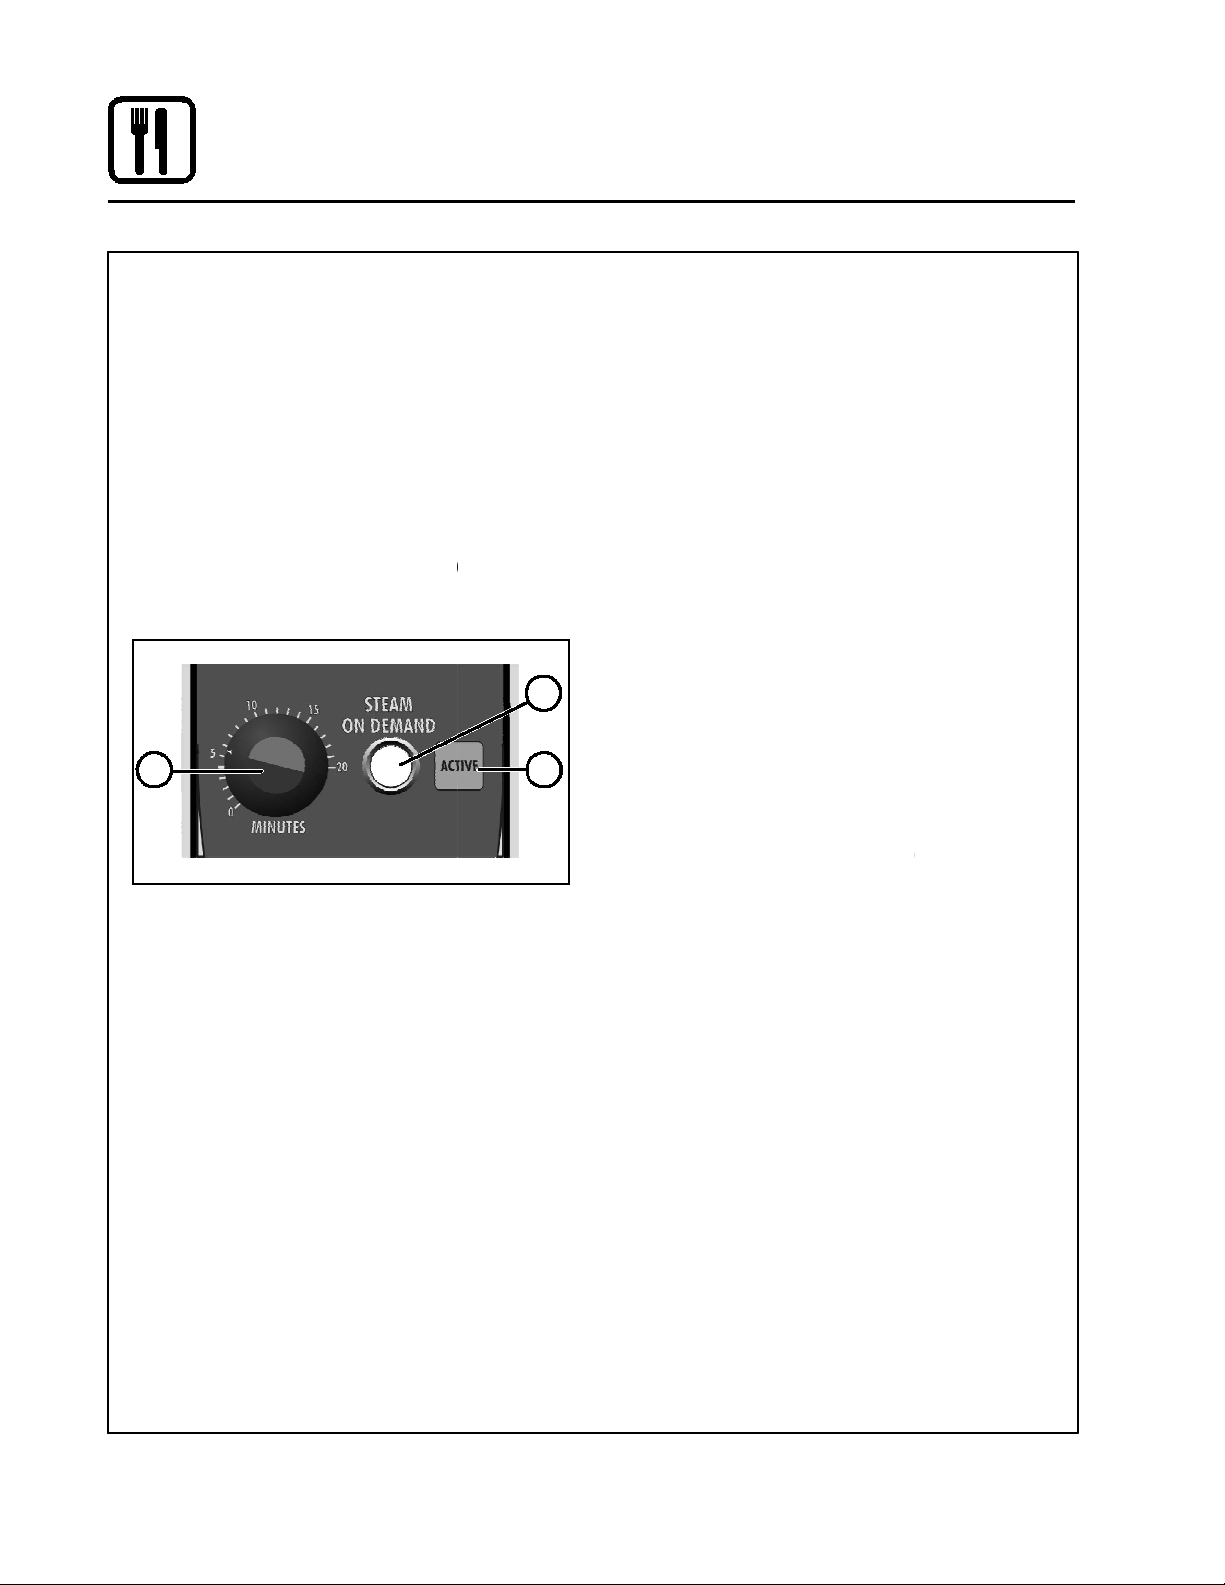
10.
STEAM ON DEMAND TIMER
duration for steam on demand.
11.
STEAM ON DEMAND SWITCH
ini tiate steam injection cycle.
12.
STEAM ON DEMAND LAMP
steam on demand is activated.
13. LIGHTS SWITCH -
used to turn the lights
on and off.
14. CAVITY VENT SWITCH -
used to open or
close vent to release steam fr
15. FAN SPEED SWITCH -
used to select fan
speed.
16. PROBE CONNECTION -
used to connect
the core temperature probe to the control.
17. FILL LAMP -
illuminated until the steam
gen erator is filled with water.
NOTE: Model BX 14 ovens do not have a
fill lamp.
18.
DELIME LAMP (BCX 14 ovens only)
Flashes when steam generator deliming
is needed. Remains steady when deliming
pro cess is active.
CLEAN LAMP (BX 14 ovens only)
when the unit has been in use for a prepro
grammed time and needs to b
1
when lit indicates
power to the unit is turned on.
-
turns power to
the oven on or off. Allows selection of
Steam, Hot Air, Combi or Cool Down Modes.
used to set
desired cooking temperature.
displays time and temperature
UP & DOWN ARROW KEYS
- press to
enter values in the display.
press to display the ac
tual probe temperature during core cooking or
actual cavity temperature in timer mode.
TIME/PROBE TOGGLE KEY
- used to
select either timer or probe cooking.
use to clear or stop
the timer and silence the buzzer.
press to start the timer.
STEAM ON DEMAND TIMER
- used to set
duration for steam on demand.
STEAM ON DEMAND SWITCH
- used to
ini tiate steam injection cycle.
STEAM ON DEMAND LAMP
- lights when
steam on demand is activated.
used to turn the lights
used to open or
close vent to release steam fr
om cavity.
used to select fan
used to connect
the core temperature probe to the control.
illuminated until the steam
gen erator is filled with water.
NOTE: Model BX 14 ovens do not have a
DELIME LAMP (BCX 14 ovens only)
-
Flashes when steam generator deliming
is needed. Remains steady when deliming
CLEAN LAMP (BX 14 ovens only)
- Flashes
when the unit has been in use for a prepro
grammed time and needs to b
e cleaned.

TIMER COOKING
1.
Press the TIMER/PROBE TOGGLE KEY (7)
to select the timer mode. The TIMER LED
below the display lights.
2.
Turn the MODE SELECTOR Switch (2) to
the desired function.
3.
Set the TEMPERATURE DIAL (3) to the de
sired cook temperature.
For Steam mode, set the t
emperature no
high er than 212_F (100_
C).
For poaching, turn the temperature dial to
the POACH position, 180_
F (82
The optimum temperature for Combi
mode is 300 350_
F (149 177
4.
When the oven has reached the cook
temper ature
, load the product.
5.
Use the ARROW KEYS (5) to enter the desired
cook time in the display. You can clear the dis
play by pressing the CLEAR/STOP KEY (8).
6.
Press the START KEY (9) to begin the timer.
The temperature, time and mode can be al
tered
at any time during the cooking process.
To stop the timer, press the CLEAR/STOP KEY
(8).
7.
When the timer reaches 00:00, the buzzer
sounds. Press the CLEAR/STOP KEY (8) to
si lence the buzzer. Remove the product.
5
6
7
8
Operation
Standard Controls for Models BCX 14 and BX 14
Press the TIMER/PROBE TOGGLE KEY (7)
to select the timer mode. The TIMER LED
Turn the MODE SELECTOR Switch (2) to
Set the TEMPERATURE DIAL (3) to the de
emperature no
C).
For poaching, turn the temperature dial to
F (82
_C).
The optimum temperature for Combi
F (149 177
_C).
When the oven has reached the cook
, load the product.
Use the ARROW KEYS (5) to enter the desired
cook time in the display. You can clear the dis
play by pressing the CLEAR/STOP KEY (8).
Press the START KEY (9) to begin the timer.
The temperature, time and mode can be al
at any time during the cooking process.
To stop the timer, press the CLEAR/STOP KEY
When the timer reaches 00:00, the buzzer
sounds. Press the CLEAR/STOP KEY (8) to
si lence the buzzer. Remove the product.
5
9
PROBE COOKING
1.
Press the TIMER/PROBE key (7) to select
the probe mode. The PROBE LED below
the dis play lights.
2.
Use the ARROW KEYS (5) to enter the
desired final cook temperature in the
display. You can clear the display by
pressing the CLEAR/ STOP KEY (8).
3.
Insert the core probe into the product. Load
product into the oven and close the door. Be
sure that the terminal end of the core probe is
outside of the oven and clear of the door.
4.
Connect the core probe to the PROBE CON
NECTION (16) at the bottom of the
5.
The display gives the actual core probe
tem perature.
6.
When the product reaches the final cook
tem perature the buzzer sounds.
COOL DOWN
NOTE: The unit can be cooled down rapidly
for steaming, cleaning, etc.
1.
To cool down the oven cavity, open the
door and select Cool Down on the MODE
SELEC TOR Switch (2).
2
Operation
Standard Controls for Models BCX 14 and BX 14
Press the TIMER/PROBE key (7) to select
the probe mode. The PROBE LED below
Use the ARROW KEYS (5) to enter the
desired final cook temperature in the
display. You can clear the display by
pressing the CLEAR/ STOP KEY (8).
Insert the core probe into the product. Load
product into the oven and close the door. Be
sure that the terminal end of the core probe is
outside of the oven and clear of the door.
Connect the core probe to the PROBE CON
NECTION (16) at the bottom of the
control.
The display gives the actual core probe
When the product reaches the final cook
tem perature the buzzer sounds.
NOTE: The unit can be cooled down rapidly
for steaming, cleaning, etc.
To cool down the oven cavity, open the
door and select Cool Down on the MODE
SELEC TOR Switch (2).
Operation
Standard Controls for Models BCX 14 and BX 14
STEAM ON DEMAND
How to set the Steam On Demand feature:
While in the Hot Air or Combi mode, the unit can
be set to steam for a
timed period. At the end of the
timed cycle the unit reverts back to the original set
ting. Steam On Demand can be used at any time
during the cook cycle.
NOTE:
Steam On Demand
is not available
steam mode.
1.
Set
the desired •steam
on" time with
STEAM ON DEMAND TIMER (10).
2. Press the STEAM
ON DEMAND SWITCH (11).
The STEAM ON DEMAND LAMP (12) lights.
10
Standard Controls for Models BCX 14 and BX 14
Uses for Steam On
Demand:
How to set the Steam On Demand feature:
Most of the ideas came from our creative custom
While in the Hot Air or Combi mode, the unit can
ers. Experiment with this feature on your own and
let us know of any new uses.
timed period. At the end of the
Add a minute or two at the beginning when bak
timed cycle the unit reverts back to the original set
D
ing bread for a shiny crust.
ting. Steam On Demand can be used at any time
D
Kick start large loads such as 20 or more chick
is not available
in
ens. By starting large loads with 5 to 8 minutes
of steam you help the oven recover and cut the
cooking time by
more than 10%.
on" time with
the
D
Bake bagels without boiling. By starting raw ba
STEAM ON DEMAND TIMER (10).
gels with 1 to 2 minutes of steam you can
ON DEMAND SWITCH (11).
achieve a beautiful crust.
The STEAM ON DEMAND LAMP (12) lights.
D
Cream caramel is great at 230
_
F to 250
Combi mode using 2 minutes of on demand
steam.
11 D
When
cooking chicken wings, try setting the
oven in the Combi mode at 375
minutes of Steam On Demand. This method will
12
stop the tips from burning. Total cooking time is
approximately 12
minutes.
D
Pork ribs tend to pull off the bone better when
using 5 to 8 minutes of Steam On Demand. Try
ribs in the Combi mode at 350
3
Most of the ideas came from our creative custom
ers. Experiment with this feature on your own and
Add a minute or two at the beginning when bak
Kick start large loads such as 20 or more chick
ens. By starting large loads with 5 to 8 minutes
of steam you help the oven recover and cut the
more than 10%.
Bake bagels without boiling. By starting raw ba
gels with 1 to 2 minutes of steam you can
F to 250
_
F in the
Combi mode using 2 minutes of on demand
cooking chicken wings, try setting the
oven in the Combi mode at 375
_
F and use 3
minutes of Steam On Demand. This method will
stop the tips from burning. Total cooking time is
Pork ribs tend to pull off the bone better when
using 5 to 8 minutes of Steam On Demand. Try
ribs in the Combi mode at 350
_
F.

Standard Control Second Level Programming
Combi Manual Control Temp. (BP# 39673)
Instructions For +7°Temperature Offset
Recommended: Read instructions before programming. If each step is not
conducted within 9 seconds, the control will lock up and the programming
sequence will have to be restarted from step 1
1. Power oven off
2. Power on oven in Combi Mode
3.
Press and Hold
for 5 seconds and release
4.
Press and hold
for 5 seconds and release
5.
Toggle
until "2 X X X" is displayed. Where "X X X" are any number
6.
Press and release
PROBE LED will begin to Flash
7.
Toggle
or
until Screed displays "P 2 0 7"
8. Press and release
TIMER LED will begin to flash
9.
Press
until Screen displays "P 3 X X" where "X X" are any number
10. Press and release PROBE LED will begin to flash
11. Toggle or until Screed displays "P 3 0 0"
12. Do not touch oven for 10 seconds. "0 0 0" will appear. Temp. offset is now programmed
13. Turn off oven and turn back on
4

Operation
Standard Controls for Models BCX 14 and BX 14
3
4
5
8
10
12
15
17
Standard Controls for Models BCX 14 and BX 14
1
2
6
7
9
11
13
14
16
CONTROLS IDENTIFICATION
1. MODE SELECTOR SWITCH
-
the oven on or off. Allows selection of
Steam, Hot Air, Combi or Cool Down Modes.
2. DISPLAY -
displays time and temperature
in formation.
3. TEMPERATURE DIAL -
desired cooking temperature.
4. HEAT LAMP -
lights when the oven is
calling for heat
5. TIMER LED -
lights when the cook time is
displayed
6. PROBE ACTUAL LED -
lights when the
actu al probe temperature is displayed
7. PROBE SETPOINT LED -
lights when the
core setpoint temperature is displa
8. TIMER/PROBE KNOB -
use to select and
set either cook time or probe temperature
9.
STEAM ON DEMAND DISPLAY
the steam on demand time
10.
STEAM ON DEMAND LAMP
steam on demand is activated.
11.
STEAM ON DEMAND KNOB
duration for steam on demand
12. LIGHTS KEY -
press to turn the oven
lights on and off
13. FAN SPEED KEY -
used to select fan speed.
14. CAVITY VENT KEY -
used to open or
close vent to release steam from cavity.
15.
DELIME LAMP (BCX 14 ovens only)
Flashes when steam generator deliming
is needed. Remains steady when deliming
pro cess is active.
16. FILL LAMP -
illuminated until the steam
gen erator is filled with water.
NOTE: Model BX 14 ovens do not have a
fill lamp.
17. PROBE CONNECTION -
used to connect
the core temperature probe to the control.
5
-
turns power to
the oven on or off. Allows selection of
Steam, Hot Air, Combi or Cool Down Modes.
displays time and temperature
used to set
desired cooking temperature.
lights when the oven is
lights when the cook time is
lights when the
actu al probe temperature is displayed
lights when the
core setpoint temperature is displa
yed
use to select and
set either cook time or probe temperature
STEAM ON DEMAND DISPLAY
- displays
STEAM ON DEMAND LAMP
- lights when
steam on demand is activated.
STEAM ON DEMAND KNOB
- use to set
duration for steam on demand
press to turn the oven
used to select fan speed.
used to open or
close vent to release steam from cavity.
DELIME LAMP (BCX 14 ovens only)
-
Flashes when steam generator deliming
is needed. Remains steady when deliming
illuminated until the steam
gen erator is filled with water.
NOTE: Model BX 14 ovens do not have a
used to connect
the core temperature probe to the control.

TIMER COOKING
1.
Press the TIMER/PROBE KNOB (8) to select
the timer mode. The TIMER LED lights.
2.
Turn the MODE SELECTOR Switch (1) to
the desired function.
3.
Set the TEMPERATURE DIAL (3) to the de
sired cook temperature.
For Steam mode, set the temperature no
high er than 212_F (100_
C).
For poaching, turn the temperature dial to
the POACH position, 180_
F (82
The optimum temperature for Combi
mode is 300 350_
F (149 177
4.
When the oven has reached the cook
temper ature, load the product.
5.
Rotate knob to enter the desired cook
time in the display. You can clear the
display by rotat ing counter clockwise.
The timer begins on its own.
6.
The temperature, time and mode can be al
tered at any time during the cooking process.
7.
When the timer reaches 00:00, the buzzer
sounds. Press or rotate the TIMER/PROBE
KNOB (8) counter clockwise to silence the
buzzer. Remove the product.
Operation
Standard Controls for Models BCX 14 and BX 14
Press the TIMER/PROBE KNOB (8) to select
the timer mode. The TIMER LED lights.
Turn the MODE SELECTOR Switch (1) to
Set the TEMPERATURE DIAL (3) to the de
For Steam mode, set the temperature no
C).
For poaching, turn the temperature dial to
F (82
_C).
The optimum temperature for Combi
F (149 177
_C).
When the oven has reached the cook
temper ature, load the product.
Rotate knob to enter the desired cook
time in the display. You can clear the
display by rotat ing counter clockwise.
The timer begins on its own.
The temperature, time and mode can be al
tered at any time during the cooking process.
When the timer reaches 00:00, the buzzer
sounds. Press or rotate the TIMER/PROBE
KNOB (8) counter clockwise to silence the
buzzer. Remove the product.
PROBE COOKING
1.
Press the TIMER/PROBE knob (8) to
select the probe setpoint mode. The
PROBE SET POINT
LED (7) lights.
2.
Rotate the knob to enter the desired final
cook temperature in the display.
3.
Insert the core probe into the product. Load
product into the oven and close the door. Be
sure that the terminal end of the core probe is
outside of the oven and clear of the door.
4.
Connect the core probe to the PROBE CON
NECTION (17) at the bottom of the
5.
The display gives the actual core probe tem
perature by pressing the TIMER/PROBE knob
(8) again.
6.
When the product reaches the final cook
tem perature the buzzer sounds.
COOL DOWN
NOTE: The unit can be cooled down rapidly
for steaming,
cleaning, etc.
1.
To cool down the oven cavity, open the
door and select Cool Down on the MODE
SELEC TOR Switch (1).
6
Operation
Standard Controls for Models BCX 14 and BX 14
Press the TIMER/PROBE knob (8) to
select the probe setpoint mode. The
LED (7) lights.
Rotate the knob to enter the desired final
cook temperature in the display.
Insert the core probe into the product. Load
product into the oven and close the door. Be
sure that the terminal end of the core probe is
outside of the oven and clear of the door.
Connect the core probe to the PROBE CON
NECTION (17) at the bottom of the
control.
The display gives the actual core probe tem
perature by pressing the TIMER/PROBE knob
When the product reaches the final cook
tem perature the buzzer sounds.
NOTE: The unit can be cooled down rapidly
cleaning, etc.
To cool down the oven cavity, open the
door and select Cool Down on the MODE
SELEC TOR Switch (1).

Operation
Standard Controls for Models BCX 14 and BX 14
STEAM ON DEMAND
How to set the Steam On Demand feature:
While in the Hot Air or Combi mode, the unit
can be set to steam for a timed period. At the
end of the timed cycle the unit reverts back to
the original set ting. Steam On
Demand can
be used at any time during the cook cycle.
NOTE: Steam On Demand is not available in
steam mode.
1.
Turn the STEAM ON DEMAND KNOB (11) to
set the desired length of time. The time is dis
played in the STEAM ON DEMAND DISPLAY
(9).
2.
Press the STEAM ON DEMAND KNOB (11).
The STEAM ON DEMAND LAMP (10) lights.
Standard Controls for Models BCX 14 and BX 14
How to set the Steam On Demand feature:
While in the Hot Air or Combi mode, the unit
can be set to steam for a timed period. At the
end of the timed cycle the unit reverts back to
Demand can
be used at any time during the cook cycle.
NOTE: Steam On Demand is not available in
Turn the STEAM ON DEMAND KNOB (11) to
set the desired length of time. The time is dis
played in the STEAM ON DEMAND DISPLAY
Press the STEAM ON DEMAND KNOB (11).
The STEAM ON DEMAND LAMP (10) lights.
Uses for Steam On Demand:
Most of the ideas came from our creative
custom ers. Experiment with this feature on
your own and let us know of any new uses.
D
Add a minute or two at the beginning when
bak ing bread for a shiny crust.
D
Kick start large loads such as 20 or more
chick ens. By starting large loads with 5 to 8
minutes of steam you help the oven recover
and cut the cooking time by more than 10%.
D Ba
ke bagels without boiling. By starting
raw ba gels with 1 to 2 minutes of steam
you can achieve a beautiful crust.
D Cream caramel is great at 230_
F to 250
Combi mode using 2 minutes of on demand
steam.
D
When cooking chicken wings, try setting
oven in the Combi mode at 375
minutes of Steam On Demand. This method
will stop the tips from burning. Total cooking
time is approximately 12 minutes.
D
Pork ribs tend to pull off the bone better when
using 5 to 8 minutes of Steam On
Try ribs in the Combi mode at 350
7
Most of the ideas came from our creative
custom ers. Experiment with this feature on
your own and let us know of any new uses.
Add a minute or two at the beginning when
bak ing bread for a shiny crust.
Kick start large loads such as 20 or more
chick ens. By starting large loads with 5 to 8
minutes of steam you help the oven recover
and cut the cooking time by more than 10%.
ke bagels without boiling. By starting
raw ba gels with 1 to 2 minutes of steam
you can achieve a beautiful crust.
F to 250
_F in the
Combi mode using 2 minutes of on demand
When cooking chicken wings, try setting
the
oven in the Combi mode at 375
_F and use 3
minutes of Steam On Demand. This method
will stop the tips from burning. Total cooking
time is approximately 12 minutes.
Pork ribs tend to pull off the bone better when
using 5 to 8 minutes of Steam On
Demand.
Try ribs in the Combi mode at 350
_F.
Page 8
BCX, BX – NEW MANUAL CONTROL
Se
rvice
Level Programming
Code: 7378
(The oven needs to be in the “OFF” position)
Press the Timer Dial Till “0000” Is Displayed
Turn the Dial: Scroll the flashing # to (7)000
Press the Dial to Enter Scroll the flashing # to 7(3)00
Press the Dial to Enter Scroll the flashing # to 73(7)0
Press the Dial to Enter Scroll the flashing # to 737(8)
Press the Dial to Enter Scroll to (DIAG) Diagnostics
Press the Dial to Enter “D-01” Is Displayed
(Cavity Heat Relay)
Press the Dial to Enter Turn Dial CW to “ON”
Turn Dial CCW to “OFF”
Press the Dial to EXIT
(CONTINUE) (FOLLOW STEPS ABOVE)
Scroll the Dial to D-02 Boiler Heat Relay
D-03 Water High Level Switch Status
D-04 Water Low Level Switch Status
D-05 Drain Relay
D-06 Fill Relay
D-07 Steam Relay
D-08 Quench Relay
D-09 Motor-Reversals Relay Gently
D-10 Motor Gently
D-11 Motor Low
D-12 Motor High
D-13 Motor Turbo
D-14 Door Status
D-15 Lights Relay
D-16 Delime Pump Relay
D-17 Software Flash Number
D-18 Software Number
D-19 Software Download Number

Page 9
BCX, BX NEW MANUAL CONTROL
Se
rvice
Level Programming
Code: 7378
(The oven needs to be in the “OFF” position)
D-20 SIB Software Number
D-21 Cavity Set Temperature
D-22 Cavity ACT Temperature
D-23 Cooling Fan Probe Temperature
D-24 Quench Probe Temperature
D-25 Core Probe Temperature
D-26 Boiler Tank Temperature
D-27 Main Switch
D-28 Fan Feedback Input
D-29 Cook Done relay
D-30 Vent relay
D-33 Cool Fan Relay
D-34 Hot Air relay
D-35 Hot Air Enable Relay
D-37 All Relays
D-38 Display and LED Test
END End Of Diagnostic Test
Press Dial to Exit
D-39 24VDC Feedback status
D-40 Hot air high limit switch
D-41 Boiler high limit switch
Page 10
BCX, BX – NEW MANUAL CONTROL
Factory
Level Programming
Code: 3228
(The oven needs to be in the “OFF” position)
Press the Timer Dial Till “0000” Is Displayed
Turn the Dial: Scroll the flashing # to (3)000
Press the Dial to Enter Scroll the flashing # to 3(2)00
Press the Dial to Enter Scroll the flashing # to 32(2)0
Press the Dial to Enter Scroll the flashing # to 322(8)
Press the Dial to Enter “P-01” Is Displayed
Press the Dial to View Turn Dial to: (F)
Press the Dial to Retune Turn Dial to: P-02
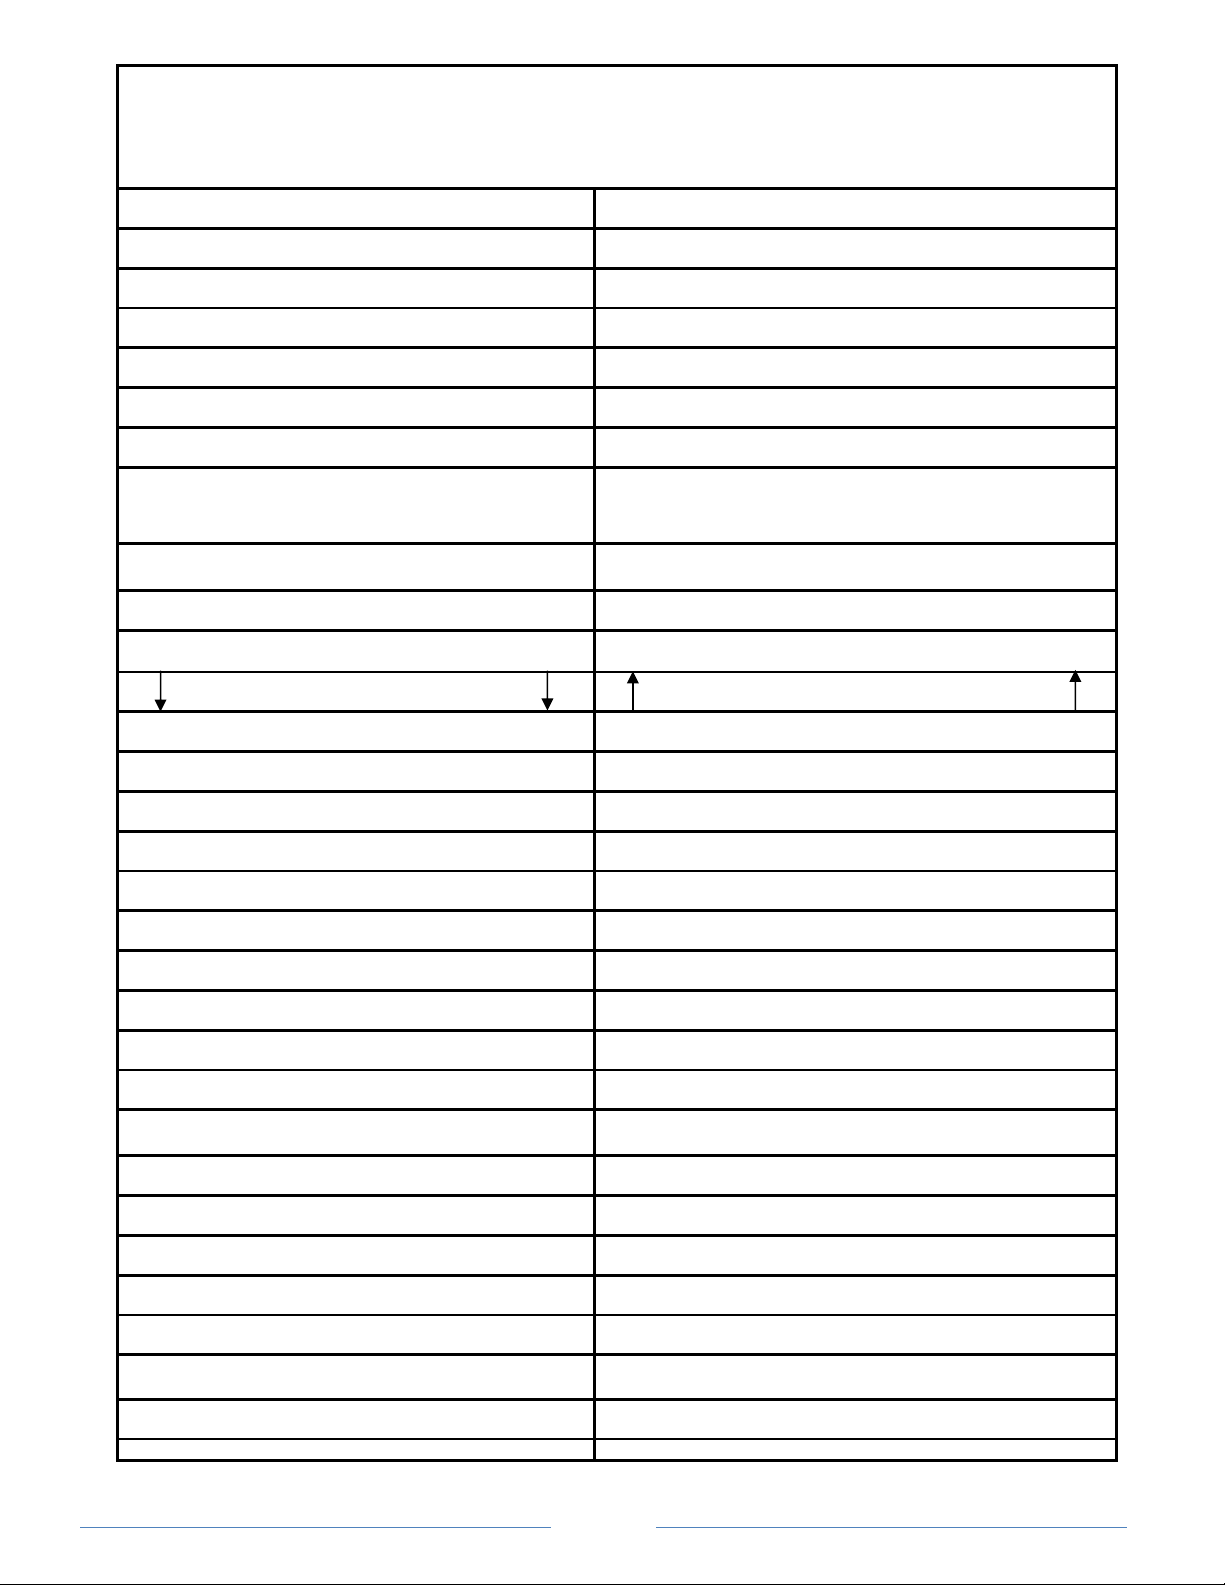
(CONTINUE) (FOLLOW STEPS ABOVE)
P-## “ Set To “
(P-02) Cool Down Temp
100F
(P-03) Ready Beep
ON
(P-04) Fan Reverse Time
6:00
(P-05) Cook Done Beeper
Yes
(P-06) Delime Interval
30 Hours
(P-07) Flush Interval
24 Hours
(P-08) Appliance Type
Gas
(P-09) Machine Type
BCX / BX
(P-10) Max Steam On Demand
20
(P-11) Min Hot Air Set Point
140F
(P-12) Max Hot Air Set Point
500
(P-13) Min Steam Set Point
85F
(P-14) Max Steam Set Point
225F
(P-15) Max Core Probe Pull Temp
200F
(P-16) Upper Hot Air Hysteresis
1F
(P-17) Lower Hot Air Hysteresis
1F
(P-18) Upper Steam Hysteresis
1F
(P-19) Lower Steam Hysteresis 1F

Page 11
BCX, BX NEW MANUAL CONTROL
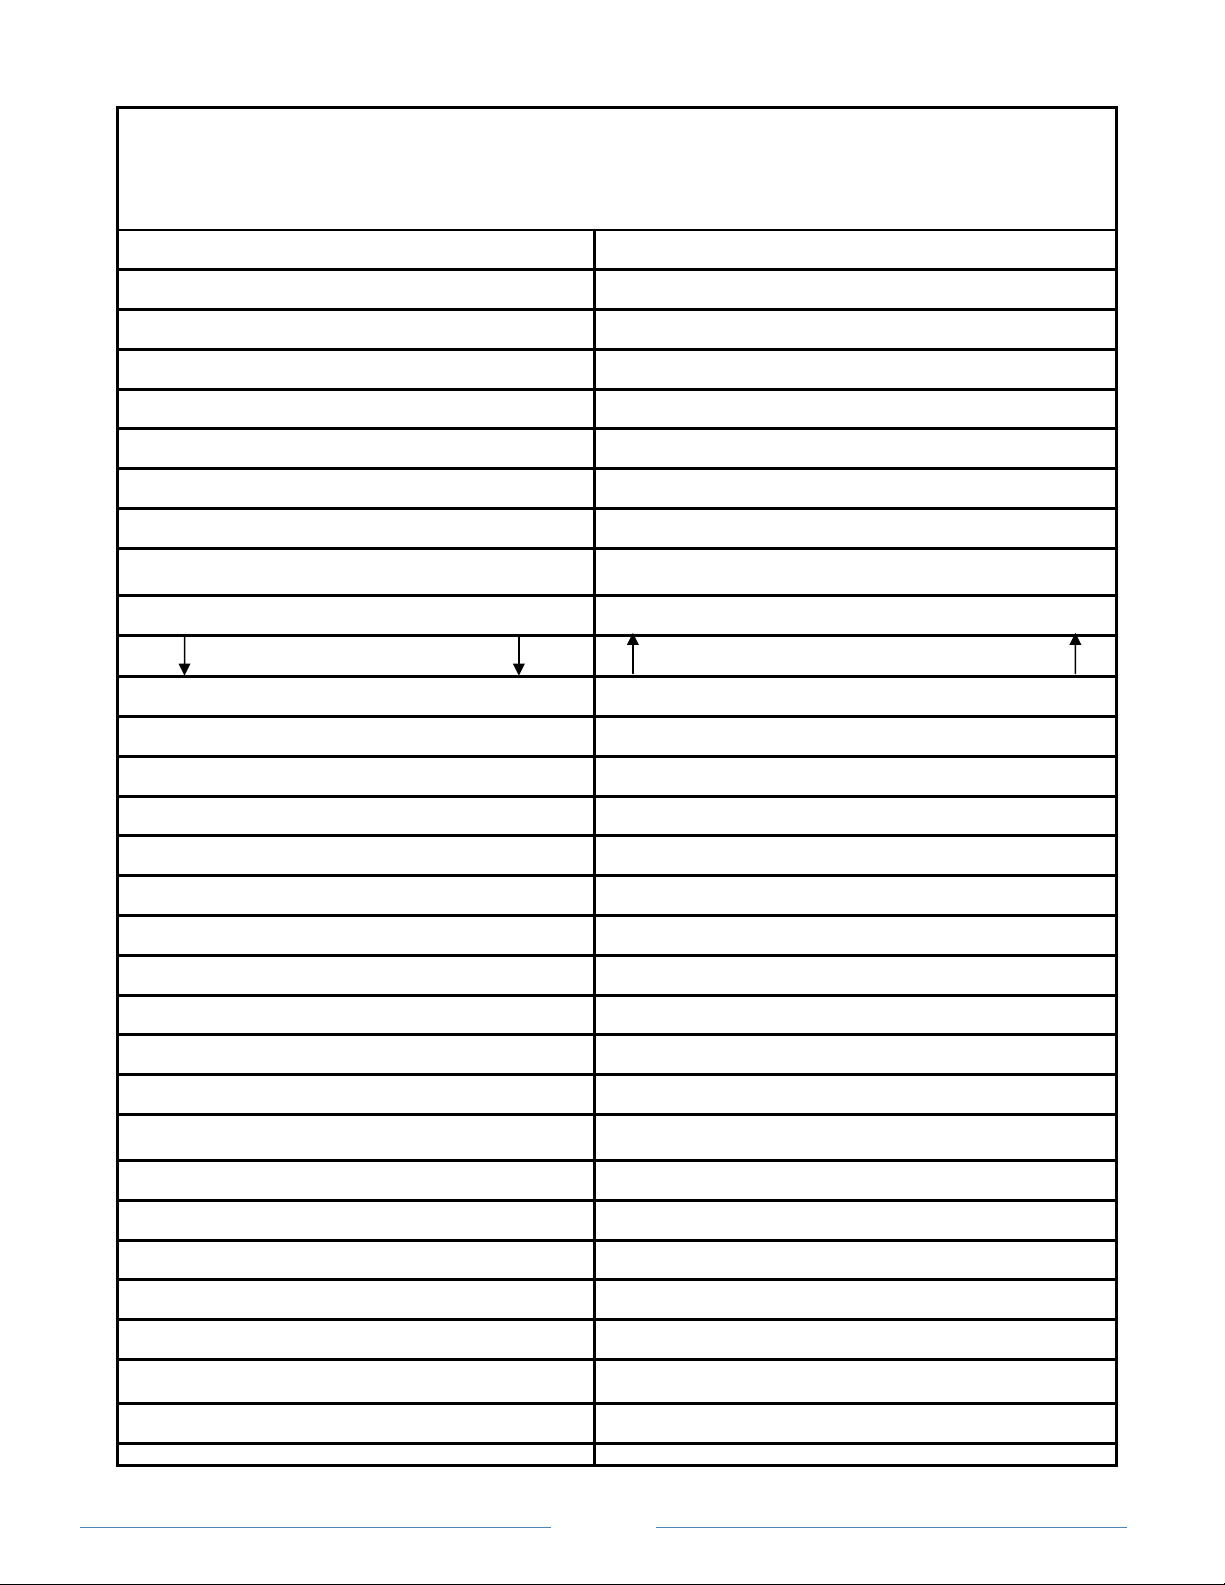
Factory Level Programming Code: 3228
(The oven needs to be in the “OFF” position)
(P-20) Upper Ready Band
25F
(P-21) Lower Ready Band
10F
(P-22) Cavity Probe Offset
0F
(P-23) Core Probe Offset
-2F
(P-24) Spritzer Solenoid Duty Cycle
33
(P-25) User Response Timeout
5
(P-26) Sleep Mode Timeout
1
(P-27) Counter Start Delay
2
(P-28) Quench Probe
Yes
(P-29) SCK Address
30
(P-31) ACT Oven Temp Display
No
(P-32) Remote Beeper
Yes
Press Dial to Exit Scroll to END
Press Dial to Exit End Of Factory Programming
(P-33) Setback time 0:00
(P-34) Setback Temp 300F
(P-35) Setback Temp Delta 10F
(P-36)Download Factory Settings From SD
(P-37) Upload factory Settings to SD
(P-38) Cavity high limit 650F
(P-39) Boiler high limit 250F
(P-40) Cool fan high limit 167F
(P-41) Cook cool fan set temp 95F
(P-42) Idle cook fan set temp 105F
(P-43) 24Vdc input detection No
(P-44) Quench probe set temp 150F
(P-45) Boiler preheat temp 185F
(P-46) Boil super steam temp 212F
(P-47) Boiler probe offset 0F
(P-48) Core probe type 1K
(P-49) No heat error 15:00
(P-50) Fan error detect time 00:15

MenuSelect Control for Models BCX 14 and BX 14
1
4
6
8
11
12
14
15
17
18
21
22
Operation
MenuSelect Control for Models BCX 14 and BX 14
CONTROL DESCRIPTION
2
1.
START/STOP KEY press to start, cancel or
pause the bake
2.
COOL DOWN KEY initiates oven cool down
cycle
3.
BAKE MORE KEY press at the end of a bake
3
cycle to add additional bake time in one min
ute increments.
4.
DISPLAY displays time or temperature and
other information related to oven function and/
or programming.
5.
DIAL used to enter set points, time, and pro
5
grammable settings. Also used to select the
programmed product.
6.
TEMP KEY used to set or change the bake
7
temperature
9
7.
TIME KEY used to set or change the bake
time.
10
8.
COMBI KEY press to enter combi mode
9.
STEAM KEY press to enter steam mode
13
10.
HOT AIR KEY press to enter hot air mode
16
11.
RETHERM KEY press to enter retherm
mode, this mode uses steam to reheat frozen
or precooked product. Retherm has a temper
19
ature limit of 250 300
_
F.
12.
STEAM ON DEMAND KEY used to initiate
steam injection cycle
20
13.
PROBE KEY press to use core probe cooking
14.
FAN KEY press to select the fan speed
15.
LIGHT KEY press to turn the lights on and off.
16.
VENT KEY press to manually open and close
the oven vent
17.
PROGRAM KEY press to enter product pro
gramming and save programmed settings.
18.
ESCAPE KEY press to back up one step dur
ing programming
19.
MAINTENANCE KEY press to enter manager
programming and save programmed settings
20.
ALPHA/NUMERIC KEYPAD used to program
recipes.
21.
POWER KEY used to place control in and out
of standby mode.
22.
CORE PROBE CONNECTION plug core tem
perature probe in here when using probe
cooking
12
Operation
MenuSelect Control for Models BCX 14 and BX 14
START/STOP KEY press to start, cancel or
COOL DOWN KEY initiates oven cool down
BAKE MORE KEY press at the end of a bake
cycle to add additional bake time in one min
DISPLAY displays time or temperature and
other information related to oven function and/
DIAL used to enter set points, time, and pro
grammable settings. Also used to select the
TEMP KEY used to set or change the bake
TIME KEY used to set or change the bake
COMBI KEY press to enter combi mode
STEAM KEY press to enter steam mode
HOT AIR KEY press to enter hot air mode
RETHERM KEY press to enter retherm
mode, this mode uses steam to reheat frozen
or precooked product. Retherm has a temper
STEAM ON DEMAND KEY used to initiate
PROBE KEY press to use core probe cooking
FAN KEY press to select the fan speed
LIGHT KEY press to turn the lights on and off.
VENT KEY press to manually open and close
PROGRAM KEY press to enter product pro
gramming and save programmed settings.
ESCAPE KEY press to back up one step dur
MAINTENANCE KEY press to enter manager
programming and save programmed settings
ALPHA/NUMERIC KEYPAD used to program
POWER KEY used to place control in and out
CORE PROBE CONNECTION plug core tem
perature probe in here when using probe

Operation
MenuSelect Control for Models BCX 14 and BX 14
OVEN STARTUP
1.
Be sure the gas shutoff switch and/or circuit
breaker switch below the control panel are
in the on position. The display flashes OFF
PRESS POWER KEY TO START.
NOTE: If the real time clock and auto wake
up functions are enabled the
display reads PRESS POW
TO START AUTO START.
2.
Press the POWER KEY (21). The display
reads PREHEAT and the oven heats to the
last manu al set temperature in the hot air
mode. The dis play flashes READY / IDLE
and the alarm beeps 5 times when the
oven is at temperature and r
eady to bake.
MANUAL COOKING
1. Turn the DIAL (5) until the display reads
MANUAL.
2.
Press the TIME KEY (7). Rotate the dial, or
use the alpha/numeric keypad to enter the
desired bake time. Press the center of the
dial to set the bake time.
NOTE: Time is set in one minute increments
using the dial. To set time in less
than one minute increments use the
alpha/ numeric keypad.
3.
Press the TEMP KEY (6). Rotate the dial, or
use the alpha/numeric keypad to enter the
de sired bake temperature. Press
of the dial to set the bake temperature. The
oven preheats to the new temperature.
NOTE: Temperature is set in 5 degree incre
ments using the dial. To set time in
less than 5 degree increments use
the al pha/numeric keypad.
4.
Press the desired mode key, combi,
steam, hot air or retherm.
If Combi or Retherm are selected, rotate
the dial, or use the alpha/numeric keypad
to enter the desired percentage of steam.
NOTE: Retherm has a temperature limit of
250 300_F.
5.
When the display flashes READY / IDLE,
open the doors. Load the product.
MenuSelect Control for Models BCX 14 and BX 14
Be sure the gas shutoff switch and/or circuit
breaker switch below the control panel are
in the on position. The display flashes OFF
PRESS POWER KEY TO START.
NOTE: If the real time clock and auto wake
up functions are enabled the
display reads PRESS POW
ER KEY
TO START AUTO START.
Press the POWER KEY (21). The display
reads PREHEAT and the oven heats to the
last manu al set temperature in the hot air
mode. The dis play flashes READY / IDLE
and the alarm beeps 5 times when the
eady to bake.
1. Turn the DIAL (5) until the display reads
Press the TIME KEY (7). Rotate the dial, or
use the alpha/numeric keypad to enter the
desired bake time. Press the center of the
NOTE: Time is set in one minute increments
using the dial. To set time in less
than one minute increments use the
Press the TEMP KEY (6). Rotate the dial, or
use the alpha/numeric keypad to enter the
de sired bake temperature. Press
the center
of the dial to set the bake temperature. The
oven preheats to the new temperature.
NOTE: Temperature is set in 5 degree incre
ments using the dial. To set time in
less than 5 degree increments use
the al pha/numeric keypad.
Press the desired mode key, combi,
If Combi or Retherm are selected, rotate
the dial, or use the alpha/numeric keypad
to enter the desired percentage of steam.
NOTE: Retherm has a temperature limit of
When the display flashes READY / IDLE,
open the doors. Load the product.
6.
Press the START/STOP KEY (1) to begin the
bake cycle. The timer counts down and the
display alternates between the cooking
mode and the name of the product.
PROGRAMMED COOKING
1.
Turn the DIAL (1) until the name of the
product is highlighted. Press the center of
the dial to select. The oven preheats to the
programmed temperature in the correct
cooking mode. The display flashes READY /
IDLE and the alarm beeps 5 times when the
oven
is at tempera ture and ready to bake.
2.
Open the doors. Load the product.
3.
Press the START/STOP KEY (1) to begin the
bake cycle. The timer counts down and the
display alternates between the cooking
mode and the name of the product.
PROBE COOKING
1.
Press the PROBE key (13) to select the
probe mode. The display reads CORE
PROBE COOK & HOLD. Turn the dial to
select either YES or NO. Press the center
of the dial to se lect.
If YES is selected, Cook & Hold has been
en abled. In the Cook &
Hold mode, the
oven cav ity lowers to the product pull
temperature as the product cooks.
If NO is selected, Cook & Hold has not
been enabled the cavity maintains the
cook temper ature.
2.
Turn the DIAL to enter the desired product pull
temperature in the display. Press the center of
the dial to save the pull temperature.
3.
Press the TEMP KEY (6). Rotate the dial, or
use the alpha/numeric keypad to enter the
de sired bake temperature. Press
of the dial to set the bake temperature. The
oven preheats to the new temperature.
NOTE: Temperature is set in 5 degree incre
ments using the dial. To set time in
less than 5 degree increments use
the al pha/numeric keypad.
13
Press the START/STOP KEY (1) to begin the
bake cycle. The timer counts down and the
display alternates between the cooking
mode and the name of the product.
Turn the DIAL (1) until the name of the
product is highlighted. Press the center of
the dial to select. The oven preheats to the
programmed temperature in the correct
cooking mode. The display flashes READY /
IDLE and the alarm beeps 5 times when the
is at tempera ture and ready to bake.
Open the doors. Load the product.
Press the START/STOP KEY (1) to begin the
bake cycle. The timer counts down and the
display alternates between the cooking
mode and the name of the product.
Press the PROBE key (13) to select the
probe mode. The display reads CORE
PROBE COOK & HOLD. Turn the dial to
select either YES or NO. Press the center
If YES is selected, Cook & Hold has been
Hold mode, the
oven cav ity lowers to the product pull
temperature as the product cooks.
If NO is selected, Cook & Hold has not
been enabled the cavity maintains the
Turn the DIAL to enter the desired product pull
temperature in the display. Press the center of
the dial to save the pull temperature.
Press the TEMP KEY (6). Rotate the dial, or
use the alpha/numeric keypad to enter the
de sired bake temperature. Press
the center
of the dial to set the bake temperature. The
oven preheats to the new temperature.
NOTE: Temperature is set in 5 degree incre
ments using the dial. To set time in
less than 5 degree increments use
the al pha/numeric keypad.

MenuSelect Control for Models BCX 14 and BX 14
4.
Press the desired mode key, combi,
steam, hot air or retherm.
If Combi or Retherm
are selected, rotate
the dial, or use the alpha/numeric keypad
to enter the desired percentage of steam.
NOTE: Retherm has a temperature limit of
250 300_F.
5.
Insert the core probe into the product. Load
product into the oven and close the door. Be
sure that the terminal end of the core probe is
outside of the oven and clear of the door.
6.
Connect the core probe to the PROBE CON
NECTION (22) at the bottom of the
NOTE: Do not connected the probe before
the cook mode has been selected.
7.
The display gives the actual core probe tem
perature as well as the oven set temperature.
8.
When the product reaches the pull
tempera ture the buzzer sounds.
9.
Press the START/STOP KEY (1) to silence
the buzzer.
If using Cook & Hold -
The cavity tempera
ture continues to drop to the product pull
tem perature and the display counts up,
telling the operator long the product has
been held. Dis connect the core pro
and remove the prod uct when ready.
If not using Cook & Hold
mains at the cook temperature. The
display does not count up. Disconnect the
core probe and remove the product when
the buzzer sounds.
DURING ANY COOK CYCLE
Steam On Demand
While in the Hot Air, Combi or retherm modes,
the unit can be set to steam for a timed period
of up to 20 minutes. At the end of the timed
cycle the unit reverts back to the original
setting. Steam On De mand can be used at
any time during the coo
k cycle.
1.
Press the STEAM ON DEMAND KEY (12).
2.
Rotate the dial, or use the alpha/numeric key
pad to enter the desired steam on demand
Operation
MenuSelect Control for Models BCX 14 and BX 14
Press the desired mode key, combi,
are selected, rotate
the dial, or use the alpha/numeric keypad
to enter the desired percentage of steam.
NOTE: Retherm has a temperature limit of
Insert the core probe into the product. Load
product into the oven and close the door. Be
sure that the terminal end of the core probe is
outside of the oven and clear of the door.
Connect the core probe to the PROBE CON
NECTION (22) at the bottom of the
control.
NOTE: Do not connected the probe before
the cook mode has been selected.
The display gives the actual core probe tem
perature as well as the oven set temperature.
When the product reaches the pull
tempera ture the buzzer sounds.
Press the START/STOP KEY (1) to silence
The cavity tempera
ture continues to drop to the product pull
tem perature and the display counts up,
telling the operator long the product has
been held. Dis connect the core pro
be
and remove the prod uct when ready.
If not using Cook & Hold
- The cavity re
mains at the cook temperature. The
display does not count up. Disconnect the
core probe and remove the product when
While in the Hot Air, Combi or retherm modes,
the unit can be set to steam for a timed period
of up to 20 minutes. At the end of the timed
cycle the unit reverts back to the original
setting. Steam On De mand can be used at
k cycle.
Press the STEAM ON DEMAND KEY (12).
Rotate the dial, or use the alpha/numeric key
pad to enter the desired steam on demand
time. Press the center of the dial to
initiate Steam on Demand cycle.
NOTE: Steam on Demand time is set in one
minute increments using the dial. To
set time in less than one minute incre
ments use the alpha/numeric keypad.
3.
The Steam on Demand LED flashes until
the steam time has expired.
Venting Moisture from the Oven Cav
1.
Press the VENT KEY (16). This manually
opens the vent until the key is pressed
again to close it.
Pause a Bake Cycle
1.
To pause a cook cycle, press the START/
STOP KEY (1). The LED on the start/stop
key flashes. The bake cycle will pause
until the key is pressed again.
Cancel a Cook Cycle
1.
To cancel the cook cycle, press and hold
the START/STOP KEY (1).
AT THE END OF
ANY COOK CYCLE
1.
An alarm sounds, the display reads DONE.
2.
If more bake time is desired, press the BAKE
MORE KEY (3). This will add an additional one
minute of time for each press of the key.
3.
When you are satisfied with the bake, press
the START/STOP KEY
(1) to silence the alarm.
Open the door to remove the product.
OVEN SHUTDOWN
1.
Press the COOL DOWN KEY (2). The
display reads AUTO COOL DOWN
ACTUAL TEMP. To speed up the cool
down process, open the doors and press
the VENT KEY (16) to open the vent.
2.
When the oven has cooled down, the display
reads OFF PRESS POWER KEY TO START.
NOTE: The lights shut off and the vent
closes automatically at the end of
the cool down cycle.
14
Operation
MenuSelect Control for Models BCX 14 and BX 14
time. Press the center of the dial to
initiate Steam on Demand cycle.
NOTE: Steam on Demand time is set in one
minute increments using the dial. To
set time in less than one minute incre
ments use the alpha/numeric keypad.
The Steam on Demand LED flashes until
the steam time has expired.
Venting Moisture from the Oven Cav
ity
Press the VENT KEY (16). This manually
opens the vent until the key is pressed
To pause a cook cycle, press the START/
STOP KEY (1). The LED on the start/stop
key flashes. The bake cycle will pause
until the key is pressed again.
To cancel the cook cycle, press and hold
the START/STOP KEY (1).
ANY COOK CYCLE
An alarm sounds, the display reads DONE.
If more bake time is desired, press the BAKE
MORE KEY (3). This will add an additional one
minute of time for each press of the key.
When you are satisfied with the bake, press
(1) to silence the alarm.
Open the door to remove the product.
Press the COOL DOWN KEY (2). The
display reads AUTO COOL DOWN
ACTUAL TEMP. To speed up the cool
down process, open the doors and press
the VENT KEY (16) to open the vent.
When the oven has cooled down, the display
reads OFF PRESS POWER KEY TO START.
NOTE: The lights shut off and the vent
closes automatically at the end of
the cool down cycle.

Operation
MenuSelect
Control for Models BCX 14 and BX 14
PRODUCT PROGRAMMING
Entering the Program Mode
1.
Press the PROGRAM KEY (17). If the control
is password protected, the display reads EN
TER CODE. Use the alpha/numeric keypad
to enter the manager
passcode 3124, then
press the center of the dial to enter the
program mode.
Naming a Product Recipe
NOTE: Use the following procedure to name a
new product or edit the name of an
existing product.
1.
For a new recipe, turn the dial to the first open
product. Press the center of the dial to select.
To edit an existing name, rotate the dial to
the name to be changed. Press the center
of the dial to select.
2.
Use the dial to scroll down to Edit Name.
Pr
ess the center of the dial to enter the
edit name menu.
3.
Turn the dial or use the alpha/numeric keypad
to select the first character. Press the center of
the dial to advance to the next character. Re
peat for all remaining characters.
NOTE: Product names may be up to 10
char acters long and can contain
spaces. Use the #1 key to insert
spaces in a recipe name.
NOTE: To select letters using the keypad,
press the appropriate key once if you
need the first letter on the key, twice
for the
second and three times for the
third. For example to enter the letter L
press the #5 key three times.
4.
Press the PROG KEY (17). With SAVE
high lighted, press the dial to save the
product name.
Control for Models BCX 14 and BX 14
Press the PROGRAM KEY (17). If the control
is password protected, the display reads EN
TER CODE. Use the alpha/numeric keypad
passcode 3124, then
press the center of the dial to enter the
NOTE: Use the following procedure to name a
new product or edit the name of an
For a new recipe, turn the dial to the first open
product. Press the center of the dial to select.
To edit an existing name, rotate the dial to
the name to be changed. Press the center
Use the dial to scroll down to Edit Name.
ess the center of the dial to enter the
Turn the dial or use the alpha/numeric keypad
to select the first character. Press the center of
the dial to advance to the next character. Re
NOTE: Product names may be up to 10
char acters long and can contain
spaces. Use the #1 key to insert
spaces in a recipe name.
NOTE: To select letters using the keypad,
press the appropriate key once if you
need the first letter on the key, twice
second and three times for the
third. For example to enter the letter L
press the #5 key three times.
Press the PROG KEY (17). With SAVE
high lighted, press the dial to save the
Programming a Product Recipe
NOTE: The control can hold 99 recipes. Each rec
ipe may have up to 6 cooking stages.
1.
Turn the dial to highlight the name of the
prod uct to be programmed. Press the
center of the dial to select the product.
2.
The display reads PRODUCT NAME: STAGE 1.
Press the center of the dial to select the stage.
3.
Rotate the dial, or use the alpha/numeric key
pad to enter the desired bake time. Press the
center of the dial to set the bake time.
NOTE: Time is set in one
minute increments
using the dial. To set time in less
than one minute increments use the
alpha/ numeric keypad.
4.
Rotate the dial to select the desired
cooking mode. Choose from combi,
steam, hot air or retherm. Press the
center of the dial to set the cook
If Combi or Retherm are selected, rotate
the dial, or use the alpha/numeric keypad
to enter the desired percentage of steam.
5.
Rotate the dial, or use the alpha/numeric
key pad to enter the desired cook
temperature. Press the center of the dial
to
set the bake tem perature.
NOTE: Temperature is set in 5 degree incre
ments using the dial. To set time in
less than 5 degree increments use
the al pha/numeric keypad.
NOTE: Retherm has a temperature limit of
250 300_F.
6.
Rotate the dial to select the desired fan speed.
Choose from gentle, low, high or turbo. Press
the center of the dial to set the fan speed.
15
Programming a Product Recipe
NOTE: The control can hold 99 recipes. Each rec
ipe may have up to 6 cooking stages.
Turn the dial to highlight the name of the
prod uct to be programmed. Press the
center of the dial to select the product.
The display reads PRODUCT NAME: STAGE 1.
Press the center of the dial to select the stage.
Rotate the dial, or use the alpha/numeric key
pad to enter the desired bake time. Press the
center of the dial to set the bake time.
minute increments
using the dial. To set time in less
than one minute increments use the
alpha/ numeric keypad.
Rotate the dial to select the desired
cooking mode. Choose from combi,
steam, hot air or retherm. Press the
center of the dial to set the cook
mode.
If Combi or Retherm are selected, rotate
the dial, or use the alpha/numeric keypad
to enter the desired percentage of steam.
Rotate the dial, or use the alpha/numeric
key pad to enter the desired cook
temperature. Press the center of the dial
set the bake tem perature.
NOTE: Temperature is set in 5 degree incre
ments using the dial. To set time in
less than 5 degree increments use
the al pha/numeric keypad.
NOTE: Retherm has a temperature limit of
Rotate the dial to select the desired fan speed.
Choose from gentle, low, high or turbo. Press
the center of the dial to set the fan speed.
Page 16
BCX, BX – MENUSELECT CONTROL
Service Level Programming
(The oven needs to be in the “ON” position)
Press the Maint Key Scroll to “SERVICE”
Press the Dial to Enter Enter Service Code “7378”
Press the Dial to Enter Scroll to “Diag Output”
Press the Dial to Enter
Press and hold # button to test
Component Function Test:
Temp Heat
Combi Fan Speed Gentle Fwd
Fan Fan Speed Low Fwd
Prog Fan Speed High Fwd Forward
1 Fan Speed Turbo Fwd
4 Fan Speed High Rev
7 Light
Light Spritzer
ESC Cooling Fan
2 Vent
5 Hot Air
8 Hot Air Enable
0 Quench
Hot Air Delime
Probe Heat Boiler
Vent Fill
Maint Drain
(Press the Dial to Exit) Scroll to “Diag Input”
Press the Dial to Enter
Press and hold buttons to test
Component Function Test:
Temp Fan Error
Combi Door
Fan Cavity Probe Temp

Page 17
BCX, BX MENUSELECT CONTROL
Service Level Programming
(The oven needs to be in the “ON” position)
Prog Cooling Fan Probe Temp
1 Quench Probe Temp
4 Core Probe Temp
7 Boiler Probe Temp
Steam Water Hi Level SW
Steam on Demand Water Low Level SW
“Press the Dial to Exit” Scroll to Exit
Press the Dial to Exit Scroll to Exit Press (“Dial”)
Factory Level Programming
(The oven needs to be in the “ON” position)
Press the Maint Key Scroll to Factory Program
Press the Dial to Enter Enter the Factory Code “3228”
Press the Dial to Enter Scroll to “Appliance Type”
Press the Dial to Enter Turn Dial to set Gas or Electric
Press the Dial to Enter
Scroll to “Cavity Probe Offset”
Press the Dial to Enter Turn the Dial to Set the Offset
Press the Dial to Enter
Scroll to ”Core Probe Offset”
Press the Dial to Enter Turn the Dial to set the Offset
Press the Dial to Enter
Scroll to Exit
Press the Dial to Exit Scroll to Exit again
Press the Dial to Exit the
Program Level.
This manual suits for next models
1
Table of contents
Other Blodgett Combi Electric Steamer manuals


