Blooma 3663602734864 User manual

PID #:
Agency Job #: PRJ06853
Product Description: Metal Shed
Brand: No Name
Brand Contact: Lin, Kandy
Barcode: 3663602734864
Vendor: Hebel Minmetals
No. of New Line Drawings: 0
Page Size: A4 / No. of Pages:
06/10/17
William 20/10/17
William 01/10/17
NAME 01/10/17
NAME 12/06/17
NAME
Artwork Done by Impala Services Ltd.
7
PLEASE NOTE THAT “SAFETY” AND “ASSEMBLY”
MANUALS SHALL BE PRINTED SEPARATELY
DO NOT PRINT THIS PAGE -
IT IS FOR INFORMATION ONLY
3663602734864_Noname-A4_IM_V02.indb 1 24/10/2017 1:36 PM
IM3663602734864 V20820.indd 1 11/08/2020 11:17

3663602734864_Noname-A4_IM_V02.indb 2 24/10/2017 1:36 PM
IM3663602734864 V20820.indd 2 11/08/2020 11:17
3663602734864 / 50593403462983663602734864 / 50593403462983663602734864 / 50593403462983663602734864 / 5059340346298

3663602734864_Noname-A4_IM_V02.indb 3 24/10/2017 1:36 PM
IM3663602734864 V20820.indd 3 11/08/2020 11:17
Check planning permission before installing your
garden shed.
Make sure you have access to all sides of the shed
during construction.
Make sure you have a good foundation before starting
to assemble the garden shed.
Carefully follow the guide to correctly assemble your
garden shed.
Ensure that all parts are present before starting
assembly.
remove any obstructions.
Remove all parts from the box and sort them by
number. Ensure that you have all elements required to
build your garden shed.
Always wear work gloves, long sleeves and safety
goggles during assembly of the garden shed. Some
components contain sharp edges and may cause
damage.
Take care when using tools for assembly.
Familiarise yourself with how to operate all tools.
Keep children and animals away from the assembly
site.
When necessary to use a ladder, ensure ground
stability is adequate. Never rest your entire weight on
the roof or on any other part of the garden shed.
Do not attempt to assemble the garden shed in
strong windy conditions due to the risk of making site
Wear safety eyewear when using power tools. Ensure
that your electrical tools are watertight to prevent any
risk of electrocution.
To maintain their original condition, ensure that nothing
is placed on top of shed components.
The garden shed must be built on a solid foundation.
We recommend a reinforced concrete foundation or
there is enough room on the foundation for a 10 cm
perimeter. The warranty does not cover the choice and
construction of your foundation.
For a reinforced concrete foundation, prepare a base
layer of stones/pebbles. The foundation must have a
minimum thickness of 10 cm. Allow cement to dry for at
least 48 hours.
foundation to protect it from strong winds.
Do not store pool chemicals in your garden shed.
Combustible and corrosive materials must be stored in
watertight containers.
The metal garden shed must be installed on a level
concrete foundation.
Ensure that the slab is level and that water can drain
off the site.
The brand is not liable for the choice and quality of the
foundation.
Set your drill’s torque limit to prevent damage to the
metal parts.
Check each of the dimensions below to ensure perfect
squaring of the foundation.
IMPORTANT: Only use screws with plastic washers on
top of the pre-painted surface.
We recommend removing snow from the roof after
each snowfall. A thickness of over 10 cm of snow may
become hazardous!
To disassemble the garden shed, the customer must
follow the instructions in the manual in reverse order.
Do not walk on the roof! Risk of falling!
Please be sure the day you select for installation is dry
and calm.
DO NOT attempt to assemble your shed in windy
weather because of risk of damage to panels, or
personal injury. Be careful of wet or muddy ground.
Avoid overhanging trees as much as possible as leaves
will make regular cleaning necessary and broken
branches are a potential hazard.
Small trees, bushes or fences nearby can be helpful,
acting as a wind break.
The site must be prepared so that the base of the shed
is level all round and checking with a spirit level is
required.
It is highly recommend to use the foundation base as
shown on the packaging.
The shed is not designed to be built onto lawn directly.
Also the ground will get muddy during rainy days.
If a concrete pad is made, it is important that this slopes
towards the edges to prevent water ingress.
Time must be allowed for any concrete or cement to dry
before building the shed on top.
Bases can also be constructed from bricks, blocks, or
mounted on a concrete pad.
and level concrete footings and the greenhouse frame
drilled and screwed to the base.
555
In the event of material and/or workmanship defects
5
of purchase, we will send a replacement part free of
charge.
This warranty is extended only to the original purchaser.
A purchase receipt or other proof of original purchase
date will be required before warranty service is
labour, installation or any other costs related thereto.
This warranty only covers failures due to defects in
materials or workmanship that occur during normal use
and does not extend to colour change arising due to
normal weathering or to damage resulting from misuse
or neglect, commercial use, failure to follow assembly
instructions and the owner’s manual (including proper
anchoring of the shed), painting, forces of nature and
other causes that are beyond our control.
We reserve the right to discontinue or change
components. If an element has been discontinued or
is not available we reserve the right to substitute a
compatible element of equal quality.
There is no express warranty, except as listed above.
The warrantor shall not be liable for incidental or
consequential damages resulting from the use of this
product, or arising from any breach of this warranty.
All express warranties are limited to the warranty period
set forth above.
Some states do not allow exclusions or limitations
on how long an implied warranty lasts, so the above
limitations may not apply to you.
may also have other rights which vary from state to
state or country to country.
IMPORTANT, RETAIN FOR FUTURE REFERENCE:
READ CAREFULLY.
0DQXIDFWXUHU
.LQJ¿VKHU,QWHUQDWLRQDO3URGXFWV/LPLWHG
3 Sheldon Square, London, W2 6PX,
United Kingdom
'LVWULEXWRU
B&Q plc, Chandlers Ford, Hants, SO53 3LE
United Kingdom www.diy.com
SFD Limited, Trade House, Mead Avenue,
Yeovil, BA22 8RT, United Kingdom
5
5555

3663602734864_Noname-A4_IM_V02.indb 4 24/10/2017 1:36 PM
IM3663602734864 V20820.indd 4 11/08/2020 11:17
votre abri.
Choisissez un emplacement adapté pour pouvoir
travailler autour de l’abri.
Assurez-vous d’avoir de bonnes fondations avant de
commencer l’assemblage de l’abri.
monter correctement votre abri.
Assurez-vous que toutes les pièces soient présentes
avant de commencer le montage.
Assurez-vous que la base de l’abri soit uniformément
répartie sur le sol.
Vos fondations doivent être planes. Si la surface n’est
pas plane, enlevez les obstacles.
Sortez vos pièces du carton et triez-les par numéro.
Assurez-vous de bien avoir tous les éléments
nécessaires pour la construction de votre abri
Portez toujours des gants de travail, de longues
manches et des lunettes de protection pendant
le montage de l’abri. Quelques éléments de l’abri
contiennent des bords tranchants et peuvent causer
des dommages.
Soyez prudent avec les outils utilisés pour le montage
de l’abri.
Familiarisez-vous avec le fonctionnement de tous les
outils.
Eloignez vos enfants et vos animaux du site
d’assemblage.
Lorsque l’usage d’une échelle est nécessaire, assurez-
vous de sa bonne stabilité au sol. Ne jamais s’appuyer
de son plein poids sur le toit ou tout autre partie de
l’abri.
N’essayez pas d’assembler l’abri par plein vent au
Portez des lunettes de protection lors de l’usage de
machines-outils. Assurez-vous de la bonne étanchéité
de vos outils électriques pour éviter tout risque
d’électrocution.
Veillez à ne rien poser sur les pièces détachées de
l’abri pour maintenir leurs états d’origine.
L’abri doit être construit sur une fondation solide.
Une fondation en béton armé ou des dalles de béton
de grandes tailles est recommandée pour une base
appropriée du plancher. Veillez à avoir des fondations
permettant de garder un pourtour de 10 cm autour de
l’abri. La garantie n’inclut pas le choix et la construction
de votre fondation.
Pour une fondation en béton armé, préparez une
première couche de pierres / cailloux. La fondation doit
faire à minima 10 cm d’épaisseur. Laissez sécher votre
ciment pendant au moins 48 heures.
Votre abri doit être fermement ancré à vos fondations
Ne stockez pas de produits chimiques de piscine dans
votre abri.
Les combustibles et le corrosif doivent être stockés
dans des récipients étanches.
L’abri métal doit être installé sur une fondation en béton
nivelé.
Assurez-vous que celle-ci soit de niveau et qu’elle
permette le drainage des eaux en dehors du site.
L’enseigne se dégage de toute responsabilité quant au
choix et à la qualité de la fondation.
Réglez la limite de couple de votre visseuse pour ne
pas endommager les parties métalliques.
assurer un parfait équerrage de la fondation.
IMPORTANT : Utilisez des vis avec des rondelles
en plastique sur le dessus de la surface pré peinte
seulement.
Nous recommandons d’enlever la neige du toit après
chaque enneigement. Une épaisseur de neige de plus
de 10 cm peut devenir dangereux !
Pour le démantèlement de l’abri de jardin, le client doit
suivre le manuel d’instructions dans le sens inverse.
Ne marchez pas sur le toit ! Risque de tomber !
Veuillez vous assurer que le temps est sec et calme le
jour où vous choisissez d’installer le produit.
NE PAS tenter de monter votre cabanon par
temps de vent, car cela peut entraîner un risque
d’endommagement des panneaux ou de blessures
corporelles. Prenez garde aux sols mouillés ou boueux.
Évitez autant que possible les zones situées sous
des arbres, car la chute des feuilles nécessitera un
nettoyage régulier et les branches cassées constituent
une source de danger potentiel.
La proximité de petits arbres, d’arbustes et de barrières
peut s’avérer utile en agissant comme un brise-vent.
Le site doit être préparé de sorte à ce que la base du
cabanon soit bien horizontale. Il est nécessaire de le
Nous vous recommandons fortement d’utiliser la base
de fondation comme illustré sur l’emballage.
Le cabanon n’est pas destiné à être construit
directement sur la pelouse. Le sol deviendrait boueux
par temps de pluie.
Si vous fabriquez un socle en béton, il est important
toute pénétration d’eau.
Tout type de béton ou de ciment nécessite un certain
temps pour sécher avant que vous ne construisiez le
cabanon dessus.
La base peut également être construite en briques, en
dalles ou montée sur un socle en béton.
Les briques ou les dalles doivent être cimentées sur
des bases de béton fermes et planes, et le cadre de la
serre doit être percé et vissé sur la base.
Nous vous ferons parvenir une pièce de remplacement
sans frais, en cas de défaut du matériel ou de
fabrication pour une période de 10 ans à compter de la
5
date d’achat.
Cette garantie couvre uniquement l’acheteur initial.
Un reçu d’achat ou une autre preuve de la date d’achat
originale sera exigé avant que la garantie de service
soit rendue. En aucun cas, nous ne payons le coût du
revêtement de sol, de main-d’oeuvre, d’installation ou
d’autres frais y référant.
Cette garantie ne couvre que les défaillances dues
à des défauts de matériel ou de fabrication qui
surviennent lors d’une utilisation normale et ne s’étend
pas aux changements de couleur dus à l’altération
normale ou aux dommages résultant de l’utilisation
abusive ou par négligence, par l’utilisation commerciale,
le non-respect des instructions de montage et le
manuel d’emploi du propriétaire (y compris le bon
ancrage de l’abri), la peinture, les forces de la nature et
à d’autres causes qui sont hors de notre contrôle.
Nous nous réservons le droit de supprimer ou de
de substituer un élément de qualité égale qui soit
compatible.
Il n’y a pas de garantie immédiate, sauf comme indiqué
ci-dessus.
Le garant ne doit pas être tenu responsable des
dommages fortuits ou consécutifs résultant de
l’utilisation de ce produit, ou découlant de toute violation
de cette garantie.
Toutes les garanties immédiates sont limitées à la
période de garantie énoncée ci-dessus
Certains états n’autorisent pas l’exclusion ou la
limitation de la durée d’une garantie implicite, de
sorte que les limitations ci-dessus ne puissent pas
s’appliquer à vous.
Cette garantie vous donne des droits légaux
droits qui varient d’un État à l’autre ou d’un pays à
l’autre.
IMPORTANT – A CONSERVER POUR DE FUTURS
BESOINS DE REFERENCE : A LIRE SOIGNEUSEMENT
5555
3 Sheldon Square, London, W2 6PX,
United Kingdom
Castorama France C.S. 50101 Templemars
59637 Wattignies CEDEX www.castorama.fr
BRICO DÉPÔT 30-32 rue de la Tourelle
91310 Longpont-sur-Orge France
www.bricodepot.com
5

3663602734864_Noname-A4_IM_V02.indb 5 24/10/2017 1:36 PM
IM3663602734864 V20820.indd 5 11/08/2020 11:17
niebezpiecznym.
cement wyschnie.
przechowywane w szczelnych pojemnikach.
betonu.
pomalowanej powierzchni
i spokojny.
pokazano na opakowaniu.
poziomych fundamentach betonowych, a rama wiaty
od daty zakupu.
celach handlowych, instalacji niezgodnej z zaleceniami
Producent nie udziela innej natychmiastowej gwarancji
Niniejsza gwarancja jest dokumentem dodatkowym,
–
5555
5
3 Sheldon Square, London, W2 6PX,
United Kingdom
Castorama Polska Sp. z o.o.
02-255 Warszawa
www.castorama.pl

3663602734864_Noname-A4_IM_V02.indb 6 24/10/2017 1:36 PM
IM3663602734864 V20820.indd 6 11/08/2020 11:17
Überprüfen Sie vor der Aufstellung des Schuppens die
örtlichen Bauvorschriften.
Wählen Sie einen Standort aus, der um den Schuppen
herum genügend Platz zum Arbeiten bietet.
Vergewissern Sie sich, bevor Sie mit dem Aufbau des
Geräteschuppens beginnen, dass Sie über ein gutes
Baufundament verfügen.
Befolgen Sie die in der Anleitung vorgeschriebenen
Schritte genau, um einen korrekten Aufbau zu
gewährleisten.
Vergewissern Sie sich vor Beginn der Aufstellung, ob
alle Teile vorhanden sind.
auf dem Boden liegt.
Das Fundament muss eben sein. Falls der Boden
uneben sein sollte, nivellieren Sie ihn.
Entnehmen Sie die Teile aus dem Karton und sortieren
Sie sie nach den Nummern. Vergewissern Sie sich,
dass alle notwendigen Teile für den Aufbau des
Schuppens vorhanden sind.
Bitte tragen Sie während der Schuppenmontage immer
Sicherheitshandschuhe, lange Ärmel und Augenschutz.
Einige Teile des Schuppens können möglicherweise
scharfe Kanten besitzen und Verletzungen
verursachen.
Bitte seien Sie während der des Aufbaus des
Schuppens vorsichtig bei der Verwendung der
Werkzeuge.
Machen Sie sich mit der Funktionsweise aller
Werkzeuge vertraut.
Halten Sie Kinder und Haustiere vom Montageort fern.
Wenn Sie eine Leiter verwenden, achten Sie auf deren
stabilen Stand. Bitte niemals mit vollem Gewicht auf
irgendein Teil des Dachs oder Schuppens stellen.
Bitte vermeiden Sie die Aufstellung des Schuppens an
einem windigen Tag. Wind kann die Arbeit erschweren
und gefährlich machen.
Bitte tragen Sie bei der Verwendung von
Elektrowerkzeugen einen Augenschutz. Vergewissern
Sie sich, dass Ihre Elektrowerkzeuge gut abgedichtet
sind, um einen Stromschlag zu vermeiden.
Stellen Sie nichts auf die unverbauten Teile, um deren
Originalzustand zu erhalten.
Der Geräteschuppen muss auf einem festen
Fundament errichtet werden. Ein Stahlbetonfundament
oder große Betonplatten werden als Bodenkonstruktion
empfohlen. Die Abmessungen des Fundamentes sollten
mindestens 10 cm größer sein als die Abmessungen
des Geräteschuppens. Die Wahl und derAufbau Ihres
Fundaments sind nicht von der Garantie abgedeckt.
Bereiten Sie für ein Stahlbetonfundament eine erste
Schicht mit Steinen bzw. Kies vor. Das Fundament
sollte eine Stärke von mindestens 10 cm aufweisen.
Lassen Sie den Beton mindestens 48 Stunden
trocknen.
Ihr Geräteschuppen muss fest am Fundament
verankert sein, um Beschädigung durch starken Wind
zu verhindern.
Lagern Sie in Ihrem Geräteschuppen keine chemischen
Produkte für den Swimmingpool.
Brennstoffe und Korrosionsmittel müssen in luftdichten
Behältern gelagert werden.
Der Geräteschuppen aus Metall muss auf einem
nivellierten Betonfundament errichtet werden.
Stellen Sie sicher, dass das Fundament waagerecht
ausgerichtet ist und die Entwässerung weg vom
Aufstellungsort ermöglicht.
Das Unternehmen übernimmt keine Verantwortung für
die Auswahl und Qualität des Fundaments.
Stellen Sie das Drehmoment Ihres Akkuschraubers ein,
um die Beschädigung der Metallteile zu vermeiden.
Überprüfen Sie jede der folgenden Abmessungen,
um sicherzustellen, dass das Fundament genau
rechtwinklig ist.
Entfernen Sie vor der Montage die Schutzfolien.
nur Schrauben mit Plastikunterlegscheiben.
Eine Schneeschicht von mehr als 10 cm kann
gefährlich werden! Eine Schneeschicht von mehr als 10
cm kann gefährlich werden!
Für die Demontage des Geräteschuppens muss der
Kunde die Anweisungen in der Gebrauchsanleitung in
der anderen Richtung befolgen.
Betreten Sie nicht das Dach! Sturzgefahr!
Achten Sie darauf, dass es an dem Tag, den Sie für die
Montage auswählen, trocken und windstill ist.
VERSUCHEN SIE NICHT, Ihre Hütte bei windigen
Wetterbedingungen zusammenzubauen, da die
Gefahr besteht, dass Paneele beschädigt oder
Personen verletzt werden. Seien Sie auf nassem oder
schlammigem Untergrund besonders vorsichtig.
Vermeiden Sie so gut wie möglich überhängende
Bäume, da herabfallende Blätter eine regelmäßige
Reinigung erforderlich machen und abbrechende Äste
eine Gefahrenquelle darstellen.
Kleine Bäume, Sträucher oder Zäune in der Nähe
können als Windschutz hilfreich sein.
Der Standort muss so vorbereitet werden, dass das
Fundament der Hütte vollständig gerade ist. Die
Überprüfung mit einer Wasserwaage ist erforderlich.
Es wird dringend empfohlen, die Fundamentbasis
entsprechend der Abbildung auf der Verpackung zu
verwenden.
Die Hütte ist nicht dafür vorgesehen, direkt auf dem
Rasen aufgebaut zu werden. Der Boden wird bei Regen
matschig.
Wenn ein Betonfundament errichtet wird, ist es wichtig,
dass dieses zu den Kanten hin abfällt, um das Eintreten
von Wasser zu verhindern.
Sie müssen dem Beton oder Zement ausreichend Zeit
lassen, um vollständig zu trocknen, bevor Sie die Hütte
darauf errichten.
Fundamente können auch aus Ziegeln, Steinblöcken
oder Betonsockeln errichtet werden.
Die Ziegel oder Blöcke sollten auf festen, ebenen
Betonfundamenten zementiert und der Rahmen des
Gewächshauses sollte am Fundament festgeschraubt
werden.
Im Falle von Material- oder Verarbeitungsfehlern
liefern wir für einen Zeitraum von 10 Jahren ab dem
5
Kaufdatum kostenlos Ersatzteile.
Diese Garantie gilt nur für den Erstkäufer.
Für die Inanspruchnahme der Garantieleistungen ist
eine Kaufquittung oder ein sonstiger Kaufnachweis
vorzulegen. Wir übernehmen keinesfalls die Kosten
für Bodenbeläge, Stundenlohn, Montage oder andere
damit zusammenhängende Kosten.
Diese Garantie deckt nur Material- oder
Verarbeitungsfehler ab, welche bei normalem Gebrauch
auftreten, jedoch nicht Verfärbungen aufgrund von
von Missbrauch oder Vernachlässigung, gewerblichen
Gebrauch, Nichtbeachtung der Montageanleitung
und des Benutzerhandbuchs (einschl. angemessener
Verankerung des Schuppens), Anstrich, Naturgewalt
und sonstigen Ursachen außerhalb unserer Kontrolle.
Wir behalten uns das Recht vor, die Herstellung
bestimmter Teile einzustellen oder zu verändern. Wenn
ein Teil nicht mehr hergestellt wird oder nicht verfügbar
kompatibles Teil gleicher Qualität zu ersetzen.
Außer der oben angegebenen Garantie werden keine
ausdrücklichen Garantien übernommen.
Der Garantiegeber haftet nicht für Neben- oder
Folgeschäden, die sich aus der Benutzung des
Produkts oder aus einem Verstoß gegen diese
Garantiebedingungen ergeben.
Alle ausdrücklichen Garantien sind auf die oben
angegebene Garantiezeit beschränkt.
In einigen Staaten sind Ausschlüsse oder
Beschränkungen der Garantiezeit nicht gestattet.
Daher ist es möglich, dass die oben genannten
Beschränkungen für Sie nicht zutreffen.
womöglich haben Sie weitere Rechte, die von Staat zu
Staat und von Land zu Land verschieden sind.
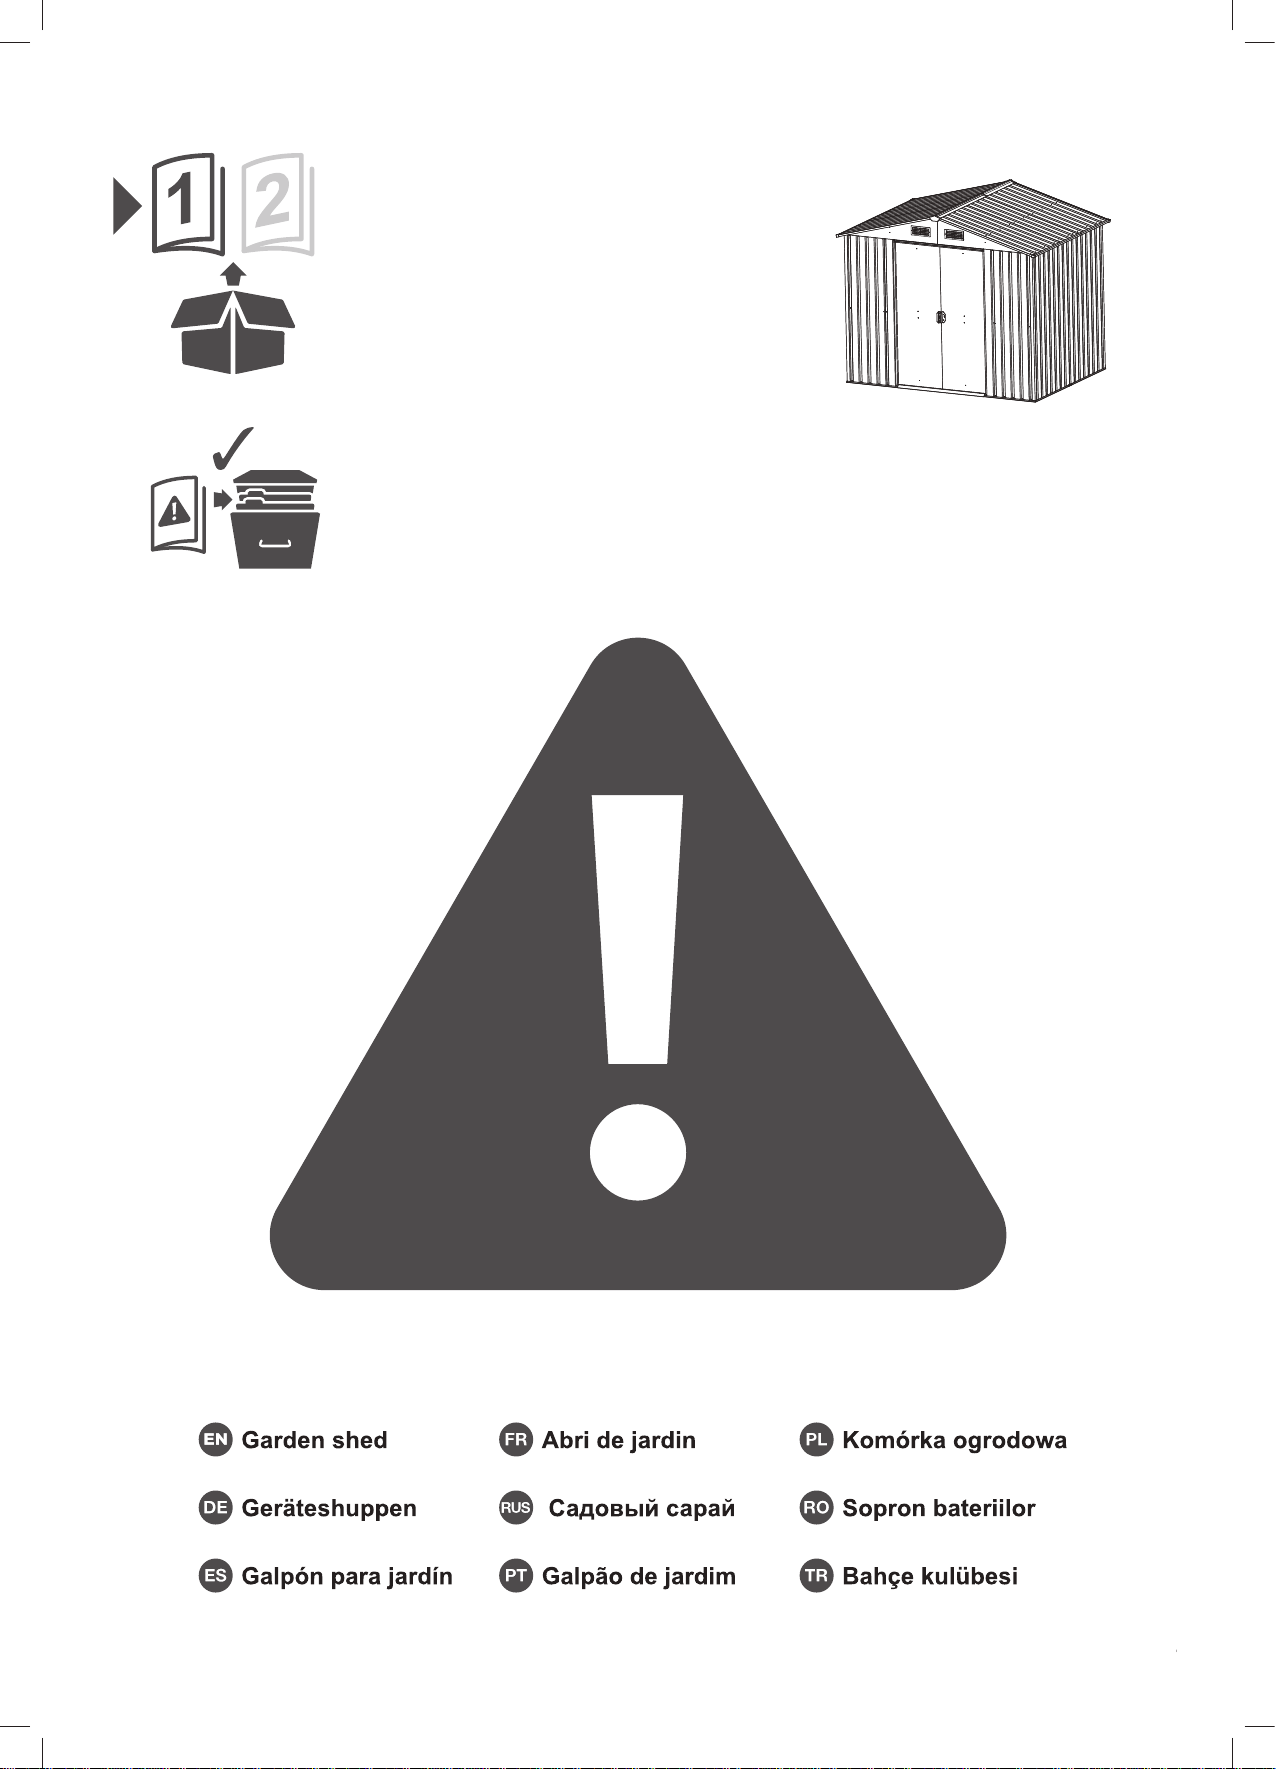
WICHTIG - LESEN SIE DIE ANWEISUNGEN
AUFMERKSAM DURCH UND BEWAHREN SIE SIE FÜR
ZUKÜNFTIGE ZWECKE AUF.
5555
3 Sheldon Square, London, W2 6PX,
United Kingdom
Mühlheimer Straße 153
63075 Offenbach/Main
5

3663602734864_Noname-A4_IM_V02.indb 7 24/10/2017 1:36 PM
IM3663602734864 V20820.indd 7 11/08/2020 11:17
–
5555
5
www.castorama.ru
ɂɡɝɨɬɨɜɢɬɟɥɶɞɥɹɊɨɫɫɢɢ
ɏɷɛɷɣɆɢɧɦɟɬɚɥɫɄɨɅɬɞ
Ⱥɞɪɟɫ
ɋɢɧɶɯɭɚɊɨɭɞɝɒɢɰɡɹɱɠɭɚɧɄɢɬɚɣ

3663602734864_Noname-A4_IM_V02.indb 8 24/10/2017 1:36 PM
IM3663602734864 V20820.indd 8 11/08/2020 11:17
demara asamblarea.
pe sol.
electrice sunt bine izolate pentru a evita orice risc de
electrocutare.
de ore.
beton nivelat.
evacuarea apei în afara amplasamentului.
de peste 10cm poate deveni periculos!
invers.
din cauza pericolului de deteriorare a panourilor sau a
noroioase.
în zilele ploioase.
se usuce înainte de a construi baraca deasupra.
blocuri sau montate pe un suport din beton.
de mai sus.
Anumite state nu permit excluderea sau limitarea
IMPORTANT –
5555
5
3 Sheldon Square, London, W2 6PX,
United Kingdom
www.bricodepot.ro

3663602734864_Noname-A4_IM_V02.indb 9 24/10/2017 1:36 PM
IM3663602734864 V20820.indd 9 11/08/2020 11:17
correspondan antes de montar la caseta.
alrededor la caseta.
empezar a montar la caseta.
Siga escrupulosamente las etapas de montaje para
montar correctamente la caseta.
Asegúrese de que dispone de todas las piezas antes
de empezar con el montaje.
Asegúrese de que la base de la caseta esté bien
repartida encima del suelo.
Extraiga las piezas del embalaje y ordénelas por
número. Asegúrese de tener todos los elementos
necesarios para construir la caseta.
Use siempre guantes de trabajo, manga larga y gafas
pueden causar daños.
Sea prudente con las herramientas que utilice para
montar la caseta.
Familiarícese con el funcionamiento de todas las
herramientas.
Aleje a los niños y a los animales domésticos del lugar
de montaje.
Cuando sea necesario el uso de una escalera,
asegúrese de su estabilidad en el suelo. No apoye
nunca todo su peso sobre el techo o cualquier otra
parte de la caseta.
No intente montar la caseta cuando haga mucho viento,
ya que existe el riesgo de que las condiciones de
trabajo sean difíciles y peligrosas.
herramientas. Asegúrese de la buena estanqueidad
de sus herramientas eléctricas para evitar el riesgo de
Tenga cuidado de no poner nada encima de las piezas
sueltas de la caseta para mantenerlas en su estado
original.
Asegúrese de que la base deje espacio para un
perímetro de 10 cm alrededor de la caseta. Las
dimensiones de la caseta se indican en la primera
debe tener un grosor mínimo de 10 cm. Deje secar
durante al menos 48 horas.
No almacene productos químicos de piscina en la
caseta.
Los combustibles y productos corrosivos deben
almacenarse en recipientes herméticos.
Asegúrese de que sea de nivel y que permita el drenaje
del agua fuera del emplazamiento.
La marca declina toda responsabilidad sobre la
Ajuste el límite del par de apriete del atornillador para
Compruebe una por una las dimensiones indicadas a
IMPORTANTE: utilice los tornillos con arandelas de
Recomendamos retirar la nieve del tejado cada vez
nieve puede ser peligroso!
Para desmontar la caseta de jardín, el cliente debe
seguir el manual de instrucciones en orden inverso.
No ande por el techo. ¡Riesgo de caídas!
seco y tranquilo.
NO intente montar el cobertizo si hace viento, ya que
se podrían ocasionar daños a los paneles o provocar
mojado o embarrado.
hojas y las ramas rotas son un posible peligro.
cortavientos.
Debe preparar el lugar para que la base del cobertizo
esté bien nivelada; utilice un nivel para comprobarlo.
Recomendamos encarecidamente usar la base de
El cobertizo no ha sido diseñado para montarlo
embarrado durante los días de lluvia.
tenga caída hacia los bordes para evitar que entre el
agua.
antes de montar el cobertizo encima de él.
Las bases también se pueden construir con ladrillos,
Le haremos llegar una pieza de recambio de forma
gratuita, en caso de defecto del material o defecto de
partir de la fecha de compra.
Esta garantía cubre solo al comprador inicial.
fecha de compra original antes de aplicar la garantía
de servicio. En ningún caso pagaremos el coste del
revestimiento del suelo, ni la mano de obra, ni la
Esta garantía solo cubre los fallos debidos a defectos
durante un uso normal, y no se extiende a cambios
resultantes de un uso abusivo, o a negligencia,
a un uso comercial o por no haber respetado las
instrucciones de montaje y el manual de uso del
propietario (incluyendo el buen anclaje de la caseta), la
pintura, las fuerzas de la naturaleza y otras causas que
queden fuera del nuestro control.
componentes.
componentes. Si un elemento fue suprimido o ya no
sustituirlo por un elemento de igual calidad que sea
compatible.
No hay garantía inmediata, salvo por lo que se ha
indicado anteriormente.
No se debe responsabilizar al garante de los daños
fortuitos o consecutivos que resulten del uso de este
producto, o que se deriven de un incumplimiento de
esta garantía.
Todas las garantías inmediatas se limitan al periodo de
garantía indicado anteriormente.
de modo que las limitaciones citadas anteriormente
podrían no serle aplicables, si fuera el caso.
y usted puede tener también otros derechos, que
cambian de un estado a otro o de un país a otro.
IMPORTANTE – GUARDE ESTA INFORMACIÓN PARA
FUTURAS CONSULTAS: LEA ATENTAMENTE.
55
5
3 Sheldon Square, London, W2 6PX,
United Kingdom
Euro Depot España, S.A.U. c/ La Selva,
(GL¿FLR,QEODX$D3ODQWD
08820-El Prat de Llobregat
www.bricodepot.es

3663602734864_Noname-A4_IM_V02.indb 10 24/10/2017 1:36 PM
IM3663602734864 V20820.indd 10 11/08/2020 11:17
antes de montar o abrigo.
Escolha um local adaptado para poder trabalhar ao
redor do abrigo.
de começar a montagem do abrigo.
Siga escrupulosamente as etapas de montagem para
montar corretamente o seu abrigo.
começar a montagem.
perfeitamente nivelada.
Tire as suas peças da caixa e ordene-as por número.
Use sempre luvas de trabalho, mangas compridas e
Quaisquer elementos do abrigo contêm bordos
cortantes e podem provocar danos.
Seja prudente com as ferramentas utilizadas para a
montagem do abrigo.
Familiarize-se com o funcionamento de todas as
ferramentas.
Afaste as crianças e os animais do local de montagem
totalmente no teto ou em qualquer outra parte do
abrigo.
trabalho pode tornar-se mais difícil e perigoso.
manter os seus estados originais.
primeira camada de pedras / seixos. A base deve ter
uma espessura mínima de 10 cm. Deixe secar o seu
cimento durante, pelo menos, 48 horas.
para estar protegido de ventos fortes.
abrigo.
Os combustíveis e o corrosivo devem ser guardados
em recipientes estanques.
O abrigo de metal deve ser instalado sobre uma
A marca isenta-se de qualquer responsabilidade
IMPORTANTE: Utilize apenas parafusos com arruelas
nevada. Neve com espessura superior a 10 cm pode
ser perigosa!
Para desmontar o abrigo de jardim, o cliente deve
seguir o manual de instruções no sentido inverso
Assegure-se de que o dia selecionado para a
NÃO tente montar o alpendre com tempo ventoso
pessoais. Tenha cuidado com pisos molhados ou
lamacentos.
vento.
O local tem de ser preparado de modo a que a base do
conforme mostrado na embalagem.
lamacento durante o tempo de chuva.
Qualquer tipo de cimento deve ter tempo de secar
antes de o alpendre ser construído sobre ele.
As bases também podem ser construídas com tijolos,
Os tijolos ou blocos devem ser cimentados em bases
deve ser perfurada e aparafusada à base.
em caso de defeito do material ou de fabrico por um
Esta garantia cobre unicamente o comprador inicial.
Esta garantia cobre apenas as avarias devidas a
defeitos do material ou de fabrico que surjam durante
forças da natureza e outras causas fora do nosso
controlo.
encontra disponível, a Brico Depot reserva-se o direito
de substituir um elemento de qualidade igual que seja
compatível
acima.
garantia.
de garantia enunciado acima.
aplicadas a si.
e pode também ter outros direitos que variam de um
Estado para outro ou de um país para outro.
IMPORTANTE – CONSERVE ESTE MANUAL PARA
FUTURAS CONSULTAS: LEIAATENTAMENTE.
55555
5
Brico Depot Portugal SA Rua Castilho,
5 - 1 esquerdo, sala 13 1250-066 Lisboa
www.bricodepot.pt
)DEULFDQWH
.LQJ¿VKHU,QWHUQDWLRQDO3URGXFWV/LPLWHG
3 Sheldon Square, London, W2 6PX,
United Kingdom

3663602734864_Noname-A4_IM_V02.indb 11 24/10/2017 1:36 PM
IM3663602734864 V20820.indd 11 11/08/2020 11:17
edin.
kenarlar hasara yol açabilir.
olun.
olun.
Metal kulübe düz bir beton temel üzerine monte
edilmelidir.
Firma, temel ile ilgili tercihiniz ve temelin kalitesi
olabilir!
zeminlere dikkat edin.
süreyle ücretsiz yedek parça tedarik edilecektir.
verilmez.
her türlü ihlalinden kaynaklanan hasarlardan sorumlu
tutulamaz.
olmayabilir.
5555
5
,WKDODWoÕ)LUPD
.2d7$܇<$3,0$5.(7/(5ø7ø&$܇
7DúGHOHQ0DK6ÕUUÕdHOLN%XOYDUÕ1R
7DúGHOHQdHNPHN|\ø67$1%8/
Tel: +90 216 4300300
Faks: +90 216 4844313
www.koctas.com.tr
<HWNLOLVHUYLVLVWDV\RQODUÕYH\HGHNSDUoDWHPLQLLoLQ
DúD÷ÕGD\HUDODQ.RoWDú0úWHUL+DWWÕYH.RoWDú*HQHO
0GUONLUWLEDWELOJLOHULQGHQID\GDODQÕQÕ]
.2d7$ù0hù7(5ø+ø=0(7/(5ø
0850 209 50 50

Regularly check and tighten bolts and fasteners.
Lubricate the hinges and oil the lock regularly and before using for the first time.
Corrosive materials/tools can cause the surface of garden shed rust. This kind of
rust can be cleaned by sponge with mild soapy water.
A scratched/damaged coating can rust. Repair any scratched/damaged by paint
immediately.
Remove water/moisture stagnated around & inside the shed & keep in dry & well air
ventilated condition.
This warranty does not cover any damage by improper installation, abnormal application,
poor maintenance & deliberate damage.
Combustibles and corrosives must be stored in air tight containers designed for chemical
and/or combustible storage. Corrosive chemicals such as fertilizers, pesticides and
herbicides should be cleaned off the interior and exterior surfaces immediately.
Rust caused by chemical damage is not covered by the warranty.
Vérifiez et resserrez régulièrement les boulons et les attaches.
Lubrifiez les charnières et huilez la serrure avant la première utilisation puis à
intervalles réguliers.
Les matériaux/outils corrosifs peuvent faire rouiller la surface des abris de jardin. Ce
type de rouille peut être éliminé à l'aide d'une éponge et d'une eau légèrement
savonneuse.
Un revêtement éraflé/endommagé peut rouiller. Réparez immédiatement toute
rayure/dommage avec de la peinture.
Éliminez l'eau/humidité stagnante autour et à l'intérieur de l'abri et gardez-le sec et
bien ventilé.
Cette garantie ne couvre pas les dommages causés par une installation incorrecte, une
utilisation inappropriée, un mauvais entretien ou des dommages intentionnels.
Les matériaux combustibles et corrosifs doivent être conservés dans des conteneurs
étanches à l'air et conçus pour contenir des produits chimiques et/ou des matériaux
combustibles. Les produits chimiques corrosifs comme les engrais, les pesticides et les
herbicides doivent être immédiatement éliminés des surfaces intérieures et extérieures.
La rouille résultant de dégradations chimiques n'est pas couverte par la garantie.
5HJXODUQLHVSUDZG]DüLGRNUĊFDüĞUXE\LPRFRZDQLD
3U]HGSLHUZV]\PXĪ\FLHPUHJXODUQLHVPDURZDü]DZLDV\L]DPHN
0DWHULDá\LQDU]ĊG]LDZ\ZRáXMąFHNRUR]MĊPRJąSRZRGRZDüUG]HZLHQLHSRZLHU]FKQL
RJURGRZHMV]RS\7HQURG]DMUG]\PRĪQDF]\ĞFLüJąENąLZRGą]PDáąLORĞFLą
P\GáD
3RU\VRZDQDOXEXV]NRG]RQDSRZáRNDPRĪHUG]HZLHü:V]HONLH]DU\VRZDQLDOXE
XV]NRG]HQLDQDW\FKPLDVWQDSUDZLDüIDUEą
8VXZDüZRGĊOXEZLOJRüQDJURPDG]RQąZRNyáLZHZQąWU]V]RS\XWU]\PXMąFZ
suchym i dobrze wentylowanym stanie.
1LQLHMV]DJZDUDQFMDQLHREHMPXMHXV]NRG]HĔVSRZRGRZDQ\FKQLHSUDZLGáRZ\P
PRQWDĪHPQLHSUDZLGáRZ\PXĪ\WNRZDQLHP]áąNRQVHUZDFMąLFHORZ\PXV]NRG]HQLHP
0DWHULDá\SDOQHLVXEVWDQFMHNRUR]\MQHQDOHĪ\SU]HFKRZ\ZDüZV]F]HOQ\FKSRMHPQLNDFK
SU]H]QDF]RQ\FKGRSU]HFKRZ\ZDQLDFKHPLNDOLyZLOXEPDWHULDáyZSDOQ\FKĩUąFH
FKHPLNDOLDWDNLHMDNQDZR]\SHVW\F\G\LKHUELF\G\QDOHĪ\QDW\FKPLDVWXVXZDü]
SRZLHU]FKQLZHZQĊWU]Q\FKL]HZQĊWU]Q\FK
Gwarancja nie obejmuje rdzy spowodowanej uszkodzeniami chemicznymi.
Ƚɚɪɚɧɬɢɹ
Ɋɟɝɭɥɹɪɧɨɩɨɞɬɹɝɢɜɚɣɬɟɛɨɥɬɵɢɤɪɟɩɥɟɧɢɹ
ɉɟɬɥɢɢɡɚɦɨɤɧɟɨɛɯɨɞɢɦɨɫɦɚɡɵɜɚɬɶɩɟɪɟɞɩɟɪɜɵɦɢɫɩɨɥɶɡɨɜɚɧɢɟɦɢɱɟɪɟɡ
ɪɟɝɭɥɹɪɧɵɟɩɪɨɦɟɠɭɬɤɢɜɪɟɦɟɧɢ
ɉɨɞɜɨɡɞɟɣɫɬɜɢɟɦɜɟɳɟɫɬɜɜɵɡɵɜɚɸɳɢɯɤɨɪɪɨɡɢɸɩɨɜɟɪɯɧɨɫɬɶɫɚɞɨɜɨɝɨ
ɫɚɪɚɹɦɨɠɟɬɩɨɤɪɵɬɶɫɹɪɠɚɜɱɢɧɨɣȾɥɹɭɞɚɥɟɧɢɹɬɚɤɨɣɪɠɚɜɱɢɧɵ
ɢɫɩɨɥɶɡɭɣɬɟɝɭɛɤɭɫɦɨɱɟɧɧɭɸɜɨɞɨɣɫɦɵɥɨɦ
ɉɨɰɚɪɚɩɚɧɧɨɟɢɥɢɩɨɜɪɟɠɞɟɧɧɨɟɩɨɤɪɵɬɢɟɦɨɠɟɬɡɚɪɠɚɜɟɬɶɐɚɪɚɩɢɧɵɢ
ɩɨɜɪɟɠɞɟɧɢɹɫɥɟɞɭɟɬɫɪɚɡɭɡɚɤɪɚɲɢɜɚɬɶ
ɍɛɢɪɚɣɬɟɜɨɞɭɢɜɥɚɝɭɤɨɬɨɪɚɹɫɨɛɢɪɚɟɬɫɹɜɫɚɪɚɟɢɜɨɤɪɭɝɧɟɝɨɏɨɪɨɲɨ
ɩɪɨɜɟɬɪɢɜɚɣɬɟɩɨɦɟɳɟɧɢɟɢɫɥɟɞɢɬɟɱɬɨɛɵɜɧɭɬɪɢɛɵɥɨɫɭɯɨ
ɗɬɚɝɚɪɚɧɬɢɹɧɟɩɨɤɪɵɜɚɟɬɩɨɜɪɟɠɞɟɧɢɹɜɨɡɧɢɤɲɢɟɩɨɩɪɢɱɢɧɟɧɟɩɪɚɜɢɥɶɧɨɣ
ɭɫɬɚɧɨɜɤɢɢɫɩɨɥɶɡɨɜɚɧɢɹɢɨɛɫɥɭɠɢɜɚɧɢɹɥɢɛɨɧɚɦɟɪɟɧɧɨɣɩɨɪɱɢ
Ƚɨɪɸɱɢɟɢɟɞɤɢɟɯɢɦɢɱɟɫɤɢɟɜɟɳɟɫɬɜɚɧɟɨɛɯɨɞɢɦɨɯɪɚɧɢɬɶɜɫɩɟɰɢɚɥɶɧɨ
ɫɨɡɞɚɧɧɵɯɞɥɹɷɬɨɝɨɝɟɪɦɟɬɢɱɧɵɯɟɦɤɨɫɬɹɯɋɪɚɡɭɭɞɚɥɹɣɬɟɟɞɤɢɟɯɢɦɢɱɟɫɤɢɟ
ɜɟɳɟɫɬɜɚɭɞɨɛɪɟɧɢɹɩɟɫɬɢɰɢɞɵɝɟɪɛɢɰɢɞɵɢɬɩɫɜɧɭɬɪɟɧɧɢɯɢɧɚɪɭɠɧɵɯ
ɩɨɜɟɪɯɧɨɫɬɟɣ
Ƚɚɪɚɧɬɢɹɧɟɩɨɤɪɵɜɚɟɬɪɠɚɜɱɢɧɭɜɵɡɜɚɧɧɭɸɯɢɦɢɱɟɫɤɢɦɩɨɜɪɟɠɞɟɧɢɟɦ
*DUDQ܊LD
9HULILFD܊L܈LVWUkQJH܊LvQPRGUHJXODW܈XUXEXULOH܈LGLVSR]LWLYHOHGHVWUkQJHUH
/XEULILD܊LEDODPDOHOH܈LXQJH܊LFXXOHLvQFXLHWRDUHDvQPRGUHJXODW܈LvQDLQWHGHDOH
IRORVLSHQWUXSULPDGDWă
6FXOHOHPDWHULDOHOHFRUR]LYHSRWFDX]DUXJLQLUHDVXSUDIH܊HLPDJD]LHLGHJUăGLQă
$FHVWWLSGHUXJLQăSRDWHILFXUă܊DWFXXQEXUHWHFXDSă܈LVăSXQ
2DFRSHULUH]JkULDWăGHWHULRUDWăSRDWHUXJLQL5HSDUD܊LRULFH]JkULHWXUăGHWHULRUDUH
imediat cu vopsea.
ÌQOăWXUD܊LDSDXPH]HDODVWD܊LRQDWHvQMXUXO܈LvQLQWHULRUXOPDJD]LHL܈LSăVWUD܊L
LQWHULRUXOvQVWDUHXVFDWă܈LELQHYHQWLODWă
$FHDVWăJDUDQ܊LHQXDFRSHUăQLFLRSDJXEăGDWRUDWăLQVWDOăULLLQFRUHFWHDDSOLFăULL
DQRUPDOHDvQWUH܊LQHULLGHILFLWDUH܈LDGHWHULRUăULLGHOLEHUDWH
6XEVWDQ܊HOHFRPEXVWLELOH܈LVXEVWDQ܊HOHFRURVLYHWUHEXLHGHSR]LWDWHvQUHFLSLHQWHHWDQ܈H
SURLHFWDWHSHQWUXGHSR]LWDUHFKLPLFă܈LVDXFRPEXVWLELOă6XEVWDQ܊HOHFKLPLFHFRUR]LYH
FXPDUILvQJUă܈ăPLQWHOHSHVWLFLGHOH܈LHUELFLGHOHWUHEXLHFXUă܊DWHLPHGLDWGHSH
VXSUDIH܊HOHLQWHULRDUH܈LH[WHULRDUH
5XJLQDFDX]DWăGHGHWHULRUDUHDVXEVWDQ܊HORUFKLPLFHQXHVWHDFRSHULWăGHJDUDQ܊LH
5HYLVH\DSULHWHSHULyGLFDPHQWHWRGRVORVSHUQRV\VXMHFLRQHV
Lubrique las bisagras y engrase la cerradura con regularidad y antes de usarla por
primera vez.
Los materiales/herramientas corrosivos pueden oxidar la superficie del cobertizo del
MDUGtQ(VWHWLSRGHy[LGRVHSXHGHOLPSLDUFRQXQDHVSRQMD\DJXDMDERQRVDVXDYH
Un revestimiento rayado o dañado se puede oxidar. Pinte inmediatamente cualquier
arañazo o daño observado.
Elimine el agua y la humedad estancadas alrededor y dentro del cobertizo y manténgalo
seco y bien ventilado.
(VWDJDUDQWtDQRFXEUHQLQJ~QGDxRFDXVDGRSRUXQDLQVWDODFLyQLQFRUUHFWDXQD
DSOLFDFLyQDQRUPDOXQPDQWHQLPLHQWRGHILFLHQWHRGDxRVGHOLEHUDGRV
Los combustibles y corrosivos deben almacenarse en contenedores herméticos
diseñados para el almacenamiento de este tipo de productos. Los productos químicos
corrosivos como fertilizantes, pesticidas y herbicidas deben eliminarse inmediatamente
de las superficies interiores y exteriores.
/DJDUDQWtDQRFXEUHORVGDxRVFDXVDGRVSRUHOy[LGRGHSURGXFWRVTXtPLFRV
Verifique e aperte com regularidade parafusos e fechos.
Lubrifique as dobradiças e oleie a fechadura com regularidade antes da primeira utilização.
Ferramentas/materiais corrosivos podem fazer com que a superfície da arrecadação do
jardim enferruje. Este tipo de ferrugem pode ser limpo com uma esponja com água e
sabão.
Um revestimento danificado/riscado por enferrujar. Repare quaisquer revestimentos
danificados/riscados com tinta imediatamente.
Remova água/humidade estagnada em volta e dentro da arrecadação e mantenha-a seca
e em ventilada.
Esta garantia não cobre quaisquer danos devidos a instalação inadequada, aplicação
DQyPDODPDQXWHQomRGHVDGHTXDGDHGDQRVGHOLEHUDGRV
Combustíveis e corrosivos devem ser armazenados em recipientes estanques criados
para o armazenamento de combustíveis e/ou químicos. Os químicos corrosivos como,
por exemplo, fertilizantes, pesticidas e herbicidas deverão ser limpos das superfícies
interiores e exteriores imediatamente.
A ferrugem causada por danos químicos não está coberta pela garantia.
&ÕYDWDODUÕYHED÷ODQWÕHOHPDQODUÕQÕG]HQOLRODUDNNRQWUROHGLQYHVÕNÕQ
øONNXOODQÕPGDQ|QFHYHG]HQOLRODUDNPHQWHúHOHULYHNLOLGL\D÷OD\ÕQ
$úÕQGÕUÕFÕPDGGHOHUDUDoODUEDKoHNXOEHVLQLQ\]H\LQLQSDVODQPDVÕQDQHGHQRODELOLU%X
SDVWUKDILIVDEXQOXVX\DEDWÕUÕOPÕúVQJHUOHWHPL]OHQHELOLU
dL]LNKDVDUOÕRODQNDSODPDSDVODQDELOLUdL]LNKDVDUOÕNDSODPD\ÕGHUKDOER\D\DUDNHVNL
haline getirin.
.XOEHQLQHWUDIÕQDYHLoLQHQIX]HGHQVX\XQHPLJLGHULQYHNXUXYHL\LKDYDODQPÕú
NRúXOODUGDPXKDID]DHGLQ
%XJDUDQWL\DQOÕúPRQWDMQRUPDOGÕúÕX\JXODPD\HWHUVL]EDNÕPYHNDVWLKDVDUVRQXFX
ROXúDQ]DUDUODUÕNDUúÕODPD]
<DQÕFÕPDGGHOHUYHDúÕQGÕUÕFÕODUNLP\DVDOYHYH\D\DQÕFÕPDGGHOHULVDNODPDNLoLQ
WDVDUODQPÕúKDYDVÕ]GÕUPD]NRQWH\QHUOHUGHVDNODQPDOÕGÕUøoYHGÕú\]H\OHUGHEXOXQDQ
VXQLJEUHOHUE|FHN|OGUFLODoODUYHELWNL|OGUFLODoODUJLELDúÕQGÕUÕFÕNLP\DVDOODU
GHUKDOVLOLQHUHNoÕNDUÕOPDOÕGÕU
.LP\DVDO]DUDUODROXúDQSDVJDUDQWLNDSVDPÕQGDGH÷LOGLU
EN RO ÌQWUH܊LQHUH
FR
ES
PL PT
RU Ɍɟɯɧɢɱɟɫɤɨɟɨɛɫɥɭɠɢɜɚɧɢɟ TR %DNÕP

Kingsher International Products Limited,
3 Sheldon Square, London, W2 6PX,
United Kingdom
Kingsher International Products B.V.
Rapenburgerstraat 175E
1011 VM Amsterdam
The Netherlands
www.kingsher.com/products
www.diy.com
www.screwx.com
www.screwx.ie
www.castorama.fr
www.bricodepot.fr
www.castorama.pl
ООО «Касторама РУС»
Дербеневская наб., дом 7, стр 8,
Россия, Москва, 115114
www.castorama.ru
Хэбэй Минметалс Ко., Лтд.
337 Синьхуа Роуд, г., Шицзячжуан, Китай
www.bricodepot.ro
www.bricodepot.es
www.bricodepot.pt
KOÇTAȘ YAPI MARKETLERİ TİC. A.Ș.
Taşdelen Mah. Sırrı Çelik Bulvarı No:5
34788 Taşdelen/Çekmeköy/İSTANBUL
Tel: +90 216 4300300
Faks: +90 216 4844313
www.koctas.com.tr
Yetkili servis istasyonları ve yedek parça temini için
aşağıda yer alan Koçtaş Müşteri Hattı ve Koçtaş
Genel Müdürlük irtibat bilgilerinden faydalanınız.
KOÇTAŞ MÜŞTERİ HİZMETLERİ
0850 209 50 50
IM3663602734864 V20820.indd 12 11/08/2020 11:18

3663602734864_Noname-A4_IM_V02.indb 1 24/10/2017 1:36 PM
IM3663602734864 V20820.indd 13 11/08/2020 11:18
3663602734864 / 50593403462983663602734864 / 50593403462983663602734864 / 50593403462983663602734864 / 5059340346298

IMPORTANT - Please
read carefully the
separate safety guide
before use.
IMPORTANT - Lire
attentivement le guide
de sécurité séparé
avant utilisation.
WICHTIG - Lesen
Sie vor Gebrauch
die separaten
atentamente la guía de
producto.
atentamente o guía de
segurança anexada
antes de usar.
Kullanmadan önce
lütfen dikkatle
okuyun.
x 7 x 7
3663602734864_Noname-A4_IM_V02.indb 2 24/10/2017 1:36 PM
IM3663602734864 V20820.indd 14 11/08/2020 11:18

3663602734864_Noname-A4_IM_V02.indb 3 24/10/2017 1:36 PM
IM3663602734864 V20820.indd 15 11/08/2020 11:18

•
•
•
•
•
•
•
•
•
•
•
•
•
•
• Retire as películas de proteção antes da montagem.
•
•
•
3663602734864_Noname-A4_IM_V02.indb 4 24/10/2017 1:36 PM
IM3663602734864 V20820.indd 16 11/08/2020 11:18

Vue explosée
Vista detallada Visão detalhada
3663602734864_Noname-A4_IM_V02.indb 5 24/10/2017 1:36 PM
IM3663602734864 V20820.indd 17 11/08/2020 11:18

Quick start Démarrage rapide
Schnellstart
Inicio rápido Início rápido
3663602734864_Noname-A4_IM_V02.indb 6 24/10/2017 1:36 PM
IM3663602734864 V20820.indd 18 11/08/2020 11:18

Foundation Fondation Fundament
Fundament
Cimentación Fundação Temel
Untergrund benötigt Necesar teren plat
É necessário um solo nivelado
Preparing the concrete
foundation Préparation de la fondation en
béton betonu
Vorbereitung des
Betonfundaments
Preparación de la base de
hormigón Preparação da fundação em
betão
3663602734864_Noname-A4_IM_V02.indb 7 24/10/2017 1:36 PM
IM3663602734864 V20820.indd 19 11/08/2020 11:18
This manual suits for next models
1
Other Blooma Outdoor Storage manuals
Popular Outdoor Storage manuals by other brands

Arrow Storage Products
Arrow Storage Products ENFRGE-01JS Owner's manual & assembly guide

Dancover
Dancover ProShed Owner's manual/ instructions for assembly

ABSCO SHEDS
ABSCO SHEDS BUSH RANGER 3023BRK manual

Riverlea
Riverlea Duratuf Guardian SHED SGS73 Assembly instructions

Asgard
Asgard FLEXISTORE1511 quick start guide

Rutland County Garden Furniture
Rutland County Garden Furniture Triple Bay Log Store manual