Blow H-342 User manual

USER MANUAL
1
Kamera IP
| H-342 ; 78-790# |
| H-343 ; 78-791# |
| H-351 ; 78-704# |
| H-352 ; 78-705# |
| H-353 ; 78-707# |
| H-355 ; 78-780#|
USER MANUAL
2
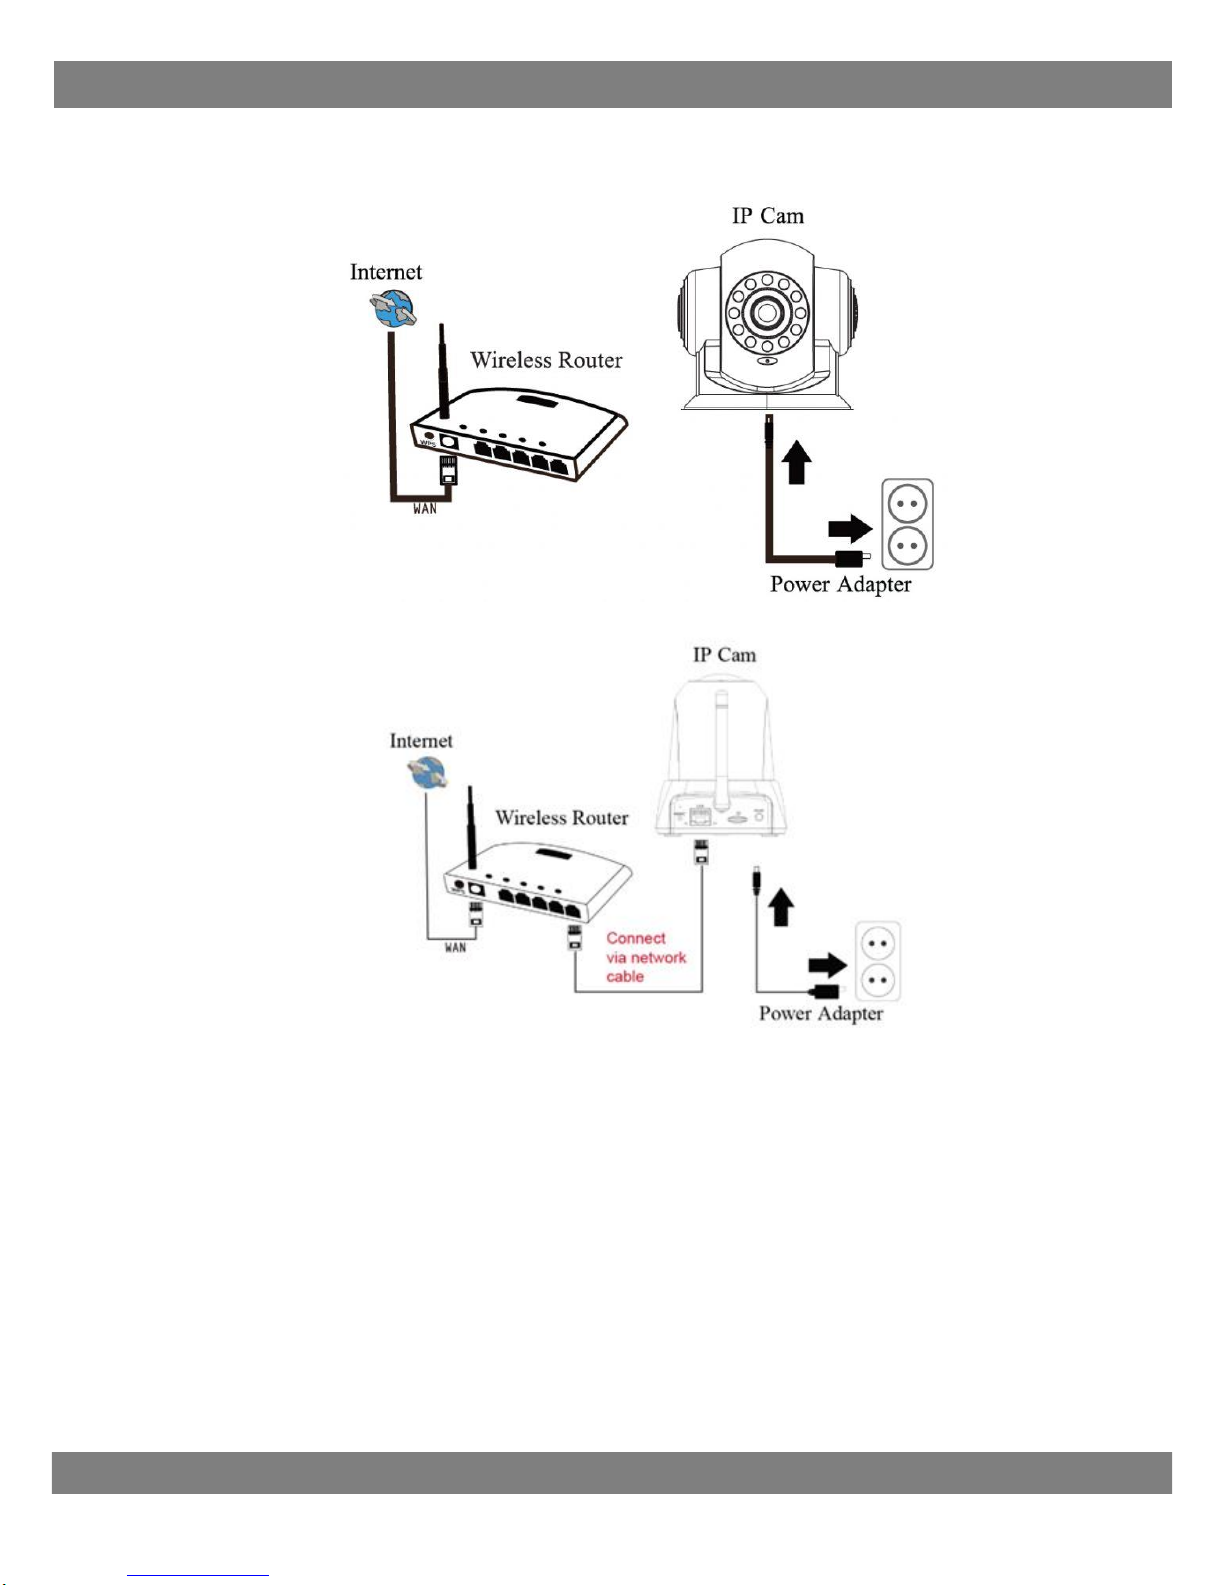
Connecting the Hardware
Conecting Wi-Fi.
Connecting via network cable
Device Connection
1. Near the router, connect camera to power and connect with router using cabel ethernet.
2. In the case of PTZ cameras, the camera will perform a rotation test and then stop in the initial
position.
3. The first configuration of the camera must be carried out via a wired connection using an Ethernet
cable. Later in the manual, the WiFi network configuration will be explained
4. Connect your mobile phone to the Wi-Fi network.
USER MANUAL
3
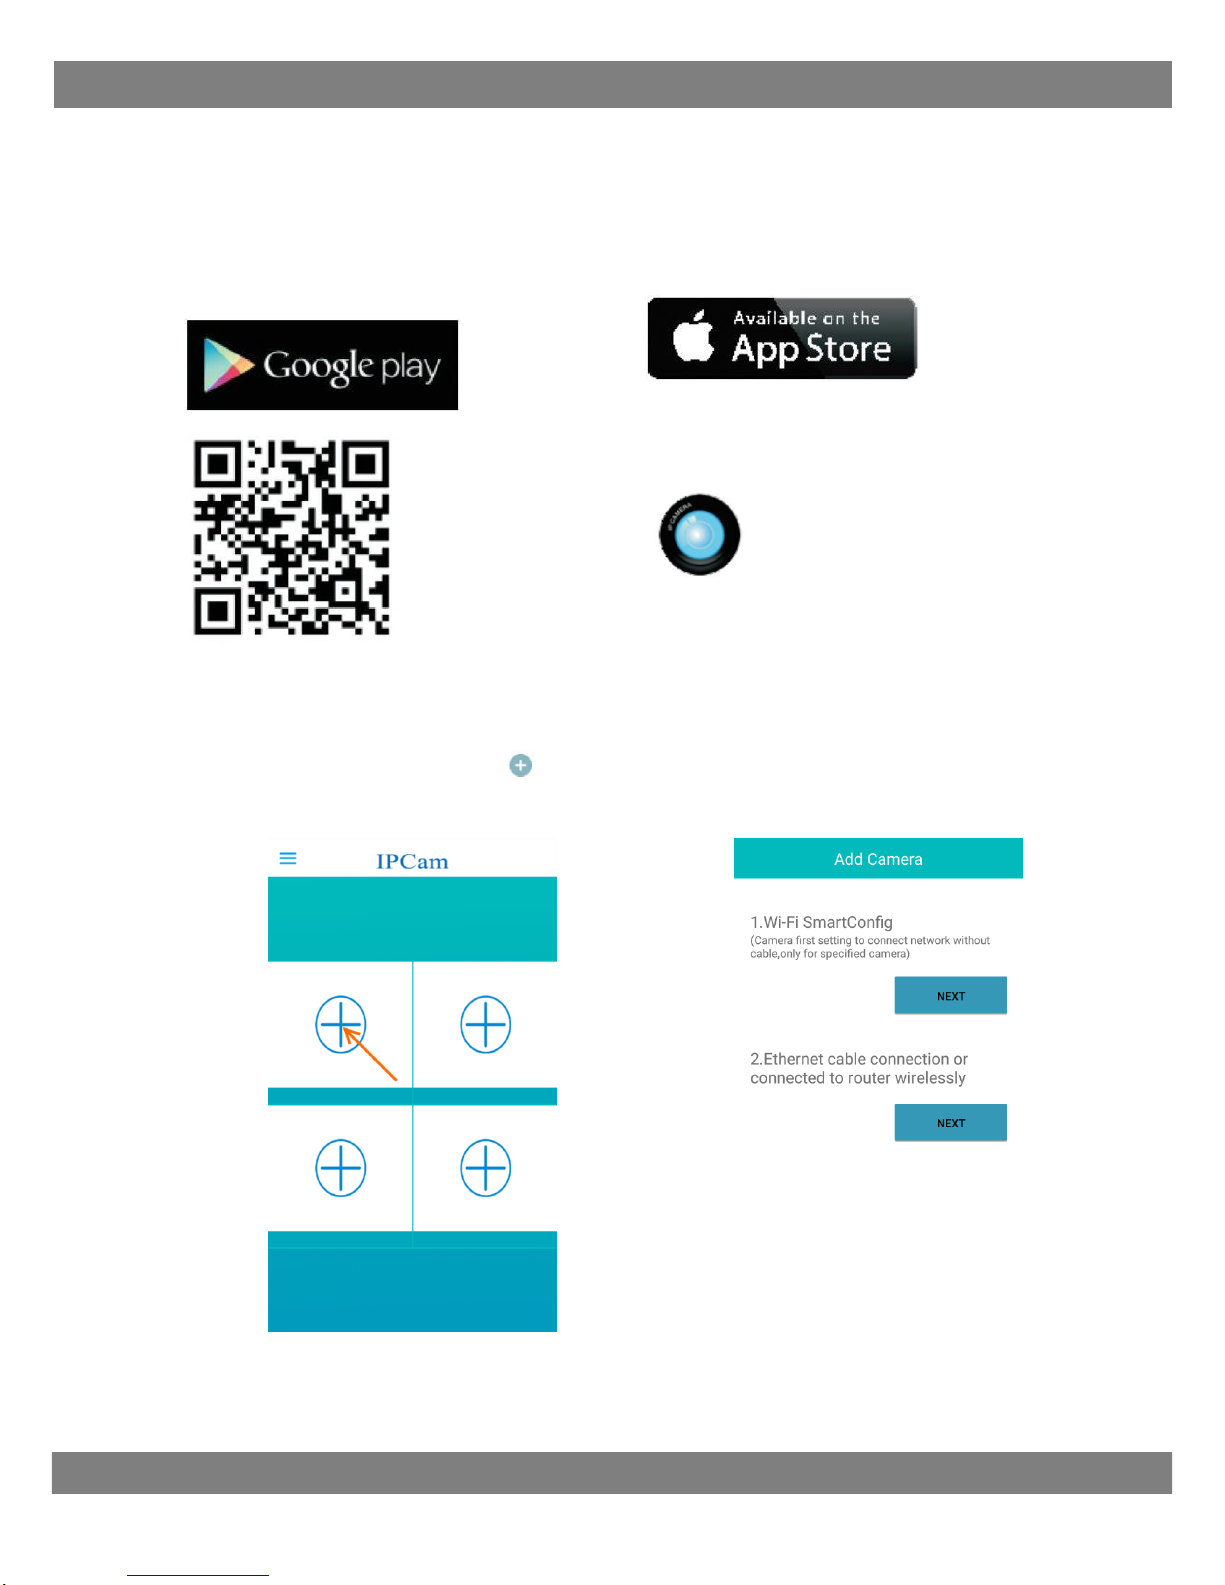
Downlad and Install App
Android users can search IPCAM P from
Google Play store, or just scan the QR-code
below to download the App.
iOS users can download IPCAM P from App
Store.
After installing, the icon will pop up on the
mobile phone.
Add Camera
1. Run the IPCAM PApp. Click on on the home screen, then click on “Add manually”. Please click
on “Next” from the first option “Ethernet cable connection”.
(1-1) (1-2)
USER MANUAL
4
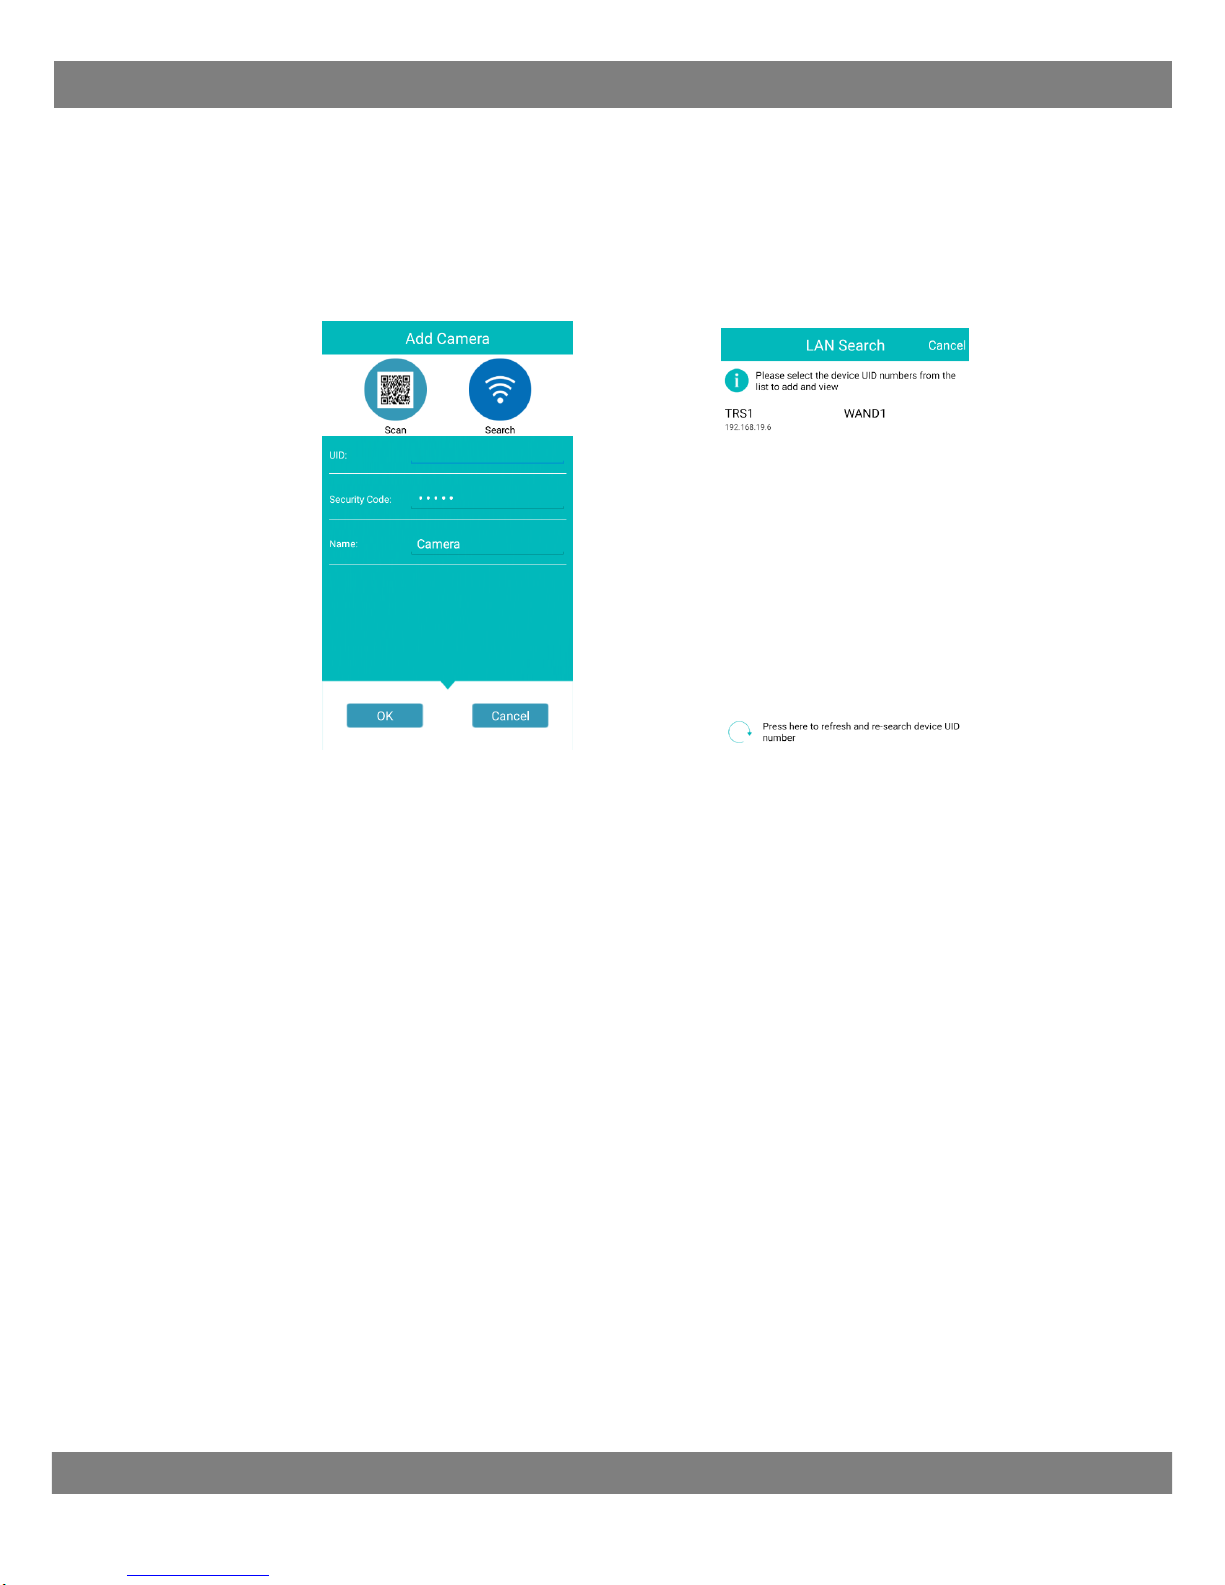
2. Wi Fi Camera we can add:
Scanning the unique UID of the camera from its enclosure -Click "Scan" (Figure 2-1).
By manually entering the UID number, click on the UID field (Figure 2-1).
Looking for a local LAN - click "Search" (Figure 2-1)
After searching the network, the program will display a list of available cameras,
then select the appropriate UID of the device (fig. 2-2) by clicking on it.that
(2-1) (2-2)

USER MANUAL
5
3. When we have enter UID number, enter a name for your camera enter security code
(default password is: admin or 888888) and next click on “OK” as picture 3-1
(3-1)
4. Once the camera was added, you will be redirected to the home screen, where you can
view the camera. Click on the video, it could be shown solely. Click on < on the top for
return .
`
(4-3) (4-4)

USER MANUAL
6
Advance settings
5. As picture 5-1, tap , to get function list bar and tap , navigating into advanced
settings, you can change password, set up motion detection, recording etc
(5-1) (5-2)
(5-3) (5-4)
USER MANUAL
7
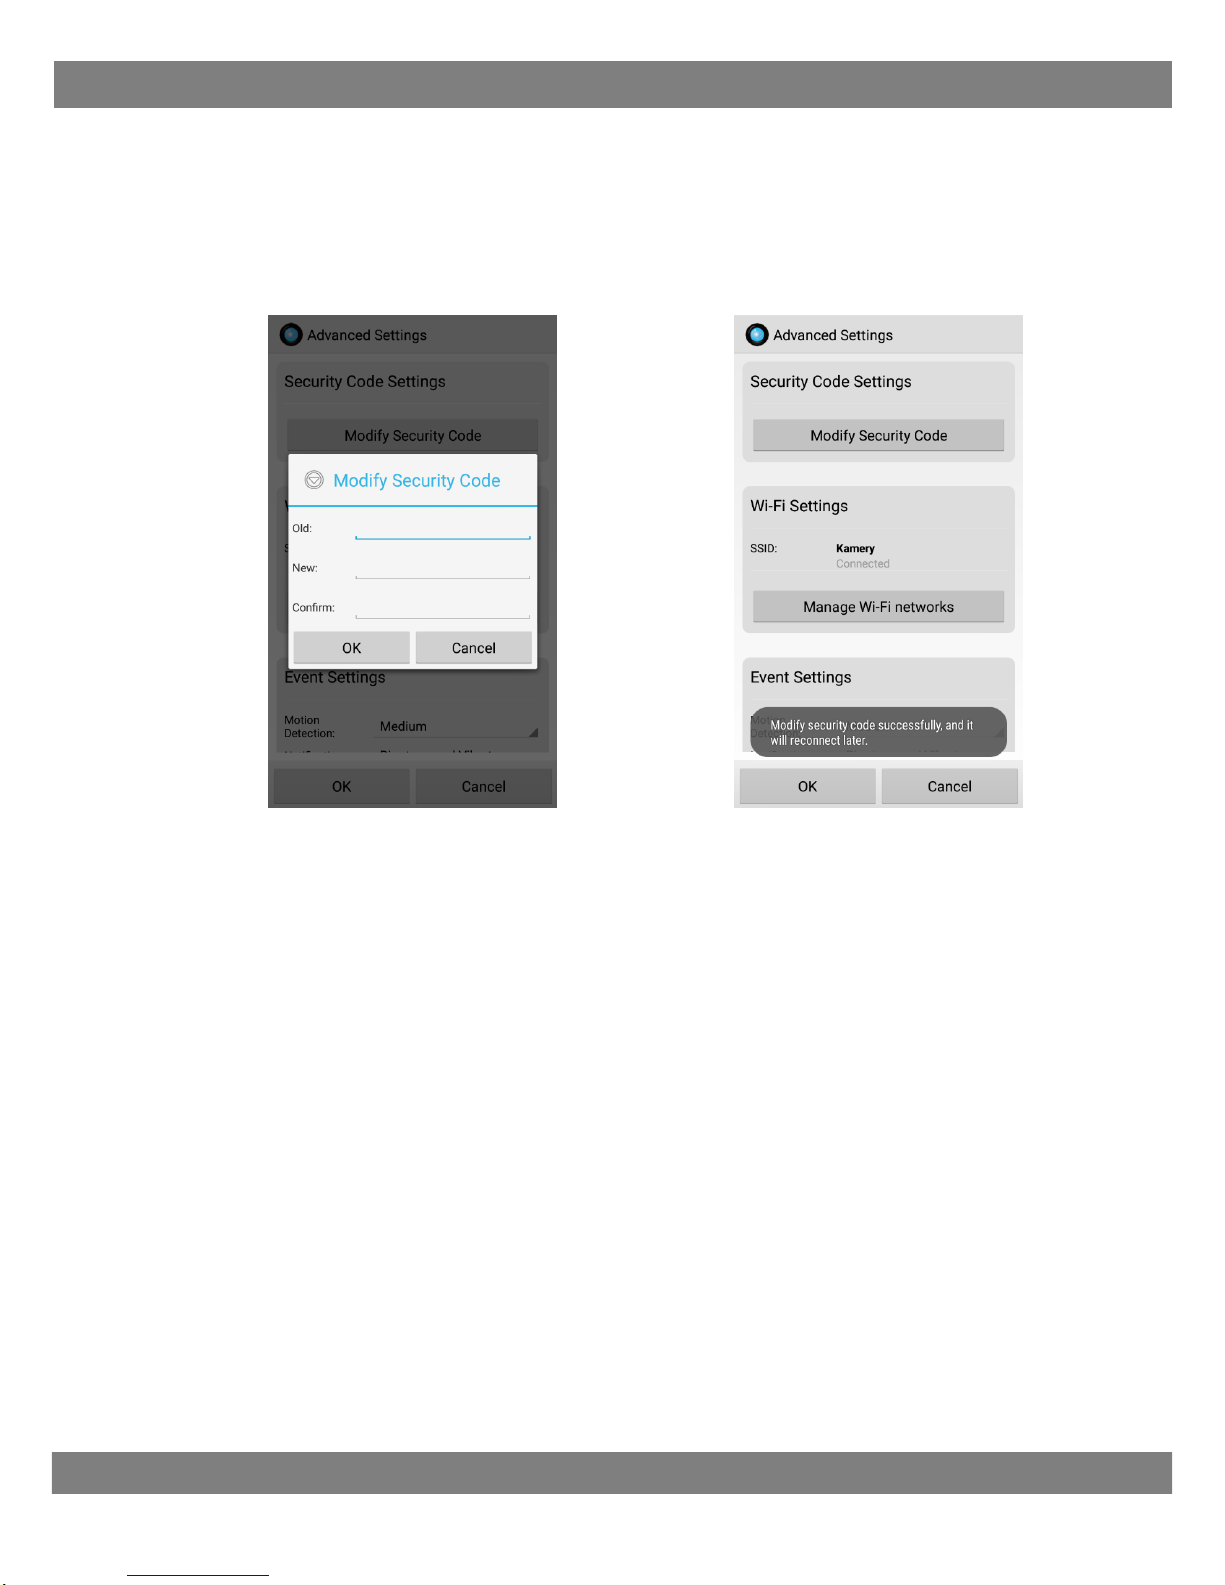
Change password camera
6. In the "Advanced Settings" menu (picture 5-1) Click "Modify Security Code" (picture
6-1), enter the old password in the "Old", the default password is admin. In the "New"
enter new password, in the "Confirm" enter new password again, then click OK. The
password will be changed.
(6-1) (6-2)
The program will go to edit camera settings view.
Make a re-connection to watch real-time video transmission.
USER MANUAL
8
Settings connect Wi-fi
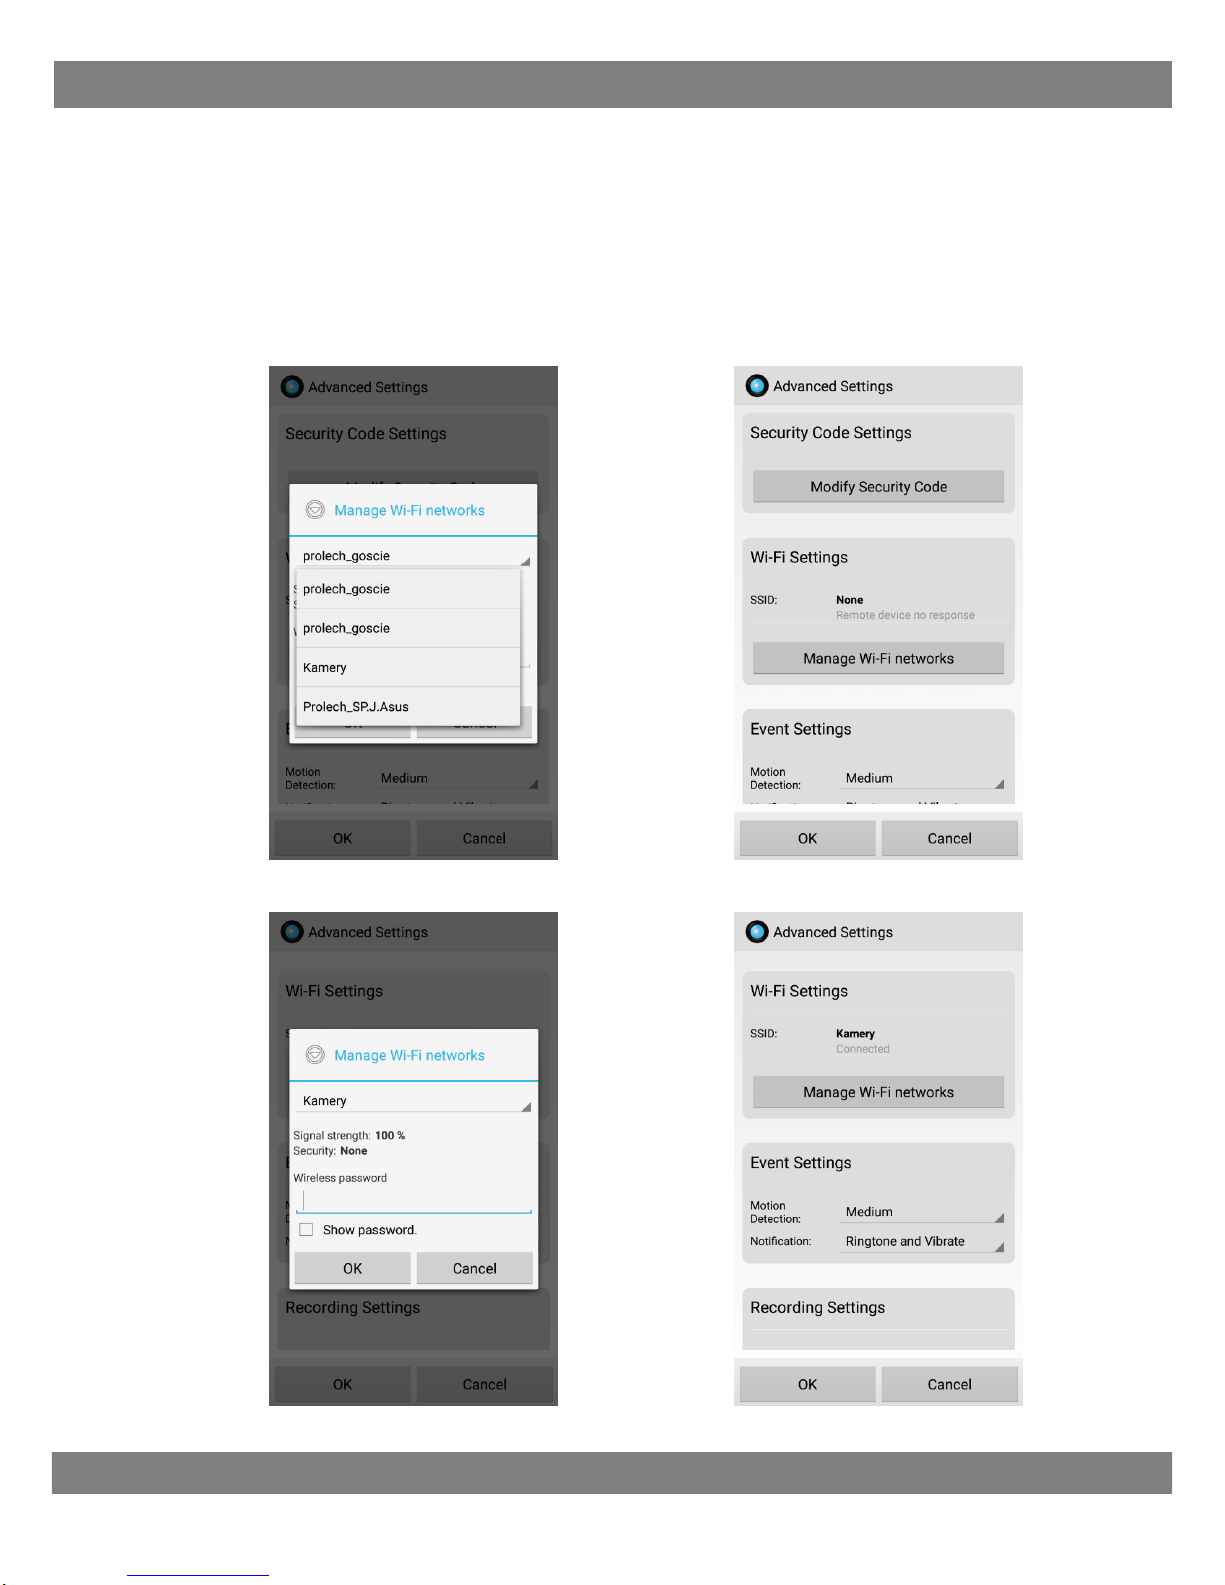
7. From the "Advanced Settings" menu, click "Wi-Fi Network Management”
(picture 7-1), expand the list of available Wi-Fi networks, choice and click (pcture 7-2),
In the next window, enter the password for the selected Wi-Fi network and press "OK"
(Picture 7-3). Correctly adding a camera to a WiFi network is shown in picture 7-4. The
name of the Wi-Fi network and "connected”.
You can remove the Ethernet cable. For a moment the camera preview will be
unavailable and will reappear after the camera switches to a Wi-Fi connection.
(7-1) (7-2)
(7-3) (7-4)

USER MANUAL
9
Motion decetion
8. From the "Advanced Settings" menu, "Event settings" (picture 8-1), expand the menu
(picture 8-2) and select the motion detection sensitivity. Off sensor ("Off") to the
maximum sensitivity ("Max"). The higher the sensitivity, the more the camera will
record. In the "Notification" menu in the list (Picture 8-3) you can choose the type of
event / alarm notification. When set to sensitivity, the camera may sound a beep..
(8-1) (8-2)
(8-3)

USER MANUAL
10
Recording SD card
9. The SD card's recording function is only available when the SD card is mounted in the
device. From the "Recording Settings" menu. Select one of the options from the list
(Picture 9-1). OFF (turn off recording), All time (continuous recording in 24 hour
mode), Alarm (motion video recording). If the space on the SD card is full, the
camcorder automatically overwrites the oldest recordings.
(9-1)
Play records SD card
10. After a successful video recording setup. On the SD cards will display video records 10
minutes time, or alarm records. To check the recording, go back to the main screen and
click "Recording Files" (picture 10-1). In the list (pigure 10-2), select the video with the
specified time and type of recording to play it.
(9-3) (9-4)

USER MANUAL
11
Made in ChRL for:
PROLECH R. i S. Leszek Sp. J.
Stary Puznów 58B
08-400 Garwolin, Polska
www.blow.com.pl
Service:
Serwis BLOW
Stary Puznów 58B
08-400 Garwolin, Polska
www.blow.com.pl
Electrical equipment marked with a crossed-out wheelie bin
symbol cannot be disposed of with municipal waste. Such
equipment is subject to collection and recycling.
www.blow.pl | www.prolech.com.pl
This manual suits for next models
5
Table of contents
Other Blow IP Camera manuals


