Blue-Ray Biotech EzScope 101 User guide

Ver. 1.1, 2019/10/24
1
EzScope 101 Quick Operation Guide
The EzScope 101 is a compact, specialized inverted bright field microscope that is
designed to be operated inside an incubation chamber for live cell observation and
documentation. It is equipped with a white LED light and exchangeable lenses that
enable the user to monitor and record the live cell status in the incubator.
1 Unpacking and Cleaning
Open the EzScope 101 package and confirm that all items below are included:
EzScope 101 x 1
Quick Guide x 1
Warranty Card x 1
USB Flash Drive x 1 (Containing EzCapture software and Operation Manual.)
LED Lamp Arm x 1 (With 2 fixation screws and hex wrench x 1.)
DC 5V Power Adaptor x 1
USB Data Cable x 1
If there are any items missing, damaged, or any incorrect items in the package,
please contact your local Blue-Ray Biotech’s distributor or sales representative
immediately.
Clean the device with a lint free cloth or KimwipeTM soaked with 70% EtOH.
Note: Do not use acetone to clean the device or autoclave the device.
2 Setting Up the EzScope
2.1 LED Lamp Arm Installation
Plug the mini USB of the LED Lamp Arm into the mini USB port of the
EzScope (Figure 1.). Tighten 2 screws with the hex wrench.
Figure 1. Installation of the LED Lamp Arm Figure 2. Back Connection Panel
Ver. 1.1, 2019/10/24
2
2.2 Cable Connection
The Back Connection Panel (Figure 2.) is on the rear of the EzScope.
Data Out: For data output to your control PC.
Data In: For daisy chain connection for another EzScope 101 unit.
DC In: For power cable connection.
Note: DO NOT plug the power adaptor into the power outlet at this stage.
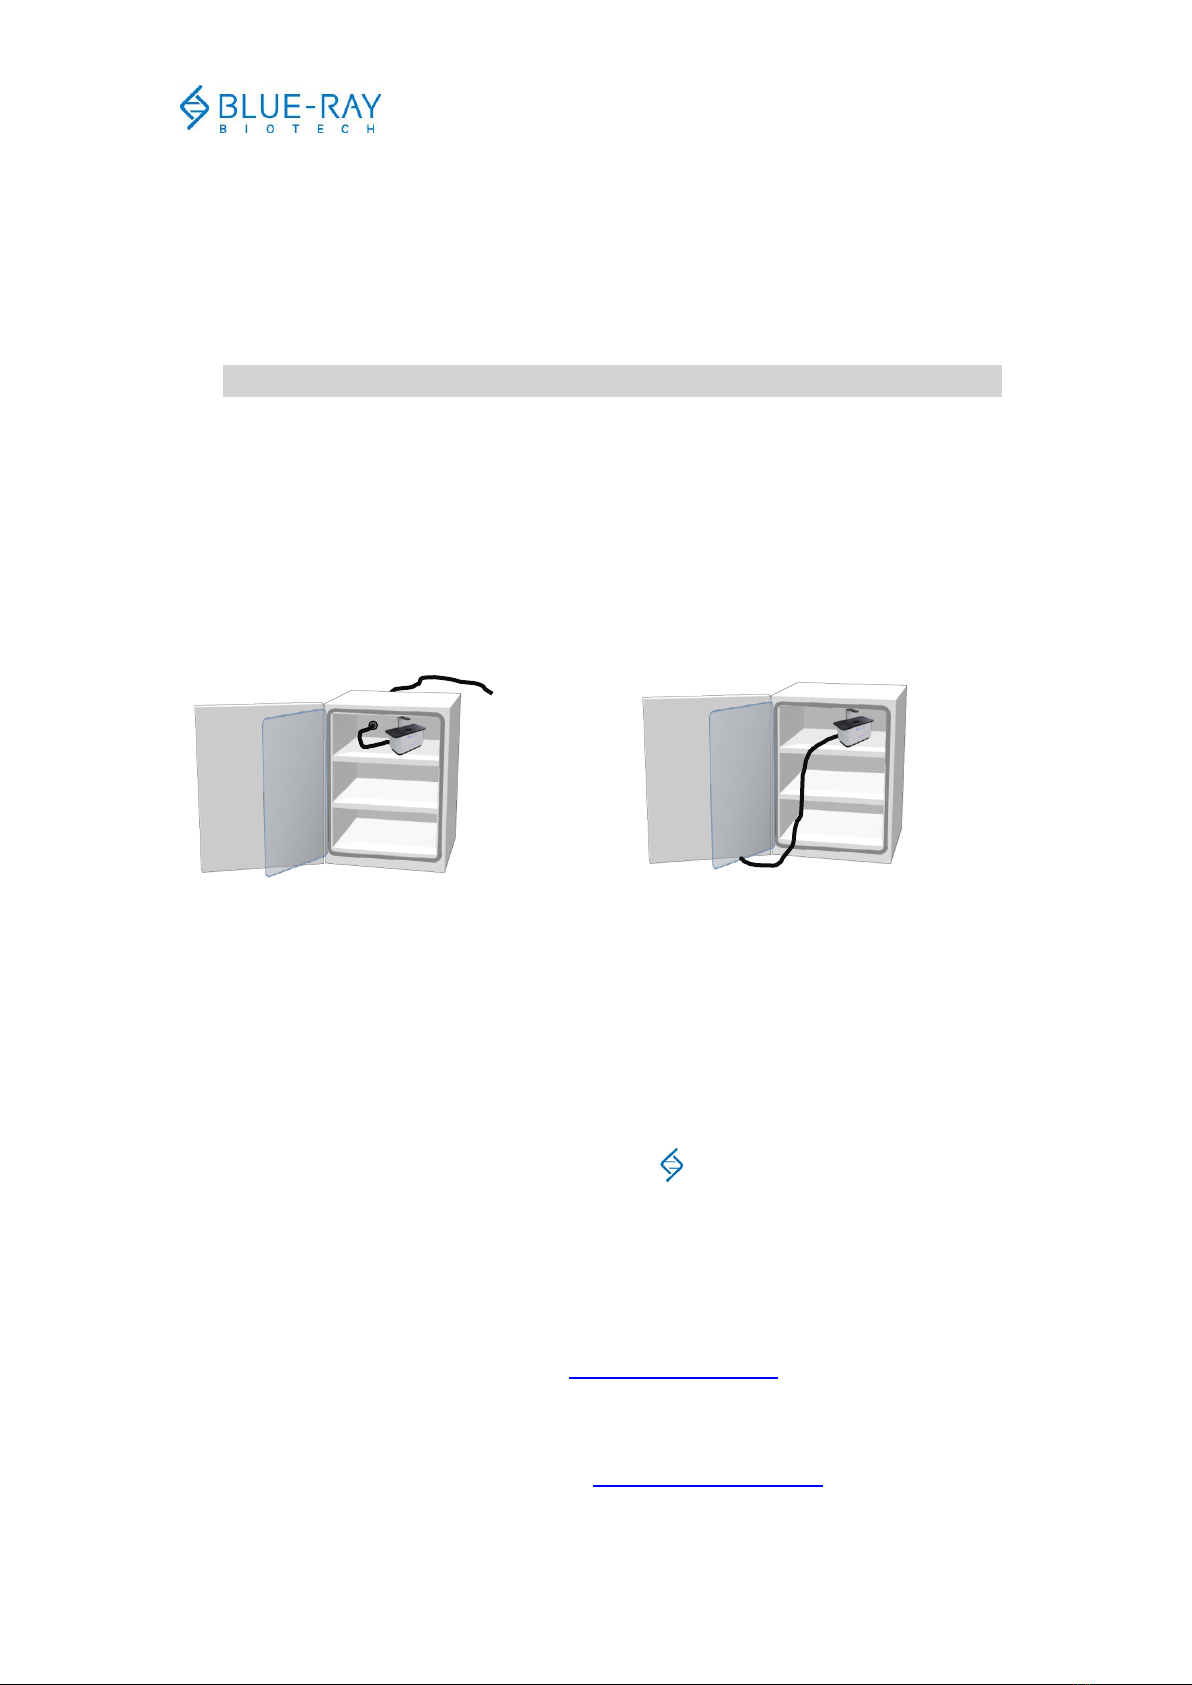
2.3 Cable Placement
Your incubator may have a cable port in the back.
If so, please guide the USB cable and the power cable through it
(Figure 3a below).
If no port is present, place the cables between the glass inner door and
the gasket of the incubator (Figure 3b below). Keep the cables free
from the hinges to prevent damage to the cables.
Figure 3. Cable Placement
Warning: To prevent condensation, place the EzScope in the incubator for
at least 1 hour for temperature equilibrium before powering on.
3 EzCapture Software Installation
Run setup.exe in the EzCapture folder stored in the USB flash drive. Follow the
on-screen instructions to finish the installation.
To launch the EzCapture software, select EzCapture from the Windows start
menu or double click on the EzCapture Icon on the Desktop.
4 Capturing the First Image
Please follow the instructions of the Operation Manual to start your experiment.
Note:
1. The contents of this document are subject to change without prior notice. Please
visit Blue-Ray Biotech’s website at www.blue-raybio.com for updated
information.
2. If you have any questions about the operation of the EzScope 101, please
contact your local distributor or email sales@blue-raybio.com for assistance.
N:406-LCBR00-11
a
b
Table of contents


