distance is, the bigger magnification is.
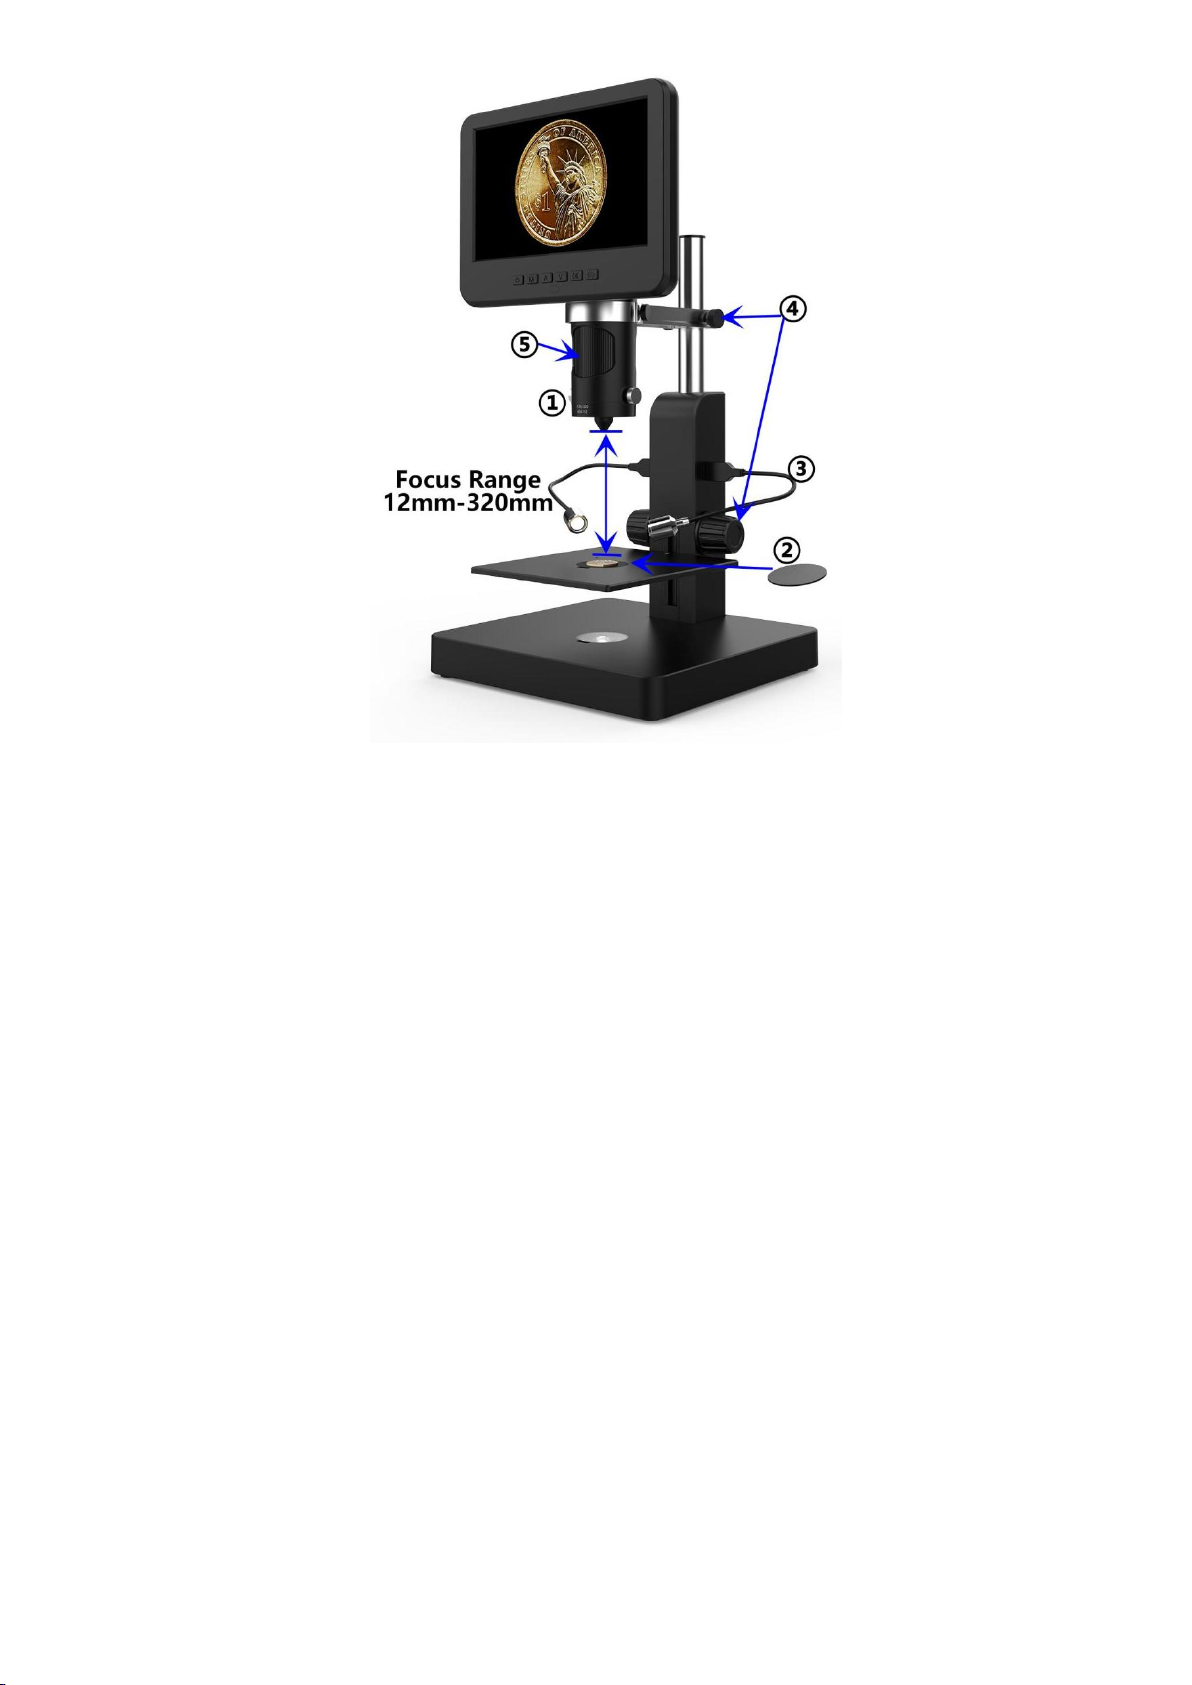
⑤Turn the focusing tube to get a clear image. Turn it clockwise to zoom in and the other way to
zoom out. Or, we recommend users to gently adjust the stage height to get a clear image, this
way causes less shake.
*Lens B&C’s magnification is quite big, which requires a short object distance. Meanwhile, any
tiny movement or shake of specimen would be displayed as huge on the monitor, which
requires user to operate very carefully and patiently.
Digital zoom
Press “up” button on the monitor (pic 2 # ③) to apply digital zoom in, and “down” to zoom
out( pic 2#④)
Save files to micro SD card
To save images and videos to a memory card, please insert a card into the TF slot at the back of the
monitor before power on the device.
Attention:
1. TD card are not included in the standard package. Please purchase it from quality suppliers. We
recommend 10 grade high speed TF card.
2. Metal strip side of the card faces outward.
3. Push the card deeply into the card slot until you hear a click sound. Otherwise it would bounce
back.
4. When the monitor shows “card error” or “card is full”, please format the card first before
take pics. Format steps are: Press and hold button M until it shows a menu→press M button
again to get into Setting menu →Press up or down button to select →choose”Format” and
confirm
5. Do not insert a card while microscope is working. If you do, the microscope would switch off
automatically. And you will have to turn it on again.
In order to take videos, pictures, or playback files we have taken, we need to get into different modes
firstly. MODE button(pic 4 #②,marked as“M”)can be used to selected among three modes,
video( ), photo( ) and playback( ).
Record videos
In video mode( ), press OK button to start recording. Press it again to stop.
It works the same way with the OK button on the remote.
In video mode, on the right upper corner of the monitor shows time and “1080FHD”(white font).