Blue Ridge OSK102 User manual

Page 1of 15
User Manual for WiFi Module
For Controlling WiFi Compatible Wall-Mounted
BLURIDGE Ductless Mini-Split HVAC Equipment
Applies to model WiFi Module # WFWM
Document Version July 2018
Effort has been made to insure compatibility of this device with standard home networking equipment and with
iOS and Android operating systems. However, due to the variety of hardware and software found in home
networks, compatibility is not assured with your particular network. Please read the manual carefully before
installing or connecting your WFWM WiFi adapter. (It is recommended to save a copy of these instructions for
future reference.)
Page 2of 15
AVOID FRUSTRATION - READ THIS
WHOA!
When setting up this device, you may think it is broken when it is not.Why? Because if the
power is turned on to the mini-split equipment either for the first time, or by powering it off
then on again to resolve a network or other setup issue, the equipment and related software
will not operate for a minimum of 15 minutes. This includes the setup process for the app also
not working for at least 15 minutes. The reason is because this mini-split equipment (as with
most air conditioners) has a delay timer that is intended to keep the equipment from quickly
starting after stopping, which could damage the condenser. And so it has been designed to
prevent power to the equipment and software for the duration of this delay period. If you
attempt to setup or use the app during this delay period, it will not function properly.
Understanding this then, after the equipment is powered on, you must wait at least 15
minutes before operating the WiFi module or the app on your mobile device.
Table of Contents
1. Specifications
2. Compatibility
3. Download and Install the App
4. Install the WiFi Module
5. Getting connected
6. Using the App
7. Troubleshooting

Page 3of 15
1. Specifications
Model: WFWM (OSK102)
Standard: IEEE 802.11b/g/n
Antenna Type: External omnidirectional Antenna
Frequency: WIFI – 2.4G
Maximum Transmitted Power: 15 dBm Max
Operation Temperature: 32 Deg F ~ 133 Deg F
Operation Humidity: 10% - 85%
Power Input: DC 5V/300mA
2. Compatibility
The WFWM is designed for compatibility with devices using Android or iOS operating systems.
Note: Due to the frequency of OS updates, the app may not be compatible with the iOS and
Android versions that are released after the manufacture of this device and software. It
probably will be compatible, but it’s uncertain what future OS updates may contain.
Note: The WFWM hardware device supports WPA-PSK/WPA2-PSK encryption and no
encryption. WPA-PSK/WPA2-PSK encryption is recommended.
3. Download and Install the App
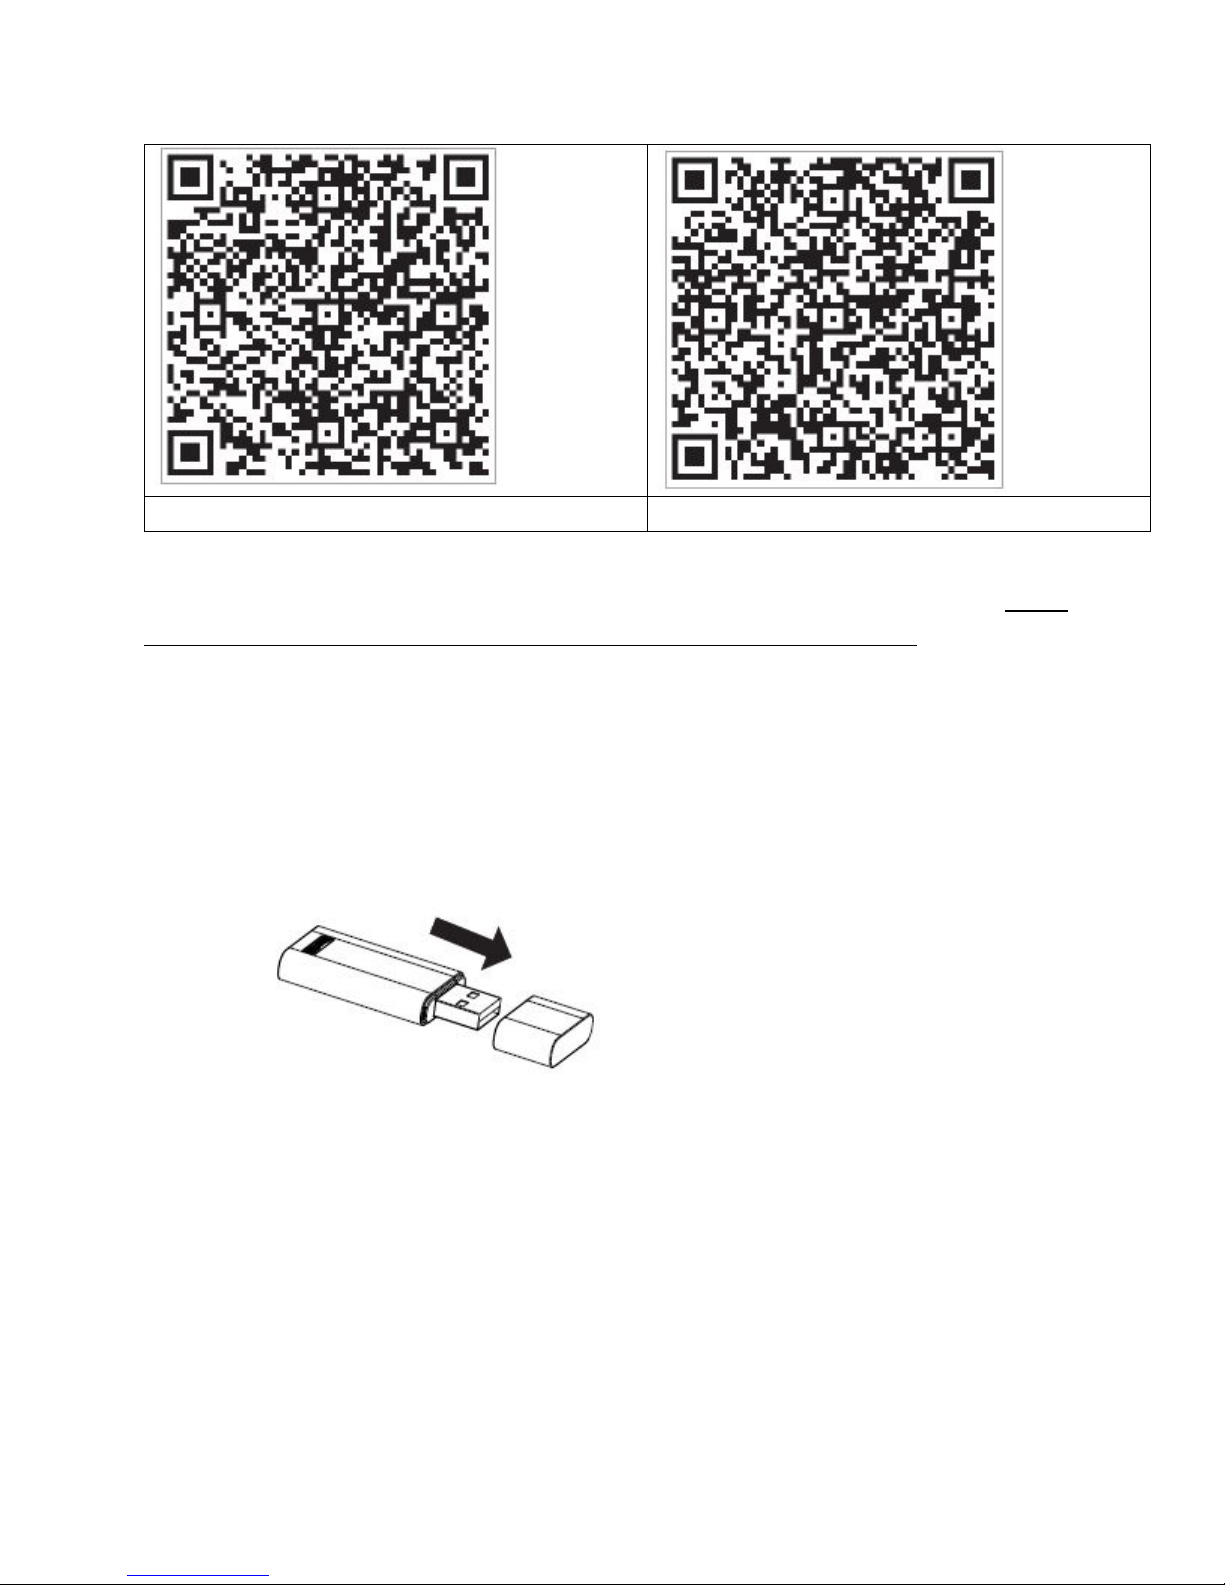
Search the App Store (iOS) or Google Play Store (Android) for Nethome Plus, download and
install.
If you prefer, you can scan the appropriate QR code below using the camera (iOS) or QR code
reader software (Android) to take you directly to the compatible app for your device.
Download and Install.
Page 4of 15
Nethome Plus for Android
Nethome Plus for iOS
Note!These QR codes are only to get Nethome Plus onto your iOS or Android device. Please
do not confuse these for the QR code on the WiFi adapter, used for setup later.
4. Install the WFWM WiFi module
•Remove the protective cap of the WFWM WiFi module
Page 5of 15
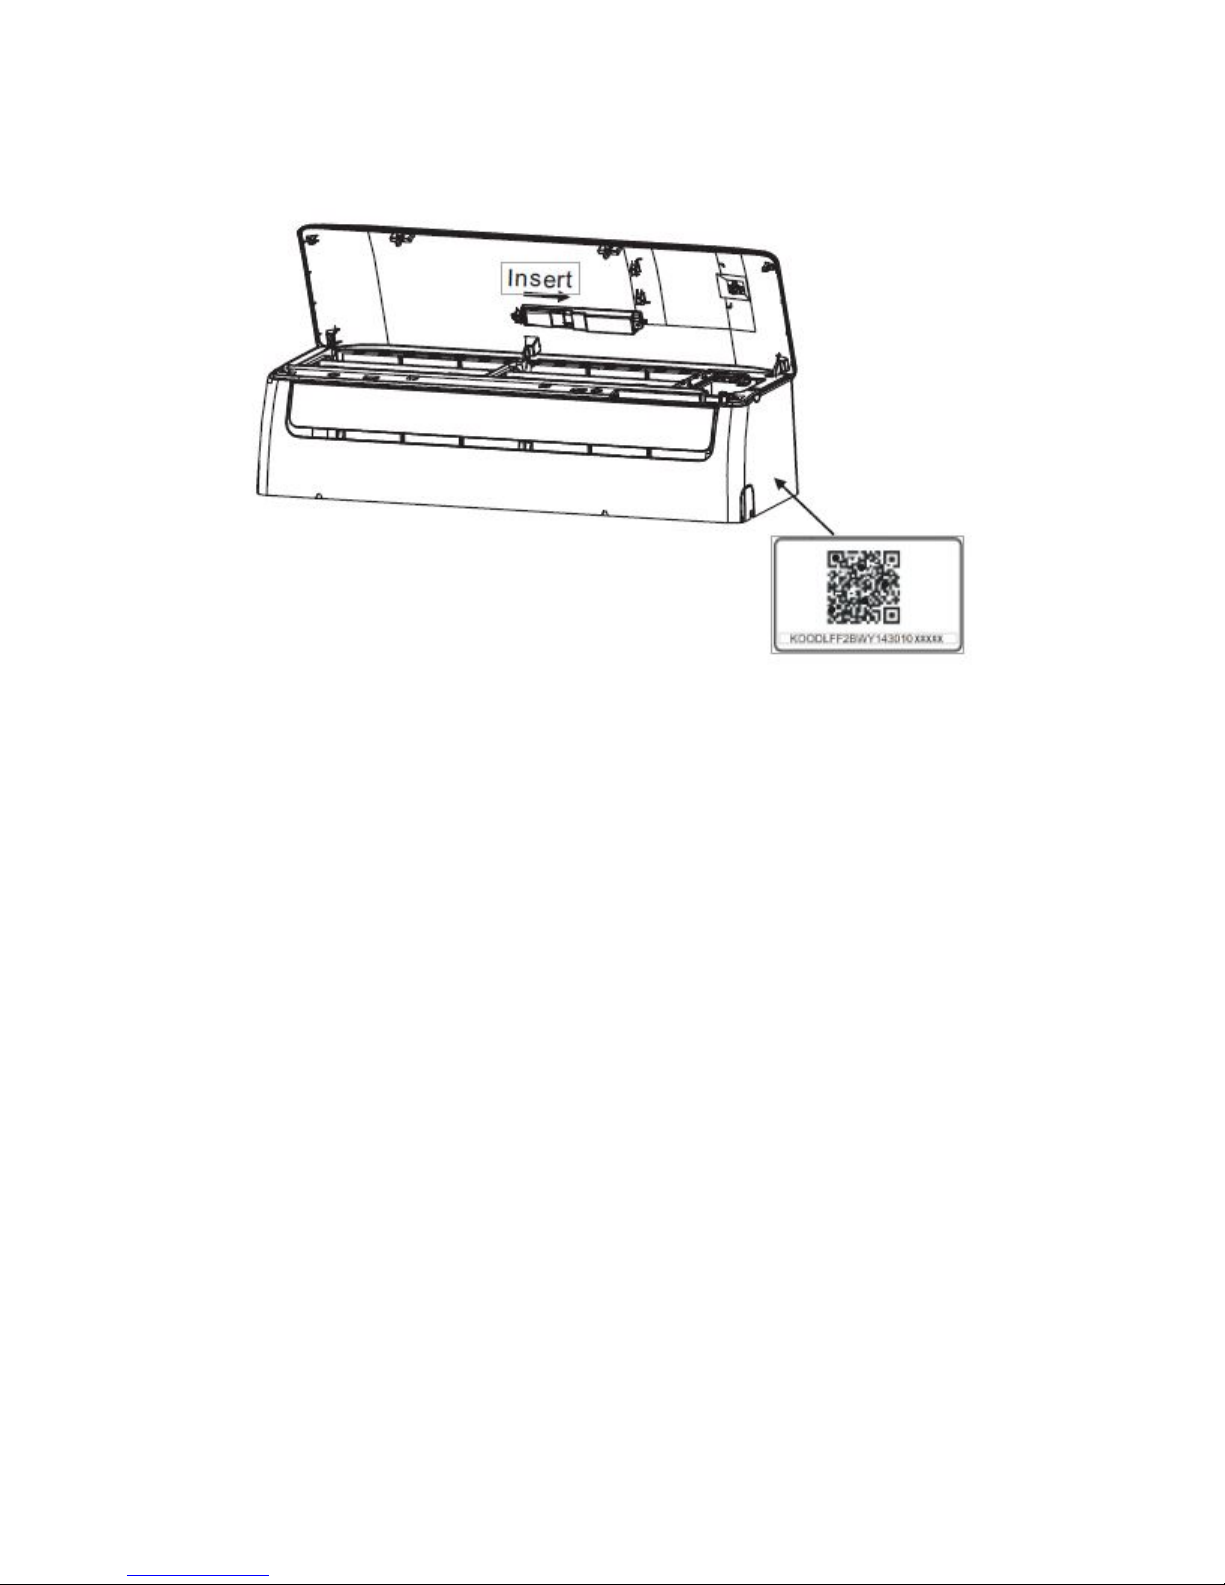
•Open the lid of your air handler and insert the WiFi adapter as shown. You should feel it
click into place.
Note: The WFWM WiFi box contains a QR code sticker to assist in setup. We suggest
you apply it to the side of the air hander as shown.
5. Register
Make sure that WiFi is enabled on your Android or iOS device and that it is on your
preferred (home) network.
Page 6of 15
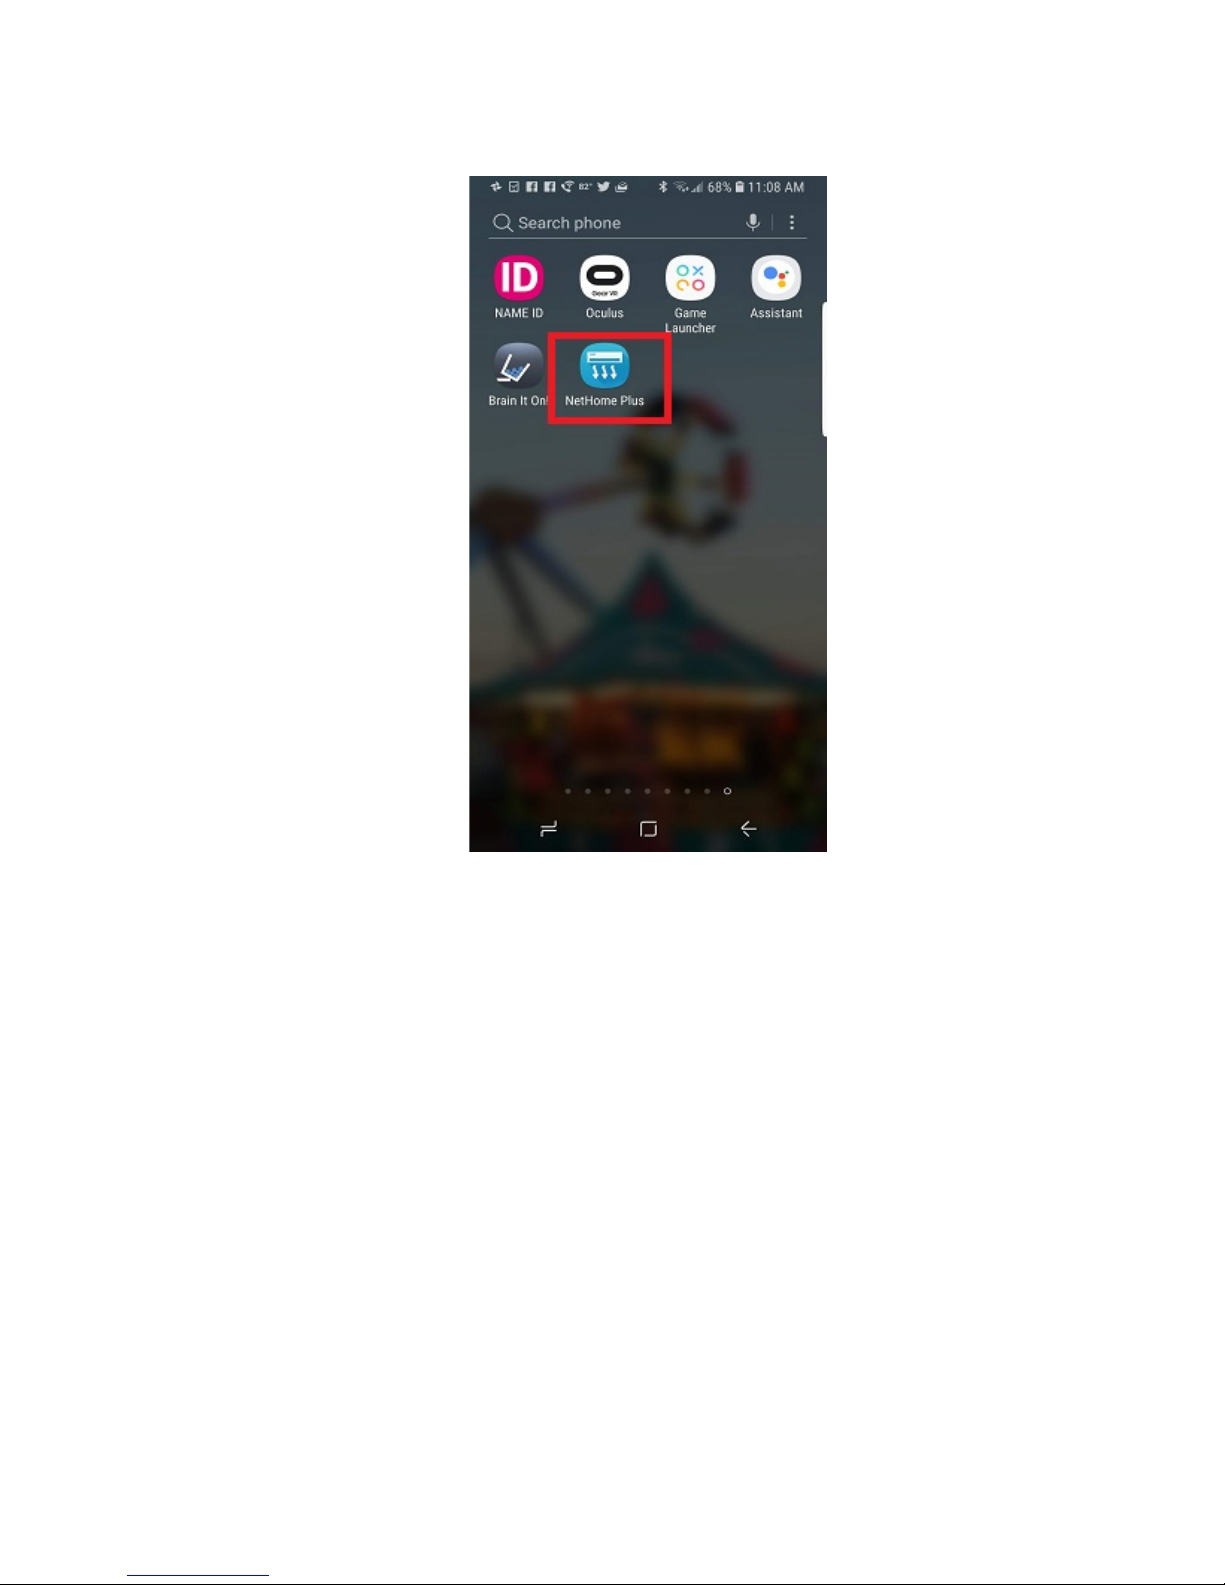
•Locate Nethome Plus in your Apps and tap to launch.

Page 7of 15
•Tap Create Account in the lower right of the screen.

Page 8of 15
•Enter your email address and create a password. Then click Registration.
•Check your email. Click the link in your email to complete registration.

Page 9of 15
6. Getting Connected
•Start with the unit powered down. Using the AC remote, power up the unit and press
the “LED” button 7 times until the wall unit displays “AP”.
Note: While in AP (programming) mode, the handheld remote control will not function.
The unit automatically reverts to normal operation after 8 minutes, or after powering
the unit off, then back on. The air handler displays the room temperature in normal
operation mode.
Page 10 of 15
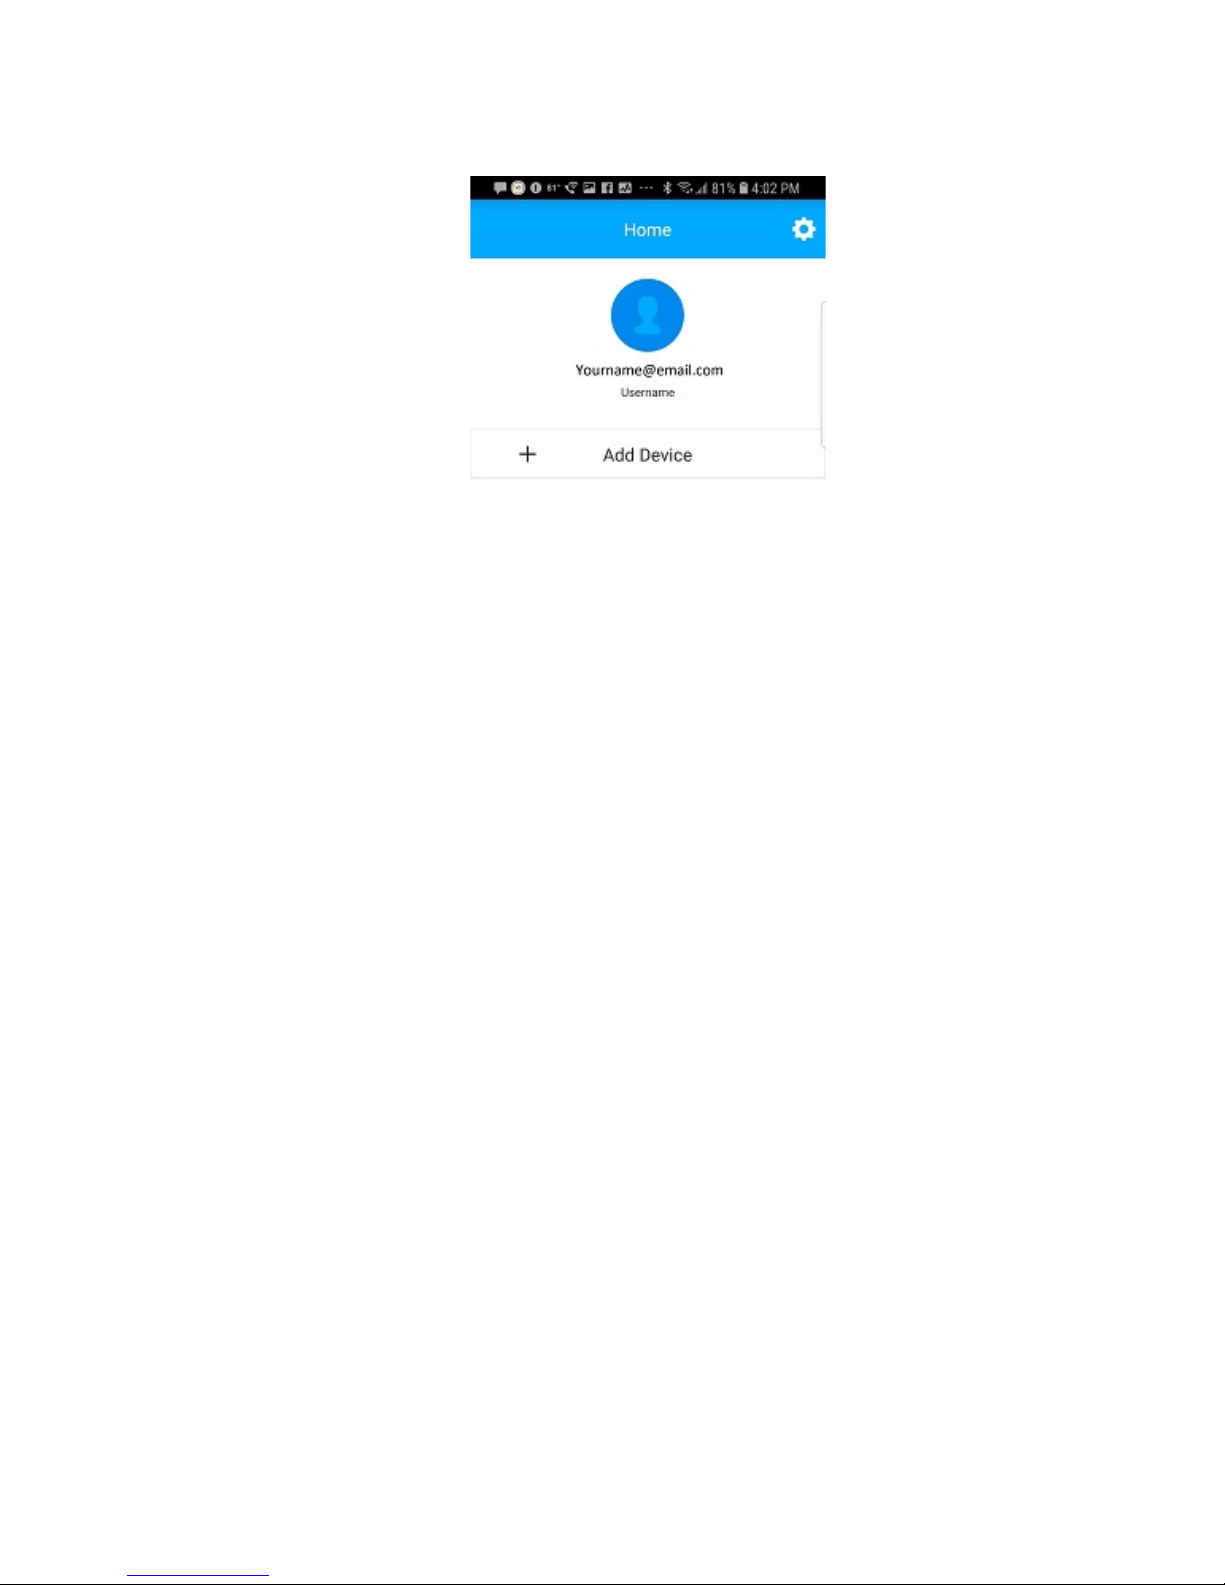
•On your iOS or Android device, tap “+ Add Device”.
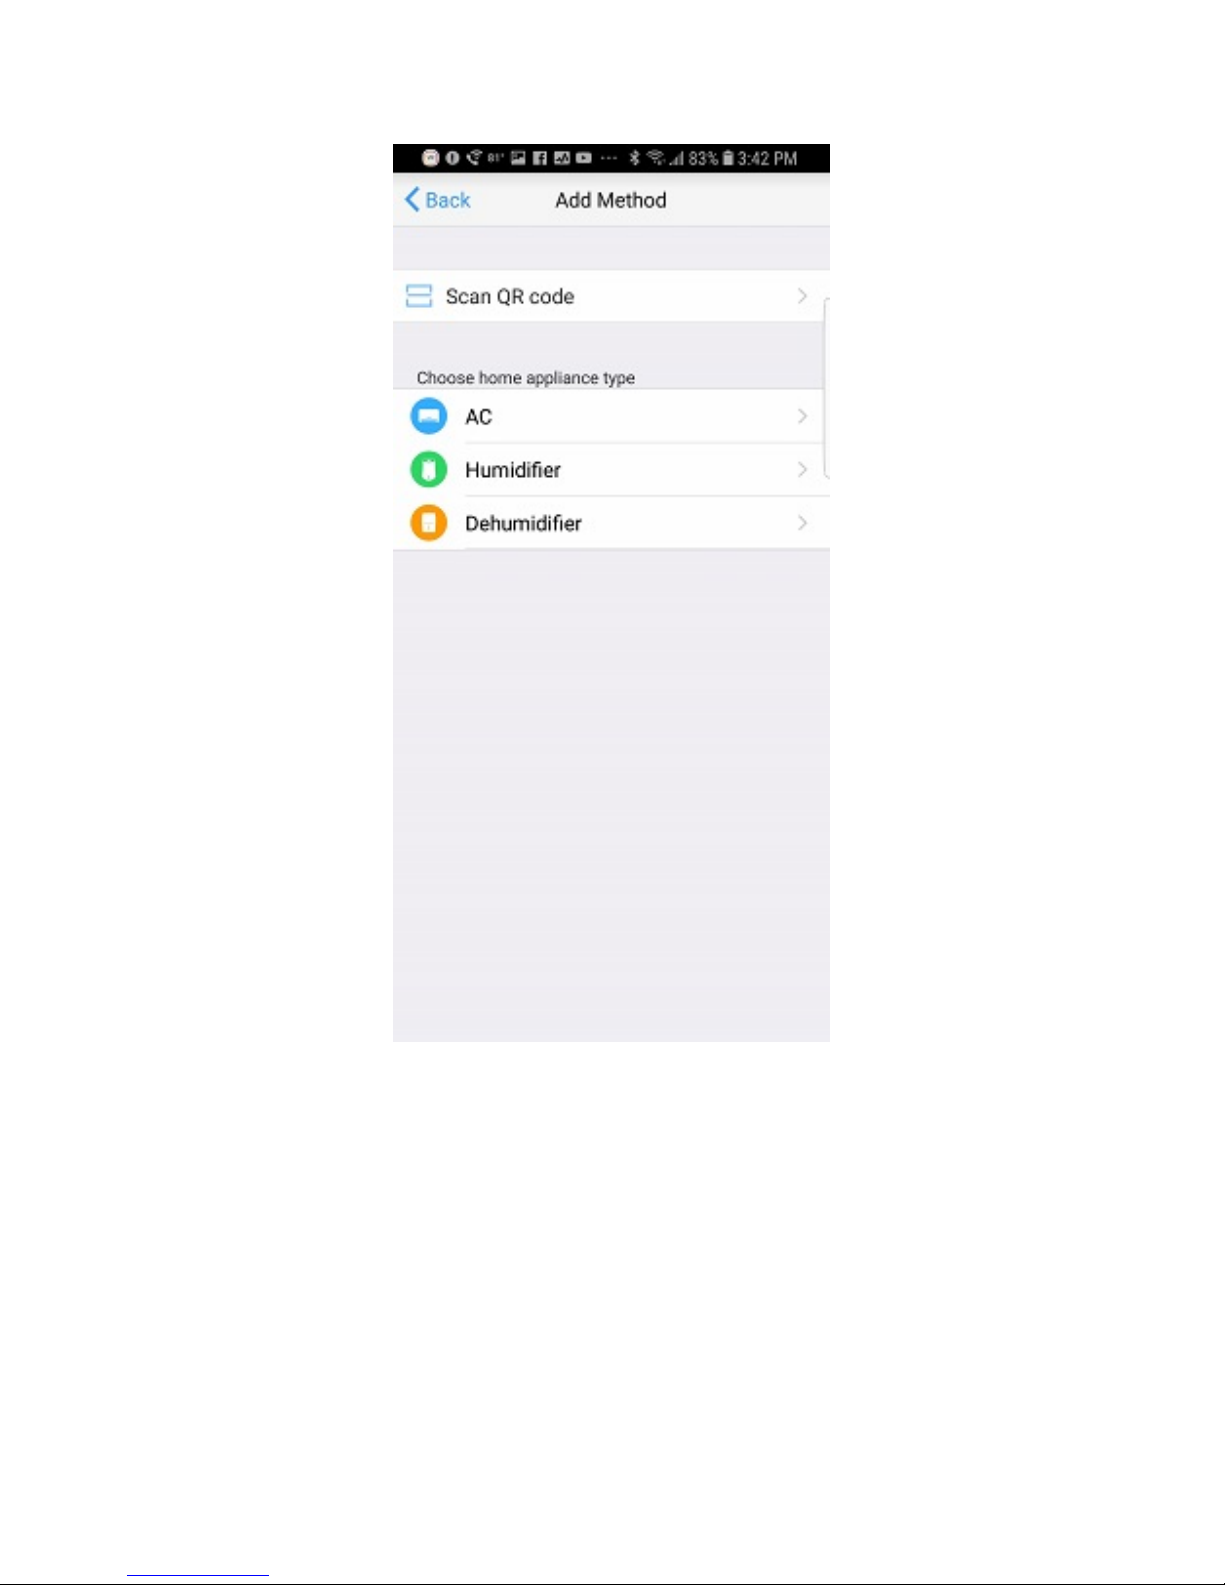
•On the next screen you have the option of using a QR code or configuring manually.
oTo use the QR code, tap ‘Scan QR code’ then hold the reader over the QR code in
the paper manual that came with the WiFi adapter, or you can use the sticker
that you removed from the WiFi adapter and placed on the side of the unit (see
step 4.)
oTo configure manually, tap AC from the ‘home appliance type’ menu, then follow
the prompts.
Page 11 of 15
•The prompts will take you to your device’s WiFi settings where you will see
“net_ac_XXXX” as an available network. Tap “net_ac_XXXX” to (temporarily) join and
enter password “12345678”. NOTE: Joining this temporary network is part of the setup
process and will not result in permanent changes.
•Next, your device will automatically revert to your home network, and you will be
prompted to enter your usual home network password. You may see a dialog
prompting you to do this step manually. If so, return to Settings/Connections/ WiFi,
choose your home network and enter your usual home network password.

Page 12 of 15
•Tap OK or Join and you will see the configuration screen as shown below.
•Once the configuration process is complete, you will see a Success message, and you will
see the device in the list above “+ Add Device”. NOTE: Try swiping down to refresh the
list if it does not appear. If it still does not appear, power the mini-split equipment off
and back on and wait 15-30 minutes.
Page 13 of 15
7. Using the App
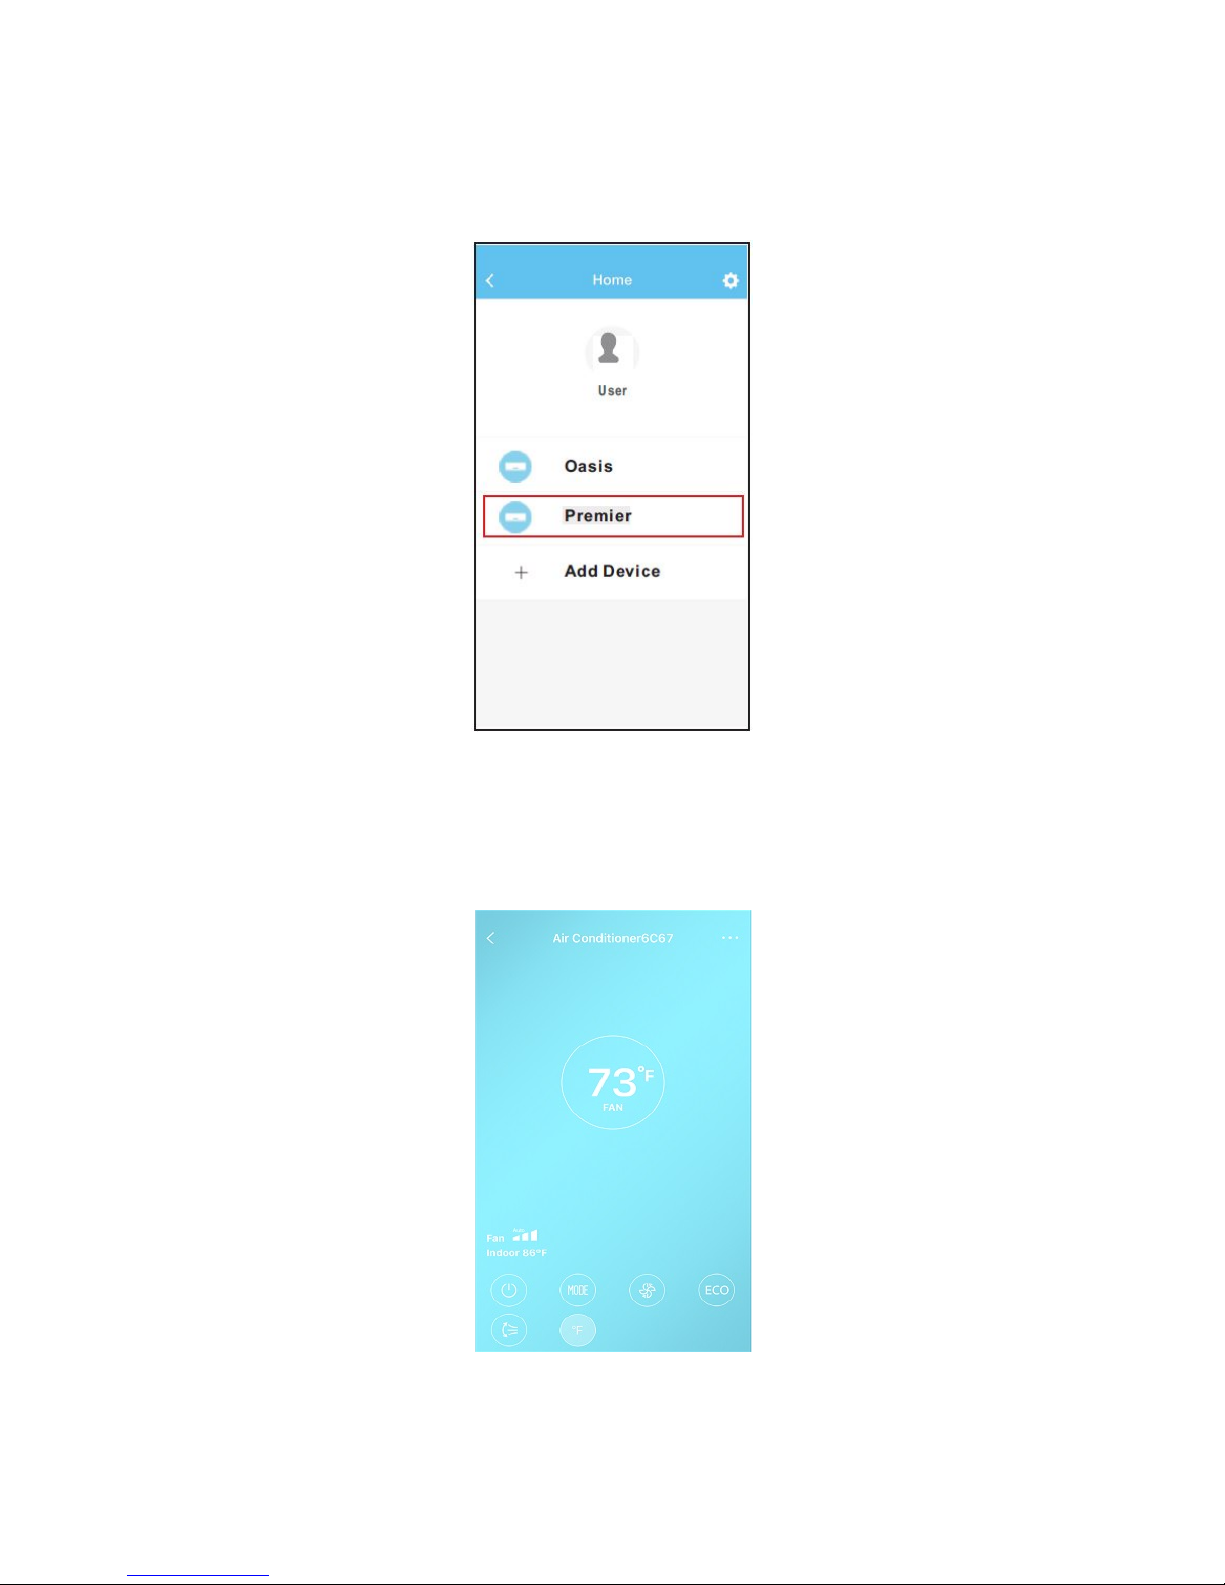
•Tap the device you wish to control from the home screen.
•From this screen, you can power the unit on and off, set operating mode (cool, dry,
heat, etc.), control fan speed and toggle between Celsius and Fahrenheit. To change
thermostat setting, drag your finger around the circle displaying temperature until you
reach your desired setting.
Note: Some of the features found on the hand held wireless remote control may not be
available on the app.

Page 14 of 15
•You can program the system to turn itself on and off with the Timer function. Toggle
start time, enter time settings, and select repeat as shown below. Repeat the process
for stop times.
•You can program the system for overnight performance to create the ideal sleeping
environment and energy use. Toggle the Sleep function and edit the temperature curve.

Page 15 of 15
8. If you have trouble with setup
Once you have seen the success message, the system is set up. However, you may not see the
AC in the device list on the Nethome Plus home page. If this happens, try these steps in order.
•Swipe downwards on the Nethome Plus home page list, where it says “+ Add Device”.
You should see the software refreshing the page. Try this a few times, and if nothing
appears, wait 15- 30 minutes and try again.
•Power off the AC unit using the remote. Power the unit back up and wait 15- 30
minutes. The device should appear in the list. If not, try swiping down a few times.
•Power off the AC unit with the remote, then cut power to the AC at the breaker. Unplug
power from your WiFi router and restart your Android or iOS device. Power everything
back up and wait 15- 30 minutes. Try swiping down to refresh the list, and if no result
repeat the entire installation process.
Thank you for your purchase of a BLUERIDGE ductless mini-split system and WiFi app controller!
We hope this equipment and the app will provide you and yours with many years of comfortable
enjoyment of your space.
Kind Regards,
The BLUERIDGE Team
This manual suits for next models
1
Table of contents
Popular Network Card manuals by other brands


Delta Electronics
Delta Electronics Digital I/Oextension Unit DVP-ES/EX specification

Seagate
Seagate FreeAgent DockStar Reviewer's guide

Motorola
Motorola Communications Gateway user guide

D-Link
D-Link DGE-660TD Brochure & specs

Nokia
Nokia C110 installation guide

Abocom
Abocom Mini SDIO 802.11b/g Wireless LAN Card... Specification sheet