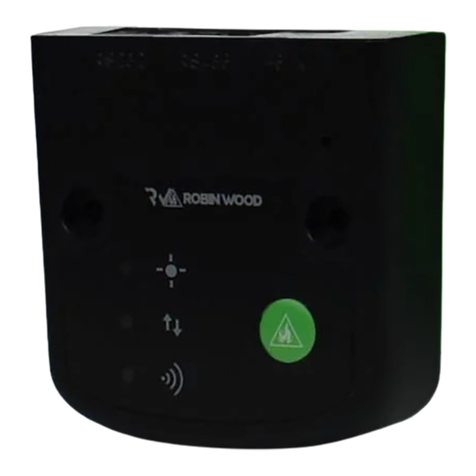
BlueNova BMAC User manual

User Manual
BMAC Module
version D
.
Document Revision No.
v4.0
Revision Date
24/06/2021
Approved by
C. Delport

User Manual
BMAC Firmware Updates
2 Erica Way Office: +27 21 205 2000
Somerset West Business Park Technical Support: support@bluenova.co.za
Somerset West, 7130 Website: www.bluenova.co.za
A. DOCUMENT SCOPE
Congratulations on purchasing a high quality BlueNova® product
This document covers structural information, installation instructions, troubleshooting & maintenance instructions
for BlueNova’s BMAC module.
If you have any questions or comments, kindly contact BlueNova® Technical Support:
Please do not discard this document as it contains valuable information that might have to be referenced later.
B. STRUCTURAL OVERVIEW
BlueNova’s BMAC module has been designed to integrate with a BlueNova battery and inverter system. The BMAC
will handle all serial communication (CAN/RS485) between a BlueNova battery and listed compatible inverter
systems as well as provide remote system monitoring and control functionality.
The diagrams below illustrate the locations of the power & communication ports:

User Manual
BMAC Firmware Updates
2 Erica Way Office: +27 21 205 2000
Somerset West Business Park Technical Support: support@bluenova.co.za
Somerset West, 7130 Website: www.bluenova.co.za
The following components are also packaged with the main module:
COMPONENT
FUNCTION / DESCRIPTION
DC Power Supply
Off-white. Pre-wired & fused on the positive (red) wire with a 1A fuse.
Used for powering the BMAC module.
CAN cable
Normally light grey, with grey connector boots. All pins are connected
on both connectors of this cable. This cable is used to connect the
BMAC module to a CAN-compatible inverter or peripheral device.
RS485 cable
Normally dark grey, with blue connector boots. Only two pins are
connected on each connector of this cable. This cable is used to
connect the BMAC module to a BlueNova RacPower battery. Labelled
“BMAC” on one end and “RACPOWER” on the other end.
USB-to-micro-USB cable
Black. Used for programming and/or updating the BMAC module’s
firmware.
Connector lugs
3 sets of 2 each, various sizes. The correct pair of lugs should be
connected to the DC power supply’s red & black input wires so that
the power supply can be connected to a suitable power source.
C. COMMUNICATION PORTS
COMPONENT
FUNCTION / DESCRIPTION
RS485 (RJ45)
PIN configuration as follows:
-Pin 1: RS485-A
-Pin 3: RS485-B
INV CAN (RJ45 connector)
Serial communication via CAN Bus
between the battery and the BMAC.
PIN configuration as follows:
-7 & 4: CAN-H
-8 & 5: CAN-L
BMS CAN (RJ45 connector)
Serial communications via CAN Bus
between the BMAC and Inverter.
Pin configuration as follows:
-7 & 4: CAN-H
-8 & 5: CAN-L
USB
Used for firmware updates and data logging.

User Manual
BMAC Firmware Updates
2 Erica Way Office: +27 21 205 2000
Somerset West Business Park Technical Support: support@bluenova.co.za
Somerset West, 7130 Website: www.bluenova.co.za
D. COMMUNICATION PORTS
The BMAC can be powered either by connecting its dry contacts (see B. STRUCTURAL OVERVIEW) directly to a
suitable power source with an output of 12VDC ~ 100VDC (excluding the battery itself), or by connecting the DC
power supply to the BMAC’s power adapter port and a suitable power source (including the battery itself).
BlueNova recommends using the power supply to power the BMAC module directly from the battery/-ies:

User Manual
BMAC Firmware Updates
2 Erica Way Office: +27 21 205 2000
Somerset West Business Park Technical Support: support@bluenova.co.za
Somerset West, 7130 Website: www.bluenova.co.za
1. STEP-BY-STEP: POWERING YOUR BMAC
1.1 Check the battery’s terminals to determine the required lug size. Crimp one lug to each end of the BMAC
power supply’s positive (red) & negative (black) input wires respectively with an appropriate crimping tool.
1.2 Connect the power supply’s positive (red) wire to the battery’s positive terminal.
1.3 Connect the power supply’s negative (black) wire to the battery’s negative terminal, then plug the power
supply’s adaptor jack into the BMAC module. Screw in the BMAC module’s antenna, if not done already.
After the above steps have been completed, serial communication (CAN) connections should be made as follows:

User Manual
BMAC Firmware Updates
2 Erica Way Office: +27 21 205 2000
Somerset West Business Park Technical Support: support@bluenova.co.za
Somerset West, 7130 Website: www.bluenova.co.za
2. STEP-BY-STEP: SERIAL COMMUNICATION (CAN) CONNECTIONS
2.1 To connect your BMAC to a single (non-paralleled) Standard Product Range battery, simply connect the
BMAC’s BMS CAN port to any one of the two available CAN ports on the battery with a straight 1-to-1 pin
RJ45 network cable.
2.2 To connect you BMAC to a parallel battery configuration, first daisy-chain connect the batteries to each
other from any one of the available two CAN ports on each battery to the next one. This should leave one
available CAN port remaining on the first and last battery in the parallel configuration. Connect the BMAC’s
BMS CAN port to either one of the two remaining CAN ports on either battery at the end of the string with a
straight 1-to-1 pin RJ45 network cable.
2.3 The BMAC can then be connected to a serial communication-compatible inverter or peripheral device from
the BMAC’s INV CAN port to the appropriate port on the peripheral device.
IMPORTANT: The above instructions are only applicable to connections between the BMAC module and
BlueNova’s Standard Product Range. For serial communication connections between the BMAC and products
from other BlueNova product ranges (i.e. RacPower etc.), please reference the latest relevant product manuals.
3. SERIAL COMMUNICATION: CONNECTOR PIN CONFIGURATIONS
To connect your BMAC module to a serial communication-compatible inverter or peripheral device, the correct
RJ45 cable is required. The pin numbering of RJ45 ports and connectors are illustrated below:
At the time of publishing this manual, the following BlueNova product ranges are serial communication
compatible with the inverter manufacturers listed below:
Victron®
SMA®
Studer®
Ingeteam®
GoodWe®
Sunsynk®
Axpert® *
Standard Range (HC)
CAN
CAN
CAN
CAN
CAN
CAN
RS485
RacPower BP/DU
CAN
CAN
CAN
CAN
CAN
CAN
RS485
13V Mobile Power
N/A
N/A
N/A
N/A
N/A
N/A
N/A
* Compatible only with Axpert® King 5kVA & 8kVA inverters

User Manual
BMAC Firmware Updates
2 Erica Way Office: +27 21 205 2000
Somerset West Business Park Technical Support: support@bluenova.co.za
Somerset West, 7130 Website: www.bluenova.co.za
Connector pin configurations for the above-mentioned inverter manufacturers are listed below:
3.1 Connecting a BMAC module to a Victron® or Studer® device:
↓ BMAC (CAN port) ↓ Victron® / Studer®
Step-by-step instructions:
1. Connect pin 7 (battery CAN) to pin 7
(Cerbo GX - BMS CAN).
2. Connect pin 8 (battery CAN) to pin 8
(Cerbo GX –BMS CAN).
3. Pins 1-6 should not be connected.
4. Any remaining open CAN ports do not
have to be terminated.
3.2 Connecting a BMAC module to an SMA®, GoodWe® or Sunsynk® device:
↓ SMA® / GoodWe® /
↓ BMAC (CAN port) Sunsynk®
Step-by-step instructions:
1. Connect pin 7 (battery CAN) to pin 4
(GoodWe® BMS CAN).
2. Connect pin 8 (battery CAN) to pin 5
(GoodWe® BMS CAN).
3. Do not connect the remaining pins.
4. Any remaining open CAN ports do not
have to be terminated.
3.3 Connecting a BMAC module to an Axpert® King inverter:
↓ BMAC (RS485 port) ↓ Axpert® King
Step-by-step instructions:
5. Connect pin 1 (battery RS485) to pin 5
(Axpert® King RS485 port).
6. Connect pin 3 (battery RS485) to pin 3
(Axpert® King RS485 port).
7. Do not connect the remaining pins.
8. Any remaining open CAN/RS485 ports
do not have to be terminated.

User Manual
BMAC Firmware Updates
2 Erica Way Office: +27 21 205 2000
Somerset West Business Park Technical Support: support@bluenova.co.za
Somerset West, 7130 Website: www.bluenova.co.za
E. SOFTWARE SETUP
Once the BMAC is powered and serial communication connections have been established to the battery and
inverter/peripheral devices, the following steps should be followed:
1) The BMAC will automatically broadcast a Wi-Fi hotspot in the format “BMAC ############”.
Connect to the BMAC’s hotspot from a smartphone, tablet or PC. Password = bluenova
2) After establishing a connection to the BMAC’s hotspot, open a web browser (Google Chrome is
recommended) and type the following IP address in the URL bar: “192.168.4.1”.
The following monitoring screen will be displayed:

User Manual
BMAC Firmware Updates
2 Erica Way Office: +27 21 205 2000
Somerset West Business Park Technical Support: support@bluenova.co.za
Somerset West, 7130 Website: www.bluenova.co.za
3) Set up communication between the BMAC and inverter/peripheral device that has been connected to.
At the bottom of the monitoring screen, select the relevant inverter manufacturer & communication rate
from the drop-down menu, then click on the Change button:
Once the Change button is clicked the BMAC will start communicating with the inverter. This will only have
to be set up once, after which the BMAC will remember the setting and automatically start communicating
when powered on again.
To verify whether CAN communication is functional, please check the following:
-Functioning CAN transmissions between the BMAC and the battery can be observed via the green
flashing LED located on the PCB on the right-hand side of the “BMS CAN” port.
-Functioning CAN transmissions between the BMAC and the inverter/peripheral device can be observed
via the green flashing LED located on the PCB on the right-hand side of the “INV CAN” port.
If the above LED’s cannot be seen flashing & CAN communication is not functional, please contact BlueNova
Technical Support for assistance.
4) If there is an internet-connected local Wifi network available within range of the BMAC, the BMAC can be
connected to this network. This will enable remote monitoring functionality of the battery via the BMAC
Online Platform.
If the BMAC is not connected to a local Wifi network yet, the following status will be displayed at the top
left of the monitoring screen:

User Manual
BMAC Firmware Updates
2 Erica Way Office: +27 21 205 2000
Somerset West Business Park Technical Support: support@bluenova.co.za
Somerset West, 7130 Website: www.bluenova.co.za
At the top right of the monitoring screen, click on the Connect BMAC to a Wi-Fi network button. The
following screen should be displayed:
Click on the Refresh Networks button first to populate the drop-down menu. Select the appropriate SSID
from the network drop-down menu & fill in the password. Click the Connect button. If the selected SSID is
connected to the internet & the password is correct, the BMAC will then connect to the internet via this
network, after which remote monitoring of your battery would be enabled.
Once the BMAC connects successfully to a Wifi network, the following status will be displayed at the top left
of the monitoring screen:
Note that the BMAC first connects to the local Wifi network after which it will attempt to connect to the
internet. The “No Internet” status will disappear after a few seconds once data transmission commences.

User Manual
BMAC Firmware Updates
2 Erica Way Office: +27 21 205 2000
Somerset West Business Park Technical Support: support@bluenova.co.za
Somerset West, 7130 Website: www.bluenova.co.za
F. BMAC ONLINE PLATFORM
BlueNova batteries that have been installed with a BMAC connected to the internet can be remotely monitored
via BlueNova’s BMAC Online Platform. To do this, follow the steps below:
1. In a web browser (Google Chrome is recommended), navigate to live.bluenova.co.za
The following login window (pictured below left) should be displayed on the page:
1.1 If you have not done so already, create
an account by clicking on the Register link
(pictured above) and filling in the form
(pictured on the right).
Then click the REGISTER button here…
1.2 If you have an account already, skip step 1.1 above and simply log in by filling in your email
address & password in the first window (top left). Then click on the LOGIN button.

User Manual
BMAC Firmware Updates
2 Erica Way Office: +27 21 205 2000
Somerset West Business Park Technical Support: support@bluenova.co.za
Somerset West, 7130 Website: www.bluenova.co.za
Creating new sites and groupings
After logging in the dashboard page will be displayed:
Start by adding sites to profile by using the tab on the left-hand side to navigate to the Sites page.
From the Sites page, click on the icon to add a new site:
When clicking on the icon, the following options will be displayed:

User Manual
BMAC Firmware Updates
2 Erica Way Office: +27 21 205 2000
Somerset West Business Park Technical Support: support@bluenova.co.za
Somerset West, 7130 Website: www.bluenova.co.za
Groupings can be used to group various sites to each other. Sites can be created without having to add
them to a specific group as well. Any name can be given to a site in the Description tab.
The 12-digit unique ID of the BMAC must be entered to link the BMAC to the site. This unique
hexadecimal ID can be found:
-in the BMAC’s broadcasted network access point name (example pictured below right) or
-on the BMAC packaging, as a handwritten ID under the “SSID” tab.
After adding a site successfully, the battery’s performance parameters will be displayed on the
Dashboard page. The large tile (pictured below) can be clicked to view different performance variables:
Click on the following headers on the flipped tile to view specific information:
-Stats: Displays battery state-of-health, state-of-charge, system state & breaker state.
-Voltage and Current: Displays min. & max. cell voltage, system & pack voltage and system current.
-Energy: Displays the total amount of energy discharged from the battery to-date.
-System: Displays hardware specifics such as battery firmware version, model name, capacity,
charge/discharge status, cell quantity & internal temperature as well as BMAC specifics such as unique
ID and ESU ID numbers.
Unique ID

User Manual
BMAC Firmware Updates
2 Erica Way Office: +27 21 205 2000
Somerset West Business Park Technical Support: support@bluenova.co.za
Somerset West, 7130 Website: www.bluenova.co.za
G. BMAC FIRMWARE UPDATES
IMPORTANT: BMAC firmware updates refer to updating the BMAC device’s own firmware. It does not
apply to updating the firmware of batteries and/or inverters connected to the BMAC device.
There are 3 ways in which a BMAC module’s firmware is updated, namely:
-Automatically: BMAC modules that have been installed correctly & are also connected to the internet will
check once every hour for updated firmware versions that might be available for download & installation.
-Manually via web browser
-Manually via module’s USB port
For manual firmware update procedures, please contact BlueNova technical support for assistance:
Office: +27 21 205 2000 / Email: [email protected]
H. NOTES
Table of contents

